Learn how to can applesauce for long-term storage! A variety of sweet crisp apples, sugar, cinnamon and nutmeg provide great flavor.

Today I want to share how to can applesauce for long term storage. The recipe is fairly simple (especially if you already are familiar with water bath canning)! You make homemade applesauce using apples, water and sugar (if desired), and can add cinnamon and/or nutmeg to taste, for more flavor.
I’ve made several batches already and am grateful we now have many jars of delicious homemade applesauce available in our pantry to enjoy year-round. Here’s how to can applesauce for long term storage.
Scroll Down For A Printable Recipe Card At The Bottom Of The Page
Before Beginning
Before you begin getting the apples ready, prepare a water bath canner, hot canning jars, lids and screw bands according to the manufacturer’s directions. This will include heating the clean jars and bringing water to a simmer in the canner, and gathering items like a canning funnel, air bubble remover, labels, etc. Save yourself some time and have all these items ready to go before you start!
Prepare The Apples
I typically use a variety of sweet, crisp apples when I make applesauce (there are so many varieties available year-round). For this particular recipe the recommended amount of apples needed is 2½ – 3½ pounds of apples per QUART jar or for every two PINT jars.
I had a couple varieties of apples (about 6½ pounds) that needed to be used and decided to make four PINT jars of applesauce instead of quarts (which my photos reflect). NOTE: The processing time is the same for pint or quart jars.
Wash and drain the apples well before beginning. Cut each apple in half, then remove the seeds and core. You can leave the peel ON or you can remove it (your choice). Weigh the apples so you know the weight of the apples you are using.
Slice each apple half into 1″ thick slices and place them into a large saucepan or soup pot that has a lid. Add just enough water (usually about ½ cup) to keep the apple slices from sticking to the pan. Cook the apple slices (and small amount of water) on Medium-Low heat until they are soft (about 12-15 minutes), stirring often.


Make Apple Purée
Once the apples are soft, use an immersion blender in the pan to puree the apples. The apple mixture should be fairly thick and pulp-like in texture.
TIP: If you don’t have an immersion blender, you can use a food mill OR process the apples in a blender (in batches), then return the processed apple pulp to the saucepan.
If you prefer plain applesauce without added sugar or spice, then the applesauce is ready to be canned. If you prefer it slightly sweetened, see the note below.

Add Some Sugar And Spice!
TIP: If you want to add some additional flavor and sweetness to the applesauce, stir in granulated sugar, ground cinnamon and a pinch of ground nutmeg (optional) to the puree until combined.
Bring the applesauce to a FULL boil (approx. 212°F.). Stir often so the apples don’t stick to the pan.
NOTE: The amount of sugar added can vary depending on how many pounds of apples you are using, but the recommended guidelines (from the Ball Blue Book of Canning) is to use about ¼ cup of sugar per pound of apples used. Add enough sugar, cinnamon and nutmeg as desired. Sometimes if you use a really sweet variety of apple, it may require less sugar overall to suit your taste.


How To Can Applesauce
Keep the temperature constant (boiling) under the apple puree while you fill each canning jar with applesauce. Use a ladle to add the applesauce into clean, hot canning jars, making sure to leave a ½” headspace. Repeat with remaining jars.
Remove the air bubbles from each jar by inserting a plastic knife or plastic spatula into each jar several times. Wipe the rims well with a wet cloth to remove any jam residue, then place flat lids and screw bands on the jars, adjusting the bands to fingertip tight.
Lower jars onto a canning rack over simmering water in the canner. Make sure the hot water covers the jars by at least two inches. Bring the water to a gentle rolling boil, then process the jars for 20 minutes (once water is boiling).
Once Done Canning
When done, turn off heat and let jars rest 4-5 minutes before removing them from the hot water. Remove jars and place them on a dish towel on the counter. Don’t place boiling hot jars directly on the counter because temperature variances could cause the jars to crack. Let jars cool undisturbed for 12-24 hours, then wipe clean.
Check each jar to ensure it has sealed properly, then label and store in your pantry (remove the screw bands before storing). If a jar has not sealed properly, keep it in the refrigerator and use it within a week or so.

Serve and Enjoy The Applesauce Or Store In Pantry
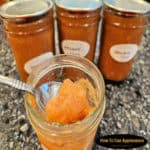
When you are ready to enjoy some home-canned applesauce, simply pop open a jar and enjoy it! I love cinnamon-flavored applesauce so much I sometimes grab a spoon and eat it right out of the jar. It is absolutely delicious!
Other ways to enjoy applesauce (besides just gobbling it up!) is to use it on top of pancakes or waffles (or even vanilla ice cream). It also tastes amazing when it’s mixed into Greek yogurt for a quick snack!


I really hope you have the opportunity to make homemade applesauce for yourself and those you love. It’s a great way to store lots of delicious applesauce to enjoy throughout the year!
Thanks for stopping by, and I invite you to come back again soon for more family-friendly recipes. Take care, may God bless you, and have a wonderful day.
Looking For More CANNING Recipes?
You can find ALL of my recipes in the Recipe Index, which is located at the top of the page. I have quite a few water bath AND pressure canning recipes you might want to check out, including:
- Peach Jam (and how to can it)
- Ham and Bean Soup (and how to can it)
- Bread and Butter Pickles
- How To Can Strawberry Jam
- Canning Cranberry Juice
Want More Recipes? Get My FREE Newsletter!
I publish a newsletter 2 times per month (1st and 15th) with lots of recipes, tips, etc.
Would you like to join our growing list of subscribers?
There is a Newsletter subscription box on the top right (or bottom) of each blog post, depending on the device you use.
You can submit your e-mail address there, to be added to my mailing list.
Find Me On Social Media:
Facebook page: The Grateful Girl Cooks!
Pinterest: The Grateful Girl Cooks!
Instagram: jbatthegratefulgirlcooks

Original recipe source (and adapted from): “The Ball Blue Book of Canning”, page 17, published in 2013 by Hearthmark, LLC, dba Jarden Home Brands
↓↓ PRINTABLE RECIPE BELOW ↓↓
Learn how to can applesauce for long-term storage! A variety of sweet crisp apples, sugar, cinnamon and nutmeg provide great flavor.
- 6½ pounds apples (ie. Gala, Fiji, Golden Delicious, Braeburn, etc.) or combo (different types)
- ½ cup water approx.-to prevent sticking
- 1½ cups granulated sugar (approx.) more or less, to suit your taste
- ground cinnamon to suit your taste
- nutmeg (optional) to suit your taste
Before beginning, prepare water bath canner, canning jars (heated), flat lids/screw bands according to manufacturer directions.
Wash and drain apples. Remove seeds and core. Leave the peel ON or OFF (your choice). Weigh apples so you know their weight (for added sugar calculation). Cut apples into 1" thick slices; put them in a Dutch oven or soup pot that has a lid. Add enough water (about ½ cup) to keep apple slices from sticking. Cover and cook on medium heat until apples become soft (12-15 minutes), stirring often.
Use an immersion blender to purée apples. TIP: No immersion blender? Use a food mill OR process apples in a blender (in batches), then return applesauce to saucepan.
Add sugar, cinnamon and nutmeg to taste (if using). Stir to combine; bring applesauce to a FULL boil (approx. 212°F.), stirring often. NOTE: Amount of sugar can vary depending on how many pounds of apples you are using, but recommendation from Ball Blue Book of Canning is to use ¼ cup of sugar per pound of apples. Add enough sugar, cinnamon and nutmeg as desired. If using lots of naturally sweet apples, it may require less sugar overall.
Keep temperature constant under apple puree while filling each jar with applesauce (1 at a time). Use a ladle and funnel to add applesauce to hot canning jars, leaving a ½" headspace. Repeat with remaining jars.
Remove air bubbles by inserting a plastic knife or spatula into each jar. Wipe the rims well with a wet cloth to remove any jam residue, then place flat lids and screw bands on the jars, adjusting bands to fingertip tight. Transfer jars to a canning rack placed in simmering water in the canner. Make sure water covers jars by 2". Bring water to a gentle rolling boil; process jars for 20 minutes (once water is boiling).
When done, turn off heat; let jars rest 4-5 minutes before removing from canner. Put hot jars on a dish towel on the counter. Don't place jars directly on counter because temperature variances can cause jars to crack. Let jars cool undisturbed for 12-24 hours, then wipe clean. Check each jar to ensure it has sealed properly. Label and store in your pantry (remove screw bands before storing). If a jar has not sealed properly, refrigerate and use it within a week.
Note: The amount of sugar you use is dependent on the types of apples used and your own personal taste. The sweeter the apples are, the less sugar you may want to use. The caloric calculation per Tablespoon is an estimate and will vary depending on the type and weight of apples and the quantity of sugar used.
Here’s one more to pin on your Pinterest boards!