Quinoa Enchilada Casserole (Meatless!)

This meatless quinoa enchilada casserole, with black beans, corn, spices, enchilada sauce and cheese will be enjoyed by everyone, vegetarian or not!This meatless quinoa enchilada casserole, with black beans, corn, spices, enchilada sauce and cheese will be enjoyed by everyone, vegetarian or not!

I am always on the lookout for a meatless entree I can serve when we have our Vegetarian son and his girlfriend over for dinner!  I found a recipe for a Quinoa Enchilada Casserole on Pinterest and decided to give it a “taste-test” before offering it up for a family get-together!

Our youngest son (the one who used to love huge steaks and hamburgers) became a vegetarian a few years ago. His girlfriend is also a vegetarian. That complicated things a bit, making dinners more challenging for our “family get-togethers”, so I’m glad I tried this recipe! I only “tweaked” the original recipe just a little bit!

The quinoa enchilada casserole was delicious, and really easy to prepare! If you like a good enchilada, or enjoy a meatless meal occasionally like we do (one with loads of flavor), you will like this recipe… meat eater or not!

Scroll Down For A Printable Recipe Card At The Bottom Of The Page

How To Make Quinoa Enchilada Casserole

Prepare the quinoa according to package directions. When done, place quinoa in large bowl. Add the green chiles, corn, black beans, cilantro, green onion, cumin, garlic powder, and chili powder.

Cooked quinoa and other ingredients for casserole in mixing bowl.
Add the enchilada sauce, salt and pepper to the quinoa. Stir well, to fully blend all the ingredients.

Enchilada sauce is added to quinoa and casserole ingredients.
Add a half cup of cheddar cheese and a half cup of pepper jack cheese, and stir until fully combined.

Grated cheddar and jack cheeses are added to casserole ingredients.
Bake The Quinoa Enchilada Casserole

Pour the mixture into a lightly greased (or sprayed) 8×8 inch baking dish. Spread the casserole mixture evenly in the dish. Sprinkle the remaining jack and cheddar cheeses on top. Bake the quinoa enchilada casserole for 20-25 minutes at 375 degrees, or until the cheese is bubbly and fully melted. Remove the casserole to a wire rack.

Quinoa enchilada casserole is placed into an 8x8 baking dish
To Serve The Quinoa Enchilada Casserole

Garnish the top of the casserole with chopped tomato and cilantro. The tomatoes and cilantro not only add a pop of color, they add wonderful flavor to this quinoa enchilada casserole, too! Serve, and enjoy!

Baked quinoa enchilada casserole is garnished with cilantro and tomatoes.

A Note About SERVING This Casserole

When served piping HOT, fresh from the oven, the texture of the quinoa casserole makes it necessary that it be scooped out with a spoon, rather than cut into pieces with a knife.

I refrigerated the leftovers and the next day was able to cut it into pieces (while chilled) and get this photo so you can see accurately what it looks like on the inside. Once cut, I microwaved the quinoa enchilada casserole to reheat it… and it tasted fantastic!

Quinoa Enchilada Casserole (Meatless!) / The Grateful Girl Cooks!

Hope you will consider trying this recipe for quinoa enchilada casserole. It is packed with flavor (even without meat!) and tastes great! Have a great day, and come back soon.

Looking For More QUINOA Recipes?

All of my recipes can be found in the Recipe Index, located at the top of the page. A few favorite recipes using quinoa include:

Interested In More Recipes?

Thank you for visiting this website. I appreciate you using some of your valuable time to do soIf you’re interested, I publish a newsletter 2 times per month (1st and 15th) with all the latest recipes, and other fun info. I would be honored to have you join our growing list of subscribers, so you never miss a great recipe! 

There is a Newsletter subscription box on the top right side (or bottom) of each blog post, depending on the device you use, where you can easily submit your e-mail address (only) to be included in my mailing list.

You Can Also Find Me On Social Media:

Facebook page: The Grateful Girl Cooks!
Pinterest:
The Grateful Girl Cooks!
Instagram:
jbatthegratefulgirlcooks

Have a GREAT day!

Author's signature

Original Recipe (slightly adapted) from: http://damndelicious.net/2014/07/07/quinoa-enchilada-casserole/

0 from 0 votes
Quinoa Enchilada Casserole (Meatless!)
Prep Time
20 mins
Cook Time
20 mins
Total Time
40 mins
 
This meatless quinoa enchilada casserole, with black beans, corn, spices, enchilada sauce and cheese will be enjoyed by everyone, vegetarian or not!
Category: Meatless Entree
Cuisine: Mexican
Keyword: quinoa enchilada casserole
Servings: 6 servings
Calories Per Serving: 290 kcal
Author: JB @ The Grateful Girl Cooks!
Ingredients
For Casserole:
  • 1 cup quinoa (uncooked)
  • 1 10 ounce can (10 ounces) enchilada sauce
  • 1 4.5 ounce can (4.5 ounce) chopped green chiles (drained)
  • 3/4 cup corn kernels (frozen or canned...doesn't matter)
  • 3/4 cup canned black beans (drained, rinsed)
  • 2 Tablespoons chopped fresh cilantro
  • 1 green onion stalk (green/white parts, sliced)
  • 1/2 teaspoon cumin
  • 1/4 teaspoon garlic powder
  • 1/2 teaspoon chili powder
  • 1/4 teaspoon cayenne pepper
  • Pinch Salt and pepper (to taste)
  • 1 cup grated cheddar cheese (divided)
  • 1 cup pepper jack cheese (divided)
For Garnish:
  • 1 Roma tomato , (diced)
  • 2 Tablespoons chopped fresh cilantro
Instructions
  1. Preheat oven to 375 degrees. Spray an 8x8 inch baking pan with non-stick spray.
  2. Cook quinoa in 2 cups of water (per package directions).
  3. In a large mixing bowl, place the cooked quinoa, green chiles, corn, black beans, cilantro, green onion, cumin, chili powder, garlic powder and cayenne pepper.
  4. Add enchilada sauce, and salt and pepper to taste. Stir to combine.
  5. Add 3/4 cup of cheddar cheese and 3/4 cup of pepper jack cheese. Mix well to combine.
  6. Pour quinoa mixture into prepared baking dish. Spread evenly in dish. Top the casserole with the rest of the cheddar and pepper jack cheeses.
  7. Bake casserole (uncovered) in a 375 degree oven for about 20-25 minutes. Cheese should be melted and very bubbly around edges of pan.
  8. Remove baking dish to a wire rack. Let it cool for a couple minutes. Garnish the top of casserole with diced tomatoes and chopped cilantro. Spoon the casserole out onto serving plates. Serve, and enjoy!
Recipe Notes

Another option: Original recipe used chopped ripe avocados as a garnish (instead of cilantro).

Nutrition Facts
Quinoa Enchilada Casserole (Meatless!)
Amount Per Serving (1 g)
Calories 290 Calories from Fat 126
% Daily Value*
Fat 14g22%
Saturated Fat 7g44%
Cholesterol 36mg12%
Sodium 346mg15%
Potassium 312mg9%
Carbohydrates 26g9%
Fiber 4g17%
Sugar 1g1%
Protein 15g30%
Vitamin A 550IU11%
Vitamin C 2.7mg3%
Calcium 297mg30%
Iron 2.2mg12%
* Percent Daily Values are based on a 2000 calorie diet.

Here’s one more to pin on your Pinterest boards!This meatless quinoa enchilada casserole, with quinoa, black beans, corn, spices, enchilada sauce and cheese will be enjoyed by everyone, vegetarian or not!


Save

Save

Spring Flower Sugar Cookies

Celebrate the season with this easy recipe for absolutely delicious Spring Flower Sugar Cookies, decorated with Royal Icing.Celebrate the season with this easy recipe for absolutely delicious Spring Flower Sugar Cookies, decorated with Royal Icing.

Springtime in the Pacific Northwest means flowers blooming everywhere… what a wonderful re-awakening, after a cold, barren Winter! What better way to celebrate the beginning of this new season than these delicious, frosted Spring Flower Sugar Cookies!

I’ve never been a great cookie decorator, but am trying to learn more tips and tricks necessary to make pretty cut-out sugar cookies. I’ve made Fall and Christmas decorated cookies since that time, using this same recipe. They’re always great!

Scroll Down for a Printable Recipe Card At The Bottom Of The Page

These Cookies Are Great To Take To A Party

I made these cookies last year for an Easter potluck we were invited to. They were a big hit! As you can see in the photo below, I also made Lemon Curd Filled Won Ton Cups, Chocolate Dream Cups with Raspberry Mousse, and Chocolate Chip Cheesecake-Swirl Brownie Bites!

Spring flower sugar cookies on table with other Easter desserts,

I found the recipe for the cookies and icing on a website called Glorious Treats. The website has lots of tips (and good info. for people who want to learn “how” to decorate cookies), including the recipe for these cookies and icing.

These spring flower sugar cookies are absolutely delicious, especially when cut into pretty designs and decorated with Royal Icing!  The cookies are very easy to prepare… you can use ANY cookie cutter you have available to create your very own masterpieces!

For me the hardest part was learning “how” to outline the cookies, then flooding them with different colors. It takes a steady hand and practice (and believe me… I am a work in progress!) All in all, I was pleased with how these decorated cookies (one of my first attempts) turned out.

How To Make Spring Flower Sugar Cookies

First, stir the flour and baking powder together in a bowl and set aside. EASY.

Flour and baking soda in bowl, for dough to make Spring flower sugar cookies.
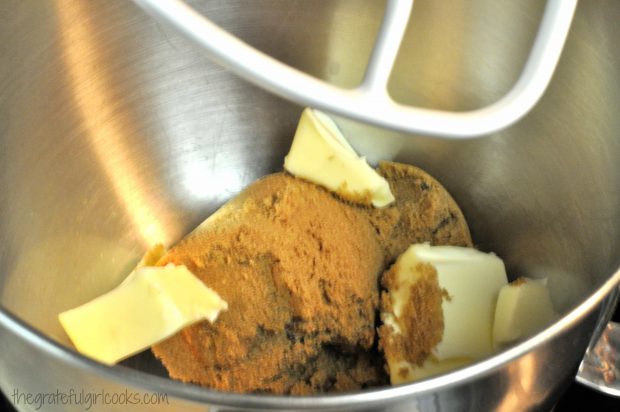
Beat the butter and sugar together for a few minutes (using an electric mixer), until mixture is thoroughly creamed and fluffy. Add the egg and vanilla, and beat again. Once blended, the flour mixture is added to the batter. The dough is then mixed until all ingredients have been incorporated.

Butter in mixer with sugar, used to make dough for Spring flower sugar cookies.
Once the dough is done, it is kneaded, then refrigerated for 2 hours to get really cold!

The dough for Spring flower sugar cookies is resting on parchment paper.
Rolling And Cutting Spring Flower Sugar Cookies

The dough for the Spring flower sugar cookies is placed onto a lightly floured work surface and rolled out to about a 1/3 inch thickness.

Dough for the Spring flower sugar cookies is rolled out before cutting.
Use a cookie cutter to cut out the shapes you desire. I used the flower cookie cutter shown below, but you can use any flower shaped cookie cutter you wish.

Place the cut out cookie dough onto lined baking sheets, then refrigerate for a few minutes. This quick refrigeration will help the Spring flower sugar cookies hold their shape while cooking. Once chilled, bake the cookies for for 8-10 minutes, but do not let them get browned.

Flower shaped cookie cutter used to cut dough for Spring flower sugar cookies.

Make The Royal Icing For The Spring Flower Sugar Cookies

While the cookies were baking, I prepared the royal icing. To make this icing, beat meringue powder, powdered sugar and warm water until stiff peaks formed. This is the meringue powder I used for the icing. I bought it at a local craft store (Michael’s). A lot of grocery stores carry this product, as well.

Meringue powder used for icing to decorate Spring flower sugar cookies.
Once the icing was the right consistency, I divided it out into bowls, then added food coloring (I used gel food coloring), until it was the color I wanted.

Yellow and green royal icing in bowls, to decorate Spring flower sugar cookies.

Decorating Spring Flower Sugar Cookies

I used a thicker consistency icing to pipe (using a pastry bag) the edges on the flowers like shown in the photo below. The icing has to be thick enough not to run, because it will be the “barrier” that holds the thinner icing that will fill the flowers later.

Yellow Royal icing is piped on edges of Spring flower sugar cookies on rack.
Let the icing dry (about 30 minutes), then thin the icing out a bit more. A teensy drop of red coloring was added to turn the icing slightly darker yellow (toward orange color). This thinner consistency icing was “flooded” in between all the thicker outlines (I used a toothpick to help fill in all the nooks and crannies) like shown in the photo below:

Light orange icing added to the Spring flower sugar cookies.
The cookies were set aside to let the icing dry. Once dry, I added the green center portion right in the middle of the flower cookie, then let that dry, also.

Green icing added to center of one of the Spring flower sugar cookies.
Time To Eat Spring Flower Sugar Cookies

Once all the cookies were dry (the icing will get hard after a couple hours-that is a good thing!), the cookies are ready to eat. Trust me- these cookies are GOOD!

Decorated Spring Flower Sugar cookies, on wire rack.
Wouldn’t a basket of sweet Spring Flower Sugar Cookies brighten someone’s day?

Basket of Spring flower sugar cookies.

I hope you will try making these delicious Spring flower sugar cookies. Enjoy using your own cookie cutters and imagination to create wonderful cookies for any celebration! Have a GREAT day!

Looking For More COOKIE Recipes?

You can find all of my recipes in the Recipe Index, located at the top of the page. A few favorite cookie recipes include:

Interested In More Recipes?

Thank you for visiting this website. I appreciate you using some of your valuable time to do soIf you’re interested, I publish a newsletter 2 times per month (1st and 15th) with all the latest recipes, and other fun info. I would be honored to have you join our growing list of subscribers, so you never miss a great recipe! 

There is a Newsletter subscription box on the top right side (or bottom) of each blog post, depending on the device you use, where you can easily submit your e-mail address (only) to be included in my mailing list.

You Can Also Find Me On Social Media:

Facebook page: The Grateful Girl Cooks!
Pinterest:
The Grateful Girl Cooks!
Instagram:
jbatthegratefulgirlcooks

Author's signatureRecipe Source for Cookies: http://www.glorioustreats.com/2010/03/making-sugar-cookies-recipe-and-tips.html
Recipe Source for Royal Icing: http://www.glorioustreats.com/2010/10/decorating-sugar-cookies-from-start-to-finish-part-2.html

0 from 0 votes
Spring Flower Sugar Cookies
Prep Time
2 hrs 30 mins
Cook Time
8 mins
Total Time
2 hrs 38 mins
 

Celebrate the season with this easy recipe for delicious Spring Flower Sugar Cookies, decorated with Royal Icing.

Category: Cookies
Cuisine: American
Keyword: spring flower sugar cookies
Servings: 30 - 2 1/2 inch cookies)
Calories Per Serving: 190 kcal
Author: JB @ The Grateful Girl Cooks!
Ingredients
For cookie dough:
  • 3 cups all purpose flour
  • 1 teaspoon baking powder
  • 1 cup (2 cubes) unsalted butter (at room temperature)
  • 1 cup granulated sugar
  • 1 large egg
  • 1 teaspoon vanilla extract
  • Parchment paper
For the Royal Icing:
  • 4 Tablespoons meringue powder
  • 4 cups powdered sugar
  • 6 Tablespoons warm water
  • Food coloring , as desired
Instructions
To make cookies:
  1. Stir flour and baking powder together in bowl, then set aside.
  2. Using an electric mixer, cream the butter and sugar together for about 3 minutes. Add the egg and vanilla extract; continue to beat for an additional minute.
  3. Slowly add the flour mixture (a bit at a time) to the butter mixture; mix this until all the flour is mixed in, and the dough begins to form ball and pull away from the side of the bowl.
  4. Remove dough ball from mixer bowl and put it on parchment paper. Knead the dough with your hands 3-4 times. Put the dough into a sealed bag or container; refrigerate it for 2 hours (or into freezer for 25 minutes)
  5. A few minutes before you get the chilled dough out of refrigerator, preheat your oven to 350 degrees.
  6. Remove HALF of the dough (let the rest stay in fridge). Put dough on lightly floured work surface. Roll dough out to 1/3 inch thickness.
  7. Cut the dough out with your favorite cookie cutters. Place cookies on prepared baking sheet (I bake these on parchment paper). Try to get same-sized cookie shapes on each sheet to ensure even cooking. Put the baking sheet (with cookies) into refrigerator for 3-5 minutes (this will help them keep their shape).
  8. Bake cookies at 350 degrees for 8-10 minutes. Bake just until they just start to look golden. Remove from oven; let cookies cool for a minute or two on the pan, then carefully remove to a wire rack to finish cooling. Once the cookies are totally cooled, they can be decorated.
For the royal icing:
  1. Measure meringue powder and powdered sugar into mixing bowl. Add 6 Tablespoons warm water. Beat until stiff peaks form. Divide icing out into bowls; add food coloring, as desired. Add additional water (1 teaspoon at a time) until you get the right consistency.
  2. FOR OUTLINING/EDGING: thin with warm water until icing reaches a "corn syrup" thickness (or slightly thicker). Pipe the icing around the border of your design. Let icing dry (half an hour) before flooding the inside of the outlined area.
  3. FOR FLOODING INSIDE THE OUTLINE: Add additional water to thin icing out. Pipe icing inside outline borders. It should slowly thin out inside border. Use a toothpick to help fill in the space.
  4. Let icing completely dry before serving (let dry several hours!). ENJOY!
Recipe Notes

Cookie baking times may vary slightly, depending on the size of the cookie.
This recipe makes approximately 30, 2 1/2 inch cookies or 16 3 1/2 inch cookies.
FYI-The prep time is the time necessary to make the cookies. It does not include decorating time. Sometimes I bake the cookies one day and decorate the next.

Nutrition Facts
Spring Flower Sugar Cookies
Amount Per Serving (1 cookie)
Calories 190 Calories from Fat 54
% Daily Value*
Fat 6g9%
Saturated Fat 3g19%
Cholesterol 21mg7%
Sodium 3mg0%
Potassium 30mg1%
Carbohydrates 32g11%
Sugar 22g24%
Protein 1g2%
Vitamin A 195IU4%
Calcium 10mg1%
Iron 0.6mg3%
* Percent Daily Values are based on a 2000 calorie diet.

Here’s one more to pin on your Pinterest boards!Celebrate the season with this easy recipe for delicious Spring Flower Sugar Cookies, decorated with Royal Icing.


Save

Save

Save

Save

Fruit Kabobs

Asked to bring fruit to a brunch or potluck? Why not bring fresh FRUIT KABOBS! Colorful fruit cubes on skewers are portable, delicious, and EASY! Asked to bring fruit to a brunch or potluck? Why not bring fresh FRUIT KABOBS! Colorful fruit cubes on skewers are portable, delicious, and EASY! 

It’s officially Spring in the Pacific Northwest… the temperatures are warming up a bit, we have enjoyed glorious days of sunshine and warmth, followed by days of clouds and rain. No complaints here, but I am really getting excited for backyard BBQ’s and family gatherings (birthdays, holidays, etc.) which are just around the corner!

If you’re the “lucky” person who is asked to bring fruit to a celebration, brunch, picnic or potluck meal, maybe you’d be interested in this simple idea… FRUIT KABOBS! Perfectly portable, delicious, and EASY! Your guests can grab a skewer of beautiful fresh fruit… healthy AND easy peasy!

Fruit Kabobs Are Always A Big Hit At Brunches!

I’ve made these many times over the years, for as little as 4 people, up to almost 50 people.  Fruit Kabobs look cute, and are very easy for guests to add to their plate. You can adapt the kabobs to whatever fruit you enjoy.

For these fruit kabobs, I used fresh blueberries, cantaloupe, kiwi, pineapple, and strawberries, all layered onto wooden skewers. Wooden skewers are available in most grocery stores and are inexpensive.

Making Fruit Kabobs Ahead Of Time

Sliced bananas can also be used on kabobs, but you will need to cut and skewer them right before you serve, so they don’t turn brown. Using the fruit shown (w/out bananas), I was able to make the skewers up several hours before we served them at an Easter brunch.

If making ahead, cover the fruit kabobs platter with plastic wrap, and refrigerate until it’s time to eat!

Fruit kabobs, being served at a brunch.
There’s no need for a fruit kabobs “recipe”, and no need for any dipping sauces. Make them colorful, ripe, and bite-sized, and you’ll have a popular side dish! The natural sweetness of the fruit is a perfect low calorie dish for any gathering!

Hope you will try this simple, easy way to serve fruit “salad” in a different format! Your family or friends will love fruit kabobs! Have a great day!

Looking For More KABOB Recipes?

You can find all of my recipes in the Recipe Index, located at the top of the page. A few kabob recipes you might enjoy include:

Interested In More Recipes?

Thank you for visiting this website. I appreciate you using some of your valuable time to do soIf you’re interested, I publish a newsletter 2 times per month (1st and 15th) with all the latest recipes, and other fun info. I would be honored to have you join our growing list of subscribers, so you never miss a great recipe!
There is a Newsletter subscription box on the top right side (or bottom) of each blog post, depending on the device you use, where you can easily submit your e-mail address (only) to be included in my mailing list.

You Can Also Find Me On Social Media:

Facebook page: The Grateful Girl Cooks!
Pinterest:
The Grateful Girl Cooks!
Instagram:
jbatthegratefulgirlcooks

Author's signature

Here’s one more to pin on your Pinterest boards!Asked to bring fruit to a brunch or potluck? Why not bring fresh FRUIT KABOBS! Colorful fruit cubes on skewers are portable, delicious, and EASY!

Save

Save

Save

A Fresh Look…

I keep a notebook of quotations that I’ve read and liked for how they speak to my heart, or challenge my thinking. If I read something that really resonates with me, I write it down in my little collection. Occasionally I go back through and read some of the quotes; the following is one I rediscovered this morning. It was good to take a fresh look…A Fresh Look...

“In one of William J. Locke’s novels there is a picture of a woman who has a large amount of money, and who has spent half a lifetime on a tour of the sights and picture galleries of the world. She is weary and bored. Then she meets a Frenchman who has little of this world’s goods, but who has a wide knowledge and a great love of beauty.

He comes with her, and in his company things are completely different. ‘I never knew what things were like’, she said to him, ‘until you taught me how to look at them.’  Life is quite different when Jesus teaches us how to look at things. When Jesus comes into our hearts, he opens our eyes to see things truly.” – (William Barclay – Commentary on Matthew 1).

My Limited Understanding

I don’t know about you, but I get weary at times trying to figure out, or make sense of things or events that happen in this amazing, beautiful, yet crazy world. My knowledge, focus, and understanding is so incredibly finite and limited (understatement of the century), and that impedes my perspective on things.

I am so grateful that the God who created all things is a part of my life (the beautiful AND the messy parts) and invites me daily to join him (the ultimate travel guide) as he reveals parts of His incomprehensible knowledge, love, beauty, and purpose to my little brain and heart. He helps and enables me to see things differently… a fresh look, a different perspective…through His eyes.

A Fresh Look... / The Grateful Girl Cooks!♥♥♥♥

“‘To whom will you compare me? Or who is my equal?’ says the Holy One. ‘Lift up your eyes and look to the heavens: Who created all these? He who brings out the starry host one by one, and calls them each by name. Because of his great power and mighty strength, none of them is missing. Why do you say, O Jacob, and complain, O Israel, My way is hidden from the Lord; my cause is disregarded by my God?  Do you not know? Have you not heard? The Lord is the everlasting God, the Creator of the ends of the earth. He will not grow tired or weary, and his understanding no one can fathom. He gives strength to the weary and increases the power of the weak. Even youths grow tired and weary, and young men stumble and fall; but those who hope in the Lord will renew their strength. They will soar on wings like eagles; they will run and not grow weary, they will walk and not be faint.'” (Isaiah 40: 25-31, New International Version)

Just as the original painter can provide insight no one else can into their work of art, I know that my loving Creator is the one I want and trust to bring insight and perspective to the “things” I experience in my life. I don’t HAVE to completely understand everything. I have to TRUST the One who does. ♥ Just my thoughts… have a good day. ♥

Author's signature


Save

Save

Quick N’ Easy Cream of Broccoli Soup

Make 4 servings of this simple, delicious, quick n’ easy cream of broccoli soup (with cheddar cheese!) in under 30 minutes!Make 4 servings of this simple, delicious, quick n' easy cream of broccoli soup (with cheddar cheese!) in under 30 minutes!

A dear friend of mine named Sandy gave me this recipe for Cream of Broccoli Soup written on a little index card about 30 years ago.  I’ve made this soup many times over the years (and have a completely food-stained index card to prove it!).  This is a delicious, very easy, inexpensive soup to make (with simple ingredients), and serves 4.

I was privileged to be a bridesmaid in Sandy’s wedding to her wonderful hubby Jeff, and my husband was privileged to be the pastor to officiate the ceremony. It was his first wedding to preside over, and we have such funny memories of that wedding.

Scroll Down for A Printable Recipe Card At The Bottom Of The Page

A Slight Tweak To the Original Recipe For Cream Of Broccoli Soup

My friend’s original instructions called for making this in the microwave oven, but I’ve adapted this cream of broccoli soup slightly over the years. Now I usually make it on my stove top in a soup pot, and add a bit of cheddar cheese, for extra flavor. The soup only takes about 25-30 minutes to prepare, so it’s easy to throw together after a long day.

I sure hope you will give this one a try. I really do think you will enjoy it! It’s EASY and DELICIOUS!

Looking For More SOUP Recipes?

You can find all of my soup recipes in the Recipe Index, located at the top of the page. I have lots of soup recipes, including:

Interested In More Recipes?

Thank you for visiting this website. I appreciate you using some of your valuable time to do soIf you’re interested, I publish a newsletter 2 times per month (1st and 15th) with all the latest recipes, and other fun info. I would be honored to have you join our growing list of subscribers, so you never miss a great recipe! 

There is a Newsletter subscription box on the top right side (or bottom) of each blog post, depending on the device you use, where you can easily submit your e-mail address (only) to be included in my mailing list.

You Can Also Find Me On Social Media:

Facebook page: The Grateful Girl Cooks!
Pinterest:
The Grateful Girl Cooks!
Instagram:
jbatthegratefulgirlcooks

Author's signatureRecipe Source: Sandy Whittaker

0 from 0 votes
Quick N' Easy Cream of Broccoli Soup
Prep Time
10 mins
Cook Time
15 mins
Total Time
25 mins
 

Make 4 servings of this simple, delicious, quick n' easy cream of broccoli soup (with cheddar cheese!) in under 30 minutes!

Category: Soup
Cuisine: American
Keyword: cream of broccoli soup
Servings: 4 servings
Calories Per Serving: 320 kcal
Author: JB @ The Grateful Girl Cooks!
Ingredients
  • 1 pkg. (10 ounces) frozen broccoli, thawed
  • 6 Tablespoons butter (or margarine)
  • 1 Tablespoon finely minced brown onion
  • 5 Tablespoons all-purpose flour
  • 1 cup chicken broth
  • 2 cups milk
  • 3/4 teaspoon salt
  • 1/8 teaspoon black pepper
  • Dash of ground nutmeg (optional)
  • 1/2 cup grated cheddar cheese (plus additional for garnish on top of soup, if desired)
Instructions
  1. In a soup pot, melt the butter. Add the minced onion, and cook for 2-3 minutes. Add the flour; whisk to combine. Cook for an additional minute. Add the chicken broth, milk, salt, pepper and nutmeg. Stir ingredients until smooth and thoroughly combined. Heat the soup for 5-7 minutes on medium-high until soup begins to thicken slightly. Stir occasionally.

  2. Add the thawed broccoli to soup. Carefully transfer the hot soup to a blender and puree OR puree the ingredients together in the soup pot using an immersion blender.

  3. Return soup to pan. Add 1/2 cup grated cheddar cheese. Stir to combine. Heat soup until hot (about 3-4 minutes). Ladle soup into 4 serving bowls. Garnish soup with a sprinkle of grated cheddar cheese; Serve, and enjoy!

Nutrition Facts
Quick N' Easy Cream of Broccoli Soup
Amount Per Serving (1 serving)
Calories 320 Calories from Fat 207
% Daily Value*
Fat 23g35%
Saturated Fat 14g88%
Cholesterol 65mg22%
Sodium 964mg42%
Potassium 471mg13%
Carbohydrates 18g6%
Fiber 2g8%
Sugar 7g8%
Protein 10g20%
Vitamin A 1340IU27%
Vitamin C 67.3mg82%
Calcium 291mg29%
Iron 1.2mg7%
* Percent Daily Values are based on a 2000 calorie diet.

Here’s one more to pin on your Pinterest boards!Quick n' Easy Cream of Broccoli Soup / The Grateful Girl Cooks!


Save

Save

Save

Chili, Lime & Cumin Cod

Southwest-inspired Chili Lime Cumin Cod is baked, seasoned fish, topped with a lime, cumin & butter sauce, and is ready in less than 15 minutes!Southwest-inspired Chili Lime Cumin Cod is baked, seasoned fish, topped with a lime, cumin & butter sauce, and is ready in less than 15 minutes!

About a month ago I found a recipe on Pinterest for Chili, Lime Cumin Cod. The flavor combination sounded interesting to me (a bit Southwestern), AND I had a few pieces of cod hanging out in the back of my freezer. So… I decided to give this easy sounding seafood recipe a try.

The entire recipe took less than 15 minutes to prepare, so I would consider this a truly easy, quick, and flavorful seafood entree! I think the quick, flavorful lime cumin butter sauce would also taste great on grilled halibut, swordfish, tilapia or mahi-mahi, as well.

The recipe is so simple, I really don’t think it’s possible to mess this one up! Chili Lime Cumin Cod for the win! This quick and simple, healthy seafood dish is perfect for busy nights where you just want something “good for you”, to eat!

Scroll Down For A Printable Recipe Card At The Bottom Of The Page 

How To Make Chili Lime Cumin Cod

Preheat your oven to 450 degrees. Spray an oven-safe baking pan with non-stick spray (or coat pan with oil).

In a small bowl, combine the chili powder, oregano and salt, until fully blended. This is your spice mixture for the fish. Sprinkle spices on top of each of the pieces of cod. Press the spices slightly into the fish to adhere them to the surface of the fish.

Place the pieces of seasoned cod into the prepared baking pan. Bake at 450 degrees for about 10 minutes, or until fish is done and opaque in color.

Cod fillets are seasoned with spices before baking.
Make The Sauce To Top Baked Chili Lime Cumin Cod

While the fish is baking, make the sauce to top the cooked fish. Melt the butter in a small skillet.

Butter, melting in skillet for making sauce to top chili lime cumin cod.
Add cumin powder and the juice of one lime to the melted butter in skillet.

Lime juice and cumin powder added to the sauce for chili lime cumin cod.
Give the sauce a good stir to combine ingredients. Cook the sauce for one more minute, then remove the skillet from the heat.

The buttery lime sauce is ready to add drizzle over the baked chili lime cumin cod.
Serve The Baked Chili Lime Cumin Cod

Once the fish is done, remove the pan from the oven. Transfer the pieces of baked chili lime cumin cod fish onto individual serving plates. Drizzle each piece of fish with the warm butter lime and cumin sauce.

Serve the chili lime cumin cod while it is hot, and enjoy! THAT’S IT! I served the fish with steamed broccoli and some rice on the side. The fish flaked very easily, and the simple butter lime sauce was the perfect finishing touch for the seasoned cod!

Chili Lime Cumin Cod is topped with sauce, then served (with broccoli and rice on the side).

I really hope you enjoy this incredibly SIMPLE seafood dish!  We really enjoyed the chili lime cumin cod, and trust you will, too! Have a GREAT day!

Looking For More COD Recipes?

You can find all of my recipes in the Recipe Index, located at the top of the page.  A few of our favorite seafood recipes featuring cod include:

Interested In More Recipes?

Thank you for visiting this website. I appreciate you using some of your valuable time to do soIf you’re interested, I publish a newsletter 2 times per month (1st and 15th) with all the latest recipes, and other fun info. I would be honored to have you join our growing list of subscribers, so you never miss a great recipe!
There is a Newsletter subscription box on the top right side (or bottom) of each blog post, depending on the device you use, where you can easily submit your e-mail address (only) to be included in my mailing list.

You Can Also Find Me On Social Media:

Facebook page: The Grateful Girl Cooks!
Pinterest:
The Grateful Girl Cooks!
Instagram:
jbatthegratefulgirlcooks

Author's signatureRecipe Source: http://cocinandoconalena.blogspot.com/2010/12/chili-lime-cumin-cod.html

0 from 0 votes
Chili Lime Cumin Cod
Prep Time
5 mins
Cook Time
10 mins
Total Time
15 mins
 
Southwest-inspired Chili Lime Cumin Cod is baked, seasoned fish, topped with a lime, cumin & butter sauce, and is ready in less than 15 minutes!
Category: Entree-Seafood
Cuisine: Southwestern
Keyword: chili lime cumin cod
Servings: 4 servings
Calories Per Serving: 197 kcal
Author: JB @ The Grateful Girl Cooks!
Ingredients
  • 2 pounds cod fillets (4 pieces)
  • 1 teaspoon chili powder
  • 1/2 teaspoon dried oregano (may substitute dried parsley or dried cilantro-I put a bit of each on the fish)
  • 1/2 teaspoon salt
  • 2 Tablespoons butter
  • 1/4 teaspoon cumin
  • 1 lime , juiced
Instructions
  1. Preheat your oven to 450 degrees. Spray an oven-safe baking pan with non-stick spray (or coat pan with oil).

  2. In a small bowl, combine the chili powder, oregano, and salt. Mix to combine. Sprinkle spices on top of the pieces of cod. Press spices slightly into the fish to adhere. Place the seasoned cod into prepared baking pan. 

  3. Bake at 450 degrees for about 10 minutes, or until fish is done and opaque in color.

  4. While the fish is baking, make the sauce to top the cooked fish. Melt the butter in a small skillet. Add cumin and the juice of one lime. Stir to combine; cook for an additional minute. Remove from heat.

  5. When pieces of cod are finished cooking, remove pieces to individual serving plates. Drizzle the Lime/Cumin/Butter sauce over the top of the pieces of fish. Serve... and enjoy!
Recipe Notes

I think the sauce for this recipe would also taste great on grilled halibut, swordfish, mahi-mahi, or tilapia.

Nutrition Facts
Chili Lime Cumin Cod
Amount Per Serving (1 piece)
Calories 197 Calories from Fat 54
% Daily Value*
Fat 6g9%
Saturated Fat 3g19%
Cholesterol 88mg29%
Sodium 441mg19%
Potassium 728mg21%
Carbohydrates 2g1%
Protein 30g60%
Vitamin A 390IU8%
Vitamin C 6.6mg8%
Calcium 37mg4%
Iron 1mg6%
* Percent Daily Values are based on a 2000 calorie diet.

Here’s one more to pin on your Pinterest boards!Southwest-inspired Chili Lime Cumin Cod is baked, seasoned fish, topped with a lime, cumin & butter sauce, and is ready in less than 15 minutes!


Save

Save

Save

Homemade Italian Dressing

Make an absolutely delicious homemade Italian dressing from scratch in about 5 minutes, to flavor your favorite mixed green salads.Make an absolutely delicious homemade Italian dressing from scratch in about 5 minutes, to flavor your favorite mixed green salads.
I found this recipe for homemade Italian dressing years and years ago (can’t remember where), and wrote it down on a 3×5 card. The only writing on the index card other than the recipe is my description: “GOOD!” Super simple to make, and FULL of flavor, this Homemade Italian Dressing recipe is my “go to” when I want to make a quick “from scratch” salad dressing.

Seriously… from start to finish, this tasty homemade Italian dressing takes less than 5 minutes to make! As an added bonus… there are no weird “shelf-stabilizing” ingredients in it (with names I can’t pronounce) to be found. Most ingredients are basic ingredients and spices I always have in my home. Can’t beat that! Here’s how you make this lickety-split!

Scroll Down For A Printable Recipe Card At The Bottom Of The Page

How To Make Homemade Italian Dressing

To make this homemade Italian dressing, measure the oil, lemon juice and white vinegar into a bowl. Add the rest of the dry ingredients (salt, sugar, dry mustard, onion powder, paprika, oregano, thyme), and 2 minced garlic cloves.

Whisk these ingredients together until the sugar and salt have dissolved and the mixture is fully blended.

The ingredients for the salad dressing in a bowl, before blending them together.
Why Is This Homemade Italian Dressing Red In Color?

Once blended, the homemade Italian dressing will look like this photo below. The red color does NOT come from ketchup, but from the addition of the paprika!

Homemade Italian Dressing is red in color, due to the paprika in it.
Pour the salad dressing into a bottle or jar that can be sealed. I usually pour it through a funnel for less spills.

Pour the salad dressing into bottle using a funnel.For BEST Homemade Italian Dressing Flavor

Put a lid on the bottle and refrigerate for at least 2 hours. This helps the flavors to become fully incorporated. Once you’re ready to dress your salad, be sure to shake the homemade Italian dressing well, before serving.

The homemade Italian dressing can be stored in a bottle with a lid.
That’s IT!!! I think it took longer to write this blog post than it did to make this delicious homemade Italian  dressing. Hope you’ll give it a try on your next mixed green salad. I think you will really like it! Have a great day.

Looking For More SALAD DRESSING Recipes?

You can find all of my salad dressing recipes in the Recipe Index, located at the top of the page. A few of our family favorites are:

Interested In More Recipes?

Thank you for visiting this website. I appreciate you using some of your valuable time to do soIf you’re interested, I publish a newsletter 2 times per month (1st and 15th) with all the latest recipes, and other fun info. I would be honored to have you join our growing list of subscribers, so you never miss a great recipe!
There is a Newsletter subscription box on the top right side (or bottom) of each blog post, depending on the device you use, where you can easily submit your e-mail address (only) to be included in my mailing list.

You Can Also Find Me On Social Media:

Facebook page: The Grateful Girl Cooks!
Pinterest:
The Grateful Girl Cooks!
Instagram:
jbatthegratefulgirlcooks

Author's signatureRecipe Source: unknown

0 from 0 votes
Homemade Italian Dressing
Prep Time
5 mins
Cook Time
0 mins
Total Time
5 mins
 

Make an absolutely delicious homemade Italian dressing from scratch in about 5 minutes, to flavor your favorite mixed green salads.

Category: Salad Dressing
Cuisine: Italian
Keyword: Italian dressing
Servings: 24 (1½ cups total)
Calories Per Serving: 122 kcal
Author: JB @ The Grateful Girl Cooks!
Ingredients
  • 1 cup vegetable oil
  • 1/4 cup fresh squeezed lemon juice
  • 1/4 cup white vinegar
  • 1 teaspoon salt
  • 1 teaspoon granulated sugar
  • 1/2 teaspoon dry mustard
  • 1/2 teaspoon onion powder
  • 1/2 teaspoon paprika
  • 1/2 teaspoon oregano
  • 1/8 teaspoon thyme
  • 2 garlic cloves , minced
Instructions
  1. Measure oil, lemon juice and vinegar into bowl. Add the rest of the ingredients. Whisk well to fully combine. Pour into a container that can be sealed well. Refrigerate salad dressing for at least 2 hours for BEST flavor.
  2. Shake bottle well, before serving.
  3. Serve, and enjoy!
Nutrition Facts
Homemade Italian Dressing
Amount Per Serving (1 Tablespoons)
Calories 122
% Daily Value*
Sodium 97mg4%
Potassium 2mg0%
Vitamin A 20IU0%
Vitamin C 1.1mg1%
Calcium 1mg0%
* Percent Daily Values are based on a 2000 calorie diet.

Here’s one more to pin on your Pinterest boards!Make an absolutely delicious homemade Italian dressing from scratch in about 5 minutes, to flavor your favorite mixed green salads.


Save

Save

Save

Butternut Squash Ravioli with Browned Butter Sage Sauce

Butternut Squash Ravioli with Browned Butter Sage Sauce, with nutmeg and Parmesan cheese, is a delicious meatless dish that looks and tastes great!Butternut Squash Ravioli with Browned Butter Sage Sauce, with nutmeg and Parmesan cheese, is a delicious meatless dish that looks and tastes great!

I found a recipe on Pinterest for Butternut Squash Ravioli, drizzled with a browned butter and sage sauce, topped with Parmesan cheese. It’s fun to make homemade ravioli, and this recipe sounded good. So… I made it… and we really enjoyed it!

The creaminess of the roasted butternut squash, combined with the flavor of Parmesan cheese and a touch of nutmeg is amazing! The browned butter sauce (with only TWO ingredients!) that covered the pasta is so easy to make.

I decided to make my own ravioli from scratch because we have the cutest little pasta machine I received as a birthday gift several years ago. Seriously- I think making homemade pasta is very therapeutic and fun!

Scroll Down For A Printable Recipe Card At The Bottom Of The Page

But What If I Don’t Have A Pasta Machine?

However, if you don’t have a pasta machine, you still can make this recipe with two other options: 1) make pasta dough and roll it out by hand with brute strength, or 2) buy a package of won ton wrappers and use those instead of pasta.

If you go the purchased won ton route, this recipe just got a lot simpler! If you like the adventure of making and rolling your own pasta dough for ravioli, then this is still a very simple recipe… honest!

Roast The Butternut Squash

You will need to roast the butternut squash first!  Peel, de-seed, and then cut it into cubes. Bake (per instructions in printable recipe card below) the butternut squash.

Butternut squash is seeded, cubed and roasted before making this dish.
Time To Make The Ravioli Dough

Making the ravioli dough is kinda fun, at least for me it is! This time I used an easy egg-less recipe I found in my pasta machine instruction book. Mix the ingredients in a stand mixer with a dough hook on it.

Dough for the raviolis is mixed together.
Remove the dough from the mixer once dough comes together enough to form a ball. Let the dough rest for about 15 minutes, covered with a slightly damp dish towel.

The dough rests on a floured surface before shaping.
Pasta Machine Fun!

Slice off a piece of the dough, and run it through your pasta machine, adjusting settings (per manufacturer instructions) until you have long strips of dough. Keep running the dough through the machine until you have very long, thin strips of dough.

The dough for making butternut squash ravioli needs to be really thin. If rolling it out by hand, keep at it until the dough is very thin!

A pasta machine is used to make long sheets of dough for the ravioli.
Time To Fill The Butternut Squash Ravioli

After the butternut squash finishes roasting, mash it up, then mix it (using an electric beater) with the Parmesan cheese and nutmeg in a bowl. Place small spoonfuls of mixture onto the pasta sheets, leaving space in between each spoonful.

Roasted squash is placed on sheets of pasta dough in dollops.
Now gently pull the dough up and over the top of the butternut squash, from front to back, to touch the other side of the dough. Carefully cut into individual raviolis like this:

The pasta dough is folded over and cut into individual pieces.
Crimp the edges with a fork all the way around, sealing the edges shut like this:

Each of the raviolis is crimped on the edges with a fork.
Now the ravioli should (hopefully) look like this:

Now the butternut squash ravioli is ready to cook!
Cook The Browned Butter Sage Sauce

Bring a large saucepan full of salted water to a full boil. Right before you cook the ravioli (remember FRESH ravioli only takes 2-3 minutes to cook), make the browned butter/sage sauce.

Melt the butter with  fresh sage leaves in a large skillet. I grow my own sage at home, so all I had to do was go out to my front porch and get some of the leaves… easy-peasy!

Melted butter is cooked with sage leaves until it becomes browned.
After the butter and sage have cooked for about 3 minutes, the butter will begin to turn light brown. It will be a bit more brown than this…and will smell somewhat “nutty”. Once the butter sauce is light brown in color, remove the skillet from the heat.

Butter and sage leaves continue to cook until browned.
The butternut squash ravioli cooks in about the same time it takes to make the sauce (about 3 minutes).

Cooking the raviolis in boiling, salted water for 3 minutes.
Time To Serve The Raviolis

Remove the raviolis with a slotted spoon to let them drain. Place them directly into the browned butter/sage sauce (sorry, no picture of that… was too busy trying to get them all in the skillet and covered with sauce!)

Spoon the sauce over the hot ravioli, then gently spoon them up and onto serving plates. Spoon additional sauce and sage leaves over the ravioli. Grate some fresh Parmesan cheese on the top, and serve!

Butternut Squash Ravioli with Browned Butter Sage Sauce on plate with a green salad.
Sure hope you try making these butternut squash ravioli. They are absolutely delicious!

Close up photo of the finished ravioli dish on serving plate.

Hope you enjoy this Italian-inspired pasta dish. It really tastes wonderful! Have a great day!

Looking For More PASTA Recipes?

You can find ALL of my recipes in the Recipe Index, located at the top of the page. I have some wonderful pasta recipes you might enjoy, including:

Interested In More Recipes?

Thank you for visiting this website. I appreciate you using some of your valuable time to do soIf you’re interested, I publish a newsletter 2 times per month (1st and 15th) with all the latest recipes, and other fun info. I would be honored to have you join our growing list of subscribers, so you never miss a great recipe!
There is a Newsletter subscription box on the top right side (or bottom) of each blog post, depending on the device you use, where you can easily submit your e-mail address (only) to be included in my mailing list.

You Can Also Find Me On Social Media:

Facebook page: The Grateful Girl Cooks!
Pinterest:
The Grateful Girl Cooks!
Instagram:
jbatthegratefulgirlcooks

Author's signatureRecipe Source: http://jennysteffens.blogspot.com/2011/09/butternut-squash-ravioli-with-sage.html

0 from 0 votes
Butternut Squash Ravioli with Browned Butter Sage Sauce
Prep Time
45 mins
Cook Time
3 mins
Total Time
48 mins
 

Butternut Squash Ravioli with Browned Butter Sage Sauce, with nutmeg and Parmesan cheese, is a delicious meatless dish that looks and tastes great!

Category: Entree
Cuisine: Italian
Keyword: butternut squash ravioli
Servings: 4 servings
Calories Per Serving: 817 kcal
Author: JB @ The Grateful Girl Cooks!
Ingredients
For Squash Filling:
  • 1 pound butternut squash
  • olive oil
  • salt & pepper (to season)
  • 1/4 cup Parmesan cheese
  • 1/4 teaspoon nutmeg
For Browned Butter Sauce:
  • 3/4 cube butter
  • 10-12 sage leaves
For Pasta:
  • 1 recipe homemade pasta dough OR 1 pkg won ton skins (*see notes)
My pasta dough was made from:
  • 3 cups all purpose flour
  • 1 cup warm water
  • 2 Tablespoons olive oil
For Garnish:
  • Additional grated Parmesan cheese
Instructions
  1. Slice squash in half. Peel and de-seed. Cut the squash into cubes, place in bowl, and coat them fairly well with olive oil. Sprinkle the squash with salt and pepper. Place the squash cubes on a baking sheet and bake for 25 minutes at 425 degrees. The squash should be tender when done. Remove squash from oven; place into a medium bowl and mash the squash with a fork until well "mashed". Add the Parmesan cheese and nutmeg. Give it a taste. If necessary, add a bit more salt and pepper.
  2. While the squash is baking, make the pasta, per manufacturer's instructions. Roll it out into long strips on a well-floured surface.
  3. Place small spoonfuls of the squash filling in the middle of the long sheets of pasta dough, leaving space between each one. Gently pull the dough up and over the filling from front to back until the dough touches the other edge. Lightly press down the outer edges. Carefully cut each ravioli apart. Using a fork, carefully crimp the edges of the raviolis, to seal completely.
  4. Bring a large saucepan of salted water to a boil, for the ravioli.
  5. While the water is coming to a boil, make the butter sauce: In a medium skillet, melt the butter. Add the sage leaves. Cook this for for 3-4 minutes on medium-low, only until the butter begins to brown. Once the butter turns light brown, remove pan from the heat.
  6. Cook the ravioli in boiling, salted water for 2-3 minutes. They will float to the top of the water when they are done cooking. Remove the raviolis from the hot water using a slotted spoon; place them into the browned butter sauce. Carefully spoon some of the sauce onto the raviolis, to cover.
  7. Place raviolis onto individual serving plates. Drizzle with the browned butter sauce and the sage leaves. Finely grate Parmesan cheese on top; Serve... and enjoy!
Recipe Notes

If using won ton wrappers, place prepared squash/Parmesan mixture into center of won ton wrapper. Brush all the edges of the won ton with water, then press edges together to completely seal around filling. Follow rest of directions.

Nutrition Facts
Butternut Squash Ravioli with Browned Butter Sage Sauce
Amount Per Serving (1 serving)
Calories 817 Calories from Fat 108
% Daily Value*
Fat 12g18%
Saturated Fat 2g13%
Cholesterol 14mg5%
Sodium 754mg33%
Potassium 591mg17%
Carbohydrates 150g50%
Fiber 6g25%
Sugar 2g2%
Protein 24g48%
Vitamin A 12135IU243%
Vitamin C 23.8mg29%
Calcium 199mg20%
Iron 9.1mg51%
* Percent Daily Values are based on a 2000 calorie diet.

Here’s one more to pin on your Pinterest boards!Butternut Squash Ravioli with Browned Butter Sage Sauce, with nutmeg and Parmesan cheese, is a delicious meatless dish that looks and tastes great!


Save

Zucchini Relish

Learn how to make tasty zucchini relish (similar to pickle relish), an amazing condiment for hot dogs, hamburgers, etc., and learn how to can it for long term storage!Learn how to make tasty zucchini relish (similar to pickle relish), an amazing condiment for hot dogs, hamburgers, etc., and learn how to can it for long term storage!
Last summer I was visiting a dear friend in her home. She told me she had canned some pickle relish, using shredded zucchini from her garden. Then she gave me not one, but TWO pint jars of her homemade zucchini relish to take home.

I was too embarrassed to tell her that I don’t even LIKE pickle relish, so I thanked her (graciously, of course!), and took them home to occupy a spot in our pantry.  My thought was… I don’t eat hot dogs that often, and I don’t use it in my potato salad, so what was I supposed to do with TWO jars of the stuff?

I figured I could always put it out with the condiments at a bar-b-que or something…I ultimately cracked open a jar of zucchini relish (my curiosity got the best of me), and tried it on a grilled hot dog, and guess what? I LOVED it… (insert rolling of the eyes here). WHO KNEW?

Scroll Down For A Printable Recipe Card At The Bottom Of The Page

Okay… Please Give Me The Recipe- I Confess

Fast forward…It’s almost a year later… and those 2 jars of relish are long gone. Used up over the past year… it’s a Christmas Miracle! (perhaps my taste buds changed?) So I told (more like “confessed”) my friend the WHOLE story of my initial reaction to her kind gift (truth-telling, from start to finish) and asked her for the recipe. Ha Ha.

We had a good laugh over it. She was kind enough to give it to me, just as she received the recipe from her Mom. I decided to make some for our pantry (you know… just in case there’s a world-wide pickle relish shortage!!!!!!).

I cut the recipe in half, and it made 2 pint jars and one half-pint jar… which should last us for awhile. The recipe I’m posting is for the whole amount, and it makes between 5-6 pint jars of zucchini relish.

So for all you relish lovers out there, here is a great relish for your hot dogs or hamburgers or potato salad, AND a great way to use up some of the zucchini that will overrun your garden this year! I’m glad I learned how to make my own. Even if you don’t “can”, you can keep one jar in the refrigerator for immediate use, and give the other jar to a friend.

How To Make Zucchini Relish

Here’s how you make it (it’s easy!):  You start with shredded zucchini that has been drained well to remove excess water. Mix in diced onion, green pepper (I even snuck in a bit of red pepper), and salt. Let the mixture sit (covered) for 24 hours. The salt helps draw out liquid from the zucchini. Drain well, and rinse with cold water. Drain once more.

Zucchini Relish / The Grateful Girl Cooks!
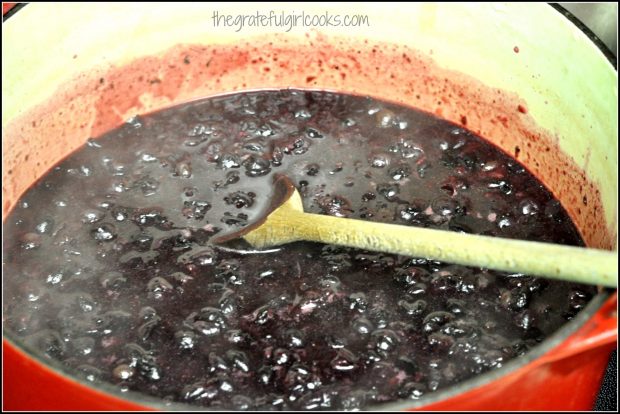
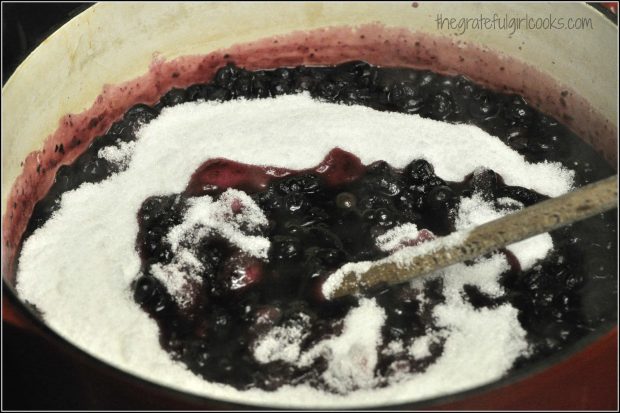
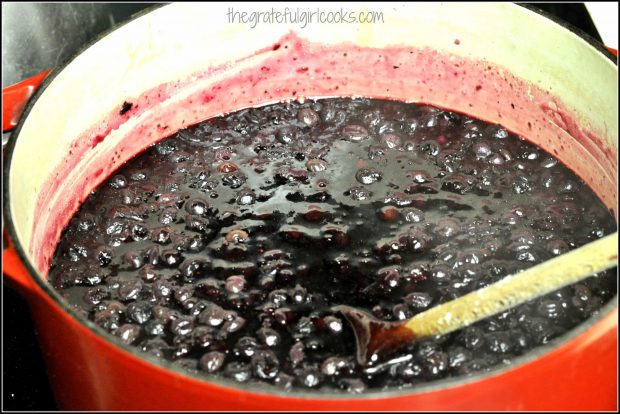
After draining zucchini mixture,  add it to the rest of the ingredients in a large stock pot, stir well to combine, and bring mixture to a boil. Cook it for 15 minutes, stirring frequently.

Zucchini Relish / The Grateful Girl Cooks!Canning Zucchini Relish

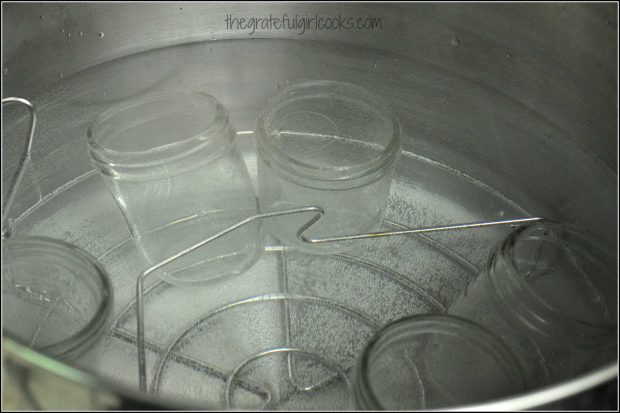
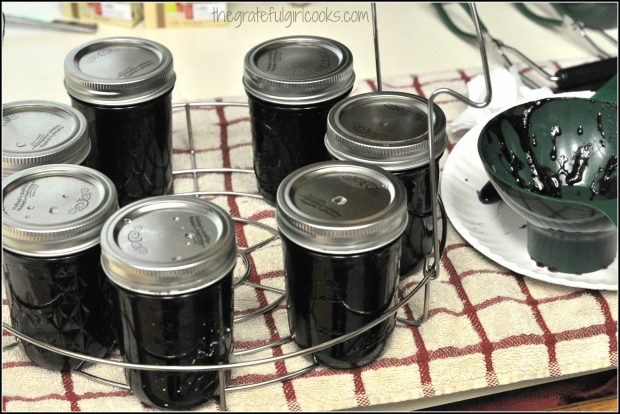
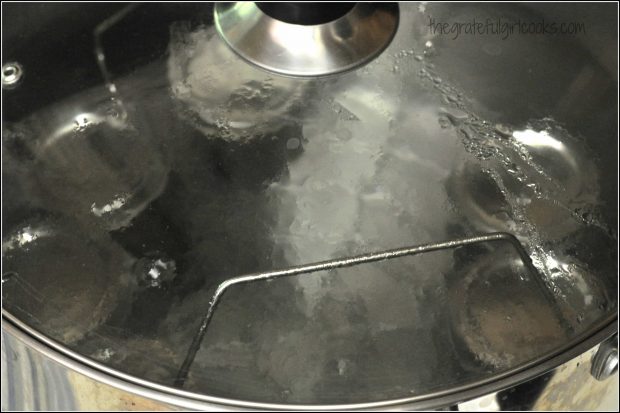
Ladle relish into hot, sterilized canning jars (following basic canning guidelines). Leave 1/2″ headspace, remove air bubbles and wipe rims. Process in a boiling hot water bath for 15 minutes.

Zucchini Relish / The Grateful Girl Cooks!
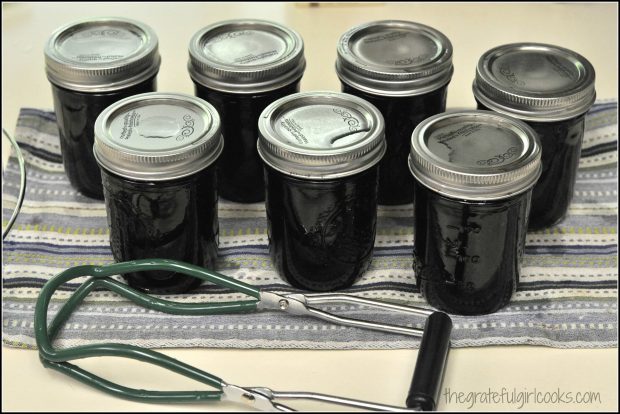
Remove jars from canner and listen for that wonderful “ping” sound, indicating the jars have sealed properly. Let the jars sit on the counter, undisturbed for 24 hours, then store in pantry.

Zucchini Relish / The Grateful Girl Cooks!
Even if you don’t “can” food, you can always let the zucchini relish cool completely, then place it in jars (and kept refrigerated), then give one to a relish-loving friend or two… (never thought I’d ever say that!).

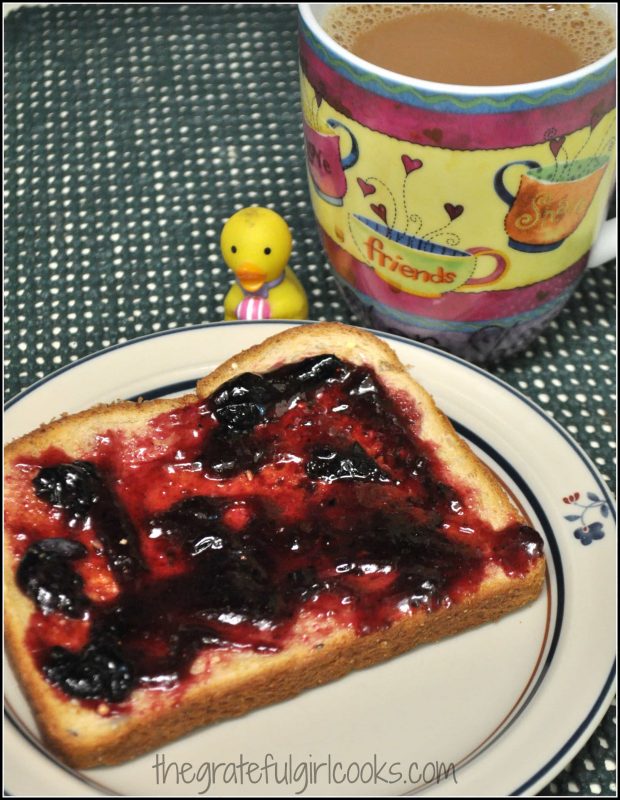
And… enjoy your hot dogs or hamburgers this summer, with this tasty zucchini relish on them (of course!).

Looking For More CANNING Recipes?

You can find all of my recipes in the Recipe Index, located at the top of the page. I have quite a few canning recipes, including:

Interested In More Recipes?

Thank you for visiting this website. I appreciate you using some of your valuable time to do soIf you’re interested, I publish a newsletter 2 times per month (1st and 15th) with all the latest recipes, and other fun info. I would be honored to have you join our growing list of subscribers, so you never miss a great recipe!
There is a Newsletter subscription box on the top right side (or bottom) of each blog post, depending on the device you use, where you can easily submit your e-mail address (only) to be included in my mailing list.

You Can Also Find Me On Social Media:
Facebook page: The Grateful Girl Cooks!
Pinterest: The Grateful Girl Cooks!
Instagram: jbatthegratefulgirlcooks

Zucchini Relish / The Grateful Girl Cooks!Recipe Source: Debbie Stephens (and her Mom)

↓↓ PRINTABLE RECIPE BELOW ↓↓

0 from 0 votes
Zucchini Relish
Prep Time
1 d
Cook Time
15 mins
Total Time
1 d 15 mins
 
Learn how to make tasty zucchini relish (similar to pickle relish), an amazing condiment for hot dogs, hamburgers, etc., and learn how to can it for long term storage!
Category: Canning, Canning and Preserving, Condiment
Cuisine: American
Keyword: zucchini relish
Servings: 5 -6 pint jars
Calories Per Serving: 26 kcal
Author: JB @ The Grateful Girl Cooks!
Ingredients
  • 10 cups shredded zucchini (seeds scooped out and discarded)
  • 1 large onion , finely diced
  • 1 green pepper , finely diced (I even used a bit of red pepper!)
  • 5 Tablespoons canning salt
  • 2 1/4 cups vinegar
  • 6 cups granulated sugar
  • 1/2 teaspoon black pepper
  • 1 Tablespoon nutmeg
  • 1 Tablespoon dry mustard powder
  • 1 Tablespoon turmeric
  • 1 Tablespoon corn starch
  • 1 Tablespoon celery seed
Instructions
  1. In a large bowl, mix together the shredded zucchini, onion, green pepper, and salt. Cover bowl with plastic wrap; let sit for 24 hours (this draws out liquid from zucchini).
  2. Drain zucchini mixture; rinse well with cold water, then drain completely again.
  3. Place the drained zucchini mixture into a large stockpot. Add the vinegar, sugar, black pepper, nutmeg, dry mustard, turmeric, corn starch, and celery seed. Stir to mix well.
  4. Bring to a boil. Cook for 15 minutes, stirring frequently.
  5. Ladle hot relish into canning jars, leaving 1/2 inch headspace. Remove air bubbles. Wipe rim of jar, adjust two piece lids.
  6. Process jars in a boiling water canner for 15 minutes. Remove to a towel to cool. Make sure jars seal, then let sit for 24 hours before moving to pantry.
Recipe Notes

Note: I cut the recipe in half easily, and it produced 2 pint jars and 1 half-pint jar.
Also, note that the long prep time is the time allotted for zucchini/pepper/onion/salt mixture to soak overnight.
If canning this in half-pint jars, they only need to process for 10 minutes.

Nutrition Facts
Zucchini Relish
Amount Per Serving (1 Tablespoon)
Calories 26
% Daily Value*
Potassium 20mg1%
Carbohydrates 6g2%
Sugar 6g7%
Vitamin A 15IU0%
Vitamin C 1.7mg2%
Calcium 2mg0%
Iron 0.1mg1%
* Percent Daily Values are based on a 2000 calorie diet.

Here’s one more to pin on your Pinterest boards!Learn how to make tasty zucchini relish (similar to pickle relish), an amazing condiment for hot dogs, hamburgers, etc., and learn how to can it for long term storage!
Save

Save

Save

Save
Strawberry-Pineapple Jello Salad

It’s easy to make a delicious Strawberry-Pineapple Jello Salad, enhanced with pecans, cream cheese and a secret ingredient- shhh.. it’s 7-Up!It's easy to make a delicious Strawberry-Pineapple Jello Salad, enhanced with pecans, cream cheese and a secret ingredient- shhh.. it's 7-Up!

Have you ever heard the phrase “it’s like trying to nail Jello to the wall”? Well, trying to get a good photo of a fantastic tasting Strawberry-Pineapple Jello Salad proved to be a huge challenge. I want to share this recipe with you in spite of that, so you need to know this strawberry-pineapple jello salad tastes good, in spite of the photos. OK? OK.

Scroll Down For A Printable Recipe Card At the Bottom Of The Page 

A Little Bit About This Yummy Salad

This sweet strawberry-pineapple jello salad is super easy to make, and it’s full of flavor! The salad contains crushed pineapple, pecans, cream cheese and the secret ingredient… wait for it… a can of 7-Up! Yep!

Jello salad is perfect to feed a crowd of people, and this strawberry-pineapple jello salad makes approximately 16 servings! I have posted the pictures and recipe for strawberry flavored salad, but at times I have substituted lime jello for the strawberry, and it is equally wonderful!

How To Make Strawberry-Pineapple Jello Salad

Here’s what you do:  Dissolve jello powder in 2 cups of boiling water (use the drained pineapple juice as part of this liquid).

Strawberry jello powder, pineapple juice and boiling water are mixed.

Time To Blend It Up!

Once mixture is dissolved, put the liquid in a blender with the cream cheese. Blend these ingredients well, until the jello and cream cheese are completely combined.

The strawberry liquid is blended with cream cheese.
Once they are fully blended, the jello and cream cheese mixture will look like this below…

After the cream cheese is added to the jello liquid, it becomes foamy.

Add The Secret Ingredient To The Jello!

Pour the creamy jello mixture into a large serving dish (a 2.5 quart dish for a half recipe or a 13×9 dish for full recipe works well). Add 1 can of 7-Up to the jello, then stir to combine.

A can of 7-Up is added to the jello mixture in a dish.
After mixing the 7-Up in, the mixture will be foamy and look like this, in the photo below.

After 7 Up is added to the salad, it becomes foamy in texture.

Time To CHILL The Strawberry Pineapple Jello Salad!

Cover the jello with plastic wrap and put the dish into a refrigerator. When the jello has thickened slightly (after about 45 minutes or so), add the crushed pineapple and chopped pecans (or walnuts).

Stir until combined, re-cover with plastic wrap and let refrigerate until the strawberry-pineapple jello salad is completely set. My recommendation is to let it refrigerate for 4-6 hours! I usually make this salad the day BEFORE I plan to serve it!

Crushed pineapple and pecans are added to the partially firm jello salad.
Time to EAT!

Once firm and fully set, serve the jello salad, by cutting it into serving-sized pieces. Remove the pieces with a spatula, serve, and enjoy!

Strawberry-Pineapple Jello Salad is cut into squares to serve.
This salad has been served alongside lots of holiday meals, especially at Thanksgiving time! It may not be the “prettiest” jello salad you’ve ever laid eyes on, but it sure is delicious!  Hope you will give it a try!

You Can Also Make Lime-Pineapple Jello Salad!

This is also fantastic as a LIME-PINEAPPLE JELLO SALAD (substitute lime jello for strawberry) YUM! Here is a photo of that salad!

This salad can also be made with LIME jello, instead of strawberry.

Strawberry-Pineapple Jello Salad served with other Thanksgiving dishes.

Hope you will consider trying this delicious jello salad! We have had it often, especially served with our Thanksgiving Day dinner! Have a great day!

Looking For More JELLO SALAD Recipes?

You can find all of my recipes in the Recipe Index, located at the top of the page. A few jello salad recipes we love include:

Interested In More Recipes?

Thank you for visiting this website. I appreciate you using some of your valuable time to do soIf you’re interested, I publish a newsletter 2 times per month (1st and 15th) with all the latest recipes, and other fun info. I would be honored to have you join our growing list of subscribers, so you never miss a great recipe!
There is a Newsletter subscription box on the top right side (or bottom) of each blog post, depending on the device you use, where you can easily submit your e-mail address (only) to be included in my mailing list.

You Can Also Find Me On Social Media:

Facebook page: The Grateful Girl Cooks!
Pinterest:
The Grateful Girl Cooks!
Instagram:
jbatthegratefulgirlcooks

Strawberry Pineapple Jello Salad / The Grateful Girl Cooks!Original recipe source: unknown (been making this for over 30 years…)

5 from 1 vote
Strawberry-Pineapple Jello Salad
Prep Time
10 mins
Cook Time
0 mins
Refrigeration (inactive)
5 hrs
Total Time
5 hrs 10 mins
 
A delicious & easy to prepare, Strawberry-Pineapple Jello Salad, enhanced with pecans, cream cheese and a secret ingredient, 7-Up!
Category: Salad, Salad/Side Dish
Cuisine: American
Keyword: strawberry-pineapple jello salad
Servings: 12 servings
Calories Per Serving: 123 kcal
Author: JB @ The Grateful Girl Cooks!
Ingredients
  • 6 ounces Strawberry Jello powder (large box-can also substitute Lime)
  • 3 ounces cream cheese
  • 8 ounces crushed pineapple (drained, BUT RESERVE JUICE!)
  • 1/2 cup chopped pecans (or walnuts)
  • 12 ounces 7-Up (1 can)
Instructions
  1. Dissolve jello in 2 cups boiling water **(use reserved pineapple juice as part of the 2 cups liquid).
  2. Put jello in blender with cream cheese. Blend until completely combined.
  3. Pour jello mixture into serving dish. Add can of 7-Up. Stir until combined. Mixture will be foamy. Cover dish with plastic wrap, then refrigerate until slightly thickened (about 45 minutes or so).
  4. When jello is slightly thickened, stir in the crushed pineapple and chopped nuts. Stir to combine and distribute throughout jello. Cover with plastic wrap and refrigerate until completely set and firm (several hours).
  5. When ready to serve, slice into serving pieces with a knife, then use a spatula to remove portions. Enjoy!
Recipe Notes

This salad does not take very long to prepare at all. Most of the prep time is INACTIVE time... "hurry up and wait for jello to firm up" kind of time! Try this with lime jello... it's fantastic!

Nutrition Facts
Strawberry-Pineapple Jello Salad
Amount Per Serving (1 serving)
Calories 123 Calories from Fat 36
% Daily Value*
Fat 4g6%
Saturated Fat 1g6%
Cholesterol 4mg1%
Sodium 102mg4%
Potassium 60mg2%
Carbohydrates 20g7%
Fiber 1g4%
Sugar 18g20%
Protein 2g4%
Vitamin A 49IU1%
Vitamin C 2mg2%
Calcium 17mg2%
Iron 1mg6%
* Percent Daily Values are based on a 2000 calorie diet.

Here’s one more to pin on your Pinterest boards!It's easy to make a delicious Strawberry-Pineapple Jello Salad, enhanced with pecans, cream cheese and a secret ingredient- shhh.. it's 7-Up!


Save

Save
Save