Snickerdoodles

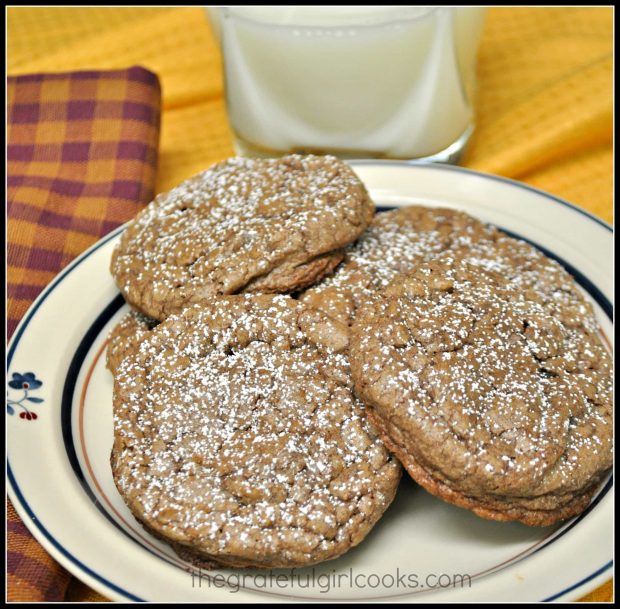
It’s easy to make these absolutely DELICIOUS snickerdoodles! These classic cookies are soft and puffy, and are coated with a cinnamon sugar topping!It's easy to make these absolutely DELICIOUS snickerdoodles! These classic cookies are soft and puffy, and are coated with a cinnamon sugar topping!
I recently tried a new recipe for Snickerdoodles. I’ve been baking snickerdoodle cookies for years and years with the same old recipe, and love them!

Recently I saw a “new” recipe on a website I love that looked interesting, so I gave it a try. The blogger I got this snickerdoodles recipe from is Chris Scheuer, at The Cafe Sucré Farine. She found this recipe in a cookbook from a famous bakery in London, England.

Bakeries tend to get things right in the cookie baking department, so I knew THESE snickerdoodles just HAD to be delicious, so I made a batch. The result? Outstanding! Do you know the story behind the humble snickerdoodle cookie? It’s pretty interesting. Find out here. It’s become such a well loved American classic cookie!

Scroll Down For A Printable Recipe Card At The Bottom Of The Page

Typical Recipes For Snickerdoodles Produce A FLAT Cookie

My tried and true recipe for snickerdoodles are delicious, but usually come out fairly flat in appearance, like these pictured below.  They’re absolutely wonderful, but flat in shape.

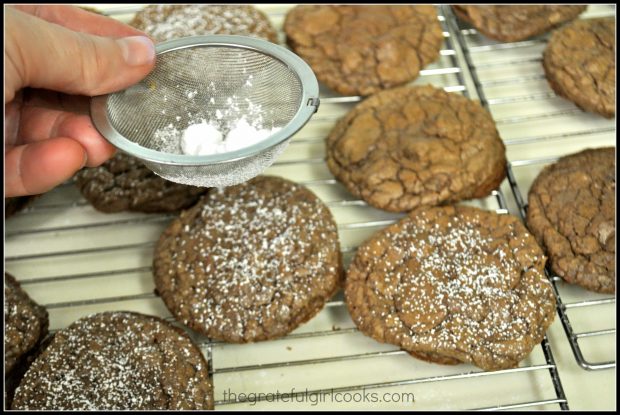
Snickerdoodles, cooling on a wire rack.

These Snickerdoodles Are Soft And PUFFY!

Not these NEW beauties! The snickerdoodles puffed up quite nicely! These cookies have a delicious cinnamon/sugar topping. The inside of the cookies are soft and fluffy, making these the perfect snickerdoodles, in my humble opinion.

I am glad I found this recipe and will happily make these yummy cookies again. Snickerdoodles would be perfect for gift-giving over the holidays or for a special occasion! They are easy to make… and let’s be honest here… who doesn’t love to eat cookies over the holidays? Wait, wait… who doesn’t like a good cookie ANYTIME???

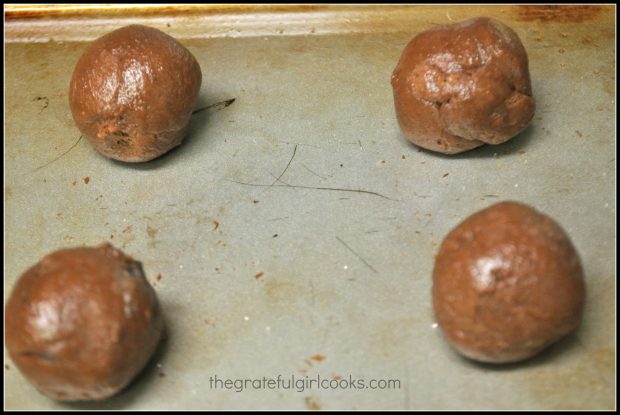
Once the dough is made, the snickerdoodles are rolled into balls, coated with cinnamon and sugar, and then are ready to bake!

Snickerdoodles dough balls on parchment paper covered cookie sheet, ready to bake.Baked Snickerdoodles Are Nice And PUFFY!

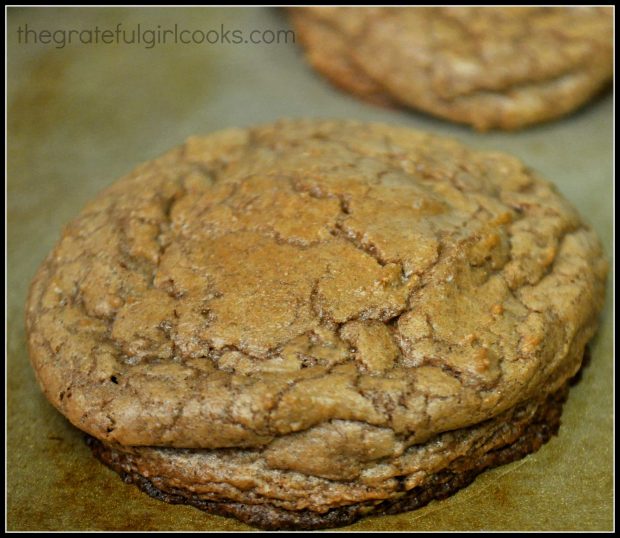
Once the cookies have baked, they look like THIS!  Behold… the humble little snickerdoodle! Can you tell that it is puffy? They are light and airy, and absolutely wonderful.

Snickerdoodles are baked with a cinnamon sugar topping.

Maybe you can see how puffy and “pillowy” these snickerdoodle cookies are in the photo below.  Yum. You’re gonna need to run and grab a cup of coffee, and help me eat these cute snickerdoodles! I would love to share a few with you!

Snickerdoodles are piled up on a plate, ready to eat!

Hope you will give these delicious cookies a try.  I know you’re gonna LOVE them!

Would You Like More Cookie Recipes?

Here are a few cookie recipes on my blog. You can find these and other yummy cookie recipes in the Recipe Index, located at the top of the page.

Interested In More Recipes?

Thank you for visiting this website. I appreciate you using some of your valuable time to do soIf you’re interested, I publish a newsletter 2 times per month (1st and 15th) with all the latest recipes, and other fun info. I would be honored to have you join our growing list of subscribers, so you never miss a great recipe! 

There is a Newsletter subscription box on the top right side (or bottom) of each blog post, depending on the device you use, where you can easily submit your e-mail address (only) to be included in my mailing list.

You Can Also Find Me On Social Media:

Facebook page: The Grateful Girl Cooks!
Pinterest:
The Grateful Girl Cooks!
Instagram:
jbatthegratefulgirlcooks

Author's signatureRecipe Source: http://thecafesucrefarine.com/2012/06/snicker-doodles-from-londons-famous/#_a5y_p=1383068

↓↓ PRINTABLE RECIPE BELOW ↓↓

0 from 0 votes
Snickerdoodles
Prep Time
15 mins
Cook Time
12 mins
Total Time
27 mins
 
It's easy to make these absolutely DELICIOUS snickerdoodles! These classic cookies are soft and puffy, and are coated with a cinnamon sugar topping!
Category: Cookies
Cuisine: American
Keyword: snickerdoodles
Servings: 18 (approx.)
Calories Per Serving: 213 kcal
Author: JB @ The Grateful Girl Cooks!
Ingredients
For the cookies:
  • 4 oz. butter , softened
  • 1 1/2 cups granulated sugar
  • 2 teaspoons vanilla extract
  • 2 large eggs
  • 3 1/4 cups all purpose flour
  • 1 1/2 teaspoons cream of tartar
  • 1 teaspoon baking soda
  • 1 teaspoon salt
  • 1/2 teaspoon ground cinnamon
For coating the dough balls:
  • 1/4 cup granulated sugar
  • 1 1/2 Tablespoons ground cinnamon
Instructions
  1. Preheat your oven to 325 degrees.
  2. In a large mixing bowl, cream together the butter, granulated sugar, and vanilla extract until mixture is light and fluffy.
  3. Add eggs to the mixture. Mix well until combined.
  4. Add the rest of the cookie ingredients to this mixture a little at a time. Mix until well combined.
  5. In a separate small bowl, mix the sugar and cinnamon together for the coating.
  6. Form cookies. Use approximately a 2 Tablespoon size scoop of cookie dough, and roll it between your (clean) hands to form a ball. Place the dough ball into the cinnamon-sugar mixture, and roll it in the mixture until all sides of the dough ball are coated.
  7. Place each coated dough ball onto parchment paper (or wax paper) lined baking sheets, about 2 inches apart from each other.
  8. Bake in 325 degree oven for about 12 minutes (or until the cookies are a light brown color). When done, let cookies cool on pan for a couple of minutes, then remove cookies and place them on a wire rack to cool. Cookies will crack a bit... don't worry... it's ALL GOOD.
Nutrition Facts
Snickerdoodles
Amount Per Serving (1 cookie)
Calories 213 Calories from Fat 45
% Daily Value*
Fat 5g8%
Saturated Fat 3g19%
Cholesterol 31mg10%
Sodium 242mg11%
Potassium 75mg2%
Carbohydrates 37g12%
Sugar 19g21%
Protein 3g6%
Vitamin A 185IU4%
Calcium 14mg1%
Iron 1.2mg7%
* Percent Daily Values are based on a 2000 calorie diet.

Here’s one more to pin on your Pinterest boards!It's easy to make these absolutely DELICIOUS snickerdoodles! These classic cookies are soft and puffy, and are coated with a cinnamon sugar topping!


Save

Save

Save

Cranberry Cashew Clusters

Make delicious Cranberry Cashew Clusters, with only 3 ingredients (dried cranberries, white chocolate and cashews)! Easy to make, and perfect for gift giving!Make delicious Cranberry Cashew Clusters, with only 3 ingredients (dried cranberries, white chocolate and cashews)! Easy to make, and perfect for gift giving!

Easy. Quick. Yummy. That explains this recipe for Cranberry Cashew Clusters, in a nutshell. Well… not really IN a nutshell, but you know what I mean, right?

This recipe is made with only 3 ingredients. They are white chocolate chips, dried cranberries and cashew pieces! Semi-sweet chocolate OR white chocolate can be used, depending on your taste. I love using white chocolate, because the cranberries show up a little bit better in the candy!

Scroll Down For A Printable Recipe Card At The Bottom Of The Page

Making Cranberry Cashew Clusters Is EASY!

Anyways… this cranberry cashew clusters recipe is as simple as melting the chocolate, and stirring in the dried cranberries and cashews. The you can place this mixture by spoonfuls (or spreading it out) onto wax paper. If you spread the mixture out, then the cranberry cashew clusters can be broken into bite-sized pieces once it has hardened.

The recipe makes approximately 2 dozen of these delicious cranberry cashew clusters. You should store them in an airtight container in the refrigerator, to keep the chocolate firm.

Cranberry cashew clusters on wax paper lined Christmas platter.

Cranberry Cashew Clusters are perfect little goodies to make when you are pressed for time! It’s so easy to make these delicious goodies to give to others, or have on hand for your ravenous family.

The chewy cranberries, crunchy cashews, and the sweet chocolate coating combine to make cranberry cashew clusters a wonderful treat! Sure hope you will give them a try! Have a great day, and please come back soon for more recipes

Looking For More CANDY Recipes?

You can find all of my recipes in the Recipe Index, located at the top of the page. I have lots of yummy candy recipes you might want to check out, including:

Interested In More Recipes?

Thank you for visiting this website. I appreciate you using some of your valuable time to do soIf you’re interested, I publish a newsletter 2 times per month (1st and 15th) with all the latest recipes, and other fun info. I would be honored to have you join our growing list of subscribers, so you never miss a great recipe! 

There is a Newsletter subscription box on the top right side (or bottom) of each blog post, depending on the device you use, where you can easily submit your e-mail address (only) to be included in my mailing list.

You Can Also Find Me On Social Media:

Facebook page: The Grateful Girl Cooks!
Pinterest:
The Grateful Girl Cooks!
Instagram:
jbatthegratefulgirlcooks

Author's signatureRecipe Source: http://www.tasteofhome.com/recipes/cranberry-clusters

↓↓ PRINTABLE RECIPE BELOW ↓↓

0 from 0 votes
Cranberry Cashew Clusters
Prep Time
15 mins
Cook Time
0 mins
Total Time
15 mins
 
Make delicious Cranberry Cashew Clusters, with only 3 ingredients (dried cranberries, white chocolate and cashews)! Easy to make, and perfect for gift giving!
Category: Candy, Dessert
Cuisine: American
Keyword: cranberry cashew clusters
Servings: 24 clusters (approx.)
Calories Per Serving: 90 kcal
Author: JB @ The Grateful Girl Cooks!
Ingredients
  • 1.5 cups (12 oz.) white chocolate chips (or semi-sweet chocolate chips)
  • 2/3 cup dried cranberries
  • 2/3 cup cashew pieces
Instructions
  1. Melt the chocolate chips in a double boiler or in the microwave. If microwaving, heat on high for 30 seconds. Stir. Heat on high for an additional 30 seconds. Stir. If not completely smooth, heat on medium power for 15 seconds more, then stir until smooth. Do not burn the chocolate!
  2. Stir the cranberries and cashews into the melted chocolate and stir well, to coat.
  3. Drop mixture by teaspoonfuls (OR spread out into a solid piece, then break up into bite sized pieces later) onto wax paper lined baking sheet. Let stand until they set up (firm).
  4. Serve and enjoy. Keep leftover candies refrigerated.
Nutrition Facts
Cranberry Cashew Clusters
Amount Per Serving (1 cluster)
Calories 90 Calories from Fat 45
% Daily Value*
Fat 5g8%
Saturated Fat 2g13%
Cholesterol 2mg1%
Sodium 10mg0%
Potassium 55mg2%
Carbohydrates 10g3%
Sugar 9g10%
Protein 1g2%
Vitamin A 5IU0%
Vitamin C 0.1mg0%
Calcium 24mg2%
Iron 0.3mg2%
* Percent Daily Values are based on a 2000 calorie diet.

Here’s one more to pin on your Pinterest boards!Make delicious Cranberry Cashew Clusters, with only 3 ingredients (dried cranberries, white chocolate and cashews)! Easy to make, and perfect for gift giving!


Save

Save

Classic Beef Stew

Classic Beef Stew, a “comfort food” soup filled with meat, potatoes, carrots, beans, and tomatoes, is a hearty and filling meal on a cold day!Classic Beef Stew, a "comfort food" soup filled with meat, potatoes, carrots, beans, and tomatoes, is a hearty and filling meal on a cold day!

My husband and I just returned home after an 11 day road trip to San Diego for Thanksgiving.  It was freezing cold when we returned to our home in Oregon, so I decided to make some Classic Beef Stew for our first dinner home.

I found the recipe for this stew in one of my old copies of Taste of Home magazine years ago. I had cut out the recipe and saved it, but had never made this particular recipe before. I grew up in a home where my Mom made beef stew all the time, and that has been the recipe I have used for years, but decided to try this one, this time.

It turned out wonderful!  This classic beef stew is baked over a couple of hours time, so the entire house smelled so amazingly good! My husband and I enjoyed this beef stew; it was easy to make, and since it yields 6-8 servings, we have leftovers for another meal!

Scroll Down For A Printable Recipe Card At The Bottom Of The Page

How To Make Classic Beef Stew

Here is how you make this hearty stew.  Start by browning the stew meat in an ovenproof baking dish.

Beef stew meat is browned in ovenproof pan.

Pan seared, browned stew meat is used to make classic beef stew.

Time To Bake The Beef Stew

Add chopped onions, tomatoes, beef broth, garlic, and spices to the stew meat in the pan. Give it all a good stir, to mix it together.

Tomatoes, onions, garlic and spices are added to classic beef stew in pan.

You will need to transfer the mixture to an ovenproof baking dish, if not already using one, then bake the stew (covered) for 1½ hours. Pretty positive you are gonna love the smell in your kitchen as this classic beef stew bakes!

Classic Beef Stew is baked for one and a half hours in oven.

Remove Stew From Oven, Add Veggies And Bake Again

Remove the hot stew pan from the oven. Add potatoes, celery, carrots, and green beans to the classic beef stew. Mix well, to combine. Bake for an additional hour (covered).

Carrots, potatoes, celery and green beans are added to classic beef stew, then baked.

Classic beef stew goes back into oven after veggies are added.Time To Serve And Eat Classic Beef Stew

When done baking, carefully remove the baking dish from oven, because it will be HOT. Dish this classic beef stew up into individual bowls, to serve!  I’m pretty sure you will be surprised at how tender the meat is!

Classic Beef Stew comes out of the oven, and is now ready to eat.

I sure hope you will give this classic beef stew a try! We love it, served with some crusty sourdough bread on the side. Hope you enjoy this perfect winter meal!

Looking For More STEW Recipes?

You can find all of my recipes in the Recipe Index, located at the top of the page. I have a couple delicious stew recipes you will enjoy, like West African Chicken and Peanut Stew, or a vegetarian friendly Lentil Stew. They’re both delicious and I highly recommend them!

Interested In More Recipes?

Thank you for visiting this website. I appreciate you using some of your valuable time to do soIf you’re interested, I publish a newsletter 2 times per month (1st and 15th) with all the latest recipes, and other fun info. I would be honored to have you join our growing list of subscribers, so you never miss a great recipe!
There is a Newsletter subscription box on the top right side (or bottom) of each blog post, depending on the device you use, where you can easily submit your e-mail address (only) to be included in my mailing list.

You Can Also Find Me On Social Media:

Facebook page: The Grateful Girl Cooks!
Pinterest:
The Grateful Girl Cooks!
Instagram:
jbatthegratefulgirlcooks

Author's signatureRecipe slightly adapted from: Taste of Home Magazine (year unknown), pg. 55, by Alberta McKay, of Bartlesville, Oklahoma

↓↓ PRINTABLE RECIPE BELOW ↓↓

0 from 0 votes
Classic Beef Stew
Prep Time
15 mins
Cook Time
2 hrs 30 mins
Total Time
2 hrs 45 mins
 
Classic Beef Stew, a "comfort food" soup filled with meat, potatoes, carrots, beans, and tomatoes, is a hearty and filling meal on a cold day!
Category: Entree
Cuisine: American
Keyword: classic beef stew
Servings: 8
Calories Per Serving: 349 kcal
Author: JB @ The Grateful Girl Cooks!
Ingredients
  • 2 pounds beef stew meat (or chuck roast), cut into 1-inch cubes
  • 2 Tablespoons vegetable oil
  • 1-1/2 cups chopped onion
  • 1 can (16 oz) diced tomatoes, with liquid
  • 1 can (10-1/2 oz) beef broth, undiluted
  • 3 Tablespoons quick-cooking tapioca (or whisk in 2 Tablespoons flour)
  • 1 1/2 garlic cloves , minced
  • 1 Tablespoon dried parsley flakes
  • 1 teaspoon salt
  • 1/4 teaspoon pepper
  • 1 bay leaf
  • 6 medium carrots , cut into 2-inch pieces
  • 3 medium potatoes , peeled and cut into 2-inch pieces
  • 1 cup sliced celery , cut into 1-inch pieces
  • 1 can green beans , cut into 2-inch pieces
Instructions
  1. Preheat oven to 350 degrees.
  2. In a dutch oven or large pan, heat the oil until very hot. Add the beef cubes, and cook until all sides are browned. Drain the oil from pan.
  3. Add the onion, tomatoes, beef broth, tapioca (or flour), garlic, parsley, salt, pepper and bay leaf. Bring this mixture to a boil, then remove pan from the heat.
  4. Cover pan (or transfer to an ovenproof large baking dish). Bake mixture in covered dish at 350 degrees for 1-1/2 hours. Remove from oven.
  5. Stir in carrots, potatoes, celery and green beans. Bake, covered, 1 hour longer, or until the meat and vegetables are tender. (mine took about 15 minutes longer). Remove bay leaf before serving. Enjoy!
Nutrition Facts
Classic Beef Stew
Amount Per Serving (1 serving)
Calories 349 Calories from Fat 108
% Daily Value*
Fat 12g18%
Saturated Fat 5g31%
Cholesterol 88mg29%
Sodium 527mg23%
Potassium 927mg26%
Carbohydrates 23g8%
Fiber 5g21%
Sugar 4g4%
Protein 35g70%
Vitamin A 8090IU162%
Vitamin C 20.5mg25%
Calcium 79mg8%
Iron 6.2mg34%
* Percent Daily Values are based on a 2000 calorie diet.

Here’s one more to pin on your Pinterest boards!Classic Beef Stew, a "comfort food" soup filled with meat, potatoes, carrots, beans, and tomatoes, is a hearty and filling meal on a cold day!

Save

Save

Chocolate Orange Truffles

Do you enjoy Christmas goodies?  Some of my favorite Christmas goodies to make are Chocolate Orange Truffles. Creamy orange flavored chocolate centers, covered with more chocolate… oh my goodness! They taste wonderful, and are perfect for gift giving!Chocolate Orange Truffles / The Grateful Girl Cooks! Chocolate Orange Truffles are delicious treats to enjoy during the holidays! Creamy orange flavored chocolate centers, dipped in chocolate to cover. YUM!
Rich, creamy, chocolate truffles infused with just the right amount of orange flavor…YUM… what a taste treat! These delicious truffles are wonderful to give as gifts over the holidays, or simply to enjoy any time of the year.

The pairing of chocolate and orange remains one of my top flavor combos… it’s so GOOD! These truffles are easy to make (really… trust me!), and are a delicious and pretty treat or homemade gift for friends or family. They are absolutely delicious, and I think you will LOVE them!

I’ve been making these for as long as I can remember (over 30 years). I don’t even remember where I found the original recipe. I copied it down on a 3×5 card many, many years ago and have been making these for family and friends ever since!

Scroll Down For A Printable Recipe Card At The Bottom Of The Page

Many Ways To Decorate the Chocolate Orange Truffles

I’ve made these chocolate orange truffles with semi-sweet chocolate topping with just a little bit of grated orange zest for a garnish. Once they are placed in cute little candy paper liners, they look so festive, especially for gift-giving. 

Chocolate-Orange Truffles / The Grateful Girl Cooks!
Another option is to dip the chocolate orange truffles in white chocolate, and then drizzle them with semi-sweet chocolate on top.

Chocolate-Orange Truffles / The Grateful Girl Cooks!
My favorite way is to dip them in semi-sweet chocolate and garnish each truffle with a melted white chocolate drizzle. Trust me, you really can’t go wrong with any of these dipping methods! Any way you make them, these chocolate orange truffles are delicious!

Chocolate-Orange Truffles / The Grateful Girl Cooks!

Don’t let the Prep Time scare you away from making these… most of the prep time is not active prep time… it’s just letting the truffles cool off in the refrigerator before dipping them in melted chocolate coating! Go wrap presents or put Aunt Edna’s fruitcake by the front door to use as a doorstop… whatever YOU like to do with some “hurry up and wait” time!

Thanks for stopping by today, and I hope you will come back soon. Have a wonderful day.

Looking For More TRUFFLE OR BON BON Recipes?

You can find all of my recipes in the Recipe Index, located at the top of the page. I have some delicious truffle and bon bon recipes you might enjoy, including:

Interested In More Recipes?

Thank you for visiting this website. I appreciate you using some of your valuable time to do soIf you’re interested, I publish a newsletter 2 times per month (1st and 15th) with all the latest recipes, and other fun info. I would be honored to have you join our growing list of subscribers, so you never miss a great recipe!
There is a Newsletter subscription box on the top right side (or bottom) of each blog post, depending on the device you use, where you can easily submit your e-mail address (only) to be included in my mailing list.

You Can Also Find Me On Social Media:

Facebook page: The Grateful Girl Cooks!
Pinterest:
The Grateful Girl Cooks!
Instagram:
jbatthegratefulgirlcooks

Chocolate-Orange Truffles / The Grateful Girl Cooks!Original recipe source: unknown

↓↓ PRINTABLE RECIPE BELOW ↓↓

0 from 0 votes
Chocolate Orange Truffles
Prep Time
2 hrs 30 mins
Cook Time
3 mins
Total Time
2 hrs 33 mins
 
Rich and creamy, these delicious chocolate and orange truffles are sure to delight friends and family!
Category: Dessert
Cuisine: American
Keyword: chocolate orange truffles
Servings: 24 truffles
Calories Per Serving: 117 kcal
Author: JB @ The Grateful Girl Cooks!
Ingredients
For Truffles:
  • 4 Tablespoons butter (1/2 stick)
  • 3 Tablespoons heavy whipping cream
  • 4 oz. semi-sweet chocolate chips , finely chopped
  • 2 Tablespoons orange liqueur (I use liqueur, but orange juice may be substituted)
  • 1 teaspoon finely grated orange peel (I use a zester for smaller pieces)
For coating the truffles:
  • 1 cup semi-sweet chocolate chips
  • 2 Tablespoons vegetable shortening
  • 1/4 cup white chocolate chips (for drizzling over the truffles... this is optional)
  • Additional orange peel zest (for sprinkling on top of truffles... this is optional)
Instructions
  1. To make the truffles: Bring the butter and the cream to a boil in a small saucepan. Remove from heat. Immediately add the chocolate chips, orange liqueur, and grated orange peel. Stir well until mixture is completely smooth.
  2. Place saucepan in refrigerator and chill chocolate mixture for 2 hours. When totally chilled, remove pan from refrigerator. Using a teaspoon (mixture will be semi-hard by now), remove chocolate and shape into 3/4 inch balls by rolling the mixture between your hands. Your hands will get a bit messy...don't worry about it! Place chocolate ball onto aluminum foil or wax paper covered baking sheet once formed. Once you have the chocolate balls (approx. 24) formed, place baking sheet back into the fridge for 30 minutes to re-harden the chocolate. When chocolate has firmed up again, make the chocolate coating.
  3. To make the chocolate coating: Place 1 cup chocolate chips and the vegetable shortening in a microwave-safe bowl. Microwave on high for 30 seconds. Remove. Stir. Put back in microwave and repeat for 30 seconds. Remove. Stir. The mixture should be smooth after stirring, but if it still has some lumps, place back into microwave for 15 seconds. Remove and stir. Do not overcook the chocolate chips or they will burn.
  4. Remove truffles from refrigerator, and one at a time, place them into the warm chocolate. You may use two forks to hold the truffle. I like to use a toothpick stuck down into the middle of the truffle to coat them. Once coated, let excess drip off back into chocolate, then place onto foil to dry. Carefully remove toothpick, cover hole with a bit of chocolate, to cover, and continue coating the rest of the truffles in the same way, until done.
  5. Allow chocolate coating to harden, then if you want, drizzle some melted white chocolate over the top of each truffle to pretty them up. Garnish with a tiny bit of orange zest onto the white chocolate before it firms up. Once chocolate toppings have hardened, place truffles into individual decorative paper wrappers, then place into a sealed container.
  6. Keep truffles refrigerated. Enjoy!
Recipe Notes

Most of the prep time listed is not active "cooking time"... it's just letting the chocolate truffles cool off in the refrigerator before finishing them off with the coating.

Nutrition Facts
Chocolate Orange Truffles
Amount Per Serving (1 truffle)
Calories 117 Calories from Fat 72
% Daily Value*
Fat 8g12%
Saturated Fat 4g25%
Cholesterol 8mg3%
Sodium 20mg1%
Potassium 74mg2%
Carbohydrates 7g2%
Sugar 6g7%
Vitamin A 90IU2%
Vitamin C 0.1mg0%
Calcium 13mg1%
Iron 0.8mg4%
* Percent Daily Values are based on a 2000 calorie diet.

Here’s one more to pin on your Pinterest boards!Chocolate Orange Truffles are delicious treats to enjoy during the holidays! Creamy orange flavored chocolate centers, and covered in chocolate. YUM!


Save

Save

Save

Save

Holiday Spritz Cookies

It’s easy to make a LOT of small, buttery holiday spritz cookies for eating or gift giving, using an inexpensive cookie press to make festive shapes!It's easy to make a LOT of small, buttery holiday spritz cookies for eating or gift giving, using an inexpensive cookie press to make festive shapes!

Well… it’s THAT time of year once again… time to make some Holiday Spritz Cookies! Making spritz cookies every year during the Christmas season has become one of my baking traditions.

Years ago my family gave me a spritz cookie press, and I’ve been using it ever since, to whip up batches of these little buttery Christmas cookies.

We eat quite a few of them, but what I enjoy most is giving most of them to friends and family! Plates are piled high with holiday spritz cookies and other homemade treats. It’s what I LOVE to do at Christmas time!

Scroll Down For A Printable Recipe Card At The Bottom Of The Page

Do I Need Special Equipment To Make Holiday Spritz Cookies?

Yes. You will need a spritz cookie press to make these holiday spritz cookies, but they are fairly inexpensive, and available in stores or online.

This recipe makes oodles of these delicious holiday spritz cookies. You can see in the picture how many patterns there are available to design these yummy treats.

A cookie press is used to make holiday spritz cookies.
Here’s mine… been using it for years!

Typically a cookie press comes with several disc inserts which the cookie dough is pressed through to form different shapes. All you do is make the dough, color the dough with food coloring as desired, insert dough into cookie press, press, and voila! Holiday Spritz Cookies!

Out comes these perfectly shaped little holiday spritz cookies, which are then baked for a very short time. That’s it. See how easy it is to make holiday spritz cookies?

Different colors and shapes of holiday spritz cookies.

Happy holiday baking… sure hope you will give these holiday spritz cookies a try! Thank you for stopping by, and I hope you will come back again soon.

Looking For More COOKIE Recipes?

You can find ALL my recipes in the Recipe Index, located at the top of the page. I have lots of yummy cookie recipes, including:

Want More Recipes? Get My FREE Newsletter!

I publish a newsletter 2 times per month (1st and 15th) with lots of recipes, tips, etc..
Would you like to join our growing list of subscribers?

There is a Newsletter subscription box on the top right (or bottom) of each blog post, depending on the device you use.
You can submit your e-mail address there, to be added to my mailing list.

Find Me On Social Media:

Facebook page: The Grateful Girl Cooks!
Pinterest:
The Grateful Girl Cooks!
Instagram:
jbatthegratefulgirlcooks

Author's signatureRecipe Source: An old box that my first cookie press came in. Box long gone. Recipe on index card survives…source unknown.

↓↓ PRINTABLE RECIPE BELOW ↓↓

0 from 0 votes
Holiday Spritz Cookies
Prep Time
15 mins
Cook Time
6 mins
Total Time
21 mins
 
It's easy to make a LOT of small, buttery holiday spritz cookies for eating or gift giving, using an inexpensive cookie press to make festive shapes!
Category: Cookies
Cuisine: American
Keyword: holiday spritz cookies
Servings: 6 dozen (approx. 72)
Calories Per Serving: 71 kcal
Author: JB @ The Grateful Girl Cooks!
Ingredients
  • 1 1/2 cups butter (3 cubes)
  • 1 cup granulated sugar
  • 1 large egg
  • 2 Tablespoons milk
  • 1 teaspoon vanilla extract
  • 1/2 teaspoon almond extract
  • 4 cups all purpose flour
  • 1 teaspoon baking powder
  • food coloring (if desired, to create a variety of colors!)
Instructions
  1. Preheat your oven to 400 degrees.
  2. In a large bowl, or stand mixer bowl, cream the butter and sugar thoroughly. Add the egg, milk, vanilla and almond extract. Beat these in very well.

  3. In a large bowl, stir the flour and baking powder together until well combined. Add the flour mixture to the creamed mixture a little at a time. Continue mixing until the dough becomes smooth and all flour has been incorporated. Do not chill the dough. NOTE: If you want to color the dough, add food coloring to various quantities of dough and mix thoroughly until color you desire has been achieved.

  4. Place dough into the cookie press canister, and press cookies out onto an ungreased cookie sheet. (This is easiest if you put the nozzle directly onto the cookie sheet). Change discs to make different shapes, as desired. It's even fun to place pieces of different colored dough into the canister and get multi-colored cookies!
  5. Bake cookies at 400 degrees for 6-8 minutes... do not brown. Remove cookies from baking sheet and place on wire rack to cool. Enjoy!

Nutrition Facts
Holiday Spritz Cookies
Amount Per Serving (1 cookie)
Calories 71 Calories from Fat 27
% Daily Value*
Fat 3g5%
Saturated Fat 2g13%
Cholesterol 12mg4%
Sodium 35mg2%
Potassium 15mg0%
Carbohydrates 8g3%
Sugar 2g2%
Vitamin A 120IU2%
Calcium 5mg1%
Iron 0.3mg2%
* Percent Daily Values are based on a 2000 calorie diet.

Here’s one more to pin on your Pinterest boards!It's easy to make a LOT of small, buttery holiday spritz cookies for eating or gift giving, using an inexpensive cookie press to make festive shapes!


Save

Save

Vegetarian Spicy Noodles in Peanut Sauce

Vegetarian or not, you’ll enjoy these spicy noodles in peanut sauce! Pasta with water chestnuts, peanuts, cilantro and carrots in a creamy Thai sauce!Vegetarian or not, you'll enjoy these spicy noodles in peanut sauce! Pasta with water chestnuts, peanuts, cilantro and carrots in a creamy Thai sauce!
The recipe I am posting today is for Vegetarian Spicy Noodles In Peanut Sauce.  The recipe is yummy, and is SO EASY to make! The plus side is that it is a vegetarian entree, for my friends and family who choose to not eat meat. However, it’s fabulous and filling for meat lovers, also!

A couple of years ago, our youngest son (a big steak and burger loving guy),  decided to become a vegetarian. We were surprised, but respect his right as a grown man to eat or not eat whatever he chooses. I’ve had to adjust my menus when he comes over for a meal, but that’s really no big deal for the most part. Well, THIS recipe for spicy noodles in peanut sauce is one he would LOVE!

Scroll Down For A Printable Recipe Card At The Bottom Of The Page

Spicy Noodles In Peanut Sauce Are EASY To Make!

The Thai-inspired peanut sauce is easy to make, full of flavor and coats the noodles well. This dish is on the table in a flash (20 minutes), and is a cinch to make. The recipe uses angel hair or spaghetti pasta for quick cooking noodles, AND will delight your taste buds, even if you are not a vegetarian.

You will make a simple peanut sauce by mixing the ingredients together, and use it to coat cooked pasta noodles, carrots and water chestnuts. Each serving of spicy noodles in peanut sauce is also garnished with chopped peanuts and cilantro. 

Peanut sauce is mixed together in a small bowl before adding to noodles in peanut sauce.

Trust me- even though I don’t have lots of photos, this recipe for spicy noodles in peanut sauce is GOOD! Hope you’ll give it a try, and I bet you will be surprised how very easy it is to make.


Looking For More PASTA Recipes?

You can find ALL my recipes in the Recipe Index, located at the top of the page. I have a variety of yummy pasta recipes you might enjoy, including:

Interested In More Recipes?

Thank you for visiting this website. I appreciate you using some of your valuable time to do soIf you’re interested, I publish a newsletter 2 times per month (1st and 15th) with all the latest recipes, and other fun info. I would be honored to have you join our growing list of subscribers, so you never miss a great recipe!
There is a Newsletter subscription box on the top right side (or bottom) of each blog post, depending on the device you use, where you can easily submit your e-mail address (only) to be included in my mailing list.

You Can Also Find Me On Social Media:

Facebook page: The Grateful Girl Cooks!
Pinterest:
The Grateful Girl Cooks!
Instagram:
jbatthegratefulgirlcooks

Author's signatureSauce recipe source: http://www.singforyoursupperblog.com/pasta/thai-chicken-pasta/

↓↓ PRINTABLE RECIPE BELOW ↓↓

0 from 0 votes
Vegetarian - Spicy Noodles in Peanut Sauce
Prep Time
10 mins
Cook Time
10 mins
Total Time
20 mins
 

Vegetarian or not, you'll enjoy these spicy noodles in peanut sauce! Pasta with water chestnuts, peanuts, cilantro and carrots in a creamy Thai sauce!

Category: Main Course, Vegetarian
Cuisine: Asian
Keyword: noodles in peanut sauce
Servings: 4 servings
Calories Per Serving: 674 kcal
Author: JB @ The Grateful Girl Cooks!
Ingredients
For the Peanut Sauce:
  • 1 cup smooth peanut butter
  • ¼ cup soy sauce
  • 3 tsp. chili paste (also may substitute 2 teaspoons Sriracha sauce)
  • 2 Tablespoons brown sugar
  • 2 limes , juiced
  • ½ cup hot water
  • 1 clove of garlic , minced
  • 1 teaspoon rice wine vinegar
  • 1 teaspoon ground ginger
  • ½ teaspoon sesame oil
For the Pasta,etc.:
  • ½ lb. spaghetti or angel hair pasta
  • 1 large carrot , julienned (matchstick cut)
  • 1 small can water chestnuts , drained
  • Handful of roasted peanuts , chopped for garnish
  • ½ bunch of cilantro , chopped (stems discarded) Save small amount for garnish on top of dish.
Instructions
  1. Make the sauce: Put all sauce ingredients in a medium sized bowl and whisk or mix until fully combined. Cover and store in the refrigerator until needed (can be made ahead).
  2. Blanch the sliced (matchstick) carrots in boiling water for approximately 3 minutes, pulling them out and draining while they are still bright and crisp.
  3. Cook pasta noodles per package directions. Place drained, hot pasta in a large bowl with the carrots, water chestnuts and cilantro (save a bit of cilantro for garnish!).
  4. Pour the peanut sauce over the cooked pasta and toss well, to coat. To serve: Top pasta with additional cilantro and the chopped peanuts. Serve hot, and enjoy!

Nutrition Facts
Vegetarian - Spicy Noodles in Peanut Sauce
Amount Per Serving (1 serving)
Calories 674 Calories from Fat 243
% Daily Value*
Fat 27g42%
Saturated Fat 4g25%
Sodium 1180mg51%
Potassium 795mg23%
Carbohydrates 84g28%
Fiber 8g33%
Sugar 16g18%
Protein 28g56%
Vitamin A 2630IU53%
Vitamin C 12.2mg15%
Calcium 68mg7%
Iron 3.3mg18%
* Percent Daily Values are based on a 2000 calorie diet.

Here’s one more to pin on your Pinterest boards!Vegetarian or not, you'll enjoy these spicy noodles in peanut sauce! Pasta with water chestnuts, peanuts, cilantro and carrots in a creamy Thai sauce!


Save

Save

Save

Pecan Squares

If you like pecan pie, you will enjoy these easy Pecan Squares. They’re sweet, sticky bar cookies with all the traditional flavors of pecan pie!If you like pecan pie, you will enjoy these easy Pecan Squares. They're sweet, sticky bar cookies with all the traditional flavors of pecan pie!
Here’s a really easy recipe for Pecan Squares, or as a lot of people call them, Pecan Pie Bars. I love to bake these delicious treats during the Holidays.

If you like pecan pie, you will love these Pecan Squares. It’s just that simple! These bars are perfect for taking to a party (if you’re the “designated dessert-bringer”). These pecan squares are equally good  sitting out on the kitchen counter to snack on!

Another option for these sweet dessert bars is to be devoured by hordes of ravenously hungry houseguests, OR to give to friends on a platter of holiday goodies. My fun thing to do is give plates of Christmas goodies to our neighbors, with a few of these bars included!

Scroll Down For A Printable Recipe Card At The Bottom Of The Page

How Many Pecan Squares Will This Recipe Make?

This recipe makes 4 dozen of these sweet and chewy pecan squares; and as an added bonus, they freeze well, also. Just think, if you want, you can stick some in the freezer and grab them whenever you have the urge for pecan pie. How deliciously convenient… and dangerous… (trust me, these are GOOD…)

Sure hope you will consider making these pecan squares. They are sooo good,  and I hope you get better photos of them than I did. Ha Ha.

Pecan Squares / The Grateful Girl Cooks!

Sure do hope you give these pecan squares a try. They are really delicious! Have a great day. Thank you for stopping by, and I sincerely hope you will come back again soon.

Looking For More BAR COOKIE Recipes?

You can find all of my recipes in the Recipe Index, located at the top of the page. A few of our absolute favorite bar cookie recipes include:

Interested In More Recipes?

Thank you for visiting this website. I appreciate you using some of your valuable time to do soIf you’re interested, I publish a newsletter 2 times per month (1st and 15th) with all the latest recipes, and other fun info. I would be honored to have you join our growing list of subscribers, so you never miss a great recipe!
There is a Newsletter subscription box on the top right side (or bottom) of each blog post, depending on the device you use, where you can easily submit your e-mail address (only) to be included in my mailing list.

You Can Also Find Me On Social Media:

Facebook page: The Grateful Girl Cooks!
Pinterest:
The Grateful Girl Cooks!
Instagram:
jbatthegratefulgirlcooks

Pecan Squares / The Grateful Girl Cooks!

Original Recipe Source: “Taste of Home” Magazine, author was Sylvia Ford (I cut out the recipe from my magazine years ago, but don’t know which issue…)

↓↓ PRINTABLE RECIPE BELOW ↓↓

0 from 0 votes
Pecan Squares
Prep Time
25 mins
Cook Time
25 mins
Total Time
50 mins
 

If you like pecan pie, you will enjoy these easy Pecan Squares. They're sweet, sticky bar cookies with all the traditional flavors of pecan pie!

Category: Dessert
Cuisine: American
Keyword: pecan squares
Servings: 48 squares
Calories Per Serving: 176 kcal
Author: JB @ The Grateful Girl Cooks!
Ingredients
For crust:
  • 3 cups all-purpose flour
  • 1/2 cup sugar
  • 1 cup butter , softened
  • 1/2 teaspoon salt
For pecan filling:
  • 4 eggs
  • 1 1/2 cups light or dark corn syrup
  • 1 1/2 cups granulated sugar
  • 3 Tablespoons butter , melted
  • 1 1/2 teaspoons vanilla extract
  • 2 1/2 cups chopped pecans
For chocolate drizzle (optional):
  • 1/2 cup semi-sweet chocolate chips , melted (to drizzle on top of finished bars, if desired)
Instructions
  1. Preheat oven to 350 degrees.

To make the crust:
  1. In a large bowl, mix together the flour, sugar, butter and salt until the mixture turns into coarse crumbs. Press the crumbs firmly (and evenly) into a greased 15 x 10 x 1 inch baking pan. Bake crust at 350 degrees for 20 minutes. Remove from oven when done.

  2. While crust is baking, prepare the pecan filling: In a large bowl, combine the eggs, corn syrup, sugar, melted butter, and vanilla extract, until well combined. Stir in the chopped pecans. Spread the pecan filling evenly over the top of the baked (hot) crust.

  3. Bake bars at 350 degrees for 25 minutes or until they are "set" in the middle. Remove pan from oven and cool on a wire rack. Drizzle cooled bars with melted chocolate, if desired. Once bars are completely cooled, cut into 4 dozen bars, and serve!

Recipe Notes

Caloric calculation was made without the (optional) semi-sweet chocolate chips used for drizzling over finished bars.

Nutrition Facts
Pecan Squares
Amount Per Serving (1 bar)
Calories 176 Calories from Fat 81
% Daily Value*
Fat 9g14%
Saturated Fat 3g19%
Cholesterol 26mg9%
Sodium 76mg3%
Potassium 38mg1%
Carbohydrates 23g8%
Fiber 1g4%
Sugar 17g19%
Protein 2g4%
Vitamin A 165IU3%
Vitamin C 0.1mg0%
Calcium 10mg1%
Iron 0.6mg3%
* Percent Daily Values are based on a 2000 calorie diet.

Here’s one more to pin on your Pinterest boards!If you like pecan pie, you will enjoy these easy Pecan Squares. They're sweet, sticky bar cookies with all the traditional flavors of pecan pie!


Save

Save

Cranberry-Orange Pinwheels With Citrus Sauce

An easy to prepare twist on classic baklava… these yummy cranberry-orange pinwheels drizzled with a citrus sauce will delight one and all.An easy to prepare twist on classic baklava... these cranberry-orange pinwheels drizzled with a citrus sauce will delight one and all.

I found a recipe for Cranberry-Orange Baklava Pinwheels years ago. I decided to try them, but tweaked the recipe a bit and added a citrus sauce for additional flavor. I ended up with these delicious Cranberry-Orange Pinwheels With Citrus Sauce!

I’m sure glad I did try this recipe, because these ended up tasting pretty amazing (in my humble opinion). I love the flavor combination of cranberry and orange, and also love how these cute little pinwheels turned out!

Scroll Down For A Pintable Recipe Card At The Bottom Of The Page

How Many Cranberry-Orange Pinwheels Will This Make?

The recipe makes 20 servings, so there are plenty to serve to holiday guests or a hungry family. The cranberry-orange pinwheels are perfect for a quick breakfast, or they can be served for dessert!

The recipe is a “tweaked version” of a classic Greek baklava. For this cranberry-orange pinwheels recipe you use pie crusts, rather than a traditional phyllo, to make the dough, which makes it much easier to prepare!

Cranberry-orange pinwheels with white chocolate drizzle, cooling on wire rack.
These delicious baklava style cranberry-orange pinwheels are bursting with the flavors of orange, cranberry, cinnamon, and pecans, and are absolutely scrumptious!

The citrus glaze and white chocolate drizzle on top add another layer of FLAVOR, and give little extra sweetness! Grab one, and dig in!

One of the cranberry-orange pinwheels with citrus sauce, on wire rack.

Sure hope you enjoy making AND eating these delicious cranberry-orange pinwheels! The recipe makes 20, so there are plenty to go around! They are delicious! Have a GREAT day!

Looking For More CRANBERRY-ORANGE Recipes?

You can find all of my recipes in the Recipe Index, which is located at the top of the page. I love the flavor combination of cranberry and orange, and have lots of delicious recipes using this flavor palette, including:

Interested In More Recipes?

Thank you for visiting this website. I appreciate you using some of your valuable time to do soIf you’re interested, I publish a newsletter 2 times per month (1st and 15th) with all the latest recipes, and other fun info. I would be honored to have you join our growing list of subscribers, so you never miss a great recipe!
There is a Newsletter subscription box on the top right side (or bottom) of each blog post, depending on the device you use, where you can easily submit your e-mail address (only) to be included in my mailing list.

You Can Also Find Me On Social Media:

Facebook page: The Grateful Girl Cooks!
Pinterest:
The Grateful Girl Cooks!
Instagram:
jbatthegratefulgirlcooks

Author's signature

Recipe slightly adapted from: http://www.pillsbury.com/recipes/cranberry-orange-baklava-pinwheels/a3e53b3f-493d-4048-be58-bc66d0f98717?p=1

↓↓ PRINTABLE RECIPE BELOW ↓↓

0 from 0 votes
Cranberry-Orange Pinwheels With Citrus Sauce
Prep Time
25 mins
Cook Time
12 mins
Total Time
37 mins
 
An easy to prepare twist on classic baklava... these cranberry-orange pinwheels drizzled with a citrus sauce will delight one and all.
Category: Dessert
Cuisine: American
Keyword: cranberry orange pinwheels
Servings: 20 servings
Calories Per Serving: 245 kcal
Author: JB @ The Grateful Girl Cooks!
Ingredients
For pinwheels:
  • 2 refrigerated pie crusts (2 pie crusts), softened as directed on box
  • 2 Tablespoons butter , melted
  • cups sweetened dried cranberries (6 oz)
  • 1 cup chopped pecans
  • 1/2 cup granulated sugar
  • 2 teaspoons ground cinnamon
  • 1 Tablespoon grated orange peel
  • 1 large egg
  • 2 tablespoons water
For Citrus Sauce:
  • 1 cup granulated sugar
  • 1/4 teaspoon salt
  • 2 Tablespoons cornstarch
  • 1 cup orange juice (processed or fresh)
  • 1/4 cup lemon juice
  • 3/4 cup water
  • 1/2 teaspoon grated lemon rind
  • 1/2 teaspoon grated orange rind
  • 1/2 cup white chocolate chips , melted (for additional garnish, if desired)
Instructions
To make pinwheels:
  1. Preheat oven to 400° F. Line a large baking sheet with parchment paper (you can also spray baking sheet with non-stick spray) Unroll the pie crusts; lightly press each piece of dough into a 10 1/2-inch square. Brush each of the squares with melted butter.

  2. Place cranberries, pecans, sugar, cinnamon and orange peel into a food processor (or a heavy duty blender). Cover; process only until mixture is finely chopped. Spread HALF of the ground up mixture on entire surface of pie crust square, dividing equally. Repeat with 2nd pie crust square. Roll each of the pie crusts into a log shape; pinch the edges of the dough tightly together to seal. Set aside.

  3. In a small bowl, beat egg and water until blended. Using a pastry brush, brush egg mixture over the surface of each log. Using a sharp,serrated knife, cut each log into 10 equal-sized slices. Place each slice, with cut side up, 1 inch apart on prepared baking sheet. If any filling falls out, just push it back inside the slice.

  4. Bake the pinwheels at 400° for 12 to 15 minutes (or until golden brown). While pinwheels are baking, make Citrus Sauce.

Make Citrus Sauce:
  1. In a medium saucepan, stir together sugar, salt and cornstarch. Gradually stir in orange juice, lemon juice, and water. Stir and cook over medium heat; bring to a boil. Boil for 1 minute. Remove from heat. Stir in grated lemon and orange rind. Set aside.

  2. Once pinwheels are done baking, remove from oven. Move them off of baking sheet (but still on the parchment paper!) to a wire rack to cool. Spoon 1-2 teaspoons of the Citrus Sauce onto the top of each slice. Let cool. Once citrus sauce has cooled, drizzle each slice with melted white chocolate (if desired). Enjoy!

Recipe Notes

The original recipe, as written, calls for 1/2 cup honey (1 teaspoon honey per slice) over the tops of the pinwheels (*instead of the citrus sauce and white chocolate drizzle I added). I wholeheartedly prefer the taste of the citrus sauce on these pinwheels, but wanted you to know this is another option.

Nutrition Facts
Cranberry-Orange Pinwheels With Citrus Sauce
Amount Per Serving (1 g)
Calories 245 Calories from Fat 99
% Daily Value*
Fat 11g17%
Saturated Fat 3g19%
Cholesterol 15mg5%
Sodium 118mg5%
Potassium 87mg2%
Carbohydrates 35g12%
Fiber 2g8%
Sugar 24g27%
Protein 2g4%
Vitamin A 80IU2%
Vitamin C 8mg10%
Calcium 22mg2%
Iron 0.7mg4%
* Percent Daily Values are based on a 2000 calorie diet.

Here’s one more to pin on your Pinterest boards!An easy to prepare twist on classic baklava... these cranberry-orange pinwheels drizzled with a citrus sauce will delight one and all.


Save

Save

9 Easy Recipes For Thanksgiving Day!

Here’s a delicious collection of 9 easy recipes for Thanksgiving Day that you, your family and friends will enjoy!9 Easy Recipes For Thanksgiving Day
Today I am sharing a few of my favorite recipes for Thanksgiving time. A lot of our holiday traditions center around the table, sharing good food and conversation with those we love.  I’ve put together this small collection of 9 Easy Recipes For Thanksgiving Day!

We all have family traditions that make our holiday celebrations special… here are some of our family recipes that will certainly make  the time spent around the table with those you love enjoyable and meaningful.

Some are our old family traditional dishes (served every year without fail), and some are new “traditions”. Either way, these dishes are delicious, and will certainly add to your Thanksgiving feast, whether it’s an appetizer, a side dish, bread, Thanksgiving breakfast, or that all important piece of pie you manage to eat, even after you are stuffed full to the brim. Hope you find one or two that will become a new “tradition” for your family…

Easy Recipes For Thanksgiving Day

Here’s a couple delicious ideas for your Thanksgiving Day breakfast:

Pumpkin Streusel CoffeecakePumpkin Streusel Coffeecake
(the recipe makes 2 delicious coffeecakes!)

Double-Glazed Pumpkin SconesDouble-Glazed Pumpkin Scones
(Starbucks copycat recipe)

I’ve included a couple of appetizers guaranteed to get your taste buds going and keep everyone satisfied until the main meal…

Mom’s Famous Cheese Ball
Mom's Famous Cheese Ball(cream cheese ball, with green onions, pecans, peppers). YUM!

Hummus

Hummus
Perfect, served with a veggie tray or pita chips!

For The Main Meal

Homemade Dinner Rolls

Homemade Dinner Rolls
(Is there anything better than freshly made dinner rolls?)

Rainbow Jello SaladRainbow Jello Salad
This is a wonderfully delicious and festive looking salad, which will practically feed a village!

Pecan Praline YamsPecan Praline Yams
Yams, brown sugar, coconut, butter, brown sugar… YES! Wonderful!

Rissole potatoes with fetaRissole Potatoes With Feta
A fantastic potato side dish, with bacon, feta, green onions…oh my – so delicious…

And last –  but DEFINITELY not least… When you’re ready for dessert –

Toll House PieToll House Pie
Our family tradition for years and years… chocolate chips, brown sugar, pecans…so delicious (and easy!)

Happy Thanksgiving, from our home to yours!

Happy Thanksgiving from our home to yours!
We have so much to thank God for, each and every day. We are blessed and GRATEFUL.
“Enter His gates with thanksgiving, and His courts with praise; be thankful unto Him, and bless His name. For the Lord is good, and His love endures forever; his faithfulness continues through all generations.”
Psalm 100:4,5(a)

Author's signature

Looking For More Thanksgiving Recipes?

You can find all of my recipes in the Recipe Index, located at the top of the page. I have lots of other recipes that are perfect for your Thanksgiving feast, including:

Interested In More Recipes?

Thank you for visiting this website. I appreciate you using some of your valuable time to do soIf you’re interested, I publish a newsletter 2 times per month (1st and 15th) with all the latest recipes, and other fun info. I would be honored to have you join our growing list of subscribers, so you never miss a great recipe!
There is a Newsletter subscription box on the top right side (or bottom) of each blog post, depending on the device you use, where you can easily submit your e-mail address (only) to be included in my mailing list.

You Can Also Find Me On Social Media:
Facebook page: The Grateful Girl Cooks!
Pinterest: The Grateful Girl Cooks!
Instagram: jbatthegratefulgirlcooks

Save

Save

Save

Pumpkin Streusel Coffeecake

Streusel topping and cinnamon icing enhance this delicious, moist Pumpkin Streusel Coffeecake! Recipe is easy, & makes 2 coffeecakes (perfect for company)!Streusel topping and cinnamon icing enhance this delicious, moist Pumpkin Streusel Coffeecake! Recipe is easy, & makes 2 coffeecakes (perfect for company)!

Yesterday I tried a new recipe for Pumpkin Streusel Coffeecake… wow! It was so easy to make, and begs you to cut a slice out of it when it’s done! Well… maybe it didn’t actually BEG, but it did taunt me a bit.

Pumpkin streusel coffeecake would be a perfect Thanksgiving morning treat to offer your family or holiday house guests. Warm spices like cinnamon, nutmeg, ginger and cloves help to season the pumpkin batter well. Once topped with a buttery streusel and cinnamon icing, this is one fabulous coffeecake!

Scroll Down For A Printable Recipe Card At The Bottom Of The Page

What Am I Going To Do With TWO Coffeecakes?

Since this pumpkin streusel coffeecake recipe makes TWO, perhaps you will be inspired to keep one for your family and give the other one away. Maybe a friend or neighbor might need someone to surprise or encourage them this time of year. The recipe itself is amazingly EASY, doesn’t require a lot of ingredients and will definitely be a big hit when you serve it or give it to a friend!

Making Pumpkin Streusel Coffeecake

Here’s a few pictures I took while making these delicious coffeecakes! Dust and flour two 8″ cake pans. Place a piece of parchment paper on the bottom of each pan. This will help make cake removal easier.

Two cake pans are dusted with flour, and parchment paper is placed on bottom.

Here are the ingredients for pumpkin streusel coffeecake ready to mix together…

Ingredients for pumpkin streusel coffeecake batter are mixed in large bowl.

Pour the pumpkin streusel coffeecake batter evenly into both cake pans.

Pumpkin Streusel Coffeecake batter is divided into two cake pans.

Make The Streusel Topping

Streusel ingredients ready to be mixed together. The ingredients include butter, brown sugar,  cinnamon, etc.

Pumpkin streusel coffeecake topping ingredients are mixed in small bowl.

Once combined, the crumbly topping is ready to go on top of the pumpkin streusel coffeecake batter.

Buttery streusel topping is mixed before adding to pumpkin streusel coffeecake batter.

Here is the batter, topped with the streusel.  The coffeecakes are now ready to bake in the oven!

Pumpkin Streusel Coffeecake is ready to go into oven, to bake.

Glazing The Coffeecake

While the pumpkin streusel coffeecakes are baking, mix up the cinnamon icing in a small bowl.

Icing is mixed for the coffeecakes.
Mix up the cinnamon icing while coffeecakes are baking…

Once you have removed the coffeecakes from the oven. Let them cool down for a few minutes, then carefully remove from pans to a wire rack. Place the coffeecake onto wire racks. For easier cleanup I recommend placing parchment paper underneath the racks. Drizzle each coffeecake with cinnamon icing. The parchment paper should catch any drips.

Cinnamon icing is drizzled over both of the pumpkin streusel coffeecakes once baked.

Time To EAT!

After the icing has firmed up, cut a big slice of pumpkin streusel coffeecake, and grab a fork! Serve, and enjoy every bite of this flavor-filled delicious coffeecake!

Pumpkin Streusel Coffeecake slice, served on a plate.

As I always say, “I hope you’ll give this recipe a try”. I’m sure you will really enjoy this wonderful tasting pumpkin streusel coffeecake! Have a GREAT day.

Looking For More COFFEECAKE Recipes?

You can find ALL my recipes in the Recipe Index, located at the top of the page. I have some wonderful coffeecakes you’ll enjoy, including:

Interested In More Recipes?

Thank you for visiting this website. I appreciate you using some of your valuable time to do soIf you’re interested, I publish a newsletter 2 times per month (1st and 15th) with all the latest recipes, and other fun info. I would be honored to have you join our growing list of subscribers, so you never miss a great recipe! 

There is a Newsletter subscription box on the top right side (or bottom) of each blog post, depending on the device you use, where you can easily submit your e-mail address (only) to be included in my mailing list.

You Can Also Find Me On Social Media:

Facebook page: The Grateful Girl Cooks!
Pinterest:
The Grateful Girl Cooks!
Instagram:
jbatthegratefulgirlcooks

Author's signatureRecipe Source: http://www.shugarysweets.com/2012/10/pumpkin-coffee-cake-with-cinnamon-struesel#_a5y_p=1490662

↓↓ PRINTABLE RECIPE BELOW ↓↓

0 from 0 votes
Pumpkin Streusel Coffeecake
Prep Time
30 mins
Cook Time
30 mins
Total Time
1 hr
 
Streusel topping and cinnamon icing enhance this delicious, moist Pumpkin Streusel Coffeecake! Recipe is easy, & makes 2 coffeecakes (perfect for company)!
Category: Breakfast
Cuisine: American
Keyword: pumpkin streusel coffeecake
Servings: 16 pieces (2 coffeecakes)
Calories Per Serving: 299 kcal
Author: JB @ The Grateful Girl Cooks!
Ingredients
For the Coffeecakes (2):
  • 1/2 cup unsalted butter , softened
  • 1 1/2 cup granulated sugar
  • 1 can (15oz) pure pumpkin
  • 3 eggs
  • 2 1/2 cup all purpose flour
  • 1/2 tsp baking soda
  • 2 tsp baking powder
  • 1 Tbsp ground cinnamon
  • 1 tsp ground ginger
  • 1/2 tsp ground nutmeg
  • 1/2 tsp ground cloves
  • 1/2 tsp salt
For the Streusel Topping:
  • 1/4 cup all purpose flour
  • 1/4 cup granulated sugar
  • 1/4 cup light brown sugar
  • 1 tsp ground cinnamon
  • 2 Tbsp unsalted butter , melted
For the Cinnamon Drizzle/Icing:
  • 1 1/2 cup powdered sugar
  • 1 tsp ground cinnamon
  • 3 Tbsp milk
Instructions
  1. Preheat your oven to 350 degrees.
  2. Grease and flour two 8 inch round cake pans. Line the bottoms of each pan with parchment paper, cut to fit. Set the cake pans aside.
  3. Make the batter for the coffeecakes: Beat the butter and sugar in a large mixing bowl until they are well combined (a couple of minutes). Add pumpkin and eggs to the mixture, and beat until ingredients are well blended. Add the flour, baking soda, baking powder, cinnamon, ginger, nutmeg, cloves and salt. Mix until fully combined. Distribute the batter evenly into the two prepared cake pans. Set aside.
  4. Make the streusel: In a small bowl, combine streusel ingredients using a fork. Sprinkle streusel evenly over both pans of coffeecake batter.
  5. Bake at 350 degrees for 30-35 minutes, (or until a toothpick inserted in the middle comes out clean).
  6. Once coffeecakes are done, remove them from oven and let them cool for 10 minutes in the pan.
  7. To easily remove coffeecakes from pan: Run a butter knife around the edges of pan. Place an inverted dinner sized plate over the top of coffeecake pan. Quickly flip the pan over (cake will now be upside down on dinner plate. Then place wire rack over the top of dinner plate and invert coffeecake again. Now the coffeecake should be right side up on a wire rack. Let coffeecakes cool completely.
  8. While coffeecakes are cooling, make the cinnamon drizzle/icing: Place ingredients in a small bowl, and whisk until smooth. Drizzle the icing onto completely cooled coffeecakes and set aside to let the icing firm up (about 30 minutes). Serve, and ENJOY!
Nutrition Facts
Pumpkin Streusel Coffeecake
Amount Per Serving (1 slice)
Calories 299 Calories from Fat 72
% Daily Value*
Fat 8g12%
Saturated Fat 4g25%
Cholesterol 49mg16%
Sodium 128mg6%
Potassium 104mg3%
Carbohydrates 54g18%
Fiber 1g4%
Sugar 36g40%
Protein 3g6%
Vitamin A 280IU6%
Calcium 51mg5%
Iron 1.3mg7%
* Percent Daily Values are based on a 2000 calorie diet.

Here’s one more to pin on your Pinterest boards!Streusel topping and cinnamon icing enhance this delicious, moist Pumpkin Streusel Coffeecake! Recipe is easy, & makes 2 coffeecakes (perfect for company)!
Save

Save

Save