Cranberry Orange Cookies

Cranberry Orange Cookies are decadent yummy treats, flavored with cranberries, pecans, orange zest and juice, and topped with a simple orange glaze!Cranberry Orange Cookies are decadent yummy treats, flavored with cranberries, pecans, orange zest and juice, and topped with a simple orange glaze!

I used to host a Christmas Cookie Exchange for my co-workers in our home each December for many, many years, which is where I first tried these Cranberry Orange Cookies. We would have between 10-20 friends show up to participate each year.

It is so much fun to play ridiculously silly games, nibble on appetizers, visit and laugh, and see the different types of cookies each friend/co-worker made and brought to share. I always hosted this party in our home the first week of December, so it was a GREAT way to kick off the holiday season!

Scroll Down For A Printable Recipe Card At The Bottom Of The Page

How Does A Cookie Exchange Work?

Everyone brings six dozen cookies (one kind/recipe), and brings the recipe for them, too! We divide the total number of cookies by the number of friends participating to see how many cookies (per variety) we pack in our boxes to take home!

Each person leaves with a big box with six dozen ASSORTED homemade Christmas cookies, and all of the cookie recipes! MAKE 1 KIND OF COOKIE… LEAVE WITH 15-20 KINDS OF COOKIES!

I love cookie exchanges, because we only have to cook once, but leave with a variety of delicious cookies, just in time for the holidays! Now that is my kind of party! We also play lots of crazy games, and have a blast!

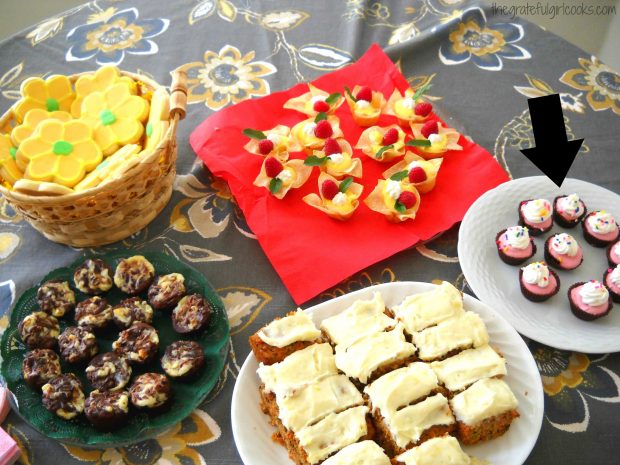
Some of the cookies (including cranberry orange cookies) brought to the Christmas cookie exchange.Some of my friends at the Christmas cookie exchange.

How I Got The Recipe For Cranberry Orange Cookies

One year, my friend Valerie brought Cranberry Orange Cookies to share. I was immediately in love with the orange and cranberry flavor of these cookies, and couldn’t wait to try the recipe on my own. Winner! My friend Valerie is on the left in the photo below.

I got the recipe for the cranberry orange cookies from my friend Valerie, on the left.

I’ve made these yummy cranberry orange cookies a few times since then, and they never disappoint! They are easy to make and are DELICIOUS! The picture of the cookies I made isn’t the greatest at representing these wonderful treats, but trust me…they’re fantastic! Perfect for any time of the year! Have a great day!

Looking For More COOKIE Recipes?

You can find all of my cookie recipes in the Recipe Index, located at the top of the page. A few favorites include:

Interested In More Recipes?

Thank you for visiting this website. I appreciate you using some of your valuable time to do soIf you’re interested, I publish a newsletter 2 times per month (1st and 15th) with all the latest recipes, and other fun info. I would be honored to have you join our growing list of subscribers, so you never miss a great recipe!
There is a Newsletter subscription box on the top right side (or bottom) of each blog post, depending on the device you use, where you can easily submit your e-mail address (only) to be included in my mailing list.

You Can Also Find Me On Social Media:
Facebook page: The Grateful Girl Cooks!
Pinterest: The Grateful Girl Cooks!
Instagram: jbatthegratefulgirlcooks

Author's signatureRecipe Adapted From:http://allrecipes.com/Recipe/Cranberry-Orange-Cookies/Detail.aspx?event8=1&prop24=SR_Thumb&e11=cranberry%20orange%20cookies&e8=Quick%20Search&event10=1&e7=Home%20Page   

↓↓ PRINTABLE RECIPE BELOW ↓↓

5 from 1 vote
Cranberry Orange Cookies
Prep Time
20 mins
Cook Time
12 mins
Total Time
32 mins
 

Cranberry Orange Cookies are decadent yummy treats, flavored with cranberries, pecans, orange zest and juice, and topped with a simple orange glaze!

Category: Cookies
Cuisine: American
Keyword: cranberry orange cookies
Servings: 48 cookies (approx.)
Calories Per Serving: 121 kcal
Author: JB @ The Grateful Girl Cooks!
Ingredients
For cookies:
  • 1 cup butter , softened
  • 1 cup granulated sugar
  • 1/2 cup packed brown sugar
  • 1 egg
  • 1 1/2 teaspoons grated orange zest
  • 2 Tablespoons orange juice
  • 2 1/2 cups all-purpose flour
  • 1/2 teaspoon baking soda
  • 1/2 teaspoon salt
  • 2 cups dried cranberries
  • 1/2 cup pecans , chopped (can substitute walnuts, if desired)
For glaze:
  • 1 teaspoon grated orange zest
  • 3 Tablespoons orange juice
  • 1 1/2 cups confectioner's sugar (powdered)
Instructions
  1. Preheat oven to 375 degrees.

  2. In a large bowl, cream together the butter, granulated and brown sugars. Beat till smooth. Add egg, and mix till well blended. Add in 1/ 1/2 tsp. grated orange zest and 2 TBSP. of orange juice. Mix well.

  3. In separate bowl, whisk together flour, baking soda and salt; stir this into the orange mixture, a little at a time. Add dried cranberries and pecans. Stir in until well mixed and evenly distributed through the dough.

  4. Drop dough by rounded Tablespoonfuls onto ungreased baking sheets. Make sure to space cookies 2 inches apart. Bake at 375 degrees for 12-14 minutes or until edges turn golden. Remove cookies from oven. Let cool slightly, then remove cookies from baking sheets to wire racks to cool.

  5. While cookies are baking (or while they are cooling), in a small bowl mix together 1 tsp. grated orange zest, 3 TBSP. orange juice, and 1 1/2 cups confectioner's (powdered) sugar until completely smooth. When cookies have cooled, either spread or drizzle the glaze over the top of the cookies, then let them sit until glaze hardens. ENJOY!

Nutrition Facts
Cranberry Orange Cookies
Amount Per Serving (1 cookie)
Calories 121 Calories from Fat 36
% Daily Value*
Fat 4g6%
Saturated Fat 2g13%
Cholesterol 13mg4%
Sodium 71mg3%
Potassium 22mg1%
Carbohydrates 19g6%
Sugar 13g14%
Vitamin A 125IU3%
Vitamin C 1mg1%
Calcium 6mg1%
Iron 0.4mg2%
* Percent Daily Values are based on a 2000 calorie diet.

Here’s one more to pin on your Pinterest boards!Cranberry Orange Cookies are decadent yummy treats, flavored with cranberries, pecans, orange zest and juice, and topped with a simple orange glaze!

Save

Save

Creamy Tomato Basil Soup

Nothing is as comforting as a hot bowl of soup on a cool day. This delicious, creamy tomato basil soup will really hit the spot, and it’s simple to make!Nothing is as comforting as a hot bowl of soup on a cool day. This delicious, creamy tomato basil soup will really hit the spot, and it's simple to make!

Writing this post made me laugh…my entire life I have despised (I know, harsh words!) tomato soup. Really, really despised it. However, I am married to a guy who loves it. Go figure! But the truth is… I have come to love the taste of this Creamy Tomato Basil Soup!

Scroll Down For A Printable Recipe Card At The Bottom Of The Page

Tomato Soup Was NOT On The List Of Foods I Enjoyed… Originally!

Years ago I worked at a school where occasionally they would serve the students and staff grilled cheese sandwiches with a small cup of tomato soup.  Word on the street was the soup was good with a grilled cheese sandwich on the side, but I could never even bring myself to try the soup.

I grew up watching that gelatinous blob of tomato soup come out of canned tomato soup when my Dad would have it for lunch. No Thanks! I had such an “ugh” factor going on.

Then I married a guy who LOVES tomato soup, so through the years I would occasionally buy him a can of the stuff to make him happy. He sometimes even buys a carton of freshly made tomato basil soup from the grocery store deli to “heat and eat”.

Why I Ended Up LIKING Creamy Tomato Basil Soup

Fast this story forward to this past summer –  our little garden was overflowing with fresh basil. I decided to combine my home-grown basil with my deep love of cooking and my love for that “tomato-soup-lovin’ husband of mine”. 

 I searched online to find a homemade tomato basil soup recipe he could enjoy.  This recipe for creamy tomato basil soup is the one I tried, and guess what? I had a tiny cup of it and it was absolutely delicious…who knew? Wait… now I like this soup? I was totally surprised!

Now I really enjoy this yummy tomato basil soup! That has to be some kind of miracle! Maybe my taste buds have changed as I’ve gotten older. Perhaps it is the fact that it didn’t come sliding (in one gelatinous blob) out of a little red and white labeled can?
 

How To Make Homemade Creamy Tomato Basil Soup

In a medium sized pan, sauté onions and garlic in butter over medium heat until they are fairly clear (about 4-5 minutes).  Don’t let the garlic burn!

Add the canned tomatoes (including juice) and the chicken stock to the saucepan. Bring the tomato mixture to a full boil.  Reduce the heat, and let it simmer, uncovered for 10 minutes.  Once the tomato mixture has cooked for 10 minutes, remove pan from heat.

 
Cooking the tomato soup before pureeing the tomatoes.
 
Use an immersion blender to puree. Be careful… the soup is HOT! NOTE: If you don’t have an immersion blender, no problem! Carefully transfer the “hot” tomato mixture to a blender or a food processor and puree. You may need to do this in batches.
 
 
Using an immersion blender to puree the tomato soup.
 
Creamy tomato basil soup, AFTER it has been pureed.
 

Add The Fresh Basil

Once the tomato mixture has been pureed, add in the fresh basil and pulse (or blend) a few more times to incorporate the basil into the soup.
 
Fresh, chopped basil is added to tomato soup, then blended in.
 
If you used a blender, return the hot soup carefully to the saucepan. Whisk in the heavy whipping cream, until blended.
 
Whipping cream is added to creamy tomato basil soup.
 
Season with salt and pepper, to taste.  Heat on low until the creamy tomato basil soup is fully heated through. Do NOT let the soup boil!
 
Creamy tomato basil soup, after whipping cream has been whisked in.
 

Serve This Delicious Creamy Tomato Basil Soup

Ladle the hot soup into cups or bowls. Garnish each portion with croutons and fresh basil leaves, if desired. ENJOY!
 
Creamy tomato basil soup is served in white bowl, with croutons and basil leaves as garnish.
 
This creamy tomato basil soup is very EASY to make and it’s DELICIOUS. Hope you will give it a try!  Have a wonderful day!

Looking For More SOUP Recipes?

You can find all of my recipes in the Recipe Index, located at the top of the page. I have LOTS of soup recipes, including:

Interested In More Recipes?

Thank you for visiting this website. I appreciate you using some of your valuable time to do soIf you’re interested, I publish a newsletter 2 times per month (1st and 15th) with all the latest recipes, and other fun info. I would be honored to have you join our growing list of subscribers, so you never miss a great recipe! 

There is a Newsletter subscription box on the top right side (or bottom) of each blog post, depending on the device you use, where you can easily submit your e-mail address (only) to be included in my mailing list.

You Can Also Find Me On Social Media:

Facebook page: The Grateful Girl Cooks!
Pinterest:
The Grateful Girl Cooks!
Instagram:
jbatthegratefulgirlcooks

Author's signatureRecipe Source: http://unsophisticook.com/tomato-basil-soup/
0 from 0 votes
Creamy Tomato Basil Soup
Prep Time
10 mins
Cook Time
30 mins
Total Time
40 mins
 
Nothing is as comforting as a hot bowl of soup on a cool day. This delicious, creamy tomato basil soup will really hit the spot, and it's simple to make!
Category: Soup
Cuisine: American
Keyword: creamy tomato basil soup
Servings: 8
Calories Per Serving: 210 kcal
Author: JB @ The Grateful Girl Cooks!
Ingredients
  • 4 Tablespoons butter
  • 2 brown onions , chopped
  • 4 garlic cloves , minced
  • 2 (28 oz.) cans whole tomatoes
  • 3 cups chicken stock
  • 1/2 cup fresh basil , chopped (plus additional leaves for garnish, if desired)
  • 1/2 cup heavy whipping cream
  • salt (to taste)
  • pepper (to taste)
  • Croutons and additional basil (for garnish, if desired)
Instructions
  1. In a medium sized pan, saute onions and garlic in butter over medium heat till they are fairly clear (about 4-5 minutes). Don't let the garlic burn!
  2. Add the canned tomatoes (including the juice) and the chicken stock to saucepan. Bring the tomato mixture to a full boil, then reduce the heat and let it simmer, uncovered, for 10 minutes. When the tomato mixture has cooked for 10 minutes, remove from heat.

  3. Use an immersion blender to puree. NOTE: If you don't have an immersion blender, no problem! Carefully transfer the "hot" tomato mixture to a blender or a food processor and puree. You may need to do this in batches.

  4. Once the tomato mixture has been pureed, add in the fresh basil and pulse (or blend) a few times to incorporate the basil into the soup.
  5. If you used a blender, return the hot soup to saucepan. Whisk in the heavy whipping cream, till blended. Season with salt and pepper, to taste. Heat on low until the creamy tomato basil soup is fully heated through. Do NOT let the soup boil!

  6. To serve: Ladle soup into cups or bowls. Garnish with croutons and fresh basil leaves, if desired. ENJOY!

Nutrition Facts
Creamy Tomato Basil Soup
Amount Per Serving (1 (1/8th of total))
Calories 210 Calories from Fat 108
% Daily Value*
Fat 12g18%
Saturated Fat 7g44%
Cholesterol 38mg13%
Sodium 447mg19%
Potassium 737mg21%
Carbohydrates 21g7%
Fiber 4g17%
Sugar 11g12%
Protein 6g12%
Vitamin A 900IU18%
Vitamin C 21.2mg26%
Calcium 93mg9%
Iron 2.9mg16%
* Percent Daily Values are based on a 2000 calorie diet.

Here’s one more to pin on your Pinterest boards!Nothing is as comforting as a hot bowl of soup on a cool day. This delicious, creamy tomato basil soup will really hit the spot, and it's simple to make!


Save

Save

Save

Save

Maple Cream Bon Bons

Decadent, creamy chocolate covered Maple Cream Bon Bons are a perfect gift for family and friends during the holidays! You’ll love these maple flavored treats!Decadent, creamy chocolate covered Maple Cream Bon Bons are a perfect gift for family and friends during the holidays! You'll love these maple flavored treats!
Every year during the holidays, I pick a couple of new recipes to make (especially chocolate covered truffles or bon bons!), to add to our family’s “tried and true” traditional Christmas treats. One of this year’s new recipes is Maple Cream Bon Bons. AMAZING!

Scroll Down For A Printable Recipe Card At The Bottom Of The Page

Homemade Food Gifts At Christmas? Yes, Please!

I enjoy making a variety of “homemade Christmas goodies”, which I LOVE to give to my friends and neighbors. Inevitably I end up making a couple kinds of chocolate-dipped truffles (in this recipe they are called “bon bons”).

I tend to make such a mess in my kitchen each Christmas, with cookbooks, recipes and ingredients scattered everywhere, but I find great JOY in giving to others this time of year!

Maple Cream Bon Bons / The Grateful Girl Cooks!

This past Christmas I found this delicious sounding recipe for maple cream bon bons during a search online at Taste of Home. These creamy, chocolate covered treats were very easy to make (with only a few ingredients… a big plus!) and the maple flavor SHINES!

Delicious Creamy Maple Bon Bons

They are so cute when placed in a decorative candy wrapper… perfect for gift giving! Who wouldn’t like to receive a plate of these delicious maple cream bon bons?

Maple Cream Bon Bons / The Grateful Girl Cooks!

The recipe makes about 5 dozen maple cream bon bons, so there are plenty to take to work, give away as gifts, or plenty to save and stash away in the refrigerator for a late night craving…they are SO GOOD!

A look at the inside of a maple cream bon bon.
Sure hope you give these little bites of yumminess a try. Maple cream bon bons are very, very good! Thanks for stopping by, and please come back again soon.

Looking For More BON BON OR TRUFFLE Recipes?

You can find ALL my recipes in the Recipe Index, located at the top of the page. I have a nice variety of bon bon and truffle recipes you might enjoy, including:

Interested In More Recipes?

Thank you for visiting this website. I appreciate you using some of your valuable time to do soIf you’re interested, I publish a newsletter 2 times per month (1st and 15th) with all the latest recipes, and other fun info. I would be honored to have you join our growing list of subscribers, so you never miss a great recipe!
There is a Newsletter subscription box on the top right side (or bottom) of each blog post, depending on the device you use, where you can easily submit your e-mail address (only) to be included in my mailing list.

You Can Also Find Me On Social Media:
Facebook page: The Grateful Girl Cooks!
Pinterest: The Grateful Girl Cooks!
Instagram: jbatthegratefulgirlcooks

Author's signatureRecipe Source: http://www.tasteofhome.com/recipes/maple-cream-bonbons

↓↓ PRINTABLE RECIPE BELOW ↓↓

0 from 0 votes
Maple Cream Bon Bons
Prep Time
1 hr
Cook Time
0 mins
Total Time
1 hr
 
Decadent, creamy chocolate covered Maple Cream Bon Bons are a perfect gift for family and friends during the holidays! You'll love these maple flavored treats!
Category: Candy
Cuisine: American
Keyword: maple cream bon bons
Servings: 5 dozen
Calories Per Serving: 125 kcal
Author: JB @ The Grateful Girl Cooks!
Ingredients
For bonbons:
  • 1 cup butter , softened (2 cubes)
  • 3 1/2 cups confectioner's sugar (powdered)
  • 3 Tablespoons maple flavoring
  • 2 cups walnuts (I used pecans), chopped
For coating:
  • 2 cups semi-sweet chocolate chips
  • 1 cup butterscotch chips
Instructions
  1. In a large bowl, with an electric mixer, cream the butter, powdered sugar, and maple flavoring till smooth. Stir in chopped walnuts (or pecans).

  2. Shape mixture into 1" balls. Place dough balls onto a wax paper covered baking sheet and put into freezer for 1/2 an hour.

  3. In a microwaveable bowl, melt the chocolate and butterscotch chips **(30 seconds on high. Stir. 30 seconds on high. Stir. Watch carefully so that you don't burn the chocolate. Should be melted and smooth after stirring the second time, but microwave an additional 15 seconds or so, then stir, if not.).
  4. Dip dough balls into chocolate mixture one at a time (I insert a toothpick into the dough ball, then dip, cover with chocolate then remove, allowing excess chocolate to drip off. You may want to use a spoon to finish coating the bonbon. Place each covered bonbon on wax paper-lined baking sheets, removing the toothpick and hiding the "hole" with a touch of melted chocolate. Place bonbons in refrigerator when done. Refrigerate till set...then ENJOY!
Nutrition Facts
Maple Cream Bon Bons
Amount Per Serving (1 bon bon)
Calories 125 Calories from Fat 72
% Daily Value*
Fat 8g12%
Saturated Fat 3g19%
Cholesterol 8mg3%
Sodium 38mg2%
Potassium 52mg1%
Carbohydrates 13g4%
Sugar 11g12%
Vitamin A 100IU2%
Vitamin C 0.1mg0%
Calcium 8mg1%
Iron 0.5mg3%
* Percent Daily Values are based on a 2000 calorie diet.

Here’s one more to pin on your Pinterest boards!Decadent, creamy chocolate covered Maple Cream Bon Bons are a perfect gift for family and friends during the holidays! You'll love these maple flavored treats!


Save

Save

Chocolate Chip Orange Scones

Chocolate chip orange scones with citrus glaze, are a delicious treat for breakfast, brunch or an afternoon snack!
Chocolate chip orange scones with a citrus glaze, are a delicious and easy to make treat for breakfast, brunch or an afternoon snack!
These chocolate chip orange scones are my “all-time favorite”! I LOVE them!  When I worked full-time (for almost 30 years), I would occasionally bring plates of them to the office, to share with my friends. They were always a big hit… and I always returned home with empty serving plates!

Now that I have my own blog (to share favorite recipes with family and friends in one convenient location), I decided to share this special recipe with you. I’ve been making them for over 20 years, and I am sure you will LOVE these scones!

Scroll Down For A Printable Recipe Card At The Bottom Of The Page

Do You Love SCONES?

If you love scones, I hope you will consider checking out some of the other recipes for them I have on this blog, like Apple Cinnamon, Lemon Cream, Cranberry Orange, Cinnamon Chip or Banana Nut, to name a few. All my recipes can be found in the Recipe Index at the top of this page! Here’s a few photos to tempt you!

Photo collage of scones from The Grateful Girl Cooks!

I made a batch of these chocolate chip orange scones this morning. It was a brisk 36 degrees outside; a gorgeous Pacific Northwest kind of day (thank you, God, for the beauty all around). My husband and I discussed our plans for the day while enjoying a scone, accompanied by our cups of “strong” coffee. Ahhhh… delicious!

Chocolate and orange are a favorite flavor combination of mine, and these scones, with their sweet citrus glaze on top, are “practically perfect in every way”.  What a great way to start the day (and much less expensive than buying them at a local coffee house!)  Give them a try… I hope you enjoy them as much as we do!

Making Chocolate Chip Orange Scones

Here’s a few pics showing how to make them: First you mix up the ingredients for the dough…(I used a food processor, but you can also use a small pastry blender).

Flour and butter for scones, in a food processor.

The grated orange peel makes the dough smell good and “citrusy”, and helps add in citrus flavor!

Orange zest, orange and microplane zester, used for scones

Forming The Dough For Chocolate Chip Orange Scones

Shape the dough into a circle after all the dough ingredients have been mixed together. Look at those chocolate chips and orange zest!

Scone dough, with chocolate chips, is rolled out into circle shape

Next, cut the dough circle into 8 pie-shaped wedges, brush the tops with egg white/water combo, and into the oven they go. I like to use a pizza cutter to make the cuts.

Scone dough is cut into 8 pie shaped wedges

Prepare The Citrus Glaze While Scones Bake

While the scones are baking, mix up the orange glaze…see all the orange zest? This glaze is made with orange juice, orange zest, orange extract, vanilla and powdered sugar.

That’s a lot of citrus flavor! The glaze will be brushed onto the scones once they have been baked and completely cooled. It’s the most wonderful topping, and adds so much additional citrus flavor to the chocolate chip orange scones.!

Orange glaze is mixed to put on top of baked scones

Glaze The Baked Chocolate Chip Orange Scones

Here are the chocolate chip orange scones, golden brown and hot, straight out of the oven. Now they just need a shiny orange glaze after they’ve cooled, to make them PERFECT!

Chocolate chip orange scones, baked, and out of oven cooling.

“Painting” the citrus glaze onto the scones with a pastry brush gives them an extra burst of flavor, plus a beautiful shiny top!

Orange glaze is brushed on top of chocolate chip orange scones

Ready To EAT!

Let the chocolate chip orange scones cool until the glaze firms up. All that’s left to do is take a big bite, and enjoy!

Chocolate Chip Orange Scones with citrus glaze, cooling on wire rack

Update: I made some this past Christmas (2015) for breakfast for my husband, myself, and our two grown sons. Here’s a picture. These scones sure disappeared in a flash!!

Christmas decorated platter of chocolate chip orange scones

Sure hope you enjoy these easy to make chocolate chip orange scones! I think you will love them as much as our family does! Have a GREAT day, and thanks for stopping by!

Interested In More Recipes?

Thank you for visiting this website. I appreciate you using some of your valuable time to do soIf you’re interested, I publish a newsletter 2 times per month (1st and 15th) with all the latest recipes, and other fun info. I would be honored to have you join our growing list of subscribers, so you never miss a great recipe!
There is a Newsletter subscription box on the top right side (or bottom) of each blog post, depending on the device you use, where you can easily submit your e-mail address (only) to be included in my mailing list.

You Can Also Find Me On Social Media:
Facebook page: The Grateful Girl Cooks!
Pinterest: The Grateful Girl Cooks!
Instagram: jbatthegratefulgirlcooks

Author's signature

Original Recipe Source: unknown

↓↓ PRINTABLE RECIPE BELOW ↓↓

0 from 0 votes
Chocolate Chip Orange Scones
Prep Time
20 mins
Cook Time
20 mins
Total Time
40 mins
 

Chocolate chip orange scones with a citrus glaze, are a delicious and easy to make treat for breakfast, brunch or an afternoon snack!

Category: Breakfast
Cuisine: American
Keyword: chocolate chip orange scones
Servings: 8
Calories Per Serving: 458 kcal
Author: JB @ The Grateful Girl Cooks!
Ingredients
For scones:
  • 2 cups all-purpose flour
  • 1/3 cup granulated sugar
  • 2 teaspoons baking powder
  • 1/2 teaspoon salt
  • 1/2 cup (1 cube) unsalted butter, very cold
  • 2 large eggs
  • 1/4 cup orange juice
  • 1 teaspoon vanilla
  • 1/2 teaspoon grated orange peel (finely grated; I use a micro-plane zester)
  • 3/4 cup semi-sweet chocolate chips (regular or mini-sized)
  • 1 egg white + 1/2 tsp. water
For glaze:
  • 1 1/2 cups powdered sugar (can always add more if you need extra)
  • 1/4 teaspoon vanilla extract
  • 1/4 teaspoon orange extract (I use it for enhanced flavor, but optional)
  • 1 teaspoon grated orange zest
  • 3-4 teaspoons orange juice (until you get the right consistency of glaze to
  • "paint" on the scones)
Instructions
  1. Preheat oven to 425 degrees. In a food processor (or cut in by hand with a pastry blender in a large bowl), mix flour, sugar, baking powder, salt and chilled butter together until well combined.

  2. In a separate bowl, mix together the eggs, orange juice, vanilla, and grated orange peel. Add egg mixture to the flour mixture; combine till fully blended.Stir in chocolate chips. Mix well, to fully combine. 

  3. Transfer dough onto a well-floured surface. Knead dough with floured hands until dough comes together...(continue to sprinkle the dough and surface with additional flour as needed, as dough is usually fairly "sticky"-I usually do this 3-4 times). Shape dough into an 8" circle.

  4. Mix egg white and water together in small bowl. Using a pastry brush, brush the tops of the scones with this mixture. Using a pizza cutter or very sharp knife, cut the dough circle into 8 pie-shaped wedges.

  5. Spray a baking sheet with cooking spray. Place wedges on baking sheet and bake at 425 degrees for 20-25 minutes (mine are usually ready at the 20 minute mark), or until golden brown on top.  When done, remove from oven; transfer scones to a wire rack, with foil or parchment paper underneath.

  6. When scones have slightly cooled, "paint" the glaze on with a pastry brush (glaze is made by mixing up the ingredients listed, in a small bowl). Completely cover the tops of the scones with the glaze. Let scones cool until glaze has hardened., then serve, and enjoy!

Nutrition Facts
Chocolate Chip Orange Scones
Amount Per Serving (1 scone)
Calories 458 Calories from Fat 171
% Daily Value*
Fat 19g29%
Saturated Fat 11g69%
Cholesterol 72mg24%
Sodium 172mg7%
Potassium 272mg8%
Carbohydrates 65g22%
Fiber 2g8%
Sugar 37g41%
Protein 6g12%
Vitamin A 440IU9%
Vitamin C 5.7mg7%
Calcium 68mg7%
Iron 2.8mg16%
* Percent Daily Values are based on a 2000 calorie diet.

Here’s one more to pin on your Pi!nterest boards!Chocolate chip orange scones with a citrus glaze, are a delicious and easy to make treat for breakfast, brunch or an afternoon snack!


Save

Save

Save

New York Style Blueberry Bagels DIY

It’s easy to make chewy, delicious, authentic New York Style Blueberry Bagels from scratch! Grab the cream cheese and enjoy this classic treat!It's easy to make chewy, delicious, authentic New York Style Blueberry Bagels from scratch! Grab the cream cheese and enjoy this classic treat!
I love bagels, especially these authentic, made from scratch New York Style Blueberry Bagels. I love them plain or toasted, with cream cheese! My husband also loves a good bagel, and is notorious for grabbing a few “fresh” bagels from the bakery department at our local grocery store.

Scroll Down For A Printable Recipe Card At The Bottom Of The Page

Making Bagels From Scratch Is Economical!

Last year I decided to take on the challenge of making bagels from the comfort of my very own kitchen. That way I would know what was in them, and in the long run, it would be a lot cheaper than buying them at a coffee house or grocery store.

I’ve Made Several Bagel Varieties Over the Years

The first bagels I made were cranberry-orange and they were amazing (and not nearly as hard to make as I had imagined). Next came the jalapeno cheddar bagels, cinnamon crunch bagels, gingerbread bagels, and everything bagels… all with good results!

Trust me… these blueberry bagels are absolutely amazing! If you like bagels, AND you like blueberries, you really should try this recipe!

Look at these beautiful Oregon blueberries in the photo below! I picked almost 20 pounds of blueberries this past summer at a local U-Pick farm, so my freezer always seems to have bags full of frozen blueberries! I used fresh for this recipe, but either fresh OR frozen blueberries will work in this recipe.

Fresh picked blueberries used to make bagels

Is It Hard To Make New York Style Blueberry Bagels?

Honestly, NO. These NY style blueberry bagels are fairly easy to make, and there are a few steps to follow. But… the end result is creating bagels that are chewy, delicious, and bursting with blueberries! The only real thing you need to have is patience to wait for the dough to rise!

That waiting time for the dough to rise is truly the only hard part of making them. Don’t worry if the dough looks a little bit purple. That’s just from a little of the blueberry juice mixing into the dough… it’s all good!

Blueberry bagel dough on lightly floured surface

Dough for NY style blueberry bagels is formed into their distinctive circular shapes. Now they are ready to boil! Boiling them before baking helps ensure a chewy, authentic textured bagel!

Dough formed into 8 bagel shapes on floured surfaceBoil First Then Bake

True NY style blueberry bagels are boiled before they are baked.  This two step process gives them their nice, traditional chewy texture! It is one extra authentic step you will be glad you took!

Look at those gorgeous blueberry bagels boiling away in a big pot of water below. It sort of looks like a blueberry bagel jacuzzi, don’t ya think? They are only boiled for 3-4 minutes, so this extra step doesn’t take too long!

Blueberry bagels cooking in boiling water in pan

The bagels are boiled in batches in a LARGE pot of water, until all of them have been boiled.  Once the NY style blueberry bagels have been boiled, they are drained, just prior to baking.

Blueberry bagels, draining on baking sheet after boiling, just prior to baking.

Bake The New York Style Blueberry Bagels, Then Enjoy!

The blueberry bagels are baked at 425° F. for approximately 20 minutes. When done, the bagels will have risen, are baked all the way through, and are wonderfully golden brown on the outside. Bagels are then transferred to a wire rack to slightly cool, then served!

Voila! Here’s one of the hot, chewy New York Style Blueberry Bagels, fresh out of the oven! All that is left to do is slice it in half, toast it (if that’s how you like ’em), spread some cream cheese on it, and EAT IT! So good!

New York style blueberry bagels after baking, on wire rack

Trust me…if I can make delicious NY style blueberry bagels, so can YOU! Toast one, grab some cream cheese to spread on it, throw on a pot of coffee or tea… and ENJOY one of these delicious blueberry bagels! I love the crispy outside, combined with the chewy goodness on the inside. It tastes like an authentic New York-style bagel should! The blueberry bagels also freeze very well, which is an added bonus!

Thank you for stopping by today, and I hope you will come back soon for more delicious recipes. Have a GREAT day, and don’t forget to check out ALL my recipes in the Recipe Index, located at the top of the page!

Interested In More Recipes?

Thank you for visiting this website. I appreciate you using some of your valuable time to do soIf you’re interested, I publish a newsletter 2 times per month (1st and 15th) with all the latest recipes, and other fun info. I would be honored to have you join our growing list of subscribers, so you never miss a great recipe! 

There is a Newsletter subscription box on the top right side (or bottom) of each blog post, depending on the device you use, where you can easily submit your e-mail address (only) to be included in my mailing list.

You Can Also Find Me On Social Media:

Facebook page: The Grateful Girl Cooks!
Pinterest:
The Grateful Girl Cooks!
Instagram:
jbatthegratefulgirlcooks

 
Author's signature
 
Recipe Source: http://www.heathersfrenchpress.com/2014/01/ny-style-blueberry-bagels.html#more-2475  

↓↓ PRINTABLE RECIPE BELOW ↓↓

4 from 2 votes
New York Style Blueberry Bagels DIY
Prep Time
30 mins
Cook Time
20 mins
INACTIVE Prep Time (dough rising)
2 hrs
Total Time
2 hrs 50 mins
 
It's easy to make chewy, delicious, authentic New York Style Blueberry Bagels from scratch! Grab the cream cheese and enjoy this classic treat!
Category: Breakfast
Cuisine: American
Keyword: blueberry bagels
Servings: 8 servings
Calories Per Serving: 221 kcal
Author: JB @ The Grateful Girl Cooks!
Ingredients
  • 1 (0.25 ounce) package (envelope) active dry yeast (2¼ tsp.)
  • 2 Tablespoons sugar
  • 1 1/4 cups warm water (divided)
  • 3 1/2 cups all-purpose flour
  • 1 1/2 teaspoons salt
  • 1 cup blueberries tossed in additional 1/4 cup AP flour
Instructions
  1. In a small bowl, dissolve yeast and sugar in ½ cup of warm water. Let rest for 5 minutes. You should see little bubbles forming on the surface after 5 minutes or so, indicating yeast is "good" and "alive".

  2. In large bowl or bowl from a stand mixer, mix together salt and 3½ C. flour - making a "well" in the center of the flour. Add yeast mixture and remaining water to the flour mixture. Gently fold in blueberries that have been tossed in an additional ¼ cup of flour.

  3. Knead (either by hand or by using dough hook on your stand mixer) until dough becomes soft and elastic (this could take approx. 5 + minutes). Don't worry when you see dough turning a bit purple...it's all "good".

  4. Cover dough with a dishtowel, set bowl in a warm place and let dough rise until doubled (about 1 ½ hours).

  5. Turn dough out onto lightly floured surface (I even lightly dusted the dough with flour so it was easier to work with). Divide dough into 8 balls (shape and pull edges of dough to the underside of the ball for a smoother ball). With floured hands, take both of your thumbs and press into the center of each ball, forming a hole, and stretch the hole to form a bagel shape (I even pick up the bagel dough and enlarge the hole from the bottom). Once bagels have been formed, let dough rest for 30 minutes.

  6. While dough rests, preheat oven to 425°F. and bring a large stockpot to a rolling boil. Boil bagels 2-3 at a time in boiling water for 3-4 minutes (make sure they float to the top at the end). Remove bagels from water. and place on an ungreased baking sheet, allowing bagels to drain a bit.

  7. Bake bagels on same baking sheet at 425°F. for 20-24 minutes, or until golden brown on top. When done, transfer bagels to a wire rack to cool, then ENJOY!

Nutrition Facts
New York Style Blueberry Bagels DIY
Amount Per Serving (1 bagel)
Calories 221
% Daily Value*
Sodium 437mg19%
Potassium 72mg2%
Carbohydrates 47g16%
Fiber 1g4%
Sugar 4g4%
Protein 5g10%
Vitamin A 10IU0%
Vitamin C 1.8mg2%
Calcium 8mg1%
Iron 2.6mg14%
* Percent Daily Values are based on a 2000 calorie diet.

Here’s one more to pin on your Pinterest boards!It's easy to make chewy, delicious, authentic New York Style Blueberry Bagels from scratch! Grab the cream cheese and enjoy this classic treat!

Save

Save

Save

Southern Praline Sauce

Southern Praline Sauce, with toasted buttered pecans in a thick, decadent sweet syrup, is an easy and delicious dessert topping for ice cream or pound cake!Southern Praline Sauce / The Grateful Girl Cooks! Delicious sauce to use as topping for ice cream or pound cake.

Today I want to share a recipe for a rich, delicious Southern Praline Sauce that is a perfect accompaniment for ice cream. I know this for a fact, based on personal experience with butter pecan, peach, and vanilla ice cream (someone has to do it)..

Each Fall, my Mom orders fresh picked pecans from Green Tree Pecan Co. (in Texas), and sends each of us (her three daughters) several bags of pecans. Talk about a great gift. I use so many pecans in my baking, and especially enjoy using them to make my Christmas goodies each year! I was able to use those pecans for this delicious praline sauce.

Scroll Down For A Printable Recipe Card At The Bottom Of The Page

Pecans used to make Southern Praline Sauce (and other desserts!).

Southern Praline Sauce Tastes GREAT Over Ice Cream

My husband and I were invited to a friends home for dinner and dessert, and I brought the dessert. I made some delicious homemade peach ice cream and covered it with Southern praline sauce! Wow, it was delicious!

At this point, I might add that this Southern praline sauce is so good, you will be tempted to eat it right out of the jar with a spoon (again-.personal experience).Give it a try, and see what I mean, because this sauce is so amazingly tasty!

Southern praline sauce is served over homemade peach ice cream.

How To Make The Sauce

Lightly “toast” chopped pecans  in a large skillet, with butter. This ensures a delicious, buttery pecan taste, which in my humble opinion, is ALWAYS a great place to start!

Chopped pecans for sauce lightly toasting in skillet for Southern praline sauce.

Add more butter, evaporated milk, brown sugar, flour and corn syrup to the toasted and buttered pecans. After they have cooked for several minutes, evaporated milk is added to the sauce.

Cook until you are left with a thick, buttery sauce that is so good it will make your eyes roll up in your head! Okay-not really. Your eyes will definitely NOT roll up in your head, but it’s THAT good! Once the sauce has thickened and cooked, remove the VERY HOT sauce from the stove, and let it cool down some before using.

Thick and buttery, this praline sauce is a perfect topping for ice cream!

Time For Southern Praline Sauce!

This decadent sauce is also can be used as a wonderful little gift when packaged in a jar with a gift tag and a cute ribbon. Then you’ll have a homemade gift, made with love, from your kitchen to a friend or colleague. The Southern praline sauce can be served at room temperature or reheated slightly in a microwave.

Southern praline sauce is served over ice cream, with a cookie on the side!

I really hope you will consider making this decadent Southern praline sauce. It is very versatile and can be used on many different desserts such as pound cake, pies, topping for cheesecake, etc. The possibilities are practically endless!  Thanks for visiting, and have a great day!

Looking For More SAUCE Recipes?

You can find ALL my recipes in the Recipe Index, located at the top of the page. I have several sauce recipes you might enjoy checking out, including:

Interested In More Recipes?

Thank you for visiting this website. I appreciate you using some of your valuable time to do soIf you’re interested, I publish a newsletter 2 times per month (1st and 15th) with all the latest recipes, and other fun info. I would be honored to have you join our growing list of subscribers, so you never miss a great recipe!
There is a Newsletter subscription box on the top right side (or bottom) of each blog post, depending on the device you use, where you can easily submit your e-mail address (only) to be included in my mailing list.

You Can Also Find Me On Social Media:
Facebook page: The Grateful Girl Cooks!
Pinterest: The Grateful Girl Cooks!
Instagram: jbatthegratefulgirlcooks

Author's signature

Recipe Adapted From: http://asouthernfairytale.com/2011/09/24/southern-praline-sauce/   

↓↓ PRINTABLE RECIPE BELOW ↓↓

0 from 0 votes
Southern Praline Sauce
Prep Time
10 mins
Cook Time
15 mins
Total Time
25 mins
 
Southern Praline Sauce, with toasted buttered pecans in a thick, decadent sweet syrup, is an easy and delicious dessert topping for ice cream or pound cake!
Category: Dessert, Sauce
Cuisine: American
Keyword: Southern praline sauce
Servings: 24 servings (2 T. each) Total of 3 cups
Calories Per Serving: 163 kcal
Author: JB @ The Grateful Girl Cooks!
Ingredients
  • 1 1/4 cups chopped pecans
  • 7 Tablespoons butter (divided)
  • 1 1/2 cups brown sugar (I used dark brown sugar)
  • 3 Tablespoons flour
  • 3/4 cup light corn syrup
  • 2/3 cup evaporated milk
Instructions
  1. Place chopped pecans and 3 Tablespoons butter in a saucepan or skillet. Cook over medium heat 5-6 minutes, stirring occasionally, till toasted nicely. Be sure and keep an eye on the pecans so they don't burn.
  2. In another large saucepan or skillet, melt the remaining butter.
  3. Whisk in the brown sugar, flour and corn syrup until they are well blended. Cook on medium-high for 4-5 minutes stirring often, until the sugar is completely dissolved.
  4. Pour in the evaporated milk and add the pecan mixture. Stir till completely blended. Remove from heat.
  5. Let sauce cool slightly, then pour it into clean jars or containers (Mason jars work great!)
  6. This sauce needs to be kept refrigerated. It should last approximately 3 weeks in the refrigerator once you open it and a bit longer unopened. When you are ready to serve it, heat jar on low temperature approximately 15-20 seconds (microwave temps. vary) in microwave, or until pourable.
  7. Be sure if you give this as a gift (the jars would look great with a pretty ribbon and tag), to include instructions as to keeping it refrigerated, and to reheat slightly in microwave when ready to serve. Enjoy!
Recipe Notes

**This sauce needs to be kept refrigerated. It should last approximately 3 weeks in the refrigerator once you open it, and a bit longer unopened. When you are ready to serve it, heat jar on low temperature approximately 15-20 seconds (microwave temps. vary) in microwave, or until pourable.
**Be sure if you give this as a gift (the jars would look great with a pretty ribbon and tag), to include instructions as to keeping it refrigerated, and to reheat slightly in microwave when ready to serve.

Nutrition Facts
Southern Praline Sauce
Amount Per Serving (2 Tablespoons)
Calories 163 Calories from Fat 63
% Daily Value*
Fat 7g11%
Saturated Fat 2g13%
Cholesterol 10mg3%
Sodium 47mg2%
Potassium 63mg2%
Carbohydrates 23g8%
Sugar 22g24%
Protein 1g2%
Vitamin A 120IU2%
Vitamin C 0.2mg0%
Calcium 36mg4%
Iron 0.3mg2%
* Percent Daily Values are based on a 2000 calorie diet.

Here’s one more to pin on your Pinterest boards!Southern Praline Sauce, with toasted buttered pecans in a thick, decadent sweet syrup, is an easy and delicious dessert topping for ice cream or pound cake!


Save

Save

Save

Mexican Layer Dip

Mexican Layer Dip is the perfect party appetizer! Set out a platter of this easy, layered dip with tortilla chips, and let the feeding frenzy begin!Super Bowl 2014 is coming up in a week and a half. Are you looking for a delicious appetizer that will feed the football loving masses, and is a real crowd-pleaser? Well, this Mexican Layer Dip is your answer!!!
Super Bowl 2014 is coming up in a week and a half. Are you looking for a delicious appetizer that will feed the football loving masses, and is a real crowd-pleaser? Well, this Mexican Layer Dip is your answer for football games, parties, New Years celebrations, birthdays, etc.!

Mexican Layer Dip is layers of refried beans, green chilis, tomatoes, two cheeses, olives, avocados, and creamy spicy sour cream. I mean, how could this NOT taste fantastic! It’s got all the good stuff we LOVE to eat!

Scroll Down For A Printable Recipe Card At The Bottom Of The Page

We LOVE Mexican Layer Dip!

I’ve had this Mexican layer dip recipe on a little index card for over 30 years! Now I really don’t remember how or where I first received it, but I’ve made this countless times over the years. It is a family favorite!

This popular appetizer takes about 20 minutes to make, and then it’s refrigerated for about an hour OR until you’re ready to serve it!  It’s a winner recipe, and I’ve even made it the day before I want to serve it, with perfect results!

Our family loves this easy to assemble appetizer. Our oldest son even asked for a platter of this dip as part of his birthday present this past year.  What? Yes, that’s how good it is!

A pizza platter filled with the Mexican layer dip, ready to eat!

Prep the ingredients before you begin preparing the Mexican layer dip, then all you need to do is layer the ingredients in order! The dip is refrigerated for an hour after that! When you’re ready to serve, all that is left is to gobble it up with a handful of tortilla or corn chips! It’s so very easy – anyone can make this! Here’s how:

How To Prepare This Mexican Layer Dip, Step By Step

Spread a can of spicy (or regular) refried beans onto a large round serving platter or pizza pan, mashing it and spreading it out to cover almost the entire platter.

Refried beans are spread out onto a large round serving platter.

Stir together sour cream, mayonnaise and taco seasoning in a bowl until fully combined. Carefully spread this mixture out (using the back of a large spoon) to cover the refried bean layer. 

Sour cream, mayonnaise and taco seasoning are combined to make a spicy spread.The spicy sour cream mixture is spread over the top of the refried bean layer.

Now For The Creamy Avocado Layer

Peel and remove the seeds from three ripe avocados. Place the avocados in a bowl, and add fresh lemon juice. Mash with a fork until the avocados are fairly smooth in texture and the lemon juice has been incorporated. The lemon juice helps the avocados retain their pretty green color!

Dollop the avocado mixture over the sour cream layer, then carefully and gently spread the avocado layer to cover. Sprinkle the avocado layer evenly with sliced green onions.

Avocados mashed with lemon juice are spooned on top of sour cream mixture and spread out.Sliced green onions are sprinkled evenly on top of the avocado layer.

Okay… Let’s Layer The Remaining Ingredients!

Distribute the chopped tomatoes evenly on top of the green onions. After that, evenly add a layer of chopped green chilis.

Chopped tomatoes are layered on top of the green onion layer.Chopped green chilis are evenly sprinkled on top of the tomato layer.

Ready For The Final Layers

Sprinkle sliced black olives over the top of the tomatoes. The next layer to be added is grated Jack cheese, which is then followed by a final layer of grated Cheddar cheese. Be sure to evenly distribute the cheeses over the surface of the Mexican Layer Dip. If desired, add a garnish of fresh cilantro leaves, but that is totally OPTIONAL.

Cover the Mexican Layer Dip platter with plastic wrap, and refrigerate for at least one hour to let the flavors come together. You can also make this up the day before you want to serve it, too. How’s that for convenience?

Sliced black olives then grated jack cheese is sprinkled on top of the green chili layer..The final layer is grated cheddar cheese on top of the Mexican Layer Dip and a cilantro garnish.

Ready To Serve

I know you will love this Mexican Layer Dip. Isn’t it “pretty”? This is one appetizer that is perfect for scooping! Yum. Serve the Mexican Layer Dip with a big bag of tortilla chips (or corn chips), and watch how fast it disappears. Just wait till you TASTE it!

Mexican Layer Dip is always a family or party favorite appetizer, and it’s fun to watch everyone huddled around it, scooping this delicious dip up as fast as they can! It is wonderful!

Mexican Layer Dip is chilled and is ready to serve with tortilla chips for dipping!

I hope you enjoy this classic layered dip appetizer! We sure do. Thanks for taking time from your busy day to stop by this website today. Have a great day, and please come back again soon, for more family-friendly recipes.

Looking For More APPETIZER Recipes?

You can find all of my recipes in the Recipe Index, located at the top of the page. A few of our favorite appetizers include:

Interested In More Recipes?

Thank you for visiting this website. I appreciate you using some of your valuable time to do soIf you’re interested, I publish a newsletter 2 times per month (1st and 15th) with all the latest recipes, and other fun info. I would be honored to have you join our growing list of subscribers, so you never miss a great recipe!
There is a Newsletter subscription box on the top right side (or bottom) of each blog post, depending on the device you use, where you can easily submit your e-mail address (only) to be included in my mailing list.

You Can Also Find Me On Social Media:
Facebook page: The Grateful Girl Cooks!
Pinterest: The Grateful Girl Cooks!
Instagram: jbatthegratefulgirlcooks

Author's signatureRecipe source: Unknown (had this recipe on an index card for over 30 years)

↓↓ PRINTABLE RECIPE BELOW ↓↓

0 from 0 votes
Mexican Layer Dip
Prep Time
20 mins
Cook Time
0 mins
Refrigeration (inactive time)
1 hr
Total Time
1 hr 20 mins
 

Mexican Layer Dip is the perfect party appetizer! Set out a platter of this easy, layered dip with tortilla chips, and let the feeding frenzy begin!

Category: Appetizer
Cuisine: Mexican
Keyword: Mexican layer dip
Servings: 12
Calories Per Serving: 216 kcal
Author: JB @ The Grateful Girl Cooks!
Ingredients
  • 16 ounces spicy fat-free refried beans (1 can) (can use regular, too)
  • 6 Tablespoons sour cream
  • 4 Tablespoons mayonnaise
  • 1 ounce taco seasoning mix (1 envelope pkg.) (or use your own mix ☺)
  • 3 medium avocados peeled/pits removed
  • 2 teaspoons fresh lemon juice
  • 3 stems green onions , chopped (green and white parts)
  • 4.5 ounces diced green chiles (small can), drained
  • 1 large tomato or 2 Roma tomatoes , chopped
  • 2.25 ounces chopped black olives (small can), drained
  • 1 cup jack cheese , grated
  • 1 cup cheddar cheese , grated
  • Tortilla chips (or corn chips), for serving
Instructions
  1. Spread entire can of refried beans onto a large round serving platter or pizza pan, mashing it down as you spread it out, to cover platter or pan.

  2. In separate bowl, stir together sour cream, mayonnaise and taco seasoning. Spread this mixture on top of refried beans, to cover.

  3. Mash avocados with lemon juice in a bowl until fairly smooth. Drop avocado mixture by large spoonfuls on top of sour cream layer. Gently spread to cover.

  4. Add layer of sliced green onions.

    Add layer of diced green chiles.

    Add layer of chopped tomatoes.

    Add layer of black olives.

    Add layer of grated jack cheese.

    Top with layer of grated cheddar cheese.

  5. Cover platter with plastic wrap and refrigerate for at least one hour. Remove from refrigerator and DIG IN! Serve this with tortilla or corn chips!

Recipe Notes

Caloric calculation does not include tortilla chips!

Nutrition Facts
Mexican Layer Dip
Amount Per Serving (1 (1/12th of total))
Calories 216 Calories from Fat 144
% Daily Value*
Fat 16g25%
Saturated Fat 5g31%
Trans Fat 0.003g
Polyunsaturated Fat 2g
Monounsaturated Fat 7g
Cholesterol 21mg7%
Sodium 699mg30%
Potassium 324mg9%
Carbohydrates 12g4%
Fiber 6g25%
Sugar 2g2%
Protein 8g16%
Vitamin A 679IU14%
Vitamin C 12mg15%
Calcium 172mg17%
Iron 1mg6%
* Percent Daily Values are based on a 2000 calorie diet.

Here’s one more to pin on your Pinterest boards!Mexican Layer Dip is the perfect party appetizer! Set out a platter of this layered dip with tortilla chips, & let the feeding frenzy begin!


Save

Save

Curried Zucchini Soup

Simple curried zucchini soup has a chicken stock base, is flavored with onion, zucchini, curry powder, and potato. It’s easy to make and very tasty!Simple curried zucchini soup has a chicken stock base, is flavored with onion, zucchini, curry powder, and potato. It's easy to make and very tasty!

“Oh, man…this is soooo good” were the first words I said after tasting this Curried Zucchini Soup for the first time. Once again I had a bumper crop of zucchini having babies growing in my vegetable garden and I was ready to try another new recipe for zucchini. I found a recipe for curried zucchini soup, thought it sounded interesting, and so I tried it!

Quick, easy to fix, and absolutely full of flavor, I give this recipe a two spoons up! If you like the flavor of curry OR you have approximately 3,000 lbs. of zucchini growing in your garden (note: this might be a slight over-exaggeration), then I anticipate you will like this recipe.

Scroll Down For A Printable Recipe Card At The Bottom Of The Page

What Is IN Curried Zucchini Soup?

Curried zucchini soup only has a few ingredients. It has a chicken stock base, but it is flavored with onion, zucchini, curry powder, salt, and is thickened with potato. For the potato called for in the recipe, you can use either small, diced potatoes or dried instant potatoes. It’s a VERY simple, but tasty soup!

Curried zucchini soup is easy to make. Once made, the soup is pureed slightly in a food processor or blender, which results in a creamy soup, with tiny pieces of zucchini still present to give it some “bite” in texture.

This curried zucchini soup recipe is also very easy on the budget ($), if that is a factor in your meal-planning. I grow zucchini in my garden, so I tend to have a lot of zucchini needing to be used each summer. This recipe is a great way to use up all those zucchini, by making curried zucchini soup!

Growing the zucchini used to make this curried zucchini soup.This recipe for curried zucchini soup serves 6 and is fantastic as a “leftover”, or “take to work” kind of soup. It reheats well in the microwave. The little pieces of zucchini give the soup a nice texture. 

Sure hope you enjoy this simple curried zucchini soup recipe. It is very unique and tastes great!  Have a wonderful day, and thank you for stopping by. I hope you come back again soon!

Looking For More SOUP Recipes?

You can find all of my recipes in the Recipe Index, located at the top of the page. I have lots of soup recipes, including:

Interested In More Recipes?

Thank you for visiting this website. I appreciate you using some of your valuable time to do soIf you’re interested, I publish a newsletter 2 times per month (1st and 15th) with all the latest recipes, and other fun info. I would be honored to have you join our growing list of subscribers, so you never miss a great recipe!

There is a Newsletter subscription box on the top right side (or bottom) of each blog post, depending on the device you use, where you can easily submit your e-mail address (only) to be included in my mailing list.

You Can Also Find Me On Social Media:
Facebook page: The Grateful Girl Cooks!
Pinterest: The Grateful Girl Cooks!
Instagram: jbatthegratefulgirlcooks

Author's signatureRecipe Source: http://www.kitchme.com/recipes/curried-zucchini-soup?invite=xyz-p

↓↓ PRINTABLE RECIPE BELOW ↓↓

0 from 0 votes
Curried Zucchini Soup
Prep Time
15 mins
Cook Time
30 mins
Total Time
45 mins
 
Simple curried zucchini soup has a chicken stock base, is flavored with onion, zucchini, curry powder, and potato. It's easy to make and very tasty!
Category: Soup
Cuisine: American
Keyword: curried zucchini soup
Servings: 6
Calories Per Serving: 148 kcal
Author: JB @ The Grateful Girl Cooks!
Ingredients
  • 2 TBSP extra virgin olive oil
  • 1 large. brown onion , halved, then thinly sliced
  • 1 Tablespoon curry powder
  • Salt , to taste
  • 4 small zucchini , halved length-wise, then cut into 1" slices
  • 1 quart chicken stock
  • 1/2 cup instant potatoes OR 2 small , cubed russet potatoes (To thicken soup- I add instant potatoes)
  • Pinch red pepper flakes
  • Croutons (used as a garnish, if desired)
Instructions
  1. Heat oil in a large pot. Stir in the onions (and cubed russet potatoes, if using these). Season with curry powder, red pepper flakes, and salt. Cook and stir on medium heat until onion (and potatoes) are tender.

  2. Stir in the sliced zucchini, and cook till tender.

  3. Pour in the chicken stock and bring to a boil, then add the instant potatoes (if using). Cover and reduce heat to low. Simmer for approximately 20 minutes.

  4. Remove soup pot from heat. Use a hand mixer OR transfer in batches to a food processor or a blender, and blend till almost smooth. Transfer hot soup to serving bowls and garnish with croutons, if desired. Enjoy!

Nutrition Facts
Curried Zucchini Soup
Amount Per Serving (1 g)
Calories 148 Calories from Fat 63
% Daily Value*
Fat 7g11%
Saturated Fat 1g6%
Cholesterol 4mg1%
Sodium 242mg11%
Potassium 603mg17%
Carbohydrates 15g5%
Fiber 2g8%
Sugar 6g7%
Protein 6g12%
Vitamin A 270IU5%
Vitamin C 29.1mg35%
Calcium 35mg4%
Iron 1.2mg7%
* Percent Daily Values are based on a 2000 calorie diet.

Here’s one more to pin on your Pinterest boards!Simple curried zucchini soup has a chicken stock base, is flavored with onion, zucchini, curry powder, and potato. It's easy to make and very tasty!


Save

Save

Save

Save

Save

Double Chocolate Zucchini Bread

Have extra zucchini? Double Chocolate Zucchini Bread is a delicious chocolate loaf with a secret ingredient your kids will never know is in there…zucchini!Have extra zucchini? Double Chocolate Zucchini Bread is a delicious chocolate loaf with a secret ingredient your kids will never know is in there...zucchini!

I recently found this very easy recipe for Double Chocolate Zucchini Bread on Pinterest.  That same day I made a couple loaves, and my husband and I loved it! Two forms of chocolate are used… cocoa powder and chocolate chips!

Scroll Down For A Printable Recipe Card At The Bottom Of The Page

What To Do With A LOT Of Zucchini

I really enjoy growing my own vegetables in raised beds in our backyard. This past summer, my zucchini plants decided to become “over-achievers”. I had zucchini coming out of my ears (nice problem, huh?).

This prolific garden abundance (even after giving plenty to my family and neighbors), forced me to search for new creative ways to prepare it. I’ve made Curried Zucchini Soup, and Italian Stuffed Zucchini already. We love “regular” zucchini bread, but this CHOCOLATE zucchini bread? Get outta here… that sounds so GOOD!

Growing zucchini in our garden to be used for baking chocolate zucchini bread.


Solution – Make Double Chocolate Zucchini Bread!

This delicious chocolate zucchini bread was a perfect solution. The recipe is completely EASY to prepare, and the results were wonderful! Looks like I found a new way to utilize some of our home-grown zucchini!

I think the “hardest” part, if you can call it “hard” was grating the zucchini, since I made a couple loaves! That’s a LOT of grated zucchini from the garden being used to make loaves of this wonderful chocolate zucchini bread! But since it was going to a good cause, it was worth all the grating.

Grated zucchini used to make loaves of double chocolate zucchini bread.

This sweet chocolate zucchini bread is decadently rich and chocolaty, and you’d never know it has zucchini in it! That makes it perfect for hiding the veggies, for little ones with picky palates! I hope you will give it a try. The chocolate zucchini bread is easy to prepare, and is really quite delicious! Thanks for stopping by, and come back again soon.

Looking For More Sweet Bread Loaf Recipes?

You can find all of my recipes in the Recipe Index, located at the top of the page. A few other family favorites include:

Interested In More Recipes?

Thank you for visiting this website. I appreciate you using some of your valuable time to do soIf you’re interested, I publish a newsletter 2 times per month (1st and 15th) with all the latest recipes, and other fun info. I would be honored to have you join our growing list of subscribers, so you never miss a great recipe!

There is a Newsletter subscription box on the top right side (or bottom) of each blog post, depending on the device you use, where you can easily submit your e-mail address (only) to be included in my mailing list.

You Can Also Find Me On Social Media:
Facebook page: The Grateful Girl Cooks!
Pinterest: The Grateful Girl Cooks!
Instagram: jbatthegratefulgirlcooks

Author's signature

Recipe Source: http://www.whatmegansmaking.com/2013/07/double-chocolate-zucchini-bread.html 

↓↓ PRINTABLE RECIPE BELOW ↓↓

0 from 0 votes
Double Chocolate Zucchini Bread
Prep Time
20 mins
Cook Time
1 hr 5 mins
Total Time
1 hr 25 mins
 
Have extra zucchini? Double Chocolate Zucchini Bread is a delicious chocolate loaf with a secret ingredient your kids will never know is in there...zucchini!
Category: Bread
Cuisine: American
Keyword: chocolate zucchini bread
Servings: 10 slices (1 loaf)
Calories Per Serving: 374 kcal
Author: JB @ The Grateful Girl Cooks!
Ingredients
  • 2 large eggs
  • 1/3 cup honey
  • 1/2 cup vegetable oil
  • 1/2 cup brown sugar
  • 1 teaspoon vanilla extract
  • 1 teaspoon salt
  • 1/2 teaspoon baking soda
  • 1/2 teaspoon baking powder
  • 1/3 cup unsweetened cocoa powder
  • 1 2/3 cups all-purpose flour
  • 2 cups shredded , unpeeled zucchini (gently pressed between paper towels to remove some moisture)
  • 1 cup semi-sweet chocolate chips
Instructions
  1. Preheat oven to 350 degrees; lightly grease an 8 1/2" x 4 1/2" loaf pan.
  2. In a large mixing bowl, beat together the eggs, honey, oil, sugar and vanilla.
  3. In separate bowl, whisk together the salt, baking powder, baking soda, cocoa and flour.
  4. Add flour mixture to the egg mixture, and stir well until combined.
  5. Stir in the zucchini and the chocolate chips.
  6. Pour batter into the prepared pan and bake for 65-75 minutes (oven temps vary), or until a toothpick inserted into the center of the loaf comes out clean. Remove pan from oven; transfer pan to a wire rack. Let cool for approx. 10-15 minutes before turning the bread out of the pan onto the rack. Cool bread completely before slicing. Enjoy!
Nutrition Facts
Double Chocolate Zucchini Bread
Amount Per Serving (1 slice)
Calories 374 Calories from Fat 171
% Daily Value*
Fat 19g29%
Saturated Fat 13g81%
Cholesterol 33mg11%
Sodium 308mg13%
Potassium 285mg8%
Carbohydrates 48g16%
Fiber 3g13%
Sugar 27g30%
Protein 5g10%
Vitamin A 105IU2%
Vitamin C 4.5mg5%
Calcium 45mg5%
Iron 2.9mg16%
* Percent Daily Values are based on a 2000 calorie diet.

Here’s one more to pin on your Pinterest boards!Have extra zucchini? Double Chocolate Zucchini Bread is a delicious chocolate loaf with a secret ingredient your kids will never know is in there...zucchini!


Save

Save

Save

Save

Save

Thai Chicken Linguini

Thai Chicken Linguini (a Cheesecake Factory copycat recipe), with chicken breasts and pasta in a creamy Asian peanut sauce, is absolutely delicious!Thai Chicken Linguini (a Cheesecake Factory copycat recipe), with chicken breasts and pasta in a creamy Asian peanut sauce, is absolutely delicious!
I have always loved the Thai Chicken Linguini at The Cheesecake Factory, however I don’t love the (sometimes) 1-2 hour wait for a table. When you’re hungry, you’re hungry!

Let’s just say I was shocked to find out this entree has been removed from their menu as of 2014. Sadness prevailed… until I found this recipe, and began making it myself, at home!

I began a search to find a good copycat recipe and found a wonderful recipe posted by Amy, at “Sing For Your Supper” that was absolutely perfect.

Now I’ve made this dish many times since then, and love the smooth and creamy Thai peanut sauce that coats the pasta, and the crunchy peanut garnish. This is such a delicious dish! Here’s how to make it.

Scroll Down For A Printable Recipe Card At The Bottom Of The Page

Why NOT Make Thai Chicken Linguini At Home?

Seriously…why wait endlessly for a table when you can make Thai chicken linguini for much less $$, but with the same results at home? It’s really not that difficult at all!

You will need cooked chicken breasts, cooked linguini, julienned and blanched carrots, water chestnuts, cilantro and chopped peanuts (optional) for this dish.

These ingredients will be combined with a simple, flavor-packed peanut sauce before serving. Cilantro and chopped peanuts (optional) will garnish for each serving.

A portion of the Thai chicken linguini, garnished with cilantro and chopped peanuts.

Thai chicken linguini is very easy to make, the flavors and textures are magnificent, and any leftovers you may have are delicious when reheated.

Well, to be perfectly honest… you will ONLY have leftovers if you don’t polish all of it off in one sitting! Just sayin’.

Making The Creamy Peanut Sauce Is Easy!

The peanut sauce is made by combining the ingredients for the sauce in a small bowl. You simply stir the ingredients well, until the sauce becomes smooth and creamy.

Ingredients for the sauce are peanut butter, soy sauce, chili paste (or sriracha), brown sugar, lime juice, garlic, rice wine vinegar, ginger and sesame oil.

All ingredients for the peanut sauce are placed in a grey bowl and stirred to combine.Peanut sauce in grey bowl is beginning to become creamy by stirring ingredients.

Once the sauce is smooth and creamy, pour it over the hot cooked linguini, cooked chicken breast slices, julienned carrots, water chestnuts, and cilantro. Toss to combine.

The fully blended peanut sauce is smooth and creamy, in a grey bowl.

Grab some chopsticks or a fork and dig in! I really think you will love delicious Thai chicken linguini! It’s so good, and it’s hard to stop eating it, once you’ve started.

A dinner plate with Thai chicken linguini on it, ready to be eaten.

The creamy peanut sauce, chicken breast and the crunch of chopped peanuts, carrots and water chestnuts make this one wonderfully tasty meal.

I could spoon up the creamy peanut sauce and eat it all by itself, because it’s THAT good. Not that I’ve ever done that… wink, wink!

Hope you will give this Thai chicken linguini a try! The recipe makes 4 servings, and can easily be doubled, if necessary. Take care, may God bless you, and have a great day.

Looking For More CHICKEN AND PASTA Recipes?

You can find all of my recipes in the Recipe Index, which is located at the top of the page. I have quite a few recipes featuring chicken AND pasta for you to enjoy, including:

Want More Recipes? Get My FREE Newsletter!

I publish a newsletter 2 times per month (1st and 15th) with lots of recipes, tips, etc..
Would you like to join our growing list of subscribers?

There is a Newsletter subscription box on the top right (or bottom) of each blog post, depending on the device you use.
You can submit your e-mail address there, to be added to my mailing list.

Find Me On Social Media:

Facebook page: The Grateful Girl Cooks!
Pinterest:
The Grateful Girl Cooks!
Instagram:
jbatthegratefulgirlcooks

Author's signature

Original Recipe Source: http://www.singforyoursupperblog.com/pasta/thai-chicken-pasta/

↓↓ PRINTABLE RECIPE BELOW ↓↓

0 from 0 votes
Thai Chicken Linguini
Prep Time
15 mins
Cook Time
12 mins
Total Time
27 mins
 

Thai Chicken Linguini (a Cheesecake Factory copycat recipe), with chicken breasts and pasta in a creamy Asian peanut sauce, is absolutely delicious!

Category: Dinner, Entree
Cuisine: Thai
Keyword: thai chicken linguini
Servings: 4 servings
Calories Per Serving: 675 kcal
Author: JB @ The Grateful Girl Cooks!
Ingredients
For the peanut sauce
  • 1 cup smooth peanut butter
  • 1/4 cup soy sauce
  • 3 tsp. chili paste (I usually substitute 2 tsp. Sriracha sauce)
  • 2 TBSP brown sugar
  • 2 limes , juiced
  • 1/2 cup hot water
  • 1 clove of garlic , minced
  • 1 tsp. rice wine vinegar
  • 1 tsp. ground ginger
  • 1/2 tsp. sesame oil
For the pasta
  • 1/2 lb. linguini (or spaghetti or fettucine), fully cooked and drained
  • 2 boneless , skinless chicken breasts, (seasoned w/ salt/pepper, fully cooked, and sliced diagonally)
  • 2 carrots , julienned (matchstick cut)
  • 1 small can water chestnuts , drained
  • 1/2 bunch of cilantro , chopped (stems discarded) Save small amount for garnish on top of dish.
  • 1 handful chopped peanuts (optional, but GOOD , for garnish (if desired)
Instructions
  1. Cook chicken. (I usually grill it, or boil it for 45 minutes in large saucepan of water). Season with salt and pepper, then slice it thinly on a diagonal.

  2. Make the sauce: Put all sauce ingredients in a small bowl and whisk or mix until fully combined, smooth and creamy. Cover and store in the refrigerator until needed (can be made ahead).

  3. Blanch the julienned carrots (cut into matchstick sized slices) in boiling water for approximately 3 minutes, pulling them out while they are still bright and crisp.

  4. Cook linguini per package directions. Place drained, hot pasta in a large bowl with the carrots, sliced chicken, water chestnuts and cilantro (save a bit of cilantro for garnish!). Pour the peanut sauce over the pasta and toss to coat.

  5. Garnish dish with additional cilantro and chopped peanuts (if using). Serve and enjoy!

Recipe Notes

Note: Cook times for this recipe do not include time for cooking chicken breasts. Some may bake, boil, broil, etc. the chicken. It's up to you to choose the method you prefer.

Chopped peanut garnish is not included in caloric calculation, as this is an optional garnish.

Nutrition Facts
Thai Chicken Linguini
Amount Per Serving (1 serving)
Calories 675 Calories from Fat 225
% Daily Value*
Fat 25g38%
Saturated Fat 4g25%
Trans Fat 0.01g
Polyunsaturated Fat 7g
Monounsaturated Fat 11g
Cholesterol 36mg12%
Sodium 1017mg44%
Potassium 984mg28%
Carbohydrates 79g26%
Fiber 6g25%
Sugar 16g18%
Protein 38g76%
Vitamin A 5144IU103%
Vitamin C 8mg10%
Calcium 64mg6%
Iron 3mg17%
* Percent Daily Values are based on a 2000 calorie diet.

Here’s one more to pin on your Pinterest boards!Thai Chicken Linguini (a Cheesecake Factory copycat recipe), with chicken breasts and pasta in a creamy Asian peanut sauce, is absolutely delicious!


Save

Save

Save

Save

Save

Save

Save

Save

Save