Peanut Butter Ice Cream Sauce

Peanut Butter Ice Cream Sauce is a DELICIOUS dessert topping! Recipe is easy, and yields approx. 2 cups, using 6 common ingredients!

If you’re looking for a delicious ice cream topping, may I suggest this yummy peanut butter ice cream sauce? It is sweet, creamy, and packed with peanut butter flavor!

This sauce is so good it’s hard to keep out of it, once any leftover sauce is in the fridge. I MIGHT have snuck a few teaspoons of the sauce all by itself, and wow, is it ever yummy!

If you enjoy peanut butter, then I’ll bet you’re going to love this ice cream sauce! The sauce is a perfect topping for vanilla, chocolate or chocolate chip ice cream.

It’s also very simple to prepare, and will make a plain old, ordinary scoop of ice cream absolutely perfect! Here’s how to make it.

Scroll Down For A Printable Recipe Card At The Bottom Of The Page

Make The Creamy Syrup Base

Measure milk, sugar, corn syrup, and salt into a deep, large saucepan. Stir until these ingredients have been well-combined.

Cook the sauce on LOW heat, stirring often, until this mixture thickens (usually about 5-7 minutes).

Sugar, milk, corn syrup and salt are cooked on Low heat in a saucepan.Stirred often, the ice cream sauce base will thicken as it cooks.

Measure creamy peanut butter into a small bowl, so it is ready to add all at once, as soon as the sauce thickens. Set it aside.

Creamy peanut butter in a small white bowl, ready to add to the cooked sauce.

Time To Add The “STAR” Ingredient!

The creamy sauce will thicken as it cooks on Low, then it will begin to boil, and rise up in the saucepan.

IMPORTANT! Keep stirring the sauce, and do not leave the pan unattended, so it won’t boil over!

Add the peanut butter to the sauce, and continue to cook the sauce on Low, keeping it well-stirred, as it melts.

Ice cream sauce base boils as it cooks, prior to adding peanut butter.

Peanut butter is adding to the hot ice cream sauce, and stirred while it melts.

Stir, Stir, Stir!

Keep stirring the peanut butter into the sauce. It will take a couple minutes for the peanut butter to melt and be fully blended into the sauce.

As soon as the peanut butter has been fully incorporated, take the pan off of the heat.

Peanut butter, slowly melting into the sauce in pan, while being stirred.

Let the sauce cool (of the heat) for 5-6 minutes. Once cooled, add vanilla extract and stir, to combine it with the peanut butter ice cream sauce.

Vanilla extract is added to cooled peanut butter sauce (off of the heat).

Serve The Peanut Butter Ice Cream Sauce

This recipe will yield approximately 2 cups of peanut butter ice cream sauce. When it has sufficiently cooled (serve it warm, not hot!), it is ready to be enjoyed!

To serve, spoon a couple Tablespoons of the peanut butter ice cream sauce over a favorite scoop or two of ice cream.

Peanut butter ice cream sauce over a scoop of vanilla ice cream.

If desired, you can top the peanut butter sauce with a few chopped peanuts, for added crunch! We love this sweet sauce!

Peanut butter ice cream sauce, served over chocolate and vanilla ice cream scoops in dish.The peanut butter ice cream sauce on a spoonful of vanilla ice cream.

I hope you have the chance to try this yummy peanut butter ice cream sauce, and feel confident you’re going to enjoy it, too!

Store leftover sauce in an airtight container in a refrigerator for 6-7 days. The sauce can be reheated in a saucepan or microwave, after stirring.

Thanks for stopping by, and I invite you to come back again soon for more family-friendly recipes. Take care, may God bless you, and have a GREAT day!

Looking For More SWEET DESSERT SAUCE Recipes?

You can find ALL of my recipes in the Recipe Index, which is located at the top of the page. I have a nice variety of sweet dessert sauce recipes to choose from, including:

Want More Recipes? Get My FREE Newsletter!

I publish a newsletter 2 times per month (1st and 15th) with lots of recipes, tips, etc..
Would you like to join our growing list of subscribers?

There is a Newsletter subscription box on the top right (or bottom) of each blog post, depending on the device you use.
You can submit your e-mail address there, to be added to my mailing list.

Find Me On Social Media:

Facebook page: The Grateful Girl Cooks!
Pinterest:
The Grateful Girl Cooks!
Instagram:
jbatthegratefulgirlcooks

Author's signature

Original recipe source: unknown (found handwritten recipe on an index card in an old recipe box)

↓↓ PRINTABLE RECIPE BELOW ↓↓

0 from 0 votes
Peanut Butter Ice Cream Sauce
Prep Time
12 mins
Cook Time
0 mins
Total Time
12 mins
 

Peanut Butter Ice Cream Sauce is a DELICIOUS dessert topping! Recipe is easy, and yields approx. 2 cups, using 6 common ingredients!

Category: Desssert, Sauce
Cuisine: American
Keyword: peanut butter ice cream sauce
Servings: 16 (2 Tablespoons per serving)
Calories Per Serving: 93 kcal
Author: JB @ The Grateful Girl Cooks!
Ingredients
  • 1 cup granulated sugar
  • ¾ cup milk
  • 1 Tablespoon Karo syrup (clear)
  • ¼ teaspoon salt
  • 6 Tablespoons creamy peanut butter
  • ¼ teaspoon vanilla extract
Instructions
  1. Place milk, sugar, corn syrup, and salt into a deep, large saucepan. Stir until well combined. Cook on LOW, stirring often, until mixture thickens (5-7 minutes).

  2. Measure peanut butter into a small bowl, so it's ready to add when the sauce thickens. Set aside.

  3. Sauce will thicken as it cooks, then begin to boil, and rise up in the saucepan. Keep stirring; do not leave pan unattended, so it won't boil over! Add peanut butter; continue cooking on Low, stirring constantly, as it melts. As soon as peanut butter has melted, and been fully incorporated, move pan off of the heat.

  4. Let sauce cool 5-6 minutes. Add vanilla extract and stir, to combine. When sauce has cooled, it's ready to serve over ice cream! Best served warm, not hot.

Nutrition Facts
Peanut Butter Ice Cream Sauce
Amount Per Serving (1 (2 Tbl.))
Calories 93 Calories from Fat 27
% Daily Value*
Fat 3g5%
Saturated Fat 1g6%
Polyunsaturated Fat 1g
Monounsaturated Fat 2g
Cholesterol 1mg0%
Sodium 67mg3%
Potassium 52mg1%
Carbohydrates 15g5%
Fiber 0.3g1%
Sugar 15g17%
Protein 2g4%
Vitamin A 22IU0%
Calcium 17mg2%
Iron 0.1mg1%
* Percent Daily Values are based on a 2000 calorie diet.

Here’s one more to pin on your Pinterest boards!Peanut Butter Ice Cream Sauce is a DELICIOUS dessert topping! Recipe is easy, and yields approx. 2 cups, using 6 common ingredients!

Classic Cannellini Bean Dip

Classic Cannellini Bean Dip is a simple, delicious appetizer! Make it in 10 minutes, then serve with crackers or pita chips for dipping!

If you enjoy eating hummus, I am confident you are going to love this classic cannellini bean dip! This delicious appetizer is made using canned cannellini beans, and it is sure to please!

I made some recently for a birthday BBQ for my husband, and put this out as an appetizer before our grilled burgers and all the fixin’s. This cannellini bean dip was a big hit, served with pita chips for dipping. It’s so GOOD.

I found the original recipe in a cookbook I had from renown chef Jacques Pépin, and when I made it, it did not disappoint! 

Classic Cannellini Bean Dip is VERY simple to make, and only takes about 10 minutes, from start to finish! Here’s how to make it.

Scroll Down For A Printable Recipe Card At The Bottom Of The Page

Introducing The Star Of the Show

Yes, friends, the star of the show is the humble cannellini bean! For this appetizer, you will need to have a can of cannellini beans. They are an inexpensive bean (this can of beans cost .79¢), and are also referred to as white kidney beans.

Cannellini beans are a very common canned ingredient, and can be found in the “bean” section of almost any local grocery store. If you enjoy this versatile bean, be sure to check out my recipe for Greek Cannellini Bean Stew! It’s so good!

Rinse the beans and drain them before beginning. Once drained, measure out 1/3 cup of the beans and set them aside (they will be used later to garnish the finished dip). 

A can of cannellini beans is used for this dip.One third cup of beans is reserved/set aside for garnishing finished dip.

Prepare Classic Cannellini Bean Dip

Place the remaining cannellini beans (NOT the reserved ones) in a food processor or a blender. Process them until they are mostly smooth.

Cannellini beans are processed until smooth in a food processor or blender.

Add minced garlic, diced bread, olive oil, water, ground cumin, salt, black pepper and Tabasco sauce to the beans.

Continue processing until all the ingredients are fully incorporated, and the bean dip is very smooth and creamy.

You may need to scrape down the sides of the processor or blender a couple times during this step, if necessary.

Bread cubes, olive oil, etc. are added to the processed cannellini beans.

Spoon the cannellini bean dip into a pretty serving bowl. Use the back of a spoon to create a “well” in the center of the dip.

This “well” will need to be large enough to hold the reserved cannellini beans. Now it’s time to finish garnishing the dip before serving.

After processing until smooth, cannellini bean dip is placed in serving bowl.

Prepare The Cannellini Bean Dip For Serving

Place the reserved cannellini beans into the “well” you created in the center of the dip. Drizzle olive oil over the beans and the dip.

Sprinkle the top of the dip lightly with paprika and poppy seeds, then add either chopped fresh parsley OR a couple sprigs of parsley.

Enjoy the Cannellini Bean Dip!

At this point, the classic cannellini bean dip is ready to enjoy! Serve with pita chips, tortilla chips, or crisp (fancy) crackers! Watch how quickly this tasty appetizer disappears.

If necessary, you can also make the dip a couple hours ahead of serving time. Cover the bowl and refrigerate it until serving time.

After refrigerating, let the dip sit out (uncovered) for about 15 minutes before serving, for best presentation.

Classic cannellini bean dip is garnished with olive oil, parsley, poppy seeds and paprika.Classic cannellini bean dip, garnished and ready to serve with chips or crackers.

I hope you’ll give this yummy appetizer a try. It tastes a lot like hummus, so it will be devoured quickly! I hope you enjoy it as much as we do.

Thanks for stopping by, and I invite you to come back again soon for more family-friendly recipes. Take care, may God bless you, and have a great day.

Looking For More APPETIZER Recipes?

You can find ALL of my recipes in the Recipe Index, which is located at the top of the page. I have some delicious appetizers to choose from, including:

Want More Recipes? Get My FREE Newsletter!

I publish a newsletter 2 times per month (1st and 15th) with lots of recipes, tips, etc..
Would you like to join our growing list of subscribers?

There is a Newsletter subscription box on the top right (or bottom) of each blog post, depending on the device you use.
You can submit your e-mail address there, to be added to my mailing list.

Find Me On Social Media:

Facebook page: The Grateful Girl Cooks!
Pinterest:
The Grateful Girl Cooks!
Instagram:
jbatthegratefulgirlcooks

Author's Signature

Recipe adapted from: “Jacques Pépin Heart & Soul In The Kitchen”, page 10, published by Houghton Mifflin Harcourt Publishing Co. in 2015

↓↓ PRINTABLE RECIPE BELOW ↓↓

0 from 0 votes
Classic Cannellini Bean Dip
Prep Time
10 mins
Cook Time
0 mins
Total Time
10 mins
 

Classic Cannellini Bean Dip is a simple, delicious appetizer! Make it in 10 minutes, then serve with crackers or pita chips for dipping!

Category: Appetizer
Cuisine: All Cuisines
Keyword: cannellini bean dip
Servings: 8 servings (1/4 cup per serving)
Calories Per Serving: 143 kcal
Author: JB @ The Grateful Girl Cooks!
Ingredients
For Dip:
  • 15.5 ounce canned cannellini beans rinsed, drained *DIVIDED USE
  • 1 teaspoon minced garlic
  • ½ cup diced bread cubes no crusts (I use white bread)
  • ¼ cup extra virgin olive oil
  • 1 Tablespoon water
  • ½ teaspoon salt
  • ¼ teaspoon ground cumin
  • 1 pinch ground black pepper
  • ½ teaspoon Tabasco sauce
Garnishes:
  • cup reserved cannellini beans (from above)
  • 2 teaspoons extra virgin olive oil
  • ¼ teaspoon paprika
  • ½ teaspoon poppy seeds
  • 1 pinch red pepper flakes
  • 1 teaspoon chopped fresh parsley or 2-3 sprigs
Instructions
  1. Rinse beans and drain. Once drained, measure out 1/3 cup of beans and set them aside (they'll garnish the finished dip). 

  2. Place remaining cannellini beans in food processor or blender. Process until mostly smooth.

  3. Add garlic, bread cubes, olive oil, water, cumin, salt, pepper and Tabasco sauce. Continue processing until bean dip is very smooth and creamy. You may need to scrape down sides of the processor or blender 2-3 times during this step.

  4. Spoon cannellini bean dip into a serving dish. Use spoon to create a "well" in the center of the dip. This "well" needs to be large enough to hold reserved beans.

  5. To garnish: Place remaining beans into the "well". Drizzle olive oil over beans and dip. Sprinkle lightly with paprika, poppy seeds and parsley (chopped or leaves).

  6. Serve with pita chips, tortilla chips, or crisp crackers! NOTE: If necessary, you can make this dip 1-2 hours hours ahead. Cover bowl and refrigerate. After refrigerating, let dip sit at room temp. (uncovered) for 15 minutes before serving.

Nutrition Facts
Classic Cannellini Bean Dip
Amount Per Serving (1 (1/4 cup per serving))
Calories 143 Calories from Fat 72
% Daily Value*
Fat 8g12%
Saturated Fat 1g6%
Trans Fat 0.001g
Polyunsaturated Fat 1g
Monounsaturated Fat 6g
Sodium 172mg7%
Potassium 261mg7%
Carbohydrates 14g5%
Fiber 3g13%
Sugar 0.4g0%
Protein 4g8%
Vitamin A 37IU1%
Vitamin C 0.3mg0%
Calcium 49mg5%
Iron 2mg11%
* Percent Daily Values are based on a 2000 calorie diet.

Here’s one more to pin on your Pinterest boards!Classic Cannellini Bean Dip is a simple, delicious appetizer! Make it in 10 minutes, then serve with crackers or pita chips for dipping!

Pan-Seared Green Beans and Bacon

Pan-Seared Green Beans and Bacon is a simple, fresh veggie side dish you’ll enjoy! Green beans are seasoned with garlic, onion, and BACON!
Pan-Seared Green Beans and Bacon is a simple, fresh veggie side dish you'll enjoy! Green beans are seasoned with garlic, onion, and BACON!

Bacon seems to make everything better, right? In this simple, delicious recipe, fresh green beans are enhanced by the addition of crisp bacon pieces. YUM.

Everything is cooked in one skillet for convenience and easy cleanup, so this is a “win-win” recipe. Fresh green beans are pan-seared until they blister and brown slightly, before adding 2-3 more ingredients.

All in all, this recipe is easy to make, and I’m confident you will enjoy it, paired with a favorite meat main dish. Here’s how to make this veggie side dish.

Scroll Down For A Printable Recipe Card At The Bottom Of The Page

Prepare The Green Beans For Cooking

I enjoy making this recipe using fresh green beans from our garden in the summer. When my garden is not in season, I buy them fresh at our grocery store, year-round.

Trim or snap off the stem ends of each of the green beans (and discard). Set the green beans aside while you cook the bacon.

Fresh green beans will need stem ends trimmed off before cooking.

Cook The Bacon, Onion And Garlic

Cut 3 slices of bacon into small pieces. I stack the slices on top of each other, then use kitchen shears to cut the bacon into small pieces. Cooking the bacon into small pieces is a timesaver, because it will cook faster.

Cook the bacon in a non-stick pan on medium heat until it is mostly cooked through. DO NOT let it get crispy at this point.

Add chopped onions to the bacon, and cook for 3 minutes, stirring often until the onions become tender. Stir in minced garlic, and cook 1 more minute, stirring often so the garlic doesn’t burn.

Small pieces of bacon are cooked until mostly done in large skillet.Chopped onions and minced garlic are added to the cooked bacon in skillet.

At this point, the bacon will be fairly crispy, and the onions should be fully cooked. Transfer this mixture out of the skillet onto a plate, and cover. Do NOT wipe out the skillet.

Bacon, onions and garlic, fully cooked, are transferred out of the skillet.

Pan-Sear The Green Beans

Add the green beans to the skillet without wiping out the bacon drippings left in the skillet. They will cook in any leftover bacon drippings, which adds flavor.

Pan-sear the green beans on Medium heat, stirring occasionally, for 7-8 minutes. The beans will slowly blister and brown on the outside while they cook.

Fresh green beans are pan-seared in bacon drippings left in skillet.As they cook, the green beans will blister and brown on the outside.

Time To Add the BACON!

 Add the bacon, onion and garlic mixture back into the skillet, and stir to combine. Taste a green bean, then season the beans to taste with salt and pepper, if desired.

Cook, stirring often, until the beans and bacon are heated through (about a minute). The pan-seared green beans and bacon are ready to serve, once they’re fully heated through.

Bacon, onion and garlic mixture is added back into the skillet of green beans.After heating them though, pan-seared green beans and bacon are ready to serve.

Serve The Pan-Seared Green Beans And Bacon

Transfer the pan-seared green beans and bacon from the skillet to a serving bowl, and serve immediately, while hot.

A white bowl, filled with pan-seared green beans and bacon.Crispy pieces of bacon mixed in with the pan-seared green beans.

The recipe will yield enough green beans for three servings (four, if smaller portions are desired). Serve with a favorite main dish, and enjoy!

Pan-seared green beans and bacon, with pork chop and rice on the plate.

I hope you have the chance to make pan-seared green beans and bacon. We really enjoy them, and trust you will, too. You can easily double or triple this recipe to suit your needs.

Thanks for stopping by, and I hope you’ll come back soon for more family-friendly recipes. Take care, may God bless you, and have a GREAT day!

Looking For More GREEN BEAN Recipes?

You can find ALL of my recipes in the Recipe Index, which is located at the top of the page. I have a nice variety of green bean recipes to enjoy, including:

Want More Recipes? Get My FREE Newsletter!

I publish a newsletter 2 times per month (1st and 15th) with lots of recipes, tips, etc..
Would you like to join our growing list of subscribers?

There is a Newsletter subscription box on the top right (or bottom) of each blog post, depending on the device you use.
You can submit your e-mail address there, to be added to my mailing list.

Find Me On Social Media:

Facebook page: The Grateful Girl Cooks!
Pinterest:
The Grateful Girl Cooks!
Instagram:
jbatthegratefulgirlcooks

Author's signature

↓↓ PRINTABLE RECIPE BELOW ↓↓

0 from 0 votes
Pan-Seared Green Beans and Bacon
Prep Time
8 mins
Cook Time
12 mins
Total Time
20 mins
 

Pan-Seared Green Beans and Bacon is a simple, fresh veggie side dish you'll enjoy! Green beans are seasoned with garlic, onion, and BACON!

Category: Vegetable Dish
Cuisine: American
Keyword: pan-seared green beans
Servings: 3
Calories Per Serving: 125 kcal
Author: JB @ The Grateful Girl Cooks!
Ingredients
  • ½ pound fresh green beans ends trimmed
  • ½ medium yellow onion peeled/diced
  • 2 cloves garlic (minced)
  • 3 slices bacon chopped
  • salt and black pepper, to taste
Instructions
  1. Trim or snap off stem ends of the green beans (and discard). Set beans aside.

  2. Cut bacon into small pieces, so it cooks faster. Cook bacon in a non-stick pan on medium heat until mostly cooked through. DO NOT let it get crispy. Add chopped onions; cook for 3 minutes, stirring often. Stir in garlic; cook 1 minute, stirring often so garlic doesn't burn. Transfer bacon mixture out of the skillet onto a plate. Do NOT wipe or clean out the skillet.

  3. Add the green beans to the skillet. They'll cook in the bacon drippings, which adds flavor. Pan-sear beans on Medium heat, stirring occasionally, for 7-8 minutes. Beans will slowly blister and brown on the outside as they cook.

  4. Add bacon mixture back into skillet; stir to combine. Taste a green bean; season lightly with salt/pepper, if desired. Cook, stirring often, until beans/bacon are heated through (about a minute). Transfer to serving dish; serve immediately.

Recipe Notes

NOTE: Nutritional calculation does not include amounts for salt and pepper, as some may season the green beans lightly or not at all, and some may desire more seasoning, to taste.

Nutrition Facts
Pan-Seared Green Beans and Bacon
Amount Per Serving (1 (1/3 of total))
Calories 125 Calories from Fat 81
% Daily Value*
Fat 9g14%
Saturated Fat 3g19%
Trans Fat 0.03g
Polyunsaturated Fat 2g
Monounsaturated Fat 4g
Cholesterol 15mg5%
Sodium 151mg7%
Potassium 238mg7%
Carbohydrates 8g3%
Fiber 2g8%
Sugar 3g3%
Protein 4g8%
Vitamin A 530IU11%
Vitamin C 11mg13%
Calcium 37mg4%
Iron 1mg6%
* Percent Daily Values are based on a 2000 calorie diet.

Here’s one more to pin on your Pinterest boards!Pan-Seared Green Beans and Bacon is a simple, fresh veggie side dish you'll enjoy! Green beans are seasoned with garlic, onion, and BACON!

Vietnamese Skillet Pork Chops

Vietnamese Skillet Pork Chops are juicy, tender and delicious! Pork chops are marinated in a simple Vietnamese sauce, then pan-seared.

Many years ago I saved a recipe out of a Bon Appetit magazine I subscribed to. The recipe for Vietnamese Pork Chops sounded interesting, especially since I’ve never visited that country. I decided to try the recipe.

What I discovered is a very simple recipe using fish sauce as part of a marinade for the pork chops. In Vietnam their much loved fish sauce is called Nuoc Mam or Nuoc Cham (which translates to “dipping sauce”). It is typically made with fermented anchovies, sea salt and water.

For this recipe, fish sauce is combined with shallots, brown sugar, rice vinegar, and black pepper to make a flavorful marinade. Fish sauce can be found in most grocery stores in the Asian Food section. 

After marinating the pork chops, the remaining marinade will be boiled and reduced into a pan sauce, while the pork cooks. The delicious sauce is spooned on top of pan-seared pork chops for serving.

The recipe is EASY to make, and tastes wonderful. Here’s how to make Vietnamese Skillet Pork Chops.

Scroll Down For A Printable Recipe Card At The Bottom Of The Page

Make The Vietnamese-Style Marinade

Place one chopped shallot, brown sugar, fish sauce, rice vinegar, and black pepper in a medium sized bowl. 

Use a wire whisk or a fork, to fully combine these ingredients, until the brown sugar dissolves. Set aside.

Fish sauce, shallots, brown sugar rice vinegar and pepper, placed in a white bowl.The Vietnamese-inspired marinade is whisked together to combine ingredients.

Prepare The Pork Chops For The Marinade

Pierce the pork chops on all sides multiple times using the tines of a fork. You can see the indents in the meat in the photo below.

By doing this, the marinade gets into the pork chops quicker, which results in tender, tasty pork chops!

Pork chops are tenderized with the tines of a fork before marinating.

Marinate The Pork Chops

Put the pork chops into a LARGE resealable bag OR in a large shallow dish. Pour the marinade over the pork chops, then flip them over, so all sides are covered.

Spoon marinade on top of the pork chops, then cover the dish. Let the chops marinate (covered) in the sauce for 20 minutes at room temperature. Flip them over a couple times so each side is well coated.

TIP: You can marinate the chops up to one day ahead! Keep them covered in the marinade and then refrigerate, flipping them occasionally. This is a great timesaver!

Pork chops are marinated in the Vietnamese-inspired sauce.

Right before you cook the Vietnamese skillet pork chops, remove them from the marinade. Let excess sauce drain back into the dish, and scrape off the shallots, too.

IMPORTANT! SAVE ALL THE MARINADE AND SHALLOTS FOR THE PAN SAUCE! 

Pour all of the remaining marinade and shallots into a small saucepan. You will need to boil it so it is safe to consume after being in contact with raw meat.

Cook the marinade into a reduction sauce while the pork chops “rest” after being cooked.

Leftover marinade is placed in a small pan to boil.

Cook The Pork Chops

Heat 1 Tablespoon vegetable oil in a large skillet on Medium-High heat. If desired, you can lightly sprinkle salt on the pork chops, but I usually do not, as the sauce tends to be salty enough. Your choice.

Once the oil is very hot, but not smoking, add the pork chops to the skillet in a single layer. They should sizzle when they hit the pan!

Cook the pork chops for 4 minutes without moving them in the skillet, then flip them to the other side. Cook an additional 4 minutes.

When done, the pork chops should be browned on both sides, cooked through, and have an internal temperature of 145°F. Remove pork chops, cover (to keep them hot), and let them “rest” for 7-8 minutes before serving.

Pork chops are pan-seared in hot oil, after marinating.The pork chops are browned on both sides until fully cooked through.

While The Pork Chops Are “Resting”

While the cooked pork chops are “resting”, make the pan sauce using the reserved marinade in the saucepan. 

Bring the marinade to a full boil, stirring often, as it will bubble and rise in the pan as it cooks. Continue boiling and stirring for about 4 minutes (this kills any residual bacteria).

The sauce is done after it has boiled for about 4 minutes, and is reduced to about ¼ cup of pan sauce. 

Marinade is boiled to kill any bacteria present after being in contact with raw pork.Pan sauce is reduced in quantity by boiling, leaving small amount in pan.

Serve The Vietnamese Skillet Pork Chops

Now it’s time to serve the Vietnamese Skillet Pork Chops. Place a pork chop onto a plate, then spoon a little pan sauce on top. Add a sprig or two of parsley (optional) then serve the pork chops with a lime wedge on the side.

Squeeze the lime wedge over the pork chops. The juice adds a pop of bright citrus flavor to this dish. It’s fantastic, so don’t leave the lime out!

We enjoy these pork chops with mashed potatoes or steamed white rice on the side. The “blandness” of mashed potatoes or rice are a good backdrop for the wonderful flavor of the pork chops.

Vietnamese Skillet Pork Chops with sauce, mashed potatoes and lime wedge.One of the Vietnamese Skillet Pork Chops on a plate, with potatoes and lime wedge.

I hope you have the opportunity to try these delicious pork chops. They have lots of flavor, and we are delighted with how juicy and tender the pork chops are.

Thanks for stopping by, and please come back soon for more family-friendly recipes. Take care, may God bless you, and have a GREAT day!

Looking For More PORK CHOP Recipes?

You can find ALL of my recipes in the Recipe Index, which is located at the top of the page. I have lots of delicious pork chop recipes to choose from, including:

Want More Recipes? Get My FREE Newsletter!

I publish a newsletter 2 times per month (1st and 15th) with lots of recipes, tips, etc..
Would you like to join our growing list of subscribers?

There is a Newsletter subscription box on the top right (or bottom) of each blog post, depending on the device you use.
You can submit your e-mail address there, to be added to my mailing list.

Find Me On Social Media:

Facebook page: The Grateful Girl Cooks!
Pinterest:
The Grateful Girl Cooks!
Instagram:
jbatthegratefulgirlcooks

Author's signature

Original recipe source: Bon Appetit Magazine, June 2013 issue, “Fast, Easy, Fresh Weeknight Favorites”, on page 46

↓↓ PRINTABLE RECIPE BELOW ↓↓

0 from 0 votes
Vietnamese Skillet Pork Chops
Prep Time
10 mins
Cook Time
10 mins
Marinating (inactive prep)
20 mins
Total Time
40 mins
 

Vietnamese Skillet Pork Chops are juicy, tender and delicious! Pork chops are marinated in a simple Vietnamese sauce, then pan-seared.

Category: Main Course
Cuisine: Vietnamese
Keyword: Vietnamese Skillet Pork Chops
Servings: 4 (1 pork chop + sauce)
Calories Per Serving: 406 kcal
Author: JB @ The Grateful Girl Cooks!
Ingredients
  • 1 small shallot finely chopped
  • cup light brown sugar (packed)
  • ¼ cup fish sauce (nuoc nam or nam pla recommended)
  • 2 Tablespoons unseasoned rice vinegar
  • 1 teaspoon ground black pepper
  • 4 1" thick pork chops (bone-in) (approx. 2 pounds)
  • 1 Tablespoon vegetable oil
  • 1 lime , for serving (cut in wedges)
Instructions
  1. Make Marinade: Place shallots, brown sugar, fish sauce, rice vinegar, black pepper in medium bowl.  Use fork to combine; mix until brown sugar dissolves. Set aside.

  2. Marinate Pork Chops: Pierce pork chops on all sides multiple times using the tines of a fork. This helps marinade get into pork chops quicker, resulting in tender, tasty pork chops!

  3. Put pork chops in a LARGE resealable bag OR a large shallow dish in a single layer. Pour marinade over pork; flip chops over, to cover all sides. Spoon marinade on top of chops; cover dish. Marinate for 20 minutes at room temp. Flip a couple times so each side is well marinated. TIP: You can marinate chops one day ahead! Keep dish covered and refrigerate, flipping them occasionally in the sauce.

  4. When ready to cook pork chops, remove them from the marinade. Let excess sauce drain into the dish; scrape sauce and shallots off the chops. SAVE THE MARINADE FOR THE PAN SAUCE!  Pour marinade/shallots into a small saucepan.

  5. Cook Pork Chops: Heat vegetable oil in large skillet on Medium-High heat. Once oil is very hot, but not smoking, add pork chops in a single layer. Cook for 4 minutes without moving them in the skillet; flip to the other side. Cook about 4 more minutes. When done, pork chops should be browned on both sides, cooked through, and have an internal temp. of 145°F. Let pork chops "rest" for 7-8 minutes before serving, so juices can redistribute inside the meat.

Make Pan Sauce While Pork Chops "Rest":
  1. While chops are "resting", make the pan sauce using reserved marinade in saucepan. Bring marinade to a full boil, stirring often (it will bubble and rise in the pan as it cooks). Continue boiling/stirring for approx. 4 minutes. Sauce should be reduced, leaving about ¼ cup in the pan. 

  2. To Serve: Place a pork chop on a plate; spoon pan sauce on top. Garnish with fresh parsley (opt.), and serve with a lime wedge on the side (a must). Squeeze lime juice over pork chops. Serve with favorite side dishes, and enjoy!

Recipe Notes

NOTE: If desired, you can very lightly salt the pork chops before cooking. I find this not necessary as the sauce/marinade is salty enough, but this is up to you to decide.

Nutrition Facts
Vietnamese Skillet Pork Chops
Amount Per Serving (1 chop + sauce)
Calories 406 Calories from Fat 171
% Daily Value*
Fat 19g29%
Saturated Fat 6g38%
Trans Fat 0.2g
Polyunsaturated Fat 4g
Monounsaturated Fat 7g
Cholesterol 117mg39%
Sodium 1238mg54%
Potassium 694mg20%
Carbohydrates 22g7%
Fiber 1g4%
Sugar 19g21%
Protein 36g72%
Vitamin A 23IU0%
Vitamin C 5mg6%
Calcium 64mg6%
Iron 2mg11%
* Percent Daily Values are based on a 2000 calorie diet.

Here’s one more to pin on your Pinterest boards!Vietnamese Skillet Pork Chops are juicy, tender and delicious! Pork chops are marinated in a simple Vietnamese sauce, then pan-seared.

Strawberry Almond Romanoff Sundae

A Strawberry Almond Romanoff Sundae is a delicious dessert. Almond flavored whipped cream and strawberries are served over vanilla ice cream.

A strawberry almond Romanoff sundae is an easy to make, delicious COLD “no cook” dessert that is perfect for hot Summer days!

You will need to plan ahead, because the strawberries need to be chilled with a couple other ingredients before using.

Why Is It Called A ROMANOFF Sundae?

STORY #1- Strawberries Romanoff is the name of a famous dish (strawberries, liqueur, and cream). It was “supposedly” created by the chef for Czar Nicholas I, a Russian ruler from the well known Romanov family (typically spelled Romanoff in English). 

STORY #2- A different story of it’s origins involves a man named Hershel Geguzin (born in Lithuania). Hershel immigrated to the U.S. as a child. He changed his name from Hershel Geguzin to Harry Gerguson, then later changed his name to Michael Romanoff. He “claimed” to be of Russian royalty, even though it was widely disputed (and allegedly proven false over the years).

Romanoff later became a restaurant owner in Beverly Hills, serving famous movie stars in the 1940’s and 1950’s. He served a dessert called “Strawberries Romanoff” at his restaurant, and it became popular in the United States.

Who truly knows the actual origins of this delicious dessert? All I know is I’ve taken a basic recipe for Strawberries Romanoff and serve it over vanilla ice cream to make a delicious ice cream sundae. Here’s here’s how to make it.

Scroll Down For A Printable Recipe Card At The Bottom Of The Page

Prepare The Fresh Strawberries

Fresh strawberries are used for this dessert. This recipe (as written in the recipe card at the bottom of the page) will make enough for 4 servings.

You will need about 4 cups of juicy, fresh strawberries, to make this sundae for 4 people.

NOTE: My photos below reflect the amounts used for 2 servings. When I photographed this, I was only making two servings.

Four cups of fresh strawberries are used to make this recipe.

Rinse the strawberries, then pat them dry. Remove the leaves and core, then cut each strawberry in half.

Place the strawberry halves in a large bowl, then sprinkle granulated sugar over the strawberries.

Strawberries are rinsed, cored, and sliced in half, then placed in bowl.Granulated sugar is added to the halved strawberries in a bowl.

Now add almond liqueur (Amaretto) to the strawberries. I use my homemade amaretto, which is wonderful (and convenient to have around)!

Don’t leave out the almond flavoring for the strawberries, because it adds so much flavor, and simply makes this dish perfect.

Amaretto liqueur will be added to the bowl of strawberries.Pouring amaretto into the bowl with the strawberries and granulated sugar.

Macerate The Strawberries

Stir well, to dissolve the granulated sugar, and combine the strawberries with the Amaretto and the sugar. Cover the bowl, and let the strawberries chill in a refrigerator for 2 hours.

This process is called “macerating” the strawberries, because the sugar and amaretto will draw out the natural juices of the strawberries as they chill. It will also infuse almond flavor into the berries.

This is a GOOD thing, so please don’t skimp on this “inactive” prep time. I try to do this early on the day I’ll make the sundaes.

Strawberry halves are stirred, to dissolve sugar in the amaretto in bowl.

Prepare The Cream Sauce

Right before serving this dish, you will need to make the cream sauce, which is spooned over the strawberry almond Romanoff sundae.

Beat heavy whipping cream and powdered sugar in a mixing bowl until it becomes foamy. Add almond extract to the whipping cream as you are beating it. Continue beating the whipping cream until SOFT peaks form. 

TIP: If you put the bowl and beaters in the freezer about 20 minutes before doing this step it helps the whipping cream form peaks faster.

Powdered sugar, whipping cream and almond extract, in a large metal bowl.Almond flavored whipping cream is beaten until peaks form.


Make The Strawberry Almond Romanoff Sundae

So, now the strawberries are fully chilled, and the whipping cream has been beaten to soft peaks… now what? IT’s TIME to build a strawberry almond Romanoff sundae!

For each serving, place a scoop of vanilla ice cream in a stemmed parfait glass (or bowl). Add a generous helping of the strawberries on top of the ice cream.

A scoop of vanilla ice cream is placed in glass dish to start making the sundae.Macerated strawberries are added on top of the vanilla ice cream in dish.

Spoon a generous amount of the whipped cream over the strawberries. Garnish each serving with some toasted almond slices, and serve!

The cold strawberries AND the whipped cream have a hint of almond flavoring, which is unique and delicious! They pair so well with the cold, creamy  scoop of vanilla ice cream under it all! YUM.

A Strawberry Almond Romanoff Sundae is so simple to make, yet it is a decadent dessert to serve. I’m absolutely positive you will enjoy it.

Almond whipping cream and toasted, sliced almond top the sundae.A strawberry almond Romanoff sundae, ready to be enjoyed.

I hope you have the opportunity to try this yummy dessert sometime soon, and hope you enjoy it, like we do.

Thanks for stopping by, and I invite you to come back soon for more family-friendly recipes. Take care, may God bless you, and have a GREAT day.

Looking For More DESSERT Recipes?

You can find ALL of my recipes in the Recipe Index, which is located at the top of the page. I have a large variety of amazing dessert recipes to choose from, including:

Want More Recipes? Get My FREE Newsletter!

I publish a newsletter 2 times per month (1st and 15th) with lots of recipes, tips, etc..
Would you like to join our growing list of subscribers?

There is a Newsletter subscription box on the top right (or bottom) of each blog post, depending on the device you use.
You can submit your e-mail address there, to be added to my mailing list.

Find Me On Social Media:

Facebook page: The Grateful Girl Cooks!
Pinterest:
The Grateful Girl Cooks!
Instagram:
jbatthegratefulgirlcooks

Author's signature

Original recipe for Strawberry Almond Romanoff: Janet Eilders, via “Southern Living 1998 Annual Recipes”, page 99, published by Oxmoor House

↓↓ PRINTABLE RECIPE BELOW ↓↓

0 from 0 votes
Strawberry Almond Romanoff Sundae
Prep Time
10 mins
Cook Time
0 mins
Refrigeration Time (inactive prep)
3 hrs
Total Time
3 hrs 10 mins
 

A Strawberry Almond Romanoff Sundae is a delicious dessert. Almond flavored whipped cream and strawberries are served over vanilla ice cream.

Category: Dessert
Cuisine: American
Keyword: strawberry almond Romanoff sundae
Servings: 4
Calories Per Serving: 602 kcal
Author: JB @ The Grateful Girl Cooks!
Ingredients
  • 4 cups fresh strawberries de-stemmed, cored, halved
  • ½ cup almond liqueur (Amaretto)
  • ½ cup granulated sugar
  • 1 cup heavy whipping cream
  • 2 Tablespoons powdered sugar
  • 1 teaspoon almond extract
  • 2 cups vanilla ice cream (½ cup per serving)
  • 2 teaspoons toasted almond slices (optional garnish)
Instructions
  1. Rinse strawberries; pat them dry. Remove leaves and core, then cut each strawberry in half.

  2. Put strawberry halves in large bowl. Add granulated sugar and almond liqueur (Amaretto) to strawberries. Stir well, to dissolve sugar and combine with strawberries. Cover bowl; refrigerate strawberries for 2 hours.

  3. Make whipped cream right before serving. Beat whipping cream and powdered sugar in bowl until it becomes foamy. Add almond extract to whipping cream as you beat it. Continue beating the whipping cream until SOFT peaks form. TIP: If you put bowl and beaters in freezer for 20 minutes before doing this step it helps whipping cream form peaks faster.

  4. For each serving, place a scoop of vanilla ice cream in a stemmed parfait glass or bowl. Add a generous helping of the strawberries. Spoon whipped cream over the strawberries. Garnish each serving with toasted almond slices (see note below). Serve and enjoy!

Recipe Notes

To lightly toast almonds, slice thin and place in a dry skillet. Cook on low heat, stirring often, for 2-3 minutes or until almonds become fragrant and lightly browned. Remove from hot skillet immediately. Let cool.

Nutrition Facts
Strawberry Almond Romanoff Sundae
Amount Per Serving (1 (1/4 of total))
Calories 602 Calories from Fat 270
% Daily Value*
Fat 30g46%
Saturated Fat 18g113%
Polyunsaturated Fat 2g
Monounsaturated Fat 8g
Cholesterol 96mg32%
Sodium 73mg3%
Potassium 434mg12%
Carbohydrates 67g22%
Fiber 4g17%
Sugar 61g68%
Protein 5g10%
Vitamin A 1170IU23%
Vitamin C 85mg103%
Calcium 153mg15%
Iron 1mg6%
* Percent Daily Values are based on a 2000 calorie diet.

Here’s one more to pin on your Pinterest boards!A Strawberry Almond Romanoff Sundae is a delicious dessert. Almond flavored whipped cream and strawberries are served over vanilla ice cream.


Asian Sesame Scallion Noodles

Asian Sesame Scallion Noodles is a meatless dish, with linguini, green onions and toasted sesame seeds, coated in a tasty Asian-style sauce.

My husband and I love this delicious meatless meal! The Asian sesame scallion noodles are packed with great flavor, and the bonus is this dish is so very simple to make.

I discovered this wonderful meal in a cookbook I had, and made only a couple very small changes. The results were outstanding, and we have enjoyed this dish several times! My sister in law is a vegan, and when I made this dish for her, she loved it, too.

My next plan is to cook this meal for our son and his girlfriend, and see what they think. They are both vegetarians, and I’m confident they will love the amazing Asian flavors of this meatless dish.

This is an easy meal to throw together at the end of a long day, because it doesn’t require too much effort or time to prepare. Here’s how to make Asian sesame scallion noodles.

Scroll Down For A Printable Recipe Card At The Bottom Of The Page

Cook The Noodles

The original recipe calls for using Udon noodles (or linguini). I use linguini pasta, because I usually have that in our pantry at any given time.

Cook the noodles in salted, boiling water according to the instructions on the package. When the noodles are done cooking, drain the noodles, but do not rinse them.

While the noodles cook, prepare the Asian sauce, so when the noodles are done, all you need to do is combine them and serve!

Linguini is cooked in boiling, salted water in a large pot.

Make The Asian Sauce

While the noodles are cooking, prepare the Asian sauce. Whisk soy sauce, dark brown sugar, rice vinegar, 1T. vegetable oil, and sesame oil in a large bowl.

Once these ingredients are well combined, set the bowl aside while you finish the second part of the sauce.

Soy sauce, rice vinegar, veg. oil, brown sugar and sesame oil are whisked together.

Toasting The Sesame Seeds And Chile Flakes

Heat 2 T. vegetable oil in a large non-stick skillet on medium heat. Add white sesame seeds, and red pepper flakes. Stir to combine.

Cook, stirring occasionally until the sesame seeds have begun to turn golden brown in color. This usually takes 3-4 minutes. Once the sesame seeds start browning, turn off the heat.

Red pepper flakes and white sesame seeds in oil in skillet.Sesame seeds, oil and red pepper flakes are stirred while cooking in skillet.

Add Garlic and Scallions

Stir minced garlic and sliced scallions (green onions) into the sesame seed mixture in the skillet until combined.  The skillet will still be hot (even off the heat), so it will slightly cook the scallions (green onions) and the garlic.

Pour this mixture into a large serving bowl. You will add the hot, cooked and drained noodles to this mixture once they’re done cooking.

Minced garlic and green onions in skillet with toasted sesame seeds.

Toss The Noodles In The Asian Sauce

When the noodles are finished cooking, drain them (without rinsing). Immediately add them to the sesame/scallion mixture in the serving bowl.

Use tongs to combine the sauce with the noodles until the noodles are fully coated with the sauce.

Hot noodles are added to Asian sauce, and tossed to combine.Tongs being used to combine Asian sauce and hot linguini pasta in a bowl.

Serve The Asian Sesame Scallion Noodles

This recipe, as written will yield about three servings. Divide the hot Asian sesame scallion noodles into individual bowls (or plates).

Garnish each serving with chopped peanuts (optional, but good!). You can also garnish the top of the noodles with additional sliced green onions for more color, if desired ( I didn’t this time).

A large white bowl, with a serving of Asian sesame scallion noodles in it.

See how easy it is to make this meal? Serve the Asian sesame scallion noodles immediately while hot, and enjoy the amazing flavors!

I am confident you’re going to enjoy this dish! Serve it with bread and/or a yummy green salad on the side, and you will have a fantastic tasting, meatless meal.

A white bowl of Asian sesame scallion noodles, with chopped peanuts on top.

I hope you have the chance to try these delicious Asian sesame scallion noodles soon, and hope you enjoy them as much as we do!

Thanks for stopping by. Please come back again soon for more family-friendly recipes. Take care, may God bless you, and have a great day!

Looking For More ASIAN Recipes?

You can find ALL of my recipes in the Recipe Index, which is located at the top of the page. I have a great variety of Asian dishes to choose from, including:

Want More Recipes? Get My FREE Newsletter!

I publish a newsletter 2 times per month (1st and 15th) with lots of recipes, tips, etc..
Would you like to join our growing list of subscribers?

There is a Newsletter subscription box on the top right (or bottom) of each blog post, depending on the device you use.
You can submit your e-mail address there, to be added to my mailing list.

Find Me On Social Media:

Facebook page: The Grateful Girl Cooks!
Pinterest:
The Grateful Girl Cooks!
Instagram:
jbatthegratefulgirlcooks

Author's signature

Recipe adapted from: “The Milk Street Cookbook”, by Christopher Kendall, page 199, published by Little Brown And Company, 2020

↓↓ PRINTABLE RECIPE BELOW ↓↓

0 from 0 votes
Asian Sesame Scallion Noodles
Prep Time
10 mins
Cook Time
15 mins
Total Time
25 mins
 

Asian Sesame Scallion Noodles is a meatless dish, with linguini, green onions and toasted sesame seeds, coated in a tasty Asian-style sauce.

Category: Main Dish
Cuisine: Asian, Vegetarian
Keyword: Asian sesame scallion noodles
Servings: 3
Calories Per Serving: 494 kcal
Author: JB @ The Grateful Girl Cooks!
Ingredients
  • ½ pound linguini pasta
  • Tablespoons soy sauce (low sodium, if available)
  • 2 Tablespoons packed dark brown sugar
  • 2 Tablespoons unseasoned rice vinegar
  • 3 Tablespoons vegetable oil (or other neutral oil) *DIVIDED USE*
  • ¾ Tablespoon toasted sesame oil
  • 1 Tablespoon white sesame seeds
  • 1 teaspoon red chili flakes
  • 4 stems scallions (green onions) white and green parts, sliced
  • 1 teaspoon minced garlic
Optional Garnish: Additional sliced scallions and/or chopped dry roasted peanuts (about 2 T. total)
    Instructions
    1. Cook noodles in salted, boiling water according to instructions on package. When done cooking, drain noodles (do not rinse).

    2. While noodles are cooking, prepare Asian sauce. Whisk soy sauce, dark brown sugar, rice vinegar, 1T. vegetable oil, and sesame oil in a large bowl. Once well combined, set bowl aside.

    3. Heat 2 T. vegetable oil in a large non-stick skillet on medium heat. Add sesame seeds and red pepper flakes. Stir to combine. Cook, stirring occasionally until sesame seeds begin to turn golden brown. This usually takes 3-4 minutes. Once sesame seeds start browning, turn off the heat.

    4. Stir garlic and scallions into sesame seed mixture in skillet for about a minute until combined. Skillet will still be hot (even off the heat), so it will slightly cook scallions and garlic. Pour mixture into a large bowl.

    5. When noodles are done cooking, drain them (without rinsing). Immediately add linguini to the sesame/scallion mixture in bowl. Use tongs to combine sauce and linguini until noodles are fully coated in sauce.

    6. To serve, divide hot Asian sesame scallion noodles into individual bowls. Garnish each serving with chopped peanuts (optional, but good!). Add additional sliced green onions for more color, if desired. Serve, and enjoy!

    Nutrition Facts
    Asian Sesame Scallion Noodles
    Amount Per Serving (1 (1/3 of total amount))
    Calories 494 Calories from Fat 180
    % Daily Value*
    Fat 20g31%
    Saturated Fat 3g19%
    Trans Fat 0.1g
    Polyunsaturated Fat 10g
    Monounsaturated Fat 5g
    Sodium 691mg30%
    Potassium 278mg8%
    Carbohydrates 67g22%
    Fiber 3g13%
    Sugar 10g11%
    Protein 12g24%
    Vitamin A 211IU4%
    Vitamin C 1mg1%
    Calcium 60mg6%
    Iron 2mg11%
    * Percent Daily Values are based on a 2000 calorie diet.

    Here’s one more to pin on your Pinterest boards!Asian Sesame Scallion Noodles is a meatless dish, with linguini, green onions and toasted sesame seeds, coated in a tasty Asian-style sauce.

    Roasted Curry Sweet Potatoes

    Roasted Curry Sweet Potatoes are a delicious and EASY side dish! Full of flavor from a simple spice mix, this recipe will yield 3-4 servings.
    Roasted Curry Sweet Potatoes are a delicious and EASY side dish! Full of flavor from a simple spice mix, this recipe will yield 3-4 servings.

    Do you like eating sweet potatoes? As an adult, I have come to LOVE them, but really did not like them as a kid, and avoided them like the plague.

    My grandmother, who in her later life lived with us for several months each year, ate a sweet potato every single day. EVERY. SINGLE. DAY.

    Frankly, as a kid I didn’t understand her unrequited love of this orange colored vegetable. I mean… it’s just a potato, right?

    Now, as a sensible older woman with a much broader flavor palette, I love them too! It must be hereditary, right? Ha Ha.

    Behold The Humble Sweet Potato

    There’s a lot to love about this filling, nutritious veggie I didn’t appreciate back then. Sweet potatoes are sweet “root” vegetables that are packed with Vitamin C, Vitamin A, and other minerals. They’re also a wonderful source of fiber, which is good for the ol’ gut.

    They have some antioxidant properties, which is another reason they are “good for you”. The orange color of sweet potatoes is produced by beta carotene, which we know is good for our overall eye health.

    Besides all of this… SWEET POTATOES ARE DELICIOUS! Here’s how to make this simple recipe for roasted curry sweet potatoes. They have great taste and color, and are a cinch to make. 

    Scroll Down For A Printable Recipe Card At The Bottom Of The Page

    Prepare The Sweet Potatoes For Roasting

    You will need about half a pound of sweet potatoes for this recipe. This typically is the equivalent of 2 medium to large sized sweet potatoes.

    Use a vegetable peeler or a sharp knife to remove the peel from the sweet potatoes. Discard the peels.

    The outer peel is removed from a medium to large sweet potato before slicing.

    Cut the sweet potatoes in half lengthwise first, then slice each half cross-wise into 1″ slices that resemble half circles (on left side of first photo below).

    Now cut each of those slices in half (on right side of first photo below). Continue slicing until both sweet potatoes are cut, and each piece is wedge shaped (bottom photo below). Set aside.

    Two peeled sweet potatoes are cut in half, then sliced into pieces.Sweet potatoes are sliced into quarter-sized wedges before baking.

    Make The Spice Mix

    Place salt, curry powder, ground black pepper and onion powder in a small bowl. Stir to combine these spices.

    See? Just like that you have an easy seasoning mix you will use to season the sweet potatoes!

    Curry powder, salt, onion powder and black pepper are combined in a bowl.

    Season The Sweet Potato Wedges

    Spray a large baking sheet with non-stick spray, then add the sweet potato wedges onto the pan in a single layer.

    Lightly spray the sweet potatoes with additional baking spray (helps the spice mix to adhere). Sprinkle the sweet potatoes with the spice mix, dividing it evenly over the potatoes.

    Sweet potato slices on pan are sprinkled with spice mix before baking.

    Ready For The Oven

    Once the sweet potatoes have been seasoned, they are ready for the oven. Place the pan on the oven’s middle rack.

    Bake at 425°F for 20-25 minutes. The time may vary a bit as oven temps can fluctuate. I usually check the roasted curry sweet potatoes for doneness after 20 minutes.

    When fully done, the outside should be slightly browned, and the inside should be soft. A butter knife can be easily inserted into the middle of a piece of sweet potato without resistance.

    A pan of roasted curry sweet potatoes, hot out of the oven.

    Serve The Roasted Curry Sweet Potatoes

    Transfer the hot, roasted curry sweet potatoes from the pan to a wire rack with a spatula. Let them cool for about one minute before serving.

    These delicious sweet potatoes can be served alongside a favorite meat, and will be a delicious side dish. The recipe will yield enough for 3 moderate portions or 4 small portions.

    The roasted sweet potatoes are cooled slightly on a wire rack before serving.

    The roasted curry sweet potatoes also taste fantastic in Kale and Sweet Potato Salad, because they add such great flavor to the dish.

    Roasted curry sweet potatoes are added to a kale green salad.

    I hope you enjoy this delicious side dish as much as we do. The smell in the kitchen while the roasted curry sweet potatoes cook is also really terrific!

    Thank you for stopping by today, and I invite you to come back soon for more family-friendly recipes. Take care, may God bless you, and have a GREAT day!

    Looking For More SWEET POTATO Recipes?

    You can find ALL of my recipes in the Recipe Index, which is located at the top of the page. I have a variety of delicious sweet potato recipes to choose from, including:

    Want More Recipes? Get My FREE Newsletter!

    I publish a newsletter 2 times per month (1st and 15th) with lots of recipes, tips, etc..
    Would you like to join our growing list of subscribers?

    There is a Newsletter subscription box on the top right (or bottom) of each blog post, depending on the device you use.
    You can submit your e-mail address there, to be added to my mailing list.

    Find Me On Social Media:

    Facebook page: The Grateful Girl Cooks!
    Pinterest:
    The Grateful Girl Cooks!
    Instagram:
    jbatthegratefulgirlcooks

    Author's signature

    Recipe Adapted From: “Year Round Fresh”, page 184, published in 2018 by WW International, Inc.

    ↓↓ PRINTABLE RECIPE BELOW ↓↓

    0 from 0 votes
    Roasted Curry Sweet Potatoes
    Prep Time
    10 mins
    Cook Time
    20 mins
    Total Time
    30 mins
     

    Roasted Curry Sweet Potatoes are a delicious and EASY side dish! Full of flavor from a simple spice mix, this recipe will yield 3-4 servings.

    Category: Side Dish, Vegetable Dish
    Cuisine: All Cuisines
    Keyword: roasted curry sweet potatoes
    Servings: 4 small servings
    Calories Per Serving: 50 kcal
    Author: JB @ The Grateful Girl Cooks!
    Ingredients
    • ½ pound sweet potatoes (approx. 2 medium-large)
    • ½ teaspoon kosher salt
    • ¼ teaspoon curry powder
    • ¼ teaspoon ground black pepper
    • ¼ teaspoon onion powder
    • non-stick baking spray (for pan and sweet potatoes)
    Instructions
    1. Preheat oven to 425℉ (218.3℃) Spray a baking sheet with non-stick baking spray.

    2. Use vegetable peeler or sharp knife to peel sweet potatoes. Discard peels. Cut sweet potatoes in half, lengthwise. Slice each half cross-wise into 1" thick half- circle slices. Cut each of those slices in half (wedge-shaped) Set aside.

    3. Place salt, curry powder, black pepper, onion powder in a bowl; stir to combine.

    4. Place sweet potato wedges on prepared pan in a single layer. Lightly spritz potatoes with baking spray, then sprinkle with spice mix, distributing it evenly over potatoes.

    5. Bake on middle rack of oven at 425°F for 20-25 minutes. When fully done, outside of potatoes will be lightly browned; inside should be soft. A butter knife can be easily inserted into sweet potatoes without resistance. Transfer sweet potatoes to wire rack; cool for 1 minute, then serve. Enjoy!
    Nutrition Facts
    Roasted Curry Sweet Potatoes
    Amount Per Serving (1 (1/4 of total))
    Calories 50 Calories from Fat 1
    % Daily Value*
    Fat 0.1g0%
    Saturated Fat 0.02g0%
    Polyunsaturated Fat 0.01g
    Monounsaturated Fat 0.01g
    Sodium 322mg14%
    Potassium 196mg6%
    Carbohydrates 12g4%
    Fiber 2g8%
    Sugar 2g2%
    Protein 1g2%
    Vitamin A 8046IU161%
    Vitamin C 1mg1%
    Calcium 19mg2%
    Iron 0.4mg2%
    * Percent Daily Values are based on a 2000 calorie diet.

    Here’s one more to pin on your Pinterest boards!Roasted Curry Sweet Potatoes are a delicious and EASY side dish! Full of flavor from a simple spice mix, this recipe will yield 3-4 servings.

    Garlic Lime Baked Salmon

    Garlic Lime Baked Salmon is simple to make, and tastes amazing! Only 5 minutes prep is needed before baking this flavorful, low-calorie dish.
    Garlic Lime Baked Salmon is simple to make, and tastes amazing! Only 5 minutes prep is needed before baking this flavorful, low-calorie dish.

    If you’re looking for a delicious, low-calorie dinner that only takes a few minutes to pull together, I think you’ll love this recipe for garlic lime baked salmon!

    This meal is perfect for those days when you’re too tired from work or school to expend a lot of energy trying to come up with dinner! The prep time is minimal (about 5 minutes), and then into the oven goes the salmon. Whoo Hoo!

    A big resounding plus is how delicious this simple meal really is… we could eat it over and over, because it tastes so good.

    Pair the garlic lime baked salmon with a favorite side dish, and you’ve got a great meal in under 30 minutes. Here’s how to make it.

    Scroll Down For A Printable Recipe Card At The Bottom Of The Page

    Prepare And Season The Salmon

    Preheat your oven to 400°F. (204° C.) before beginning. Prep takes only a few minutes, so to save time, you will that oven preheated and ready to go!

    For this recipe, you will need two skinless salmon fillets, approximately 4 ounces each. Pat the salmon dry using paper towels to blot the moisture.

    Place a layer of parchment paper onto a baking sheet, then place the salmon fillets on top. Lightly sprinkle Cajun seasoning mix on the top surface only, then set the pan aside.

    Salmon fillets are patted dry with paper towels to absorb moisture.The salmon fillets are sprinkled lightly on top with Creole seasoning mix.

    Make The Garlic Lime Baking Sauce

    For the garlic lime sauce that will bake on top of the salmon, you will need fresh lime juice (and the zest from the peel). You will also use minced garlic, extra virgin olive oil and fresh chopped parsley.

    Garlic, olive oil, parsley, lime juice and zest are used as topping for fish.

    Mix the lime juice, lime zest, minced garlic, olive oil and chopped parsley together in a medium sized bowl. Stir until these ingredients are fully combined.

    NOTE: Lime zest is the outer green peel of the lime, grated very finely using a microplane or the very tiny holes in a box grater. The lime peel contains oils which are released, and provide amazing flavor. Be careful to only grate the GREEN peel, NOT the white inner part. The white part of the inner peel is bitter, and you do not want that!

    Using a microplane to extract lime zest from outer peel of the lime.

    Parsley, EVOO, lime juice, garlic and lime zest in a medium bowl.After being combined, this is the topping for garlic lime baked salmon.

    Bake The Salmon

    Spoon the sauce evenly over the two salmon fillets, spreading the ingredients evenly, and dividing the mixture between the two pieces of fish. Use all of the sauce!

    Bake in a preheated 400°F (204°C) oven for 18-20 minutes, or until the salmon is cooked through and flakes easily.

    Since oven temperatures can fluctuate with different models, I suggest checking on the fish at about the 17 minute mark, to check for doneness. When done, remove the garlic lime baked salmon from the oven.

    Garlic lime sauce is divided evenly on top of salmon fillets before baking.Garlic lime baked salmon is cooked and ready to transfer to plates.

    Serve The Garlic Lime Baked Salmon

    Serve the garlic lime baked salmon while hot. Transfer the fillets to individual plates, and garnish with more chopped parsley and/or a couple of lime wedges (to squeeze juice over the fish).

    These are optional garnishes, of course, but really add to the color, flavor, and presentation of the finished dish. I don’t think you will regret adding these ingredients, ESPECIALLY the lime wedges.

    Serve the fish with a couple of your favorite side dishes, and enjoy this delicious garlic lime baked salmon! 

    Garlic lime baked salmon served with lime wedges, rice and broccoli on the side.

    I hope you have the opportunity to try this yummy recipe, and hope you will enjoy it as much as we do. It is such an easy main dish to make, and it really does taste great!

    Thanks for stopping by, and please come back again soon. Take care, may God bless you, and have a wonderful day!

    Looking For More SALMON Recipes?

    You can find ALL of my recipes in the Recipe Index, which is located at the top of the page. I have lots of delicious salmon recipes to enjoy, including:

    Want More Recipes? Get My FREE Newsletter!

    I publish a newsletter 2 times per month (1st and 15th) with lots of recipes, tips, etc..
    Would you like to join our growing list of subscribers?

    There is a Newsletter subscription box on the top right (or bottom) of each blog post, depending on the device you use.
    You can submit your e-mail address there, to be added to my mailing list.

    Find Me On Social Media:

    Facebook page: The Grateful Girl Cooks!
    Pinterest:
    The Grateful Girl Cooks!
    Instagram:
    jbatthegratefulgirlcooks

    Author's signature

    Recipe adapted from: New Life Promise-Live Smart Online Edition, Volume 10, page 32, by Isabel D. Price.

    ↓↓ PRINTABLE RECIPE BELOW ↓↓

    0 from 0 votes
    Garlic Lime Baked Salmon
    Prep Time
    5 mins
    Cook Time
    18 mins
    Total Time
    23 mins
     

    Garlic Lime Baked Salmon is simple to make, and tastes amazing! Only 5 minutes prep is needed before baking this flavorful, low-calorie dish.

    Category: Entree
    Cuisine: American
    Keyword: garlic lime baked salmon
    Servings: 2 fillets
    Calories Per Serving: 203 kcal
    Author: JB @ The Grateful Girl Cooks!
    Ingredients
    • ½ pound skinless salmon fillets (2 fillets) approx. 4 oz. per fillet
    • ½ teaspoon creole seasoning to sprinkle lightly on fish
    • 2 teaspoons fresh lime juice
    • 1 teaspoon lime zest
    • cloves garlic minced
    • 2 teaspoons extra virgin olive oil
    • 2 teaspoons chopped fresh parsley
    Optional: additional chopped parsley and/or lime wedges for garnish
      Instructions
      1. Preheat oven to 400°F. (204° C.) before beginning. Prep time is minimal, so preheating oven will save time. Lay piece of parchment paper on baking sheet.

      2. Pat salmon fillets dry using paper towels, then place fillets on prepared baking sheet. Lightly sprinkle top of fish with Creole seasoning; set pan aside.

      3. Mix the lime juice, lime zest, minced garlic, olive oil and chopped parsley together in a medium sized bowl. Stir until fully combined.

      4. Spoon sauce evenly over salmon fillets, spreading evenly, and dividing mixture between both pieces. Use all of the sauce.

      5. Bake at 400°F (204°C) oven for 18-20 minutes, or until salmon is cooked through and flakes easily. When done, remove pan from the oven.

      6. Transfer salmon fillets to individual plates. OPTIONAL: Garnish with additional chopped parsley and/or a couple lime wedges (to squeeze juice on salmon). Serve immediately, and enjoy!
      Nutrition Facts
      Garlic Lime Baked Salmon
      Amount Per Serving (1 fillet (4 oz.))
      Calories 203 Calories from Fat 99
      % Daily Value*
      Fat 11g17%
      Saturated Fat 2g13%
      Polyunsaturated Fat 3g
      Monounsaturated Fat 5g
      Cholesterol 62mg21%
      Sodium 51mg2%
      Potassium 582mg17%
      Carbohydrates 2g1%
      Fiber 0.2g1%
      Sugar 0.2g0%
      Protein 23g46%
      Vitamin A 265IU5%
      Vitamin C 3mg4%
      Calcium 20mg2%
      Iron 1mg6%
      * Percent Daily Values are based on a 2000 calorie diet.

      Here’s one more to pin on your Pinterest boards!Garlic Lime Baked Salmon is simple to make, and tastes amazing! Only 5 minutes prep is needed before baking this flavorful, low-calorie dish.

      Chocolate Covered Strawberries

      Chocolate Covered Strawberries are EASY to make, decadent treats which can be enjoyed any time! They are made using only 3 ingredients.Chocolate Covered Strawberries are EASY to make, decadent treats which can be enjoyed any time! They are made using only 3 ingredients.

      I’ve been making chocolate covered strawberries for many, many years now (over 20), and never get tired of them! What tastes better than a huge, juicy, fresh strawberry coated in chocolate?

      Whether you want to serve chocolate covered strawberries at a fancy brunch, or just have them around for a nice treat, they are DELICIOUS!

      True Story

      When we were cruising to Alaska a few years ago, we ran into the Director of Restaurant Operations (whom I had met previously on a food galley tour and food demo on another cruise).

      After we visited with him, he secretly had a plate of chocolate covered strawberries delivered to us as a surprise. They were waiting for us when we returned to our room. Wasn’t that nice?

      Here’s a photo I took of a few of the strawberries we received, after we ate a few and shared the rest with our family.

      Note on a plate of chocolate covered strawberries sent to our room on a cruise.

      They were delicious and were such a wonderful, unexpected treat! This was a very kind and generous gift from this very busy professional, to us.

      Guess what? To be honest, I feel my homemade chocolate covered strawberries are just as delicious as those that were made by the team of culinary pros!

      So… I want to share with you how I make chocolate covered strawberries. They are quite simple to make, but look fabulous when served at a party, holiday, or brunch. They are usually one of the first treats to disappear, too! Here’s how to make them.

      Scroll Down For A Printable Recipe Card At The Bottom Of The Page

      Large, Fresh Strawberries!

      For the best chocolate covered strawberries, you will want to have large, fresh strawberries. The bigger the better, as far as I am concerned.

      Gently rinse the strawberries in a colander, but be sure to leave the green leaves/stem on the strawberries. This recipe is written to fully coat one dozen large strawberries with chocolate.

      Large fresh strawberries are needed to make chocolate covered strawberries.Strawberries in a colander are gently rinsed with water.

      DRY, DRY, DRY Those Strawberries!

      Now… here’s the most important part. DRY the strawberries really, really well. I gently place them on paper towels after rinsing and let them air dry for a few minutes.

      Then I hand dry each strawberry (GENTLY) between layers of paper towels. Water and chocolate are NOT friends, so take the time to do this right!

      It is vitally important the strawberries be absolutely dry before decorating them, so the chocolate will adhere, and won’t “seize up” from the water droplets. 

      The strawberries air dry on layers of paper towels.Each strawberry is gently patted completely dry using paper towels.

      Prepare The Chocolate For Dipping

      I use the microwave to melt the chocolate for the strawberries (easy!). A little bit of vegetable shortening is also added, which smooths out the chocolate, and allows for a nice firm, shiny finish on the strawberries.

      Place chocolate chips (we prefer semi-sweet) and vegetable shortening in a microwave-safe bowl. Place the bowl in the microwave and heat on High power for 45 seconds.

      Remove the bowl and stir the mixture as much as possible. Put it back in the microwave for 30 more seconds, remove and stir again.

      Continue this process in 30 second increments until the chocolate and shortening are melted, smooth and lump-free. Now you’re ready to dip the strawberries.

      A four photo collage showing various stages of melting the chocolate.

      Dipping The Strawberries

      Cover a baking sheet with wax paper. Take the DRY strawberries, one at a time, and dip them in the hot, melted chocolate, rotating them to cover. Gently hold the strawberry by the green leaves to do this.

      If necessary, use a spoon to add chocolate to the strawberry, covering all sides of the berry. Let the excess chocolate drip back into the bowl.

      A completely dry strawberry is dipped into the melted chocolate.Entire strawberry (except for leaves) is coated with melted chocolate.

      Carefully place the chocolate covered strawberry onto the wax paper-lined baking sheet. Repeat process with the remaining strawberries.

      Do not move the strawberries once you place them on the wax paper, and make sure to leave space between each one.

      If the chocolate firms up slightly as it cools, place it back in the microwave for about 20 seconds, then stir it again.

      Chocolate covered strawberries resting on wax paper-lined baking sheet.

      Decorate The Chocolate Covered Strawberries

      Once the chocolate has firmed up, they can be eaten, as is. HOWEVER I enthusiastically recommend decorating them to look a bit more fancy, and chilling them before serving!

      Make sure the chocolate is smooth again before using it to decorate. Use a fork to decoratively drizzle melted chocolate over the top of the strawberries.

      Do not move the strawberries while decorating them. Instead, drizzle the chocolate over them right where they are on the wax paper.

      You can use melted white chocolate (if desired, for contrast), or use the remaining chocolate in the bowl.

      TIP: If you will be using colorful sprinkles, drizzle a strawberry (one at a time) with chocolate. IMMEDIATELY add the sprinkles while the chocolate is still “wet”, so they will adhere.

      Four photo collage showing ways to decorate chocolate covered strawberries.

      Chill, Then ENJOY Chocolate Covered Strawberries

      Place the decorated chocolate covered strawberries (still on baking sheet) in a refrigerator to chill for an hour or so.

      Once chilled, they should be absolutely perfect for serving! The chocolate covering should be firm and ready to go.

      Carefully transfer the chocolate covered strawberries to a serving platter, serve, and enjoy these delicious treats.

      White plate with chocolate covered strawberries topped with colored sprinkles.

      Here you can see one of the chocolate covered strawberries sliced in half. Notice that the chocolate coating remains firm, even after cutting! That’s what you want!

      If you have any leftovers after serving (not sure you will, though), you can safely refrigerate them for 1-2 more days.

      A chocolate covered strawberry sliced in half to reveal the inside.

      That’s it! See how easy it is to make these wonderful desserts? I hope you have the opportunity to make these for a special occasion, or as a unique dessert for family and/or friends!

      Thank you for stopping by, and I invite you to come back soon for more family-friendly recipes. Take care, may God bless you, and have a GREAT day!

      Looking For More CHOCOLATE DESSERT Recipes?

      You can find ALL of my recipes in the Recipe Index, which is located at the top of the page. I have some really delicious desserts you may enjoy that feature chocolate, including:

      Want More Recipes? Get My FREE Newsletter!

      I publish a newsletter 2 times per month (1st and 15th) with lots of recipes, tips, etc..
      Would you like to join our growing list of subscribers?

      There is a Newsletter subscription box on the top right (or bottom) of each blog post, depending on the device you use.
      You can submit your e-mail address there, to be added to my mailing list.

      Find Me On Social Media:

      Facebook page: The Grateful Girl Cooks!
      Pinterest:
      The Grateful Girl Cooks!
      Instagram:
      jbatthegratefulgirlcooks

      Author's signature

      ↓↓ PRINTABLE RECIPE BELOW ↓↓

      0 from 0 votes
      Chocolate Covered Strawberries
      Prep Time
      30 mins
      Cook Time
      0 mins
      Refrigeration Time (inactive prep)
      1 hr
      Total Time
      1 hr 30 mins
       

      Chocolate Covered Strawberries are EASY to make, decadent treats which can be enjoyed any time! They are made using only 3 ingredients.

      Category: Dessert
      Cuisine: All Cuisines
      Keyword: chocolate covered strawberries
      Servings: 12 large strawberries
      Calories Per Serving: 114 kcal
      Author: JB @ The Grateful Girl Cooks!
      Ingredients
      • 12 large strawberries (fresh)
      • 1 cup semi-sweet chocolate chips
      • 2 Tablespoons vegetable shortening
      • colored sprinkles (if using)
      Instructions
      1. Cover a baking sheet with wax paper.

      2. Gently rinse strawberries in a colander. Leave green leaves/stem attached. DRY strawberries really well. Place on paper towels after rinsing; let air dry a few minutes. Gently dry each strawberry between paper towels. It is vitally important the strawberries be absolutely dry so chocolate adheres, and won't "seize up".

      3. Place chocolate chips and vegetable shortening in microwave-safe bowl. Place bowl in microwave; heat on High for 45 seconds. Remove bowl and stir mixture as much as possible. Put bowl back in microwave for 30 more seconds on High, remove and stir again. Continue in 30 second increments until chocolate and shortening are melted, smooth and lump-free.

      4. Take DRY strawberries, one at a time, holding them carefully by the green leaves. Dip them in melted chocolate, rotating to cover all sides. If necessary, use a spoon to add chocolate to the strawberry to cover all sides. Let excess chocolate drip back into bowl.

      5. Carefully place chocolate covered strawberry onto wax paper-lined baking sheet. Repeat process with remaining strawberries. Don't move strawberries once on the wax paper; leave space between each one. If melted chocolate in bowl firms up as it cools, place back in the microwave for about 20 seconds; stir it again.

      6. Let chocolate on the strawberries firm up before decorating. Make sure remaining chocolate in bowl is warm and smooth again before using it to decorate. Use a fork to decoratively drizzle melted chocolate over the top of the strawberries. Do not move strawberries while decorating. Drizzle chocolate over them right where they are on the wax paper. TIP: If using colorful sprinkles, drizzle a strawberry (one at a time) with chocolate. IMMEDIATELY add sprinkles while chocolate is still "wet", so they adhere.

      7. Place baking sheet with strawberries in the refrigerator. Chill for at least 1 hour before transferring to a serving platter. Serve, and enjoy! Any leftovers can be stored in refrigerator for 1-2 days.
      Nutrition Facts
      Chocolate Covered Strawberries
      Amount Per Serving (1 chocolate covered strawberry)
      Calories 114 Calories from Fat 72
      % Daily Value*
      Fat 8g12%
      Saturated Fat 4g25%
      Trans Fat 0.3g
      Polyunsaturated Fat 1g
      Monounsaturated Fat 3g
      Cholesterol 1mg0%
      Sodium 2mg0%
      Potassium 126mg4%
      Carbohydrates 10g3%
      Fiber 2g8%
      Sugar 7g8%
      Protein 1g2%
      Vitamin A 11IU0%
      Vitamin C 16mg19%
      Calcium 14mg1%
      Iron 1mg6%
      * Percent Daily Values are based on a 2000 calorie diet.

      Here’s one more to pin on your Pinterest boards!Chocolate Covered Strawberries are EASY to make, decadent treats which can be enjoyed any time! They are made using only 3 ingredients.

      Thousand Island Salad Dressing

      Homemade Thousand Island Salad Dressing is a cinch to make in only 5 minutes! Use it on your favorite green salads, hamburgers or patty melts!
      Homemade Thousand Island Salad Dressing is a cinch to make in only 5 minutes! Use it on your favorite green salads, hamburgers or patty melts!

      Today I’m going to share with you how simple it is to make homemade salad dressing in a few minutes, in the comfort of your own home. Simple and delicious is my favorite kind of recipe!

      I have quite a few homemade salad dressing recipes here on my blog, and always enjoy learning how to make them from scratch, at home.

      Thousand Island Salad Dressing is a cinch to make, and uses fairly “common” kitchen ingredients. This famous salad dressing is named after Thousand Islands, New York (apparently), where it is believed to have been first created.

      If you’re interested in learning more about the origins of Thousand Island Salad Dressing, you can do so HERE. Let me show you how to make this delicious salad dressing, lickety-split!

      Scroll Down For A Printable Recipe Card At The Bottom Of The Page

      Making Thousand Island Salad Dressing Is EASY!

      The ingredients you need to make thousand island salad dressing are mayonnaise, sour cream, ketchup, sweet pickle relish, red onion, white vinegar, sugar, garlic, salt and pepper.

      Measure, then place all ingredients except the salt and pepper into a medium-sized bowl, and stir until the salad dressing has been fully combined.

      Season with salt and pepper to suit your personal taste (it doesn’t take too much- start with 1/8 teaspoon, then add more, as desired).

      And just like that, you’ve made homemade thousand island salad dressing!  See how easy that was? You’ll probably also notice that this salad dressing is fairly THICK.

      Ingredients for thousand island salad dressing are measured into a bowl.

      Some people even add a hard-boiled egg to their dressing. I don’t care for it that way, but feel free to add a finely crumbled hard-boiled egg to the salad dressing if it makes you happy!

      You may also notice that the ingredients in thousand island salad dressing are similar to those in Russian Salad Dressing. That’s true, but did you know Russian Dressing also has horseradish in it? 

      Thousand Island Salad Dressing is mixed together in a silver, medium sized bowl.

      Check The Texture To Suit Your Preference

      Check out the texture of the thousand island salad dressing. You may like it very thick, but if you’re like me, you prefer it a bit thinner in texture.

      If desired, simply add a little bit of milk (in very small increments), and stir until the salad dressing reaches your desired consistency.

      A spoonful of thousand island salad dressing shows how thick it is.

      I typically add about 1-2 Tablespoons milk to mine to thin it slightly when I make it. This texture is completely YOUR CHOICE, of course.

      A bit of milk has been added, to thin out the salad dressing a bit.

      Storing The Salad Dressing

      Cover the bowl with plastic wrap and refrigerate the Thousand Island Salad Dressing at least 2-3 hours before serving, for best flavor.

      You can also transfer the salad dressing to an airtight container before refrigerating, if you prefer. I usually store mine in a canning jar.

      Thousand Island Salad Dressing can be stored safely in an airtight container in the refrigerator for up to 6-7 days. The recipe (as written) will yield about 1 cup of salad dressing, so it is fairly easy to use it up during that week.

      A glass canning jar is filled with thousand island salad dressing, then refrigerated.

      Serve The Thousand Island Salad Dressing

      After the thousand island salad dressing has been fully chilled, use it to top one of your favorite mixed green salads for added flavor!
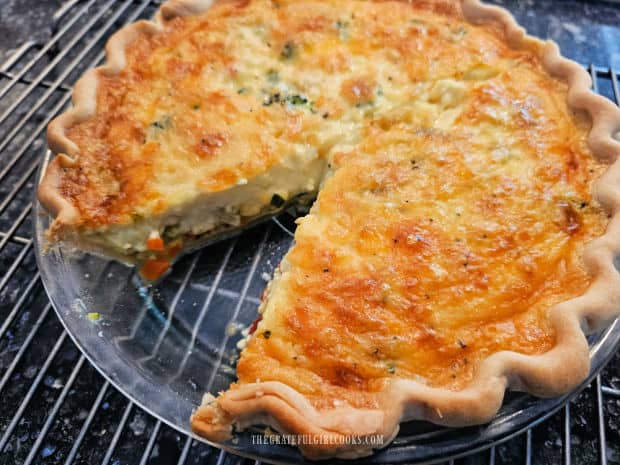
      The salad dressing is also a wonderful condiment which can be used on burgers or patty melts. It is delicious, spread on a grilled patty melt with caramelized onions.

      A white plate holding a green salad with thousand island salad dressing on top.A patty melt can be spread with the thousand island dressing.

      Making thousand island salad dressing is so absolutely EASY, and I hope you have the opportunity to create this recipe. I think you’re going to really like it.

      Thanks for taking the time to visit this website today, and I invite you to come back again soon. Take care, may God bless you, and have a GREAT day!

      Looking For More SALAD DRESSING Recipes?

      You can find ALL of my recipes in the Recipe Index, which is located at the top of the page. I have a wonderful variety of homemade salad dressing recipes you may enjoy, including:

      Want More Recipes? Get My FREE Newsletter!
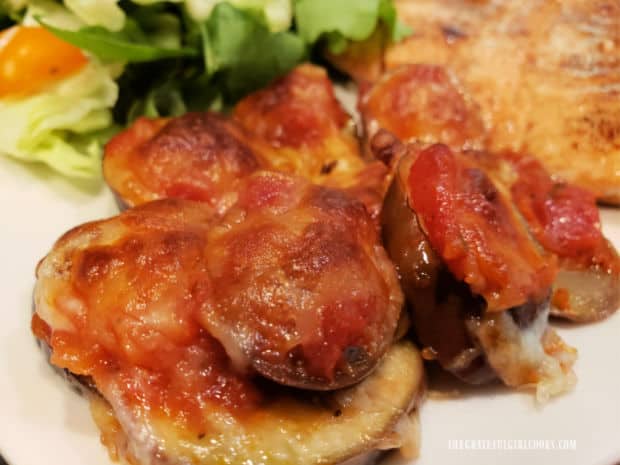
      I publish a newsletter 2 times per month (1st and 15th) with lots of recipes, tips, etc..
      Would you like to join our growing list of subscribers?

      There is a Newsletter subscription box on the top right (or bottom) of each blog post, depending on the device you use.
      You can submit your e-mail address there, to be added to my mailing list.

      Find Me On Social Media:

      Facebook page: The Grateful Girl Cooks!
      Pinterest:
      The Grateful Girl Cooks!
      Instagram:
      jbatthegratefulgirlcooks

      Author's signature

      Original recipe source (and with thanks to Lauren Allen) at: tastesbetterfromscratch.com/thousand-island-dressing

      ↓↓ PRINTABLE RECIPE BELOW ↓↓

      0 from 0 votes
      Thousand Island Salad Dressing
      Prep Time
      5 mins
      Cook Time
      0 mins
      Total Time
      5 mins
       

      Homemade Thousand Island Salad Dressing is a cinch to make in only 5 minutes! Use it on your favorite green salads, hamburgers or patty melts!

      Category: Salad Dressing
      Cuisine: American
      Keyword: thousand island salad dressing
      Servings: 8 (2 T. per serving)
      Calories Per Serving: 122 kcal
      Author: JB @ The Grateful Girl Cooks!
      Ingredients
      • ½ cup mayonnaise
      • ¼ cup sour cream
      • 3 Tablespoons ketchup
      • 2 Tablespoons red onion finely diced
      • 2 Tablespoons sweet pickle relish
      • 1 Tablespoon white vinegar
      • teaspoons granulated sugar
      • 1 lg. clove garlic minced
      • *salt & pepper, to taste
      Instructions
      1. Place all ingredients except salt and pepper in a medium bowl; stir until fully combined. Season with salt/pepper to taste (it doesn't take too much- start with ⅛ teaspoon, then add more, as desired). Stir until combined.

      2. Check texture of the salad dressing. It is fairly thick. If you prefer it thinner, add small amount of milk (1-2 T. at a time). Add milk and stir until salad dressing reaches desired consistency.

      3. Cover bowl with plastic wrap; refrigerate salad dressing at least 2-3 hours before serving, for best flavor. Serve, and enjoy on a favorite green salad or burger.

      4. Store salad dressing in an airtight container in refrigerator up to 6-7 days.

      Recipe Notes

      NOTE: If interested in reducing the number of calories for this salad dressing, consider using light mayonnaise and/or light sour cream.

      Nutrition Facts
      Thousand Island Salad Dressing
      Amount Per Serving (1 (2 Tablespoons))
      Calories 122 Calories from Fat 99
      % Daily Value*
      Fat 11g17%
      Saturated Fat 2g13%
      Trans Fat 0.03g
      Polyunsaturated Fat 6g
      Monounsaturated Fat 3g
      Cholesterol 8mg3%
      Sodium 176mg8%
      Potassium 39mg1%
      Carbohydrates 5g2%
      Fiber 0.1g0%
      Sugar 4g4%
      Protein 0.5g1%
      Vitamin A 107IU2%
      Vitamin C 1mg1%
      Calcium 13mg1%
      Iron 0.1mg1%
      * Percent Daily Values are based on a 2000 calorie diet.

      Here’s one more to pin on your Pinterest boards!Homemade Thousand Island Salad Dressing is a cinch to make in only 5 minutes! Use it on your favorite green salads, hamburgers or patty melts!