Chicken, Quinoa and Veggies

Chicken, Quinoa and Veggies is a nutritious, tasty dish with chicken, zucchini, broccoli, bell pepper, garlic, cherry tomatoes and quinoa!

If you’re looking for a way to add more vegetables to your meals, or to eat a bit more “healthy” dishes, may I suggest this recipe for Chicken, Quinoa and Veggies?

This yummy meal is made all in one big skillet, and is really simple to prepare! Plus… did I mention that is is a very “healthy” meal? Oh, I did? Okay!

Chicken, Quinoa and Veggies has it all- flavor, color, protein, texture, and “good for you” veggies like broccoli, zucchini, garlic, tomatoes, and bell peppers! Here’s how to make this delicious meal.

Scroll Down For A Printable Recipe Card At The Bottom Of The Page

By the Way- What IS Quinoa?

Quinoa is used in this recipe, and it is a great source of nutrition!

Quinoa (this is the “short” version) is basically a small seed from a specific plant that has been stripped of it’s outer coating and then can be cooked. This “superfood” originated in South America many, many years ago, and has become widely touted for its nutritional benefits.

Quinoa is gluten-free, high in protein, contains minerals such as iron, magnesium and zinc, and has dietary fiber! It is typically cooked in liquid to become edible and expands in size as it cooks.

You can typically find quinoa with the rice or beans in a grocery store, or in the Health Food section. It has become very popular in the United States, as well as other parts of the world.

First – Cook The Veggies And Chicken

Heat olive oil in a large skillet on Medium heat. Add minced garlic to the hot oil, and stirring often, cook for about 30 seconds (don’t burn the garlic!).

Minced garlic is cooked in olive oil in a large skillet.

Stir in boneless chicken breast (cubed), and chopped bell peppers. Cook, stirring occasionally for 5 minutes, to cook the chicken and bell pepper.

NOTE: I use a variety of colored bell peppers (green, red and yellow), but if you don’t have a variety of colors available, use a green bell pepper for flavoring this dish.

Season the chicken and peppers with salt, black pepper, and onion powder, then stir to combine. NOTE: The chicken may not be fully cooked through at this stage, but will finish cooking as the dish progresses.

Chunks of chicken breast and green, yellow and red bell peppers are added to the skillet.The chicken and bell peppers are lightly seasoned with salt, pepper, and onion powder.

Add Water And Quinoa

Measure the quinoa and water into the skillet, then stir to combine. Bring the liquid to a boil on Medium-High heat, then put a lid on the skillet and reduce the heat to Medium-Low.

Cook for 10-12 minutes, keeping the lid on the skillet. There will probably still be a small amount of liquid in the pan when done.

Quinoa and water are added to the chicken and veggies in the skillet.

Time To Add More Veggies!

Stir the quarter-sliced zucchini and the broccoli pieces into the skillet of chicken and quinoa until combined. Place a lid on the skillet and cook on Medium-Low heat for 13-15 minutes.

When done, the remaining liquid should be fully absorbed into the quinoa, and the zucchini and broccoli should be fork-tender.

Quartered zucchini slices and chopped broccoli are added to the skillet.

The last step is to add the halved cherry tomatoes to the skillet. Give them a gentle stir to incorporate them into the dish, then remove the pan from the heat source, and serve.

NOTE: I used multi-colored cherry tomatoes (more COLOR!), because we grew them in our garden. If you have them, use them, but good ol’ red cherry tomatoes are perfect!

Halved cherry tomatoes are added to te Chicken, Quinoa and Veggies before serving.

Serve The Chicken, Quinoa And Veggies

This recipe (as written) will yield two generous main dish servings. Transfer the chicken, quinoa and veggies to individual serving bowls or plates, and dig in while it is hot!

I’m confident you’re going to be surprised by how filling this meal is! Enjoy those healthy veggies bringing their color, texture and flavor to this dish. YUM!

A white bowl with one serving of the chicken, quinoa and veggies, ready to be enjoyed.Chicken, Quinoa and Veggies, served in a white bowl.

I really hope you enjoy this nutritious, flavorful (and veggie packed) dish! Chicken, Quinoa and Veggies is very filling, bursting with great tasting vegetables, and it is simple to prepare!

Thanks for stopping by, and I invite you to come back again soon for more family-friendly recipes. Take care, may God bless you, and have a GREAT day!

Looking For More CHICKEN Recipes?

You can find ALL of my recipes in the Recipe Index, which is located at the top of the page. I have LOTS of fantastic tasting chicken recipes to choose from, including:

Want More Recipes? Get My FREE Newsletter!

I publish a newsletter 2 times per month (1st and 15th) with lots of recipes, tips, etc..
Would you like to join our growing list of subscribers?

There is a Newsletter subscription box on the top right (or bottom) of each blog post, depending on the device you use.
You can submit your e-mail address there, to be added to my mailing list.

Find Me On Social Media:

Facebook page: The Grateful Girl Cooks!
Pinterest:
The Grateful Girl Cooks!
Instagram:
jbatthegratefulgirlcooks

Author's signature

Recipe Adapted From: The book “Food Meets Faith”, by Isabel D. Price / New Life Promise, page 75, published by Live Smart Solutions, LLC, in 2019

↓↓ PRINTABLE RECIPE BELOW ↓↓

0 from 0 votes
Chicken, Quinoa and Veggies
Prep Time
10 mins
Cook Time
35 mins
Total Time
45 mins
 

Chicken, Quinoa and Veggies is a nutritious, tasty dish with chicken, zucchini, broccoli, bell pepper, garlic, cherry tomatoes and quinoa!

Category: Entree, Main Course
Cuisine: All Cuisines
Keyword: chicken, quinoa and veggies
Servings: 2
Calories Per Serving: 278 kcal
Author: JB @ The Grateful Girl Cooks!
Ingredients
  • 2 teaspoons olive oil
  • 2 cloves garlic minced
  • ½ medium green bell pepper (or color combo) chopped
  • 8 ounces boneless, skinless chicken breast =½ pound, cut in bite-sized pieces
  • ½ teaspoon salt
  • ¼ teaspoon ground black pepper
  • ¼ teaspoon onion powder
  • ¼ cup uncooked quinoa
  • cup water
  • ½ cup fresh, chopped broccoli cut in bite-sized pieces
  • ½ medium zucchini sliced and quartered
  • ½ cup cherry tomatoes sliced in half
Instructions
  1. Heat olive oil in large skillet on Medium heat. Add garlic: cook, stirring often for 30 seconds (don't burn garlic!).

  2. Stir in chicken cubes, and bell peppers. Cook, stirring occasionally, for 5 minutes. Season with salt, pepper, and onion powder; stir to combine. NOTE: Chicken may not be fully cooked, but will finish cooking later.

  3. Add quinoa and water to skillet; stir to combine. Bring liquid to a boil on Medium-High heat. Put a lid on the skillet; reduce heat to Medium-Low. Cook for 10-12 minutes, keeping skillet covered. There might still be small amount of liquid in skillet when done.

  4. Add zucchini and broccoli; stir to combine. Place lid on skillet; cook on Medium-Low 13-15 minutes. When done, remaining liquid should be absorbed into quinoa, and zucchini and broccoli should be fork-tender.

  5. Gently stir in halved cherry tomatoes. Give them a gentle stir to incorporate into the dish. Remove skillet from heat source. Serve hot, and enjoy!

Nutrition Facts
Chicken, Quinoa and Veggies
Amount Per Serving (1 (1/2 of total))
Calories 278 Calories from Fat 81
% Daily Value*
Fat 9g14%
Saturated Fat 1g6%
Trans Fat 0.01g
Polyunsaturated Fat 2g
Monounsaturated Fat 4g
Cholesterol 73mg24%
Sodium 733mg32%
Potassium 890mg25%
Carbohydrates 21g7%
Fiber 4g17%
Sugar 3g3%
Protein 29g58%
Vitamin A 571IU11%
Vitamin C 64mg78%
Calcium 50mg5%
Iron 2mg11%
* Percent Daily Values are based on a 2000 calorie diet.

Here’s one more to pin on your Pinterest boards!

Chicken, Quinoa and Veggies is a nutritious, tasty dish with chicken, zucchini, broccoli, bell pepper, garlic, cherry tomatoes and quinoa!

Mexican Red Lentil Soup

Mexican Red Lentil Soup has all the flavor of a good chili recipe, but it’s a meatless soup you’ll really love, with enough for 7 helpings!
Mexican Red Lentil Soup has all the flavor of a good chili recipe, but it's a meatless soup you'll really love, with enough for 7 helpings!

Mexican Red Lentil Soup is a yummy, meatless main dish that is packed with flavor! If you enjoy chili, I’m confident you will enjoy this recipe, as well. Whether you’re a vegetarian or not, this soup is wonderful, budget friendly, and it’s worth checking out.

Red lentils (or other lentils) are an amazingly inexpensive, but high in protein superfood! Did you know that lentils have been around for thousands of years? Yes, they have!

Lentils contain large amounts of vitamins, minerals, potassium, fiber and polyphenols (think antioxidants!), and are a wonderful source of protein in “meatless” dishes.

If you’re not too familiar with lentils… what they are and to learn more about their history and nutritional value, check out the info on this amazing food source here

Today I want to share this yummy recipe I found online many years ago online. So… here we go!

Scroll Down For A Printable Recipe Card At The Bottom Of The Page

Rinse And Drain, Rinse And Drain!

Lentils need to be rinsed several times before cooking, to clean them. Pour the red lentils into a large saucepan (one that has a lid). Cover the lentils completely with water.

Stir or swirl them around in the water, then cover the pan with the lid, and drain off the water. Be sure to hold the lid on tightly so the lentils can’t “escape” while draining!

Repeat this process 1-2 more times or until the water becomes mostly clear, to ensure the lentils are cleaned and “good to go”.

Red lentils are placed in saucepan, covered with water, then drained.After rinsing several times, the red lentils are ready to be cooked in more water.

Cook The Lentils

Add 4 cups of fresh water back into the pan with the lentils, and cover the pan. Turn the heat to HIGH, and let the water come to a boil

Once the water has begun boiling, turn off the heat, then remove the pan from the heat source. Keeping the lid on, let the lentils rest for 20 minutes, without disturbing.

The red lentils are brought to a boil, then sit covered off the heat, for 20 minutes.

Cook The Veggies While Lentils Are “Resting”

Place a large soup pot on the stovetop, and add olive oil. Begin to heat the oil on medium-low, then add diced onions and minced garlic.

Continue to cook, stirring often, until onions have become tender, then add diced celery, and stir to combine. Cook for a couple minutes until the celery starts to get soft.

Chopped onion and minced garlic are cooked in olive oil in a large pot.Celery is added to the onions and garlic in the pan.

The next ingredients to add to the pan are fire-roasted canned tomatoes, chili powder, turmeric, ground cumin and hot sauce.

NOTE: For the hot sauce I use Tabasco sauce, and use between 6-8 dashes, but if you like it HOT, add 10-15 dashes.

Stir these ingredients until they are fully combined, and then you are ready to finish this soup with lentils and broth.

Fire-roasted tomatoes, spices and hot sauce are added to the pan.The soup pot is now filled with vegetables, spices and tomatoes, all combined.

Drain The Cooked Lentils

Drain the remaining water off of the cooked red lentils, then add the lentils to the soup pan. Pour the vegetable broth into the soup pot, as well.

Give the Mexican red lentil soup a stir to incorporate all the ingredients, then let the soup simmer (uncovered) on medium-low heat for 15 minutes.

After draining off water, the cooked lentils are ready to add to the soup.The red lentils and vegetable broth are added to the soup mixture already in the pot.

Final Step Before Serving

After 15 minutes the soup will be nice and hot. Stir in chopped cilantro leaves, then squeeze in the the juice of one medium-sized lime.

Stir these ingredients into the soup, then take a little taste. Add salt or more hot sauce, if desired, to suit your taste. Now your Mexican Red Lentil Soup is ready to serve!

Chopped cilantro and the juice from a lime are added to the Mexican red lentil soup.When hot, the Mexican red lentil soup is now ready to be served and enjoyed.

Enjoy A Bowl Of Mexican Red Lentil Soup

This soup will yield about 7 servings in total. Ladle each portion (about 1½ cups per serving) into bowls, serve hot… and enjoy!

A red and yellow bowl, filled with one serving of Mexican red lentil soup.

I really hope you have the chance to make this delicious Mexican Red Lentil Soup for those you love. It’s REALLY good, and I’m sure you will enjoy it.

Store any leftover soup in an airtight container in the refrigerator for up to 3-4 days. It can be easily reheated on the stovetop or in a microwave. It freezes fairly well, also. 

Thank you for stopping by today. I invite you to come back again soon for more family-friendly recipes! Take care, may God bless you, and have a GREAT day!

Looking For More SOUP Recipes?

You can find ALL of my recipes in the Recipe Index, which is located at the top of the page. I have LOTS of delicious soup recipes, including:

Want More Recipes? Get My FREE Newsletter!

I publish a newsletter 2 times per month (1st and 15th) with lots of recipes, tips, etc..
Would you like to join our growing list of subscribers?

There is a Newsletter subscription box on the top right (or bottom) of each blog post, depending on the device you use.
You can submit your e-mail address there, to be added to my mailing list.

Find Me On Social Media:

Facebook page: The Grateful Girl Cooks!
Pinterest:
The Grateful Girl Cooks!
Instagram:
jbatthegratefulgirlcooks

Author's signature

Original recipe source, and with thanks to Beth Moncel, at: https://www.budgetbytes.com/2009/12/mexican-lentil-stew/

↓↓ PRINTABLE RECIPE BELOW ↓↓

0 from 0 votes
Mexican Red Lentil Soup
Prep Time
10 mins
Cook Time
40 mins
Total Time
50 mins
 

Mexican Red Lentil Soup has all the flavor of a good chili recipe, but it's a meatless soup you'll really love, with enough for 7 helpings!

Category: Main Dish, Soup
Cuisine: Mexican
Keyword: Mexican red lentil soup
Servings: 7 (1½ cups per serving)
Calories Per Serving: 250 kcal
Author: JB @ The Grateful Girl Cooks!
Ingredients
  • 2 cups dry red lentils
  • 1 Tablespoon olive oil
  • 1 medium yellow onion peeled, diced
  • 4 stalks celery diced
  • 4 cloves garlic minced
  • 29 ounces canned fire-roasted diced tomatoes =two 14.5 ounce cans
  • ½ Tablespoon chili powder
  • 1 teaspoon ground cumin
  • ½ teaspoon ground turmeric
  • 4 cups vegetable broth
  • 6-8 dashes Tabasco sauce or other hot sauce + more if heat desired!
  • 1 medium lime (juice of)
  • ½ cup chopped cilantro stems removed
Instructions
  1. Put lentils in a large pot (one with a lid). Cover completely with water. Stir or swirl them around in water; tightly cover pan with lid; drain water out. Repeat 1-2 more times until water is fairly clear.

  2. Add 4 cups water to pan with lentils; cover pan. Turn heat to HIGH; let water come to a boil. Once boiling, turn off heat. Keeping lid on, let lentils rest 20 minutes, undisturbed.

  3. Place large soup pot on stovetop; add olive oil. Heat oil on medium-low; add diced onions and minced garlic. Cook, stirring often, until onions are tender, then add celery; stir to combine. Cook 2-3 minutes until celery becomes tender.

  4. Add tomatoes, chili powder, turmeric, ground cumin and hot sauce into pot; stir until combined. NOTE: For hot sauce I use Tabasco sauce, and use between 6-8 dashes; if you like it HOT, add 10-15 dashes.

  5. Drain any remaining cooking water off lentils, then add lentils to soup pot. Stir in vegetable broth, until combined. Let soup simmer (uncovered) on medium-low heat for 15 minutes.

  6. Stir in chopped cilantro (discarding stems), and juice of one lime. Taste the soup. Add salt or more hot sauce, if desired.

  7. This soup will yield about 7 servings total. Ladle 1½ cups soup per serving into bowls. Serve hot... and enjoy!

Nutrition Facts
Mexican Red Lentil Soup
Amount Per Serving (1 serving (about 1½ cups))
Calories 250 Calories from Fat 27
% Daily Value*
Fat 3g5%
Saturated Fat 0.4g3%
Polyunsaturated Fat 1g
Monounsaturated Fat 2g
Sodium 753mg33%
Potassium 611mg17%
Carbohydrates 42g14%
Fiber 18g75%
Sugar 6g7%
Protein 15g30%
Vitamin A 1131IU23%
Vitamin C 9mg11%
Calcium 86mg9%
Iron 5mg28%
* Percent Daily Values are based on a 2000 calorie diet.

Here’s one more to pin on your Pinterest boards!Mexican Red Lentil Soup has all the flavor of a good chili recipe, but it's a meatless soup you'll really love, with enough for 7 helpings!

Mocha Cinnamon Brownies

Whip up a pan of Mocha Cinnamon Brownies for a quick dessert! These brownies are fudgy and delicious, with hints of cinnamon and coffee.

Do you like delicious, fudgy brownies? You know… the kind that by eating them seem to cure all the world’s problems? If you do, then I’m sure you’ll enjoy these Mocha Cinnamon brownies!

The recipe originated on a TV show called “Chopped”, and found it in a cookbook I had that was published quite a few years ago. These brownies are really good and I hope you’ll try them!

I slightly tweaked the original recipe to add a bit more coffee and cinnamon, and we loved the result! These are dense, fudgy brownies that are deeply chocolate-flavored, but with a subtle back taste of cinnamon and mocha.

Mocha Cinnamon Brownies are simple to make in a short amount of time, so be warned! Before you know it, you’ll be serving them or stuffing your face with this decadent dessert. Here’s how to make them.

Scroll Down For A Printable Recipe Card At The Bottom Of The Page

Make The Brownie Batter

This recipe is a bit unique to me because the technique used to make the batter is quite different than the way I “normally” do it for my other brownie recipes!

It’s actually quite easy, though. Place butter, sugar, cocoa powder, instant coffee, vanilla extract, cinnamon and salt into a medium-sized saucepan.

Turn the heat to MEDIUM, then cook, stirring often, until the butter melts. As the butter melts and you stir, the ingredients will all become combined.

Butter, sugar, coffee powder, cocoa powder, cinnamon, salt and vanilla are cooked in saucepan.

Let It COOL

Once the mixture has been fully combined, remove the pan from the heat source. Set the pan aside and let the batter cool until it has become WARM, but not hot.

This will usually take about 10 minutes (or a little less if you keep stirring). You want the batter only slightly warm when you add the eggs.

Why? If the batter is too hot, the eggs will “scramble” as they are added, and you absolutely do NOT want that!

Once ingredients are combined, pan of batter is removed from the heat to cool.

Finish The Brownie Batter

Stir or beat in the eggs, ONE AT A TIME. Continue mixing after each addition, until the batter is smooth with a bit of a glossy shine to it.

Eggs are stirred, on at a time, into cooled batter, and stirred to combine.

Add the flour to the batter and stir until it has been combined with the rest of the batter. Now the brownie batter is ready for baking!

Flour is added and then stirred into the batter for the mocha cinnamon brownies.

Ready, Set… Bake!

Pour the brownie batter into the previously buttered baking pan. Place the pan of mocha cinnamon brownies on a middle rack in a preheated oven.

Bake at 325°F. for about 20-25 minutes, or until the brownies are set. Oven temps can vary widely, so keep an eye on them.

To check for doneness, insert a toothpick into the middle of the brownies. If it comes out clean, the brownies are ready.

Batter is spread into a buttered 9" x 9" baking dish then cooked in oven.The mocha cinnamon brownies are baked for 20-25 minutes until set.

Time For Some Mocha Cinnamon Brownies!

Remove the pan of brownies from the oven and transfer the pan to a wire rack. Let the mocha cinnamon brownies cool to room temperature in the baking pan before cutting and serving.

When cooled, cut the brownies into 12 bars, and then serve these delicious treats! Cover any leftovers well with plastic wrap or in an airtight container.

The mocha cinnamon brownies can be stored (covered) on the countertop for up to 2-3 days (if they’re not all gobbled up by then). They’re delicious, dense, and filled with chocolate flavor!

A beige platter with four mocha cinnamon brownies on it, ready to be eaten.A close up of mocha cinnamon brownies, dense and fudgy, and ready to be enjoyed.

I hope you have the opportunity to make these mocha cinnamon brownies for yourself or for those you love. You’re going to like them, I’m sure!

Thanks for stopping by, and I invite you to come back again soon for more family-friendly recipes. Take care, may God bless you, and have a GREAT day!

Looking For More Recipes For BAR COOKIES?

You can find ALL of my recipes in the Recipe Index, which is located at the top of the page. I have some delicious bar cookie recipes for you to enjoy, including:

Want More Recipes? Get My FREE Newsletter!

I publish a newsletter 2 times per month (1st and 15th) with lots of recipes, tips, etc..
Would you like to join our growing list of subscribers?

There is a Newsletter subscription box on the top right (or bottom) of each blog post, depending on the device you use.
You can submit your e-mail address there, to be added to my mailing list.

Find Me On Social Media:

Facebook page: The Grateful Girl Cooks!
Pinterest:
The Grateful Girl Cooks!
Instagram:
jbatthegratefulgirlcooks

Author's signature

Recipe adapted from: “The Chopped Cookbook”, page 229, published by Clarkson Potter in 2014 for Television Food Network, G. P.

↓↓ PRINTABLE RECIPE BELOW ↓↓

0 from 0 votes
Mocha Cinnamon Brownies
Prep Time
10 mins
Cook Time
20 mins
Total Time
30 mins
 

Whip up a pan of Mocha Cinnamon Brownies for a quick dessert! These brownies are fudgy and delicious, with hints of cinnamon and coffee.

Category: Dessert, Snacks
Cuisine: All Cuisines
Keyword: mocha cinnamon brownies
Servings: 12 brownies
Calories Per Serving: 203 kcal
Author: JB @ The Grateful Girl Cooks!
Ingredients
  • 12 Tablespoons butter =1½ sticks + more for greasing pan
  • 1 cup granulated sugar
  • ¾ cup unsweetened cocoa powder
  • teaspoons instant coffee
  • 1 teaspoon vanilla extract
  • ¾ teaspoon ground cinnamon
  • ¼ teaspoon salt
  • 2 large eggs
  • cup all purpose flour
Instructions
  1. Preheat oven to 325℉. Use additional butter (about 1 T.) to butter bottom and sides of 9"x9" square baking pan.

  2. Place butter, sugar, cocoa powder, instant coffee, vanilla, cinnamon and salt into a medium saucepan. Turn heat to MEDIUM. Cook, stirring often, until butter melts and ingredients are combined.

  3. Remove pan from heat source. Set aside. Let batter cool until WARM, but not hot (about 10 minutes). You want batter only slightly warm before you add eggs.

  4. Stir or beat in eggs, one at a time. Continue mixing until batter is smooth with a slight glossy shine. Add flour; stir until combined

  5. Spread batter in buttered pan. Place pan on middle rack in preheated oven. Bake at 325°F. for 20-25 minutes, or until brownies are set. To check for doneness, insert a toothpick into middle of the brownies. If it comes out clean, they're done.

  6. Remove brownies from oven; transfer pan to a wire rack. Let brownies cool to room temp. (in pan) before cutting into 12 bars and serving. ENJOY! *Store leftovers in airtight container on countertop.

Nutrition Facts
Mocha Cinnamon Brownies
Amount Per Serving (1 brownie)
Calories 203 Calories from Fat 117
% Daily Value*
Fat 13g20%
Saturated Fat 8g50%
Trans Fat 0.5g
Polyunsaturated Fat 1g
Monounsaturated Fat 3g
Cholesterol 61mg20%
Sodium 152mg7%
Potassium 109mg3%
Carbohydrates 23g8%
Fiber 2g8%
Sugar 17g19%
Protein 3g6%
Vitamin A 395IU8%
Vitamin C 0.01mg0%
Calcium 17mg2%
Iron 1mg6%
* Percent Daily Values are based on a 2000 calorie diet.

Here’s one more to pin on your Pinterest boards!Whip up a pan of Mocha Cinnamon Brownies for a quick dessert! These brownies are fudgy and delicious, with hints of cinnamon and coffee.

Kale and Sweet Potato Salad

Kale and Sweet Potato Salad is a delicious salad! Curry-roasted sweet potatoes, kale and red onion, topped with lime jalapeño salad dressing.

If you’re looking for a healthy, new, and tasty salad recipe, I’d like to share this one for Kale And Sweet Potato Salad with you today!

If you’re anything like me, KALE isn’t high on the list of “must have” yummy ingredients (ha ha!). BUT…in this salad it is quite yummy (and did I mention it’s good for you?).

However… give this wonderful salad a chance, okay? Seasoned sweet potatoes (including curry powder!) are roasted, then added to a simple salad made with kale and red onion slices.

Top the simple salad with a lime, ginger, diced jalapeño, garlic and oil salad dressing that takes only a minute to make, and BOOM!  Just like that, this salad is ready to enjoy!

You will have a healthy, packed with flavor (and nutrients) salad I’m confident will surprise you with great flavor. Here’s how to make it:

Scroll Down for A Printable Recipe Card At The Bottom Of The Page

Prepare The Sweet Potato

To make enough salad for three servings, you will need one half pound of sweet potatoes (approx. 1½ medium-large potatoes). Peel the sweet potatoes and discard the peels.

Cut the sweet potatoes in half, length-wise. Next you will need to cut each half cross-wise into 1″ slices, then cut each of those slices down the middle, lengthwise.

This will leave you with bite-sized “quarter” pieces of the sweet potatoes. Set them aside while you whip up the seasoning mix.

The first step in this recipe is to peel sweet potatoes. Easy!Sweet potatoes are peeled, sliced, then cut into quarters before seasoning.

Make Seasoning Mix For Sweet Potatoes

Stir salt, curry powder, onion powder and black pepper together in a small bowl. Once combined, this will be the seasoning mix for the sweet potatoes.

Spice mix is made by combining salt, pepper, curry powder, and onion powder in a small bowl.

Season The Sweet Potatoes

Spray a rimmed baking sheet generously with non-stick baking spray. Lay the raw sweet potato pieces out on the sheet in a single layer.

Lightly spray the sweet potatoes with more baking spray. Sprinkle the seasoning mixture evenly over the sweet potatoes, so all pieces are seasoned.

Bake The Sweet Potatoes

Bake the sweet potatoes in a preheated 425°F. oven for 20-25 minutes. Halfway through the cooking time, give them a toss, then lay them back out in a single layer and continue baking.

When done, a butter knife should be able to be easily inserted into a potato piece with no resistance! They should also be very lightly browned.

Mine usually take 20 minutes to fully roast, but times may vary based on the size of the pieces you will have used.

Once done, transfer the sweet potato pieces to a wire rack and allow them to cool completely.

Seasoned sweet potato pieces are baked in a single layer on a greased baking sheet.Seasoned, roasted sweet potatoes cool on a wire rack.

Make Salad Dressing While Sweet Potatoes Cool

While the roasted sweet potatoes cool, you can quickly whip up the simple salad dressing. Place lime juice, oil, diced jalapeño, minced garlic and ginger in a small bowl.

Use a fork or whisk to fully combine these ingredients. This is the salad dressing you will use on the Kale and Sweet Potato Salad! Set aside.

A fork is used to whisk together the ingredients for the simple salad dressing.

Assemble The Kale And Sweet Potato Salad

When the sweet potatoes have cooled to room temperature, you can finish making the salad before serving. Place the kale, red onion and sweet potatoes in a salad bowl.

Drizzle all of the salad dressing on top, then gently toss, to coat everything with the dressing. That’s it! Now you’re ready to serve and enjoy the kale and sweet potato salad!

NOTE: The container of kale I used had small leaves. If the kale variety you’re using has large leaves, tear them into bite-sized pieces before adding them to the bowl.

Kale leaves, red onion slices and roasted sweet potatoes are placed in salad bowl.Lime salad dressing is drizzled over the top of the kale and sweet potato salad.

Serve The Kale And Sweet Potato Salad

This salad pairs very well with just about every type of meat, from fish, poultry, pork to beef! We’ve even enjoyed it as a side salad with… Hamburgers! Yum!

The light curry seasoning of the sweet potatoes, healthy kale, and the light lime, garlic, ginger and jalapeño dressing all come together in a bright, delicious salad!

If you choose not to eat meat, then this salad would be a lovely main dish, too! You might adjust the total serving size to serve two, rather than three portions, as written.

Kale and sweet potato salad is tossed to combine ingredients, then served as side dish.A white plate with a hamburger, baked beans and kale and sweet potato salad.

I hope you’ll take the opportunity to try this dish, even if you dislike kale! It has great flavor, besides the fact your home will smell great while the potatoes roast!

Thanks for taking the time to stop by today. I invite you to come back soon for more family-friendly recipes. Take care, and have a GREAT day!

Looking For More SALAD Recipes?

You can find ALL of my recipes in the Recipe Index, which is located at the top of the page. I have some fantastic tasting salads you can check out, including:

Want More Recipes? Get My FREE Newsletter!

I publish a newsletter 2 times per month (1st and 15th) with lots of recipes, tips, etc..
Would you like to join our growing list of subscribers?

There is a Newsletter subscription box on the top right (or bottom) of each blog post, depending on the device you use.
You can submit your e-mail address there, to be added to my mailing list.

Find Me On Social Media:

Facebook page: The Grateful Girl Cooks!
Pinterest:
The Grateful Girl Cooks!
Instagram:
jbatthegratefulgirlcooks

Author's signature

Recipe Adapted From: “Year-Round Fresh”, page 184, published by WW International, Inc. in 2018

↓↓ PRINTABLE RECIPE BELOW ↓↓

0 from 0 votes
Kale And Sweet Potato Salad
Prep Time
10 mins
Cook Time
20 mins
Total Time
30 mins
 

Kale and Sweet Potato Salad is a delicious salad! Curry-roasted sweet potatoes, kale and red onion, topped with lime jalapeño salad dressing.

Category: Salad
Cuisine: All Cuisines
Keyword: kale and sweet potato salad
Servings: 3
Calories Per Serving: 120 kcal
Author: JB @ The Grateful Girl Cooks!
Ingredients
For Salad:
  • ½ pound sweet potatoes , peeled, cut in 1" quarters
  • non-stick cooking spray for baking sheet and sweet potatoes
  • ½ teaspoon kosher salt
  • ¼ teaspoon curry powder
  • teaspoon onion powder
  • teaspoon ground black pepper
  • 2 cups fresh kale torn or in small leaves
  • ¼ cup red onion (cut in thin slices)
For Salad Dressing:
  • Tablespoons fresh lime juice
  • teaspoons canola oil or other neutral oil
  • ¼ small fresh jalapeño seeded, finely diced
  • ½ small garlic clove minced
  • ¼ teaspoon fresh ginger peeled/ finely grated
Instructions
  1. Preheat oven to 425℉. Generously coat large baking sheet with non-stick cooking spray.

  2. Peel sweet potatoes. Cut in half, length-wise. Slice each half cross-wise into 1" half circles, then cut each slice in half, into wedges, Set aside.

  3. Stir salt, curry powder, onion powder and black pepper together in a small bowl.

  4. Lay sweet potatoes in a single layer on prepared baking sheet. Lightly spray sweet potatoes with baking spray. Sprinkle potatoes with spice mix.

  5. Bake at 425°F. for 20-25 minutes. Halfway through cooking, give them a toss, then put back in single layer; continue baking. When done, potatoes will be lightly browned. A knife can be inserted into potatoes with no resistance! Transfer potatoes to a wire rack; cool completely.

  6. Whisk lime juice, oil, jalapeño, garlic and ginger in bowl, until fully combined.

  7. Put kale, red onion and sweet potatoes in salad bowl. Drizzle with salad dressing. Toss gently, to coat everything with dressing. Serve! NOTE: If kale you're using has large leaves, tear them into bite-sized pieces before adding.

Nutrition Facts
Kale And Sweet Potato Salad
Amount Per Serving (1 (1/3 of total))
Calories 120 Calories from Fat 36
% Daily Value*
Fat 4g6%
Saturated Fat 0.4g3%
Trans Fat 0.01g
Polyunsaturated Fat 1g
Monounsaturated Fat 2g
Sodium 475mg21%
Potassium 448mg13%
Carbohydrates 20g7%
Fiber 4g17%
Sugar 4g4%
Protein 3g6%
Vitamin A 15215IU304%
Vitamin C 47mg57%
Calcium 143mg14%
Iron 1mg6%
* Percent Daily Values are based on a 2000 calorie diet.

Here’s one more to pin on your Pinterest boards!Kale and Sweet Potato Salad is a delicious salad! Curry-roasted sweet potatoes, kale and red onion, topped with lime jalapeño salad dressing.


Cajun-Seasoned Burger Patties

Cajun-Seasoned Burger Patties have great flavor, whether BBQ grilled or skillet-cooked. Eat them “as is”, or on a bun with all the fixin’s!
Cajun-Seasoned Burger Patties have great flavor, whether BBQ grilled or skillet-cooked. Eat them "as is", or on a bun with all the fixin's!

If you’re looking for a way to boost the flavor of cooked burgers, may I suggest this SIMPLE recipe for Cajun-seasoned burger patties?

Whether you enjoy eating burger patties PLAIN on a plate, OR eaten as a full-fledged burger on a bun with condiments, etc., I believe you’ll enjoy these patties.

You can pan-fry them, grill on a BBQ, cook in an air fryer, or broil them in the oven!  You can make them using your preferred method of cooking burgers!

As written, this recipe will yield two burger patties (which is enough for my husband and myself), but can easily be increased in quantity. Here’s how to make this simple recipe.

Scroll Down For A Printable Recipe Card At The Bottom Of The Page

What Spices Will I Need?

Spices are what give these Cajun-seasoned burger patties their wonderful taste! The burger patties have lots of flavor, and a tiny bit of “heat”, but not too much (in case you’re wondering).

The dried spices you will need are cumin, smoked paprika, garlic powder, salt and pepper, onion powder, cayenne pepper and thyme.

Bottles of dried spices used to flavor the ground beef burger patties.

Make The Cajun-Seasoned Burger Patties

Place the ground beef in a large mixing bowl. Add all of the spices, and then mix them together using a fork or your clean hands.

Combine until all the spices have been incorporated into the ground beef. Try not to overwork or compact the ground beef too much.

Spices are added to a half pound of ground beef in a bowl, and mixed, to combine.

Remember- this recipe will yield two burger patties (as written), but can easily be doubled or tripled to make the quantity you need.

Divide the meat into two balls, then use your hands to flatten and shape them into two round circles. Place each patty on wax paper or parchment paper.

Two Cajun-seasoned burger patties on wax paper, before being cooked.

To Grill Or Not To Grill?

We LOVE to grill our burger patties outside, however the weather here in Oregon can be hard to predict. NEWS ALERT: It rains a lot here!

Our crazy weather patterns make it difficult at times to plan a good old-fashioned BBQ! To grill or not to grill is a constant question. Cooking inside or outside is your choice!

When it’s nice outside we grill these burger patties on our Weber BBQ. If it is raining (often) or freezing cold outside, we cook them inside, in a large skillet (cast iron is the best).

Cooking The Burger Patties- BBQ or Skillet

NOTE: If grilling outside, prepare them as you would any burger on the BBQ grill. Cook them until they reach the desired “doneness” you prefer.

Cajun-seasoned burger patties can be cooked on an outside BBQ.

As you can see in the photo below, we cooked these in a large cast iron skillet. One patty is not seasoned, and the other two are the Cajun-seasoned burger patties from this recipe.

Heat a large cast iron skillet on medium heat until it is really hot (but not smoking). Place the patties into the hot skillet (they should sizzle when they hit the skillet).

NOTE: If using a NON cast iron skillet, lightly spray the skillet with non-stick spray before adding the patties.

The burger patties can be cooked in a large cast iron skillet.

Do not move or disturb them for about 3 minutes, while they sear (and set) in the skillet. When they have browned well on the bottom, carefully turn each patty over to the other side.

Continue to cook the Cajun-seasoned burger patties to your preferred doneness, turning (if desired) to further brown the outside.

The Cajun-seasoned burger patties are flipped over to cook the other side.Two fully cooked Cajun-seasoned burger patties in a cast iron skillet.

Time To Eat!

Once the burger patties are cooked to your taste, they are ready to be served. At times we enjoy them plain, served as is, on a plate with side dishes.

Our FAVORITE way to enjoy them is to go “full on burger” with the patties! Place them on toasted hamburger buns, and top with your favorite condiments. If you’re looking for a delicious, unique condiment for your hamburgers, check out my recipe for Bacon Jam for Burgers!

Now all you have to do is add some delicious sides (like potato salad or fruit salad) and dig in! The well-seasoned patties will add a nice pop of flavor to the burgers.

A hamburger made with one of the Cajun-seasoned burger patties, on plate with fruit and potato salad.

I hope you’ll have the chance to try these Cajun-seasoned burger patties. They’re a cinch to make, and I’m confident you’ll enjoy them.

Thanks for stopping by today, and I invite you to come back soon for more family-friendly recipes. Take care, and have a GREAT day!

Looking For More BEEF Recipes?

You can find ALL of my recipes in the Recipe Index, which is located at the top of the page. I have some delicious recipes using beef you can check out, including:

Want More Recipes? Get My FREE Newsletter!

I publish a newsletter 2 times per month (1st and 15th) with lots of recipes, tips, etc..
Would you like to join our growing list of subscribers?

There is a Newsletter subscription box on the top right (or bottom) of each blog post, depending on the device you use.
You can submit your e-mail address there, to be added to my mailing list.

Find Me On Social Media:

Facebook page: The Grateful Girl Cooks!
Pinterest:
The Grateful Girl Cooks!
Instagram:
jbatthegratefulgirlcooks

Author's signature

Recipe adapted from: Isabel D. Price, via the book “Food Meets Faith”, page 77, published in 2019 by Live Smart Solutions, LLC

↓↓ PRINTABLE RECIPE BELOW ↓↓

0 from 0 votes
Cajun-Seasoned Burger Patties
Prep Time
5 mins
Cook Time
10 mins
Total Time
15 mins
 

Cajun-Seasoned Burger Patties have great flavor, whether BBQ grilled or skillet-cooked. Eat them "as is", or on a bun with all the fixin's!

Category: Beef, Main Course
Cuisine: Cajun
Keyword: Cajun-seasoned burger patties
Servings: 2
Calories Per Serving: 253 kcal
Author: JB @ The Grateful Girl Cooks!
Ingredients
  • ½ pound ground beef (85%) see NOTE section below*
  • ½ teaspoon salt
  • ¾ teaspoon ground cumin
  • ½ teaspoon smoked paprika
  • ½ teaspoon garlic powder
  • ¼ teaspoon onion powder
  • ¼ teaspoon cayenne pepper
  • ¼ teaspoon black pepper
  • ¼ teaspoon ground thyme
Instructions
  1. Place ground beef in mixing bowl. Add all spices; mix together using a fork or clean hands, until spices are distributed in the meat. Don't overwork the beef.

  2. Divide meat into 2 balls; use your hands to flatten/shape them into 2 round circles. Place each patty on wax paper or parchment paper.

  3. BBQ: If grilling outside, cook as you would any burger on the BBQ grill. Cook until they reach your preferred "doneness".

    SKILLET: Heat a cast iron skillet on medium heat until really hot (but not smoking). Place patties into hot skillet (they should sizzle when they hit the skillet).

    NON CAST IRON SKILLET: If using NON cast iron skillet, lightly spray skillet with non-stick spray before adding patties.

  4. Do not move/disturb patties for about 3 minutes, while they sear (and set) in the skillet. Once nicely browned on the bottom, carefully flip each patty to the other side. Continue to cook to your preferred doneness, turning (if desired) to further brown the outside.

  5. Serve plain (as is), on a plate with side dishes OR place them on toasted hamburger buns, and top with your favorite burger condiments. Enjoy!
Recipe Notes

*NOTE: 85% ground beef was used for the caloric calculation of 253 calories per patty. If using LEAN ground beef, caloric calculation would lower to about 165 calories per patty.

Nutrition Facts
Cajun-Seasoned Burger Patties
Amount Per Serving (1 patty)
Calories 253 Calories from Fat 153
% Daily Value*
Fat 17g26%
Saturated Fat 7g44%
Trans Fat 1g
Polyunsaturated Fat 1g
Monounsaturated Fat 8g
Cholesterol 77mg26%
Sodium 659mg29%
Potassium 380mg11%
Carbohydrates 2g1%
Fiber 1g4%
Sugar 0.1g0%
Protein 22g44%
Vitamin A 366IU7%
Vitamin C 0.4mg0%
Calcium 31mg3%
Iron 3mg17%
* Percent Daily Values are based on a 2000 calorie diet.

Here’s one more to pin on your Pinterest boards!Cajun-Seasoned Burger Patties have great flavor, whether BBQ grilled or skillet-cooked. Eat them "as is", or on a bun with all the fixin's!

Chunky Apple Cinnamon Pancakes

Make a batch of Chunky Apple Cinnamon Pancakes in no time at all! Diced apples, Greek yogurt, vanilla and cinnamon add to the great flavor!

I love the combination of apples and cinnamon. Do you? YUM! Recently I made some pancakes even better by incorporating diced apples and cinnamon into the batter.

I also added Greek yogurt (plain and unsweetened) to the batter for added protein, and came up with these delicious made from scratch pancakes. The recipe as written will yield approximately 8 pancakes, each about 5″ in diameter.

Filled with lots of diced apples, and enhanced with cinnamon and vanilla flavoring, the pancakes are really GOOD, especially topped with butter and maple syrup!

Here’s how to make this easy recipe for chunky apple cinnamon pancakes.

Scroll Down For A Printable Recipe Card At The Bottom Of The Page

Make The Pancake Batter

Stir or whisk flour, sugar, baking soda, salt and ground cinnamon together in a large mixing bowl. Once combined, set the bowl aside.

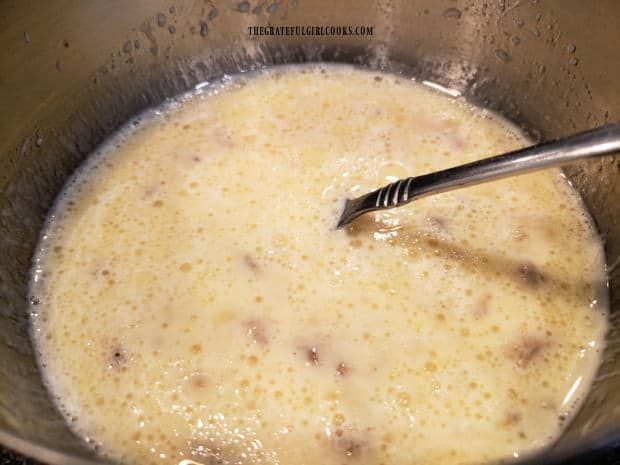
In a separate bowl, combine eggs, milk, Greek yogurt, oil and vanilla until thoroughly blended. I normally use a fork to do this, and it only takes a minute or so.

Flour, sugar, baking soda, salt and cinnamon are combined in a mixing bwl.Eggs, milk, Greek yogurt, vanilla and oil are mixed together in a separate bowl.

Combine, Then Add Diced Apples

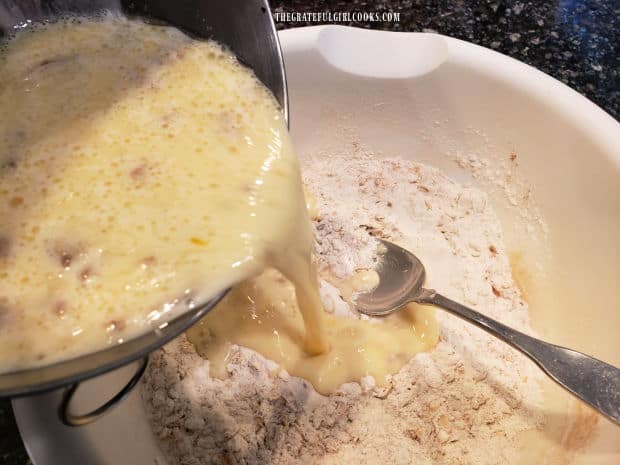
Add the egg mixture to the bowl containing the combined “dry” ingredients (flour, etc.). Stir well, but only until these ingredients are combined, being careful to NOT overmix the batter.

 Now add the diced unpeeled apples, and stir only until the apples have been incorporated into the batter.

Wet ingredients are added to the bowl of dry ingredients and it's mixed until smooth.Diced apples are added to the thick batter for the pancakes.

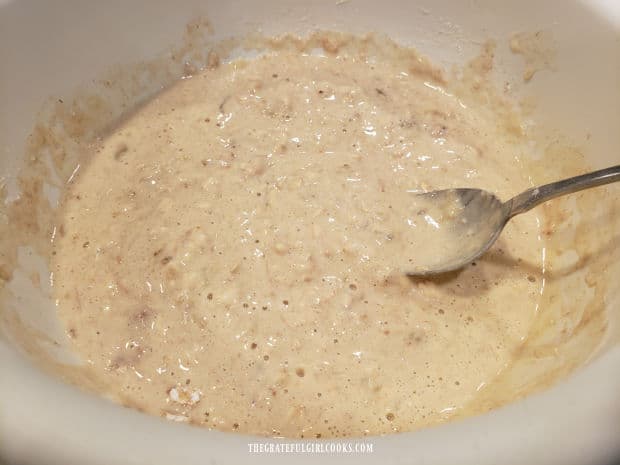
The batter for the chunky apple cinnamon pancakes will be very thick, but resist the urge to thin it out!

The batter for the pancakes is vey thick and has chunky bits of apples in it.

Time To Cook The Pancakes!

Spray or lightly oil a large non-stick skillet (or griddle), and heat the skillet on Medium heat. Once the skillet is hot, it’s time to cook the pancakes.

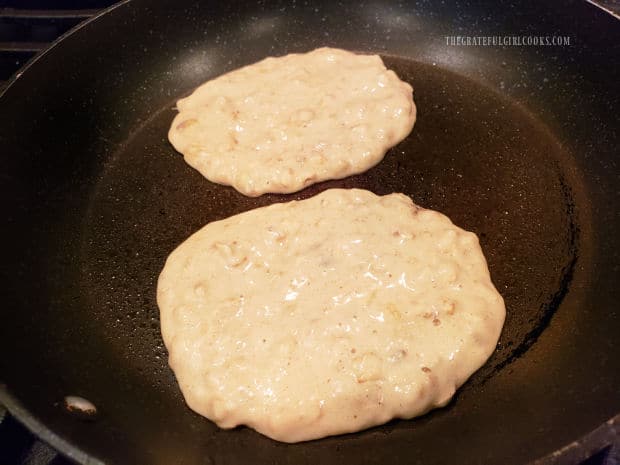
Pour a half-cup of pancake batter into the skillet (or onto the griddle) for each pancake. Because the batter is so thick, I use a spoon to spread out the batter (and shape it into a 5″ circle).

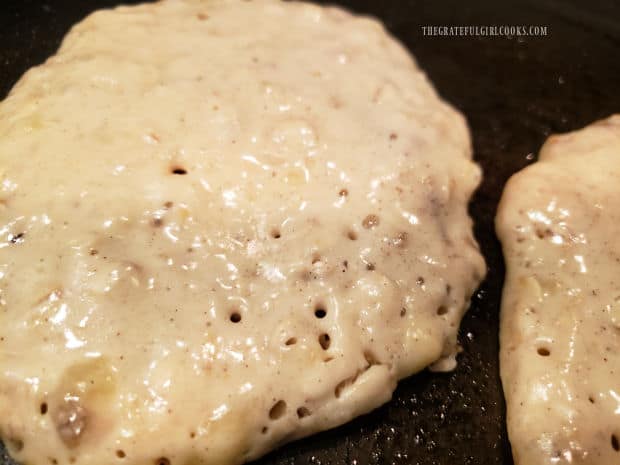
Let the pancake cook until bubbles slightly form around the edges, and the bottom of the pancake browns. Carefully flip the pancake over, using a spatula.

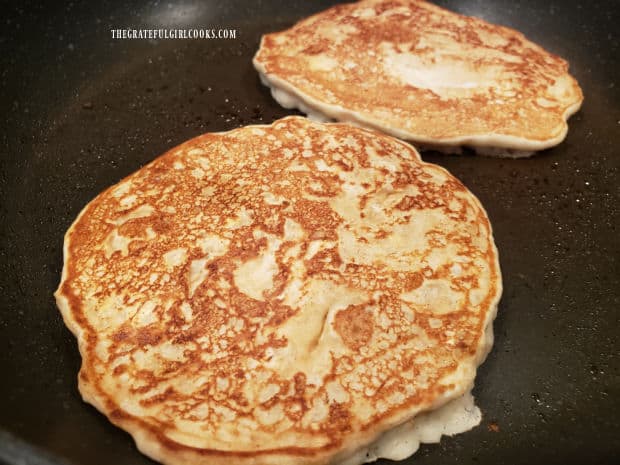
Continue cooking the other side until it’s browned on bottom, the batter is set, and the pancake is cooked all the way through. Remove from the skillet, and repeat with remaining batter.

One of the chunky apple cinnamon pancakes cooking in a skillet.Once the bottom browns, pancake is flipped to cook the other side.

Continue cooking until all the pancakes have been made. This recipe will yield about eight, 5 inch-wide pancakes. Of course, you can always make more by making the pancakes a little smaller!

What If We Can’t Eat That Many Pancakes At One Time?

My husband and I can’t possibly eat a full batch of the chunky apple cinnamon pancakes, so I let them cool, then stack them (with pieces of wax paper between each pancake).

After that I wrap the stacked leftover pancakes in plastic wrap, and store them in our refrigerator for 1-2 days. That way, they can easily be reheated in the microwave, for another easy breakfast!

You can also freeze the pancakes in a single layer on a baking sheet. Once flash frozen, transfer them to an airtight freezer bag or container. Thaw and reheat.

Six chunky apple cinnamon pancakes cool on aluminum foil after being cooked.

Who Wants Some Chunky Apple Cinnamon Pancakes?

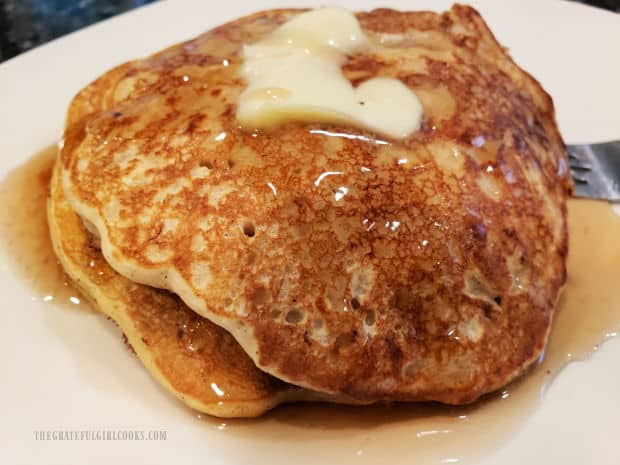
Serve the chunky apple cinnamon pancakes hot, topped with a pat of butter. Drizzle the pancakes with pancake syrup, pure maple syrup, or honey, depending on your personal taste.

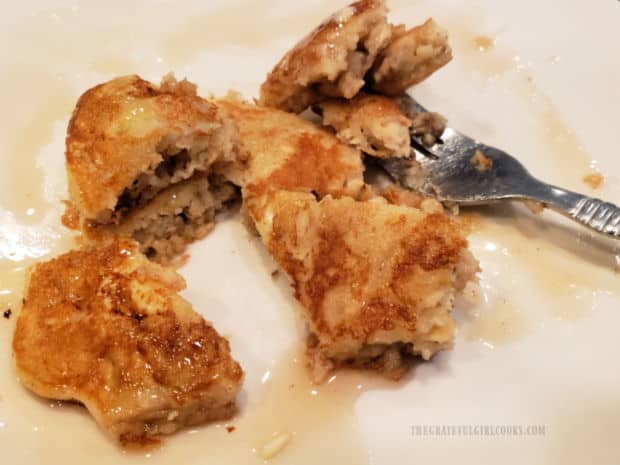
Serve immediately, and enjoy these tasty breakfast treats! As you can see from the 2nd photo below, they are packed full of chunky, diced apples! They taste really yummy.

Butter and syrup are served on top of the chunky apple cinnamon pancakes.Pieces of apple can be seen throughout the cooked pancakes.

I hope you have the chance to make these delicious chunky apple cinnamon pancakes. Perhaps you (and those you love) will enjoy them as much as we do!

Thanks for stopping by today. I invite you to come back again soon for more family-friendly recipes. Take care, may God bless you, and have a GREAT day!

Looking For More PANCAKE Recipes?

You can find ALL of my recipes in the Recipe Index, which is located at the top of the page. I have some delicious pancake recipes for you to check out, including:

Want More Recipes? Get My FREE Newsletter!

I publish a newsletter 2 times per month (1st and 15th) with lots of recipes, tips, etc..
Would you like to join our growing list of subscribers?

There is a Newsletter subscription box on the top right (or bottom) of each blog post, depending on the device you use.
You can submit your e-mail address there, to be added to my mailing list.

Find Me On Social Media:

Facebook page: The Grateful Girl Cooks!
Pinterest:
The Grateful Girl Cooks!
Instagram:
jbatthegratefulgirlcooks

Author's signature

↓↓ PRINTABLE RECIPE BELOW ↓↓

0 from 0 votes
Chunky Apple Cinnamon Pancakes
Prep Time
10 mins
Cook Time
10 mins
Total Time
20 mins
 

Make a batch of Chunky Apple Cinnamon Pancakes in no time at all! Diced apples, Greek yogurt, vanilla and cinnamon add to the great flavor!

Category: Breakfast
Cuisine: American
Keyword: chunky apple cinnamon pancakes
Servings: 8 pancakes (5" diameter)
Calories Per Serving: 224 kcal
Author: JB @ The Grateful Girl Cooks!
Ingredients
  • 2 cups all purpose flour
  • 2 Tablespoons granulated sugar
  • 2 teaspoons ground cinnamon
  • 1 teaspoon baking soda
  • ½ teaspoon salt
  • 2 large eggs lightly beaten
  • 1 cup low-fat milk
  • 1 cup low-fat plain Greek yogurt (unsweetened)
  • 2 Tablespoons canola oil
  • ½ teaspoon vanilla extract
  • 1 medium apple unpeeled, finely diced
Instructions
  1. Stir or whisk flour, sugar, baking soda, salt and ground cinnamon together in a large mixing bowl. Once combined, set the bowl aside.

  2. In a separate bowl, combine eggs, milk, Greek yogurt, oil and vanilla until thoroughly blended.

  3. Add egg mixture to the "dry" ingredients (flour, etc.). Stir well, but only until ingredients are combined. Don't overmix. Add diced apples; stir only until apples are incorporated into batter. Batter will be very thick.

  4. Spray or lightly oil large non-stick skillet (or griddle). Heat on Medium heat. Once skillet is hot, pour ½ cup batter into skillet (or onto griddle) for each pancake. TIP: batter is thick; use a spoon to spread out batter into a 5" wide circle.

  5. Let pancake cook until bubbles form around the edges, and bottom of pancake browns. Carefully flip pancake over with spatula. Continue cooking other side until bottom is browned and pancake is set and cooked through. Remove from skillet. Continue making pancakes until all batter is gone.

  6. Serve pancakes hot, topped with butter. Drizzle pancakes with pancake syrup, pure maple syrup, or honey, if desired. Enjoy!
Nutrition Facts
Chunky Apple Cinnamon Pancakes
Amount Per Serving (1 pancake)
Calories 224 Calories from Fat 54
% Daily Value*
Fat 6g9%
Saturated Fat 1g6%
Trans Fat 0.04g
Polyunsaturated Fat 1g
Monounsaturated Fat 3g
Cholesterol 50mg17%
Sodium 326mg14%
Potassium 119mg3%
Carbohydrates 33g11%
Fiber 2g8%
Sugar 8g9%
Protein 9g18%
Vitamin A 128IU3%
Vitamin C 1mg1%
Calcium 87mg9%
Iron 2mg11%
* Percent Daily Values are based on a 2000 calorie diet.

Here’s one more to pin on your Pinterest boards!Make a batch of Chunky Apple Cinnamon Pancakes in no time at all! Diced apples, Greek yogurt, vanilla and cinnamon add to the great flavor!

Roasted Brussel Sprouts For Two

It’s simple to make Roasted Brussel Sprouts For Two! This delicious, baked vegetable side dish only requires a few common ingredients.It's simple to make Roasted Brussel Sprouts For Two! This delicious, baked vegetable side dish only requires a few common ingredients.

Have you ever roasted Brussel sprouts in the oven? They turn out DELICIOUS! After roasting, they look a bit “charred” and crispy looking on the outside, but are soft and tender on the inside!

The recipe I am sharing today is ideal for two servings, but can EASILY be doubled, tripled, or multiplied into the quantity you need.

TIP: You can enter the # of servings you need into the printable recipe card at the bottom of the page (in the box by SERVINGS). The software will then re-calculate the quantity of ingredients you will need.

I think you’ll be surprised at how really EASY it is to make delicious, roasted Brussel sprouts for two people. Here’s how to make them!

Scroll Down For A Printable Recipe Card At The Bottom Of The Page

Prepare The Brussel Sprouts

Preheat your oven to 425°F. For this recipe as written (for two servings), you will need about ¾ pound of fresh Brussel spouts. Typically this will be about 10-12 whole Brussel sprouts, depending on their size.

Trim off the stem ends (seen in the 2nd photo below). Some of the small outer leaves may fall off, but don’t worry! That is to be expected.

Once the stem end has been trimmed off, slice each Brussel sprout in half length-wise. Discard the stem and any of the outer leaves that have fallen off.

Brussel sprouts are sliced lengthwise before seasoning.The stems are trimmed off of the Brussel sprouts before seasoning and slicing.

Place the Brussel sprout halves in a medium sized bowl. Drizzle 1½ Tablespoons of olive oil over them, and gently toss, to coat them with the oil.

Olive oil is drizzled over the Brussel sprout halves in a mixing bowl.

A Little Seasoning

Once coated with the olive oil, sprinkle the Brussel sprouts with salt, pepper, garlic powder and a bit of onion powder. Stir gently, to evenly distribute the seasoning over the veggies.

Seasonings are added to the oil-tossed Brussel sprouts before baking.

Bake The Brussel Sprouts

Place the seasoned Brussel sprouts, cut side down, on a parchment paper-lined baking sheet. This will also help to create less mess to clean up!

However, if you don’t have access to parchment paper, place the Brussel sprouts directly on a baking sheet, leaving a small space between each one.

NOTE: I don’t recommended using a silpat or a silicon mat, because you want the charring that occurs on the sprouts when in contact with parchment paper or a metal baking sheet.

Seasoned Brussel sprout halves are roasted, cut side down on parchment lined baking sheet.

Bake the Brussel sprouts at 425°F. for 23-25 minutes. When done, the Brussel sprouts will be slightly “charred” and crispy on the outside, but very tender on the inside!

After roasting, the Brussel sprouts are charred on the outside and tender inside.Crispy, charred outer leaves cover the green, tender roasted Brussel sprouts.

Serve The Roasted Brussel Sprouts For Two

Use a spatula to transfer the roasted Brussel sprouts for two onto a platter or individual serving plates. See how browned they are?

We enjoy them this way, but if you prefer them less browned on the outside, simply peel off the outer leaf before serving or remove from the oven a bit early.

The flavor is quite nice as well, thanks to the simple seasoning on them. They may look browned on the outside, but they cut easily, because they’re quite soft inside.

This Brussel sprout side dish can be served with a variety of main dish meats. We enjoyed them (this time), served alongside pork chops and sweet potatoes. YUM! 

Roasted Brussel Sprouts For Two, served with a sweet potato and pork chop.

I hope you have the chance to try this simple recipe for Roasted Brussel Sprouts For Two. You can easily change the amount of the servings in the printable recipe below, if necessary.

Thank you for stopping by, and I hope you’ll come back again soon for more family-friendly recipes. Take care, may God bless you, and have a GREAT day!

Looking For More VEGGIE Recipes?

You can find ALL of my recipes in the Recipe Index, which is located at the top of the page. I have LOTS of yummy vegetable recipes to choose from, including:

Want More Recipes? Get My FREE Newsletter!

I publish a newsletter 2 times per month (1st and 15th) with lots of recipes, tips, etc..
Would you like to join our growing list of subscribers?

There is a Newsletter subscription box on the top right (or bottom) of each blog post, depending on the device you use.
You can submit your e-mail address there, to be added to my mailing list.

Find Me On Social Media:

Facebook page: The Grateful Girl Cooks!
Pinterest:
The Grateful Girl Cooks!
Instagram:
jbatthegratefulgirlcooks

Author's signature

↓↓ PRINTABLE RECIPE BELOW ↓↓

0 from 0 votes
Roasted Brussel Sprouts For Two
Prep Time
10 mins
Cook Time
25 mins
Total Time
35 mins
 

It's simple to make Roasted Brussel Sprouts For Two! This delicious, baked vegetable side dish only requires a few common ingredients.

Category: Side Dish, Vegetable Dish
Cuisine: All Cuisines
Keyword: roasted Brussel Sprouts
Servings: 2
Calories Per Serving: 170 kcal
Author: JB @ The Grateful Girl Cooks!
Ingredients
  • ¾ pound fresh Brussel sprouts (about 10-12)
  • Tablespoons olive oil
  • ½ teaspoon salt
  • ½ teaspoon ground black pepper
  • ½ teaspoon garlic powder
  • teaspoon onion powder
Instructions
  1. Preheat oven to 425°F. Line a baking sheet with parchment paper (optional).

  2. Trim off stem ends of Brussel sprouts. Some outer leaves may fall off, that's okay. Slice each Brussel sprout in half length-wise. Discard stem/leaves that fell off.

  3. Place Brussel sprout halves in a medium bowl. Drizzle with olive oil; gently toss, to coat with oil. Sprinkle sprouts with salt, pepper, garlic powder and onion powder. Stir gently, to evenly distribute seasoning.

  4. Put Brussel sprouts, cut side down, on parchment paper-lined baking sheet (or directly on baking sheet), leaving space between each one. NOTE: It is NOT recommended to use silpat or silicone mats to roast the Brussel sprouts.

  5. Bake at 425°F. for 23-25 minutes. When done, Brussel sprouts will be slightly "charred"/crispy on the outside, but tender on the inside! Serve and enjoy!

Nutrition Facts
Roasted Brussel Sprouts For Two
Amount Per Serving (1 (1/2 of total))
Calories 170 Calories from Fat 99
% Daily Value*
Fat 11g17%
Saturated Fat 2g13%
Polyunsaturated Fat 1g
Monounsaturated Fat 8g
Sodium 625mg27%
Potassium 679mg19%
Carbohydrates 16g5%
Fiber 7g29%
Sugar 4g4%
Protein 6g12%
Vitamin A 1285IU26%
Vitamin C 145mg176%
Calcium 75mg8%
Iron 3mg17%
* Percent Daily Values are based on a 2000 calorie diet.

Here’s one more to pin on your Pinterest boards!It's simple to make Roasted Brussel Sprouts For Two! This delicious, baked vegetable side dish only requires a few common ingredients.

Asian Chicken Lettuce Wraps

Asian Chicken Lettuce Wraps are very EASY to make, and taste fantastic! With two wraps per serving, they are a great appetizer or main dish!

One of my favorite appetizers to order at a favorite local restaurant is Asian chicken lettuce wraps. I absolutely LOVE them, and enjoy scooping and wrapping the chicken filling in a big ol’ lettuce leaf!

There are many recipes that can be found online for chicken lettuce wraps. I found this recipe a while ago, and it’s my “go to”. It’s perfect for when I crave Asian chicken lettuce wraps and don’t want to go out, or pay for them in a restaurant!

This recipe, as written, will yield about 12 wraps. A suggested serving size is two wraps, and each serving comes in under 200 calories (total for TWO wraps). How’s that for a fantastic low calorie appetizer or main dish!

Asian chicken lettuce wraps may be LOW in calories, but they’re BIG on amazing flavors and are really delicious!.  Here’s how to make them. 

Scroll Down For A Printable Recipe Card At The Bottom Of The Page

Prepare The Bibb (aka Butter) Lettuce

Carefully separate lettuce leaves from the head of lettuce. Give them a rinse, then pat each leaf dry using paper towels to absorb excess moisture. Set them aside while you make the filling.

NOTE: Bibb lettuce, also known as butter lettuce is typically used. If you don’t have access to this variety, use large lettuce leaves of your choice that are sturdy enough to hold the filling when wrapped.

You can use one or two lettuce leaves for each wrap. We usually stack two leaves per wrap to make it sturdier for holding the filling, but that is YOUR choice.

Cook The Onions, Garlic And Ginger

Heat sesame oil on Medium heat in a large skillet. Once the oil is pretty hot (but not smoking), add chopped onions, and cook, stirring often for about 3 minutes.

When the onions have softened and become lightly browned, add minced garlic and grated fresh ginger to the skillet. Cook 1 more minute, stirring often so the garlic doesn’t burn (and become bitter).

Chopped onions are cooked in sesame oil in a large skillet.Minced garlic and ginger are added to the softened and lightly browned onions.

Add The Ground Chicken

Now you need to add a pound of ground chicken to the skillet. Cook the chicken on Medium heat, mixing it with the onions, and breaking the chicken up into small pieces as it cooks.

The chicken is finished cooking when it is fully cooked through (3-5 minutes), chopped in small pieces, and is very slightly browned.

Ground chicken is added to the skillet and broken up with a wooden spoon into small pieces.Seasoned with salt/pepper, the ground chicken continues cooking until fully cooked through.

Make The Asian Chili Sauce

While the chicken is cooking, whip up the Asian sauce that will be added to the chicken. It’s simple to make this flavorful sauce and only takes a minute!

Place soy sauce, Thai red chili sauce, maple syrup (or honey/agave) and lime juice in a small bowl, and whisk or stir, until fully combined. That’s it!

OPTIONAL NOTE: The sauce can be doubled if you want extra sauce for later! Also, if desired, whisk in a tiny bit (about ½ tsp.) of cornstarch if you want the sauce to be slightly thicker.

Add The Sauce To The Skillet

Turn the heat down to LOW. Pour the sauce over the cooked chicken, add chopped cashews (or peanuts), then stir well, to combine these ingredients.

Cook for 1-2 more minutes, then take the skillet off the heat source. Let the chicken “rest” and cool slightly for 1-2 minutes, before adding the fresh veggies.

Soy sauce, Thai chili sauce, lime juice and honey are combined in a small bowl.Asian sauce and chopped cashews are added to the skillet and stirred to combine.

Time For Some Veggie COLOR!

Once the chicken has cooled slightly, add grated carrots, chopped green onions, and chopped cilantro to the skillet. That pop of color really adds a nice touch, along with lots of flavor!

Stir, to fully combine the chicken, sauce and veggie mixture, which will be used for filling the Asian chicken lettuce wraps.

Grated carrots, chopped cilantro and green onions are added to the skillet.The meat mixture is now ready to make Asian chicken lettuce wraps.

Serve The Asian Chicken Lettuce Wraps!

Now it’s time to fill and serve these delicious Asian chicken lettuce wraps! Whoo Hoo! For each wrap, place a large spoonful of the chicken filling into the center of the Bibb (or butter) lettuce leaf.

Think of chicken lettuce wraps like you would a taco! You want to be able to wrap the edges of the lettuce leaf up and around the filling, so be careful not to overfill them!

Spoon leftover pan sauce over the filling, then sprinkle each wrap with sesame seeds (optional, but a nice touch!). Roll a lettuce wrap up, and eat it like a taco! DELICIOUS!

The Asian chicken lettuce wraps are filled with flavor, and are ready to enjoy!One of the Asian chicken lettuce wraps, with a closeup of the yummy chicken filling.

We really enjoy these Asian chicken lettuce wraps, and I hope you and those you love will, too! I think they are vey easy to make, and wow… do they ever taste great!

Thanks for stopping by today, and I invite you to come back soon for more delicious, family-friendly recipes. Take care, may God bless you, and have a great day!

Looking For More CHICKEN Recipes?

You can find ALL of my recipes in the Recipe Index, which is located at the top of the page. I have LOTS of fantastic chicken recipes to choose from, including:

Want More Recipes? Get My FREE Newsletter!

I publish a newsletter 2 times per month (1st and 15th) with lots of recipes, tips, etc..
Would you like to join our growing list of subscribers?

There is a Newsletter subscription box on the top right (or bottom) of each blog post, depending on the device you use.
You can submit your e-mail address there, to be added to my mailing list.

Find Me On Social Media:

Facebook page: The Grateful Girl Cooks!
Pinterest:
The Grateful Girl Cooks!
Instagram:
jbatthegratefulgirlcooks

Author's signature

Original recipe source, with thanks to Marjorie at: apinchofhealthy.com/thai-chicken-lettuce-wraps/

↓↓ PRINTABLE RECIPE BELOW ↓↓

0 from 0 votes
Asian Chicken Lettuce Wraps
Prep Time
10 mins
Cook Time
10 mins
Total Time
20 mins
 

Asian Chicken Lettuce Wraps are very EASY to make, and taste fantastic! With two wraps per serving, they are a great appetizer or main dish!

Category: Main Dish
Cuisine: Asian
Keyword: Asian chicken lettuce wraps
Servings: 6 (2 wraps per serving)
Calories Per Serving: 172 kcal
Author: JB @ The Grateful Girl Cooks!
Ingredients
  • 1 Tablespoon sesame oil
  • ¼ cup yellow onion diced
  • 1 Tablespoon fresh ginger finely minced
  • 2 cloves garlic minced
  • 10 ounces ground chicken
  • ¼ cup low sodium soy sauce can sub. coconut aminos/Tamari
  • Tablespoons Thai sweet red chili sauce
  • 1 medium lime (JUICE OF)
  • 1 teaspoon pure maple syrup or agave/honey
  • cup cashews (raw or roasted/salted) chopped (can sub. roasted peanuts)
  • ½ cup grated carrots
  • cup green onions (scallions) chopped
  • ¼ cup fresh cilantro chopped
  • 1 head Bibb (butter) lettuce leaves removed/rinsed/patted dry
  • sesame seeds (Optional) to sprinkle as a topping for wraps
Instructions
  1. Separate leaves from head of lettuce. Rinse/pat dry with paper towels. Set aside. Use 1 or 2 lettuce leaves for each wrap (sturdy enough to hold chicken filling).

  2. Heat sesame oil on Medium heat in large skillet. Once oil is hot (but not smoking), add yellow onions, and cook, stirring often, for about 3 minutes. When onions are softened and lightly browned, add garlic and ginger. Cook 1 minute, stirring often so garlic doesn't burn (and become bitter).

  3. Add ground chicken to skillet. Cook on Medium heat, combining it with the onions. Break up chicken into small pieces as it cooks with a spoon or spatula. It's done when cooked through (3-5 min.), in small pieces, and slightly browned.

  4. MAKE SAUCE: Place soy sauce, Thai red chili sauce, maple syrup and lime juice in a small bowl; whisk or stir, until combined. OPTIONAL NOTE: Sauce can be doubled if you want extra for later! Also, whisk in a tiny bit (½ tsp,) of cornstarch if you want sauce to be slightly thicker.

  5. Turn heat to LOW. Pour sauce over chicken; add cashews. Stir well, to combine. Cook 1-2 minutes, then take skillet off the heat source. Let chicken cool 1-2 minutes, before adding fresh veggies.

  6. Add carrots, green onions, and cilantro. Stir, to fully combine all ingredients.

  7. MAKE WRAPS: For each wrap, place large spoonful of chicken filling into center of lettuce leaf. You want to wrap edges of the lettuce leaf up and around the filling, so don't overfill. Spoon any remaining pan sauce over chicken. Sprinkle each wrap with sesame seeds (optional). Roll up lettuce wrap, and eat it like a taco! Enjoy!

Nutrition Facts
Asian Chicken Lettuce Wraps
Amount Per Serving (1 (two wraps))
Calories 172 Calories from Fat 90
% Daily Value*
Fat 10g15%
Saturated Fat 2g13%
Trans Fat 0.03g
Polyunsaturated Fat 2g
Monounsaturated Fat 5g
Cholesterol 41mg14%
Sodium 494mg21%
Potassium 472mg13%
Carbohydrates 11g4%
Fiber 1g4%
Sugar 6g7%
Protein 11g22%
Vitamin A 2785IU56%
Vitamin C 5mg6%
Calcium 32mg3%
Iron 1mg6%
* Percent Daily Values are based on a 2000 calorie diet.

Here’s one more to pin on your Pinterest boards!Asian Chicken Lettuce Wraps are very EASY to make, and taste fantastic! With two wraps per serving, they are a great appetizer or main dish!

Apple Pecan French Toast Cups

Make delicious, baked Apple Pecan French Toast Cups! This simple dish is filled with apples, cinnamon, pecans, and topped with maple syrup!

I don’t know about you, but I LOVE French toast! In the past I have made individual sized French toast cups using blueberries and even a three berry combination.

Recently I was daydreaming about other flavor combos I could use to make a new type of French toast cup. I came up with this one, using diced and peeled apples, pecans, brown sugar and cinnamon, and wow… is it GOOD!

The recipe is quite simple to make, but the only thing is that you MUST plan ahead! Apple Pecan French Toast Cups (like the others) must be assembled the night before you want to serve them.

They need to be refrigerated overnight so the bread cubes can soak up the good egg filling. Then when you wake up and are ready for breakfast, they only need to be baked. They’re delicious, and here’s how to make them.

Scroll Down For A Printable Recipe Card At The Bottom Of The Page

A Tiny Bit Of Prep The Night Before You Bake Them

Generously butter two oven-safe ramekins on the bottom and sides. The ramekins I use for this are about 4½ inches wide and about 2 inches deep.

Cut approximately 2 cups of 1-2 day old (slightly stale) French bread into small cubes (leave crusts on). This amount of bread cubes will be divided between the two ramekins.

White ramekins are generously buttered, and day old French bread is cut into cubes.

Whisk eggs, milk, vanilla extract, and maple syrup together in a medium-sized bowl, until the ingredients are fully combined.

In a SEPARATE medium-sized bowl, place peeled and diced apples, and mix them with lemon juice. Add chopped pecans, cinnamon and brown sugar, then stir to combine.

Eggs, milk, maple syrup and vanilla extract are whisked together until combined.Peeled, diced apples are mixed with lemon juice, brown sugar, cinnamon and pecans in a bowl.

Layering The French Toast Cups

For each ramekin, add ½ cup bread cubes, then top with ¼ of the apple mixture. Top with another ½ cup bread cubes, and end with ¼ cup apple mixture.

Repeat with the other ramekin. The ramekins will be very full at this point. Place them onto an aluminum foil-lined baking sheet.

Ramekins are layered halfway with bread cubes, then apple pecan mixture.Apple Pecan French Toast cups are filled, and placed on foil-lined baking sheet.

Slowly pour the egg mixture over the top of the French toast cups, dividing the liquid equally between the two ramekins. Try to cover as much of the bread cubes with egg mixture as possible.

Use a spoon or the back of a fork to carefully push the bread slightly down into the liquid. Be careful- the ramekins will be VERY full!

Egg mixture is equally divided and poured over both ramekins.White ramekins are very full of bread cubes, apple/pecan mixture and egg filling.

Time To Chill

Cover the ramekins with plastic wrap. Let them chill in the refrigerator at least 6 hours (or overnight, which is the easiest!). The next morning, before baking, preheat the oven to 375°F.

Remove the ramekins from the refrigerator (and uncover them) about 15 minutes before cooking (while oven preheats), to take some of the chill off.

Time To Bake!

Place the ramekins (still on the foil-lined baking sheet) in a preheated 375°F. oven on a middle rack. Bake the apple pecan French toast cups for 30 minutes or until a toothpick inserted into the middle comes out clean (free of batter).

The French toast cups should be nicely browned on top when they are finished baking. Transfer the ramekins to a wire rack and let them cool for 7-8 minutes before serving.

Apple Pecan French Toast Cups cool on a wire rack for a few minutes after baking.

Serve The Apple Pecan French Toast Cups

You can serve the French toast IN the ramekins or you can remove them from the ramekins. I always remove them from the ramekins, as it is easier to serve with maple syrup (your choice).

To remove them from the ramekins, simply run a butter knife around the edges. After that, slide a fork or small spatula under the French toast to loosen and then remove.

Place the apple pecan French toast cups on serving plates, sift powdered sugar on top and serve with or without Maple syrup (with is the best!)

Apple Pecan French Toast Cups are removed from ramekins, then dusted with powdered sugar.One of the Apple Pecan French Toast Cups, served with maple syrup, on a white plate,

I really hope you have the opportunity to make these delicious apple pecan French toast cups, because I’m confident you’ll enjoy them! They’re delicious!

Thanks for stopping by today. I invite you to come back again soon for more family-friendly recipes. Take care, may God bless you… and have a GREAT day!

Looking For More FRENCH TOAST Recipes?

You can find ALL of my recipes in the Recipe Index, which is located at the top of the page. I have some delicious French Toast recipes for you to enjoy, including:

Want More Recipes? Get My FREE Newsletter!

I publish a newsletter 2 times per month (1st and 15th) with lots of recipes, tips, etc..
Would you like to join our growing list of subscribers?

There is a Newsletter subscription box on the top right (or bottom) of each blog post, depending on the device you use.
You can submit your e-mail address there, to be added to my mailing list.

Find Me On Social Media:

Facebook page: The Grateful Girl Cooks!
Pinterest:
The Grateful Girl Cooks!
Instagram:
jbatthegratefulgirlcooks

Author's signature

↓↓ PRINTABLE RECIPE BELOW ↓↓

0 from 0 votes
Apple Pecan French Toast Cups
Prep Time
10 mins
Cook Time
30 mins
INACTIVE Refrigeration Time
6 hrs
Total Time
6 hrs 40 mins
 

Make delicious, baked Apple Pecan French Toast Cups! This simple dish is filled with apples, cinnamon, pecans, and topped with maple syrup!

Category: Breakfast
Cuisine: American
Keyword: apple pecan French toast cups
Servings: 2
Calories Per Serving: 518 kcal
Author: JB @ The Grateful Girl Cooks!
Ingredients
  • teaspoons butter softened (to butter ramekins)
  • 2 cups cubed Italian bread (stale) cut into bite sized cubes
  • 3 large eggs
  • 1 cup milk
  • 2 Tablespoons pure maple syrup
  • 1 teaspoon vanilla extract
  • ¼ large Granny Smith apple peeled, diced
  • 2 teaspoons lemon juice
  • ¼ cup chopped pecans
  • 1 teaspoon brown sugar (packed)
OPTIONAL FOR SERVING: powdered sugar and/or maple syrup (as desired)
    Instructions
    PREP (Night Before):
    1. Generously butter 2 oven-safe ramekins on bottom/sides (ramekins are 4½" wide, 2" deep). Cut day old Italian bread into bite-sized cubes. Set aside.

    2. Whisk eggs, milk, maple syrup, vanilla in medium bowl, until combined. Set aside.

    3. In a SEPARATE bowl, mix diced apples with lemon juice. Add chopped pecans, cinnamon, brown sugar; stir to combine. Set aside.

    4. For each ramekin, add ½ cup bread cubes, then top with ¼ of apple mixture. Top with another ½ cup bread cubes, and end with ¼ cup apple mixture. Ramekins will be very full. Place on an aluminum foil-lined baking sheet.

    5. Slowly pour egg mixture over top of French toast cups, dividing equally between both ramekins. Cover as many bread cubes with egg mixture as possible. Use a spoon to carefully push bread cubes slightly down into liquid.

    6. Cover ramekins with plastic wrap. Refrigerate at least 6 hours or overnight. Remove ramekins from refrigerator (and uncover) 15 minutes before cooking. Preheat oven to 375°F. while you take the chill off the ramekins.

    Bake (Day Of Serving):
    1. Place ramekins (on foil-lined baking sheet) in preheated oven on middle rack. Bake at 375°F for 30 minutes or until toothpick inserted into middle comes out clean. French toast cups should be nicely browned on top. Transfer ramekins to wire rack; let cool 7-8 minutes before serving.

    2. Serve IN the ramekins or OUT (easier if using syrup).To remove from ramekins, run a knife around edges, then slide fork or spatula under French toast to loosen and remove. Place on serving plates. Sift powdered sugar on top; serve with maple syrup, if desired. Enjoy!

    Recipe Notes

    NOTE: Caloric calculation does not include powdered sugar or (extra) maple syrup used for serving, as they are optional.

    Nutrition Facts
    Apple Pecan French Toast Cups
    Amount Per Serving (1 g)
    Calories 518 Calories from Fat 279
    % Daily Value*
    Fat 31g48%
    Saturated Fat 11g69%
    Trans Fat 0.2g
    Polyunsaturated Fat 6g
    Monounsaturated Fat 12g
    Cholesterol 293mg98%
    Sodium 283mg12%
    Potassium 494mg14%
    Carbohydrates 43g14%
    Fiber 3g13%
    Sugar 33g37%
    Protein 17g34%
    Vitamin A 753IU15%
    Vitamin C 3mg4%
    Calcium 227mg23%
    Iron 2mg11%
    * Percent Daily Values are based on a 2000 calorie diet.

    Here’s one more to pin on your Pinterest boards!Make delicious, baked Apple Pecan French Toast Cups! This simple dish is filled with apples, cinnamon, pecans, and topped with maple syrup!


    Italian Meatball Sandwiches

    Make delicious, hearty Italian Meatball Sandwiches using homemade meatballs (recipe included) or store-bought meatballs (for convenience).
    Make delicious, hearty Italian Meatball Sandwiches using homemade meatballs (recipe included) or store-bought meatballs (for convenience).

    If you’re on the lookout for a delicious new lunch or dinner sandwich to try, may I suggest this recipe for Italian Meatball Sandwiches?

    These sandwiches are hearty, tasty and filling! Homemade Italian meatballs, with marinara sauce and mozzarella cheese are served on lightly toasted, garlic butter hoagie rolls! YUM!

    I came up with this recipe using the recipe I use to make Italian meatballs for spaghetti. The rest was simply re-creating what I have seen on meatballs subs my husband has ordered from restaurants over the years.

    Whether you use my simple recipe for homemade meatballs OR choose to use store-bought frozen meatballs, I’m confident you’ll love Italian Meatball Sandwiches. Here’s how to make them.

    Scroll Down For A Printable Recipe Card At The Bottom Of The Page

    Make The Italian Meatballs From Scratch

    If you want to make homemade Italian meatballs instead of purchasing them (and baking), here is the way I prepare them. It’s really easy!

    Place ground beef, salt, pepper, garlic powder, oregano, diced onion and finely grated Parmesan cheese in a mixing bowl. Stir, to combine the ingredients.

    Shape the meatball mixture into 6 balls (each about the same size). To do this, roll the meat between the palms of your hands to form a cute, round meatball.

    Lean ground beef is combined with onions, Parmesan and spices for meatballs.Meat mixture is shaped into meatballs, ready to be cooked.

    Cook The Meatballs

    Heat a Tablespoon of oil on medium heat in a large, non-stick skillet. When the oil is hot (but not smoking), add the meatballs, leaving space between each one.

    Cook until browned on the bottom (without disturbing), then carefully turn to the other side. Continue cooking on all sides, until meatballs are well-browned and fully cooked through.

    Place the meatballs on paper towels to absorb excess grease. Now you have fully cooked Italian meatballs, made in about the same time as it takes to bake store-bought meatballs!

    NOTE: This recipe, as written, will yield 2 sandwiches and requires 6 medium-sized meatballs. Double or triple the recipe if desired, to have extras for another meal.

    Italian meatballs cooking in hot oil in a skillet.Meatballs are turned and continue cooking, browning all sides and cooking through.

    Place 6 cooked meatballs into a small skillet filled with your favorite Italian-seasoned marinara sauce. Heat the meatballs and sauce through when you’re ready to make the sandwiches.

    Cooked meatballs are heated back up in a skillet of Italian-seasoned marinara sauce.

    What If I Want To Use Store-Bought Frozen Meatballs?

    Using frozen, store-bought meatballs is certainly fine, and makes this recipe slightly more convenient. Typically store bought meatballs will be smaller in size than the homemade ones (you might need 8 total to fill the two hoagie buns). If that doesn’t matter, then do what is most convenient for YOU.

    If you are making these sandwiches using frozen, store bought meatballs, follow the instructions that are on the package for cooking them.

    Once the meatballs have been fully cooked, proceed with the sauce, and then continue with the rest of the recipe.

    Toast The Hoagie Rolls

    I  toast the hoagie rolls in the oven (under the broiler), because it tends to keep the bread crisp and firm underneath the weight of the meatballs, sauce, and cheese.

    To toast the rolls, first melt butter, then stir in garlic powder. Place the rolls on an aluminum foil covered baking sheet, and open the rolls, trying to keep them attached in the back, if possible.

    Use a pastry brush to lightly brush the garlic butter onto the insides of each open roll.

    Butter is melted and garlic powder is added before brushing it on rolls.Hoagie rolls are brushed with garlic butter before broiling in the oven.

    Let’s Build  Italian Meatball Sandwiches

    Turn on the broiler in your oven. When hot, place the baking sheet about 5-6 inches from the broiler’s heating element. Broil the buttered hoagies until they turn golden brown, keeping an eye on them so they don’t burn.

    When done, remove the rolls from the oven. Place three hot meatballs on one side of each hoagie. Spoon a little of the remaining marinara sauce over the top of the meatballs.

    After broiling, the garlic butter hoagie rolls are lightly browned and toasted.Each toasted hoagie roll is topped with 3 hot meatballs and marinara sauce.

    Sprinkle the meatballs with shredded (or thinly sliced) mozzarella cheese, using just enough to cover the meatballs.

    Place the baking sheet back under the broiler (5-6 inches from the heating element), and let the cheese broil ONLY until melted. This usually only takes a minute or less, so keep an eye on it!

    Grated mozzarella cheese is added to the meatballs, and is broiled in oven until melted.

    Time To Enjoy The Italian Meatball Sandwiches

    Once the cheese has melted, remove the baking sheet with the Italian meatball sandwiches from the oven. Place the top of the hoagie roll onto the melted cheese.

    Carefully transfer the sandwiches from the baking sheet to a serving plate, using a spatula. Serve the Italian meatball sandwiches immediately, while hot!


    Top of the roll is added to the Italian meatball sandwiches, and they are ready to seve.One of the Italian meatball sandwiches is served hot, on a white plate.

    I hope you will try these delicious Italian meatball sandwiches! They are so good, and this sandwich is quite filling! If you are serving this dish to kids, a half sandwich will usually be more than enough to fill their little tummies up!

    Thanks so much for stopping by today, and I invite you to come back soon for more family-friendly recipes. Take care, may God bless you, and have a GREAT day!

    Looking For More SANDWICH Recipes?

    You can find ALL of my recipes in the Recipe Index, which is located at the top of the page. I have several great recipes for sandwiches to check out, including:

    Want More Recipes? Get My FREE Newsletter!

    I publish a newsletter 2 times per month (1st and 15th) with lots of recipes, tips, etc..
    Would you like to join our growing list of subscribers?

    There is a Newsletter subscription box on the top right (or bottom) of each blog post, depending on the device you use.
    You can submit your e-mail address there, to be added to my mailing list.

    Find Me On Social Media:

    Facebook page: The Grateful Girl Cooks!
    Pinterest:
    The Grateful Girl Cooks!
    Instagram:
    jbatthegratefulgirlcooks

    Author's signature

    ↓↓ PRINTABLE RECIPE BELOW ↓↓

    0 from 0 votes
    Italian Meatball Sandwiches
    Prep Time
    10 mins
    Cook Time
    10 mins
    Total Time
    20 mins
     

    Make delicious, hearty Italian Meatball Sandwiches using homemade meatballs (recipe included) or store-bought meatballs (for convenience).

    Category: Dinner, Lunch, Main Dish
    Cuisine: Italian
    Keyword: Italian meatball sandwiches
    Servings: 2 sandwiches
    Calories Per Serving: 614 kcal
    Author: JB @ The Grateful Girl Cooks!
    Ingredients
    For Meatballs (6 homemade):
    • ½ pound lean ground beef
    • ¼ cup diced yellow onion
    • ¼ teaspoon salt
    • teaspoon black pepper
    • teaspoon garlic powder
    • teaspoon dried oregano
    • ¼ cup Parmesan cheese (shredded)
    • 1 Tablespoon vegetable oil
    For Sandwiches (2):
    • ½ cup Italian-seasoned marinara sauce to heat cooked meatballs in
    • 2 Hoagie rolls
    • Tablespoons butter melted
    • ½ teaspoon garlic powder
    • ½ cup mozzarella cheese (shredded)
    Instructions
    If Making Homemade Meatballs:
    1. Place ground beef, salt, pepper, garlic powder, oregano, onion and Parmesan in mixing bowl. Stir until combined. Shape mixture into 6 balls, rolling meat between palms of hands to form meatballs.

    2. Heat oil on Medium in large, non-stick skillet. When hot, add meatballs. Cook without moving them, until browned on bottom, then turn, and cook on all sides, until meatballs are browned and cooked through. Transfer meatballs to paper towels to absorb grease.

    3. Place cooked meatballs into skillet filled with marinara sauce. Heat meatballs/sauce when ready to make sandwiches.

    If Using Store-Bought Frozen Meatballs:
    1. Follow instructions on the package for cooking (if small meatballs, you may need 8 (4 per sandwich) to fill the hoagie). Once meatballs are fully cooked, proceed with sauce, and the rest of the recipe.

    Building The Sandwiches:
    1. Melt butter, then stir in garlic powder. Place hoagie rolls on aluminum foil covered baking sheet. Open rolls: try to keep rolls attached in the back. Use a pastry brush to lightly brush garlic butter on insides of each open roll.

    2. Turn on oven broiler. When hot, place hoagies 5-6 inches from broiler's heating element. Broil until buttered hoagies turn golden brown; watch closely so they don't burn. When done, remove from oven. Place three hot meatballs on one side of each toasted hoagie. Spoon a little marinara sauce over the meatballs.

    3. Sprinkle meatballs with shredded (or thinly sliced) mozzarella cheese, to cover. Place sandwiches back under the broiler. Let broil ONLY until cheese has melted.

    4. Remove sandwiches from oven. Place top of hoagie roll on the melted cheese. Transfer sandwiches to serving plates, using a spatula. Serve immediately, while hot! Enjoy!
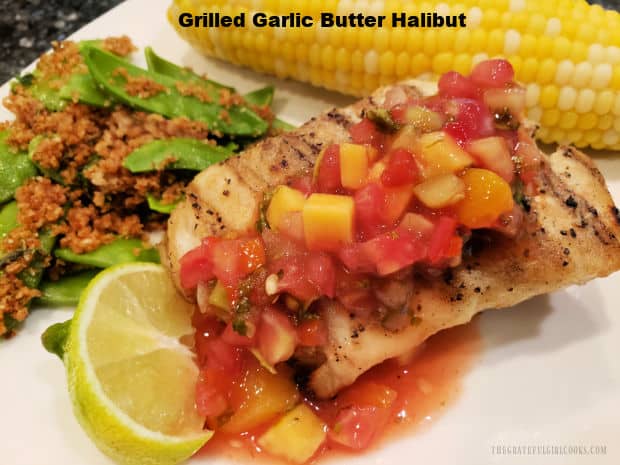
    Nutrition Facts
    Italian Meatball Sandwiches
    Amount Per Serving (1 sandwich)
    Calories 614 Calories from Fat 279
    % Daily Value*
    Fat 31g48%
    Saturated Fat 14g88%
    Trans Fat 1g
    Polyunsaturated Fat 5g
    Monounsaturated Fat 8g
    Cholesterol 122mg41%
    Sodium 1409mg61%
    Potassium 667mg19%
    Carbohydrates 41g14%
    Fiber 2g8%
    Sugar 8g9%
    Protein 41g82%
    Vitamin A 774IU15%
    Vitamin C 6mg7%
    Calcium 365mg37%
    Iron 14mg78%
    * Percent Daily Values are based on a 2000 calorie diet.

    Here’s one more to pin on your Pinterest boards!Make delicious, hearty Italian Meatball Sandwiches using homemade meatballs (recipe included) or store-bought meatballs (for convenience).