Easy Baked Mahi Mahi

Easy Baked Mahi Mahi is delicious and is a cinch to make! Lightly seasoned fillets are served with browned butter, garlic, herb and lemon sauce.

Do you enjoy seafood dishes? We do at our home, and one of the varieties of fish we really enjoy is Mahi Mahi. Firm in texture and mild in flavor, this is a very versatile fish my husband and I enjoy whenever we can!

Curious about mahi mahi? To learn more interesting facts about Mahi Mahi, its source and nutritional info., etc., check out this info source here.

My husband picks up a big bag of frozen mahi mahi fillets every couple of months from Costco. Each boneless fillet is individually wrapped and the pieces vary in sizes. I’ve featured mahi mahi in other recipes on my blog over the years.

Once my husband brings it home, I know we will be enjoying mahi mahi in our dinner rotation. I found this particular recipe online, and when we want a simple seafood meal, this is one I easily choose. It’s a super easy recipe, requires only a few ingredients and it’s delicious. Here’s how to make easy baked mahi mahi.

Scroll Down For A Printable Recipe Card At The Bottom Of The Page

Prepare The Mahi Mahi For Baking

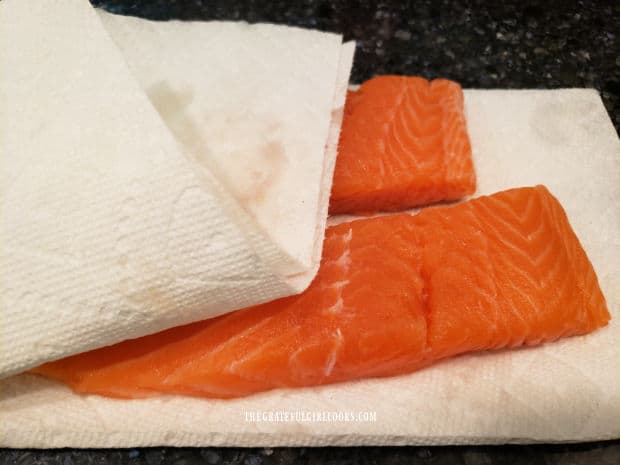
Pat boneless mahi mahi fillets dry using paper towels to absorb the excess moisture. Season each piece lightly with salt and black pepper, on both sides.

TIP: Cover a large baking sheet with aluminum foil, to help minimize your cleanup. This is an optional step, but one I recommend.

Spray the foil generously with non-stick baking spray. Cut a large lemon into 6 thin, round slices. Place two of the lemon slices together (for each piece of fish) on the aluminum foil.

Three boneless mahi mahi fillets are patted dry, then rest on plate before seasoning.

Time To Bake The Mahi Mahi

Place each piece of seasoned mahi mahi on top of two lemon slices. The shape of the fillets may vary slightly, but each piece should weigh about 4 ounces. If the fillet is long, length-wise, place a lemon slice under each end.

Bake the mahi mahi in a preheated 400° F. (204.4°C.) oven for 10-15 minutes. I recommend placing the baking pan on the middle rack in the oven for best heat circulation.

How Will I Know When The Fish Is Done?

The amount of time it takes to bake the fish will obviously depend on the thickness of the fish fillets you use. A “general rule” is that fish should be cooked about 10 minutes per inch of thickness.

A “safe” internal temperature for cooked mahi mahi is between 137°F-145°F. to ensure it is fully cooked through. If you have a meat thermometer, use it, to make sure you don’t undercook OR overcook the mahi mahi.

The fish will only be slightly browned on top, and can be easily flaked with a fork when fully cooked.

Seasoned mahi mahi fillets placed on top of lemon slices on a foil-covered baking sheet.

Make The Garlic Butter Sauce While the Fish Bakes

While the fish bakes, you can quickly make the simple garlic butter and lemon sauce to spoon or drizzle over the finished fish.

Melt butter in a medium-sized saucepan on Medium-Low heat. Continue to cook for a few minutes, stirring often, as you make browned butter.

The butter will begin bubbling, and will turn brown as the milk solids separate, due to the heat. It will also develop a slightly “nutty” aroma as it browns.

Once the butter has melted and browned, stir in minced garlic, and continue cooking for 30 seconds more. Be careful to not let the butter burn, or it becomes bitter in taste.

Butter sauce is made by first melting butter in a saucepan.Browned butter cooking in a saucepan, with minced garlic added for flavor.

Remove the pan from the heat, and stir in fresh lemon juice and fresh (or dried) chopped parsley, until incorporated into the browned butter.

Normally I use fresh parsley from our garden, but when I photographed this, our garden (and house) was covered with 4 inches of snow, so I had no fresh parsley (sigh).

TIP: If using fresh parsley, you will use 1 Tablespoon, but if using dried you will only need 1 teaspoon, because the flavor is more concentrated in dried herbs.

Lemon juice and dried (or fresh) parsley is stirred into the butter (off the heat).

Serve The Easy Baked Mahi Mahi

Once safely cooked to 137-145°F., remove the mahi mahi from the oven. Transfer the mahi mahi immediately (keeping the lemon slices underneath) to serving plates.

Spoon some of the garlic butter “sauce” over each piece of fish, making sure to get lots of minced garlic on each piece! If you have access to fresh parsley, add a couple sprigs to each piece of fish, for a pop of color!

Serve immediately while hot, and dig in! We enjoyed this easy baked mahi mahi served with brown rice and steamed broccoli on the side. It was a nice, light meal. YUM!

Easy baked mahi mahi, served with garlic butter sauce on top, brown rice and broccoli on the side.The easy baked mahi mahi fillet is served on top of lemon slices, on a white plate.

I hope you have the opportunity to try this yummy recipe for easy baked mahi mahi, and trust you’ll enjoy it as much as we do. It’s a simple recipe, but it’s really tasty.

Thank you for stopping by today, and I invite you to come back again soon, for more family-friendly recipes. Take care, may God bless you, and have a GREAT day!

Looking For More MAHI MAHI Or Other SEAFOOD Recipes?

You can find ALL of my recipes in the Recipe Index, which is located at the top of the page. I have a wonderful variety of seafood recipes for you to ch3ck out, including:

Want More Recipes? Get My FREE Newsletter!

I publish a newsletter 2 times per month (1st and 15th) with lots of recipes, tips, etc..
Would you like to join our growing list of subscribers?

There is a Newsletter subscription box on the top right (or bottom) of each blog post, depending on the device you use.
You can submit your e-mail address there, to be added to my mailing list.

Find Me On Social Media:

Facebook page: The Grateful Girl Cooks!
Pinterest:
The Grateful Girl Cooks!
Instagram:
jbatthegratefulgirlcooks

Author's signature

Original recipe source, and with thanks to Angela, at: https://bakeitwithlove.com/baked-mahi-mahi/

↓↓ PRINTABLE RECIPE BELOW ↓↓

4.5 from 2 votes
Easy Baked Mahi Mahi
Prep Time
10 mins
Cook Time
10 mins
Total Time
20 mins
 

Easy Baked Mahi Mahi is delicious and is a cinch to make! Lightly seasoned fillets are served with browned butter, garlic, herb and lemon sauce.

Category: Main Dish
Cuisine: American
Keyword: baked mahi mahi
Servings: 3
Calories Per Serving: 202 kcal
Author: JB @ The Grateful Girl Cooks!
Ingredients
  • 12 ounces mahi mahi boneless, approx. 4 oz. each
  • ½ teaspoon salt to season fish (approx.)
  • ½ teaspoon black pepper to season fish (approx.)
  • 6 thin slices lemon
  • 3 Tablespoons butter
  • teaspoons minced garlic
  • 1 Tablespoon fresh lemon juice
  • 1 Tablespoon fresh parsley (chopped) OR 1 teaspoon DRIED parsley
Instructions
  1. Preheat oven to 400°F (204.4 C). Line a baking sheet with aluminum foil. Spray foil generously with non-stick baking spray.

  2. Pat mahi mahi fillets dry using paper towels to absorb excess moisture. Season fish lightly on both sides with salt/pepper.

  3. Cut large lemon into 6 round slices. Place 2 slices together (for each piece of fish) on the aluminum foil. Place each piece of fish on top of 2 lemon slices.

  4. Bake at 400° F. (204.4°C.) for 10-15 minutes. **Time to fully cook depends on thickness of fillets. A "general rule" is fish should cook 10 minutes per inch of thickness. Fully cooked mahi mahi should have internal temperature between 137°F - 145°F. Use meat thermometer, so fish isn't undercooked OR overcooked. Fish should be slightly browned on top, and flake easily with a fork.

  5. Make Browned Butter Sauce While Fish Bakes: Melt butter in medium saucepan on Medium-Low heat. Cook 3-4 minutes, stirring often, until bubbly and browned; butter will turn brown as the milk solids separate. Stir in garlic; continue cooking for 30 seconds. Remove pan from heat; add lemon juice and parsley (fresh or dried). Stir until combined.

  6. To Serve: Remove fish from oven; Use spatula to transfer mahi mahi (keeping lemon slices underneath) to serving plates. Spoon butter sauce over each piece. Garnish with fresh parsley, if desired. Serve immediately.

Nutrition Facts
Easy Baked Mahi Mahi
Amount Per Serving (1 fillet + sauce)
Calories 202 Calories from Fat 108
% Daily Value*
Fat 12g18%
Saturated Fat 7g44%
Trans Fat 0.5g
Polyunsaturated Fat 1g
Monounsaturated Fat 3g
Cholesterol 113mg38%
Sodium 579mg25%
Potassium 501mg14%
Carbohydrates 1g0%
Fiber 0.2g1%
Sugar 0.2g0%
Protein 21g42%
Vitamin A 669IU13%
Vitamin C 5mg6%
Calcium 27mg3%
Iron 1mg6%
* Percent Daily Values are based on a 2000 calorie diet.

Here’s one more to pin on your Pinterest boards!Easy Baked Mahi Mahi is delicious and is a cinch to make! Lightly seasoned fillets are served with browned butter, garlic, herb and lemon sauce.

Cinnamon Glazed Almonds

Make a batch of cinnamon glazed almonds for a fantastic, crunchy snack. Almonds are coated and baked in a buttery cinnamon sugar glaze!

If you’re looking for a fun and tasty snack (or appetizer) that friends and family will LOVE, you’ve got to try these cinnamon glazed almonds! Wow… they are really good!

Delicious and crunchy, this is one treat that will rapidly disappear when served! The recipe as written will yield about 12 small servings (about 3 cups in total), so there’s plenty to go around!

I found the handwritten recipe many years ago in an old recipe box, and it is a KEEPER! Here’s how to make this fun, yummy snack.

Scroll Down For A Printable Recipe Card At The Bottom Of The Page

Preheat The Oven And Melt The Butter!

Place the butter onto a large (at least 13″ x 9″), rimmed baking sheet. Put the baking sheet with the butter in the oven and set the temperature for 325°F.

While the oven preheats, the butter will melt while you work on the almonds! This is a timesaver so the butter melts and the oven is preheated when the almonds are ready for baking!

Prepare The Egg White Glaze

Beat two egg whites in a large mixing bowl, using an electric mixer. If you have a stand mixer, you can use this, as well.

Continue to beat the egg whites until soft peaks are formed. The mixture will be quite foamy, and will increase in volume, too.

Two egg whites are beaten using an electric mixer.The egg whites are beaten until frothy, increased in volume, and soft peaks are formed.

Time For The Sugar

Add granulated sugar, a little at a time, to the egg white mixture, beating as you add each little bit. Keep beating until all the sugar has been added, and stiff peaks can be formed

 TIP: A stiff peak is when you can lift the thick egg whites with a spoon or the beater into a peak, and they hold their shape.

Granulated sugar is added, a little at a time, to the beaten egg white mixture.Sugared egg whites are beaten with electric mixer until firm peaks can be formed.

Add The Almonds And Cinnamon

Use a spatula or a large spoon to fold the cinnamon and almonds into the egg white mixture in the bowl. Keep folding until all the almonds have been coated with the thick mixture.

Almonds and ground cinnamon are added to the stiff egg white mixture in the bowl.Cinnamon glazed almonds are gently folded into the sugared egg white mixture until coated.

Bake The Cinnamon Glazed Almonds

Place the coated almonds on the buttered baking sheet. Stir, to incorporate the melted butter into the egg white mixture.

After that, carefully spread the coated almonds out in as much of a single layer as possible. The almonds will stick together a bit, but do the best you can!

Bake the cinnamon glazed almonds at 325°F. for 10 minutes. After 10 minutes, remove the pan from the oven. Quickly stir and turn the nuts on the baking sheet.

Cinnamon glazed almonds are combined with melted butter and spread out on baking sheet.After baking for 10 minutes, the almonds are stirred and turned in the pan.

Put the almonds back in the oven in a single layer, and continue baking. Continue to cook the almonds for 30 more minutes, giving them a gentle stir every 10 minutes.

The total cooking time for the cinnamon glazed almonds is 40 minutes, but you will need to stir and turn the nuts every 10 minutes.

The almonds bake for a total of 40 minutes, turning them every 10 minutes.

Before Serving

After the cinnamon glazed almonds have finished baking, remove the baking sheet from the oven, and let them cool on the tray. If desired, you can transfer them to wax paper to cool, but that is optional.

The almonds are at their very best when served at room temperature. If you will not be serving them right away, store them (once cooled) in an airtight container.

A baking sheet full of cinnamon glazed almonds, cooling to room temperature after baking.

Serve The Cinnamon Glazed Almonds!

When the cinnamon glazed almonds have cooled to room temperature, they are ready to be gobbled up! Transfer the nuts to a serving bowl, and watch how fast they disappear.

Store any leftover cinnamon glazed almonds in an airtight container, to preserve their crispness, and enjoy them for days! I have even frozen them for later in a freezer bag, with good results. They are so delicious!

A yellow bowl with red trim, full of cinnamon glazed almonds, ready to be eaten.Close up photo of the cinnamon glazed almonds in a bowl.

I really hope you enjoy this yummy snack! It is pretty hard to stay out of them, once you get started, so be warned (ha ha)! Yes- I speak from experience, because these crunchy cinnamon glazed almonds are absolutely delicious!

Thanks for stopping by, and I invite you to come back again soon for more family-friendly recipes. Take care, may God bless you, and have a wonderful day.

Looking For More SNACK Recipes That Use Nuts?

You can find ALL of my recipes in the Recipe Index, which is located at the top of the page. I have quite a few delicious recipes for snacks that feature a variety of nuts, including:

Want More Recipes? Get My FREE Newsletter!

I publish a newsletter 2 times per month (1st and 15th) with lots of recipes, tips, etc..
Would you like to join our growing list of subscribers?

There is a Newsletter subscription box on the top right (or bottom) of each blog post, depending on the device you use.
You can submit your e-mail address there, to be added to my mailing list.

Find Me On Social Media:

Facebook page: The Grateful Girl Cooks!
Pinterest:
The Grateful Girl Cooks!
Instagram:
jbatthegratefulgirlcooks

Author's signature

Original recipe source: unknown (found recipe handwritten on a 3×5″ index card in an old recipe box)

↓↓ PRINTABLE RECIPE BELOW ↓↓

0 from 0 votes
Cinnamon Glazed Almonds
Prep Time
10 mins
Cook Time
40 mins
Total Time
50 mins
 

Make a batch of cinnamon glazed almonds for a fantastic, crunchy snack. Almonds are coated and baked in a buttery cinnamon sugar glaze!

Category: Appetizer/Snack
Cuisine: American
Keyword: cinnamon glazed almonds
Servings: 12 (1/4 cup per serving)
Calories Per Serving: 329 kcal
Author: JB @ The Grateful Girl Cooks!
Ingredients
  • Tablespoons butter
  • 2 egg whites
  • 1 pinch kosher salt
  • 1⅛ cups granulated sugar (equals 1 cup + 6 teaspoons)
  • 4 teaspoons ground cinnamon
  • 3 cups raw almonds
Instructions
  1. Place butter on large rimmed baking sheet (at least 13" x 9"). Put baking sheet in oven; set temp. for 325°F.

  2. Beat egg whites in large mixing bowl with an electric mixer. Continue to beat egg whites until soft peaks form. Mixture will be foamy, and will increase in volume.

  3. Add sugar, a little at a time, to egg white mixture, beating as you add. Keep beating until all sugar has been added, and stiff peaks can be formed TIP: A stiff peak is when you can lift thick egg whites with a spoon or beater into a peak, and they hold their shape.

  4. Gently fold cinnamon and almonds into egg white mixture, until almonds have been fully coated. Place almonds on buttered baking sheet. Stir, to mix melted butter into egg white mixture.

  5. Carefully spread coated almonds out in single layer. Bake at 325°F. for 10 minutes. After 10 minutes, remove pan from oven. Quickly stir and turn the nuts. Put the almonds back in the oven in a single layer; continue baking. Bake almonds 30 more minutes, stirring every 10 minutes.

  6. When done, remove pan from oven; let almonds cool on the tray. Serve almonds at room temperature. If not serving them right away, store cooled almonds in an airtight container (room temp.). Enjoy!

Nutrition Facts
Cinnamon Glazed Almonds
Amount Per Serving (1 (approx. 1/4 cup per serving))
Calories 329 Calories from Fat 207
% Daily Value*
Fat 23g35%
Saturated Fat 5g31%
Trans Fat 0.2g
Polyunsaturated Fat 5g
Monounsaturated Fat 13g
Cholesterol 14mg5%
Sodium 53mg2%
Potassium 275mg8%
Carbohydrates 27g9%
Fiber 5g21%
Sugar 20g22%
Protein 8g16%
Vitamin A 163IU3%
Vitamin C 0.02mg0%
Calcium 105mg11%
Iron 1mg6%
* Percent Daily Values are based on a 2000 calorie diet.

Here’s one more to pin on your Pinterest boards!

Make a batch of cinnamon glazed almonds for a fantastic, crunchy snack. Almonds are coated and baked in a buttery cinnamon sugar glaze!

Egg, Bacon and Veggie Scramble

Want a filling meal to start the day? Try an Egg, Bacon and Veggie Scramble – it’s a delicious and easy to make, healthy breakfast.
Want a filling meal to start the day? Try an Egg, Bacon and Veggie Scramble - it's a delicious and easy to make, healthy breakfast.

Do you enjoy scrambled eggs for breakfast? I sure do, and usually enjoy them the most when combined with ham chunks and cheddar cheese! That’s my FAVORITE way to eat them, even if it’s not the healthiest way to enjoy them.

That being said, at times I try to eat “healthier” meals, and this is a “go to” recipe I came up with to do that! I know I need to incorporate more vegetables into my meals, and this breakfast recipe helps to achieve that goal.

This yummy egg dish is filling, because it’s full of scrambled eggs, bacon, cooked broccoli, green onions and red bell peppers! It has color, texture, protein, and FLAVOR!

As written, this recipe will make one serving, but can easily be adapted for more servings. Here’s how to make an egg, bacon and veggie scramble.

Scroll Down For A Printable Recipe Card At The Bottom Of The Page

Cook The Chopped Bacon Until Crisp

Cut a slice of bacon into thin strips or pieces. Place the bacon in a medium non-stick skillet (big enough to cook the eggs later).

Cook the bacon, stirring often, until it becomes crispy. Once the bacon has finished cooking, leave the bacon (and the bacon “grease”) in the skillet. 

NOTE: If you are making more than this one serving, you will have more grease remaining than you’ll need (from using more bacon). For each portion, you need to leave about 1 teaspoon of grease remaining in the skillet.

A slice of bacon is cut into small pieces, then is cooked in a skillet until crispy.

Add The Veggies To The Skillet

Add chopped red bell pepper, broccoli, and chopped green onions to the skillet with the bacon (and bacon “grease). Stir, to combine them with the bacon.

No oil is needed, since the veggies will cook in the small amount of bacon grease left in the skillet. Cook on medium heat for 3-4 minutes, or until the veggies become tender.

Chopped red bell pepper, broccoli and green onion are added to cooked bacon in the skillet.Veggies are cooked 3-4 minutes in the skillet until they become tender.

Now Let’s Scramble Those Eggs

In a small bowl, whisk together two eggs and 2 Tablespoon of milk until combined. Add the eggs to the skillet, and stir, to combine them with the veggies.

Cook the eggs, stirring occasionally, until they’re fully cooked, and well-incorporated into the veggies and bacon in the skillet.

Beaten eggs, salt and pepper are added to the veggies and bacon in the skillet.Egg, bacon and veggie scramble, fully cooked in the skillet.

Time To Enjoy The Egg, Bacon and Veggie Scramble

Immediately transfer the hot egg, bacon and veggie scramble onto a plate, and serve immediately. Be sure to serve the scrambled eggs with a favorite side dish!

I LOVE to have these scrambled eggs with half of a juicy, Ruby red grapefruit on the side. It’s such a delicious breakfast, and I enjoy it often!

The texture and color of the veggies, the golden colored eggs and the pinkish red of the grapefruit make this meal “pretty on the plate”, too! YUM!

The egg, bacon and veggie scramble, served with a half red grapefruit on the side.

What If I Don’t Eat Bacon?

If you don’t eat meat or don’t want to use the bacon called for in the recipe, no problem! All you’ll need is a tiny bit of a light oil to cook the veggies in.

Simply heat 1 teaspoon of a neutral cooking oil in the skillet and then cook the chopped broccoli, red bell peppers and green onions. Proceed with the rest of the recipe, as written.

A white plate with one serving of egg, bacon and veggie scramble.

I hope you have the chance to make this yummy egg, bacon and veggie scramble for yourself or someone you love. It’s delicious!

As written, this recipe makes enough for one serving. However, the quantity can EASILY be doubled, tripled, etc. so you can make as much of this recipe as you need.

Thanks so much for stopping by, and I invite you to come back again soon for more family-friendly recipes. Take care, may God bless you, and have a GREAT day.

Looking For More BREAKFAST Recipes?

You can find ALL of my recipes in the Recipe Index, which is located at the top of the page. I have a great variety of breakfast recipes you’ll want to check out, including:

Want More Recipes? Get My FREE Newsletter!

I publish a newsletter 2 times per month (1st and 15th) with lots of recipes, tips, etc..
Would you like to join our growing list of subscribers?

There is a Newsletter subscription box on the top right (or bottom) of each blog post, depending on the device you use.
You can submit your e-mail address there, to be added to my mailing list.

Find Me On Social Media:

Facebook page: The Grateful Girl Cooks!
Pinterest:
The Grateful Girl Cooks!
Instagram:
jbatthegratefulgirlcooks

Author's signature

↓↓ PRINTABLE RECIPE BELOW ↓↓

0 from 0 votes
Egg, Bacon and Veggie Scramble
Prep Time
5 mins
Cook Time
6 mins
Total Time
11 mins
 

Want a filling meal to start the day? Try an Egg, Bacon and Veggie Scramble - it's a delicious and easy to make, healthy breakfast.

Category: Breakfast
Cuisine: All Cuisines
Keyword: egg bacon and veggie scramble
Servings: 1 serving
Calories Per Serving: 284 kcal
Author: JB @ The Grateful Girl Cooks!
Ingredients
  • 1 slice bacon in small pieces; cooked until crisp
  • ½ cup chopped broccoli
  • ½ cup chopped red bell pepper
  • 1 Tablespoon chopped green onion
  • 2 large eggs
  • 2 Tablespoons milk
  • salt and pepper, to taste
Instructions
  1. Cut bacon into small pieces and place them in a medium non-stick skillet. Cook, stirring often, until bacon becomes crisp. Leave bacon (and bacon grease) in skillet.

    NOTE: If making more than one serving, you'll have more grease than you'll need (from using more bacon). For each portion, leave 1 tsp. grease in skillet.

  2. Add red bell pepper, broccoli, and green onions to the skillet. No oil is needed, since veggies will cook in bacon grease. Cook on medium heat for 3-4 minutes, or until veggies become tender.

  3. In a small bowl, whisk together eggs and milk until combined. Add this mixture to the skillet; stir, to combine with veggies/bacon. Cook eggs, stirring often, until fully cooked. Season to taste, with salt and pepper.

  4. Immediately transfer eggs to a plate. Serve hot, with a favorite side dish. Enjoy!

Recipe Notes

NOTE: Salt/pepper were not calculated as the amounts used may vary greatly per person.

Nutrition Facts
Egg, Bacon and Veggie Scramble
Amount Per Serving (1 g)
Calories 284 Calories from Fat 171
% Daily Value*
Fat 19g29%
Saturated Fat 6g38%
Trans Fat 0.1g
Polyunsaturated Fat 4g
Monounsaturated Fat 8g
Cholesterol 388mg129%
Sodium 318mg14%
Potassium 547mg16%
Carbohydrates 11g4%
Fiber 3g13%
Sugar 6g7%
Protein 19g38%
Vitamin A 3283IU66%
Vitamin C 137mg166%
Calcium 126mg13%
Iron 3mg17%
* Percent Daily Values are based on a 2000 calorie diet.

Here’s one more to pin on your Pinterest boards!Want a filling meal to start the day? Try an Egg, Bacon and Veggie Scramble - it's a delicious and easy to make, healthy breakfast.


Shamrock Sugar Cookies

Make Shamrock Sugar Cookies for St. Patrick’s Day! You’ll love these soft cookies, which can be decorated with green icing (recipe included).Make Shamrock Sugar Cookies for St. Patrick's Day! You'll love these soft cookies, which can be decorated with green icing (recipe included).

Top o’ the morning to ya! St. Patrick’s Day is right around the corner, so why not make shamrock cookies to mark the occasion? Better yet, why not make the cookies and let the kids (your own little leprechauns) help decorate them?

These soft sugar cookies are easily made, and can be cut into any desired shape. I used two different sized shamrock cookie cutters for this batch, and then added Irish green icing and sprinkles for decoration.

The icing for decorating the cookies is optional, so you can choose to add it or not. Undecorated shamrock cookies are soft, slightly sweet and delicious even without icing. Here’s how to make these festive cookies.

Scroll Down For A Printable Recipe Card At The Bottom Of The Page

Make The Cookie Batter

Cream room temperature butter and granulated sugar together in a large bowl, using an electric mixer. Beat until the mixture becomes fully combined, and fluffy.

Add 2 eggs, ONE AT A TIME, beating between each addition. Measure vanilla extract and almond extract into the batter, and continue beating until they’re incorporated into the dough.

Granulated sugar and butter are creamed together in a large bowl, with an electric mixer.Eggs are added, one at a time to the butter mixture.

Mix Dry Ingredients And Add To Batter

In a separate large bowl, stir (or whisk) flour, baking powder and salt together. Add this dry mixture a little at a time to the batter, while beating on LOW speed until fully combined.

The cookie dough at this point will be fairly thick, a bit sticky, and soft in texture.

Flour, baking powder and salt are mixed into the dough until incorporated.Dough for the shamrock cookies is thick and soft after mixing.

Rolling And Chilling the Dough

Equally divide the cookie dough into two portions. Put each piece on a lightly floured silicone mat OR parchment paper (also floured).

Use a rolling pin (lightly floured) to roll each portion of dough out until it is approx. ¼” in thick. If the dough starts to stick, sprinkle the top of the dough and rolling pin with a tiny bit more flour.

After the dough is rolled to ¼” thickness, lightly sprinkle the top of each piece of dough with flour. Cover each portion with plastic wrap, and place them in the refrigerator to chill at least 2 hours (or overnight, if desired).

Cookie dough is halved, then each piece is rolled out on a floured surface until 1/4" thick.Dough for shamrock cookies is covered with plastic wrap and refrigerated two hours until firm.

Cut Out The Cookies

Preheat your oven to 375°F. before cutting out the cookies. Take ONE PORTION of the dough out of the refrigerator (keep other piece refrigerated). Use a shamrock cookie cutter to carefully cut out the cookies. 

Place the cutout cookies onto large baking sheets lined with silicone mats, or parchment paper that has been lightly floured. Leave about 2″ between each cookie. Remove the second half of the dough and repeat the process.

TIP: You can use those remaining scrap pieces of dough! Combine the scraps, re-roll the dough and cut out more cookies, then refrigerate cookies for 10 minutes before baking. You want the dough cold and slightly firm again, so the cookies don’t spread out too much while baking, ruining their shape!

On average, this recipe yields about 36 cookies. I used 2 different sized cookie cutters (one was fairly small), so I ended up with about 40 shamrock cookies. The size cookie cutter(s) you use will determine the total quantity of cookies.

Bake The Shamrock Sugar Cookies

Bake the cookies at 375°F. for 8-10 minutes, or ONLY until the cookies are very lightly browned on the bottom. DO NOT OVERBAKE!

Let the cookies rest and cool on the baking sheet for 5 minutes, then transfer them with a spatula to wire racks to finish cooling. 

Cut out shamrock cookies on a silicone mat (on baking sheet) ready to be baked.Shamrock cookies are baked until only very slightly browned, then cool on wire rack.

Make The Icing (Optional)

If you want to make decorative icing for the cookies, it’s simple. Measure powdered sugar, 2 Tablespoons of milk (to start), light corn syrup, and vanilla extract into a medium bowl.

TIP: If you want to color the icing, add the gel coloring at this point. Stir until the desired color is reached and evenly distributed in the icing.

Stir until the icing ingredients are combined and lump-free. If the icing is too thick, add a tiny bit of milk (about 1 teaspoon) at a time, stirring until it reaches the desired consistency.

You will want the icing to be spreadable and slightly thick (or pipeable, if using a pastry bag). TIP: Too thick? Add a tiny bit of milk. Too thin? Add a little more powdered sugar.

Mixing the ingredients for green icing to decorate the shamrock cookies.Green icing is mixed and is now ready to decorate the shamrock cookies.

To Decorate Or Not? That IS The Question!

TRUTH! If there were awards for worst cookie decorator, I’m fairly sure I would rank right up there somewhere near the top of the list. I am not a good or skilled cookie decorator AT ALL.

That being said, if you make the icing and want to decorate your shamrock cookies, go for it! Whether you spread it, pipe it, or dunk the cookies in icing, have fun decorating these shamrock cookies, whatever the result!

Kids LOVE to be creative with their own special decorated cookie creations, so make that icing, and let them have a go at it. Their decorated cookies will probably be better looking than mine… ha ha!

Wait until the cookies have cooled to room temperature before decorating. After decorating, let the cookies rest, so the icing gets firm. Once the icing has hardened, grab a cookie and enjoy a bite! They’re delicious.

Shamrock cookies, with green icing and colored sprinkles, resting on a wire rack.

Thanks for taking time out of your day to visit my blog. I hope you have the opportunity to try these yummy little shamrock cookies. Remember you can use your favorite cookie cutters to make these cookies for any holiday or occasion, too!

I hope you have a great day, and invite you to come back again soon for more family-friendly recipes. Take care, and may God bless you!

Looking For More COOKIE Recipes?

You can find ALL of my recipes in the Recipe Index, which is located at the top of the page. I have lots of cookie recipes for you to enjoy, including:

Want More Recipes? Get My FREE Newsletter!

I publish a newsletter 2 times per month (1st and 15th) with lots of recipes, tips, etc..
Would you like to join our growing list of subscribers?

There is a Newsletter subscription box on the top right (or bottom) of each blog post, depending on the device you use.
You can submit your e-mail address there, to be added to my mailing list.

Find Me On Social Media:

Facebook page: The Grateful Girl Cooks!
Pinterest:
The Grateful Girl Cooks!
Instagram:
jbatthegratefulgirlcooks

Author's signature

Original recipe source (and with thanks to): Blair Lonergan, at: theseasonedmom.com/cut-out-sugar-cookies/

↓↓ PRINTABLE RECIPE BELOW ↓↓

0 from 0 votes
Shamrock Sugar Cookies
Prep Time
15 mins
Cook Time
10 mins
Refrigeration Time (Inactive)
1 hr
Total Time
1 hr 25 mins
 

Make Shamrock Sugar Cookies for St. Patrick's Day! You'll love these soft cookies, which can be decorated with green icing.

Category: Dessert
Cuisine: All Cuisines
Keyword: shamrock cookies
Servings: 36 cookies (approx.)
Calories Per Serving: 95 kcal
Author: JB @ The Grateful Girl Cooks!
Ingredients
For Cookies:
  • cups all purpose flour
  • 1 teaspoon baking powder
  • ½ teaspoon salt
  • 1 cup granulated sugar
  • ¾ cup butter (=12 Tbl. or 1½ sticks), at room temp.
  • 2 large eggs at room temp.
  • teaspoons vanilla extract
  • ¼ teaspoon almond extract
For Icing: (this is optional, but can be used to decorate cookies!)
  • 3 cups powdered sugar
  • 3 Tablespoons milk + more as needed
  • 2 Tablespoons light corn syrup
  • ½ teaspoon vanilla extract
  • gel food coloring (optional) to color the icing
Instructions
For Cookies:
  1. Cream butter and sugar together in large bowl, using electric mixer. Beat until fully combined/fluffy. Add eggs, one at a time, beating between each addition. Measure vanilla and almond extracts into batter; continue beating until they're incorporated into dough.

  2. In separate large bowl, stir (or whisk) flour, baking powder and salt together. Add this (a little at a time) to the bowl of batter, while mixing on LOW speed until combined. Cookie dough will be fairly thick, and a bit sticky.

  3. Divide dough into two equal portions. Put each on lightly floured silicone mats OR parchment paper (also floured). Use a rolling pin (lightly floured) to roll each portion of dough out until it is ¼" thick. If dough begins to stick, sprinkle dough and rolling pin with a tiny bit more flour. After dough is rolled to ¼" thickness, lightly sprinkle the top of dough with flour. Cover each portion with plastic wrap; refrigerate at least 2 hours (or overnight, if desired).

  4. Preheat oven to 375°F. before cutting out cookies.

  5. Take 1 portion of chilled dough out of refrigerator (keep other one refrigerated). Use shamrock cookie cutter to cut out cookies. Place cookies on large baking sheets lined with silicone mats, or lightly floured parchment paper. Leave 2" between cookies. Remove remaining half of dough from refrigerator; repeat process. The size cookie cutter(s) you use determines the total quantity of cookies. TIP: You can use those remaining scrap pieces of dough! Combine scraps, re-roll the dough, cut out more cookies, then refrigerate cookies for 10 minutes before baking. You want dough cold/firm again, so cookies don't spread out too much while baking, ruining their shape!

  6. Bake cookies at 375°F. for 8-10 minutes, or ONLY until the cookies are very lightly browned on the bottom. DO NOT OVERBAKE! Let cookies rest on baking sheet for 5 minutes, then transfer to a wire rack to finish cooling. 

Make Icing And Decorate:
  1. Measure powdered sugar, 2 Tablespoons of milk (to start), light corn syrup, and vanilla into a medium bowl. If you want colored icing, add gel coloring. Stir until ingredients are fully combined, lump-free, and desired color. If icing is too thick, add a bit of milk (about 1 teaspoon) at a time, stirring until it reaches desired consistency. Icing should be spreadable and slightly thick (or pipeable, if using a pastry bag). TIP: Too thick? Add a tiny bit of milk. Too thin? Add a little more powdered sugar.

  2. Wait until cookies have cooled to room temperature before decorating. After decorating, let cookies rest, so the icing hardens. Serve, and enjoy!

Recipe Notes

NOTE: Caloric calculation was made for cookies WITHOUT icing. If icing is added to the cookies, their approximate caloric value would increase to 138 per cookie, on average.

Nutrition Facts
Shamrock Sugar Cookies
Amount Per Serving (1 cookie)
Calories 95 Calories from Fat 36
% Daily Value*
Fat 4g6%
Saturated Fat 3g19%
Trans Fat 0.2g
Polyunsaturated Fat 0.2g
Monounsaturated Fat 1g
Cholesterol 21mg7%
Sodium 67mg3%
Potassium 27mg1%
Carbohydrates 13g4%
Fiber 0.3g1%
Sugar 6g7%
Protein 1g2%
Vitamin A 133IU3%
Calcium 9mg1%
Iron 1mg6%
* Percent Daily Values are based on a 2000 calorie diet.

Here’s one more to pin on your Pinterest boards!

Make Shamrock Sugar Cookies for St. Patrick's Day! You'll love these soft cookies, which can be decorated with green icing, if desired (recipe included).

Chicken Pineapple Bacon Burger

Enjoy a Chicken Pineapple Bacon Burger tonight! Chicken patties, glazed with teriyaki-style sauce, & topped with grilled pineapple & bacon!

Do you enjoy chicken burgers? We occasional make them, and always enjoy them. Recently I came up with a delicious chicken burger which I am sharing with you today. I found the original recipe for the burger patties (using ground chicken) online.

I made the sauce by adapting an Asian-inspired recipe I found previously on another website. My thought was “Wow…if I combine the two separate recipes into one, that might taste really good.”

So I set about to make them! I modified the sauce recipe slightly, and used it to coat the chicken patties while cooking AND used it as a condiment on the finished burgers.

The result was a delicious chicken pineapple bacon burger, which was a happy surprise! As written, this recipe will make enough for 4 burgers. Here’s how to make them.

Scroll Down For A Printable Recipe Card At The Bottom Of The Page

Make The Sauce

Mix pineapple juice, soy sauce, BBQ sauce, honey and red pepper flakes in a medium sized saucepan. Stir until these ingredients have been combined.

Heat the sauce on Medium heat until it is bubbling. Once bubbling, turn the heat down to Medium-Low, and cook until the sauce has been reduced by about half.

Ingredients for the burger sauce are combined in a medium sized saucepan.

Sauce for the chicken burgers is cooked until bubbly and reduced in volume.

The sauce should also be slightly thickened at this point. Take the saucepan off of the heat, and stir in finely grated fresh ginger. Set the sauce aside to cool.

Fresh grated ginger is stirred into the sauce after the pan is removed from the heat.

Grill the Pineapple

The next thing to do is grill the pineapple slices. Dry 4 pineapple rings between paper towels to absorb moisture. Very lightly oil a large skillet, and turn the heat to Medium. 

 Once the skillet is hot, lay pineapple rings (you will need 4) in a single layer. Heat the pineapple only until the bottom begins to brown, then carefully flip them to the other side.

Continue to cook only until the bottoms again become lightly browned. Transfer the grilled pineapple slices out of the skillet and let them cool.

Canned pineapple rings are grilled in a skillet until golden brown on both sides.

Prepare The Burger Fixin’s

Before you grill the chicken patties, get all your burger toppings in place and be ready to build the burgers. Each chicken pineapple bacon burger will have a grilled pineapple ring, red onion slice, lettuce and crispy cooked bacon slice.

For the buns, you can serve them warmed, OR you can lightly toast them. My preference is to lightly toast them face down on medium heat in a large skillet, but it’s your choice.

Toasted hamburger buns, bacon, lettuce, onion and grilled pineapple ready for burgers.

Make The Chicken Patties

Place the ingredients for the chicken patties in a large bowl. The ingredients for the patties are ground chicken, egg yolk, green onion, sesame oil and spices.

Mix well with a fork until all the ingredients have been combined. Now it’s time to form the chicken patties. For each patty you will use ¼ of the meat mixture.

The ingredients for the chicken patties are combined in a bowl.


TIP: Wet your hands, then shape the meat into a ball. Wetting your hands helps the chicken mixture not stick  to your hands as much as if they were dry.

Flatten the chicken “ball” into the shape of a burger patty, then set it aside on wax paper. Repeat this process until you have four chicken burger patties.

Chicken burger mixture is shaped into round burger patties before cooking.

Cooking The Chicken Patties

Heat a large skillet on Medium-Low, and add 1 Tablespoon of vegetable oil (or an alternative). When the oil is hot, but not smoking, carefully add the patties to the skillet.

Let the chicken patties cook for about 2-3 minutes, without moving them. This allows the bottom side of the burger to get nicely browned.

Chicken burger patties cooking in a large, cast iron skillet.

Use a spatula to carefully turn the patties to the other side. Generously baste the top of each chicken patty with the reserved sauce.

Continue cooking for 2-3 more minutes OR until the patties are fully cooked through.

Flip the patties a final time and baste the other side with sauce. Now you are ready to build the chicken pineapple bacon burgers!

After the bottom of the patties brown, the burgers are flipped over in the skillet.Sauce is brushed onto the top of each of the chicken burger patties.

Who Wants A Chicken Pineapple Bacon Burger?

You can build your burger any way you wish, but this is how I build ours. Lightly brush sauce on the bottom bun, then top with the chicken patty.

Top the chicken with a grilled pineapple ring, then cut a cooked bacon slice in half and place the two pieces on top of the pineapple.

For the top bun, brush it lightly with more sauce, then add a red onion slice and a lettuce leaf. Place the top bun on the burger, and you’re ready to enjoy this delicious meal!

Layering on the condiments on top of the grilled chicken burger patty.A plate with a chicken pineapple bacon burger on it, ready to be eaten and enjoyed.

I hope you enjoy this recipe for chicken burgers. They have great flavor. and are very filling Yes… there is a fairly long ingredient list, but I think it’s worth it!

Thank you for stopping by today, and please come back soon for more family-friendly recipes. Take care, and have a GREAT day!

Looking For More BURGER Recipes?

You can find ALL of my recipes in the Recipe Index, which is located at the top of the page. I have lots of yummy recipes featuring chicken, including:

Want More Recipes? Get My FREE Newsletter!

I publish a newsletter 2 times per month (1st and 15th) with lots of recipes, tips, etc..
Would you like to join our growing list of subscribers?

There is a Newsletter subscription box on the top right (or bottom) of each blog post, depending on the device you use.
You can submit your e-mail address there, to be added to my mailing list.

Find Me On Social Media:

Facebook page: The Grateful Girl Cooks!
Pinterest:
The Grateful Girl Cooks!
Instagram:
jbatthegratefulgirlcooks

Author's signature

Chicken Patty recipe from Bee, at: rasamalaysia.com/chicken-patties/
Sauce recipe adapted from Tricia, at: savingdessert.com/grilled-hawaiian-chicken-sandwich/

↓↓ PRINTABLE RECIPE BELOW ↓↓

0 from 0 votes
Chicken Pineapple Bacon Burger
Prep Time
15 mins
Cook Time
8 mins
Total Time
23 mins
 

Enjoy a Chicken Pineapple Bacon Burger tonight! Chicken patties, glazed with teriyaki-style sauce, & topped with grilled pineapple & bacon!

Category: Main Course, Sandwich
Cuisine: All Cuisines
Keyword: chicken pineapple bacon burger
Servings: 4
Calories Per Serving: 583 kcal
Author: JB @ The Grateful Girl Cooks!
Ingredients
For Sauce:
  • 20 ounce can pineapple slices (Use JUICE ONLY for sauce) reserve pineapple slices
  • 2 Tablespoons low sodium soy sauce
  • ¼ cup BBQ sauce
  • 2 Tablespoons honey
  • ¼ teaspoon red chili flakes (optional, but good!)
  • 1 inch piece fresh ginger peeled, finely grated
For Chicken Patties:
  • 1 pound ground chicken
  • 1 egg yolk
  • 1 green onion (scallion) bulb & stem thinly sliced
  • ¼ teaspoon salt
  • ¼ teaspoon black pepper
  • teaspoon cayenne pepper
  • 1 teaspoon toasted sesame oil
  • 1 Tablespoon vegetable oil for cooking patties
For 4 Sandwiches:
  • 4 hamburger buns lightly toasted (if desired)
  • 4 slices bacon cooked until crisp
  • 4 iceberg lettuce leaves
  • 4 thin slices red onion
Instructions
  1. Make The Sauce: Mix pineapple juice, soy sauce, BBQ sauce, honey and red pepper flakes in medium saucepan. Stir until combined. Heat sauce on Medium heat until bubbling. Once bubbling, turn heat to Medium-Low; cook until sauce is reduced in volume by about half, and slightly thickened. Remove pan from heat: stir in grated fresh ginger. Set aside.

  2. Grill Pineapple: Dry 4 pineapple rings between paper towels to absorb moisture. Lightly oil large skillet; turn heat to Medium. Once skillet is hot, add pineapple rings in a single layer. Heat pineapple only until bottom begins to brown; flip them over to the other side. Continue to cook only until bottom side is lightly browned. Transfer pineapple out of skillet; let cool.

  3. Make Chicken Patties: Place ground chicken, egg yolk, green onion, sesame oil and spices in large bowl. Mix well with a fork until all combined. For each patty use ¼ of the meat mixture. Wet hands, then shape chicken into a ball. Flatten "ball" out into the shape of a burger patty; set aside on wax paper. Repeat to make 4 patties total.

  4. Cook Burgers: Heat large skillet on Medium-Low. Add vegetable oil. When oil is hot, but not smoking, add patties in single layer. Let patties cook for about 3-4 minutes, without moving them. This allows bottom of burger to brown. Use a spatula to turn patties over. Generously baste top of each patty with sauce. Continue cooking 3-4 more minutes OR until the patties are cooked through. Flip patties a final time and baste top with sauce.

  5. Assemble Each Burger: Lightly brush sauce on bottom bun; top with chicken patty. Add 1 grilled pineapple ring. Cut 1 cooked bacon slice in half; place both pieces on top of the pineapple. Brush top bun lightly with sauce. Add a red onion slice and lettuce leaf. Place top bun on burger, serve and enjoy!

Nutrition Facts
Chicken Pineapple Bacon Burger
Amount Per Serving (1 sandwich)
Calories 583 Calories from Fat 234
% Daily Value*
Fat 26g40%
Saturated Fat 7g44%
Trans Fat 0.1g
Polyunsaturated Fat 7g
Monounsaturated Fat 10g
Cholesterol 161mg54%
Sodium 1051mg46%
Potassium 973mg28%
Carbohydrates 61g20%
Fiber 3g13%
Sugar 38g42%
Protein 29g58%
Vitamin A 318IU6%
Vitamin C 15mg18%
Calcium 112mg11%
Iron 3mg17%
* Percent Daily Values are based on a 2000 calorie diet.

Here’s one more to pin on your Pinterest boards!Enjoy a Chicken Pineapple Bacon Burger tonight! Chicken patties, glazed with teriyaki-style sauce, & topped with grilled pineapple & bacon!

Asian-Inspired Couscous

 Asian-Inspired Couscous is a simple, flavor-filled side dish to make, with green onions, soy sauce, and a few spices (ginger, garlic, etc.).
Asian-Inspired Couscous is a simple, flavor-filled side dish to make, with green onions, soy sauce, and a few spices (ginger, garlic, etc.).

If you’re like me, you’re probably constantly on the lookout for a new recipe or two that are easy to make and taste great. Simple, right?

Well, this recipe for Asian-Inspired Couscous fits that bill. It is VERY simple to make, and has wonderful flavor. Green onions, soy sauce, garlic, ginger, and a smidge of cayenne pepper give this versatile couscous side dish it’s great taste.

Couscous is a fairly bland variety of pasta made with semolina flour, but it absorbs flavors very well. It is low in fat, but also contains more protein, minerals and vitamins than white rice.

Because couscous absorbs flavors well, it’s perfect used in this recipe, because it takes on Asian-inspired flavors from the spices, soy sauce and green onions. Here’s how to make this side dish.

Scroll Down For A Printable Recipe Card At The Bottom Of The Page

Prepare The Asian-Inspired Sauce

Spray a large skillet with non-stick baking spray. Heat the skillet on Medium-High heat until it is very hot. Add chopped green onions to the skillet and cook, stirring often, until they become tender (2-3 minutes).

Now add water, soy sauce, sugar, garlic powder, ground ginger, and cayenne pepper to the skillet. Stir until the ingredients are well-combined, then bring the liquid to a full boil.

Chopped green onions are cooked in a lightly sprayed skillet on Medium-High heat.Water, soy sauce, and spices are added to the cooked green onions in the skillet.

Cook The Couscous

Pour uncooked couscous into the boiling liquid in the skillet. Stir well, to fully combine the liquid and the couscous.

A cup of uncooked couscous is added to the boiling liquid in the skillet.Couscous, ready to be stirred into the Asian-inspired sauce and cooked.

Put a lid on the skillet, and turn the heat down to Low. Simmer the Asian-inspired couscous COVERED on low heat for 10-12 minutes, or until the liquid has been absorbed. Stir occasionally.

Asian-inspired couscous cooks in a covered skillet on low heat in sauce until liquid is absorbed.

Fluff And Serve Asian-Inspired Couscous

When all the liquid has been absorbed into the couscous, it should be ready to serve. The couscous should be tender to the bite. Use a fork to “fluff” up the couscous before serving.
Asian-inspired couscous is fluffed with a fork before serving, once liquid has been absorbed.

Serve the Asian-inspired couscous right out of the skillet, or transfer to a serving bowl. Serve this dish immediately while the couscous is still hot!

This recipe for Asian-inspired couscous will yield enough for six small side dish servings. It pairs well with beef, chicken, pork or lamb, and I’m confident you’ll like it.

A white bowl filled with hot Asian-inspired couscous, ready to be served.,

I hope you have the opportunity to make this versatile side dish, and trust you’ll enjoy it as much as we do. It is a very handy recipe to have because it’s so yummy, and is a cinch to make!

Thanks for stopping by, and I invite you to come back again soon for more family-friendly recipes. Take care, God bless, and have a GREAT day!

Looking For More SIDE DISH Recipes?

You can find ALL of my recipes in the Recipe Index, which is located at the top of the page. I have lots of delicious side dishes for you to choose from, including:

Want More Recipes? Get My FREE Newsletter!

I publish a newsletter 2 times per month (1st and 15th) with lots of recipes, tips, etc..
Would you like to join our growing list of subscribers?

There is a Newsletter subscription box on the top right (or bottom) of each blog post, depending on the device you use.
You can submit your e-mail address there, to be added to my mailing list.

Find Me On Social Media:

Facebook page: The Grateful Girl Cooks!
Pinterest:
The Grateful Girl Cooks!
Instagram:
jbatthegratefulgirlcooks

Author's signature

Original recipe source: ” Cooking Light” Cookbook 1994, pages 132-133, published in 1993 by Oxmoor House

↓↓ PRINTABLE RECIPE BELOW ↓↓

0 from 0 votes
Asian-Inspired Couscous
Prep Time
10 mins
Cook Time
12 mins
Total Time
22 mins
 

Asian-Inspired Couscous is a simple, flavor-filled side dish to make, with green onions, soy sauce, and a few spices (ginger, garlic, etc.).

Category: Side Dish
Cuisine: Asian
Keyword: Asian-inspired couscous
Servings: 6
Calories Per Serving: 116 kcal
Author: JB @ The Grateful Girl Cooks!
Ingredients
  • cooking spray (enough for skillet)
  • ½ cup sliced green onions (use green and white parts)
  • cups water
  • 2 Tablespoons low sodium soy sauce
  • ½ teaspoon granulated sugar
  • ¼ teaspoon garlic powder
  • ¼ teaspoon ground ginger
  • ¼ teaspoon ground cayenne pepper OR ⅛ teaspoon for less heat
  • 1 cup couscous uncooked
Instructions
  1. Spray large skillet with non-stick baking spray. Heat skillet on Medium-High heat until very hot. Add chopped green onions; cook, stirring often until they become tender (2-3 minutes).

  2. Add water, soy sauce, sugar, garlic, ginger, and cayenne pepper to skillet. Stir until well-combined. Bring liquid to a full boil.

  3. Pour uncooked couscous into boiling liquid in skillet. Stir well.

  4. Put a lid on the skillet; turn heat down to Low. Simmer couscous COVERED on low heat for 10-12 minutes, or until liquid has been absorbed. Stir occasionally.

  5. When liquid has been fully absorbed into couscous, it should be ready to serve. Couscous should be tender to the bite. Use a fork to "fluff" up couscous before serving hot. Enjoy!

Nutrition Facts
Asian-Inspired Couscous
Amount Per Serving (1 (1/6 of total))
Calories 116 Calories from Fat 2
% Daily Value*
Fat 0.2g0%
Saturated Fat 0.04g0%
Polyunsaturated Fat 0.1g
Monounsaturated Fat 0.03g
Sodium 196mg9%
Potassium 94mg3%
Carbohydrates 24g8%
Fiber 2g8%
Sugar 1g1%
Protein 4g8%
Vitamin A 118IU2%
Vitamin C 2mg2%
Calcium 15mg2%
Iron 1mg6%
* Percent Daily Values are based on a 2000 calorie diet.

Here’s one more to pin on your Pinterest boards!

Asian-Inspired Couscous is a simple, flavor-filled side dish to make, with green onions, soy sauce, and a few spices (ginger, garlic, etc.).

Southwest Veggie Skillet

Southwest Veggie Skillet is a yummy side dish, with corn, zucchini, bell peppers, onion and tomatoes! Add black beans to make it a meatless meal!
Southwest Veggie Skillet is a yummy side dish, with corn, zucchini, bell peppers, onion and tomatoes! Add black beans to make a meatless meal!

If you’re on the lookout for a great tasting, easy to make side dish, may I suggest this Southwest Veggie Skillet? This dish features a lot of yummy vegetables and a few Southwest-inspired spices that combine to make a fantastic side dish!

The vegetables are low in calories, but have a lot of flavor! Guess what? If you add a rinsed, drained can of black beans to this recipe, you can also enjoy this as a MEATLESS main dish! How’s that for versatile?

 I’m confident you’ll enjoy this simple dish, whether eaten as a side dish or as a vegetarian main course. Here’s how to make it, in about 25 minutes!

Scroll Down for A Printable Recipe Card At The Bottom Of The Page

How To Make The Southwest Veggie Skillet

Heat olive oil over Medium-high heat in a large skillet (I use cast iron). Once the oil is very hot, but not smoking, add chopped onions and a chopped jalapeño pepper to the skillet.

Cook these ingredients for approximately 4 minutes, and then add minced garlic to the skillet. Continue to cook, stirring the veggies often for 1 more minute (don’t burn the garlic!). The veggies should be tender at this point.

Chopped onion and jalapeño pepper are cooked in hot oil in a cast iron skillet.Minced garlic is added to the onions and jalapeños in skillet.

Add More Veggies!

Now add frozen corn (or fresh, if available), chopped bell pepper and zucchini to the skillet. NOTE: I use a combination of red, orange and green bell peppers for added color, but that is optional.

TIP: If you are adding black beans to make this a meatless main dish, this is when to add them!

Sprinkle the veggies with ground cumin and chili powder, then stir until the spices have been mixed in. Cook the veggies, stirring often, for 7-8 minutes, until the veggies have softened and are heated through.

Frozen corn, bell peppers, zucchini and spices are added to the hot skillet.The Southwest flavored veggies cook in the skillet for 7-8 minutes, until tender.

Last Steps Before Serving

Stir cherry tomato halves (I use red and yellow) into the skillet, and cook ONLY until they are barely heated through. This will only take a minute or less! Remove the skillet from the heat source.

Once the skillet is off the heat, add chopped cilantro, fresh lime juice, salt and black pepper to the veggies. Stir to combine, and then the Southwest Veggie Skillet is ready to be served.

Halved cherry tomatoes (red and yellow) are added to the Southwest Veggie Skillet.Skillet is removed from heat, and lime juice, salt/pepper, and chopped cilantro are added.

Serve The Southwest Veggie Skillet

The Southwest Veggie Skillet is now ready to be enjoyed! Transfer the dish to a serving bowl OR serve it hot, right from the skillet.

This is a very tasty side dish that pairs well with chicken, pork, beef or fish! Serve it next to the meat, or place the meat on top of the veggies, serve and enjoy!

After stirring to combine ingredients, the Southwest Veggie Skillet is ready to serve.Southwest Veggie Skillet side dish is served with a cooked chicken breast, on a white plate.

I hope you enjoy this delicious vegetable side dish as much as we do! The veggies have great flavor, and it really is a simple dish to prepare in a short amount of time.

Thanks for stopping by, and I invite you to come back soon for more family-friendly recipes. Take care, may God bless you, and have a wonderful day.

Looking For More VEGGIE Recipes?

You can find ALL of my recipes in the Recipe index, which is located at the top of the page. I have LOTS of delicious vegetable dishes for you to check out, including:

Want More Recipes? Get My FREE Newsletter!

I publish a newsletter 2 times per month (1st and 15th) with lots of recipes, tips, etc..
Would you like to join our growing list of subscribers?

There is a Newsletter subscription box on the top right (or bottom) of each blog post, depending on the device you use.
You can submit your e-mail address there, to be added to my mailing list.

Find Me On Social Media:

Facebook page: The Grateful Girl Cooks!
Pinterest:
The Grateful Girl Cooks!
Instagram:
jbatthegratefulgirlcooks

Author's signature

Recipe adapted from a recipe found in : “The Essential WW Freestyle Cookbook”, page 196, published in 2018 by Weight Watchers International, Inc.

↓↓ PRINTABLE RECIPE BELOW ↓↓

0 from 0 votes
Southwest Veggie Skillet
Prep Time
10 mins
Cook Time
15 mins
Total Time
25 mins
 

Southwest Veggie Skillet is a yummy side dish, with corn, zucchini, bell peppers, onion and tomatoes! Add black beans to make a meatless meal!

Category: Side Dish, Vegetables
Cuisine: Southwest
Keyword: Southwest veggie skillet
Servings: 4 (1 cup per serving)
Calories Per Serving: 142 kcal
Author: JB @ The Grateful Girl Cooks!
Ingredients
  • 1 Tablespoon olive oil
  • 1 medium yellow onion chopped
  • large garlic cloves finely minced
  • 1 medium jalapeño pepper seeds removed, finely minced
  • 10 ounces frozen corn kernels OR 1¾ cup fresh
  • 1 medium zucchini chopped
  • 1 medium red bell pepper (or color combo) chopped (I use red/orange/green)
  • teaspoons ground cumin
  • ¼ teaspoon chili powder
  • 1 cup cherry tomatoes cut in half (I use red/yellow)
  • 2 Tablespoons chopped cilantro
  • Tablespoons fresh lime juice
  • ¾ teaspoon salt
  • ½ teaspoon ground black pepper
Instructions
  1. Heat olive oil on Medium-high heat in a large skillet. Once oil is very hot, but not smoking, add onions and jalapeño pepper. Cook approx. 4 minutes; add garlic. Continue to cook, stirring often for 1 minute (don't burn the garlic!).

  2. Add frozen corn (or fresh, if using), red bell pepper and zucchini to skillet. NOTE: I use a combo of red, orange and green bell peppers for color, but that is optional. TIP: If adding a can of black beans to make this a meatless main dish, this is when to add them!

  3. Sprinkle veggies with cumin and chili powder; stir until combined. Cook, stirring often, for 7-8 minutes, until veggies have softened and are heated through.

  4. Gently stir cherry tomato halves into veggies; cook ONLY until heated through. This will only take a minute or less! Remove skillet from heat source.

  5. Off heat, add cilantro, lime juice, salt and pepper to the veggies; stir to combine. Serve immediately. Enjoy!

Recipe Notes

NOTE: If you wish to make this a MEATLESS main dish, add 1 can of rinsed/drained black beans.

Nutrition Facts
Southwest Veggie Skillet
Amount Per Serving (1 cup)
Calories 142 Calories from Fat 45
% Daily Value*
Fat 5g8%
Saturated Fat 1g6%
Polyunsaturated Fat 1g
Monounsaturated Fat 3g
Sodium 454mg20%
Potassium 558mg16%
Carbohydrates 26g9%
Fiber 4g17%
Sugar 5g6%
Protein 4g8%
Vitamin A 1316IU26%
Vitamin C 69mg84%
Calcium 34mg3%
Iron 2mg11%
* Percent Daily Values are based on a 2000 calorie diet.

Here’s one more to pin on your Pinterest boards!Southwest Veggie Skillet is a yummy side dish, with corn, zucchini, bell peppers, onion and tomatoes! Add black beans to make a meatless meal!

Pan-Seared Steelhead Trout

Pan-Seared Steelhead Trout is a delicious, easy to make dish! Trout fillets are cooked in a simple browned butter, shallot and garlic sauce!

Recently my husband bought some steelhead trout in the fish department at our local grocery store. He brought it home and told me he wanted to try it, because it looked good. When I saw the fillets he bought, I thought he was mistaken! I was absolutely convinced he had accidentally bought salmon fillets.

Well, I was WRONG! It turns out that steelhead trout, which is common to the West coast (and Alaska), LOOKS a lot like salmon. It has the same orange-pink color as salmon, and is similar in taste and texture, but it’s actually TROUT. Who knew? Certainly not me!

My decision was made to pan-sear them, and I knew I wanted to use sauce to add flavor. I ended up making a simple sauce with browned butter, minced garlic, dried dill weed and chopped shallots.

Pan-seared steelhead trout turned out to be delicious, low in calories, and quite easy to prepare. The cooking technique I used is similar to how I make Pan Seared Creole Salmon. Here’s how to make this dish using one pound of steelhead trout (approx. 3 servings).

Scroll Down For A Printable Recipe Card At The Bottom Of The Page

Prepare The Trout For Cooking

Pat the trout fillets dry with paper towels to remove any excess moisture before seasoning. Lightly season the fish (flesh side only) with salt and black pepper.

Three steelhead trout fillets are seasoned with salt and pepper before cooking.

Pan-Sear the Steelhead Trout

Melt 2 Tablespoons of butter in a large skillet on Medium heat. Once the butter melts, add chopped shallots, and cook for 2 minutes, stirring occasionally.

Place the steelhead trout in the hot skillet, with the skin side facing up. Cook the trout fillets on Medium heat for 3 minutes, without moving them in the skillet.

Stir minced garlic and dried dill weed into the butter sauce, and cook the fish and sauce 1 more minute. Be sure to stir the sauce often, so the garlic doesn’t burn. 

Chopped shallots are cooked in melted butter in a large skillet.Steelhead fillets are cooked, skin side up, in a skillet with melted butter and shallots.

The butter sauce will begin to brown as it is cooked, which gives it a wonderful, slightly nutty flavor! The fish is ready to flip over once the bottom side is nicely seared and browned.

Browned butter with shallots, garlic and herbs are cooked in skillet with 3 steelhead trout fillets.

Baste The Trout With Garlic Shallot Butter Sauce

Turn the steelhead trout fillets to the other side (flesh facing up). Use a spoon to scoop up the sauce, and drizzle it over each piece. Continue to cook the fish for 4-5 more minutes until cooked though. 

Spoon the sauce over the trout fillets continuously as they finish cooking. This basting adds wonderful flavor to the fish, because of the browned butter, shallots, dill weed and garlic!

Pan-seared steelhead trout fillets are browned and drizzled with brown butter sauce in skillet.

Time To Serve The Pan-Seared Steelhead Trout

Once the trout is fully cooked through and flakes easily, it is ready to serve. Use a large spatula to transfer the pan-seared steelhead trout onto individual plates.

To garnish the dish, squeeze lemon juice over each fillet, and top with fresh parsley and a lemon slice, if desired. This adds additional color and a pop of lemon flavor to the fish!

A white plate with pan-seared steelhead trout, broccoli and rice on it.A piece of steelhead trout, garnished with lemon slice and chopped fresh parsley to serve.

I hope you have a chance to try this delicious dish, and trust you’ll enjoy it as much as we do. It is a simple to make, yet scrumptious seafood entree!

Thanks for stopping by, and I invite you to come back again soon for more delicious recipes! Take care, God bless you, and have a wonderful day!

Looking For More TROUT Recipes?

You can find ALL of my recipes in the Recipe Index, which is located at the top of the page. I have several recipes for trout you might enjoy, including:

Interested In More Recipes? Get My FREE Newsletter!

I publish a newsletter 2 times per month (1st and 15th) with recipes, tips, etc..
 I would be honored to have you join our growing list of subscribers!

There is a Newsletter subscription box on the top right (or bottom) of each blog post, depending on the device you use, where you can submit your e-mail address to be added to my mailing list.

Find Me On Social Media:

Facebook page: The Grateful Girl Cooks!
Pinterest:
The Grateful Girl Cooks!
Instagram:
jbatthegratefulgirlcooks

Author's signature

↓↓ PRINTABLE RECIPE BELOW ↓↓

5 from 4 votes
Pan-Seared Steelhead Trout
Prep Time
7 mins
Cook Time
10 mins
Total Time
17 mins
 

Pan-Seared Steelhead Trout is a delicious, easy to make dish! Trout fillets are cooked in a simple browned butter, shallot and garlic sauce!

Category: Main Course
Cuisine: All Cuisines
Keyword: Pan-Seared Steelhead Trout
Servings: 3
Calories Per Serving: 266 kcal
Author: JB @ The Grateful Girl Cooks!
Ingredients
  • 1 pound steelhead trout, skin on cut in approx. three 5 oz. pieces
  • ¼ teaspoon salt
  • ¼ teaspoon black pepper
  • 2 Tablespoons butter
  • 2 teaspoons shallots chopped
  • 4 teaspoons minced garlic
  • ¾ teaspoon dried dill weed
  • 1 large lemon half for juice and half for garnish
  • 2 Tablespoons chopped fresh parsley
Instructions
  1. Cut fish into three portions. Pat fish dry with paper towels to remove excess moisture. Lightly season fish (flesh side only) with salt and pepper.

  2. Melt butter in large skillet on Medium heat. Add chopped shallots; cook for 2 minutes, stirring occasionally.

  3. Place trout fillets in skillet (skin side facing up). Cook on Medium heat for 3 minutes, without moving them in the skillet. Stir garlic and dill weed into butter sauce. Cook fish/sauce 1 more minute until bottom of fish is browned. Stir sauce often, so garlic doesn't burn. 

  4. Turn fillets to the other side (flesh facing up). Use spoon to scoop up sauce; drizzle it on each piece. Cook fish 4-5 more minutes until cooked though, spooning sauce over fish often, as it finishes cooking.

  5. When trout is cooked through and flakes easily, it's ready to serve. Transfer fillets to plates. To garnish, squeeze lemon juice over each fillet. Top with fresh parsley and a lemon slice, if desired. Enjoy!

Nutrition Facts
Pan-Seared Steelhead Trout
Amount Per Serving (1 portion (approx. 5 oz.))
Calories 266 Calories from Fat 117
% Daily Value*
Fat 13g20%
Saturated Fat 6g38%
Trans Fat 0.3g
Polyunsaturated Fat 2g
Monounsaturated Fat 4g
Cholesterol 109mg36%
Sodium 304mg13%
Potassium 822mg23%
Carbohydrates 5g2%
Fiber 1g4%
Sugar 1g1%
Protein 32g64%
Vitamin A 571IU11%
Vitamin C 28mg34%
Calcium 128mg13%
Iron 2mg11%
* Percent Daily Values are based on a 2000 calorie diet.

Here’s one more to pin on your Pinterest boards!Pan-Seared Steelhead Trout is a delicious, easy to make dish! Trout fillets are cooked in a simple browned butter, shallot and garlic sauce!

Cranberry Apple Scones

Cranberry Apple Scones with vanilla glaze can be enjoyed for breakfast or a light snack! They’re yummy and ready to eat in under 30 minutes!
Cranberry Apple Scones with vanilla glaze can be enjoyed for breakfast or a light snack! They're yummy and ready to eat in under 30 minutes!

I don’t know about you, but I LOVE scones! They are wonderful to have for a quick breakfast, afternoon snack or treat, and I’ve been making them for years in multiple flavors!

Cranberry apple scones have great flavor and texture, and are actually quite simple to make. Fresh or frozen cranberries and your choice of apple can be used, which makes it a convenient recipe, too!

If you’ve never made scones before, there’s no need to worry about it! These are easy to make, and you’ll be a “scone master” before you know it! Here’s how to make cranberry apple scones.

Scroll Down For A Printable Recipe Card At The Bottom Of The Page

Making The Dough For Cranberry Apple Scones

Mix flour, baking powder and baking soda in a large bowl until combined. Add slices of COLD butter to the flour mixture. Use a pastry blender or two forks to cut the butter in, until it becomes the size of peas.

Add the chopped fresh cranberries and peeled apples, and stir until they are combined with the flour mixture. NOTE: Frozen cranberries may be used, if thawed before chopping and adding.

Cold butter slices are cut into a flour mixture until butter is the size of peas.Chopped cranberries and peeled apples are added to the flour and butter mixture in bowl.

Add the buttermilk to the scone mixture. Stir in the buttermilk ONLY until the ingredients have been combined.

Buttermilk is added to the scone dough, and stirred only until incorporated.

Rolling Out The Dough For The Scones

Shape the dough into a ball, and place it on a lightly floured surface. Sprinkle the dough with a tiny bit of flour. Roll the dough into an 8″ circle (¾” thick). Use your palms to shape the outer edge.

TIP: I’ve been known to use a tape measure to tell me how much more I need to roll the dough out. Hey… it works! Don’t knock it until you’ve tried it!

Cut the dough evenly into 8 pie-shaped wedges using a large knife (or pizza cutter!). Carefully transfer the scones onto an ungreased baking sheet.

Scone dough is shaped in a ball, and placed on floured surface for rolling.A measuring tape is used to measure dough into an 8" circle.

Ready… Set… Bake!

When you put the scones onto the baking sheet, keep them in a circular shape. Leave a small amount of space (not too much!) between each of the slices.

Bake the scones at 400°F. for 12-15 minutes. Oven temperatures can vary, so check them, beginning at the 12 minute mark! When done, the scones should be lightly browned on top. A toothpick inserted into the thickest part of one should come out clean.

Transfer the pan to a wire rack and let the scones cool to room temperature before adding the glaze.

Cranberry apple scones dough is cut into 8 wedges and put on a baking sheet to cook.The baked cranberry apple scones cool on a baking sheet after coming out of the oven.

Glazing The Cranberry Apple Scones

While the cranberry apple scones cool, make the vanilla glaze to drizzle on top. Measure powdered sugar, vanilla extract and warm water into a small bowl.

Stir well, until the glaze fully mixed and lump-free. Add a drop or two more water, if needed, to make the glaze a consistency that’s easy to drizzle.

Once the scones are at room temperature, drizzle the glaze over the top. I use a honey spreader or a fork to do this. Try to evenly distribute the glaze over the surface of the scones.

Powdered sugar, vanilla and water are mixed in a bowl to make a sweet glaze for the scones.Sweet glaze is drizzled over the baked scones, using a honey spreader.

Time To Enjoy A Scone

Let the cranberry apple scones rest until the glaze has hardened. This usually only takes a few minutes, and then the scones are ready to be enjoyed. Slice through the scones to separate them from each other before serving.
Grab a hot cup of coffee or tea and one of the scones, then sit back and enjoy these delicious treats. I really think you’re going to like them!

Once glaze hardens, cranberry apple scones are cut into wedges, then are ready to be enjoyed.

I really hope you like this recipe for cranberry apple scones! They have great flavor, thanks to the cranberries and apples spread throughout the scones, and the sweet glaze on top.

Thanks for stopping by, and I invite you to come back again soon for more family-friendly recipes. Take care, God bless, and have a GREAT day!

Looking For More SCONE Recipes?

You can find ALL of my recipes in the Recipe Index, which is located at the top of the page. I have some fantastic tasting scone recipes for you to check out, including:

Interested In More Recipes? Get My FREE Newsletter!

I publish a newsletter 2 times per month (1st and 15th) with recipes, tips, etc..
 I would be honored to have you join our growing list of subscribers!

There is a Newsletter subscription box on the top right (or bottom) of each blog post, depending on the device you use You can submit your e-mail address to be added to my mailing list.

Find Me On Social Media:

Facebook page: The Grateful Girl Cooks!
Pinterest:
The Grateful Girl Cooks!
Instagram:
jbatthegratefulgirlcooks

Author's signature

Recipe adapted from: “Gooseberry Patch- Have Yourself A Homemade Christmas”, Cranberry Scones, pg. 151, published 2014 by Gooseberry Patch/Time Home Entertainment, Inc.

↓↓ PRINTABLE RECIPE BELOW ↓↓

0 from 0 votes
Cranberry Apple Scones
Prep Time
13 mins
Cook Time
14 mins
Total Time
27 mins
 

Cranberry Apple Scones with vanilla glaze can be enjoyed for breakfast or a light snack! They're yummy and ready to eat in under 30 minutes!

Category: Breakfast, Snack
Cuisine: American
Keyword: cranberry apple scones
Servings: 8 scones
Calories Per Serving: 222 kcal
Author: JB @ The Grateful Girl Cooks!
Ingredients
  • cups all purpose flour
  • teaspoons baking powder
  • ¼ teaspoon baking soda
  • 6 Tablespoons butter COLD, sliced
  • ½ cup cranberries (fresh or frozen/thawed) chopped
  • ½ cup chopped apple peeled, chopped
  • cup granulated sugar
  • 6 Tablespoons buttermilk
For Glaze:
  • ½ cup powdered sugar
  • teaspoon vanilla extract
  • teaspoons warm water
Instructions
  1. Preheat oven to 400°F.

  2. Stir flour, baking powder and baking soda in large bowl to combine. Add COLD butter slices. Use pastry blender or 2 forks to cut butter in, until it becomes the size of peas. Add cranberries and apples; stir to combine. Add buttermilk. Stir buttermilk in ONLY until ingredients are combined.

  3. Shape dough into a ball; place on lightly floured surface. Sprinkle dough with tiny bit of flour. Roll ball into an 8" circle (¾" thick). Use hands to shape outer edge. Cut into 8 pie-shaped wedges. Transfer scones onto ungreased baking sheet, keeping them in a circular shape. Leave a small space between slices.

  4. Bake at 400°F. for 12-15 minutes. When done, scones should be lightly browned on top. A toothpick inserted into thickest part should come out clean. Transfer pan to a wire rack; let scones cool to room temp before adding glaze.

  5. Measure powdered sugar, vanilla and warm water into bowl. Stir well, until lump-free. Add 2-3 more drops of water, if needed, to make glaze a consistency that's easy to drizzle. Drizzle glaze over surface of scones.

  6. Let scones rest until glaze hardens (2-3 minutes). Slice scones to separate them from each other before serving. Enjoy!
Recipe Notes

NOTE: Frozen cranberries may be used, if thawed before chopping and adding.

Nutrition Facts
Cranberry Apple Scones
Amount Per Serving (1 scone)
Calories 222 Calories from Fat 81
% Daily Value*
Fat 9g14%
Saturated Fat 6g38%
Trans Fat 0.3g
Polyunsaturated Fat 0.4g
Monounsaturated Fat 2g
Cholesterol 24mg8%
Sodium 115mg5%
Potassium 128mg4%
Carbohydrates 33g11%
Fiber 1g4%
Sugar 17g19%
Protein 3g6%
Vitamin A 289IU6%
Vitamin C 1mg1%
Calcium 52mg5%
Iron 1mg6%
* Percent Daily Values are based on a 2000 calorie diet.

Here’s one more to pin on your Pinterest boards!

Cranberry Apple Scones with vanilla glaze can be enjoyed for breakfast or a light snack! They're yummy and ready to eat in under 30 minutes!

Brussel Sprout Casserole For Two

Brussel Sprout Casserole For Two is a tasty side dish! Sliced Brussel sprouts, cheddar and bacon are baked, topped with cheese and breadcrumbs.

If you’re on the lookout for a new veggie side dish OR a new way to prepare Brussel sprouts, check out this recipe! As written, this delicious side dish will serve two people, but it can easily be adapted to double or triple the quantity.

Cheddar cheese, bacon and crispy Panko breadcrumbs compliment the tender Brussel sprouts wonderfully in this dish! My personal feeling is that everything is better with bacon, right? YEP!

This recipe is quite simple to make, and is a tasty way to enjoy Brussel sprouts, even if you’re not usually a fan. The Brussel sprouts are par-boiled first (to tenderize them), then the casserole is quickly assembled and baked. 

Here’s how to make this scrumptious vegetable side dish!

Scroll Down for A Printable Recipe Card At The Bottom Of The Page

Preparing The Brussel Sprouts

To make this dish for two, you will need about 10 fresh Brussel sprouts. Trim the end stem off of the Brussel sprouts, then slice them in half length-wise.

Fill a Medium sized saucepan with water, and bring it to a boil. Add the Brussel sprout halves, and boil them for 7-8 minutes or until the Brussel sprouts have become slightly tender.

Remove the pan from the stove, and drain off the water. Let the Brussel sprouts cool.

Brussels sprout ends are trimmed, then the sprouts are sliced in half.Halved brussel sprouts are boiled in water for 7 minutes, or until tender.

Preparing The Bacon

You will need crisp, cooked bacon for this casserole. I find it’s best to cook it at the same time the Brussel sprouts are cooking, to save time.

Cut the bacon into small pieces, then cook, stirring often until browned, cooked through, and crispy. Use a slotted spoon to transfer the cooked bacon to paper towels to absorb any excess grease.

Two slices of bacon are cut in small pieces, then cooked until crispy in skillet.Crisp, browned bacon slices drain on paper towels after being removed from skillet.

Assembling The Brussel Sprout Casserole For Two

Once the Brussel sprouts have cooled enough to handle, cut them into thin slices with a sharp knife. Place the slices into a medium-sized bowl.

Add grated cheddar cheese (half the total amount), bacon, half and half, salt and black pepper to the bowl. Gently toss these ingredients together until they’re fully combined.

Tender-cooked brussel sprouts are cut into thin slices for the casserole.Sliced brussel sprouts, cheese, bacon, salt, pepper and half and half are mixed in bowl.

Place the combined Brussel sprout mixture into a lightly greased small baking dish. Now the casserole is ready for the final step before baking!

The combined brussel sprout mixture is placed in small, greased baking dish.

Topping And Then Baking The Casserole 

Sprinkle the top of the Brussel sprout casserole with the remaining grated cheddar cheese. Top this with the crispy Panko breadcrumbs.

Place the Brussel sprout casserole for two into a preheated 400°F. oven, and bake for 14-16 minutes. When done, the top should be lightly browned and crusted, and the casserole will be fully heated through.

Grated cheddar and Panko breadcrumbs top the Brussel Sprout Casserole For Two.After baking, the brussel sprout casserole for two is lightly browned on top.

Serving The Brussel Sprout Casserole For Two

Transfer the baking dish from the oven to a wire rack. Let the casserole cool 1-2 minutes before serving. Scoop out a portion (recipe yields 2 servings), transfer to plates… serve and enjoy!
We enjoyed the Brussel sprout casserole for two, served with chicken cutlets in pan sauce, and steamed rice on the side. It tastes fantastic!

This veggie side dish is absolutely delicious, and has wonderful flavor! I’m confident you will enjoy this lovely Brussel sprout side dish served with a favorite main dish.

Brussel Sprout Casserole For Two cools on a wire rack after being removed from oven.A serving of the brussel sprout casserole for two, served on a white plate.

I hope you will have the opportunity to make this Brussel sprout recipe, and trust you’ll enjoy it like we do! It really is a delicious veggie side dish.

Thanks for stopping by, and please come back soon for more family-friendly recipes. Take care, and have a great day!

Looking For More VEGETABLE Side Dish Recipes?

You can find ALL of my recipes in the Recipe Index, which is located at the top of the page. I have a large variety of delicious vegetable recipes for you to check out, including:

Want More Recipes? Get My FREE Newsletter!

I publish a newsletter 2 times per month (1st and 15th) with lots of recipes, tips, etc..
Would you like to join our growing list of subscribers?

There is a Newsletter subscription box on the top right (or bottom) of each blog post, depending on the device you use.
You can submit your e-mail address there, to be added to my mailing list.

Find Me On Social Media:

Facebook page: The Grateful Girl Cooks!
Pinterest:
The Grateful Girl Cooks!
Instagram:
jbatthegratefulgirlcooks

Author's signature

Recipe adapted from: mantitlement.com/the-best-brussels-sprouts-casserole

↓↓ PRINTABLE RECIPE BELOW ↓↓

0 from 0 votes
Brussel Sprout Casserole For Two
Prep Time
15 mins
Cook Time
15 mins
Total Time
30 mins
 

Brussel Sprout Casserole For Two is a tasty side dish! Sliced Brussel sprouts, cheddar and bacon are baked, topped with cheese and breadcrumbs.

Category: Side Dish, Vegetable
Cuisine: American
Keyword: brussel sprout casserole
Servings: 2
Calories Per Serving: 318 kcal
Author: JB @ The Grateful Girl Cooks!
Ingredients
  • ½ pound fresh brussel sprouts
  • 2 slices bacon cooked till crispy, crumbled
  • ½ cup cheddar cheese divided use, GRATED
  • 3 Tablespoons half and half (or heavy whipping cream)
  • 1 teaspoon butter melted
  • cup Panko breadcrumbs
  • ¼ teaspoon salt
  • teaspoon black pepper
Instructions
  1. Preheat oven to 400°F. Lightly grease/spray a small baking dish; set aside.

  2. Trim stem end off Brussel sprouts; slice Brussel sprouts in half length-wise. Fill medium saucepan with water; bring it to a boil. Add Brussel sprouts; boil them 7-8 minutes or until slightly tender. Drain water; let Brussel sprouts rest until cool enough to handle.

  3. Cut bacon into small pieces. Cook, stirring often until browned/crispy. Place bacon on paper towels to absorb grease.

  4. Cut Brussel sprouts into thin slices (lengthwise). Transfer slices to a medium bowl. Add ¼ cup cheddar cheese (reserve remaining ¼ C.), bacon, half and half, salt and pepper. Gently toss to combine. Place mixture in prepared baking dish. Sprinkle casserole with remaining ¼ C. cheese; top with Panko breadcrumbs.

  5. Bake casserole at 400°F. for 14-16 minutes. When done, casserole should be lightly browned/crusted on top, and heated through.

  6. Transfer baking dish to a wire rack. Let casserole cool 1-2 minutes before serving. Scoop out a portion, transfer to plates... serve and enjoy!
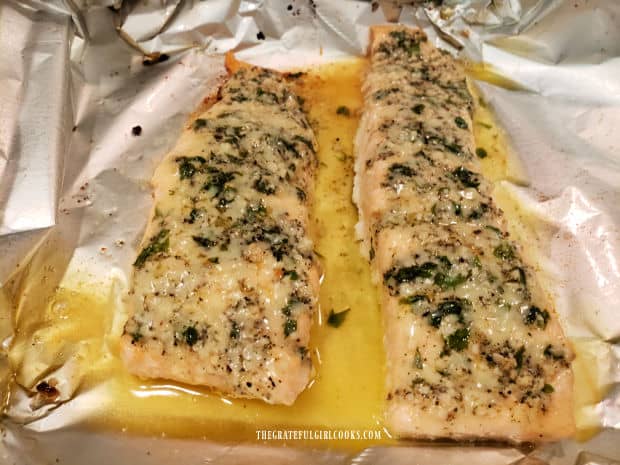
Nutrition Facts
Brussel Sprout Casserole For Two
Amount Per Serving (1 g)
Calories 318 Calories from Fat 207
% Daily Value*
Fat 23g35%
Saturated Fat 11g69%
Trans Fat 0.1g
Polyunsaturated Fat 2g
Monounsaturated Fat 7g
Cholesterol 56mg19%
Sodium 707mg31%
Potassium 546mg16%
Carbohydrates 15g5%
Fiber 5g21%
Sugar 4g4%
Protein 14g28%
Vitamin A 1289IU26%
Vitamin C 97mg118%
Calcium 281mg28%
Iron 2mg11%
* Percent Daily Values are based on a 2000 calorie diet.
Here’s one more to pin on your Pinterest boards!

Brussel Sprout Casserole For Two is a tasty side dish! Sliced Brussel sprouts, cheddar and bacon are baked, topped with cheese and breadcrumbs.