Cheesy Bread Wedges

Cheesy Bread Wedges are an easy to make side dish using biscuit mix! They’re buttery, and filled with cheddar cheese, onions, and parsley.
Cheesy Bread Wedges are an easy to make side dish using biscuit mix! They're buttery, and filled with cheddar cheese, onions, and parsley.

If you’re looking for an easy side dish to serve with a favorite salad or main dish, may I suggest these yummy, cheesy bread wedges? They are incredibly simple to make, and have great flavor! With only 10 minutes of prep time needed before baking, they’re a perfectly easy side dish to whip up after a long, busy day.

The recipe utilizes biscuit mix which helps cut down on the number of ingredients needed. Cheddar cheese is used IN the bread batter, and is added to the top of the batter also, so there is plenty of cheesy goodness in each bite. Here’s how to make eight delicious, cheesy bread wedges.

Scroll Down For A Printable Recipe Card At The Bottom Of The Page

Make The Batter

Preheat your oven to 350°F before mixing the batter, and spray or grease the sides/bottom of an 8″ or 9″ round cake pan. This batter doesn’t take long at all to make, and you’ll want your oven and prepared baking pan ready to go, once the batter is done!

Whisk together an egg and milk in a large mixing bowl. Add biscuit mix (like Bisquick), minced onion, ½ cup of grated cheese, and chopped fresh parsley. Stir well, just until the ingredients have been combined.

Egg and milk are whisked together in a large mixing bowl.Cheddar cheese, chopped parsley, minced onion, and biscuit mix are combined with egg mixture. Pour the batter into the prepared pan, and spread it out evenly in the dish. Sprinkle the batter with the remaining ½ cup of grated cheddar cheese.

After batter for the cheesy bread wedges is combined, it's placed in a greased cake pan.More grated cheese is added to the top of the bread batter in pan.

Bake The Cheesy Bread

Melt a half stick of butter (4 T.) in a pan or microwave, and pour it evenly over the top of the grated cheese. Place the baking pan on the middle rack in a preheated oven.

Bake the cheesy bread wedges at 350°F. for 25 minutes, or until the surface of the bread becomes set and golden brown in color. Transfer the baking pan to a wire rack and let the bread cool slightly before slicing.

Melted butter is added to the top of the batter for the cheesy bread wedges.When finished baking, the bread is set and golden brown in color on the top.

Time To Enjoy Some Cheesy Bread Wedges!

Cut the cheesy bread into eight wedges, and serve hot. NOTE: You can cut the cheesy bread wedges IN the pan OR you can remove the entire round loaf to a cutting board and slice it on the board.

You probably will NOT need additional butter, because the melted butter has already been added! That’s it… see how easy this recipe is to prepare? Now you can go ahead and serve the cheesy bread wedges with your favorite salads and/or main dishes.

One of the pieces of cheesy bread wedges is sliced, and is ready to eat.A side view of one of the cheesy bread wedges, showing cheese and parsley inside.

I really hope you enjoy this recipe for cheesy bread wedges, and know you’ll see just how easy it is to make. Thank you for stopping by today, and I hope you will come back again soon for more yummy recipes. Take care, and have a GREAT day!

Looking For More BREAD Recipes?

You can find ALL of my recipes in the Recipe Index, which is located at the top of the page. I have some delicious bread recipes for you to check out, including:

Interested In More Recipes?

Thank you for visiting this website. I appreciate you using some of your valuable time to do soIf you’re interested, I publish a newsletter 2 times per month (1st and 15th) with all the latest recipes, and other fun info. I would be honored to have you join our growing list of subscribers, so you never miss a great recipe!
There is a Newsletter subscription box on the top right side (or bottom) of each blog post, depending on the device you use, where you can easily submit your e-mail address (only) to be included in my mailing list.

You Can Also Find Me On Social Media:

Facebook page: The Grateful Girl Cooks!
Pinterest:
The Grateful Girl Cooks!
Instagram:
jbatthegratefulgirlcooks

Author's signature

Original recipe source: “Church Suppers” Cookbook, page 94, published by Black Dog & Leventhal Publishers, Inc. in 2005

↓↓ PRINTABLE RECIPE BELOW ↓↓

0 from 0 votes
Cheesy Bread Wedges
Prep Time
10 mins
Cook Time
25 mins
Total Time
35 mins
 

Cheesy Bread Wedges are an easy to make side dish using biscuit mix! They're buttery, and filled with cheddar cheese, onions, and parsley.

Category: Bread, Side Dishes
Cuisine: American
Keyword: cheesy bread wedges
Servings: 8 wedges
Calories Per Serving: 221 kcal
Author: JB @ The Grateful Girl Cooks!
Ingredients
  • 1 large egg lightly beaten
  • ½ cup milk
  • cups biscuit mix like Bisquick
  • 2 Tablespoons chopped parsley
  • 1 Tablespoon minced yellow onion
  • 1 cup grated cheddar DIVIDED USE!
  • ¼ cup butter = 4 Tablespoons, melted
Instructions
  1. Preheat oven to 350°F. Spray or grease sides/bottom of 8" or 9" round cake pan.

  2. Whisk egg and milk together in large mixing bowl. Add biscuit mix, onion, ½ cup grated cheese, and parsley. Stir well just until ingredients are combined. Don't overmix. Pour batter into prepared pan; spread it evenly.

  3. Sprinkle batter with remaining ½ cup grated cheese. Melt butter (4 T.) in pan or microwave. Pour it evenly over the top of the cheese.

  4. Place pan on middle rack in oven. Bake at 350°F. for 25 minutes, or until surface of bread is set and golden brown in color. Transfer baking pan to a wire rack; let bread cool slightly before slicing.

  5. Cut bread into eight wedges, and serve hot. You probably will NOT need additional butter, because melted butter has already been added! Enjoy!

Nutrition Facts
Cheesy Bread Wedges
Amount Per Serving (1 wedge)
Calories 221 Calories from Fat 135
% Daily Value*
Fat 15g23%
Saturated Fat 8g50%
Trans Fat 0.2g
Polyunsaturated Fat 1g
Monounsaturated Fat 5g
Cholesterol 54mg18%
Sodium 440mg19%
Potassium 89mg3%
Carbohydrates 16g5%
Fiber 1g4%
Sugar 3g3%
Protein 6g12%
Vitamin A 467IU9%
Vitamin C 1mg1%
Calcium 166mg17%
Iron 1mg6%
* Percent Daily Values are based on a 2000 calorie diet.

Here’s one more to pin on your Pinterest boards!Cheesy Bread Wedges are an easy to make side dish using biscuit mix! They're buttery, and filled with cheddar cheese, onions, and parsley.

Air Fryer Crusted Mahi Mahi

Air Fryer Crusted Mahi Mahi is a delicious, easy dish! Mahi Mahi fillets are coated in seasoned Panko breadcrumbs and air fried until crispy!

Today I want to share a recipe for air fryer crusted mahi mahi (its Hawaiian name) that we really enjoy! Boneless fillets of this firm white fish are covered with a seasoned panko breadcrumb topping, and then cooked in an air fryer until browned and crispy!

The recipe could not be more simple, and if you happen to own an air fryer you’ll appreciate how easy is to prepare this crispy fish.

We love mahi mahi! It does not have a “fishy taste”, but is a mild flavored piece of fish. Frozen individually wrapped fillets can be found in the frozen food department of many grocery stores (or Costco), and whole fillets can often be found at a local fish market.

The prep time for this is only about 5 minutes, then the mahi mahi cooks in the air fryer, with only a quick flip over, about halfway through the cooking. That’s it! 

Perhaps you are unfamiliar with this delicious piece of seafood. If you’re interested in learning more about this type of fish, be sure to check out the information HERE, which tells you the origins of this fish, where it is commonly found, and lots of other cool facts! Here’s how to make air fryer crusted mahi mahi.

Scroll Down For A Printable Recipe Card At The Bottom Of The Page

Prepare The Panko And Spice Topping

NOTE: Before making the topping for the fish, preheat your air fryer to 400°F. The prep for this dish only takes a few minutes, so you want the air fryer hot, in order to save time!

Combine panko breadcrumbs, paprika, garlic powder, onion powder, salt and black pepper in a shallow bowl or dish. Stir to fully combine these ingredients.

This is the panko topping that will coat and season the mahi mahi. The crispy panko breadcrumbs are what will give the fish its crunchy texture on the outside!

Panko breadcrumbs are combined with a variety of spices to coat the fish fillets.

Prepare The Fish Fillets

Use several paper towels to pat each of the mahi mahi fillets dry. Use a pastry brush to coat all sides of each piece of fish with olive oil.

Please note that we only used three fillets this time instead of four, as the recipe calls for. 

Mahi Mahi fillets are dried off with paper towels then wait to be breaded.Each fish fillet is brushed on all sides with olive oil.

Add Breadcrumb Seasoning To The Mahi Mahi

Place the mahi mahi fillets (one at a time) onto the breadcrumb seasoning mixture. Press the breadcrumbs on gently, to help adhere them to the fish. Coat all sides of the fish with the seasoned panko.

Place each coated fillet onto a large plate, then lightly spritz the top and bottom of each piece of fish with additional olive oil. This will help the panko breadcrumb coating to become very crisp on both sides.

The oiled Mahi Mahi fillets are coated, one at a time in seasoned panko breadcrumbs.Panko coated fish fillets are spritzed with olive oil before being put into air fryer to cook.

Cooking The Mahi Mahi Fillets

Place the breaded/sprayed mahi mahi fillets (in a single layer) in the basket of the air fryer. Cook at 400°F. for 6-7 minutes, then gently turn the fish fillets over to the other side.

They should be nicely browned on the surface. Continue cooking for an additional 6-8 minutes until cooked through. The panko crust on the fish should be nicely browned and crispy, as well.

Be careful to not overcook the fish. Because mahi mahi is a very lean fish, if overcooked, it runs the risk of being dry, and we don’t want that, do we?

Three crusted mahi mahi fillets are placed in the air fryer basket to be cooked.Halfway through the air frying time, the fillets are flipped to cook the other side.

Serve The Air Fryer Crusted Mahi Mahi

Transfer the air fryer crusted mahi mahi to individual serving plates. Garnish each piece of fish with a lemon wedge or two (for squeezing) and fresh parsley for additional color and flavor.

We also love to add peach/mango salsa (which we get at Costco), and lightly spoon it over the top of each piece. That is optional, but oh so good!

The air fryer crusted mahi mahi pairs well with a great variety of side dishes. When I made the dish this time, I served it with Pineapple Topped Sweet Potato Puff. That was a unique pairing, but they actually ended up complimenting each other very well!

An Air fryer crusted mahi mahi filet is served with a lemon wedge on the side.This piece of air fryer crusted mahi mahi is served with fruit salsa on top and lemon on the side.

I hope you have the chance to try this delicious seafood recipe, and trust you’ll enjoy it as much as we do. If you enjoy mahi mahi, be sure to try Easy Baked Mahi Mahi, or Mahi Mahi with Corn & Avocado Salsa,too!

Thanks for stopping by, and I invite you to come back again soon for more family-friendly recipes. Take care, may God bless you, and have a GREAT day!

Looking For More AIR FRYER Recipes?

You can find ALL of my recipes in the Recipe Index, which is located at the top of the page. I have some delicious air fryer recipes for you to enjoy, including:

Interested In More Recipes?

Thank you for visiting this website. I appreciate you using some of your valuable time to do soIf you’re interested, I publish a newsletter 2 times per month (1st and 15th) with all the latest recipes, and other fun info. I would be honored to have you join our growing list of subscribers, so you never miss a great recipe!
There is a Newsletter subscription box on the top right side (or bottom) of each blog post, depending on the device you use, where you can easily submit your e-mail address (only) to be included in my mailing list.

You Can Also Find Me On Social Media:

Facebook page: The Grateful Girl Cooks!
Pinterest:
The Grateful Girl Cooks!
Instagram:
jbatthegratefulgirlcooks

Author's signature

Recipe adapted from Samantha at: everydayfamilycooking.com/air-fryer-mahi-mahi

↓↓ PRINTABLE RECIPE BELOW ↓↓

0 from 0 votes
Air Fryer Crusted Mahi Mahi
Prep Time
5 mins
Cook Time
13 mins
Total Time
18 mins
 

Air Fryer Crusted Mahi Mahi is a delicious, easy dish! Mahi Mahi fillets are coated in seasoned Panko breadcrumbs and air fried until crispy!

Category: Entree-Seafood, Main Dish
Cuisine: American
Keyword: air fryer crusted mahi mahi
Servings: 4
Calories Per Serving: 285 kcal
Author: JB @ The Grateful Girl Cooks!
Ingredients
  • pounds Mahi Mahi fillets (4 fillets)
  • 2 Tablespoons extra virgin olive oil + additional for spritzing
  • cups panko breadcrumbs
  • 1 teaspoon paprika
  • ½ teaspoon garlic powder
  • ½ teaspoon onion powder
  • ½ teaspoon salt
  • ½ teaspoon black pepper
OPTIONAL: Lemon wedges, fresh parsley sprigs, and/or salsa, to serve
    Instructions
    1. Preheat air fryer to 400°F.

    2. Combine panko breadcrumbs, paprika, garlic powder, onion powder, salt and pepper in shallow bowl or dish. Stir to combine.

    3. Pat mahi mahi fillets dry with paper towels. Use a pastry brush to coat all sides of each fillet with olive oil.

    4. Lay fillets (one at a time) on breadcrumbs. Press breadcrumbs onto fish to adhere and coat each with breadcrumbs on all sides. Place each coated fillet onto a large plate; lightly spritz top and bottom sides of each fillet with additional olive oil. This helps panko breadcrumb coating to become very crisp.

    5. Place fish in a single layer in air fryer basket. Cook at 400°F. for 6-7 minutes, then gently turn fish over to the other side. Continue cooking for 6-8 minutes. Fish should be fully cooked; breadcrumb crust should be crisp and browned when done. Be careful to not overcook the fish (or it can become dry).

    6. Transfer mahi mahi to individual serving plates. Garnish each piece with lemon wedges (for squeezing) and fresh parsley., if desired. Also can spoon salsa over the top of each piece, for additional flavor (optional). Enjoy!

    Nutrition Facts
    Air Fryer Crusted Mahi Mahi
    Amount Per Serving (1 fillet (1/4 of total))
    Calories 285 Calories from Fat 81
    % Daily Value*
    Fat 9g14%
    Saturated Fat 2g13%
    Polyunsaturated Fat 1g
    Monounsaturated Fat 6g
    Cholesterol 124mg41%
    Sodium 579mg25%
    Potassium 766mg22%
    Carbohydrates 14g5%
    Fiber 1g4%
    Sugar 1g1%
    Protein 34g68%
    Vitamin A 554IU11%
    Vitamin C 0.1mg0%
    Calcium 64mg6%
    Iron 3mg17%
    * Percent Daily Values are based on a 2000 calorie diet.

    Here’s one more to pin on your Pinterest boards!Air Fryer Crusted Mahi Mahi is a delicious, easy dish! Mahi Mahi fillets are coated in seasoned Panko breadcrumbs and air fried until crispy!

    Pineapple Topped Sweet Potato Puff

    Pineapple Topped Sweet Potato Puff is a delicious side dish featuring cinnamon vanilla mashed sweet potatoes, with a pineapple crumb topping!
    Pineapple Topped Sweet Potato Puff is a delicious side dish featuring cinnamon vanilla mashed sweet potatoes, with a pineapple crumb topping!

    Today I want to share a yummy recipe for a fruit topped veggie side dish! I found the original recipe in an old cookbook, and we loved the taste of this simple dish. The recipe, as written, makes 8 servings, so it’s not only great for dinner (and leftovers!), but would be a wonderful addition to a holiday table, as well.

    The recipe uses fresh sweet potatoes (also known as yams), and I typically use the red-skinned variety. This side dish does require a bit of planning ahead because it is necessary to boil the fresh sweet potatoes for about 40 minutes to get them soft enough to mash. Once you get past that part, the rest of the dish is easy! This dish has two distinct layers of flavor… a bottom layer of cinnamon vanilla seasoned mashed sweet potatoes, and a final layer of crumbly pineapple topping. Here’s how to make this delicious veggie side dish.

    Scroll Down For A Printable Recipe Card At The Bottom Of The Page

    Prepare The Sweet Potatoes

    Wash the sweet potatoes, then piece each potato 5-6 times with the tines of a fork, or with a sharp knife. Place them in a large pan of boiling water and cook them on medium high heat for about 40 minutes or until softened. To test for doneness, simply insert a knife into the middle of a sweet potato. The knife should be able to pierce the potato very easily once done.

    Remove potatoes from the water, and let them cool for 1-2 minutes, then remove the peel (discard the peels). Cut the peeled sweet potatoes into slices or chunks, and place them in a medium sized bowl. At this point, you should also preheat your oven to 350°F. so it is ready to go, once the dish is assembled.

    Three medium sized sweet potatoes cooking in boiling water in a large saucepan.After cooking, sweet potatoes are peeled and then mashed using an electric mixer.

    Make The Sweet Potato Filling

    Use an electric mixer to “mash” the sweet potatoes until mostly smooth and lump-free. Add sugar, softened butter, eggs, milk, cinnamon, vanilla and salt, and mix these ingredients together, until fully incorporated. Pour the sweet potato mixture into an UNGREASED 2 quart baking dish, then set the dish aside while making the pineapple topping.

    The sweet potatoes are mashed to remove chunks before adding other ingredients.Sugar, eggs, milk, vanilla, butter, cinnamon and salt are mixed with the mashed sweet potatoes.Sweet potato mixture is poured into an ungreased, 2 quart casserole dish.

    Make The Pineapple Topping

    Measure all purpose flour, sugar, egg and softened butter into a medium sized bowl. Stir the ingredients together until it becomes a thick, “wet” looking batter. Fold an 8 oz. can of well-drained crushed pineapple into the batter until combined. This is the pineapple topping for the sweet potatoes, and it will be slightly “lumpy” in texture..

    Flour, sugar, softened butter and an egg are combined in a medium bowl.A well-drained 8 ounce can of crushed pineapple is added to the topping mixture.

    Ready… Set… Bake!

    Drop the pineapple topping (by the spoonful) over the top of the sweet potatoes, trying to cover as much of the surface as possible. Place the casserole dish on the middle rack of your preheated oven.

    Bake the pineapple topped sweet potato puff at 350°F for 30-35 minutes. When done, the top will be light golden brown in color, and the sweet potato filling will have “puffed up” a bit as it was baking. Remove the dish from the oven and let it rest for 1-2 minutes before serving (it’s quite HOT).

    A layer of pineapple topping is added to the top of the sweet potato mixture in casserole dish.Once baked, the pineapple topped sweet potato puff is golden brown and rises slightly in dish.

    Serve The Pineapple Topped Sweet Potato Puff

    To serve this dish, spoon up the pineapple topped sweet potato puff and place on individual serving dishes. The sweet potato puff is so colorful, sweet and buttery, and pairs wonderfully with the sweet pineapple topping!

    The day I photographed this recipe, we enjoyed this vegetable dish served alongside yummy Air Fryer Crusted Mahi Mahi. This dish would also compliment a variety of main dishes, such as beef, pork, turkey or chicken, etc. Any leftovers can be easily reheated in the oven or in a microwave, so don’t worry about having too much!

    A look at the insides of the pineapple topped sweet potato puff in the serving dish.The pineapple topped sweet potato puff was served alongside a piece of crusty, air fried fish.

    I hope you have the opportunity to make this tasty vegetable side dish for yourself and/or for those you love. Thanks for stopping by, and I invite you to come back soon for more family friendly recipes. Take care, and have a GREAT day!

    Looking For More SWEET POTATO (OR YAM) Recipes?

    You can find ALL of my recipes in the Recipe Index, which is located at the top of the page. I have some really delicious sweet potato/yam recipes you might enjoy, including:

    Interested In More Recipes?

    Thank you for visiting this website. I appreciate you using some of your valuable time to do soIf you’re interested, I publish a newsletter 2 times per month (1st and 15th) with all the latest recipes, and other fun info. I would be honored to have you join our growing list of subscribers, so you never miss a great recipe!
    There is a Newsletter subscription box on the top right side (or bottom) of each blog post, depending on the device you use, where you can easily submit your e-mail address (only) to be included in my mailing list.

    You Can Also Find Me On Social Media:

    Facebook page: The Grateful Girl Cooks!
    Pinterest:
    The Grateful Girl Cooks!
    Instagram:
    jbatthegratefulgirlcooks

    Author's signature

    Recipe adapted from: Gooseberry Patch “Big Book of Holiday Cooking”, page 199, submitted by Linda Littlejohn, published in 2012 by Oxmoor House and Time Home Entertainment, Inc.

    ↓↓ PRINTABLE RECIPE BELOW ↓↓

    5 from 1 vote
    Pineapple Topped Sweet Potato Puff
    Prep Time
    40 mins
    Cook Time
    30 mins
    Total Time
    1 hr 10 mins
     

    Pineapple Topped Sweet Potato Puff is a delicious side dish featuring cinnamon vanilla mashed sweet potatoes, with a pineapple crumb topping!

    Category: Side Dish, Vegetable Dish
    Cuisine: American
    Keyword: pineapple topped sweet potato puff
    Servings: 8
    Calories Per Serving: 338 kcal
    Author: JB @ The Grateful Girl Cooks!
    Ingredients
    For Sweet Potato Filling:
    • 2 cups sweet potatoes boiled, peeled, mashed
    • 1 cup granulated sugar
    • ¼ cup butter softened
    • 2 large eggs
    • ¼ cup milk
    • 1 teaspoon vanilla extract
    • ¼ teaspoon ground cinnamon
    • ¼ teaspoon salt
    For Pineapple Topping:
    • ¼ cup all purpose flour
    • ½ cup granulated sugar
    • 1 large egg slightly beaten
    • ¼ cup butter softened
    • 8 ounces crushed pineapple (canned) well drained
    Instructions
    1. Wash sweet potatoes; piece each potato 5-6 times with the tines of a fork, or with a sharp knife. Place them in large pan of boiling water; cook on medium high heat for 40 minutes or until softened. To test for doneness, insert a knife into the middle of a sweet potato. Knife should easily pierce potato very once done. Remove potatoes from water; let cool 1-2 minutes. Remove peel (discard peels). Cut sweet potatoes into slices or chunks; place in medium bowl.

    2. Preheat oven to 350°F. so it's ready to go, once dish is assembled.

    3. Use electric mixer to "mash" sweet potatoes until smooth and lump-free. Add sugar, butter, eggs, milk, cinnamon, vanilla and salt. Mix until fully incorporated. Pour in UNGREASED 2 qt. baking dish. Set aside while making pineapple topping.

    4. Measure flour, sugar, egg and softened butter into medium bowl. Stir together until it becomes a thick, wet batter. Fold pineapple into batter until combined. Drop pineapple topping (by the spoonful) over the top of the sweet potatoes; cover as much of the surface as possible.

    5. Place baking dish on middle rack of oven. Bake at 350°F for 30-35 minutes. When done, the top will be light golden brown in color, and sweet potato filling will have "puffed up". Remove from the oven; let rest 1-2 minutes before serving.

    Nutrition Facts
    Pineapple Topped Sweet Potato Puff
    Amount Per Serving (1 (1/8 of total))
    Calories 338 Calories from Fat 126
    % Daily Value*
    Fat 14g22%
    Saturated Fat 8g50%
    Trans Fat 0.5g
    Polyunsaturated Fat 1g
    Monounsaturated Fat 4g
    Cholesterol 101mg34%
    Sodium 212mg9%
    Potassium 194mg6%
    Carbohydrates 52g17%
    Fiber 2g8%
    Sugar 43g48%
    Protein 4g8%
    Vitamin A 5202IU104%
    Vitamin C 3mg4%
    Calcium 39mg4%
    Iron 1mg6%
    * Percent Daily Values are based on a 2000 calorie diet.

    Here’s one more to pin on your Pinterest boards!Pineapple Topped Sweet Potato Puff is a delicious side dish featuring cinnamon vanilla mashed sweet potatoes, with a pineapple crumb topping!

    Raspberry Surprise Muffins

    Raspberry Surprise Muffins taste great and are easy to make! You’ll enjoy their light almond flavor and raspberry jam inside. Makes 1 dozen.
    Raspberry Surprise Muffins taste great and are easy to make! You'll enjoy their light almond flavor and raspberry jam inside. Makes 1 dozen.

    Do you enjoy muffins for breakfast? We sure do at our home! What I enjoy about muffins is that they typically don’t take a lot of time to make, but yield quite a few that (in our house) can last my husband and I for a few days (or more, if we freeze some of them). A little work for several meals or snacks… YESSSS!

    Today I am sharing a delicious recipe with you that I discovered in a wonderful cookbook that was published quite a few years ago. The recipe is very simple to prepare, and yields a dozen delicious muffins that I’m sure you’re going to enjoy! Here’s how to make them:

    Scroll Down For A Printable Recipe Card At The Bottom Of The Page

    Make The Muffin Batter

    Before making the batter, preheat your oven to 400°F, and line a 12 cup standard muffin pan with paper liners (or spray). It doesn’t take long to make the muffin batter, so you will want both the oven and the muffin pan ready to go!

    Okay… now let’s make the muffin batter! Place all purpose flour, sugar, baking powder and salt in a large mixing bowl. Stir until these dry ingredients are combined. Add in milk, melted butter, one egg, vanilla extract and almond extract. Stir the batter only until all ingredients have been combined and moistened. Yes… you may have some small lumps, but do not overmix the batter.

    Dry ingredients for the muffins are measured into a large bowl and combined.Milk, egg, melted butter, vanilla and almond extracts are added to the dry muffin batter ingredients.Batter for the muffins is stirred only until all ingredients have been incorporated.

    Preparing The Muffins For Baking

    Spoon the batter into the muffin cups only until HALFWAY FULL. Top the batter in each muffin cup with one teaspoon of raspberry jam (seeded or seedless). Divide and spoon the remaining batter over the muffins to cover the jam.

    Sprinkle the top of each muffin with the reserved 2 Tablespoons of granulated sugar, dividing the sugar evenly between the 12 muffins. Now the raspberry surprise muffins are ready for the oven. NOTE: If desired, you can add a few thinly sliced almonds to decorate the top of the muffins before baking, but that is OPTIONAL (we prefer them without).

    Muffin cups are filled only halfway with the batter for raspberry surprise muffins.Raspberry jam (regular or seedless) is spooned on top of the muffin batter.Muffin batter is added to cover jam, then muffin tops are sprinkled with sugar before baking.

    Bake The Muffins

    Bake the raspberry surprise muffins at 400°F. for between15-17 minutes (or more, if necessary). When done, a toothpick inserted into the top of a muffin should come out clean. The tops of the muffins should also be very light golden brown in color, as well.

    Transfer the muffin pan to a wire rack and let the muffins cool (in the pan) for 5 minutes, then transfer the muffins out of the pan to the wire rack to finish cooling.

    A dozen Raspberry Surprise Muffins cooling on a wire rack after baking.A close up reveals a bit of the surprise raspberry filling peeking out from the muffin.

    Time To Enjoy Some Raspberry Surprise Muffins!

    We enjoy eating these raspberry surprise muffins when they are just slightly warm! You really can’t see the raspberry jam from the outside looking at the muffins, but it is a nice SURPRISE to take a bite and SEE the surprise raspberry filling inside. YUM!

    The muffins taste good with a dab of softened butter spread on them, too, if you like that on your muffins. The subtle almond flavor pairs very well with the sweet raspberry jam filling. I think you’re going to like these tasty muffins for breakfast or enjoyed as a snack! They freeze well, if wrapped tightly and stored in the freezer in an airtight container or bag!

    A bite taken from the muffin shows the surprise raspberry filling inside the muffin.One of the raspberry surprise muffins is cut apart, revealing the surprise filling hidden inside.

    I hope you have the opportunity to try these delicious muffins, and trust you’ll enjoy them as much as we do! Thank you so much for stopping by, and I invite you to come back soon for more family-friendly recipes. Have a GREAT day!

    Looking For More MUFFIN RECIPES?

    You can find ALL of my recipes in the Recipe Index, which is located at the top of the page. I have a lot of wonderful muffin recipes for you to choose from, including:

    Interested In More Recipes?

    Thank you for visiting this website. I appreciate you using some of your valuable time to do soIf you’re interested, I publish a newsletter 2 times per month (1st and 15th) with all the latest recipes, and other fun info. I would be honored to have you join our growing list of subscribers, so you never miss a great recipe!
    There is a Newsletter subscription box on the top right side (or bottom) of each blog post, depending on the device you use, where you can easily submit your e-mail address (only) to be included in my mailing list.

    You Can Also Find Me On Social Media:

    Facebook page: The Grateful Girl Cooks!
    Pinterest:
    The Grateful Girl Cooks!
    Instagram:
    jbatthegratefulgirlcooks

    Author's signature

    Original recipe source: “Gooseberry Patch – Have Yourself A Homemade Christmas”, page 162, published by Time Home Entertainment/Oxmoor House in 2014

    ↓↓ PRINTABLE RECIPE BELOW ↓↓

    0 from 0 votes
    Raspberry Surprise Muffins
    Prep Time
    13 mins
    Cook Time
    17 mins
    Total Time
    30 mins
     

    Raspberry Surprise Muffins taste great and are easy to make! You'll enjoy their light almond flavor and raspberry jam inside. Makes 1 dozen.

    Category: Breakfast, Snack
    Cuisine: American
    Keyword: raspberry surprise muffins
    Servings: 12 muffins
    Calories Per Serving: 230 kcal
    Author: JB @ The Grateful Girl Cooks!
    Ingredients
    • 2 cups all purpose flour
    • cup granulated sugar
    • 2 teaspoons baking powder
    • ½ teaspoon salt
    • 1 cup milk whole, 1% or 2%
    • ½ cup butter melted
    • 1 large egg lightly beaten
    • 1 teaspoon vanilla extract
    • ½ teaspoon almond extract
    • ¼ cup raspberry jam regular or seedless
    • 2 Tablespoons granulated sugar to sprinkle on top of muffin batter
    Instructions
    1. Preheat oven to 400°F, Line a 12 cup standard muffin pan with paper liners (or use non-stick spray).

    2. Measure flour, ⅔ cup of sugar, baking powder and salt into a large bowl. Stir until combined. Add milk, melted butter, egg, vanilla and almond extracts. Stir batter only until ingredients are combined and moistened. Don't overmix batter.

    3. Spoon batter into muffin cups only until HALFWAY FULL. Top the batter in each muffin cup with one teaspoon of raspberry jam. Finish filling muffin cups with remaining batter (dividing it evenly) to cover the jam.

    4. Sprinkle each muffin with reserved 2 Tablespoons of granulated sugar, dividing sugar evenly between the muffins. NOTE: If desired, you can also add thinly sliced almonds to the top of the muffins before baking (OPTIONAL).

    5. Bake muffins at 400°F. for 15-17 minutes (or more, if necessary). When done, a toothpick inserted into the top of a muffin should come out clean. Tops of the muffins should be light golden brown in color. Transfer muffin pan to wire rack and let muffins cool (in the pan) for 5 minutes. Transfer muffins out of the pan to wire rack to finish cooling. Serve and enjoy. (NOTE: Leftover muffins freeze well, if wrapped tightly and stored in the freezer in an airtight container or bag!)

    Recipe Notes

    NOTE: Caloric calculation made using 1% milk.

    Nutrition Facts
    Raspberry Surprise Muffins
    Amount Per Serving (1 muffin)
    Calories 230 Calories from Fat 81
    % Daily Value*
    Fat 9g14%
    Saturated Fat 5g31%
    Trans Fat 0.3g
    Polyunsaturated Fat 0.5g
    Monounsaturated Fat 2g
    Cholesterol 37mg12%
    Sodium 175mg8%
    Potassium 135mg4%
    Carbohydrates 35g12%
    Fiber 1g4%
    Sugar 18g20%
    Protein 3g6%
    Vitamin A 297IU6%
    Vitamin C 1mg1%
    Calcium 63mg6%
    Iron 1mg6%
    * Percent Daily Values are based on a 2000 calorie diet.

    Here’s one more to pin on your Pinterest boards!Raspberry Surprise Muffins taste great and are easy to make! You'll enjoy their light almond flavor and raspberry jam inside. Makes 1 dozen.

    Coney Dogs

    Looking for an easy meal for your family? Make Coney Dogs! Learn how to make this simple, flavorful meat sauce for your favorite hot dogs.
    Looking for an easy meal for your family? Make Coney Dogs! Learn how to make this simple, flavorful meat sauce for your favorite hot dogs.

    Coney dogs have been around since the early 1900’s, in one version or another. There has always been some disagreement regarding how Coney dogs became popular in the United States.

    Years ago I found this recipe in one of my old cooking magazines, and knew I had to try it out. My husband wasn’t sure he would like it, but he (and I) ended up loving this sauce and our Coney dogs!

    Coney Dog History 

    I grew up thinking Coney dogs got their name because originated in Coney Island, New York, but according to historians, that may not actually be the case. I

    f you are interested in the history of this classic hot dog and sauce, check out this article from the Smithsonian magazine here. It is quite fascinating to read about its origins, and is a quick, easy read!

    Coney Dogs Flavor Profile

    If you enjoy traditional chili dogs, then you will most likely enjoy Coney dogs, as they share some similarities, but have a slightly different flavor profile (slightly sweet). 

    The sauce for Coney dogs is incredibly EASY to prepare, using ground beef, onions, celery, brown sugar, tomato sauce and spices, etc.

    When this sauce is used to top your favorite hot dogs, I’m confident you’ll enjoy them! Here’s how simple it is to prepare Coney dogs!

    Scroll Down For A Printable Recipe Card At The Bottom Of The Page

    Cook The Ground Beef

    Cook ground beef, chopped onions and celery in a large skillet on Medium heat. Break the beef up until it is in small pieces.

    Stir often, and continue cooking the beef until fully cooked through. Once the meat is done cooking, drain off any accumulated grease in the skillet and discard. 

    Ground beef is cooked in a skillet with chopped onions and celery.Hamburger meat is cooked until it is fully browned and cooked through.

    Let’s Make The Sauce For The Coney Dogs!

    Now it’s time to make the Coney sauce for the hot dogs. Add tomato sauce, brown sugar, lemon juice, Worcestershire sauce, chili powder, yellow mustard and salt to the ground beef mixture.

    Bring the sauce to a boil on MEDIUM heat. Once it begins to boil, reduce the heat to LOW. Let the sauce simmer UNCOVERED on LOW heat for 15 minutes, stirring it occasionally while it cooks. 

    While the sauce is simmering, cook the hot dogs according to the instructions on the package or by using your favorite method (boil, grill, oven broil, air fryer, etc.).

    Plan your time so that the hot dogs will be ready when the sauce is finished cooking!

    Tomato sauce, brown sugar and other seasonings are added to the browned ground beef in skillet.The sauce for the Coney dogs is cooked for 15 minutes until it has thickened.

    Once done, the Coney dog sauce will have thickened considerably, and most of the liquid will have been absorbed.

    Once this occurs, and the meat is fully heated through, the sauce is ready to serve as a topper for the hot dogs!

    Once thickened and fully cooked through, the Coney sauce is ready to add to cooked hot dogs.

    Who’s Ready For Some Coney Dogs?

    Place the cooked hot dogs into hot dog buns, and then spoon some of the sauce onto each hot dog. A lot of folks enjoy eating Coney dogs just like this (only adding the sauce), but add your favorite condiments, as well.

    My favorite way to enjoy a Coney dog is to add diced fresh onion and yellow mustard on top of the sauce. My husband enjoys adding chopped onions and shredded cheddar cheese to his.

    Serve the Coney dogs hot, and enjoy their wonderful flavor! This recipe makes enough sauce to top 8 hot dogs.

    Any leftover Coney sauce can be frozen for later use when sealed in an airtight freezer bag or container.

    The Coney meat sauce is spooned on top of cooked hot dogs in buns, to serve.Mustard and chopped onions are added to the top of one of the Coney dogs to enjoy.

    I hope you enjoy this simple meal. We really do, because it is so simple to prepare, and is a nice change from plain hot dogs or traditional chili cheese dogs!

    Thank you for stopping by and I hope you will come back for more family friend recipes again soon. Take care, and have a great day!

    Looking For More EASY LUNCH or DINNER Recipes?

    You can find ALL of my recipes in the Recipe Index, which is located at the top of the page. I have some yummy lunch recipes you can check out, including:

    Want More Recipes? Get My FREE Newsletter!

    I publish a newsletter 2 times per month (1st and 15th) with lots of recipes, tips, etc..
    Would you like to join our growing list of subscribers?

    There is a Newsletter subscription box on the top right (or bottom) of each blog post, depending on the device you use.
    You can submit your e-mail address there, to be added to my mailing list.

    Find Me On Social Media:

    Facebook page: The Grateful Girl Cooks!
    Pinterest:
    The Grateful Girl Cooks!
    Instagram:
    jbatthegratefulgirlcooks

    Author's signature

    Original recipe source: “Taste of Home” magazine, June/July 2005 edition, page 54, published by Reiman Publications

    ↓↓ PRINTABLE RECIPE BELOW ↓↓

    0 from 0 votes
    Coney Dogs
    Prep Time
    10 mins
    Cook Time
    15 mins
    Total Time
    25 mins
     

    Looking for an easy meal for your family? Make Coney Dogs! Learn how to make this simple, flavorful meat sauce for your favorite hot dogs.

    Category: Dinner, Lunch
    Cuisine: American
    Keyword: coney dogs
    Servings: 8 coney dogs
    Calories Per Serving: 84 kcal
    Author: JB @ The Grateful Girl Cooks!
    Ingredients
    For Coney Sauce:
    • ½ pound ground beef
    • ¼ cup chopped yellow onions
    • 2 Tablespoons chopped celery
    • 8 ounces canned tomato sauce
    • 2 Tablespoons brown sugar light or dark
    • 1 Tablespoon lemon juice
    • teaspoons Worcestershire sauce
    • ¾ teaspoon chili powder
    • ½ teaspoon prepared yellow mustard
    • ¼ teaspoon salt
    For Hot Dogs (these items not included in caloric calculation as varieties/brands of hot dogs and buns may vary greatly):
    • 8 hot dogs/weiners
    • 8 hot dog buns
    Instructions
    1. Cook beef, onions and celery in a large skillet on Medium heat. Break beef up until it's in small pieces. Stir often; continue cooking beef until fully cooked through. Drain off any accumulated grease in skillet and discard.

    2. Add tomato sauce, brown sugar, lemon juice, Worcestershire sauce, chili powder, mustard and salt to ground beef mixture. Bring sauce to a boil on MEDIUM heat. Once it begins to boil, reduce heat to LOW. Let sauce simmer UNCOVERED on LOW heat for 15 minutes, stirring occasionally while it cooks. NOTE: While sauce is simmering, cook hot dogs according to pkg. instructions or use your favorite method (boil, grill, oven broil, air fryer, etc.). Plan ahead so hot dogs will be ready when sauce is finished cooking!

    3. When done, the sauce will have thickened considerably, and most liquid will have been absorbed. The sauce is now ready to serve as a topper for the hot dogs!

    4. Place cooked hot dogs into warm hot dog buns. Top each one with sauce. Enjoy the hot dogs with just the added coney sauce OR add additional condiments like cheese, yellow mustard, chopped onions, or other condiments you enjoy.

    5. NOTE: This recipe makes enough sauce to top 8 hot dogs. Any leftover meat sauce can be frozen for later use when sealed in an airtight freezer bag or container.

    Recipe Notes

    NOTE: Hot dogs and buns were not included in caloric calculation, as varieties/brands/calories of hot dogs and buns will vary greatly. Caloric calculation is for the coney sauce (1/8th portion of total sauce).

    Nutrition Facts
    Coney Dogs
    Amount Per Serving (1 serving sauce)
    Calories 84 Calories from Fat 36
    % Daily Value*
    Fat 4g6%
    Saturated Fat 2g13%
    Trans Fat 0.3g
    Polyunsaturated Fat 0.2g
    Monounsaturated Fat 2g
    Cholesterol 19mg6%
    Sodium 257mg11%
    Potassium 204mg6%
    Carbohydrates 6g2%
    Fiber 1g4%
    Sugar 4g4%
    Protein 6g12%
    Vitamin A 189IU4%
    Vitamin C 3mg4%
    Calcium 15mg2%
    Iron 1mg6%
    * Percent Daily Values are based on a 2000 calorie diet.

    Here’s one more to pin on your Pinterest boards!Looking for an easy meal for your family? Make Coney Dogs! Learn how to make this simple, flavorful meat sauce for your favorite hot dogs.

    Tuscan Cannellini Tuna Salad

    Tuscan Cannellini Tuna Salad is an easy dish with albacore tuna, cannellini beans and red onion tossed in a delicious, light salad dressing!
    Tuscan Cannellini Tuna Salad is an easy dish with albacore tuna, cannellini beans and red onion tossed in a delicious, light salad dressing!

    If you’re looking for a protein-filled salad to enjoy for lunch or a simple dinner, how about Tuscan Cannellini Tuna Salad? I found the original recipe in one of my very old Weight Watcher cookbooks (from 1998), and it’s delicious.

    This salad has wonderful flavor, and is a CINCH to make! You NEED TO PLAN AHEAD, though, because for best flavor, the salad dressing needs to be made about 45 minutes ahead of time. This extra time allows the flavors to develop fully! You can always mix the salad dressing up in the morning, then it’s ready for a quick lunch later!

    The actual salad itself is made up of only 3 ingredients… a can of albacore tuna, red onion, and protein-packed cannellini beans. Cannellini beans are also called white kidney beans, and can be found in most grocery stores. The salad is then tossed with the amazing salad dressing before serving. Let me show you how to make this tasty salad, which yields enough for four portions.

    Scroll Down For A Printable Recipe Card At The Bottom Of The Page

    Make The Salad Dressing

    The salad dressing used is the source of this salads great flavor! Best part? It only takes a minute or two to make! Place dried sage, olive oil, white wine, garlic, white wine vinegar, salt and pepper in a small bowl. Use a whisk to combine these ingredients very well.

    PLAN AHEAD! For the very BEST flavor (recommended!), cover the salad dressing once it’s fully combined. Let the salad dressing sit (covered) at room temperature for 45 minutes. Plan ahead for this, because this time gives the flavors a chance to fully develop!

    Salad dressing ingredients are placed in a small bowl before combining.Tuscan Cannellini tuna Salad dressing is mixed together before adding it to the salad.

    Combine The Salad Ingredients

    It’s time to finish making the Tuscan Cannellini Tuna Salad, once the salad dressing has “rested”. Place the drained, rinsed cannellini beans, drained and flaked albacore tuna and chopped red onion into a medium bowl. Toss lightly to combine these three ingredients.

    Rinsed, drained cannellini beans, red onion, and albacore tuna are combined in a large bowl.

    Dressing The Salad

    Give the salad dressing a quick stir to re-combine the ingredients and pour it over the tuna, cannellini beans and red onion. Toss the salad, so that the dressing is coating the salad ingredients very well.

    Salad dressing is poured over the Tuscan Cannellini Tuna Salad before mixing.After mixing in the salad dressing, the salad is ready to be served.

    Time To Enjoy Tuscan Cannellini Tuna Salad!

    Transfer the Tuscan Cannellini Tuna Salad into a pretty serving bowl, if desired, and then serve. The salad has wonderful flavors, thanks to that delicious salad dressing! This recipe makes four servings, and you can store any leftovers (covered or in airtight container) in the refrigerator for several days.

    A bowl filled with Tuscan Cannellini Tuna Salad is ready to be served.A close up photo of the Tuscan Cannellini Tuna Salad.

    That’s how simple it is to make this yummy Tuscan Cannellini Tuna Salad, which can be served on its own for lunch, dinner or as a side dish. I hope you enjoy it, and trust you will come back soon for more family-friendly recipes. Take care and have a GREAT day.

    Looking For More SALAD Recipes?

    You can find ALL of my recipes in the Recipe Index, which is located at the top of the page. I have lots of yummy salad recipes for you to check out, including:

    Interested In More Recipes?

    Thank you for visiting this website. I appreciate you using some of your valuable time to do soIf you’re interested, I publish a newsletter 2 times per month (1st and 15th) with all the latest recipes, and other fun info. I would be honored to have you join our growing list of subscribers, so you never miss a great recipe!
    There is a Newsletter subscription box on the top right side (or bottom) of each blog post, depending on the device you use, where you can easily submit your e-mail address (only) to be included in my mailing list.

    You Can Also Find Me On Social Media:

    Facebook page: The Grateful Girl Cooks!
    Pinterest:
    The Grateful Girl Cooks!
    Instagram:
    jbatthegratefulgirlcooks

    Author's signature

    Original recipe source: “Weight Watchers New Complete Cookbook”, page 433, published by Wiley Publishing, Inc., 1998

    ↓↓ PRINTABLE RECIPE BELOW ↓↓

    0 from 0 votes
    Tuscan Cannellini Tuna Salad
    Prep Time
    5 mins
    Cook Time
    0 mins
    Resting Time-Salad Dressing (inactive prep)
    45 mins
    Total Time
    50 mins
     

    Tuscan Cannellini Tuna Salad is an easy dish with albacore tuna, cannellini beans and red onion tossed in a delicious, light salad dressing!

    Category: Lunch, Salads
    Cuisine: All Cuisines
    Keyword: Tuscan cannellini tuna salad
    Servings: 4
    Calories Per Serving: 235 kcal
    Author: JB @ The Grateful Girl Cooks!
    Ingredients
    For Dressing:
    • 4 teaspoons extra virgin olive oil
    • 1 Tablespoon white wine vinegar
    • 1 Tablespoon dry white wine
    • 2 teaspoons dried sage or 2 Tablespoons fresh (minced)
    • 2 cloves garlic minced
    • ¼ teaspoon salt
    • teaspoon ground black pepper
    For Salad:
    • 16 ounces cannellini beans (canned) rinsed/drained
    • 7 ounces albacore tuna (canned, in water) drained. flaked
    • 1 Tablespoon chopped red onion
    Instructions
    Make Salad Dressing (at least 45 minutes before assembling salad)
    1. Place dried sage, olive oil, white wine, garlic, white wine vinegar, salt and pepper in a small bowl. Use a whisk to combine these ingredients very well. For the very BEST flavor, cover salad dressing once combined. Let salad dressing sit (covered) at room temperature for at least 45 minutes. Plan ahead, because this time gives the flavors in the salad dressing the chance to fully develop!

    Finish Salad
    1. Place cannellini beans, tuna and red onion into a medium bowl. Toss lightly, to combine.

    2. Give salad dressing a stir to re-blend ingredients; pour it over the salad Toss gently, so that salad dressing is coating salad ingredients well. Serve, and enjoy!

    3. Any leftovers can be stored (covered or in airtight container) in refrigerator for several days.

    Nutrition Facts
    Tuscan Cannellini Tuna Salad
    Amount Per Serving (1 (1/4 of total))
    Calories 235 Calories from Fat 54
    % Daily Value*
    Fat 6g9%
    Saturated Fat 1g6%
    Polyunsaturated Fat 1g
    Monounsaturated Fat 3g
    Cholesterol 21mg7%
    Sodium 339mg15%
    Potassium 648mg19%
    Carbohydrates 25g8%
    Fiber 6g25%
    Sugar 0.5g1%
    Protein 20g40%
    Vitamin A 13IU0%
    Vitamin C 1mg1%
    Calcium 95mg10%
    Iron 4mg22%
    * Percent Daily Values are based on a 2000 calorie diet.

    Here’s one more to pin on your Pinterest boards!Tuscan Cannellini Tuna Salad is an easy dish with albacore tuna, cannellini beans and red onion tossed in a delicious, light salad dressing!


    Chocolate Chip Swirl Bars

    Make a dozen Chocolate Chip Swirl Bars in about 30 minutes! Be warned! These delicious, simple bar cookies are so good, they’re dangerous!
    Make a dozen Chocolate Chip Swirl Bars in about 30 minutes! Be warned! These delicious, simple bar cookies are so good, they're dangerous!

    Do you enjoy warm chocolate chip cookies? Well, I sure do! If you enjoy them as much as I do, I’m positive you’re going to love these chocolate chip swirl bars! The bar cookies are filled with chopped pecans (or walnuts), and a layer of chocolate chips are swirled through the batter after a minute or two of baking. They are so good!

    I originally found this recipe in one of my old cookbooks that was published way back in 2005. The recipe is super simple to prepare, and the results are outstanding! Chocolate Chip Swirl Bars are a decadent treat, that take only about 10 minutes prep to get into the oven. The rest is about 20 minutes of baking time, and then you get to enjoy one (or seven!) of these yummy dessert bars! Here’s how to make them.

    Scroll Down For A Printable Recipe Card At The Bottom Of The Page

    Make The Bar Cookie Dough

    First thing you’ll need to do is preheat your oven to 375°F. and spray an 8″x8″ square baking pan with non-stick spray. The dough doesn’t take long to prepare, so you will want your oven hot and ready to go, once it is made. Now you’re ready to mix up the dough for these chocolate chip dessert bars!

    Sift together flour, baking soda and salt into a Medium sized bowl, then set the bowl aside. In a separate Large bowl, use an electric mixer to beat softened butter, granulated and brown sugars, vanilla extract and water together until fully combined.

    Once combined, use the electric mixer to beat an egg and the flour mixture into the dough, a little at a time, until incorporated. Remove the mixer, and STIR chopped pecans (or walnuts) into the dough until they’re incorporated.

    Chopped pecans (or walnuts) are stirred into the prepared dessert bars dough.

    Getting Ready To Bake

    Evenly spread the dough into the prepared baking pan. Sprinkle the chocolate chips over the entire surface of the dough. Now you’re ready to bake the chocolate chip swirl bars! See how easy it was to get them ready to bake?

    Dough for the chocolate chip swirl bars is spread in a greased baking dish.Chocolate chips are sprinkled over the surface of the dough.

    Bake The Chocolate Chip Swirl Bars

    Place the baking pan into a preheated 375°F. oven and let them bake for ONLY 2 minutes. Remove the pan from the oven and quickly take a butter knife and run it through the dough, creating marbleized “swirls” throughout the dough in the pan.

    After creating swirls of softened chocolate chips, put the pan back into the hot oven, and continue baking for 16-18 minutes longer. When done, the top of the chocolate chip swirl bars will be nicely browned, and a toothpick inserted into the top middle should come out free of dough batter (clean).

    After baking for 2 minutes, a knife is used to swirl the softened chocolate chips through the dough.Chocolate chips are swirled through the dough, then pan is put back in oven to finish baking.

    Remove the pan from the oven once done, and transfer it to a wire rack to cool. The chocolate chip swirl bars will slice easier once they have had several minutes to cool, so make sure to let them “rest” a bit.

    Golden brown and firm on top, the chocolate chip swirl bars are removed from oven.Chocolate chip swirl bars, in baking dish, cooling down before slicing.

    Serve The Chocolate Chip Swirl Bars

    We enjoy these cookie bars best when served slightly warm, but if you prefer them hot OR at room temperature, that is your choice. Either way, when you’re ready to serve, slice the bars into 12 pieces. However, when served warm, the chocolate chips will still be ooey gooey and delicious (just sayin’)!

    Serve and enjoy these decadent treats. IF you have any leftovers (notice I said “IF”?), they can be wrapped tightly or placed in a freezer bag or airtight container and frozen for use at a later date. YUM!

    The chocolate chip dessert bars are cut into 12 pieces before serving.Four of the chocolate chip swirl bars are served on a white plate.

    I hope you have the chance to make these yummy dessert bars for those you love. They’re REALLY delicious! Thanks for stopping by today, and I hope you can come back soon for more family-friendly recipes. Take care, have a GREAT day, and may God bless you in all you do.

    Looking For More BAR COOKIE Recipes?

    You can find ALL of my recipes in the Recipe Index, which is located at the top of the page. I have lots of amazing bar cookie recipes for you to enjoy, including:

    Interested In More Recipes?

    Thank you for visiting this website. I appreciate you using some of your valuable time to do soIf you’re interested, I publish a newsletter 2 times per month (1st and 15th) with all the latest recipes, and other fun info. I would be honored to have you join our growing list of subscribers, so you never miss a great recipe!
    There is a Newsletter subscription box on the top right side (or bottom) of each blog post, depending on the device you use, where you can easily submit your e-mail address (only) to be included in my mailing list.

    You Can Also Find Me On Social Media:

    Facebook page: The Grateful Girl Cooks!
    Pinterest:
    The Grateful Girl Cooks!
    Instagram:
    jbatthegratefulgirlcooks

    Author's signature

    Original recipe source: Betty Green, in “Church Suppers”, page 351, published by Black Dog & Leventhal Publishers in 2005

    ↓↓ PRINTABLE RECIPE BELOW ↓↓

    0 from 0 votes
    Chocolate Chip Swirl Bars
    Prep Time
    12 mins
    Cook Time
    18 mins
    Total Time
    30 mins
     

    Make a dozen Chocolate Chip Swirl Bars in about 30 minutes! Be warned! These delicious, simple bar cookies are so good, they're dangerous!

    Category: Bar Cookies, Dessert
    Cuisine: American
    Keyword: chocolate chip swirl bars
    Servings: 12 bars
    Calories Per Serving: 272 kcal
    Author: JB @ The Grateful Girl Cooks!
    Ingredients
    • 1 cup + 2 teaspoons all purpose flour
    • ½ teaspoon baking soda
    • ½ teaspoon salt
    • 8 Tablespoons butter, softened = 1 stick or ½ cup
    • 6 Tablespoons packed brown sugar
    • 6 Tablespoons granulated sugar
    • 1 teaspoon vanilla extract
    • ¼ teaspoon water
    • 1 large egg
    • ½ cup chopped pecans (or walnuts)
    • 6 ounces semi-sweet chocolate chips
    Instructions
    1. Preheat oven to 375°F. and spray an 8"x8" square baking pan with non-stick spray.

    2. Sift together flour, baking soda and salt into a medium bowl; set bowl aside. In a separate large bowl, use electric mixer to beat butter, granulated and brown sugars, vanilla and water together until combined. Add egg and reserved flour mixture to the dough, a little at a time, beating until incorporated. STIR chopped pecans (or walnuts) into the dough until incorporated. Evenly spread dough into baking pan. Evenly sprinkle surface of dough with chocolate chips.

    3. Place pan with dough into 375°F. oven and bake dough for ONLY 2 minutes. Remove pan from oven. Take a butter knife and run it through the dough, creating marbleized "swirls" throughout the dough. Put the pan back into oven; continue baking 16-18 minutes longer. Bars should be nicely browned, and a toothpick inserted into the top should come out free of dough (clean). Transfer pan to a wire rack to cool before attempting to slice.

    4. When you're ready to serve (warm or room temperature), slice into 12 bars. Serve and enjoy! NOTE: If you have leftovers, they can be wrapped or placed in a freezer bag or airtight container and frozen for later use.

    Nutrition Facts
    Chocolate Chip Swirl Bars
    Amount Per Serving (1 (1/12 of total))
    Calories 272 Calories from Fat 153
    % Daily Value*
    Fat 17g26%
    Saturated Fat 8g50%
    Trans Fat 0.3g
    Polyunsaturated Fat 3g
    Monounsaturated Fat 4g
    Cholesterol 36mg12%
    Sodium 212mg9%
    Potassium 130mg4%
    Carbohydrates 28g9%
    Fiber 2g8%
    Sugar 17g19%
    Protein 3g6%
    Vitamin A 264IU5%
    Vitamin C 0.1mg0%
    Calcium 25mg3%
    Iron 2mg11%
    * Percent Daily Values are based on a 2000 calorie diet.

    Here’s one more to pin on your Pinterest boards!Make a dozen Chocolate Chip Swirl Bars in about 30 minutes! Be warned! These delicious, simple bar cookies are so good, they're dangerous!

    Smoked Whole Turkey

    Make a delicious 20 lb. smoked whole turkey (with butter and a variety of dried spices) in about 6 hours, using a pellet grill or smoker.
    Make a delicious 20 lb. Smoked Whole Turkey (with butter and a variety of dried spices) in about 6 hours, using a pellet grill or smoker.

    The first time I ever cooked a whole turkey was a LONG TIME ago (I was 20 years old). I won’t bore you with the details, but I’ll just say my husband and I had some single friends over for Thanksgiving and it wasn’t pretty! It ended with a turkey that was cooked and pretty on the “outside”, but the middle/insides of that bird were an entirely different story. UGH.

    True story- and we all ended up having a good time, and lived to tell the tale… ha ha! After that disaster I learned how to perfectly roast a turkey in our oven, and have never had a problem since, thank goodness. 

    My husband and I received a FREE 20 lb. turkey last Christmas, and decided to smoke it on our pellet grill, and this is the “recipe” we used. The finished turkey, covered with melted butter and lots of spices, had great seasoning and smoky flavor! Here’s how we make a smoked whole turkey on our pellet grill. We enjoy making smoked turkey outside, because it doesn’t heat up our kitchen cooking it all day, especially during our Summer heat!

    Scroll Down For A Printable Recipe Card At The Bottom Of The Page

    Preheat The Smoker

    The prep time to get the turkey ready to cook is minimal, so the first thing you need to do is preheat your smoker or pellet grill according to the manufacturers instructions. Once preheated, set the temperature for 250°F. This is the temperature you will smoke the turkey at for the first half of the cooking time (low and slow!). 

    While the smoker preheats, make the spice mix and prep the turkey (it only takes a few minutes). You can use whatever type smoker pellets you prefer, but we love using mesquite or applewood.

    Make The Spice Mix For the Turkey

    The ingredients for the seasoning mix are simple to prepare. Measure dried Cajun seasoning, Italian seasoning, basil, oregano, rosemary, salt, pepper, rosemary, celery seed and garlic powder in a small bowl. Stir to combine these ingredients, and your spice mix is done. See how easy that is?

    Melt a stick of butter in a saucepan, and then stir in the seasoning mix until completely combined. Remove the pan from the heat.

    A variety of spices used to season a whole turkey are combined in a bowl.Spice mix is combined with melted butter in a saucepan, before basting the turkey.

    Remove the giblets from the inside cavity of the turkey. Pat the turkey dry on all sides, using paper towels to absorb the moisture, then set it on a small wire rack (to slightly elevate the turkey) in a large roasting pan.

    Brush the butter seasoning mixture over the entire surface of the turkey, including inside the turkey cavity. Try to get some seasoning under the skin of the breast, as well. Use ALL of the seasoning mixture on the turkey. 

    A 20 lb. turkey is patted dry, then placed on wire rack in a roasting pan.Butter and spice mixture is brushed over the surface of the turkey before it is cooked.

    Time To Smoke The Turkey!

    Once the smoker grill has reached 250°F. and the turkey has been seasoned, it’s ready to cook! Place the roasting pan in the smoker, then insert a temperature probe into the thickest part of the turkey.

    Let the turkey cook UNCOVERED until it reaches an internal temperature of 100 – 110°F. Once it begins cooking, don’t open the grill… just be patient, and let it smoke away. It typically takes about 3 hours to reach this temperature for a turkey this size, but keep an eye on the temp, because we know the temps in various smokers can vary quite a bit!

    The seasoned whole turkey is now ready to go on a pellet grill or into a smoker.Temperature probe is inserted into thickest part of the turkey before cooking.

    Halfway Point

    Once the turkey reaches an internal temp of 100 – 110°F., remove the turkey pan from the grill. Baste the turkey with any accumulated juice on the bottom of the pan. Add 3 Tablespoons of additional butter to the pan. Cover the pan with aluminum foil, then place the pan back on the grill.

    TURN THE HEAT UP TO 300°F. and continue cooking the turkey (covered) for another 2-3 hours, OR until the internal temperature reaches 165°F. We have found that on our smoker (a Traeger), this second half of the cooking time usually takes somewhere between 2½ – 3 hours.

    Obviously if you are cooking a much smaller weight turkey, your cooking time will be considerably less. Remember- your cooking time might vary, depending on the size turkey you’re using, model of smoker you’re using (and other conditions), so keep an eye on that internal temperature! The temperature probe is your friend!

    Halfway through cooking time, turkey is basted with juices from pan, then covered with foil.

    Smoked whole turkey rests after being removed from grill, before slicing.

    Serving The Smoked Whole Turkey

    Once the turkey is done, remove it from the smoker, and let it rest (covered) for 25-30 minutes before carving. The turkey will continue to cook slightly as it rests. This resting time allows the juices time to redistribute inside the turkey. After the turkey has rested, baste it again with the accumulated juices from the bottom of the pan, then slice and serve.

    We enjoyed the smoky flavor of the well-seasoned meat, and served our turkey slices with steamed broccoli and a delicious Sweet Potato Apple Bake, which complimented the meat well.

    The smoked whole turkey is cut into slices and served.Turkey slices, along with broccoli and a sweet potato apple side dish are served on a white plate.

    I hope you have the opportunity to make a smoked whole turkey for yourself and those you love. We really enjoy having lots of leftovers when we cook a large turkey, which we use for sandwiches, Turkey Fiesta Casserole, and Turkey Tortilla Soup!

    Thank you for stopping by, and I invite you to come back soon for more family-friendly recipes. Take care, and have a great day!

    Looking For More SMOKER GRILL Recipes?

    You can find ALL of my recipes in the Recipe Index, located at the top of the page. I have a variety of Smoker Grill Recipes, including:

    Interested In More Recipes?

    Thank you for visiting this website. I appreciate you using some of your valuable time to do soIf you’re interested, I publish a newsletter 2 times per month (1st and 15th) with all the latest recipes, and other fun info. I would be honored to have you join our growing list of subscribers, so you never miss a great recipe!
    There is a Newsletter subscription box on the top right side (or bottom) of each blog post, depending on the device you use, where you can easily submit your e-mail address (only) to be included in my mailing list.

    You Can Also Find Me On Social Media:

    Facebook page: The Grateful Girl Cooks!
    Pinterest:
    The Grateful Girl Cooks!
    Instagram:
    jbatthegratefulgirlcooks

    Author's signature

    Recipe adapted from: https://anaffairfromtheheart.com

    ↓↓ PRINTABLE RECIPE BELOW ↓↓

    0 from 0 votes
    Smoked Whole Turkey
    Prep Time
    10 mins
    Cook Time
    6 hrs
    Total Time
    6 hrs 10 mins
     

    Make a delicious 20 lb. Smoked Whole Turkey (with butter and a variety of dried spices) in about 6 hours, using a pellet grill or smoker.

    Category: Main Dish
    Cuisine: American
    Keyword: smoked whole turkey
    Servings: 16 (8 oz. servings) approx.
    Calories Per Serving: 328 kcal
    Author: JB @ The Grateful Girl Cooks!
    Ingredients
    • 20 pound turkey giblets removed
    • ½ cup butter = ½ cup or 8 T.
    • 2 teaspoons Cajun seasoning or Creole seasoning
    • teaspoons salt
    • 1 teaspoon dried basil
    • 1 teaspoon dried rosemary
    • 1 teaspoon dried oregano
    • 1 teaspoon Italian seasoning
    • 1 teaspoon celery seed
    • ½ teaspoon black pepper
    • ½ teaspoon garlic powder
    • 3 Tablespoons butter additional to be added later
    Instructions
    1. Preheat smoker or pellet grill according to manufacturer instructions. Once preheated, set temperature for 250°F.

    2. Combine Cajun seasoning, salt, basil, rosemary, oregano, Italian seasoning, celery seed, black pepper, and garlic powder in a small bowl. Melt a stick of butter in saucepan; add seasoning mix; stir until combined. Remove pan from heat.

    3. Pat turkey dry, using paper towels. Set turkey on small wire rack (to slightly elevate turkey) in a large roasting pan. Brush butter mixture over surface of turkey (all sides), including turkey cavity. Put some seasoning under skin of the breast, as well. Use ALL of the seasoning mixture.

    4. Place roasting pan in smoker; insert temperature probe into thickest part of turkey. Cook UNCOVERED until it reaches an internal temp. of 100° - 110°F. It typically takes about 3 hours to reach temperature. Keep an eye on the temp, because smoker temps can vary! When turkey reaches an internal temp of 100° - 110°F., remove pan from grill. Baste turkey with any accumulated juices in bottom of the pan. Add 3 Tablespoons more butter to the pan. Cover pan with aluminum foil; place pan back on the grill.

    5. TURN THE HEAT UP TO 300°F. and continue cooking turkey (covered) another 2-3 hours, OR until internal temp. reaches 165°F. Remember- your cooking time might vary, depending on the model of smoker (and other conditions), so keep an eye on that internal temperature! 

    6. Once done, remove pan from the smoker; let turkey rest (covered) for 25-30 minutes before carving. Turkey will continue to cook slightly as it rests. Resting time allows juices to redistribute in turkey. After resting, baste turkey again with juices from pan, then slice and serve.

    Recipe Notes

    NOTE: A 20 pound turkey will yield approximately 8½ - 9 pounds of white and dark meat after cooking. The caloric calculation listed is an approximation that uses both dark and white meat in the total per serving. Your caloric amount will vary depending on portion size, and type of turkey meat consumed (white or dark meat).

    Nutrition Facts
    Smoked Whole Turkey
    Amount Per Serving (1 (8 oz. portion))
    Calories 328 Calories from Fat 162
    % Daily Value*
    Fat 18g28%
    Saturated Fat 8g50%
    Trans Fat 0.4g
    Polyunsaturated Fat 3g
    Monounsaturated Fat 5g
    Cholesterol 151mg50%
    Sodium 484mg21%
    Potassium 422mg12%
    Carbohydrates 1g0%
    Fiber 0.3g1%
    Sugar 0.2g0%
    Protein 39g78%
    Vitamin A 473IU9%
    Vitamin C 0.04mg0%
    Calcium 31mg3%
    Iron 2mg11%
    * Percent Daily Values are based on a 2000 calorie diet.

    Here’s one more to pin on your Pinterest boards!Make a delicious 20 lb. Smoked Whole Turkey (with butter and a variety of dried spices) in about 6 hours, using a pellet grill or smoker.

    Banana Nut Bagels

    Make a batch of 9 homemade New York-style Banana Nut Bagels from scratch! They’re chewy, delicious, and can be made with pecans or walnuts!
    Make a batch of 9 homemade New York-style Banana Nut Bagels from scratch! They're chewy, delicious, and can be made with pecans or walnuts!

    Do you like a good chewy New-York style bagel? You know… the kind that are boiled and then baked? That’s the best way to make them, and this recipe I am sharing with you today fits the bill perfectly! Over the years I’ve shared several bagel recipes on my blog, and I love to make bagels from scratch.
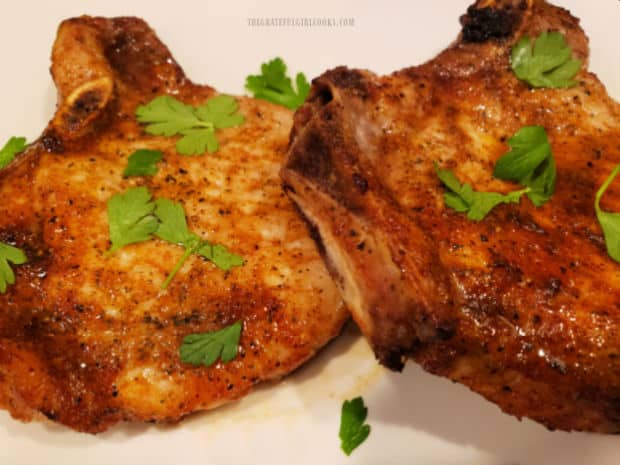
    Years ago a recipe for Banana Nut Bagels was shared on a blog from a woman in Sweden named Anne. She shared the recipe back in 2006, and I am just now getting around to sharing it here on my blog. I knew I would have to try them, and after adapting the recipe from European measurements to an American measuring system, I made a couple changes to her original recipe and then made them. Guess what? They’re GOOD! Let me show you how simple it is to make a batch of 9 delicious banana nut bagels!

    Scroll Down For A Printable Recipe Card At The Bottom Of The Page

    Make The Bagel Dough

    Measure active dry yeast, sugar, and warm water (110°F) in a mixing bowl or in the bowl of an electric mixer (like a KitchenAid). If the water is too hot, it can kill the yeast, so use a kitchen thermometer if you have it. Stir to combine these ingredients, then let it sit for 5 minutes. The yeast should bubble on the surface during this time, ensuring the yeast is “good” to use to help the dough rise.

    In a separate small bowl, mash 2 bananas with ground cinnamon. After the yeast mixture has rested, add the banana mixture to the mixing bowl. Combine on Low speed and mix until the bananas and cinnamon have been incorporated into the batter. NOTE: You can also mix this by hand, if you prefer.

    Yeast is bubbling in a small bowl, indicating the yeast is "good" to use.Bananas are mashed with a fork before adding them to the bagel dough.Ground cinnamon and mashed bananas are mixed into the yeast mixture.

    In another bowl, mix all purpose flour with salt, then slowly add these ingredients, a little at a time, to the mixer. Continue adding and slowly mixing until all flour/salt has been added and a thick dough has formed. About half way through the mixing, toss in chopped pecans (or walnuts, if using), and mix them into the dough The dough should end up being smooth and very elastic in texture.

    NOTE: If necessary, you may need to add a tiny bit more flour a little at a time to achieve this texture. You do NOT want the dough to be sticky when touched, however be careful not to add too much flour or the dough will become really dry and “floury”.

    Roll the dough into a large ball, and put it into a lightly-oiled (or sprayed) large bowl. Turn the dough over so some of the oil (or spray) gets on all sides of the dough. Cover the bowl with a dish towel, and let the dough rise in a warm place for 1 hour. When done, the dough should have almost doubled in size.
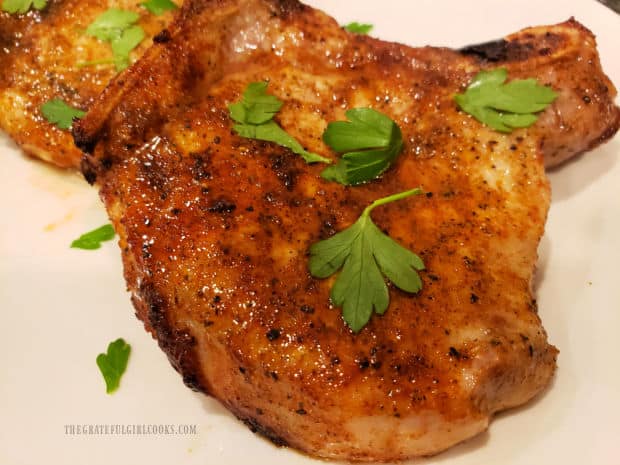
    Halfway through the mixing time, chopped pecans (or walnuts) are added to bagel dough.Ball of dough is placed in a greased large bowl, covered, and left to rise for 1 hour.

    Shape The Bagels

    After dough has risen for about an hour it will be fluffy and puffy. Punch the dough down a couple times with your fist, which helps to knock excess air out of the dough. Let the dough rest for 10 minutes. After the dough has rested, evenly divide it into 9 dough balls. If you have a kitchen scale it helps ensure each dough ball weighs about the same.

    Shape each piece into a round ball, then take one dough ball into your hands. Use your fingers to make a small hole in the middle of the bagel, then gently stretch the hole out until the bagel has a nice shaped hole in the middle (like a doughnut). Repeat this with all the dough balls, placing each of the 9 bagels onto a baking sheet. Cover the bagels with a dish towel, and let them rest again for 10 more minutes.

    Banana nut bagel dough is punched down after rising, to remove excess air.Using fingers, a hole is made in the center of each of the 9 bagel dough balls.Banana nut bagels have been shaped, and wait to be boiled.

    Boil the Bagels

    Bring a large saucepan (or Dutch oven) of water to a boil, then lower the temperature to a gentle simmer. Place 2-3 bagels at a time into the simmering water. Let them cook undisturbed for about 1 minute, then flip them over to the other side. I use a couple of chopsticks to easily flip the bagels because I can fit one in the middle of the bagel for stability. Two large spoons will do the trick, as well!

    Cook the 2nd side for another minute, then carefully remove the boiled bagels to a baking sheet. Repeat until all bagels have been boiled on both sides. Use a slotted spoon to remove the bagels one at a time, letting excess water drain through the spoon back into the saucepan. Now the bagels are ready for the final step… BAKING them!

    The bagels are boiled, a few at a time, in hot simmering water.

    Bake The Bagels

    Place the bagels in a single layer on a large baking sheet with a little space between each one. Bake them at 425°F. for 18-20 minutes. When done, the banana nut bagels will be golden brown in color and should be firm to the touch. Remove them from the oven, and place the bagels on a wire rack to cool.
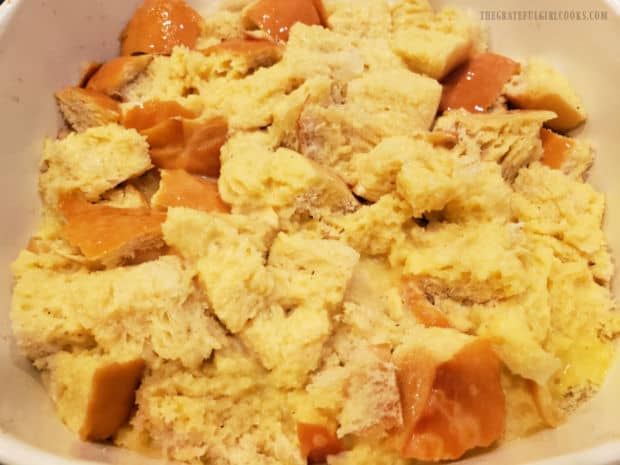
    After boiling, the banana nut bagels are put on baking sheet to be baked.Golden browned on top, the baked bagels come out of the oven to cool.

    The Banana Nut Bagels Are Ready To Eat!

    Let the bagels cool on a wire rack, then serve them any way you prefer, plain or toasted! I love them served with some cream cheese spread on them… yum! Another way I enjoy banana nut bagels is to toast (or broil) them, then generously butter them while hot. Those are really, really good, too! However you choose to eat them, I’m confident you’ll enjoy these chewy, delicious homemade bagels.

    A close up of one of the banana nut bagels cooling on a wire rack.A bagel, cut in half and smeared with cream cheese, ready to be eaten.

    Thanks for stopping by today, and I hope you have the opportunity to try these yummy bagels! Don’t forget the butter and/or cream cheese! Please come back again soon, for more family-friendly recipes. Take care, and have a GREAT day!

    Looking For More BAGEL Recipes?

    You can find ALL of my recipes in the Recipe Index, which is located at the top of the page. I have some wonderful bagel recipes for you to enjoy, including:

    Interested In More Recipes?

    Thank you for visiting this website. I appreciate you using some of your valuable time to do soIf you’re interested, I publish a newsletter 2 times per month (1st and 15th) with all the latest recipes, and other fun info. I would be honored to have you join our growing list of subscribers, so you never miss a great recipe!
    There is a Newsletter subscription box on the top right side (or bottom) of each blog post, depending on the device you use, where you can easily submit your e-mail address (only) to be included in my mailing list.

    You Can Also Find Me On Social Media:

    Facebook page: The Grateful Girl Cooks!
    Pinterest:
    The Grateful Girl Cooks!
    Instagram:
    jbatthegratefulgirlcooks

    Author's signature

    Recipe adapted from: annesfood.blogspot.com/2006/02/banana-pecan-bagels-with-cinnamon.html?spref=pi

    ↓↓ PRINTABLE RECIPE BELOW ↓↓

    5 from 1 vote
    Banana Nut Bagels
    Prep Time
    20 mins
    Cook Time
    20 mins
    Inactive- Dough Rising Time
    1 hr
    Total Time
    1 hr 40 mins
     

    Make a batch of 9 homemade New York-style Banana Nut Bagels from scratch! They're chewy, delicious, and can be made with pecans or walnuts!

    Category: Bread, Breakfast, Snack
    Cuisine: American
    Keyword: banana nut bagels
    Servings: 9 bagels
    Calories Per Serving: 336 kcal
    Author: JB @ The Grateful Girl Cooks!
    Ingredients
    • teaspoons active dry yeast =1 small envelope
    • 1 Tablespoon granulated sugar
    • cups warm water 110°F, DIVIDED USE
    • 2 medium bananas very ripe, mashed
    • 1 Tablespoon cinnamon
    • 5 cups all purpose flour + more as needed
    • 1 pinch salt
    • ½ cup chopped pecans (or walnuts)
    Instructions
    1. Stir yeast, sugar, and warm water (110°F) together in mixing bowl or in the bowl of an electric mixer (like a KitchenAid). If water is too hot, it can kill yeast, so use a kitchen thermometer if you have one Let it sit for 5 minutes. Yeast should bubble, ensuring the yeast is "good" to use to help the dough rise.

    2. In separate bowl, mash 2 bananas. After the yeast mixture has rested, add the bananas and cinnamon. Mix on Low speed until bananas/cinnamon have been incorporated. NOTE: You can mix this by hand, if you prefer.

    3. In another bowl, mix flour with salt, then slowly add, a little at a time, to the mixer bowl. Continue adding SLOWLY, mixing on Low until all flour/salt has been added and thick dough has formed. Half way through mixing, add chopped nuts; mix them into the dough. Dough should end up being smooth and very elastic in texture. NOTE: If necessary, you may need to add a bit more flour (a little at a time) to achieve this texture. You do NOT want dough to be sticky when touched, however be careful not to add too much flour or dough will become really dry and "floury".
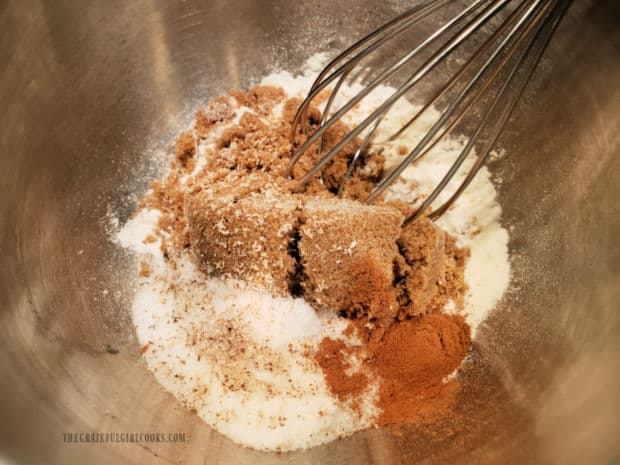
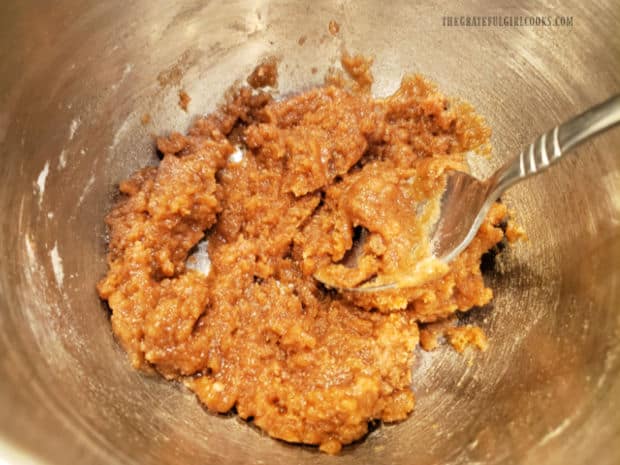
    4. Shape dough into a ball; put it in lightly-oiled (or sprayed) large bowl. Turn dough over so some oil (or spray) gets on all sides. Cover bowl with dish towel; let dough rise in warm place for 1 hour.

    5. After 1 hour, dough should be almost doubled in size. Punch dough down a couple times with your fist to remove excess air. Let dough rest 10 minutes, then evenly divide into 9 dough balls. Shape each into a round ball, then take one into your hands. Use your fingers to make a hole in the middle of the bagel, then gently stretch/shape hole until bagel has a round hole (like a doughnut) in the middle. Repeat with all dough balls, placing shaped bagels on a large baking sheet. Cover bagels with a dish towel; let them rest for 10 minutes.

    6. Preheat oven to 425°F.

    7. Bring a large saucepan (or Dutch oven) of water to a boil, then lower temp. to a gentle simmer. Place 2-3 bagels at a time into simmering water. Let cook undisturbed for 1 minute, then flip them over to the other side. Cook second side for 1 minute. Carefully remove boiled bagels with slotted spoon (to drain water); transfer to a baking sheet. Repeat until all bagels have been boiled.

    8. Place bagels in a single layer on large baking sheet leaving space between each one. Bake at 425°F. for 18-20 minutes. When done, bagels should be nicely browned on top, and firm to the touch. Remove from oven; place on a wire rack to cool. Serve and enjoy!

    Recipe Notes

    NOTE: Caloric calculation made using walnuts.

    Nutrition Facts
    Banana Nut Bagels
    Amount Per Serving (1 bagel)
    Calories 336 Calories from Fat 45
    % Daily Value*
    Fat 5g8%
    Saturated Fat 1g6%
    Polyunsaturated Fat 3g
    Monounsaturated Fat 1g
    Sodium 9mg0%
    Potassium 229mg7%
    Carbohydrates 63g21%
    Fiber 4g17%
    Sugar 5g6%
    Protein 10g20%
    Vitamin A 21IU0%
    Vitamin C 2mg2%
    Calcium 29mg3%
    Iron 4mg22%
    * Percent Daily Values are based on a 2000 calorie diet.

    Here’s one more to pin on your Pinterest boards!Make a batch of 9 homemade New York-style Banana Nut Bagels from scratch! They're chewy, delicious, and can be made with pecans or walnuts!

    Roasted Parmesan Acorn Squash

    Roasted Parmesan Acorn Squash is a tasty veggie side dish! Squash is seasoned with butter, spices, and Parmesan, and it’s ready in 30 minutes!
    Roasted Parmesan Acorn Squash is a tasty veggie side dish! Squash is seasoned with butter, spices, and Parmesan, and it's ready in 30 minutes!

    Tender and seasoned well with butter, spices and Parmesan cheese, this simple acorn squash recipe is delicious, and I think you’ll enjoy it! I’ve been experimenting with acorn squash recipes for the past couple of years, have enjoyed the process!

    I’ve already posted delicious “sweet” recipes for Apple Pecan Stuffed Acorn Squash and Baked Praline Acorn Squash on my blog. Now it’s time for a “SAVORY” recipe for this versatile winter squash! It is ready in 30 minutes from start to finish, so you can’t go wrong with this recipe! Here’s how easy it is to make:

    Scroll Down For A Printable Recipe Card At The Bottom Of The Page

    Prepare The Acorn Squash For Baking

    Before beginning, remember to preheat your oven to 400°F. Okay- here we go:  Start with a 1½ to 2 pound acorn squash. This is considered a medium sized squash, since they can get as large as 5 pounds! Carefully slice the squash in half through the middle (NOT stem to bottom!) then scoop out and discard the seeds and pulp from each half.

    Place the squash, cut side down, and slice each half into 1″ wide slices, creating a half moon-shaped slice. Place all the slices into a large mixing bowl, and set aside.

    A medium sized acorn squash ready to slice in half for this recipe.Seeds and pulp need to be removed from each of the acorn squash halves.One inch slices are cut from each of the acorn squash halves.

    This is what the slices will look like after they have been cut.

    The acorn squash slices resemble a half-moon in shape after being cut.

    Seasoning The Acorn Squash

    Now it’s time to make the seasoning sauce for the squash. Melt butter in a small saucepan. When melted, add garlic powder, oregano, thyme, salt and pepper, and stir to combine. Pour the sauce over the acorn squash slices, and toss gently, until the squash is covered on all sides with the buttery spice mixture.

    Spices are combined with melted butter in a small saucepan.

    All the acorn squash slices are gently tossed to coat them with butter/spice mixture.

    Bake The Acorn Squash

    Lay the seasoned acorn squash slices in a single layer on a large baking sheet. Sprinkle each slice on top with a little grated Parmesan cheese (either fresh grated or the kind you get in a green shaker can). Bake them at 400°F. for 20 minutes, or until the squash is tender.

    Test for doneness by inserting a knife into the middle of a slice. It should glide in smoothly, showing you the squash is tender. Remove the pan from the oven, and serve the roasted Parmesan acorn squash while hot.

    Acorn squash is sprinkled with Parmesan cheese and baked in a single layer for 20 minutes.


    Serve The Roasted Parmesan Acorn Squash

    To serve, arrange the roasted Parmesan acorn squash slices on a serving platter or onto individual plates. Garnish with fresh parsley, if desired. Serve immediately and enjoy this savory vegetable side dish. A butter knife can easily be used to separate (cut away) the tender squash from the peel.

    The roasted Parmesan acorn squash is garnished with fresh parsley and served.Roasted Parmesan acorn squash is served hot, and is very tender to the bite

    I hope you have the opportunity to try this easy to prepare side dish, and trust you will enjoy it as much as we do. Thank you for stopping by today, and I invite you to come back soon for more family-friendly recipes. Take care, and have a GREAT day!

    Looking For More VEGGIE SIDE DISH Recipes?

    You can find ALL of my recipes in the Recipe Index, which is located at the top of the page. I have a wonderful variety of vegetable side dish recipes for you to choose from, including:

    Interested In More Recipes?

    Thank you for visiting this website. I appreciate you using some of your valuable time to do soIf you’re interested, I publish a newsletter 2 times per month (1st and 15th) with all the latest recipes, and other fun info. I would be honored to have you join our growing list of subscribers, so you never miss a great recipe!
    There is a Newsletter subscription box on the top right side (or bottom) of each blog post, depending on the device you use, where you can easily submit your e-mail address (only) to be included in my mailing list.

    You Can Also Find Me On Social Media:

    Facebook page: The Grateful Girl Cooks!
    Pinterest:
    The Grateful Girl Cooks!
    Instagram:
    jbatthegratefulgirlcooks

    Author's signature

    ↓↓ PRINTABLE RECIPE BELOW ↓↓

    0 from 0 votes
    Roasted Parmesan Acorn Squash
    Prep Time
    10 mins
    Cook Time
    20 mins
    Total Time
    30 mins
     

    Roasted Parmesan Acorn Squash is a tasty veggie side dish! Squash is seasoned with butter, spices, and Parmesan, and it's ready in 30 minutes!

    Category: Side Dish, Vegetable
    Cuisine: American
    Keyword: roasted Parmesan acorn squash
    Servings: 4
    Calories Per Serving: 161 kcal
    Author: JB @ The Grateful Girl Cooks!
    Ingredients
    • 1 medium acorn squash between 1½-2 pounds
    • 3 Tablespoons butter
    • ¼ teaspoon garlic powder
    • ¼ teaspoon oregano
    • ¼ teaspoon thyme
    • ¼ teaspoon salt
    • ¼ teaspoon black pepper
    • 3 Tablespoons grated Parmesan cheese fresh or shaker container
    • fresh parsley (optional for garnish)
    Instructions
    1. Preheat oven to 400°F.

    2. Carefully slice squash in half through the middle (NOT stem to bottom!). Scoop out/discard seeds and pulp. Place squash cut side down, and slice each half into 1" wide slices, creating half moon-shaped slices. Place into large bowl; set aside.

    3. Melt butter in a small saucepan. Add garlic powder, oregano, thyme, salt and pepper; stir to combine. Pour sauce over acorn squash; toss gently, until squash is covered on all sides with sauce. Lay slices in single layer on large baking sheet. Sprinkle slices with grated Parmesan (fresh grated or green shaker can type).

    4. Bake at 400°F. for 20 minutes, or until the squash is fork-tender. Test for doneness by inserting knife into the middle of a slice. It should glide in smoothly. Remove from the oven; serve roasted Parmesan acorn squash immediately, garnishing with fresh parsley, if desired.

    Nutrition Facts
    Roasted Parmesan Acorn Squash
    Amount Per Serving (1 (1/4 of total))
    Calories 161 Calories from Fat 90
    % Daily Value*
    Fat 10g15%
    Saturated Fat 6g38%
    Trans Fat 0.3g
    Polyunsaturated Fat 0.4g
    Monounsaturated Fat 2g
    Cholesterol 26mg9%
    Sodium 284mg12%
    Potassium 606mg17%
    Carbohydrates 19g6%
    Fiber 3g13%
    Sugar 0.02g0%
    Protein 3g6%
    Vitamin A 928IU19%
    Vitamin C 19mg23%
    Calcium 95mg10%
    Iron 1mg6%
    * Percent Daily Values are based on a 2000 calorie diet.

    Here’s one more to pin on your Pinterest boards!Roasted Parmesan Acorn Squash is a tasty veggie side dish! Squash is seasoned with butter, spices, and Parmesan, and it's ready in 30 minutes!