Turkey Tortilla Soup

Have leftover roast turkey? Make a pot of yummy Turkey Tortilla Soup, garnished with cheese, tomato, cilantro and baked tortilla strips!

If you enjoy the flavor of Southwestern-style soups or chilis, then I believe you will really love this turkey tortilla soup! The soup can be made quite simply, and features cooked turkey, so it’s a perfect soup to use any leftover cooked turkey you might have!

Typically once Thanksgiving is over, or any time we cook a whole turkey or turkey breast, we have leftover turkey. I usually make turkey noodle soup with leftover turkey, but this tortilla soup is now (also) an option. You only need 2 cups of cooked turkey to make this soup, and it is so yummy!

Corn tortillas are used  in two ways for this soup. They are used uncooked IN the soup and used (baked ’til crispy) ON TOP of the soup, adding flavor and texture.

The turkey tortilla soup is garnished with crispy tortilla strips, and then can be topped with cheese, tomatoes, sour cream, avocado and cilantro, if desired! YUM! Turkey tortilla soup not only LOOKS great… it tastes great, too. Here’s how to make it:

Scroll Down For A Printable Recipe Card At The Bottom Of The Page

Prep The Corn Tortillas

Preheat your oven to 450°F. Place the corn tortillas in two piles of 5 each, stacking 5 tortillas on top of each other. Slice the tortillas into ½” wide strips. Reserve and set aside one stack of strips from 5 tortillas until later.

The reserved stack of tortilla strips will go (uncooked) into the soup, and the remaining strips will be baked until crispy to garnish the finished soup.

Take the remaining stack of strips (from 5 tortillas) and place them on a large baking sheet, in a single layer. Lightly coat the strips with non-stick cooking spray, then turn them over and spray the other side.

Bake the tortilla strips at 450°F for 9-10 minutes, turning them over once, halfway through the cooking timeOnce crispy and browned, remove them from the oven, let cool, then place in an airtight container, plastic wrap or bag until you’re ready to serve the soup.

Corn tortillas are sliced into 1/2" strips for the soup.Half of the tortilla strips are sprayed with oil, then baked until crispy, for garnishing soup.

Let’s Make Some Turkey Tortilla Soup!

Now you’re ready to make some delicious turkey tortilla soup! TIP: If you start the soup while the tortilla strips are baking, you will save time! Heat olive oil on MEDIUM in a large soup pot or Dutch oven.

Once oil is hot, add chopped onion, minced garlic and jalapeño. Cook for 5-6 minutes, stirring often (so garlic doesn’t burn), until onions are softened and slightly browned.

Pour in the chicken broth, then add the reserved (unbaked) tortilla strips to the soup pot. Stir to combine, and cook on MEDIUM heat for 3-5 minutes. This cooking time will soften the tortilla strips which helps to slightly thicken the broth.

Chopped onion, jalapeno and minced garlic are lightly browned in olive oil in soup pot.Unbaked corn tortilla strips are added to chicken broth and sauteed onion mixture in soup pan.

The next step is to add canned (mild-flavored) enchilada sauce, chopped turkey and ground cumin to the soup.

Stir these ingredients in, then cook the turkey tortilla soup for 7-8 more minutes on Medium heat. Do NOT let the soup boil. The soup is done when the turkey and the soup is fully heated through.

NOTE: If you feel the soup is too spicy (depending on the brand of enchilada sauce you used), simply add a little more water or chicken broth to even it out a bit.

Chopped turkey, enchilada sauce and ground cumin are added to the turkey tortilla soup.A ladle full of the turkey tortilla soup, ready to be served.

Serving Turkey Tortilla Soup

To serve the turkey tortilla soup, ladle the hot soup into serving bowls. Place several baked tortilla strips on top of each serving of soup. At this point, the soup is ready to serve, unless you want to add optional toppings (which I recommend!).

OPTIONAL, BUT GOOD: If desired, garnish each serving with shredded cheddar cheese, chopped tomatoes, and cilantro leaves. A dollop of sour cream or avocado chunks can also add to the presentation and taste of this dish, too.

These extra toppings are completely OPTIONAL, but they really do add additional flavor and color to the soup.  Serve immediately, and enjoy this delicious soup!

Bowl of turkey tortilla soup is garnished with tomatoes, cheese, baked tortilla strips and cilantro.Shredded cheese, tomatoes, cilantro and baked tortilla strips top the soup.

I truly hope you enjoy this tasty soup… we LOVE it, and trust you will, too! This soup is such a wonderful way to use up turkey leftovers!

Thanks for stopping by today, and I hope you will come back again for more delicious recipes. Take care, may God bless you, and have a GREAT day!

Looking For More SOUP Recipes?

You can find ALL of my recipes in the Recipe Index, located at the top of the page. I have many delicious soup recipes for you to enjoy, including:

Want More Recipes? Get My FREE Newsletter!

I publish a newsletter 2 times per month (1st and 15th) with lots of recipes, tips, etc..
Would you like to join our growing list of subscribers?

There is a Newsletter subscription box on the top right (or bottom) of each blog post, depending on the device you use.
You can submit your e-mail address there, to be added to my mailing list.

Find Me On Social Media:

Facebook page: The Grateful Girl Cooks!
Pinterest:
The Grateful Girl Cooks!
Instagram:
jbatthegratefulgirlcooks

Author's signature

Original recipe source: “Southern Living Best-Loved Christmas Classics”, page 242, published 2013 by Time Home Entertainment, Inc./ Oxmoor House

↓↓ PRINTABLE RECIPE BELOW ↓↓

0 from 0 votes
Turkey Tortilla Soup
Prep Time
15 mins
Cook Time
20 mins
Total Time
35 mins
 

Have leftover roast turkey? Make a pot of yummy Turkey Tortilla Soup, garnished with cheese, tomato, cilantro and baked tortilla strips!

Category: Main Course, Soup
Cuisine: Southwestern
Keyword: turkey tortilla soup
Servings: 8 cups
Calories Per Serving: 105 kcal
Author: JB @ The Grateful Girl Cooks!
Ingredients
  • 10 6" corn tortillas cut in ½" strips, divided use
  • vegetable cooking spray as needed
  • 1 Tablespoon olive oil
  • 1 small yellow onion chopped
  • 1 small jalapeño pepper , seeded and minced
  • 2 garlic cloves minced
  • 32 ounces chicken broth
  • 2 cups chopped cooked turkey breast meat used in caloric calculation
  • 10 ounce can MILD enchilada sauce
  • 1 teaspoon ground cumin
Additional Garnishes (optional): shredded cheddar cheese, cilantro, chopped tomatoes, avocado, sour cream
    Instructions
    1. Preheat oven to 450°F.

    2. Place tortillas in two piles of 5 each, stacking 5 tortillas on top of each other. Slice tortillas into ½" wide strips. Reserve/set aside one stack of strips from 5 tortillas until later. Take remaining strips (from 5 tortillas) and place them on a large baking sheet in a single layer. Spray strips with cooking spray; turn and spray other side. Bake strips at 450°F for 9-10 minutes, turning them over once halfway through cooking timeOnce crispy/browned, remove them from oven, let cool, then place in airtight container, plastic wrap or bag until ready to serve soup. TIP: If you start soup while tortilla strips are baking, you'll save time!

    3. Heat olive oil on MEDIUM heat in large soup pot or Dutch oven. Once oil is hot, add onion, garlic and jalapeño. Cook 5-6 minutes, stirring often (so garlic doesn't burn) until onions are softened/slightly brown.

    4. Add chicken broth and reserved (unbaked) tortilla strips to soup pot. Stir to combine; turn heat down to MEDIUM; cook 3-5 minutes. This will soften the tortilla strips which help to slightly thicken broth.

    5. Add turkey, enchilada sauce, and cumin to soup. Stir well, then cook 7-8 minutes on MEDIUM heat until soup is fully heated through. Do NOT let soup boil.

    6. To serve, ladle soup into serving bowls. Place several baked tortilla strips on top. OPTIONAL: If desired, also garnish with cheese, tomatoes, cilantro, avocado or sour cream. Serve immediately, and enjoy this delicious soup!

    Recipe Notes

    NOTE: Caloric calculation made using a serving size of 1 cup, and using turkey breast meat. It does NOT include optional garnishes of cheese, avocado, cilantro, tomato or sour cream, but DOES include baked tortilla strips.

    Nutrition Facts
    Turkey Tortilla Soup
    Amount Per Serving (1 cup (8 oz.))
    Calories 105 Calories from Fat 27
    % Daily Value*
    Fat 3g5%
    Saturated Fat 1g6%
    Trans Fat 1g
    Polyunsaturated Fat 1g
    Monounsaturated Fat 2g
    Cholesterol 34mg11%
    Sodium 851mg37%
    Potassium 190mg5%
    Carbohydrates 5g2%
    Fiber 1g4%
    Sugar 3g3%
    Protein 14g28%
    Vitamin A 273IU5%
    Vitamin C 4mg5%
    Calcium 20mg2%
    Iron 1mg6%
    * Percent Daily Values are based on a 2000 calorie diet.

    Here’s one more to pin on your Pinterest boards!Have leftover roast turkey? Make a pot of yummy Turkey Tortilla Soup, garnished with cheese, tomato, cilantro and baked tortilla strips!

    Lemon Mint Tea

    Lemon Mint Tea is simple to make with only a few ingredients, and it can be enjoyed hot to warm you up, or cold to refresh you on a hot day!Lemon Mint Tea is simple to make with only a few ingredients, and it can be enjoyed hot to warm you up, or cold to refresh you on a hot day!

    On a hot day, nothing refreshes like a glass of iced tea, but on a cold day, there’s something warming and soothing about a mug of hot tea. Lucky for you, this Lemon Mint Tea can satisfy both those expectations! It’s super simple to make in just a few minutes, and it’s flavored with peppermint tea, a cinnamon stick, lemon juice and a bit of sugar. It’s DELICIOUS!

    If you want to drink it hot, it can be ready after steeping 5 minutes, and if you want it cold, you will need to let it cool down before pouring it over ice. Other than that, it’s EASY PEASY, and I know you’re going to love it! I found the recipe years ago in an old cookbook I have, and finally got around to taking photos for my blog. Here’s how to make lemon mint tea:

     Scroll Down For A Printable Recipe Card At The Bottom Of The Page

    How To Make The Tea

    The recipe as written will make 1 serving, but can EASILY be doubled, tripled, etc. (only 1 cinnamon stick needed for up to 10 servings). To make the tea, you will need to have a lemon, a peppermint tea bag, cinnamon stick and granulated sugar. My photos below will show how to make ONE serving.

    One peppermint tea bag, lemon, sugar and a cinnamon stick are used to make this tea.

    Place the tea bag and the cinnamon stick in a small saucepan. Pour one cup of boiling water over them, then immediately put a lid on the pan. Let the tea steep (covered) for 5 minutes. Once it has fully steeped, remove the tea bag and cinnamon stick.

    A peppermint tea bag and cinnamon stick are steeped in boiling water (covered) for 5 minutes.

    Add 1 Tablespoon of granulated sugar and 1 Tablespoon of freshly squeezed lemon juice to the hot tea. Stir well, until the sugar has had a chance to fully dissolve. Now the tea is done!

    Granulated sugar and fresh lemon juice are added to the brewed mint tea.

    Serving Lemon Mint Tea HOT

    If you want to enjoy the tea HOT, simply pour the hot beverage into a mug once the sugar has dissolved. You can garnish the mug of lemon mint tea with a fresh sprig of mint and a lemon wedge, if desired. That is completely optional, but sure makes that mug of hot tea look good!

    Hot lemon mint tea is poured into a mug once done.A mug of hot lemon mint tea, garnished with a mint sprig and lemon wedge, to serve.

    Lemon Mint Tea Served COLD

    If you prefer your tea COLD, let the tea first cool to room temperature. Once cooled, fill a glass with ice cubes, and pour the tea into the glass. NOTE: One reason you shouldn’t pour HOT tea over ice is because it could possibly cause the glass to crack. The other reason is that the HOT tea will melt the ice cubes faster which waters down the tea considerably.

    Iced cold lemon mint tea is garnished with a lemon wedge and mint sprig to serve.

    I hope you have the chance to try this delicious tea, and trust you’ll enjoy it like I do. Thank you for stopping by, and please come back again soon for more family-friendly recipes. Take care, and have a great day.

    Looking For More BEVERAGE Recipes?

    You can find ALL f my recipes in the Recipe Index, located at the top of the page. I have some wonderful hot AND cold beverage recipes you may enjoy, including:

    Interested In More Recipes?

    Thank you for visiting this website. I appreciate you using some of your valuable time to do soIf you’re interested, I publish a newsletter 2 times per month (1st and 15th) with all the latest recipes, and other fun info. I would be honored to have you join our growing list of subscribers, so you never miss a great recipe!
    There is a Newsletter subscription box on the top right side (or bottom) of each blog post, depending on the device you use, where you can easily submit your e-mail address (only) to be included in my mailing list.

    You Can Also Find Me On Social Media:

    Facebook page: The Grateful Girl Cooks!
    Pinterest:
    The Grateful Girl Cooks!
    Instagram:
    jbatthegratefulgirlcooks

    Author's signature

    Original recipe source: “The Complete Cooking Light Cookbook”, page 49, published in 2000 by Oxmoor House

    ↓↓ PRINTABLE RECIPE BELOW ↓↓

    0 from 0 votes
    Lemon Mint Tea
    Prep Time
    6 mins
    Cook Time
    0 mins
    Total Time
    6 mins
     

    Lemon Mint Tea is simple to make with only a few ingredients, and it can be enjoyed hot to warm you up, or cold to refresh you on a hot day!

    Category: Beverage
    Cuisine: All Cuisines
    Keyword: lemon, mint, tea
    Servings: 1 cup
    Calories Per Serving: 52 kcal
    Author: JB @ The Grateful Girl Cooks!
    Ingredients
    • 8 ounces boiling water =1 cup
    • 1 teabag peppermint tea single size
    • 1 3 inch cinnamon stick
    • 1 Tablespoon granulated sugar
    • 1 Tablespoon fresh lemon juice
    • 1 Lemon wedge and Mint sprig (OPTIONAL) for garnish
    Instructions
    Directions For ONE Serving:
    1. Place tea bag and cinnamon stick into a small saucepan. Pour 8 ounces boiling water over them; immediately cover pan. Let tea steep (covered) for 5 minutes. Once fully steeped, remove tea bag and cinnamon stick.

    2. Add 1 Tablespoon granulated sugar and 1 Tablespoon fresh lemon juice to hot tea. Stir well, until sugar fully dissolves.

    To Enjoy HOT:
    1. Pour hot tea into a mug once sugar has dissolved. Garnish with a fresh sprig of mint and a lemon wedge, if desired. Serve, and enjoy.

    To Enjoy COLD:
    1. Let tea first cool to room temperature. Once cooled, fill a glass with ice cubes, and pour tea into glass. NOTE: One reason you shouldn't pour HOT tea over ice is because it could possibly cause the glass to crack. The other reason is that the heat will melt the ice cubes which would water down the tea considerably.

    Recipe Notes

    Note: If making then the quantity desired, increase the amount of tea bags, sugar and lemon juice times the amount you want. However- you will only need ONE cinnamon stick to flavor up to about 10 servings.
    Nutrition Facts
    Lemon Mint Tea
    Amount Per Serving (1 cup (8 oz.))
    Calories 52 Calories from Fat 9
    % Daily Value*
    Fat 1g2%
    Saturated Fat 1g6%
    Sodium 12mg1%
    Potassium 20mg1%
    Carbohydrates 14g5%
    Fiber 1g4%
    Sugar 12g13%
    Protein 1g2%
    Vitamin A 4IU0%
    Vitamin C 6mg7%
    Calcium 18mg2%
    Iron 1mg6%
    * Percent Daily Values are based on a 2000 calorie diet.

    Here’s one more to pin on your Pinterest boards!Lemon Mint Tea is simple to make with only a few ingredients, and it can be enjoyed hot to warm you up, or cold to refresh you on a hot day!

    Blueberry Cinnamon Overnight Oats

    Blueberry Cinnamon Overnight Oats are a delicious, “make ahead” meal (5 min. prep). Chill overnight, then enjoy a blueberry-packed breakfast!
    Blueberry Cinnamon Overnight Oats are a delicious, "make ahead" meal (5 min. prep). Chill overnight, then enjoy a blueberry-packed breakfast!

    If you enjoy delicious meals that can quickly be eaten OR taken with you to work, etc., then overnight oats are a meal you’ll enjoy! It only takes a couple minutes to mix the ingredients in canning jars, then put them in the fridge overnight! I love overnight oats, because they’re so convenient to make ahead, and they taste delicious!

    The next morning, if you’re in a hurry to get to work, school, etc., just open the jar, give them a stir, and EAT! Overnight oats do not have to be heated, and are made to be eaten cold! Individual servings in canning jars also make overnight oats PORTABLE! Grab a spoon, a jar out of the fridge… and out the door you go… with a filling breakfast or snack you can eat later!

    Blueberry Cinnamon Overnight Oats are filled with fresh (or frozen) blueberries, and have almond butter added, for added protein! Cinnamon and vanilla add extra flavor, blueberries provide sweetness, and the oats become thick and creamy, once refrigerated! Here’s how easy blueberry cinnamon overnight oats are to prepare:

    Scroll Down For A Printable Recipe Card At The Bottom Of The Page

    What Ingredients Will I Need?

    You need old fashioned oats, almond butter, fresh OR frozen blueberries, cinnamon, vanilla, and almond milk (or dairy milk) for this recipe. The recipe yields 2 jars of blueberry cinnamon overnight oats, but can easily be doubled. You can safely store jars of these overnight oats in the fridge up to 3 days.

    Oats, cinnamon, vanilla, almond butter, milk and frozen or fresh blueberries are used in the recipe.

    How To Prepare Blueberry Cinnamon Overnight Oats

    This recipe makes enough for TWO jars, so the ingredients will need to be divided evenly between them. Place ½ C. of oats, ½ C. almond milk, 1 T. almond butter, and ½ t. each of cinnamon and vanilla into EACH JAR. Stir the ingredients well, until they are combined. TIP: Use a PINT sized jar, to have room for all the ingredients, and have room to stir them.

    Gently stir ½ C. blueberries into each jar, until they’re incorporated into the oat mixture NOTE: If using FROZEN blueberries, DO NOT THAW before adding!

    Milk, oats, cinnamon, vanilla and almond butter are combined in a Mason jar.Part of the blueberries are added to the jar, then gently stirred into the oat mixture.

    Mix Then Add MORE Blueberries!

    Once the blueberries have been mixed in, add another ½ C. of blueberries to each jar. Do not stir them into the oats, but let them sit on top of the oats! Screw on the lid to each jar, and place in the refrigerator.

    Blueberry Cinnamon Overnight Oats will need to chill for about 8 hours in a refrigerator for best results. Make them, and refrigerate the jars before heading to bed, and they’ll be ready when you wake up.

    The overnight oats are mixed with fresh or frozen blueberries in the jar.Topped with more blueberries, the jars are then covered and refrigerated overnight.

    The Blueberry Cinnamon Oats Are Ready To Eat!

    After the jars of oats have chilled overnight, they are ready to be enjoyed. Old-fashioned oats absorb the milk, leaving a creamy, thick oatmeal treat, filled with all those juicy blueberries! YUM! You can safely store jars of oats (or “breakfast on the go”) in the refrigerator for up to 3 days! YES… overnight oats are meant to be eaten cold. There’s no need to heat them!

    Blueberry Cinnamon Overnight Oats turn out creamy and delicious after refrigerating overnight.

    I hope you enjoy these delicious blueberry cinnamon overnight oats! Thank you for taking time out of your busy day to visit this website today. I do hope you will come back again for more family-friendly recipes. Take care… and have a GREAT day! May God bless you.

    Looking For More OVERNIGHT OATS Recipes?

    You can find ALL my recipes in the Recipe Index, located at the top of the page. I have some wonderful recipes for overnight oats I’m confident you’ll enjoy, which include:

    Interested In More Recipes?

    Thank you for visiting this website. I appreciate you using some of your valuable time to do soIf you’re interested, I publish a newsletter 2 times per month (1st and 15th) with all the latest recipes, and other fun info. I would be honored to have you join our growing list of subscribers, so you never miss a great recipe!
    There is a Newsletter subscription box on the top right side (or bottom) of each blog post, depending on the device you use, where you can easily submit your e-mail address (only) to be included in my mailing list.

    You Can Also Find Me On Social Media:

    Facebook page: The Grateful Girl Cooks!
    Pinterest:
    The Grateful Girl Cooks!
    Instagram:
    jbatthegratefulgirlcooks

    Author's signature

    Recipe adapted from: Isabel D. Price in the book, “Food Meets Faith”, published by Live Smart Solutions, LLC, 2019, page 82

    ↓↓ PRINTABLE RECIPE BELOW ↓↓

    0 from 0 votes
    Blueberry Cinnamon Overnight Oats
    Prep Time
    5 mins
    Cook Time
    0 mins
    Refrigeration (inactive time)
    8 hrs
    Total Time
    8 hrs 5 mins
     

    Blueberry Cinnamon Overnight Oats are a delicious, "make ahead" meal (5 min. prep). Chill overnight, then enjoy a blueberry-packed breakfast!

    Category: Breakfast, Snack
    Cuisine: American
    Keyword: blueberry, cinnamon, overnight oats
    Servings: 2
    Calories Per Serving: 362 kcal
    Author: JB @ The Grateful Girl Cooks!
    Ingredients
    • 1 cup old-fashioned oats NOT instant
    • 1 cup unsweetened almond milk can sub. dairy milk or coconut milk
    • 2 Tablespoons almond butter
    • 1 teaspoon cinnamon
    • 1 teaspoon vanilla extract
    • 2 cups blueberries fresh or frozen (unthawed)
    Instructions
    1. Place ½ C. of oats, ½ C. almond milk, 1 T. almond butter, and ½ t. each of cinnamon and vanilla into EACH PINT JAR. Stir well, until combined.

    2. Gently stir ½ C. blueberries into each jar, until incorporated into oat mixture. NOTE: If using FROZEN blueberries, DO NOT THAW before adding!

    3. Add another ½ C. of blueberries to each jar, but do not stir them into the oats. Let them sit on top! Screw the lid onto each jar; place jars in fridge. Chill overnight (8 hours) for best results.

    4. Once chilled, remove lid; stir content wells; oats are to be eaten cold. Store jars up to 3 days in fridge. Enjoy!

    Nutrition Facts
    Blueberry Cinnamon Overnight Oats
    Amount Per Serving (1 g)
    Calories 362 Calories from Fat 126
    % Daily Value*
    Fat 14g22%
    Saturated Fat 1g6%
    Polyunsaturated Fat 4g
    Monounsaturated Fat 7g
    Sodium 168mg7%
    Potassium 388mg11%
    Carbohydrates 53g18%
    Fiber 10g42%
    Sugar 16g18%
    Protein 10g20%
    Vitamin A 83IU2%
    Vitamin C 14mg17%
    Calcium 246mg25%
    Iron 3mg17%
    * Percent Daily Values are based on a 2000 calorie diet.

    Here’s one more to pin on your Pinterest boards!Blueberry Cinnamon Overnight Oats are a delicious, "make ahead" meal (5 min. prep). Chill overnight, then enjoy a blueberry-packed breakfast!

    Sweet Potato Apple Bake

    You’ll love Sweet Potato Apple Bake! This yummy dish features layers of sweet potatoes, apples, butter, cinnamon, brown sugar and pecans!
    You'll love Sweet Potato Apple Bake! This yummy dish features layers of sweet potatoes, apples, butter, cinnamon, brown sugar and pecans!

    Today I want to share an absolutely delicious side dish! It’s a dish that requires minimal prep before it is baked to perfection. My husband and I both think it tastes like dessert, even though we enjoy it served as a side dish. It’s the best of two worlds… if you enjoy sweet potatoes and the taste of apple pie… then this dish is for YOU!

    The sweet potato apple bake only takes about 10 minutes to get ready, then it bakes away the rest of the time. How easy is THAT? I really think you’re gonna love this tasty dish, so let me show you just how simple it is to prepare.

    Scroll Down For A Printable Recipe Card At The Bottom Of The Page

    Prepare The Sweet Potato And Apple

    Before starting, preheat your oven to 350°F. It doesn’t take long to get the potatoes ready, so you want your oven preheated to save time! Peel a large sweet potato (the red skinned kind). Slice the sweet potato in half lengthwise. Cut each half into half-moon shaped pieces about ¼” thick. Separate the slices into two equal piles.

    Peel the apple, then remove the seeds. Cut the apple in half from the stem down to the bottom. Cut each half into the same size half-moon shaped pieces (¼” thick). Keep the apple slices in one pile.

    A large sweet potato is peeled, halved, then cut into moon shaped slices.An apple is peeled, then cut into thin slices, along with a sweet potato.

    Time To Layer This Dish!

    Spray or grease a 2 quart baking dish. Place the slices of HALF the sweet potato in a single layer in the dish. Evenly sprinkle the slices with ½ Tablespoon of brown sugar. Next, place ALL of the apples on top of the sweet potatoes, keeping the apple slices in a single layer, as much as possible.

    Sprinkle the apple slices with ½ Tablespoon brown sugar and the cinnamon. Measure out 2 Tablespoon of chopped pecans and set them aside for later (not in the layering). Take the REMAINING chopped pecans and evenly sprinkle them over the brown sugar cinnamon apple slices.

    A baking dish with bottom layer of sweet potato and brown sugar, topped with apple slices.Pecans and cinnamon are sprinkled on a layer of apple slices in baking dish.

    Now add the final half of the sweet potato slices over the apples, placing them in a single layer, once again. Sprinkle the sweet potatoes with the remaining Tablespoon of brown sugar, then drizzle melted butter over the sweet potatoes.

    Brown sugar is sprinkled on final layer of sweet potato slices in baking dish.Melted butter is drizzled over the sweet potatoes.

    Ready To Bake

    COVER THE BAKING DISH and bake at 350°F. for 35 minutes. Remove the dish from the oven, and top with the reserved 2 Tablespoons pecans (and a couple shakes of cinnamon, if desired).

    Leave the lid OFF and place the dish back into the oven. Continue baking (uncovered) for an additional 30-35 minutes. When done, the sweet potatoes and apples will be lightly browned and tender. You can insert a knife into a sweet potato slice to make sure it is tender!

    The sweet potato apple bake is covered with melted butter and brown sugar.Chopped pecans and cinnamon is added to the top of the dish when halfway done baking.

    The Sweet Potato Apple Bake Is Ready To Enjoy!

    Let the sweet potato apple bake cool for just a minute, then serve it with a favorite main course, and enjoy this amazing side dish! When I was photographing this recipe, my husband and I had just smoked a whole turkey on our Traeger grill.

    We served slices of the smoked turkey with this sweet potato and apple dish, along with steamed broccoli. Even though we enjoyed this meal at the very beginning of MAY, it felt like it was THANKSGIVING! Turkey and sweet potatoes… yum! This dish would be a wonderful addition to any holiday feast!

    Sweet Potato Apple Bake is golden brown and tender to the bite when done baking.A portion of the sweet potato apple bake, served with turkey slice and steamed broccoli.

    I hope you have the chance to try this flavor-filled recipe, because it really does taste great. The recipe yields 4 servings, so it is also a fairly inexpensive side dish to make. Thanks for stopping by, and please come back soon for more family-friendly recipes. Take care, and have a great day.

    Looking For More VEGGIE Recipes?

    You can find ALL of my recipes in the Recipe Index, located at the top of the page. I have LOTS of yummy veggie recipes for you to choose from, including:

    Interested In More Recipes?

    Thank you for visiting this website. I appreciate you using some of your valuable time to do soIf you’re interested, I publish a newsletter 2 times per month (1st and 15th) with all the latest recipes, and other fun info. I would be honored to have you join our growing list of subscribers, so you never miss a great recipe!
    There is a Newsletter subscription box on the top right side (or bottom) of each blog post, depending on the device you use, where you can easily submit your e-mail address (only) to be included in my mailing list.

    You Can Also Find Me On Social Media:

    Facebook page: The Grateful Girl Cooks!
    Pinterest:
    The Grateful Girl Cooks!
    Instagram:
    jbatthegratefulgirlcooks

    Author's signature

    Recipe adapted from the cookbook: “Southern Living Best-Loved Christmas Classics”, page 113, published in 2013 by Time Home Entertainment, Inc./Oxmoor House

    ↓↓ PRINTABLE RECIPE BELOW ↓↓

    0 from 0 votes
    Sweet Potato Apple Bake
    Prep Time
    10 mins
    Cook Time
    1 hr 5 mins
    Total Time
    1 hr 15 mins
     

    You'll love Sweet Potato Apple Bake! This yummy dish features layers of sweet potatoes, apples, butter, cinnamon, brown sugar and pecans!

    Category: Side Dish, Vegetable Dish
    Cuisine: American
    Keyword: sweet potato apple bake
    Servings: 4
    Calories Per Serving: 206 kcal
    Author: JB @ The Grateful Girl Cooks!
    Ingredients
    • 1 large sweet potato (approx. 8 oz.)
    • 1 large Granny Smith apple (approx. 8 oz.)
    • 2 Tablespoons packed dark brown sugar **divided use
    • 2 Tablespoons butter melted
    • cup chopped pecans ** divided use
    • ¼ teaspoon ground cinnamon
    Instructions
    1. Preheat oven to 350°F. Grease or spray a 2 quart baking dish.

    2. Peel sweet potato; slice in half lengthwise. Slice each half into "half-moon" shaped pieces about ¼" thick. Divide slices into two equal piles. Peel apple; remove seeds. Cut apple in half from stem down to bottom. Slice each half into ¼" thick "half-moon" shaped pieces. Keep apple slices in one pile. You should have 2 piles of sweet potato (½ potato in each) and 1 pile of apple slices.

    Three Layers:
    1. Layer#1: Place one pile of sweet potato slices (½ of total) in a single layer in baking dish. Evenly sprinkle slices with ½ Tablespoon brown sugar.

      Layer #2: Place ALL apple slices on top of sweet potatoes in a single layer. Sprinkle apples with ½ Tablespoon brown sugar and the cinnamon. **Measure out 2 Tablespoons from the chopped pecans - set them aside for later (not in the layering). Take REMAINING chopped pecans and sprinkle them over apples.

      Layer #3: Put remaining sweet potato slices in a single layer over apples. Sprinkle with remaining 1 Tablespoon brown sugar, then drizzle with melted butter.

    Bake:
    1. COVER baking dish; bake at 350°F for 35 minutes. Remove from oven; top with reserved 2 Tablespoons pecans (and a couple shakes of cinnamon, if desired). Place dish (uncovered) back into oven. Continue baking (uncovered) for 30-35 minutes. When done, sweet potatoes/apples will be lightly browned and tender. Insert a knife into a sweet potato slice to check for tenderness. Remove from oven; let cool for a minute, then serve.

    Nutrition Facts
    Sweet Potato Apple Bake
    Amount Per Serving (1 (1/4 of total))
    Calories 206 Calories from Fat 108
    % Daily Value*
    Fat 12g18%
    Saturated Fat 4g25%
    Trans Fat 1g
    Polyunsaturated Fat 2g
    Monounsaturated Fat 5g
    Cholesterol 15mg5%
    Sodium 63mg3%
    Potassium 321mg9%
    Carbohydrates 24g8%
    Fiber 4g17%
    Sugar 15g17%
    Protein 2g4%
    Vitamin A 8859IU177%
    Vitamin C 11mg13%
    Calcium 35mg4%
    Iron 1mg6%
    * Percent Daily Values are based on a 2000 calorie diet.

    Here’s one more to pin on your Pinterest boards!You'll love Sweet Potato Apple Bake! This yummy dish features layers of sweet potatoes, apples, butter, cinnamon, brown sugar and pecans!

    Bacon, Onion and Spinach Tart

    Enjoy a Bacon, Onion and Spinach Tart for breakfast, lunch or dinner! It’s yummy, and filled with caramelized onions, cheese, spinach & bacon.
    Enjoy a Bacon, Onion and Spinach Tart for breakfast, lunch or dinner! It's yummy, and filled with caramelized onions, cheese, spinach & bacon.

    If you’re interested in an absolutely scrumptious recipe that can do double duty as either breakfast, lunch OR dinner, may I suggest this bacon, onion and spinach tart? How convenient it is to make this tart, then have it in the fridge to enjoy the leftovers throughout the week!

    Caramelized onions are the unabashed star of this dish, as their flavor and sweetness permeate every bite! Add some bacon, spinach, cheese, and eggs to the filling, and you’ve got yourself a fabulous recipe! Here’s how to make this flavor-packed bacon, onion and spinach tart.

    Scroll Down For A Printable Recipe Card At The Bottom Of The Page

    Prepare The Crust For The Tart

    For this tart, feel free to use either a homemade pie crust OR a purchased, refrigerated rolled, flat pie crust. Roll the dough out, and fit the pie crust into a 9″ tart pan (with a removable bottom). Press the dough into the sides of the pan, then trim away excess crust from the top edge. You will want the top edge of the crust to be flush with the pan.

    Use the tines of a fork to prick the dough in several places on the sides and bottom. Keep the prepared crust in the refrigerator while the filling for the tart is made.

    Pie dough is placed and shaped in a tart pan, to be ready for the filling.

    Cook The Bacon And Spinach

    Cut 4 strips of bacon crosswise into small thin strips. I use kitchen scissors and stack the bacon strips to quickly cut the pieces. Place the bacon strips into a large non-stick skillet and cook on Medium heat, stirring often. Cook the bacon for approximately 6-8 minutes.

    Add 6 cups of fresh baby spinach into the skillet with the bacon. It looks like a lot of spinach, but will greatly reduce in size as it cooks. Continue to stir and cook for 1 minute, or until the spinach has wilted. Transfer the bacon/spinach mixture out of the skillet with a slotted spoon. Place on a plate lined with paper towels, to absorb excess grease.

    Strips of bacon are quickly cooked in a large skillet.Baby spinach leaves are added to the cooked bacon in a large skillet.After cooking, the bacon and spinach will be removed from the pan to cool.

    Caramelize The Onions

    Caramelized onions will take about 25 minutes to turn out perfect, so plan ahead! Place sliced onions, dried thyme and (part of) the salt into the same large skillet you cooked the bacon/spinach in. Turn the heat to MEDIUM, and put a lid on the skillet.

    Cook the onions (covered) for 25 minutes, stirring occasionally. Continue to cook (covered) until the onions have caramelized. They will also reduce in size as they become browned and fully cooked. The longer they cook, the more caramelized and sweeter the onions become! TIP: PREHEAT your oven while the onions are cooking!

    Once the onions have caramelized, take the skillet off the heat, stir, then let them cool, uncovered, for 5 minutes.

    Sliced onions, salt and thyme are placed in large skillet to cook.A lid is placed on the skillet of onions while they cook and caramelize.Once caramelized, the onions in the skillet become brown in color.

    Prepare The Bacon, Onion And Spinach Tart For Baking

    Now it’s time to make the filling for the Bacon, Onion and Spinach Tart! In a large mixing bowl, whisk together eggs, half and half, pepper and remaining salt until fully combined. Stir in the bacon and spinach mixture. Add the cooled caramelized onions, and stir until all ingredients are incorporated.

    Carefully pour the tart filling into the prepared crust. The filling will come very close to the top of the crust. Make sure the spinach and bacon are evenly distributed in the filling. Now the bacon, onion and spinach tart is ready for baking.

    Cooked bacon and spinach are added to the tarts egg filling in a large bowl.Filling for the bacon, onion and spinach tart is poured into prepared crust in a tart pan.

    Bake And Broil

    Bake the tart at 375°F. for 15 minutes, then reduce the heat to 325°, and bake another 20 minutes at the lower temperature. Remove the tart from the oven and turn the oven to the BROIL setting. Sprinkle the top of the tart with shredded cheese, then place the tart about 6″ from the broiler heating element. Let it broil for 1-2 minutes, or only until the cheese has melted!. Keep an eye on it so you don’t burn the top!

    Transfer the bacon, onion and spinach tart to a wire rack and let it cool about 5 minutes, before you attempt to slice and serve it.

    After baking, cheese is sprinkled on top of the tart and placed under broiler to melt it.A baked bacon, onion and spinach tart cools on wire rack for 5 minutes before serving.

    Slice And Serve The Bacon, Onion and Spinach Tart

    Carefully remove the tart rim from the tart by pushing up from the bottom to separate the tart from the metal rim. Slice the tart into 8 slices, serve, and enjoy! Keep any leftovers covered and refrigerated for up to 4-5 days.

    The leftovers can be easily microwaved to reheat, which makes this delicious tart a perfect choice to enjoy again for breakfast, lunch or dinner the next day! When we had this for dinner, we enjoyed it served with fresh fruit and Pistachio Asparagus In Orange Sauce!

    A slice of the bacon, onion and spinach tart is removed from the pan, for serving.Asparagus and fresh fruit are served alongside a slice of bacon, onion and spinach tart.

    I really do love the versatility of this dish! The leftovers are wonderful as they hold up well taste-wise, even after being refrigerated for several days! I’m confident you’re going to enjoy this meal. Thanks for stopping by, and I invite you to come back again soon for more family friendly recipes. Take care, and have a GREAT day! 

    Looking For More TART Or QUICHE Recipes?

    You can find ALL of my recipes in the Recipe Index, located at the top of the page. I have other tart recipes (quiches, too) that you might enjoy, including:

    Interested In More Recipes?

    Thank you for visiting this website. I appreciate you using some of your valuable time to do soIf you’re interested, I publish a newsletter 2 times per month (1st and 15th) with all the latest recipes, and other fun info. I would be honored to have you join our growing list of subscribers, so you never miss a great recipe!
    There is a Newsletter subscription box on the top right side (or bottom) of each blog post, depending on the device you use, where you can easily submit your e-mail address (only) to be included in my mailing list.

    You Can Also Find Me On Social Media:

    Facebook page: The Grateful Girl Cooks!
    Pinterest:
    The Grateful Girl Cooks!
    Instagram:
    jbatthegratefulgirlcooks

    Author's signature

    Recipe adapted from and printed from original source in April, 2018 at FamilyCircle.com

    ↓↓ PRINTABLE RECIPE BELOW ↓↓

    5 from 1 vote
    Bacon, Onion and Spinach Tart
    Prep Time
    30 mins
    Cook Time
    35 mins
    Total Time
    1 hr 5 mins
     

    Enjoy a Bacon, Onion and Spinach Tart for breakfast, lunch or dinner! It's yummy, and filled with caramelized onions, cheese, spinach & bacon.

    Category: Breakfast, Dinner, Lunch
    Cuisine: American
    Keyword: bacon onion and cheese tart
    Servings: 8
    Calories Per Serving: 258 kcal
    Author: JB @ The Grateful Girl Cooks!
    Ingredients
    • 1 refrigerated rolled pie crust or homemade
    • 4 slices bacon crosswise cut into ¼" strips
    • 6 cups baby spinach leaves
    • pounds yellow onions (about 4) cut into ¼" slices (about 6 cups total)
    • ¾ teaspoon salt
    • ¼ teaspoon dried thyme
    • 3 large eggs
    • ¾ cup half and half
    • ¼ teaspoon black pepper
    • cup shredded cheddar cheese or Gruyere
    Instructions
    Prep:
    1. Roll out dough; fit it into a 9" tart pan (with removable bottom). Press dough into sides of pan; trim away excess crust from top edge, so top of crust is flush with pan. Use fork tines to prick dough on sides and bottom. Refrigerate crust while making tart filling.

    2. Cut 4 strips of bacon crosswise into small thin strips. Place bacon strips in a large non-stick skillet. Cook on Medium heat, stirring often. Cook approx. 6-8 minutes. Add spinach. Continue to stir; cook for 1 minute, or until spinach has wilted. Transfer bacon/spinach mixture out of skillet with a slotted spoon. Place on plate lined with paper towels, to absorb excess grease. Do not clean skillet.

    Caramelize Onions:
    1. Place onions, thyme and ¼ teaspoon salt into the same skillet. Turn to Medium heat; put a lid on skillet. Cook onions (covered) for 25 minutes, stirring occasionally. Continue to cook (covered) until onions have caramelized, softened and are a rich brown color. When done, remove skillet from heat. Stir, then let them cool, uncovered, for 5 minutes. TIP: Preheat oven to 375°F. while onions are cooking.

    Make Tart Filling:
    1. In large mixing bowl, whisk together eggs, half and half, pepper and remaining ½ tsp. salt until combined. Stir in bacon/spinach. Add cooled onions; stir until combined. Carefully pour filling into crust, making sure spinach/onions/bacon are evenly distributed.

    Time For The Oven:
    1. Bake at 375°F. for 15 minutes, then reduce the heat to 325°, and bake another 20 minutes at lower temperature. Remove tart from oven, and turn oven to BROIL setting. Sprinkle top of tart with shredded cheese. Place tart about 6" from broiler heating element. Let it broil for 1-2 minutes, or until cheese has melted. Keep an eye on it so you don't burn the top! Transfer tart to wire rack. Let cool 5 minutes before removing from tart pan, slicing and serving.

    2. Carefully remove metal rim from the tart by pushing up from the bottom to separate tart from outer rim. Cut into 8 slices, serve, and enjoy! Keep any leftovers covered/refrigerated up to 4-5 days.

    Nutrition Facts
    Bacon, Onion and Spinach Tart
    Amount Per Serving (1 slice (1/8 of total))
    Calories 258 Calories from Fat 144
    % Daily Value*
    Fat 16g25%
    Saturated Fat 6g38%
    Trans Fat 1g
    Polyunsaturated Fat 2g
    Monounsaturated Fat 6g
    Cholesterol 90mg30%
    Sodium 470mg20%
    Potassium 353mg10%
    Carbohydrates 21g7%
    Fiber 3g13%
    Sugar 5g6%
    Protein 8g16%
    Vitamin A 2346IU47%
    Vitamin C 13mg16%
    Calcium 115mg12%
    Iron 2mg11%
    * Percent Daily Values are based on a 2000 calorie diet.

    Here’s one more to pin on your Pinterest boards!Enjoy a Bacon, Onion and Spinach Tart for breakfast, lunch or dinner! It's yummy, and filled with caramelized onions, cheese, spinach & bacon.

    Baked Banana Doughnuts

    Whip up some Baked Banana Doughnuts, glazed, then topped with chocolate and toasted nuts! Easy to make, delicious, and ready in 25 minutes!
    Whip up some Baked Banana Doughnuts, glazed, then topped with chocolate and toasted nuts! Easy to make, delicious, and ready in 25 minutes!

    Good morning! Today I want to share a delicious recipe for baked banana doughnuts! Our family enjoyed them at our Easter brunch this past April, and they were a wonderful addition to our “feast”. Banana baked doughnuts have wonderful flavor, and look good, too!. I “prettied them up” a bit by adding chocolate drizzle and toasted nuts to each one, which gave them even better presentation and flavor! A family member was overheard saying they look like “REAL” doughnuts… ha ha!!

    These breakfast treats (or snacks) are BAKED, and not FRIED, which makes them even easier to prepare! To make them, you will need to have a doughnut pan with a six doughnut well in it. I got mine years ago online, and it was fairly inexpensive. I’ve used mine many times over the years to make doughnuts, so it was a worthwhile purchase. 

    Scroll Down For A Printable Recipe Card At The Bottom Of The Page

    Make The Batter For The Doughnuts

    Before beginning, remember to preheat your oven to 325°F. It doesn’t take long at all to prepare the batter, so you will want that oven hot and ready to go, when you’re ready to bake the doughnuts. While the oven preheats, make the batter. Lightly spray or grease the doughnut pan, as well.

    Whisk together all purpose flour, granulated sugar, cinnamon, baking powder and salt in a large bowl. Once you’ve combined these ingredients, make a “well” in the center of the mix, then set the bowl aside. In a separate bowl, combine mashed banana, buttermilk, a beaten egg, melted (cooled) butter and vanilla extract.

    Flour, sugar, baking powder, cinnamon and salt are placed in a medium bowl and combined.Egg, banana, buttermilk, vanilla and melted butter are combined in bowl.

    Pour the banana mixture into the well in the middle of the dry ingredients, and then stir until all ingredients are combined. Don’t overmix the batter… only stir until all ingredients have been incorporated into a thick batter.

    Egg mixture is poured into a well in the dry ingredients, then combined.Batter for baked banana doughnuts is thoroughly combined and ready to use.

    Bake The Doughnuts

    Evenly divide the doughnut batter into your lightly greased doughnut pan. I spoon the batter into each doughnut well, and it is not too messy at all. You will find that the batter will fill each well almost to the top.

    Bake the doughnuts on the middle rack of the oven, at 325°F. for about 10-12 minutes. They will not be overly browned once done baking, but they should be set on top and cooked through. If you gently touch the top of the doughnut, it should spring back lightly.

    Transfer the pan to a wire rack to cool slightly before removing the baked banana doughnuts from the pan. Once cooled slightly, place the doughnuts onto the wire rack, and put a sheet of wax paper or aluminum foil UNDER the rack. The foil or wax paper will catch any drips when you glaze the doughnuts later.

    The baked banana doughnut batter is divided evenly into six wells in doughnut pan.After baking, the banana doughnuts cool in the pan on a wire rack before removing.Baked banana doughnuts cooling on a wire rack.

    Glaze And Decorate The Doughnuts

    While the baked banana doughnuts cool, make the simple glaze. Stir or whisk together powdered sugar, vanilla extract and milk until the glaze is smooth (no lumps!). Once the doughnuts have cooled to room temperature, dip the top of each doughnut (one at a time) into the glaze.

    Dip doughnuts enough to cover the top of the doughnut, then quickly flip it over, allowing excess glaze to drip back into the bowl. Set the glazed doughnut back (frosting side UP) onto the wire rack, and repeat this process with the remaining doughnuts. 

    A glaze is made with powdered sugar, milk and vanilla to frost the baked doughnuts.Each doughnut is placed in the glaze to fully coat the top of each one.Six baked banana doughnuts on a wire rack after being glazed.

    Once the glaze has been applied and has firmed up just a bit… drizzle melted chocolate over each donut, then add the toasted, chopped nuts on top of the chocolate. Lightly press the nuts into the chocolate so they will adhere to the doughnut. Let the toppings firm up before serving.

    Chopped toasted nuts and melted chocolate are added to the top of each doughnut.

    Serve The Baked Banana Doughnuts!

    Once the glaze and chocolate toppings have firmed up, the baked banana doughnuts are ready to serve! We served them at our Easter brunch, and they were a hit! In the photo below you can see them (with the red arrow), along with our other choices.

    We enjoyed them with a variety of dishes, including creamy deviled eggs, snickerdoodle bread, egg, cheese and veggie breakfast casserole, chocolate chip orange scones, and blueberry lemon muffins!

    A serving plate with six baked banana doughnuts on it, ready to eat!Easter brunch included the baked banana doughnuts (see red arrow).

    I hope you enjoy these yummy baked banana doughnuts! Thank you for stopping by my blog today, and I invite you to come back again for more family friendly recipes. Take care, and have a GREAT day!

    Looking for More DOUGHNUT Recipes?

    You can find ALL of my recipes in the Recipe Index, located at the top of the page. I have some absolutely delicious doughnut recipes for you to enjoy, including:

    Interested In More Recipes?

    Thank you for visiting this website. I appreciate you using some of your valuable time to do soIf you’re interested, I publish a newsletter 2 times per month (1st and 15th) with all the latest recipes, and other fun info. I would be honored to have you join our growing list of subscribers, so you never miss a great recipe!
    There is a Newsletter subscription box on the top right side (or bottom) of each blog post, depending on the device you use, where you can easily submit your e-mail address (only) to be included in my mailing list.

    You Can Also Find Me On Social Media:

    Facebook page: The Grateful Girl Cooks!
    Pinterest:
    The Grateful Girl Cooks!
    Instagram:
    jbatthegratefulgirlcooks

    Author's signature

    Recipe adapted from: https://www.imbored-letsgo.com/baked-banana-donuts/

    ↓↓ PRINTABLE RECIPE BELOW ↓↓

    0 from 0 votes
    Baked Banana Doughnuts
    Prep Time
    15 mins
    Cook Time
    10 mins
    Total Time
    25 mins
     

    Whip up some Baked Banana Doughnuts, glazed, then topped with chocolate and toasted nuts! Easy to make, delicious, and ready in 25 minutes!

    Category: Breakfast, Snack
    Cuisine: American
    Keyword: , doughnuts, baked banana doughnuts, banana donuts
    Servings: 6 doughnuts
    Calories Per Serving: 307 kcal
    Author: JB @ The Grateful Girl Cooks!
    Ingredients
    • 1 cup all purpose flour
    • ¼ cup granulated sugar
    • 1 teaspoon baking powder
    • ½ teaspoon salt
    • ½ teaspoon cinnamon
    • 1 banana very ripe, mashed
    • 1 large egg beaten
    • ¼ cup buttermilk
    • 1 teaspoon vanilla extract
    • 1 Tablespoon butter melted
    For Glaze:
    • 1 cup powdered sugar
    • 1 Tablespoon milk
    • ½ teaspoon vanilla extract
    For Topping:
    • 10 walnuts or pecans lightly toasted, chopped
    • ¼ cup semi-sweet chocolate melted
    Instructions
    1. Preheat oven to 325°F. Lightly spray/grease doughnut pan.

    2. Whisk flour, sugar, cinnamon, baking powder and salt in large bowl. Once combined, make a "well" in the center; set bowl aside.

    3. In separate bowl, combine mashed banana, buttermilk, egg, melted butter (cooled) and vanilla. Add this to the flour mixture. Stir to combine ingredients only until incorporated into batter.

    4. Evenly spoon batter into prepared pan, filling each well almost to the top. Bake at 325°F. for 10-12 minutes (on middle rack of oven). Finished doughnuts will be cooked through, and lightly sping back when gently touched on the top. Place pan on wire rack to cool 1-2 minutes, then transfer doughnuts out of pan to wire rack. Let cool completely. Place foil or wax paper UNDER the rack to prepare for glazing doughnuts.

    Glaze/Garnish Doughnuts
    1. While doughnuts cool, make glaze. In a small bowl, stir powdered sugar, vanilla and milk until smooth (no lumps!). Once the doughnuts have cooled to room temp., dip top of doughnuts (one at a time) into glaze, to cover top of doughnut. Allow excess glaze to drip back into bowl, then flip doughnut over. Set doughnut, glazed side UP on wire rack. Repeat with remaining doughnuts.

    2. Once glaze has firmed up, drizzle melted chocolate over each donut, then quickly sprinkle with toasted, chopped nuts. Lightly press the nuts into the chocolate so they adhere. Let toppings firm up before serving.

    Recipe Notes

    NOTE: To toast walnuts/pecans, place them in a skillet and heat on medium heat for 2-3 minutes, stirring occasionally until lightly toasted and aromatic.

    Nutrition Facts
    Baked Banana Doughnuts
    Amount Per Serving (1 doughnut)
    Calories 307 Calories from Fat 72
    % Daily Value*
    Fat 8g12%
    Saturated Fat 4g25%
    Trans Fat 1g
    Polyunsaturated Fat 2g
    Monounsaturated Fat 2g
    Cholesterol 38mg13%
    Sodium 235mg10%
    Potassium 248mg7%
    Carbohydrates 54g18%
    Fiber 2g8%
    Sugar 34g38%
    Protein 5g10%
    Vitamin A 140IU3%
    Vitamin C 2mg2%
    Calcium 63mg6%
    Iron 2mg11%
    * Percent Daily Values are based on a 2000 calorie diet.

    Here’s one more to pin on your Pinterest boards!Whip up some Baked Banana Doughnuts, glazed, then topped with chocolate and toasted nuts! Easy to make, delicious, and ready in 25 minutes!

    Air Fryer Whole Chicken

    Use your air fryer to make an Air Fryer Whole Chicken in about 1 hour! The crispy, well-seasoned and browned chicken tastes delicious!
    Use your air fryer to make an Air Fryer Whole Chicken in about 1 hour! The crispy, well-seasoned and browned chicken tastes delicious!

    Using an air fryer to cook an entire chicken is a great way to prepare a crispy, browned whole chicken. The process is extremely simple, and the cooked chicken is full of flavor! After the chicken is well-seasoned, the air fryer does the rest of the work for you!

    Air fryers use extremely hot air circulating around the food to cook it, and we really enjoy using ours! There is minimal hands-on, prep time necessary (about 10 minutes) to make a 4½ pound air fryer whole chicken. The rest of the time is simply letting the air fryer cook the chicken! When you use the homemade spice mixture as shown below, the cooked chicken also has great flavor! Here’s how to make this dish:

    Scroll Down For A Printable Recipe Card At The Bottom Of The Page

    Looking For A Good Spice Rub?

    Obviously, when making an air fryer whole chicken, feel free to use whatever spice mixture you enjoy, to season the chicken. However, I love to use this homemade spice mix and have included the ingredients in the printable recipe card below.

    The spices used are brown sugar, paprika, garlic, salt, pepper, onion powder, cayenne, cumin and dry mustard, and they add great flavor to the chicken! Mix these ingredients together in a medium-sized bowl. The ingredients will yield about 1/2 cup of spice mix, but you’ll only need 4 Tablespoons to season one chicken, so save the rest for another time!

    Spices used to flavor the air fryer whole chicken are measured into a bowl.Seasoning mix is combined before adding it to olive oil to help season a whole chicken.

    Prepare The Chicken For Cooking

    Remove giblets from the cavity of the chicken (and discard). Rinse the chicken, and pat it dry, using paper towels to absorb moisture. I recommend using kitchen twine or raffia to tie the legs of the chicken together (see photo below). This helps the chicken cook more evenly! Tuck the wings snugly under the chicken for cooking, as well.

    Place 4 Tablespoons of the combined spice mixture and 1½ T. olive oil in a separate bowl. Mix together, then spread this spice rub over the entire chicken. Be sure to spread some of the spice rub into the chicken cavity, also. Now this big ol’ chicken is ready for the air fryer!

    Chicken legs are tied together, and chicken is covered with spice mixture before cooking.

    Into The Air Fryer It Goes!

    Preheat your air fryer to 360°F. This usually takes 4-5 minutes. Place the seasoned whole chicken into the fryer BREAST SIDE DOWN. NOTE: The photo below is only to show that an entire chicken can fit into the basket of an air fryer! Anyways… place it breast side down into the basket for cooking.

    Cook the chicken at 360°F. for about 45-50 minutes. Carefully turn the chicken over to the other side (breast side up), and continue cooking for an additional 10 minutes or until the chicken reaches a safe internal temperature of 165°F. Once the internal temperature is 165°F., it is considered done and is safe to eat. To check the temperature, insert a meat thermometer into the thick part of the chicken between the thigh and the breast.  The finished chicken should also be beautifully browned and crispy on the outside. 

    TIP: Because the weight of each chicken used may vary a bit, keep an eye on it! Yours may take slightly less time or slightly more time to finish cooking. Check the temperature occasionally, to make sure it is not overcooked or undercooked.

    An entire seasoned chicken, before cooking, in an air fryer basket.

    Time To Serve The Air Fryer Whole Chicken

    Transfer the whole chicken to a cutting board and let it rest for 5-10 minutes before slicing. This “resting time” allows the juices time to redistribute throughout the chicken. After the air fryer whole chicken has rested, slice away! A whole chicken can be cut into 8 pieces, with two pieces each of the breasts, legs, thighs, and wings.

    An Air Fryer Whole Chicken after cooking is browned and crispy on the outside.The inside of the air fryer whole chicken after cooking, now sliced and ready to serve.

    I hope you enjoy making and eating this air fryer whole chicken! We enjoy cooking whole chickens this way, and love the flavor and the way it turns out. Thanks for stopping by today, and I invite you to come back again soon for more recipes! Take care, and have a GREAT day!

    Looking For More AIR FRYER Recipes?

    You can find ALL of my recipes in the Recipe Index, which is located at the top of the page. I have a nice variety of air fryer recipes, including:

    Interested In More Recipes?

    Thank you for visiting this website. I appreciate you using some of your valuable time to do soIf you’re interested, I publish a newsletter 2 times per month (1st and 15th) with all the latest recipes, and other fun info. I would be honored to have you join our growing list of subscribers, so you never miss a great recipe!
    There is a Newsletter subscription box on the top right side (or bottom) of each blog post, depending on the device you use, where you can easily submit your e-mail address (only) to be included in my mailing list.

    You Can Also Find Me On Social Media:

    Facebook page: The Grateful Girl Cooks!
    Pinterest:
    The Grateful Girl Cooks!
    Instagram:
    jbatthegratefulgirlcooks

    Author's signature

    ↓↓ PRINTABLE RECIPE BELOW ↓↓

    0 from 0 votes
    Air Fryer Whole Chicken
    Prep Time
    10 mins
    Cook Time
    1 hr
    Total Time
    1 hr 10 mins
     

    Use your air fryer to make an Air Fryer Whole Chicken in about 1 hour! The crispy, well-seasoned and browned chicken tastes delicious!

    Category: Dinner, Main Course
    Cuisine: American
    Keyword: air fryer whole chicken
    Servings: 8 pieces
    Calories Per Serving: 313 kcal
    Author: JB @ The Grateful Girl Cooks!
    Ingredients
    • pound whole chicken giblets removed from cavity
    For Seasoning:
    • Tablespoons olive oil
    • Tablespoons brown sugar
    • 2 Tablespoons paprika
    • 1 Tablespoon garlic powder
    • 1 Tablespoon salt
    • teaspoons black pepper
    • teaspoons onion powder
    • ¾ teaspoon cayenne pepper
    • ¾ teaspoon ground cumin
    • ¾ teaspoon dry mustard powder
    Instructions
    Prepare Chicken:
    1. Remove giblets from the cavity of the chicken. Rinse and pat the chicken dry using paper towels. Use kitchen twine or raffia to tie the legs of the chicken together. This helps the chicken cook evenly! Tuck the wings snugly under chicken for cooking.
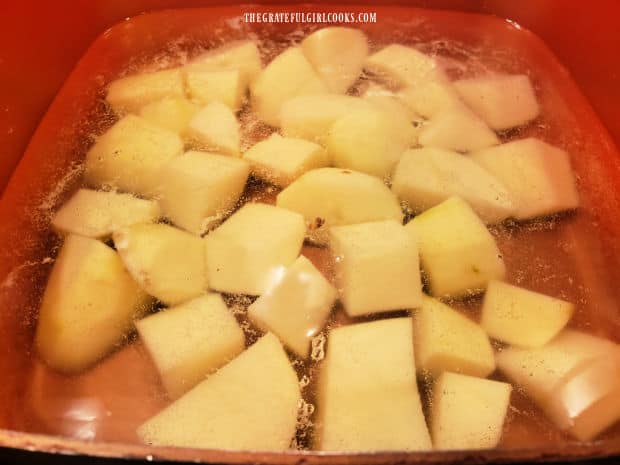
    2. Mix spices together in a medium-sized bowl. NOTE: This will yield about ½ cup spice mix; you only need 4 T. spice mix for one chicken (so save the rest for another time). Place 4 Tablespoons of the combined homemade spice mixture and the olive oil into a separate bowl. Stir to combine, then rub entire chicken with the spice mix. Be sure to spread some spice mix inside the chicken cavity.

    Air Fry The Seasoned Chicken:
    1. Preheat air fryer to 360°F. (about 4-5 minutes). Place seasoned chicken into fryer basket BREAST SIDE DOWN. Cook chicken at 360°F. for about 45-50 minutes. Carefully turn chicken over (now breast side UP). Continue cooking 10 minutes, or until chicken reaches an internal temperature of 165°F. Because weight of chickens used may vary, keep an eye on it! Check internal temp. occasionally, to make sure it isn't overcooked or undercooked.
    2. Transfer chicken to cutting board; let it rest 5-10 minutes before slicing. This allows juices time to redistribute through the meat. Once chicken has rested, slice away, and serve!

    Recipe Notes

    NOTE: Estimated caloric calculation made using 8 pieces of chicken divided between total calories. Depending on the size piece consumed, calorie count may vary. The total amount of spices were used to calculate nutrients, however you will not use all the spice mix for one chicken.

    Nutrition Facts
    Air Fryer Whole Chicken
    Amount Per Serving (1 piece (1/8of total pieces))
    Calories 313 Calories from Fat 189
    % Daily Value*
    Fat 21g32%
    Saturated Fat 6g38%
    Trans Fat 1g
    Polyunsaturated Fat 4g
    Monounsaturated Fat 10g
    Cholesterol 92mg31%
    Sodium 961mg42%
    Potassium 306mg9%
    Carbohydrates 6g2%
    Fiber 1g4%
    Sugar 4g4%
    Protein 23g46%
    Vitamin A 1116IU22%
    Vitamin C 2mg2%
    Calcium 28mg3%
    Iron 2mg11%
    * Percent Daily Values are based on a 2000 calorie diet.

    Here’s one more to pin on your Pinterest boards!Use your air fryer to make an Air Fryer Whole Chicken in about 1 hour! The crispy, well-seasoned and browned chicken tastes delicious!

    Guinness Baked Cheese Dip

    Guinness Baked Cheese Dip is a terrific appetizer, with 3 cheeses, caramelized onions, and Guinness beer! Served hot, you’re gonna love it!
    Guinness Baked Cheese Dip is a terrific appetizer, with 3 cheeses, caramelized onions, and Guinness beer! Served hot, you're gonna love it!

    My husband and I love to order hot appetizer dips (if available) at restaurants when we go out. Typically we order hot artichoke dip and stuff ourselves silly with the gooey cheesy dip. A while back I saw a recipe for a Baked Cheese Dip online which had caramelized onions and Guinness beer in it. Normally, I don’t even like the smell of beer, but this recipe sounded so delicious, so I knew we absolutely HAD to try it!

    One of the cheeses used for this dip is called Dubliner cheese, which I’d never heard of before, but my husband found it easily at our Fred Meyer grocery store (Kroger). Dubliner cheese is a hard, light yellow-colored cheese that is slightly salty, nutty, and reminiscent of a flavorful Parmesan to the bite.

    I made a couple slight changes to the original recipe, by adding shredded Parmesan cheese to the Dubliner and cream cheese already in the recipe. I also baked it in two 4″ cast iron skillets. That way my husband and I could have one, and I could give the other to our son (and his girlfriend), so they could enjoy it, too! Guinness Baked Cheese Dip is really quite delicious, and here’s how to make it:

    Scroll Down For A Printable Recipe Card At The Bottom Of The Page

    Let’s Caramelize Those Onions!

    Caramelizing onions takes time, but results in sweet, well-browned, amazing tasting onions, which bring great flavor the dip! To do this, melt butter on medium-low heat in a large skillet. Add thinly sliced onions and a nice big pinch of salt, and then toss, to coat the onions with the butter. It looks like LOTS of onions, but once caramelized, they’ll be greatly reduced in size.

    Cook the onions slowly, giving them a toss often as they brown. Continue to cook, turning often until they are soft in texture and wonderfully browned. This will take about 20-25 minutes on medium-low heat. Just be patient, and let those onions caramelize – you’ll be glad you did! Remove the caramelized onions from the heat and let them cool completely.

    Thinly sliced onions are cooked in melted butter in skillet.Caramelized onions are nicely browned in butter before adding to dip mixture.

    Prepare The Dip Mixture

    While the onions cool, prepare the dip mixture AND preheat your oven to 400°F. Place cream cheese, mayonnaise, PART of the Dubliner cheese, and PART of the Parmesan cheese in a medium bowl. Stir well, to fully combine ingredients. The remaining cheeses you set aside will be used to top the dip before baking.

    Once the onions are cooled to room temperature, stir them into the dip. The onions need to be cooled so they don’t melt the cheeses! Add the Guinness beer and stir well, to fully incorporate it into the dip. This dip recipe uses ¼ cup of beer, and the alcohol in it will cook away in the oven, leaving only the flavor.

    Three cheeses and mayonnaise are combined in a bowl.Caramelized onions are stirred into the dip mixture in the bowl.Guinness beer is added to the cheeses and onion dip mixture in bowl.

    Final Step Before Baking

    Spread the dip mixture into an 8″ cast iron (or oven-safe) skillet OR two 4″ cast iron skillets. You can also use an oven-safe baking dish, if desired, to make this baked dip. NOTE: For these photos I used two 4″ cast iron skillets to make two separate appetizer dishes! 

    Once the dip is evenly spread in the skillet, sprinkle the top with the reserved shredded Dubliner and Parmesan cheeses. Now the Guinness Baked Cheese Dip is ready for the oven!

    Dip is spread in a cast iron skillet and topped with shredded cheeses.Two 4" cast iron skillets filled with cheese dip before baking.

    Place a sheet of aluminum foil under the skillet in the oven (to catch any spills). Cook the Guinness Baked Cheese Dip at 400° F. If using an 8″ skillet, you will need to bake the dip for 25-28 minutes. The two 4″ skillets will only need to bake for about 13-15 minutes.

    When done, the Guinness Baked Cheese Dip will be browned on top and the cheese will be bubbly. Transfer the hot skillets to a wire rack, and let the dip cool for 10-12 minutes before serving! The baked cheese is VERY hot, and you don’t want anyone to burn themselves on “molten lava” hot cheese!

    Hot Guinness Baked Cheese Dip cools on wire rack after baking.

    Serving The Guinness Baked Cheese Dip

    After the cheese dip has cooled sufficiently, it is ready to serve. Serve the Guinness Baked Cheese Dip with crisp, sturdy crackers, toasted baguette slices, or pita chips. Crackers, baguette slices, etc. should be sturdy enough to hold the weight of the cheese dip as it is scooped up!

    The cheesy onion dip tastes wonderful with it’s complex flavors, and I’m confident you and your family or friends will enjoy it!

    A skillet of Guinness Baked Cheese Dip is served with crackers as an appetizer.Scooping up the hot, baked cheese dip with one of the crackers.

    Thanks for stopping by! I hope you enjoy this delicious baked cheese dip as much as we do. Please come back soon for more recipes, take care… and have a wonderful day.

    Looking For More APPETIZER Recipes?

    You can find ALL of my recipes in the Recipe Index, located at the top of the page. I have some terrific appetizer recipes you might enjoy, including:

    Interested In More Recipes?

    Thank you for visiting this website. I appreciate you using some of your valuable time to do soIf you’re interested, I publish a newsletter 2 times per month (1st and 15th) with all the latest recipes, and other fun info. I would be honored to have you join our growing list of subscribers, so you never miss a great recipe!
    There is a Newsletter subscription box on the top right side (or bottom) of each blog post, depending on the device you use, where you can easily submit your e-mail address (only) to be included in my mailing list.

    You Can Also Find Me On Social Media:

    Facebook page: The Grateful Girl Cooks!
    Pinterest:
    The Grateful Girl Cooks!
    Instagram:
    jbatthegratefulgirlcooks

    Author's signature

    Recipe adapted from Laurie McNamara at: simplyscratch.com/guinness-dubliner-dip

    ↓↓ PRINTABLE RECIPE BELOW ↓↓

    0 from 0 votes
    Guinness Baked Cheese Dip
    Prep Time
    25 mins
    Cook Time
    25 mins
    Resting Time (cooling)
    10 mins
    Total Time
    1 hr
     

    Guinness Baked Cheese Dip is a terrific appetizer, with 3 cheeses, caramelized onions, and Guinness beer! Served hot, you're gonna love it!

    Category: Appetizer/Snack
    Cuisine: American
    Keyword: Guinness baked cheese dip
    Servings: 8
    Calories Per Serving: 205 kcal
    Author: JB @ The Grateful Girl Cooks!
    Ingredients
    • 2 Tablespoons butter
    • 1 large yellow onion peeled, thinly sliced
    • 1 pinch salt
    • 8 ounces cream cheese softened
    • 5 ounces Dubliner cheese DIVIDED USE, shredded
    • 2 ounces Parmesan cheese DIVIDED USE, shredded
    • ¼ cup mayonnaise
    • ¼ cup Guinness beer
    Crackers, toasted baguette slices, etc. for serving
      Instructions
      1. Melt butter on medium-low heat in a 8" cast iron skillet (or two 4"), OR an oven safe skillet. Add onions and salt; toss to coat onions with butter. Cook onions slowly on medium-low, stirring often until soft in texture and fully browned (20-25 minutes). Remove skillet from heat; let onions cool completely.

      2. While onions cool, preheat oven to 400°F. AND prepare dip. Place cream cheese, mayonnaise, HALF the Dubliner cheese and HALF the Parmesan cheese in a medium bowl. Stir well, to combine. Once onions are cooled to room temp, stir them into the dip. Add Guinness beer and stir well, to combine.

      3. Evenly spread dip mixture into an oven-safe baking dish, 8" cast iron (or oven-safe) skillet OR two 4" skillets. Sprinkle top with reserved Dubliner/Parmesan cheeses.

      4. Bake at 400° F. NOTE: If using 8" skillet, bake for 25-28 minutes. Bake two 4" skillets for approx. 13-15 minutes. When done, the dip should be browned on top and cheese will be bubbly. Transfer hot skillet(s) to a wire rack; let dip cool 10-12 minutes before serving with crackers, pita chips or toasted baguette slices!

      Nutrition Facts
      Guinness Baked Cheese Dip
      Amount Per Serving (1 (1/8 of total))
      Calories 205 Calories from Fat 144
      % Daily Value*
      Fat 16g25%
      Saturated Fat 10g63%
      Trans Fat 1g
      Polyunsaturated Fat 1g
      Monounsaturated Fat 3g
      Cholesterol 44mg15%
      Sodium 433mg19%
      Potassium 107mg3%
      Carbohydrates 5g2%
      Fiber 1g4%
      Sugar 3g3%
      Protein 9g18%
      Vitamin A 310IU6%
      Vitamin C 1mg1%
      Calcium 144mg14%
      Iron 1mg6%
      * Percent Daily Values are based on a 2000 calorie diet.

      Here’s one more to pin on your Pinterest boards!Guinness Baked Cheese Dip is a terrific appetizer, with 3 cheeses, caramelized onions, and Guinness beer! Served hot, you're gonna love it!

      Country Skillet Potatoes

      Country Skillet Potatoes are tender potatoes, caramelized with onions, garlic and bell peppers. It’s a great side dish for a breakfast or entree.
      Country Skillet Potatoes are tender potatoes, caramelized with onions, garlic and bell peppers. It's a great side dish for a breakfast or entree.

      We love potatoes! Do you enjoy them, too? There are so many different ways to use them in recipes, because they are such a versatile vegetable. Today I want to share a recipe for country skillet potatoes that can double as a breakfast side dish or as a tasty veggie that is a delicious side for a variety main dish meats.

      When I found the original recipe online they were called potatoes O’Brien, apparently named after a famous restaurant. But growing up, my Dad (who was from Texas) occasionally made cubed potatoes or hash browns using almost identical ingredients, and called them fried potatoes or skillet potatoes. This recipe I found reminded me of my Dad’s recipe (which I never got from him before he passed away). Whatever you want to call them is just fine with me, because they are truly delicious potatoes!

      Potato cubes are cooked in butter and olive oil with caramelized onions and red and green bell peppers until tender on the inside and a bit crispy on the outside. The recipe I am sharing today will make about 3-4 small servings of these yummy skillet potatoes! They are really delicious, so let me show you how to make them.

      Scroll Down For A Printable Recipe Card At The Bottom Of The Page

      Cook The Peppers And Onions

      Heat 1 Tablespoon of butter and ¾ Tablespoon of olive oil in a large skillet on Medium-High heat. Once the butter has melted, add chopped onions and chopped red and green bell peppers. Let the veggies cook for 8-10 minutes, stirring occasionally.

      As they cook, the peppers and onions will soften and will begin to slightly “char” on the outside. Continue to stir every minute or so while they finish cooking.

      Onions with red and green bell peppers cook in butter and oil in skillet.Bell peppers and onion continue to cook in skillet until charred and tender.When done cooking, the onions and bell peppers are charred on the outside and tender.

      Add The Potatoes

      While the onions and peppers are cooking for 8-10 minutes, peel and cube the potatoes into approximately ½”- ¾” cubes. The reason to wait until this time to peel and cut them is so they don’t turn brown from exposure to the air! When the onions and peppers have finished cooking, add the cubed potatoes to the skillet. Season with salt and pepper.

      Turn the stove down to Medium heat, and cover the skillet with a lid. Cook the potatoes and veggies for 10-12 additional minutes, stirring every 1-2 minutes. Steam will condense on the inside of the lid on the skillet and drip back into the skillet to help cook the potatoes. TIP: If it seems the potatoes are sticking to the skillet, add a Tablespoon or so of water to help with the steaming/cooking.

      Russet potatoes are peeled, then cut into 1/2" cubes before cooking.Potato cubes are combined with the charred bell peppers and onions in skillet.A lid covers the pan of country skillet potatoes to steam them until tender.

      When Are The Potatoes DONE?

      The country skillet potatoes are ready for the final step when the potatoes are fork-tender. They may need a bit longer to become tender, depending on the size of the potato cubes. If so, simply keep a lid on the skillet, and let them cook a bit more, until tender.

      Once the potatoes are fork-tender, remove the lid from the skillet. Add the remaining ½ Tablespoon of butter and the remaining ¾ Tablespoon olive oil to the skillet, and stir to combine. Turn the heat to HIGH, and let the potatoes cook (uncovered) an additional 2-3 minutes, stirring often, to let them get crispy on the outside. Take a taste, and if desired, season with additional salt and pepper.

      Butter and additional olive oil is added to the country skillet potatoes to help them get crispy.Country skillet potatoes cook a few more minutes (uncovered) to crisp up the potatoes.

      Serve The Country Skillet Potatoes!

      When the country skillet potatoes are hot and crispy on the outside, remove the skillet from the heat. Serve immediately while hot, and enjoy this delicious side dish for breakfast, lunch, OR dinner!

      A serving of country skillet potatoes, served with ham slices and green beans.

      I hope you enjoy making and eating these country skillet potatoes. Thank you for taking time out of your busy day to visit this blog. I hope you will choose to come back again soon for more family-friendly recipes. Take care, and have a GREAT day!

      Looking For More POTATO Recipes?

      You can find ALL of my recipes in the Recipe Index, located at the top of the page. I have some wonderful recipes featuring potatoes for you to enjoy, including:

      Interested In More Recipes?

      Thank you for visiting this website. I appreciate you using some of your valuable time to do soIf you’re interested, I publish a newsletter 2 times per month (1st and 15th) with all the latest recipes, and other fun info. I would be honored to have you join our growing list of subscribers, so you never miss a great recipe!
      There is a Newsletter subscription box on the top right side (or bottom) of each blog post, depending on the device you use, where you can easily submit your e-mail address (only) to be included in my mailing list.

      You Can Also Find Me On Social Media:

      Facebook page: The Grateful Girl Cooks!
      Pinterest:
      The Grateful Girl Cooks!
      Instagram:
      jbatthegratefulgirlcooks

      Author's signature

      Recipe Adapted from Jack and Martha at: https://www.afamilyfeast.com/potatoes-obrien/

      ↓↓ PRINTABLE RECIPE BELOW ↓↓

      0 from 0 votes
      Country Skillet Potatoes
      Prep Time
      20 mins
      Cook Time
      25 mins
      Total Time
      45 mins
       

      Country Skillet Potatoes are tender potatoes, caramelized with onions, garlic and bell peppers. It's a great side dish for a breakfast or entree.

      Category: Side Dish, Vegetable Dish
      Cuisine: American
      Keyword: country skillet potatoes, fried potatoes
      Servings: 3 (or 4 small portions)
      Calories Per Serving: 270 kcal
      Author: JB @ The Grateful Girl Cooks!
      Ingredients
      • Tablespoon butter DIVIDED USE
      • Tablespoon extra virgin olive oil DIVIDED USE
      • 1 cup red bell pepper seeded, finely chopped
      • ¾ cup green bell pepper seeded, finely chopped
      • ¾ cup yellow onion peeled, finely chopped
      • 1 pound Russet potatoes (approx. 2 large or 3 medium)
      • ½ Tablespoon minced garlic
      • ½ teaspoon kosher salt
      • ¼ teaspoon coarse black pepper
      Instructions
      1. Heat 1 Tablespoon butter and ¾ Tablespoon olive oil in large skillet on Medium-High heat. Once butter melts,, add onions and red/green peppers. Cook 8-10 minutes, stirring occasionally. Peppers and onions will soften and slightly "char" on the outside. Continue to stir occasionally.

      2. While onions/peppers cook, peel and cube potatoes into ½"- ¾" cubes. When onions and peppers are done,, add potatoes to skillet. Season with salt/pepper.

      3. Turn heat to Medium; put lid on skillet. Cook potatoes 10-12 minutes, stirring every 1-2 minutes. Steam will condense on inside of skillet lid and drip back into skillet to help cook potatoes. TIP: If it seems potatoes are sticking to skillet, add a small amount (1 Tablespoon or so) of water to help them steam/cook.

      4. Potatoes are ready when they become fork-tender. They may need longer to become tender, depending on size of the cubes. If so, simply keep lid on skillet; let them cook a bit more until tender.

      5. Once potatoes are fork-tender, remove skillet lid. Add remaining ½ Tablespoon butter and ¾ Tablespoon olive oil; gently stir to combine. Turn heat to HIGH; let potatoes cook (uncovered) 2-3 minutes, stirring often, to let them get crispy on the outside. Taste; if desired, season with additional salt and pepper. Serve immediately, and enjoy!

      Nutrition Facts
      Country Skillet Potatoes
      Amount Per Serving (1 (1/3 of total))
      Calories 270 Calories from Fat 117
      % Daily Value*
      Fat 13g20%
      Saturated Fat 5g31%
      Trans Fat 1g
      Polyunsaturated Fat 1g
      Monounsaturated Fat 7g
      Cholesterol 15mg5%
      Sodium 445mg19%
      Potassium 868mg25%
      Carbohydrates 36g12%
      Fiber 4g17%
      Sugar 6g7%
      Protein 5g10%
      Vitamin A 1871IU37%
      Vitamin C 106mg128%
      Calcium 41mg4%
      Iron 2mg11%
      * Percent Daily Values are based on a 2000 calorie diet.

      Here’s one more to pin on your Pinterest boards!Country Skillet Potatoes are tender potatoes, caramelized with onions, garlic and bell peppers. It's a great side dish for a breakfast or entree.

      Sour Cream Lemon Meringue Pie

      Sour Cream Lemon Meringue Pie, filled with creamy sweet/tart lemon filling and topped with puffy meringue, is a fabulous dessert you’ll love!
      Sour Cream Lemon Meringue Pie, filled with creamy sweet/tart lemon filling and topped with puffy meringue, is a fabulous dessert you'll love!

      Today I want to share a delicious recipe for Sour Cream Lemon Meringue Pie with you. This recipe is very special to me, because my Dad typed it up and e-mailed it to me almost 19 years ago before he passed away. My father loved to cook, and enjoyed listening to a cooking show on the radio on his daily commute to work. He said he thought that’s how he originally got this recipe.

      About 20 years ago, both my Mom AND Dad were confined to bed due to different circumstances. My Mom had severely hurt her back, and my Dad had become paralyzed from the chest down due to complications from bone cancer. Since my Mom was my Dad’s full-time caregiver, they needed some extra help!  I flew home from our home in Oregon to their home in Southern California to take care of them while they both were bedridden. While there, I cooked all the meals for the 3 of us, and enjoyed sharing each one with them.

      One day while there, I found this recipe written down in my Mom’s recipe box and made it as a surprise for them, using lemons from a tree in their backyard. They were so surprised when I brought them slices of fresh sour cream lemon meringue pie upstairs! Of course I “sacrificed for the team” (wink, wink) and ate pie too, and we were thrilled with this dessert. My Dad later sent me the recipe via e-mail so I would always have it. I have treasured this recipe ever since, because I got it from my DAD, who I dearly loved. Here’s how to make this decadent pie:

      Scroll Down For A Printable Recipe Card At The Bottom Of The Page

      Use A Pre-Baked Pie Shell

      You can use a purchased pie crust or a homemade one for the pie. Prick the pie crust on the bottom and sides with the tines of a fork, so it won’t “bubble up” too much when pre-baked. You can also put parchment paper on the bottom and fill the crust with pie weights or dried beans to weigh the pastry down.

      Bake the crust at 350°F. until golden brown around the edges (approx. 8-10 minutes). Set the baked pie crust aside to let it cool.

      Pie shell is baked before making pie filling, and is allowed to cool before filling.

      Make The Lemon Pie Filling

      Now it’s time to make the pie filling. Combine granulated sugar, salt and cornstarch in a medium saucepan. Add milk, and stir to combine. Cook on medium heat, stirring constantly, until thickened and bubbly. Remove the pan from the heat, and set it aside.

      In a small bowl, slightly beat egg yolks. Slowly drizzle in a small amount of the hot milk mixture, a Tablespoon at a time, stirring constantly (total of about 1/3 cup). Keep stirring while adding, because you do NOT want the hot liquid to scramble the egg yolks! This is called “tempering” the eggs, because you “warm them up” so they won’t cook when the cold eggs hit the hot liquid.

      Sugar, cornstarch, salt and milk cook in a saucepan until thickened and bubbly.A small amount of milk mixture is used to temper egg yolks so they don't get scrambled.

      Slowly add the warmed egg yolks back into the milk in the saucepan, stirring constantly as they’re added. Cook on medium heat for 2 minutes, stirring constantly, then remove the pan from the heat. Immediately stir in the butter, lemon juice, and all but ½ teaspoon of the lemon zest. Cover the pan, and let the pie filling cool to room temperature before completing the final step.

      Once tempered, egg mixture is added into the pan with the thickened milk mixture.Milk and egg thickener is heated in saucepan for two minutes to cook.Butter, lemon zest, and lemon juice are added to the saucepan to make the pie filling.

      Final Step To Make The Filling

      When the pie filling is at room temperature, fold in the sour cream. Once combined, pour the pie filling into the cooled, pre-baked pie crust. Set the pie aside while you make the meringue topping.

      Sour cream is folded into the cooled lemon filling.

      Pre-baked pie crust is filled with the creamy lemon filling.

      Prepare Meringue And Cover the Pie Filling

      Use an electric mixer to beat the egg whites, cream of tartar and vanilla until soft peaks form. Add 6 Tablespoons granulated sugar (a little at a time while beating), and continue beating until stiff peaks form.

      Spread the meringue carefully over the pie filling, sealing the meringue to the crust. I use the back of a large spoon to drag it all the way to the edges. The filling should be completely sealed in. This way it won’t produce moisture on top of the meringue, due to gaps between the filling and the meringue.

      Take the back of the spoon and “decorate” the meringue topping by pulling up small dollops of meringue to form peaks on the pie.

      Meringue is carefully spread over the surface of warm pie filling, all the way to seal the edges.Decorative dollops of meringue are formed with a spoon on top of pie.

      Bake The Sour Cream Lemon Meringue Pie

      Bake the sour cream lemon meringue pie in a preheated 350°F. oven for 13-15 minutes. When done, the meringue should be golden brown on top. The pie filling should only BARELY jiggle in the middle.

      Remove the sour cream lemon meringue pie from the oven, and transfer to a wire rack. Sprinkle with the reserved lemon zest. Let the pie cool completely, and then slice and serve! 

      Lemon zest is added to top of the sour cream lemon meringue pie after baking.

      Time To EAT!

      Slice the pie into 8 wedges, and transfer onto serving plates. It’s SO DELICIOUS, and I think you’ll enjoy this sour cream lemon meringue pie as much as we do! Remember to store any leftover pie in the refrigerator (covered) for up to 3 days. Meringue tends to “break down” a bit when stored, so this pie is at its best served the day it’s made (or within 24 hours).

      A slice of the sour cream lemon meringue pie on a plate with a lemon slice garnish.

      The pie is a perfect combo of sweet and tart, and the fluffy meringue puts it right over the edge! YUMMY! I hope you can make this pie for those you love, and trust they will enjoy it, too. Thanks for stopping by, and I hope you’ll come back for more family friendly recipes. Take care, may God bless you, and have a GREAT day!.

      Looking For More PIE Recipes?

      You can find ALL of my recipes in the Recipe Index, located at the top of the page. I have quite a few delicious pie recipes you might enjoy, including:

      Interested In More Recipes?

      Thank you for visiting this website. I appreciate you using some of your valuable time to do soIf you’re interested, I publish a newsletter 2 times per month (1st and 15th) with all the latest recipes, and other fun info. I would be honored to have you join our growing list of subscribers, so you never miss a great recipe!
      There is a Newsletter subscription box on the top right side (or bottom) of each blog post, depending on the device you use, where you can easily submit your e-mail address (only) to be included in my mailing list.

      You Can Also Find Me On Social Media:

      Facebook page: The Grateful Girl Cooks!
      Pinterest:
      The Grateful Girl Cooks!
      Instagram:
      jbatthegratefulgirlcooks

      Author's signature

      ↓↓ PRINTABLE RECIPE BELOW ↓↓

      1 from 1 vote
      Sour Cream Lemon Meringue Pie
      Prep Time
      30 mins
      Cook Time
      15 mins
      Inactive "Cooling" Time
      30 mins
      Total Time
      1 hr 15 mins
       

      Sour Cream Lemon Meringue Pie, filled with creamy sweet/tart lemon filling and topped with puffy meringue, is a fabulous dessert you'll love!

      Category: Dessert
      Cuisine: American
      Keyword: sour cream lemon meringue pie
      Servings: 8 slices
      Calories Per Serving: 269 kcal
      Author: JB @ The Grateful Girl Cooks!
      Ingredients
      • 1 9" baked pie pastry shell
      • 1 cup granulated sugar
      • 1 Tablespoon cornstarch
      • 1 pinch salt
      • 1 cup milk
      • 3 large eggs **separated
      • 4 Tablespoons butter
      • ¼ cup lemon juice (fresh)
      • 2 Tablespoons grated lemon zest **divided use
      • 1 cup sour cream
      • ½ teaspoon vanilla extract
      • ¼ teaspoon cream of tartar
      • 6 Tablespoons granulated sugar
      Instructions
      1. Preheat oven to 350°F. To pre-bake crust, prick pie crust on bottom and sides with tines of a fork. Bake crust at 350°F. until light brown around edges (approx. 8-10 minutes). Set aside to cool.

      Make Pie Filling
      1. Combine 1 C. sugar, salt, cornstarch in medium saucepan. Add milk; stir to combine. Cook on medium, stirring constantly, until thick/bubbly. Remove from heat; set pan aside.

      2. In small bowl, slightly beat egg yolks. Slowly drizzle in a small amount of the hot milk mixture, a Tablespoon at a time (total approx. 1/3 cup), stirring or whisking constantly. Keep stirring while adding, because you don't want hot liquid to scramble egg yolks! Slowly add warmed egg yolks back into milk in saucepan, stirring constantly as they're added. Cook on medium heat for 2 minutes, stirring constantly. Remove pan from heat. Immediately stir in butter, lemon juice, and all but ½ teaspoon of lemon zest. Cover pan; let pie filling cool to room temperature.

      3. Once at room temp., fold in sour cream. When combined, pour pie filling into room temp. baked pie crust. Set pie aside.

      Make Meringue
      1. Use electric mixer to beat egg whites, cream of tartar, vanilla until soft peaks form. Add 6 Tablespoons granulated sugar (little at a time while beating), and continue beating until stiff peaks form. Spread meringue over pie filling, sealing meringue to the crust. Use back of large spoon to drag it all the way to the edges. Filling should be completely sealed in. Take the back of the spoon and "decorate" meringue by pulling up small dollops of meringue to form peaks on pie.

      Bake
      1. Bake at 350°F. for 13-15 minutes. When done, meringue should be golden brown. Pie filling should only BARELY jiggle in the middle. Transfer pie from oven to wire rack. Sprinkle with reserved lemon zest. Let pie cool completely, then slice and serve! Refrigerate leftovers.

      Recipe Notes

      **IMPORTANT NOTE: Caloric calculation was made WITHOUT the pie crust included. There are so many types of pie crusts (frozen, refrigerated, handmade with butter or shortening, etc.) all with varying ingredients that you might use. On average, pie crust has between 110-175 calories per slice, so please take this into account.

      Nutrition Facts
      Sour Cream Lemon Meringue Pie
      Amount Per Serving (1 slice (1/8 of total))
      Calories 269 Calories from Fat 99
      % Daily Value*
      Fat 11g17%
      Saturated Fat 6g38%
      Trans Fat 1g
      Polyunsaturated Fat 1g
      Monounsaturated Fat 3g
      Cholesterol 97mg32%
      Sodium 115mg5%
      Potassium 157mg4%
      Carbohydrates 39g13%
      Fiber 1g4%
      Sugar 36g40%
      Protein 4g8%
      Vitamin A 402IU8%
      Vitamin C 5mg6%
      Calcium 91mg9%
      Iron 1mg6%
      * Percent Daily Values are based on a 2000 calorie diet.

      Here’s one more to pin on your Pinterest boards!Sour Cream Lemon Meringue Pie, filled with creamy sweet/tart lemon filling and topped with puffy meringue, is a fabulous dessert you'll love!