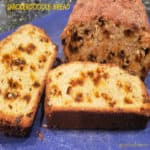
Cinnamon Crinkle Cookies

Make a batch of yummy Cinnamon Crinkle Cookies, flavored with cinnamon, nutmeg, lemon and orange! Easy to make, the recipe yields about 6 dozen.
Make a batch of yummy Cinnamon Crinkle Cookies, flavored with cinnamon, nutmeg, lemon and orange! Easy to make, the recipe yields 6 dozen.

Looking for an easy-to-make recipe for cookies that are absolutely delicious? These cinnamon crinkle cookies fit the bill. They are slightly crisp, and have wonderful cinnamon (and citrus!) flavor. I found the recipe in one of my old cookbooks, and wanted to share it with you today.

If you make the recipe as written, it will yield about 6 dozen yummy cookies (which also freeze well). They are a cinch to make, so there is no special talent needed to make these treats. Here’s how to make them:

Scroll Down For A Printable Recipe Card At The Bottom Of The Page

Make The Cookie Dough

First- preheat your oven to 350°F. While the oven preheats, cream butter, vegetable shortening, granulated and brown sugars together in a large mixing bowl, using an electric mixer. Continue beating until the mixture becomes light and fluffy in texture (a couple minutes). Add an egg, vanilla and almond extracts, then continue beating the batter until they are fully incorporated.

In a separate bowl, stir together flour, cinnamon, baking soda, cream of tartar, salt, and finely grated lemon and orange peel until combined. Add the flour mixture, a little at a time, to the creamy batter mixture, beating with each addition. The batter for the cinnamon crinkle cookies is done when fully combined.

An egg, plus vanilla and almond extracts are added to the cookie batter.Dry ingredients, plus orange and lemon zest are combined in a separate large bowl.

Making The Cookie Dough Balls

Form the dough into 1″ balls, by rolling the firm dough between the palms of your hands. You should have enough dough to make approximately 72 cookie dough balls. As you form them, place the dough balls onto wax paper, until all the cookies have been formed.

Place granulated sugar into a small bowl. I typically use about 1/3 cup, but you may require more or less, depending on the size of the finished cookie dough balls. Place 2-3 dough balls at a time into the sugar, and roll them around to coat the entire surface with sugar.

Dough for the cinnamon crinkle cookies is thick and ready to shape into balls of dough.Dough balls are coated in granulated sugar before baking.

Bake The Cinnamon Crinkle Cookies

Place the sugar-coated cinnamon crinkle cookies about 2″ apart from each other onto ungreased baking sheets. As you can see, I used my old ratty baking sheets for this photo shoot, so here they are in all their glory. HA HA! They show the evidence of a LOT of wear and tear over many years, but are still getting the job done. Kind of like me!

Bake the cinnamon crinkle cookies in a 350°F oven for 10-15 minutes, or until they are lightly browned and set on top. Mine are usually done in about 12 minutes, but because oven temps can vary greatly, be sure to check on them at the 10 minute mark. The tops should also be crinkled (or crackled) on top when done.

Sugar-coated dough balls are placed on baking sheets 2" apart.Cinnamon crinkle cookies on baking sheet, right out of the oven.

Transfer the cinnamon crinkle cookies to a wire rack, and allow them to come to room temperature before serving. They taste BEST at room temp, after they’ve had time to crisp up! Wrap any extras in an air-tight container for storage in the pantry OR in the freezer.

Since this recipe makes so many cookies, I freeze at least half of them to serve another time after thawing. They also make a yummy, thoughtful food gift for friends, neighbors, or co-workers!

All of the cinnamon crinkle cookies, cooling on wire racks after baking.

The Cinnamon Crinkle Cookies Are Ready To EAT!

Cinnamon crinkle cookies are best served at room temperature, because they crisp up as they cool. Pile a bunch of them onto a plate, and watch just how fast they are devoured. They’re REALLY tasty, and I just know you will love ’em!.

A pile of the cinnamon crinkle cookies on a plate, ready to enjoy!

I really believe you (and those you love) are going to enjoy every single bite of these delicious cookies! They freeze well, too, so you can put some aside to enjoy at a later date. Thanks for stopping by, and I hope you will come back again soon. Have a great day, and may God bless you in all you do.

Looking For More COOKIE Recipes?

You can find ALL of my recipes in the Recipe Index, located at the top of the page. I have lots of yummy cookie recipes for you to enjoy, including:

Interested In More Recipes?

Thank you for visiting this website. I appreciate you using some of your valuable time to do soIf you’re interested, I publish a newsletter 2 times per month (1st and 15th) with all the latest recipes, and other fun info. I would be honored to have you join our growing list of subscribers, so you never miss a great recipe!
There is a Newsletter subscription box on the top right side (or bottom) of each blog post, depending on the device you use, where you can easily submit your e-mail address (only) to be included in my mailing list.

You Can Also Find Me On Social Media:

Facebook page: The Grateful Girl Cooks!
Pinterest:
The Grateful Girl Cooks!
Instagram:
jbatthegratefulgirlcooks

Author's signature

Original Recipe Source: The cookbook called “Taste of Home Complete Guide To Baking”, page 43, published in 2004 by Reiman Media Group, Inc.

↓↓ PRINTABLE RECIPE BELOW ↓↓

0 from 0 votes
Cinnamon Crinkle Cookies
Prep Time
15 mins
Cook Time
10 mins
Total Time
25 mins
 

Make a batch of yummy Cinnamon Crinkle Cookies, flavored with cinnamon, nutmeg, lemon and orange! Easy to make, the recipe yields 6 dozen.

Category: Dessert, Snack
Cuisine: American
Keyword: cinnamon crinkle cookies
Servings: 72 (approx. 6 dozen)
Calories Per Serving: 58 kcal
Author: JB @ The Grateful Girl Cooks!
Ingredients
  • ½ cup butter softened
  • ½ cup vegetable shortening
  • 1 cup granulated sugar
  • ½ cup packed brown sugar
  • 1 large egg
  • 1 teaspoon vanilla extract
  • ½ teaspoon almond extract
  • cups all purpose flour
  • 3 teaspoons ground cinnamon
  • 2 teaspoons finely grated orange peel
  • 1 teaspoon finely grated lemon peel
  • 2 teaspoons ground nutmeg
  • 2 teaspoons cream of tartar
  • 2 teaspoons baking soda
  • ½ teaspoon salt
  • cup granulated sugar to cover dough balls
Instructions
  1. Preheat oven to 350°F. While oven preheats, cream butter, vegetable shortening, granulated and brown sugars together in large mixing bowl, using electric mixer. Continue beating until it becomes light and fluffy in texture (2-3 minutes). Add egg, vanilla and almond extracts; continue beating until fully incorporated.

  2. In separate bowl, stir together flour, cinnamon, baking soda, cream of tartar, salt, lemon and orange peel until combined. Add this, a little at a time, to the creamy butter mixture, beating with each addition, until fully combined.

  3. Form dough into 1" balls, by rolling dough between the palms of your hands, to make approx. 72 dough balls. Place dough balls on wax paper, until all are done.

  4. Place sugar into small bowl (you may need a little more or a little less). Place 2-3 dough balls at a time into sugar; roll them around to coat surface with sugar.

  5. Place dough balls 2" apart on ungreased baking sheets. Bake at 350°F for 10-15 minutes, or until lightly browned. Because oven temps vary, check them at the 10 minute mark. Cookies should be crinkled (or crackled) on top when done. Transfer cookies to wire rack; let come to room temp. before serving. Store extras in an air-tight container in pantry OR in freezer. Enjoy!

Nutrition Facts
Cinnamon Crinkle Cookies
Amount Per Serving (1 cookie)
Calories 58 Calories from Fat 27
% Daily Value*
Fat 3g5%
Saturated Fat 1g6%
Trans Fat 1g
Polyunsaturated Fat 1g
Monounsaturated Fat 1g
Cholesterol 6mg2%
Sodium 59mg3%
Potassium 23mg1%
Carbohydrates 8g3%
Fiber 1g4%
Sugar 4g4%
Protein 1g2%
Vitamin A 44IU1%
Vitamin C 1mg1%
Calcium 4mg0%
Iron 1mg6%
* Percent Daily Values are based on a 2000 calorie diet.

Here’s one more to pin on your Pinterest boards!Make a batch of yummy Cinnamon Crinkle Cookies, flavored with cinnamon, nutmeg, lemon and orange! Easy to make, the recipe yields 6 dozen.

Smothered Turkey Patties

Smothered Turkey Patties are pan-seared, then cooked in an easy to make sauce with onions, bell peppers, tomatoes and celery.

Many, many years ago (at least 15), I scribbled down a recipe for turkey patties that I found on the back of a package of ground turkey. The meat patties are pan-cooked, then finish cooking covered in sauce and veggies, and it sounded good to me.

I first made this recipe at least 15 years ago, but have made it quite a number of times since then. When I decided to make this dish again, I photographed the process so I could add the recipe to my blog.

Smothered turkey patties are quite simple to make. Stir a sauce together, cut up some veggies, form/cook turkey patties, then cook it all in that delicious sauce.

That’s the basic info on this recipe, and the result is a yummy main dish I am confident you (and those you love) will enjoy! Here’s how to make it:

Scroll Down For A Printable Recipe Card At The Bottom Of The Page

Prepare The Sauce And Veggies

The turkey patties will eventually be “smothered” in a simple to make sauce. To make the sauce, all you need to do is combine chicken broth, soy sauce, cornstarch, sugar, vinegar and black pepper in a small bowl.

Give the sauce a good stir to fully incorporate the ingredients, then set aside.

Prepare the veggies by slicing and chopping up celery, onion, green bell pepper, and two medium tomatoes (cut into 8 wedges each). Set the vegetables aside until you are ready to add them to the sauce later.

Sauce is mixed together to pour over cooked turkey patties.Celery, green bell pepper, onions and tomatoes are prepped for the smothered turkey patties.

Make And Cook The Turkey Patties

Mix together one pound of ground turkey, bread crumbs, an egg and garlic salt in a large bowl. Once all the ingredients have been fully combined, form the meat into 4 round (burger-like) patties.

Place the turkey patties on wax or parchment paper after they are formed. Continue until all patties have been made.

Ground turkey, egg, bread crumbs and garlic salt are combined in large bowl.Four patties are made out of the ground turkey mixture.

Heat a Tablespoon of oil in a large non-stick skillet on medium-high heat, until very hot, but not smoking. Carefully add the turkey patties to the skillet.

They should sizzle when they hit the hot oil. Cook the patties (without moving them) for about 3 minutes.

After cooking for 3 minutes, the bottom of the patties should be nicely browned. Carefully turn the patties over and let the other side cook an additional 3 minutes.

The turkey patties are pan-seared in hot oil in a large skillet.After searing the bottom of the turkey patties, they are flipped to cook the other side.

Finishing The Smothered Turkey Patties

Give the reserved sauce a quick stir to re-mix the ingredients, then pour it over the turkey patties. Bring the sauce to a boil, stirring often. The sauce will thicken slightly, similar to a gravy.

Reduce the heat to LOW, then add the celery, onion, and green pepper to the skillet. Stir to combine the ingredients and cover the patties with sauce. Do not add the tomatoes at this time!

Cover the skillet, and allow the smothered turkey patties to simmer on low heat for 6 minutes. The veggies will cook and soften during this time.

Sauce is poured over the top of the patties.Celery, onion, and green bell pepper are added to the smothered turkey patties.

Finishing Touch Before Enjoying The Smothered Turkey Patties

Remove the lid from the skillet. Taste the sauce, and season with salt and black pepper to suit your own taste. Add the tomato wedges and stir gently to incorporate them into the sauce.

Let the smothered turkey patties simmer on low heat for 2-3 minutes OR until heated through.

Fresh tomato wedges are added to the smothered turkey patties and heated through.

To serve, place each of the smothered turkey patties onto individual plates. Be sure to spoon some of the sauce and veggies over the top of the patties for presentation.

We enjoy this dish served with steamed rice (or mashed potatoes) and vegetables on the side.

One of the smothered turkey patties topped with sauce and veggies, served with rice on the side.

I really hope you enjoy this simple, but yummy dish! It really taste great, and I think you will enjoy it.

Thank you for stopping by, and I sincerely hope you will come back again soon for more family-friendly recipes. Take care, and have a GREAT day!

Looking For More Recipes Featuring TURKEY?

You can find ALL of my recipes in the Recipe Index, located at the top of the page. I have some delicious recipes featuring turkey you might enjoy, including:

Want More Recipes? Get My FREE Newsletter!

I publish a newsletter 2 times per month (1st and 15th) with lots of recipes, tips, etc..
Would you like to join our growing list of subscribers?

There is a Newsletter subscription box on the top right (or bottom) of each blog post, depending on the device you use.
You can submit your e-mail address there, to be added to my mailing list.

Find Me On Social Media:

Facebook page: The Grateful Girl Cooks!
Pinterest:
The Grateful Girl Cooks!
Instagram:
jbatthegratefulgirlcooks

Author's signature

Original Recipe Source: found on the back of a package of ground turkey at least 15 years ago (don’t remember which brand).

↓↓ PRINTABLE RECIPE BELOW ↓↓

0 from 0 votes
Smothered Turkey Patties
Prep Time
15 mins
Cook Time
15 mins
Total Time
30 mins
 

Smothered Turkey Patties are pan-seared, then cooked in an easy to make sauce with onions, bell peppers, tomatoes and celery.

Category: Main Course
Cuisine: American
Keyword: smothered turkey patties
Servings: 4
Calories Per Serving: 256 kcal
Author: JB @ The Grateful Girl Cooks!
Ingredients
For Sauce:
  • 1 cup chicken broth low sodium recommended
  • Tablespoons soy sauce low sodium recommended
  • 2 teaspoons cornstarch
  • 1 teaspoon granulated sugar
  • 1 teaspoon white vinegar
  • 1 dash ground black pepper
For Remainder:
  • 1 pound ground turkey
  • cup dried bread crumbs
  • 1 large egg
  • ¾ teaspoon garlic salt
  • 1 Tablespoon vegetable oil
  • 2 stalks celery sliced
  • 1 medium yellow onion chopped
  • 1 medium green bell pepper seeded/chopped in bite sized pieces
  • 2 medium tomatoes each tomato sliced into 8 wedges
  • salt and pepper, to taste
Instructions
  1. Place chicken broth, soy sauce, cornstarch, sugar, vinegar and pepper in a small bowl. Stir to fully incorporate ingredients; set aside.

  2. Mix turkey, bread crumbs, egg and garlic salt in a large bowl. Once combined, form mixture into 4 round patties. Place patties on wax or parchment paper.

  3. Heat oil in large non-stick skillet on medium-high heat, until very hot, but not smoking. Carefully add turkey patties. They should sizzle when they hit the hot oil. Cook patties (without moving them) for 3 minutes. The bottom of the patties should be well browned. Carefully turn patties over; cook additional 3 minutes.

  4. Give the reserved sauce a quick stir; pour it over turkey patties. Bring sauce to a boil, stirring often; sauce will thicken slightly. Reduce heat to LOW. Add celery, onion, and green pepper. Stir to combine, covering patties with sauce. Cover the skillet; let patties simmer on low heat for 6 minutes.

  5. Remove lid from skillet. Taste sauce; season with salt and black pepper to taste. Add tomato wedges; stir gently to incorporate into the sauce. Simmer on low heat (uncovered) for 2-3 minutes, until heated through.

  6. Serve turkey patties hot, topped with the sauce and veggies. Enjoy!

Nutrition Facts
Smothered Turkey Patties
Amount Per Serving (1 patty + sauce)
Calories 256 Calories from Fat 72
% Daily Value*
Fat 8g12%
Saturated Fat 2g13%
Trans Fat 1g
Polyunsaturated Fat 3g
Monounsaturated Fat 2g
Cholesterol 109mg36%
Sodium 1014mg44%
Potassium 718mg21%
Carbohydrates 16g5%
Fiber 3g13%
Sugar 6g7%
Protein 31g62%
Vitamin A 810IU16%
Vitamin C 39mg47%
Calcium 55mg6%
Iron 2mg11%
* Percent Daily Values are based on a 2000 calorie diet.

Here’s one more to pin on your Pinterest boards!Smothered Turkey Patties are pan-seared, then cooked in an easy to make sauce with onions, bell peppers, tomatoes and celery.

Blueberry Oat Muffins

Glazed Blueberry Oat Muffins, with blueberries, oats, brown sugar and cinnamon are yummy for breakfast or a snack! This recipe makes 12 muffins.
Glazed Blueberry Oat Muffins, with blueberries, oats, brown sugar and cinnamon are yummy for breakfast or a snack! Recipe makes 12 muffins.

Today I want to share this recipe for blueberry oat muffins with you. I found this recipe a while back in a cookbook I checked out from our local library. The muffins turned out really well, and have good flavor, especially from the juicy blueberries inside.

These muffins have rolled oats inside, which help to fill you up, so that’s a win-win in my book. There is a tiny bit of prep time, as the old-fashioned oats are soaked in buttermilk for one hour before whipping up the muffins. During that time the oats soak up the buttermilk, leaving them very moist and perfect for a muffin batter base!

I added a simple, thin powdered sugar glaze once the muffins were done, which leaves them pretty, shiny and lovely for serving. Honestly, the muffins come together quickly once the oats have soaked, so just plan ahead a little bit and you’ll have no problems. Here’s how to make these tasty breakfast or snack treats.

Scroll Down For A Printable Recipe Card At The Bottom Of The Page

A Little Prep Work Ahead Of Time

Preheat your oven to 400°F. Place rolled oats (old-fashioned, not instant) and buttermilk in a large mixing bowl, then stir to combine. Set the bowl aside and let the oats “soak” in the buttermilk for one hour. The oats will absorb almost all of the buttermilk during this time.

In a SEPARATE bowl, stir together all purpose flour, baking powder, baking soda, cinnamon, salt and brown sugar. Set the bowl aside. You will also need to spray or grease 12 standard-sized muffin cups (or line with paper liners). Silicon muffin liners can be used, as well.

Old-fashioned rolled oats are soaked for 1 hour in buttermilk.Flour and other dry ingredients are stirred together in a mixing bowl.

Make The Muffin Batter

After the oats have soaked for one hour, add an egg and melted (but cooled) shortening into the bowl of oats. Stir, but only until these ingredients are just barely combined. Don’t overmix! Add the dry ingredients (flour mixture) to the bowl, and stir again until combined into a thick batter.

Egg and melted shortening are stirred into the rolled oat mixture which has been soaking.Dry ingredients are stirred into the rolled oat mixture, forming a thick batter.

The last step is to gently fold the blueberries into the batter for the blueberry oat muffins. Once combined, divide the muffin batter evenly between 12 greased, standard-sized muffin cups. Each muffin cup will be filled over half way. 

Blueberries are gently folded into the batter for the blueberry oat muffins.Muffin tin liners are filled with the thick blueberry batter before baking.

Bake, Cool, Then Glaze The Top Of The Muffins

Bake the blueberry oat muffins at 400°F for 18-20 minutes on a middle rack in the oven. When done, the muffins will be golden brown. and a toothpick inserted into the top should come out clean (no batter). Let them rest 3-4 minutes, then transfer them from the pan to a wire rack (placed on top of paper towels or wax paper) to finish cooling.

While the muffins cool, make a thin glaze by combining powdered sugar and a few drops of water in a small bowl. When the blueberry oat muffins have completely cooled, use a pastry brush to “paint” the muffin tops with glaze. The paper towels (or wax paper) under the wire rack will catch any random drips, (which makes for easier cleanup).

After baking, the blueberry oat muffins cool on a wire rack before glazing.A thin glaze of powdered sugar and water is mixed to glaze the top of the baked muffins.Powdered sugar glaze is painted onto the blueberry oat muffins with a pastry brush.

Time To Eat The Blueberry Oat Muffins

The blueberry oat muffins are ready to serve and enjoy once the glaze has firmed up! They are delicious, especially when sliced and topped with a tiny bit of soft butter! The blueberries are wonderfully moist and juicy, and the muffins have a nice flavor and texture.

Glazed blueberry oat muffins, on a wire rack and ready to eat!The blueberry oat muffins are filled with juicy blueberries for lots of flavor.

I really hope you enjoy making (and eating!) these blueberry oat muffins. They are a nice breakfast or snack, and the oats (with fiber) inside each muffin will help to fill you up! Thanks for stopping by, and I hope you will come back again soon! Take care, and have a GREAT day.

Looking For More MUFFIN Recipes?

You can find ALL of my recipes in the Recipe Index, located at the top of the page. I have lots of yummy muffin recipes for you to enjoy, including:

Interested In More Recipes?

Thank you for visiting this website. I appreciate you using some of your valuable time to do soIf you’re interested, I publish a newsletter 2 times per month (1st and 15th) with all the latest recipes, and other fun info. I would be honored to have you join our growing list of subscribers, so you never miss a great recipe!
There is a Newsletter subscription box on the top right side (or bottom) of each blog post, depending on the device you use, where you can easily submit your e-mail address (only) to be included in my mailing list.

You Can Also Find Me On Social Media:

Facebook page: The Grateful Girl Cooks!
Pinterest:
The Grateful Girl Cooks!
Instagram:
jbatthegratefulgirlcooks

Author's signature

Recipe adapted from the cookbook “Country Cooking Made Easy”, page 398, published by Firefly Books, 2013, contributed by Eva Whitmore

↓↓ PRINTABLE RECIPE BELOW ↓↓

0 from 0 votes
Blueberry Oat Muffins
Prep Time
10 mins
Cook Time
18 mins
Inactive Prep Time (oats soaking)
1 hr
Total Time
1 hr 28 mins
 

Glazed Blueberry Oat Muffins, with blueberries, oats, brown sugar and cinnamon are yummy for breakfast or a snack! Recipe makes 12 muffins.

Category: Bread/Breakfast, Snack
Cuisine: American
Keyword: blueberry oat muffins
Servings: 12 muffins
Calories Per Serving: 163 kcal
Author: JB @ The Grateful Girl Cooks!
Ingredients
  • 1 cup rolled old-fashioned oats not instant
  • 1 cup buttermilk
  • 1 cup all purpose flour
  • ¼ cup brown sugar (packed)
  • 1 teaspoon baking powder
  • ½ teaspoon baking soda
  • ½ teaspoon salt
  • ¼ teaspoon ground cinnamon
  • 1 egg lightly beaten
  • 4 Tablespoons vegetable shortening melted and cooled
  • 1 cup blueberries
Glaze:
  • ½ cup powdered sugar
  • few drops of water as needed to make thin glaze
Instructions
  1. Preheat oven to 400°F. Spray or grease 12 standard-sized muffin cups (or fill with paper liners). Silicon muffin liners can be used, as well.

  2. Place rolled oats and buttermilk in a large mixing bowl; stir to combine. Set bowl aside; let oats "soak" in buttermilk for 1 hour. Oats will absorb most of the buttermilk during this time.

  3. In a SEPARATE bowl, stir together flour, baking powder, baking soda, cinnamon, salt and brown sugar. Set bowl aside.

  4. After oats have soaked for 1 hour, add egg and melted (but cooled) shortening to oats. Stir, only until ingredients are just combined. Add flour mixture; stir until it becomes a thick batter. Gently fold blueberries into the batter.

  5. Fill 12 muffin cups about half full, dividing batter evenly. Bake at 400°F for 18-20 minutes on middle rack. When done, muffins will be golden brown. and toothpick inserted into the top should come out clean (no batter). Let muffins rest 3-4 minutes; transfer from pan to a wire rack (placed on top of paper towels or wax paper) to finish cooling.

  6. While muffins cool, make a thin glaze by combining powdered sugar and water in a small bowl. Too thick? Add water? Too thin? Add powdered sugar. When muffins are completely cooled, use a pastry brush to "paint" muffin tops with glaze. Let glaze firm up, then serve and enjoy!

Nutrition Facts
Blueberry Oat Muffins
Amount Per Serving (1 g)
Calories 163 Calories from Fat 54
% Daily Value*
Fat 6g9%
Saturated Fat 2g13%
Trans Fat 1g
Polyunsaturated Fat 2g
Monounsaturated Fat 2g
Cholesterol 16mg5%
Sodium 171mg7%
Potassium 117mg3%
Carbohydrates 25g8%
Fiber 1g4%
Sugar 12g13%
Protein 3g6%
Vitamin A 60IU1%
Vitamin C 1mg1%
Calcium 50mg5%
Iron 1mg6%
* Percent Daily Values are based on a 2000 calorie diet.

Here’s one more to pin on your Pinterest boards!Glazed Blueberry Oat Muffins, with blueberries, oats, brown sugar and cinnamon are yummy for breakfast or a snack! Recipe makes 12 muffins.

Irish Cream Layered Brownies

Irish Cream Layered Brownies are a decadent treat! Fudgy brownies with 2 layers of Irish cream-infused chocolate ganache and buttercream! YUM!Irish Cream Layered Brownies are a decadent treat! Fudgy brownies with 2 layers of Irish cream-infused chocolate ganache and buttercream! YUM!

Top o’ the morning to ya! Isn’t that we’re “supposed” to say as it nears St. Patrick’s Day? Today I want to share an absolutely scrumptious recipe for Irish Cream Layered Brownies. Thee brownies are made of three distinct layers: a mocha brownie, topped with an Irish Cream frosting, which is topped with Irish cream chocolate ganache.

Yes… you might detect an “Irish” theme here. One of our sons gave me a cookbook for Christmas to add to my collection. I found this recipe for these sweet treats in it, and we were thrilled with the results! Perfect for St. Patrick’s Day or any time you want a yummy dessert to serve, I’m confident you’re gonna enjoy them. These brownies are chewy and full of flavor, and I can guarantee you no leprechauns were harmed in the making of this recipe.

Irish cream liqueur is used (sparingly, but it’s in there) to flavor the frosting and the chocolate ganache, giving it a distinctive flavor.  The recipe, as written below will yield 16 delicious Irish Cream Layered Brownies. Here’s how to make them:

Scroll Down For A Printable Recipe Card At The Bottom Of The Page

Make The Brownie Batter

Before mixing the batter, preheat your oven to 350°F and grease the bottom and sides of an 8″ x 8″ square baking pan. Set the pan aside while you make the brownie batter. To make the batter, first sift flour, baking powder and salt into a mixing bowl, then set the bowl aside. 

Flour, baking powder and salt are sifted together for the brownie batter.

Melt butter in a small saucepan on low heat, then remove the pan from the heat source. Immediately stir in cocoa, oil, and instant coffee powder. Stir well, to combine, then let the mixture cool a bit (4-5 minutes).

After it’s cooled, stir in granulated sugar, then beaten eggs, stirring well as the eggs are added. Add the flour mixture and vanilla extract, adding the flour mixture a little at a time. Stir well, between additions, to incorporate the dry ingredients into the batter. 

A four photo collage showing the steps for making the brownie batter in a saucepan.

Layer #1- Bake The Brownies

Spread the brownie batter evenly into the prepared baking pan. Bake at 350°F. for 23-25 minutes, or until the center is set, being careful to NOT overcook the brownies. Test by inserting a toothpick into the top center of the brownies. It should come out free of batter. Transfer the pan to a wire rack to cool until the brownies are just barely warm.

Brownies are baked in a greased 8"x8" pan until set on top.

Layer #2- Make The Irish Cream Frosting

While the brownies cool, mix together the Irish cream frosting. Beat powdered sugar and softened butter together with an electric mixer on Low setting. Add Irish cream liqueur, and beat the frosting until it becomes smooth.

Spread the frosting over the entire surface of the slightly warm brownies (if they’re too hot, it will melt frosting). Place the pan in a refrigerator and let the chill for 1 hour. This allows the frosting to firm up before adding the top layer of ganache.

Irish cream flavored frosting is mixed together, then spread on cooled brownies.

Layer #3- Make The Chocolate Ganache Topping

About 15 minutes before the brownies finish chilling, make the chocolate ganache topping. Place chocolate chips, Irish cream liqueur, heavy whipping cream and instant coffee powder in a microwave-safe bowl.

Microwave on High temperature for 1 minute, then stir. Place bowl back into the microwave, and heat it on High another 30-45 seconds. Remove and stir the ganache until smooth. Let the ganache cool slightly (3-4 minutes), or until it is warm and spreadable.

Three photo collage showing chocolate ganache made by microwaving ingredients & stirring until smooth.

Spread the ganache evenly over the entire frosting layer. By the way… the photo below is the same ganache. Different lighting, perhaps? Weird! Cover the pan with plastic wrap, and refrigerate the Irish Cream Layered Brownies until the chocolate is firmly set. This usually takes about an hour or less.

Irish cream chocolate ganache is spread on top of the frosting layer on the brownies.

The Irish Cream Layered Brownies Are Ready To Eat!

After the Irish Cream Layered Brownies have been fully chilled, they’re ready to cut, serve, and enjoy! Cut the brownies into 16 pieces, and dig in. They taste wonderful! Store any leftovers covered in the fridge, or give some to friends and family. We gave extra Irish Cream Layered Brownies to both of our sons so they could enjoy them, too!

The brownies have a light mocha taste, and are chewy and yummy. Those two layers of frosting and ganache will taste awesome, thanks to the Irish cream liqueur infused flavor. Put all three layers together and you’ve got terrific dessert treats for St. Patrick’s Day OR any other day, for that matter! They are dense, rich tasting and oh so good!

Photo showing all three layers: brownie layer, frosting layer, and chocolate ganache layer on top.A stack of Irish cream layered brownies, ready to eat on a white plate.One of the Irish cream layered brownies on a white plate, ready to be eaten.

I really hope you will give these delicious fudgy brownies a try. Remember to plan ahead, to allow for chilling two of the three layers, okay? Thanks for stopping by, and I hope you’ll come back soon for more yummy recipes. Take care, and have a wonderful day.

Looking For More BAR COOKIE Recipes?

You can find ALL of my recipes in the Recipe Index, located at the top of the page. I have some really wonderful bar cookie recipes you’ll enjoy, including:

Interested In More Recipes?

Thank you for visiting this website. I appreciate you using some of your valuable time to do soIf you’re interested, I publish a newsletter 2 times per month (1st and 15th) with all the latest recipes, and other fun info. I would be honored to have you join our growing list of subscribers, so you never miss a great recipe!
There is a Newsletter subscription box on the top right side (or bottom) of each blog post, depending on the device you use, where you can easily submit your e-mail address (only) to be included in my mailing list.

You Can Also Find Me On Social Media:

Facebook page: The Grateful Girl Cooks!
Pinterest:
The Grateful Girl Cooks!
Instagram:
jbatthegratefulgirlcooks

Author's signature

Original Recipe Source: recipe submitted by Sue Gronholz in “The Taste Of Home Cookbook”, page 486,  published by RDA Enthusiast Brands, LLC, 2019

↓↓ PRINTABLE RECIPE BELOW ↓↓

0 from 0 votes
Irish Cream Layered Brownies
Prep Time
35 mins
Cook Time
25 mins
Additional refrigeration time
2 hrs
Total Time
3 hrs
 

Irish Cream Layered Brownies are a decadent treat! Fudgy brownies with 2 layers of Irish cream-infused chocolate ganache and buttercream!

Category: Bar Cookies, Dessert
Cuisine: American
Keyword: Irish cream layered brownies
Servings: 16 brownies
Calories Per Serving: 296 kcal
Author: JB @ The Grateful Girl Cooks!
Ingredients
For Batter (Layer #1):
  • cup all purpose flour
  • ½ teaspoon baking powder
  • ¼ teaspoon salt
  • cup butter
  • 6 Tablespoons cocoa powder
  • 2 Tablespoons canola oil or vegetable oil
  • ¾ teaspoon instant coffee powder
  • 1 cup granulated sugar
  • 2 large eggs slightly beaten, at room temp.
  • 1 teaspoon vanilla extract
Frosting (Layer #2)
  • 2 cups powdered sugar (confectioners sugar)
  • ¼ cup butter softened
  • 3 Tablespoons Irish Cream Liqueur
Chocolate Ganache (Layer #3)
  • 1 cup semisweet chocolate chips
  • 3 Tablespoons Irish Cream Liqueur
  • 2 Tablespoons heavy whipping cream
  • ½ teaspoon instant coffee powder
Instructions
  1. Preheat oven to 350°F. Grease bottom/sides of 8" x 8" square baking pan. Set pan aside.

  2. MAKE BROWNIE BATTER (Layer #1): Sift flour, baking powder and salt into mixing bowl; set aside.

  3. Melt butter in a saucepan on low heat. Remove pan from heat. Stir in cocoa, oil, and instant coffee powder. Stir well; let cool 4-5 minutes. Add sugar and eggs, stirring constantly as they're added. Gradually add flour mixture and vanilla, a little at a time. Stir well, to fully mix into batter. 

  4. Spread brownie batter evenly in greased pan. Bake at 350°F. about 23-25 minutes, or until center is set. Don't overcook brownies. Test by inserting toothpick into top of brownies. Toothpick should come out free of batter. Transfer pan to wire rack to cool.

  5. MAKE FROSTING (Layer #2): While brownies cool, mix frosting. Beat powdered sugar and soft butter with electric mixer on low setting. Add Irish cream liqueur; beat until frosting becomes smooth. Spread over brownies that are only barely warm. Put pan in refrigerator; chill brownies 1 hour.

  6. MAKE CHOCOLATE GANACHE (Layer #3): Approx. 15 minutes before brownies finish chilling, make ganache. Place chocolate chips, Irish cream liqueur, whipping cream and coffee powder in microwave-safe bowl. Heat in microwave on High for 1 minute, then stir. Put back in microwave; heat another 30-45 seconds. Remove; stir ganache until smooth. Let cool 3-4 minutes until warm and spreadable.

  7. Spread ganache over frosting layer. Cover pan; refrigerate until ganache is set (45-60 minutes). Cut into 16 pieces; serve. Store (covered) in fridge.

Nutrition Facts
Irish Cream Layered Brownies
Amount Per Serving (1 brownie)
Calories 296 Calories from Fat 135
% Daily Value*
Fat 15g23%
Saturated Fat 8g50%
Trans Fat 1g
Polyunsaturated Fat 1g
Monounsaturated Fat 5g
Cholesterol 44mg15%
Sodium 107mg5%
Potassium 126mg4%
Carbohydrates 39g13%
Fiber 2g8%
Sugar 32g36%
Protein 3g6%
Vitamin A 274IU5%
Vitamin C 1mg1%
Calcium 23mg2%
Iron 1mg6%
* Percent Daily Values are based on a 2000 calorie diet.

Here’s one more to pin on your Pinterest boards!Irish Cream Layered Brownies are a decadent treat! Fudgy brownies with 2 layers of Irish cream-infused chocolate ganache and buttercream! YUM!


Creamy Coconut Rice

Creamy Coconut Rice is prepared with coconut oil, coconut milk and shredded coconut, and is a wonderfully flavored side dish you’ll enjoy!Creamy Coconut Rice is prepared with coconut oil, coconut milk and shredded coconut, and is a wonderfully flavored side dish you'll enjoy!

I don’t know about you, but we eat lots of rice in our home. Usually it is steamed long grain white rice, but occasionally we mix it up and have creamy coconut rice with our meals. If you’ve never made coconut rice before, I think you will enjoy it! I found the original recipe in a cookbook I checked out from our local library a while ago. The coconut flavor is subtle and NOT too overbearing, and is a nice change from regular, bland tasting white rice.

Canned coconut milk (light or full fat) are used to create a creamy texture and light coconut flavor in jasmine rice. Canned coconut milk can usually be found in the Asian section of most supermarkets. I always have 3-4 cans available in our pantry for dishes like this! Let me show you how to make creamy coconut rice:

Scroll Down For A Printable Recipe Card At The Bottom Of The Page

Making The Coconut Rice

Melt coconut oil (solid form) in a medium or large saucepan on Medium heat. Add shredded coconut, and stir to combine. Cook the coconut for 1-2 minutes, stirring often until it becomes lightly “toasted”. Stir in jasmine rice, and cook about 2 minutes or until it begins to kind of “pop” in the pan from the heat.

Shredded coconut is cooked in coconut oil until lightly "toasted".Jasmine rice is added to coconut oil and toasted coconut mixture in saucepan.

Cooking The Rice With Coconut Milk

Quickly stir the canned coconut milk, and remove 2 Tablespoons into a separate bowl. Add water, salt and the remaining can of coconut milk to the rice. Bring this mixture to a simmer, and then reduce the heat to LOW.

Continue to cook the creamy coconut rice on low heat, stirring often so the rice doesn’t stick to the bottom of the pan. Let it cook for 17-20 minutes on LOW heat. As it cooks LOW and SLOW, the rice will absorb the coconut milk. Don’t turn up the heat, because it needs the time to fully cook and create tender rice.

Canned coconut milk is used to make this creamy coconut rice.Stirring the canned coconut milk into the jasmine rice for more cooking.As it cooks, the creamy coconut rice will absorb the coconut milk, and become thicker.

Final Steps

When the coconut milk has been absorbed, and the rice is tender to the bite, remove the pan from the heat. This usually takes about 18-20 minutes. If rice is not tender enough, simply add a tiny bit more liquid and continue cooking until tender.

Once the creamy coconut rice is tender, remove the pan from the heat and immediately cover with a lid. Let the rice sit (covered) for 5 minutes, then add the reserved 2 Tablespoons of coconut milk back into the rice. Stir the milk in, and fluff the rice with a fork before serving.

Creamy coconut rice is removed from heat when coconut milk is absorbed and rice is tender.Saucepan is covered and rice rests for 5 minutes after cooking.Reserved Tablespoons of coconut milk are added to finished rice, and combined, before serving.

Serve The Creamy Coconut Rice

Serve the creamy coconut rice while hot. If desired, garnish the dish with chopped fresh parsley (this is optional). The rice is now ready to be served with a variety of main dishes, and will be a wonderful addition to your meal!

Creamy coconut rice is served, garnished with chopped fresh parsley.Serving platter is piled high with creamy coconut rice and a spoon, for serving.

I hope you enjoy this tasty side dish, and trust those you make it for will enjoy it, as well. If you like this recipe, check out my recipe for Coconut Lime Rice… it’s yummy, as well! Thank you for stopping by today, and hope you will come back again soon for more family-friendly recipes. Take care, and have a wonderful day!

Looking More Recipes Featuring RICE?

You can find ALL of my recipes in the Recipe Index, which is located at the top of the page. I have some delicious recipes featuring rice, including:

Interested In More Recipes?

Thank you for visiting this website. I appreciate you using some of your valuable time to do soIf you’re interested, I publish a newsletter 2 times per month (1st and 15th) with all the latest recipes, and other fun info. I would be honored to have you join our growing list of subscribers, so you never miss a great recipe!
There is a Newsletter subscription box on the top right side (or bottom) of each blog post, depending on the device you use, where you can easily submit your e-mail address (only) to be included in my mailing list.

You Can Also Find Me On Social Media:

Facebook page: The Grateful Girl Cooks!
Pinterest:
The Grateful Girl Cooks!
Instagram:
jbatthegratefulgirlcooks

Author's signature

Original Recipe source: “The Milk Street Cookbook”, with Christopher Kendall (page 170). Published by Little Brown And Company, 2020.

↓↓ PRINTABLE RECIPE BELOW ↓↓

0 from 0 votes
Creamy Coconut Rice
Prep Time
10 mins
Cook Time
25 mins
Total Time
35 mins
 

Creamy Coconut Rice is prepared with coconut oil, coconut milk and shredded coconut, and is a wonderfully flavored side dish you'll enjoy!

Category: Side Dish
Cuisine: American
Keyword: creamy coconut rice
Servings: 6 (½ cup per serving)
Calories Per Serving: 315 kcal
Author: JB @ The Grateful Girl Cooks!
Ingredients
  • 2 Tablespoons coconut oil
  • ½ cup unsweetened shredded coconut
  • cups jasmine rice uncooked/rinsed
  • ¾ cup water
  • 14 ounces canned coconut milk (light or full fat) stirred or shaken, divided use
  • 1 teaspoon kosher salt
  • chopped parsley for garnish (OPTIONAL)
Instructions
  1. Melt coconut oil in medium or large saucepan on Medium heat. Add coconut; stir to combine. Cook and stir coconut 1-2 minutes, until it is lightly toasted. Add rice; stir/cook 2 minutes or until it begins to "pop" in the pan from heat.

  2. Stir canned coconut milk; remove 2 Tablespoons into separate bowl; set aside.

  3. Add water, salt and remaining can of coconut milk to rice. Bring to a simmer, and then reduce heat to LOW. Continue to cook rice on low heat, stirring often so rice doesn't stick to bottom of pan. Cook 17-20 minutes on LOW heat. As it cooks LOW and SLOW, the rice will absorb coconut milk. Don't turn up heat, because it needs time to fully cook rice until tender.

  4. When coconut milk is absorbed, and rice is tender (about 18-20 min.), remove pan from heat. TIP: If rice is not tender enough, simply add a bit more water; continue cooking until tender. Remove pan from heat; immediately cover with lid. Let rice sit (covered) for 5 minutes, then add reserved 2 T. coconut milk back into rice. Stir milk in, and fluff rice with a fork.

  5. Transfer rice to serving platter or bowl. Garnish with chopped parsley, if desired (optional). Serve rice hot, and enjoy!

Recipe Notes

NOTE: Lite coconut milk was used for the nutritional calculation.

Nutrition Facts
Creamy Coconut Rice
Amount Per Serving (1 (1/6 of total))
Calories 315 Calories from Fat 126
% Daily Value*
Fat 14g22%
Saturated Fat 13g81%
Polyunsaturated Fat 1g
Monounsaturated Fat 1g
Sodium 449mg20%
Potassium 95mg3%
Carbohydrates 41g14%
Fiber 2g8%
Sugar 1g1%
Protein 4g8%
Vitamin C 1mg1%
Calcium 16mg2%
Iron 1mg6%
* Percent Daily Values are based on a 2000 calorie diet.

Here’s one more to pin on your Pinterest boards!Creamy Coconut Rice is prepared with coconut oil, coconut milk and shredded coconut, and is a wonderfully flavored side dish you'll enjoy!

Krispy Rockfish Fillets

Pan-seared Krispy Rockfish Fillets have a seasoned flour/cornmeal/puffed rice coating, creating an easy, delicious main dish to enjoy.

If you’re looking for a delicious, seafood main dish that doesn’t take too much time or effort to make, check out this recipe for Krispy Rockfish Fillets! This recipe can also be used to cook other types of “whitefish”. My husband and I became fans of rockfish several years ago, after the first time we tried it. I made Pan-Seared Rockfish with Fresh Herbs , wrote about that experience and shared the recipe on this blog.

Since that time, I’ve share quite a few recipes featuring rockfish, and we’ve enjoyed each one. I found this particular recipe in a 20 year old food magazine in my collection, made a few changes to suit our taste, and want to share the recipe here today. It’s simple and delicious, and I truly hope you enjoy it:

Scroll Down For A Printable Recipe Card At The Bottom Of The Page

Prepare The Egg Wash And Crumb Coating For The Fish

Whisk one egg and ¾ cup of milk in a shallow medium-sized bowl. Once combined, set the bowl aside. Place puffed rice cereal (we use Rice Krispies) in a re-sealable plastic bag, and use the flat side of a meat mallet (or a rolling pin) to finely crush the cereal.

In a large re-sealable bag, combine the crushed rice cereal, flour, cornmeal and seasonings (lemon pepper, seasoning salt, onion and garlic powders). Now you should have a bowl of egg/milk mixture AND a large bag containing the seasoning/coating mix. Time to prepare the rockfish for cooking!

Egg and milk are whisked together as an egg wash for rockfish fillets.Puffed rice cereal in plastic bag is crushed using the flat side of a meat mallet.The egg wash and seasoning mixture is ready to coat the fish fillets before cooking.

Time To Coat the Rockfish With Seasoning

This recipe as written is for 4 rockfish fillets (my photos only show 3), since it was only my husband and I eating this meal (he ate two). Pat the rockfish fillets dry with paper towels, then coat them, one at a time in egg wash on all sides. Let any excess egg mixture drip off back into the bowl, then place the fillet into the bag with the seasoning mix.

Repeat this with remaining fillets. Once all are in the seasoning mixture, seal the bag and shake well to fully cover all sides of each piece of fish with the flour/seasoning mix.

Paper towels are used to dry the rockfish before covering with coating.Each piece of fish is dipped into the egg wash to completely cover.Fish fillets are placed into seasoning mix bag after being covered in egg wash.

Cooking The Krispy Rockfish Fillets

Pour oil into a large skillet at a depth of about 1/4″. Heat the oil on medium-high heat until very hot, but not smoking. Carefully add the rockfish fillets to the hot oil in a single layer. They should sizzle when they hit the hot oil!

Try not to move the fish once they go into the oil. Let the Krispy rockfish fillets cook for 6-7 minutes, then carefully turn the fish over to the other side. The bottom side should be crispy and golden brown in color. Cook second side an additional 5-6 minutes, until fish is cooked through and flakes easily with a fork. Remove the skillet from the heat, and carefully transfer fish to individual plates for serving.

The Krispy rockfish fillets are fried in hot oil for 6-7 minutes before flipping to other side.Golden brown Krispy rockfish fillets frying in hot oil.

Time To Eat!

If desired, garnish each of the Krispy rockfish fillets with chopped fresh parsley and a lemon slice. These garnishes are optional, but add color and flavor, especially when the lemon is squeezed over the fish. Serve immediately while hot! 

The fish has a nice coating, good flavor, and should flake easily, if cooked well. We also enjoy the fish served with malt vinegar (drizzle it on the fish), or tartar sauce on the side . YUM!

Krispy rockfish fillets are served, garnished with parsley and a lemon slice.One of the rockfish fillets, served with broccoli and rice on the side.

I hope you have a chance to try this yummy recipe, and trust you’ll enjoy it like we do! Thanks for stopping by, and I hope you come back soon for more family-friendly recipes. Take care, and have a wonderful day, friend.

Looking For More ROCKFISH Recipes?

You can find ALL of my recipes in the Recipe Index, which is located at the top of the page. I have a nice selection of rockfish recipes for you to enjoy, including:

Interested In More Recipes?

Thank you for visiting this website. I appreciate you using some of your valuable time to do soIf you’re interested, I publish a newsletter 2 times per month (1st and 15th) with all the latest recipes, and other fun info. I would be honored to have you join our growing list of subscribers, so you never miss a great recipe!
There is a Newsletter subscription box on the top right side (or bottom) of each blog post, depending on the device you use, where you can easily submit your e-mail address (only) to be included in my mailing list.

You Can Also Find Me On Social Media:

Facebook page: The Grateful Girl Cooks!
Pinterest:
The Grateful Girl Cooks!
Instagram:
jbatthegratefulgirlcooks

Author's signature

Original Recipe Source: “Taste of Home Magazine”, February-March 2002 edition (pages 27-28), published by The Reiman Corporation

↓↓ PRINTABLE RECIPE BELOW ↓↓

0 from 0 votes
Krispy Rockfish Fillets
Prep Time
10 mins
Cook Time
12 mins
Total Time
22 mins
 

Pan-seared Krispy Rockfish Fillets have a seasoned flour/cornmeal/puffed rice coating, creating an easy, delicious main dish to enjoy.

Category: Main Dish, Seafood
Cuisine: American
Keyword: krispy rockfish fillets
Servings: 4
Calories Per Serving: 285 kcal
Author: JB @ The Grateful Girl Cooks!
Ingredients
  • 1 medium egg
  • ¾ cup milk
  • 1 cup puffed rice cereal crushed
  • ¼ cup yellow cornmeal
  • ¼ cup all purpose flour
  • ½ teaspoon seasoning salt
  • ¼ teaspoon ground black pepper
  • teaspoon garlic powder
  • teaspoon onion powder
  • 4 rockfish fillets (approx. 6 ounces each) can sub. other whitefish fillets
  • oil for frying (approx. 1/4" deep in skillet)
  • lemon slice and parsley (OPTIONAL garnish)
Instructions
  1. Whisk egg and milk in medium-sized bowl. Set bowl aside.

  2. Place puffed rice cereal in large re-sealable plastic bag and seal; use flat side of meat mallet or rolling pin to finely crush cereal. Add flour, cornmeal and remaining seasonings (lemon pepper, seasoning salt, onion and garlic powders) to bag.

  3. Pat fish dry with paper towels. Coat one fillet at a time in egg wash (on all sides). Let excess egg mixture drip back into bowl; place fillet into bag of flour/seasoning. Repeat with other fillets. Once all fillets are in bag with seasoning, seal bag; shake well to fully cover each fillet on all sides with flour/seasoning.

  4. Pour oil into a large skillet at a depth of 1/4". Heat oil on medium-high heat until very hot, but not smoking. Carefully add rockfish fillets to hot oil in a single layer. They should sizzle when they hit oil! Try not to move fish once they're in oil. Cook 6-7 minutes; carefully turn fish over. Bottom side should be crispy/golden brown. Cook second side 5-6 minutes, until fish is cooked through, golden brown and flakes easily with a fork. Remove skillet from heat; transfer fish to individual plates for serving. Serve hot.

  5. OPTIONAL: Garnish each fillet with chopped fresh parsley and a lemon slice, if desired.

Recipe Notes

NOTE: The oil used for frying the fish is not added into the caloric calculation as the majority of it remains in the skillet and not on the fish.

Nutrition Facts
Krispy Rockfish Fillets
Amount Per Serving (1 fillet)
Calories 285 Calories from Fat 45
% Daily Value*
Fat 5g8%
Saturated Fat 2g13%
Trans Fat 1g
Polyunsaturated Fat 1g
Monounsaturated Fat 2g
Cholesterol 130mg43%
Sodium 491mg21%
Potassium 786mg22%
Carbohydrates 22g7%
Fiber 1g4%
Sugar 3g3%
Protein 36g72%
Vitamin A 596IU12%
Vitamin C 5mg6%
Calcium 86mg9%
Iron 4mg22%
* Percent Daily Values are based on a 2000 calorie diet.

Here’s one more to pin on your Pinterest boards!Pan-seared Krispy Rockfish Fillets have a seasoned flour/cornmeal/puffed rice coating, creating an easy, delicious main dish to enjoy.

Cheddar Jack Cheese Spread

Cheddar Jack Cheese Spread is easy to make, features three cheeses, and is a delicious snack or appetizer, served with your favorite crackers!

Looking for a delicious party appetizer or delicious cheese spread to keep in the refrigerator for a late night snack? How about this absolutely yummy and super EASY cheddar jack cheese spread?

This creamy spread (approximately 2 cups) can be made in under 10 minutes using a food processor or high-powered blender.

The spread is made with cheddar cheese, jack cheese, cream cheese, cooking sherry, Dijon, etc., and tastes great on crackers or pita chips.

Cheddar jack cheese spread also makes a great food gift for friends or family, when wrapped decoratively in a ramekin, gift container or crock! Let me show you how easy it is to make:

Scroll Down For A Printable Recipe Card At The Bottom Of The Page

How To Make Cheddar Jack Cheese Spread

Place cheddar and jack cheese cubes, cream cheese, butter, green onion, sherry, Worcestershire, Dijon, tabasco, and salt into a food processor. Process these ingredients until the mixture becomes fairly smooth.

NOTE: For the cream cheese, you can use 3 oz. of cubes cut from a block of cream cheese OR  3 oz. of spreadable cream cheese.

Ingredients for the cheddar jack cheese spread are placed into a food processor.A food processor is used to process the cheese spread until smooth.

Last Step Before It’s Done!

Once the cheddar jack cheese spread is fairly smooth, add finely chopped chives to the food processor. Pulse just until the chives are incorporated into the mixture.

Remove the cheese spread from the processor. Spoon it out of the processor and and place it into a ramekin, gift container or crock.

Cover the cheddar jack cheese spread and refrigerate it for about an hour. This is to give the flavors a chance to “mingle”, which makes the cheese spread taste even better.

Finely chopped chives are added to the processed cheese spread.Cheddar jack cheese spread is pulsed until chives are incorporated into mixture.

Serving The Cheddar Jack Cheese Spread

To serve, remove the cheddar jack cheese spread from the refrigerator. Let it slightly “soften” at room temperature (uncovered) for about 15 minutes, because this makes it easier for spreading and provides the best flavor.

Serve with an assortment of your favorite crackers or pita chips, and enjoy! You can store any leftovers (covered) in the refrigerator for up to 4-5 days. Remember to let it come to room temperature before serving!

See how easy it is to make this yummy snack? I really think you’re going to enjoy eating it and serving it to family and friends.

A ramekin, filled with cheddar jack cheese spread, is served with assorted crackers.A ramekin full of the cheese spread ready to enjoy on crackers.Spread on a cracker, the cheddar jack cheese spread is ready to eat.

I hope you will have the chance to make this tasty cheddar jack cheese spread for those you love. It’s really GOOD, and I hope you enjoy it like we do.

Thank you for stopping by this blog, and trust you will come back again for more family-friendly recipes. Have a GREAT day, and may God bless you as you journey through it.

Looking For More APPETIZER Recipes?

You can find ALL of my recipes in the Recipe Index, located at the top of the page. I have a wonderful variety of yummy appetizer recipes you may enjoy, including:

Want More Recipes? Get My FREE Newsletter!

I publish a newsletter 2 times per month (1st and 15th) with lots of recipes, tips, etc..
Would you like to join our growing list of subscribers?

There is a Newsletter subscription box on the top right (or bottom) of each blog post, depending on the device you use.
You can submit your e-mail address there, to be added to my mailing list.

Find Me On Social Media:

Facebook page: The Grateful Girl Cooks!
Pinterest:
The Grateful Girl Cooks!
Instagram:
jbatthegratefulgirlcooks

Author's signature

Original recipe source: unknown- found it handwritten on a 3″x5″ index card in old recipe box (no original source noted)

↓↓ PRINTABLE RECIPE BELOW ↓↓

0 from 0 votes
Cheddar Jack Cheese Spread
Prep Time
10 mins
Cook Time
0 mins
Total Time
10 mins
 

Cheddar Jack Cheese Spread is easy to make, features three cheeses, and is a delicious snack or appetizer, served with your favorite crackers!

Category: Appetizer/Snack
Cuisine: American
Keyword: cheddar jack cheese spread
Servings: 8 (serving = 1/4 cup)
Calories Per Serving: 136 kcal
Author: JB @ The Grateful Girl Cooks!
Ingredients
  • 3 ounces cheddar cheese cut in 1" cubes
  • 3 ounces jack cheese cut in 1" cubes
  • 3 ounces cream cheese cut in 1" cubes (can sub. "spreadable")
  • 6 green onions (white part ONLY) chopped
  • 2 Tablespoons butter softened
  • 2 Tablespoons cooking sherry
  • 1 teaspoon Dijon mustard
  • 1 teaspoon Worcestershire sauce
  • ¼ teaspoon salt
  • 2 dashes Tabasco sauce or other hot sauce
  • 2 Tablespoon chives finely chopped
Instructions
  1. Place all ingredients (EXCEPT for chopped chives) into a food processor. Process until mixture becomes fairly smooth.

  2. Add chives. Pulse only until chives are incorporated. Remove cheese spread from processor. Spoon it into ramekin, gift container or crock.

  3. Cover and refrigerate for an hour. This gives flavors a chance to "mingle", which helps cheese spread taste even better.

  4. Let cheese spread come to room temperature (approx. 15 minutes) before serving with favorite crackers. Store leftovers (covered) in refrigerator up to 4-5 days.

Nutrition Facts
Cheddar Jack Cheese Spread
Amount Per Serving (1 (1/4 cup))
Calories 136 Calories from Fat 99
% Daily Value*
Fat 11g17%
Saturated Fat 7g44%
Trans Fat 1g
Polyunsaturated Fat 1g
Monounsaturated Fat 3g
Cholesterol 34mg11%
Sodium 287mg12%
Potassium 83mg2%
Carbohydrates 2g1%
Fiber 1g4%
Sugar 1g1%
Protein 6g12%
Vitamin A 458IU9%
Vitamin C 2mg2%
Calcium 181mg18%
Iron 1mg6%
* Percent Daily Values are based on a 2000 calorie diet.

Here’s one more to pin on your Pinterest boards!Cheddar Jack Cheese Spread is easy to make, features three cheeses, and is a delicious snack or appetizer, served with your favorite crackers!

Simple Szechuan Noodles

Simple Szechuan Noodles is an easy to make, flavorful and delicious main dish which can be prepared and on the table in about 20 minutes!

Today I want to share a scrumptious recipe that is not only delicious, but really easy to prepare! I found the original recipe in a library book I had checked out and thought it sounded really good. After making only a couple simple changes, my husband and I tried the recipe and thought it was fabulous!

The recipe makes 6 decent-sized portions (or 4 large servings if you want a ton of noodles!), and can be easily cut in half OR doubled to feed less or more people.

Simple Szechuan noodles can be easily prepared in about 20 minutes, which makes it a wonderful “busy night” dinner. There is a small amount of finely diced ham in the meal, but if you are a vegetarian, omit it, and you will still enjoy this flavor-packed dish!

The recipe is fairly simple in that it basically involves 3 steps: 1) cook noodles, 2) cook sauce while noodles cook, and 3) combine the two, heat and serve!

It is really that easy to make simple Szechuan noodles, which are not too spicy at all (in case you’re wondering!). Here’s how to make this recipe:

Scroll Down For A Printable Recipe Card At The Bottom Of The Page

Cook The Noodles

Cook fettucine noodles until tender, in a large saucepan full of boiling water, according to the instructions on the box. This generally takes 12-14 minutes.

While the noodles are cooking, prepare the Szechuan sauce, so it will be ready once the noodles are done.

Noodles are cooked in boiling water until tender.

Prepare Szechuan Sauce While The Noodles Cook

NOTE: **When I photographed this recipe, I cut the recipe in half, so my photos reflect the reduced amount!** 

While the pasta cooks, you have time to make the simple Szechuan sauce. In a large skillet, heat 1 Tablespoon oil over MEDIUM heat until hot, but not smoking.

Add the chopped green onions, and stir-fry them in the hot oil for about 1 minute, stirring as they cook.

Turn the heat down to LOW. Add the minced ham, chopped peanuts, sesame seeds, soy sauce, vinegar, honey, ketchup, sesame oil, chili flakes and Tabasco sauce to the skillet.

Stir to combine these ingredients and let them simmer for 2-3 minutes, stirring often. After they’ve cooked, add the chopped celery, stir to combine, and let it continue to cook for 1-2 minutes.

Chopped green onions are stir-fried in oil in a large skillet.Sesame seeds are added to the Szechuan sauce in a large skillet.Chopped celery is added to the Szechuan sauce and cooked before noodles are added.

Time To Put This Dish Together!

When the noodles are finished cooking (tender to the bite), drain them. Put them back into the pan and toss them with the remaining 1 Tablespoon of oil.

Add the noodles to the skillet. Use tongs to mix and combine the sauce fully with the noodles. Heat the simple Szechuan noodles through on low heat for 1-2 minutes, tossing often until fully heated through.

Hot drained pasta is added to the Szechuan sauce, creating simple Szechuan noodles.

Serve The Simple Szechuan Noodles

As soon as the noodles are heated through, you are ready to serve this delicious dish! Place portions onto serving plates or into bowls, making sure to spoon up the sauce onto the noodles.

Garnish each serving with additional chopped peanuts, sesame seeds and chopped green onions, if desired. Serve immediately while noodles are hot and yummy!

A white bowl, full of simple Szechuan noodles, which are ready to eat.Simple Szechuan Noodles are served, topped with peanuts, green onions and sesame seeds.

I hope you have the chance to make these yummy, simple Szechuan noodles! They are filled with flavor, but not too spicy at all. I’m confident you will love not only the taste, but just how easy this recipe is to make!

Thank you for stopping by, and I invite you to come back again soon for more family-friendly recipes. Take care, and have a great day!

Looking For More Delicious ASIAN Recipes?

You can find ALL of my recipes in the Recipe Index, located at the top of the page. I have lots of delicious Asian recipes you’ll enjoy, including:

Want More Recipes? Get My FREE Newsletter!

I publish a newsletter 2 times per month (1st and 15th) with lots of recipes, tips, etc..
Would you like to join our growing list of subscribers?

There is a Newsletter subscription box on the top right (or bottom) of each blog post, depending on the device you use.
You can submit your e-mail address there, to be added to my mailing list.

Find Me On Social Media:

Facebook page: The Grateful Girl Cooks!
Pinterest:
The Grateful Girl Cooks!
Instagram:
jbatthegratefulgirlcooks

Author's signature

Recipe adapted from: The cookbook “Country Living Made Easy”, page 344, published by Firefly Books, 2013

↓↓ PRINTABLE RECIPE BELOW ↓↓

0 from 0 votes
Simple Szechuan Noodles
Prep Time
10 mins
Cook Time
12 mins
Total Time
22 mins
 

Simple Szechuan Noodles is an easy to make, flavorful and delicious main dish which can be prepared and on the table in about 20 minutes!

Category: Main Dish
Cuisine: American
Keyword: simple Szechuan noodles
Servings: 6
Calories Per Serving: 447 kcal
Author: JB @ The Grateful Girl Cooks!
Ingredients
  • 1 pound fettucine pasta or Chinese noodles
  • 2 Tablespoons vegetable oil divided use
  • 4 green onions (white and green parts) chopped
  • ½ cup minced cooked ham
  • ¼ cup chopped peanuts dry roasted or salted
  • cup sesame seeds
  • cup low-sodium soy sauce
  • 2 Tablespoons ketchup
  • 1 Tablespoon apple cider vinegar
  • 1 teaspoon honey
  • teaspoon sesame oil
  • teaspoon red chili pepper flakes
  • 2 shakes Tabasco sauce or other hot sauce
  • cup chopped celery
OPTIONAL GARNISH: sprinkle with additional chopped peanuts, sesame seeds and chopped green onions
    Instructions
    1. Cook pasta in boiling water until tender in large saucepan, according to instructions on box (usually 12-14 minutes).

    2. While pasta cooks, make Szechuan sauce. In a large skillet, heat 1 Tablespoon oil over medium heat until hot, but not smoking. Add green onions; stir-fry them in oil for 1 minute, stirring often. Turn heat to Low. Add ham, peanuts, sesame seeds, soy sauce, vinegar, honey, ketchup, sesame oil, chili flakes and Tabasco sauce. Stir to combine; simmer for 2-3 minutes, stirring often. Add celery; stir to combine; cook for another minute or so.

    3. When noodles are done (tender to the bite), drain them. Put drained noodles back into pan; toss with remaining 1 Tablespoon oil. Add noodles to Szechuan sauce; use tongs to fully mix/combine sauce with noodles. Heat on low heat for 1-2 minutes, tossing often until heated through.

    4. Transfer noodles and sauce to serving dish(es). Optional-Garnish each portion with peanuts, sesame seeds and green onions, if desired. Serve immediately.

    Nutrition Facts
    Simple Szechuan Noodles
    Amount Per Serving (1 (1/6 of total))
    Calories 447 Calories from Fat 144
    % Daily Value*
    Fat 16g25%
    Saturated Fat 3g19%
    Trans Fat 1g
    Polyunsaturated Fat 6g
    Monounsaturated Fat 5g
    Cholesterol 69mg23%
    Sodium 721mg31%
    Potassium 361mg10%
    Carbohydrates 62g21%
    Fiber 5g21%
    Sugar 5g6%
    Protein 16g32%
    Vitamin A 216IU4%
    Vitamin C 2mg2%
    Calcium 125mg13%
    Iron 3mg17%
    * Percent Daily Values are based on a 2000 calorie diet.

    Here’s one more to pin on your Pinterest boards!Simple Szechuan Noodles is an easy to make, flavorful and delicious main dish which can be prepared and on the table in about 20 minutes!

    Cannellini Bean Salad

    Cannellini Bean Salad with tomatoes, onion, olive oil, balsamic, vinegar and garlic is easy to make and delicious as a salad topper OR a dip!
    Cannellini Bean Salad with tomatoes, onion, olive oil, balsamic, vinegar and garlic is easy to make and delicious as a salad topper OR a dip!

    Today I want to share with you a recipe for cannellini bean salad. It’s SUPER EASY to make in just a couple minutes, and can be enjoyed as is, OR on top of mixed greens (delicious) OR served as a dip with pita chips, etc. However you choose to serve it, the flavors are wonderful, and I’m confident you’ll enjoy this simple salad!

    I found the original recipe in one of the cookbooks I own called “100 Days Of Real Food”, by Lisa Leake. It’s a great cookbook for those looking to cook with wholesome family-friendly foods. She serves this salad as a dip, which we love, but I’ve found I enjoy it the most served as a topper over a mixed green salad.

    The beans and the delicious dressing they are covered with make it a double whammy salad. Lots of protein and fiber is provided from the beans and tomatoes, onions, garlic, olive oil, balsamic vinegar with seasoning create a salad dressing! It’s a win-win, no matter how you serve it! Here’s how to make this delicious vegetarian and gluten-free salad:

    Scroll Down For A Printable Recipe Card At The Bottom Of The Page

    How To Make This EASY Cannellini Bean Salad

    Drain, and then rinse one can (approx. 15 oz.) of cannellini beans. After the beans are drained and rinsed well, place them into a small or medium-sized serving bowl.

    Cannellini beans are drained from the can and rinsed well before making the salad.

    Add the rest of the ingredients to the bowl of drained cannellini beans. The remaining ingredients are tomato, red onion, garlic, olive oil, balsamic vinegar, salt and black pepper. Stir, to fully combine these ingredients. 

    At this point the cannellini bean salad is finished and can be served immediately. Stir the ingredients a couple of times to keep the beans coated with the simple dressing. OPTIONAL: Cover the bowl and let the flavors “mingle” in the refrigerator for 20-30 minutes before serving, for even more flavor. Your choice!

    All the ingredients for the cannellini bean salad are combined in a bowl.

    Enjoy This Salad On Mixed Greens! 

    My favorite way to enjoy the cannellini bean salad is to place a portion on a bed of chilled mixed greens. Stir the beans before serving, and don’t forget to spoon some olive oil/balsamic dressing (from the bottom of the bowl) on top. 

    The beans provide fiber and protein, and the red onion, garlic and tomato add flavor, texture and color. Another added bonus is that the oil/balsamic mixture creates a simple, but delicious salad dressing, so there’s no need to add any. It’s delicious, just as it is!

    Cannellini bean salad is served as a topper for a mixed green salad.

    Cannellini Bean Salad Can Be Served As A DIP, Too!

    My husband enjoys the cannellini bean salad served as a dip, too! Just stir it well, and serve it with pita chips, crackers or pieces of firm, crusty bread! It’s a simple, yet tasty dip I’m sure you will enjoy! This easy salad (or dip) has a lot of flavor!

    The cannellini bean salad can be served as a dip with pita chips, crackers or crusty bread.A bowl of cannellini bean salad ready to be served as a dip or eaten as is.

    Thank you for stopping by today. I hope you’ll try this easy to prepare dish, and trust you will enjoy it as much as we do. It should keep well (covered) in the refrigerator for up to 4-5 days. Please come back again soon for more family-friendly recipes. Take care, and have a GREAT day!

    Looking For More SALAD Recipes?

    You can find ALL of my recipes in the Recipe Index, which is located at the top of the page. I have many delicious salad recipes for you to enjoy, including:

    Interested In More Recipes?

    Thank you for visiting this website. I appreciate you using some of your valuable time to do soIf you’re interested, I publish a newsletter 2 times per month (1st and 15th) with all the latest recipes, and other fun info. I would be honored to have you join our growing list of subscribers, so you never miss a great recipe!
    There is a Newsletter subscription box on the top right side (or bottom) of each blog post, depending on the device you use, where you can easily submit your e-mail address (only) to be included in my mailing list.

    You Can Also Find Me On Social Media:

    Facebook page: The Grateful Girl Cooks!
    Pinterest:
    The Grateful Girl Cooks!
    Instagram:
    jbatthegratefulgirlcooks

    Author's signature

    Original recipe source: The cookbook “100 Days Of Real Food”, by Lisa Leake, page 195, published by Harper Collins Publishers in 2014

    ↓↓ PRINTABLE RECIPE BELOW ↓↓

    0 from 0 votes
    Cannellini Bean Salad
    Prep Time
    10 mins
    Cook Time
    0 mins
    Total Time
    10 mins
     

    Cannellini Bean Salad with tomatoes, onion, olive oil, balsamic, vinegar and garlic is easy to make and delicious as a salad topper OR a dip!

    Category: Appetizer, Salad
    Cuisine: American
    Keyword: cannellini bean salad
    Servings: 4
    Calories Per Serving: 190 kcal
    Author: JB @ The Grateful Girl Cooks!
    Ingredients
    • 15 ounces cannellini beans drained/rinsed
    • 1 medium tomato chopped
    • cup red onion diced
    • 2 garlic cloves minced
    • 3 Tablespoons extra virgin olive oil
    • 2 Tablespoons balsamic vinegar
    • ¼ teaspoon salt use more if needed, to taste
    • ¼ teaspoon ground black pepper
    Instructions
    1. Drain and rinse cannellini beans. Place the beans in a small or medium-sized serving bowl.

    2. Add remaining ingredients, and stir to fully combine. Serve and enjoy! OPTIONAL: If desired, cover and refrigerate for 20-30 minutes for flavors to mingle.

    3. Can be served as a dip with pita bread, crackers or crusty slices of bread OR as a salad topper, OR eaten as is. If using as a salad topper, be sure to spoon some olive oil/balsamic dressing (from bottom of the bowl) over the salad.

    4. Store leftovers (covered) in refrigerator for up to 4-5 days.

    Recipe Notes

    NOTE: Canned cannellini beans vary in weight from 15 ounces up to 15.5 ounces. Use a whole can; the various weights will all work just fine!

    Nutrition Facts
    Cannellini Bean Salad
    Amount Per Serving (1 (1/4 of total))
    Calories 190 Calories from Fat 99
    % Daily Value*
    Fat 11g17%
    Saturated Fat 1g6%
    Polyunsaturated Fat 1g
    Monounsaturated Fat 8g
    Sodium 378mg16%
    Potassium 109mg3%
    Carbohydrates 21g7%
    Fiber 6g25%
    Sugar 3g3%
    Protein 6g12%
    Vitamin A 257IU5%
    Vitamin C 6mg7%
    Calcium 76mg8%
    Iron 3mg17%
    * Percent Daily Values are based on a 2000 calorie diet.

    Here’s one more to pin on your Pinterest boards!Cannellini Bean Salad with tomatoes, onion, olive oil, balsamic, vinegar and garlic is easy to make and delicious as a salad topper OR a dip!

    Tasty Turkey Chili

    Make a pot of tasty turkey chili with fresh veggies, spices, pinto beans and black beans. Chili is easy to make, filling, and tastes great!
    Make a pot of tasty turkey chili with fresh veggies, spices, pinto beans and black beans. Chili is easy to make, filling, and tastes great!

    I don’t know about where you live, but it has been cold here the past few weeks in Oregon. It’s been so cold each morning while walking our dog that I leave our house bundled up, from head to toe. My husband and I have been craving hot, comfort food meals lately due to the cold of Winter. We’ve enjoyed eating LOTS of tasty turkey chili in the past month or two!

    This is a simple soup to make, and the end result is a delicious, wonderfully spiced turkey chili I think you will enjoy. Ground turkey and black and pinto beans provide protein and fiber, so it is a filling soup. Lots of fresh veggies such as tomatoes, celery, onions, and bell peppers contribute to the texture and taste of this chili, as well.

    I came up with this this soup recipe after looking at lots of different recipes (including my Mom’s- a family favorite), added some new ingredients or spices here and there, and ended up with this tasty turkey chili! It’s delicious! Here’s how to make it:

    Scroll Down For A Printable Recipe Card At The Bottom Of The Page

    Prepare The Spice Mix

    Place the chili powder, cumin, paprika, oregano, and cayenne pepper in a small bowl. Stir to fully combine these spices, then set aside. This will be the spice mix you will use to season the chili.

    Chili powder, cumin, paprika, cayenne pepper and oregano are used to make spice mix for chili.

    Cook The Turkey

    Spray a large saucepan generously with non-stick spray.  Add one pound of ground turkey. Stir and cook on high heat until the meat has turned light brown in color and is cooked through. This usually takes about 5 minutes. Drain and discard any grease, then transfer the turkey to a bowl or plate, and cover.

    Ground turkey is cooked until lightly browned and cooked through, in large saucepan.

    Okay- Let’s Make Some Tasty Turkey Chili

    Add a teaspoon of butter to the saucepan, and allow to melt over low heat. Stir in chopped onion, celery and red bell pepper. Cook  on LOW heat for 4 -5 minutes, stirring the veggies often until the onions are translucent. Add minced garlic to the pan and cook for an additional 30 seconds, stirring so the garlic doesn’t burn. Note: You can substitute green bell peppers for the red OR use a combination of red and green.

    Chopped onion, red bell peppers and celery are cooked until softened in saucepan.Minced garlic is added to the cooked vegetables during the last minute of cooking.

    Pour the spice mixture into the pan of cooked veggies. Stir to cover the veggies with the spices. Add fresh chopped tomatoes (or canned, if using), chicken broth, and 3 cups of water to the pan. Stir well, to combine ingredients. Bring this mixture to a boil, then let it simmer (uncovered) for about 20 minutes.

    NOTE: If you don’t have access to enough fresh tomatoes (2½ cups chopped), you can substitute a 28 oz. can of diced tomatoes (+ juice), and it will taste great in this chili, too! I do this often, as well.

    Homemade seasoning mix is added to the sautéed veggies in the saucepan.Chopped fresh tomatoes are added to the saucepan with cooked veggies and spices.

    Final Steps Before Serving

    Now it’s time to finish cooking this tasty turkey chili! Add the cooked turkey back into the pan, followed by the drained black beans and pinto beans. Stir well, to combine all ingredients. Take a taste, and add additional salt at this point, if desired.

    Cook the tasty turkey chili for about 10 more minutes on MEDIUM heat to ensure it is fully heated through.

    Cooked ground turkey is added to the chili.

    Pinto and black beans are added, to finish the tasty turkey chili.

    Time For A Bowl Of Tasty Turkey Chili!

    Once the tasty turkey chili is hot, it’s time to serve it up and ENJOY! It tastes delicious as is, but feel free to top it with grated cheese or a dollop of sour cream if you want! Yum!

    A soup mug holds a serving of the hot and tasty turkey chili, ready to eat.

    I really hope you enjoy this tasty turkey chili. We love the leftovers for quick lunches, too! For us, it is a nice change from beef chili, and is a bit more healthy, thanks to the use of turkey. Thanks for stopping by, and I hope you’ll come back again soon for more delicious, family-friendly recipes. Have a GREAT day!

    Looking For More SOUP Recipes?

    You can find ALL of my recipes in the Recipe Index, located at the top of the page. I have a broad variety of soup recipes for you to enjoy, including:

    Interested In More Recipes?

    Thank you for visiting this website. I appreciate you using some of your valuable time to do soIf you’re interested, I publish a newsletter 2 times per month (1st and 15th) with all the latest recipes, and other fun info. I would be honored to have you join our growing list of subscribers, so you never miss a great recipe!
    There is a Newsletter subscription box on the top right side (or bottom) of each blog post, depending on the device you use, where you can easily submit your e-mail address (only) to be included in my mailing list.

    You Can Also Find Me On Social Media:

    Facebook page: The Grateful Girl Cooks!
    Pinterest:
    The Grateful Girl Cooks!
    Instagram:
    jbatthegratefulgirlcooks

    Author's signature

    ↓↓ PRINTABLE RECIPE BELOW ↓↓

    0 from 0 votes
    Tasty Turkey Chili
    Prep Time
    10 mins
    Cook Time
    35 mins
    Total Time
    45 mins
     

    Make a pot of tasty turkey chili with fresh veggies, spices, pinto beans and black beans. Chili is easy to make, filling, and tastes great!

    Category: Main Dish, Soup
    Cuisine: Mexican
    Keyword: tasty turkey chili
    Servings: 6
    Calories Per Serving: 264 kcal
    Author: JB @ The Grateful Girl Cooks!
    Ingredients
    For Spice Mix:
    • 2 teaspoons chili powder
    • teaspoons ground cumin
    • 1 teaspoon paprika
    • ½ teaspoon dried oregano
    • teaspoon cayenne pepper
    For Rest Of Chili:
    • 1 pound ground turkey
    • salt/pepper for seasoning turkey, to taste
    • 1 teaspoon butter
    • 1 cup chopped yellow onion
    • 1 cup chopped red bell pepper or combo of red/green
    • ½ cup chopped celery
    • 1 Tablespoon minced garlic
    • cups fresh chopped tomatoes or 28 oz. can diced +juice
    • ½ cup low sodium chicken broth
    • 3 cups water
    • 15..25 ounce can black beans , rinsed/drained
    • 15.5 ounce can pinto beans rinsed/drained
    • additional salt if needed, to taste
    Instructions
    1. Place chili powder, cumin, paprika, oregano, and cayenne pepper in a small bowl. Stir to combine, then set aside.

    2. Spray large saucepan with non-stick spray.  Add ground turkey; stir/cook on high heat until it turns light brown in color and is cooked through (about 5 min.). Drain and discard any grease, then transfer turkey to a bowl or plate, and cover.

    3. Add butter to saucepan; melt over low heat. Stir in chopped onion, celery and red pepper. Cook  on LOW heat 4 -5 minutes, stirring often until onions are translucent. Add garlic; cook for 30 seconds, stirring so garlic doesn't burn.

    4. Add spices; stir to combine. Now add fresh tomatoes (or canned, if using), chicken broth, and 3 cups of water to pan. Stir well, to combine ingredients. Bring to a boil, then let simmer (uncovered) for about 20 minutes.

    5. Add cooked turkey back into pan, followed by black beans and pinto beans. Stir well, to combine. Taste; add additional salt, if desired. Cook chili about 10 more minutes on MEDIUM heat to ensure it's fully heated through. Serve, and enjoy!

    Recipe Notes

    NOTE: Approximately 1½ cups per serving. Salt was not calculated in the sodium percentage as amounts people use may vary greatly.

    Nutrition Facts
    Tasty Turkey Chili
    Amount Per Serving (1 (1/6 of total))
    Calories 264 Calories from Fat 27
    % Daily Value*
    Fat 3g5%
    Saturated Fat 1g6%
    Trans Fat 1g
    Polyunsaturated Fat 1g
    Monounsaturated Fat 1g
    Cholesterol 43mg14%
    Sodium 551mg24%
    Potassium 1048mg30%
    Carbohydrates 33g11%
    Fiber 11g46%
    Sugar 6g7%
    Protein 28g56%
    Vitamin A 2067IU41%
    Vitamin C 51mg62%
    Calcium 101mg10%
    Iron 4mg22%
    * Percent Daily Values are based on a 2000 calorie diet.

    Here’s one more to pin on your Pinterest boards!Make a pot of tasty turkey chili with fresh veggies, spices, pinto beans and black beans. Chili is easy to make, filling, and tastes great!