Cauliflower Au Gratin

Cauliflower Au Gratin is a yummy side dish you’ll love! Featuring fresh cauliflower florets baked in a creamy cheese sauce, it’s delicious!
Cauliflower Au Gratin is a yummy side dish you'll love! Featuring fresh cauliflower florets baked in a creamy cheese sauce, it's delicious!

One of the “hobbies” I truly enjoy is looking through old cookbooks or cooking magazines for inspiration. I LOVE the thrill of the hunt for great recipes!

The recipe I’m sharing today for cauliflower au gratin came from a cookbook I’ve had for years and years. This cookbook highlights traditional foods popular in different regions of the United States.

Cauliflower Au Gratin (which means “cauliflower and cheese”) is one of the recipes from this cookbook. It’s a wonderful tasting recipe for tender cauliflower baked in a super creamy (and simple to prepare) cheddar cheese sauce.

The entire recipe itself is really quite easy to make. I slightly changed the original recipe from the cookbook just a smidge, and truly think you’re gonna love it! Here’s how to make hot, creamy, cheesy and delicious cauliflower au gratin:

Scroll Down For A Printable Recipe Card At The Bottom Of The Page

Prepare The Cauliflower Florets

The first thing you will need to do is prepare the cauliflower florets. You can remove the florets from the cauliflower any way you prefer. This is how I like to get them.

Remove a large head of cauliflower from the bag, and remove the leaves and stems from the bottom. Once the leaves and stalk stems have been pulled or cut off, take a knife and carefully cut the core out from the middle underside of the cauliflower.

Once the core has been removed, remove the florets by cutting them out with a knife. Try to cut the florets into bite-sized pieces. You may have to slice them in half or thirds to do so, because some of those florets can be ginormous!

A head of cauliflower is removed from package and leaves and stems are removed.The core of the cauliflower is cut out, so the florets can be obtained.Florets from a cauliflower head are cut, and ready to cook for cauliflower au gratin.

Cook The Cauliflower Florets Until Tender But Firm

Bring a large saucepan of salted water to a boil on medium-high heat. Add the cauliflower florets to the pan, making sure they are covered with water.

Cook the cauliflower for 7-8 minutes, or until  just barely tender, but firm. Drain well, and set the cauliflower aside.

Cauliflower florets are cooked in boiling, salted water until just barely tender.

Make The Cheese Sauce

I like to make the cheese sauce while the cauliflower is cooking, to save time. Making the thick and creamy cheese sauce is very easy. Begin by melting the butter in a medium saucepan.

Whisk in the flour until fully combined. Cook the flour mixture on low heat, continuing to whisk, until it begins bubbling. This mixture will act as the thickening for the creamy cheese sauce, so make sure all lumps of flour are gone.

Flour is whisked into melted butter, to begin making a cheese sauce.Butter and flour are combined and cooked in pan until bubbly.

Slowly pour the milk into the thickened flour mixture, stirring or whisking the milk in as you pour. Once all the milk has been added and whisked in, bring the mixture to a boil, stirring constantly as it cooks.

Continue cooking and stirring until this sauce has thickened (just a couple minutes at most). Remove the pan from the heat once the sauce has thickened. Immediately stir in grated sharp cheddar cheese.

Continue to stir (off the heat) until all the cheese has melted and been blended in. Once fully combined, grab a spoon and give the sauce a quick taste. Season with salt and pepper, a little at a time, until it suits your personal taste preference.

Milk is slowly added to the bubbly flour mixture, and whisked until fully combined.After sauce has thickened, sharp cheddar cheese is added, and stirred in, until fully incorporated.

Almost Ready To Bake!

Grease or spray a 2 quart baking dish. Place the cauliflower florets evenly in the dish. Pour the thickened cheese sauce over the cauliflower, covering all the florets with sauce. Lightly sprinkle the sauce with dried bread crumbs. Now the cauliflower au gratin is ready to bake!

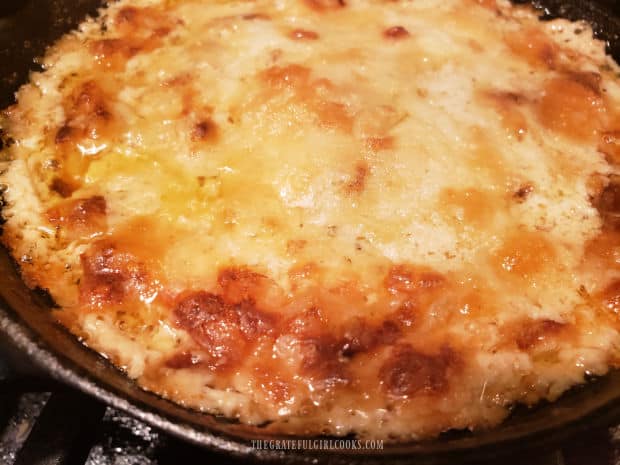
Bake cauliflower au gratin at 350°F. on the middle oven rack for about 23-25 minutes, until the top is very lightly browned. The sauce should be bubbling around the edges of the dish once done. Remove the cauliflower au gratin from the oven and serve immediately.

Thick creamy cheese sauce is poured over cauliflower florets in baking dish.The cauliflower au gratin is sprinkled with bread crumbs before baking.

Time To Enjoy Delicious Cauliflower Au Gratin

Be sure to serve this dish immediately while everything is nice and hot. I hope you find that the tender, baked cauliflower florets and creamy cheese sauce make a great tasting combination!

This recipe will make about 6 servings. Any leftovers (cooled to room temp.) can be stored for 3-4 days in the refrigerator, if covered well. You can easily reheat them in a microwave, if desired

Once done baking and bubbling hot, the cauliflower au gratin is ready to serve.A fork with a bite of cauliflower au gratin, ready to eat!

Thanks for stopping by my blog today. I appreciate your time, and sincerely hope you will have the opportunity to make this delicious cauliflower side dish for those you love. Have a great day, and please come back soon for another visit.

Looking For More VEGETABLE Recipes?

You can find all of my veggie recipes in the Recipe Index, which is located at the top of the page. I have many recipes using a variety of vegetables I think you’ll enjoy, including:

Want More Recipes? Get My FREE Newsletter!

I publish a newsletter 2 times per month (1st and 15th) with lots of recipes, tips, etc..
Would you like to join our growing list of subscribers?

There is a Newsletter subscription box on the top right (or bottom) of each blog post, depending on the device you use.
You can submit your e-mail address there, to be added to my mailing list.

Find Me On Social Media:

Facebook page: The Grateful Girl Cooks!
Pinterest:
The Grateful Girl Cooks!
Instagram:
jbatthegratefulgirlcooks

Author's signature

Recipe adapted from: The cookbook “Best of America – Traditional Regional Recipes”, page 238, published 1994 by Anness Publishing, Ltd.

↓↓ PRINTABLE RECIPE BELOW ↓↓

0 from 0 votes
Cauliflower Au Gratin
Prep Time
15 mins
Cook Time
25 mins
Total Time
40 mins
 

Cauliflower Au Gratin is a yummy side dish you'll love! Featuring fresh cauliflower florets baked in a creamy cheese sauce, it's delicious!

Category: Side Dish, Vegetable Dish
Cuisine: American
Keyword: cauliflower au gratin
Servings: 6
Calories Per Serving: 208 kcal
Author: JB @ The Grateful Girl Cooks!
Ingredients
  • pound cauliflower head , cut into bite-sized florets
  • 3 Tablespoons butter
  • 3 Tablespoons all purpose flour
  • 2 cups milk
  • ¾ cup sharp cheddar cheese (grated)
  • salt and pepper, to taste
  • 1 Tablespoon dried bread crumbs
Instructions
  1. Preheat oven to 350°F. Lightly grease (or spray) a 2 quart baking dish. Set aside.

  2. Bring a large saucepan of salted water to a boil on medium-high heat. Add cauliflower florets to pan, making sure they're covered with water. Cook 7-8 minutes, or until just barely tender, but firm. Drain well; place cauliflower evenly in prepared baking dish; set aside.

  3. Make cheese sauce while cauliflower is cooking, to save time. Melt butter in medium saucepan. Whisk in flour until combined. Cook flour mixture on low heat, continuing to whisk to remove lumps, until it begins bubbling. Slowly pour milk into thickened flour mixture, stirring or whisking sauce as you pour. Bring to a boil, stirring constantly. Continue cooking and stirring until sauce thickens (1-2 minutes). Remove pan from heat. Immediately stir in cheese. Continue to stir (off heat) until cheese has melted. Give sauce a quick taste, then season with salt and pepper (a little at a time), until it suits your personal preference. Pour cheese sauce over the cauliflower, covering all florets with sauce. Lightly sprinkle sauce with dried bread crumbs.

  4. Bake at 350°F. (on middle rack) for approx. 23-25 minutes, until the top is lightly browned. Sauce should be bubbling around edges of dish once done. Remove cauliflower au gratin from oven; serve immediately. Enjoy! Store leftovers, covered in fridge for up to 3-4 days (microwave to reheat).

Nutrition Facts
Cauliflower Au Gratin
Amount Per Serving (1 (1/6 of total))
Calories 208 Calories from Fat 108
% Daily Value*
Fat 12g18%
Saturated Fat 7g44%
Trans Fat 1g
Cholesterol 34mg11%
Sodium 241mg10%
Potassium 706mg20%
Carbohydrates 18g6%
Fiber 4g17%
Sugar 8g9%
Protein 10g20%
Vitamin A 471IU9%
Vitamin C 91mg110%
Calcium 247mg25%
Iron 1mg6%
* Percent Daily Values are based on a 2000 calorie diet.

Here’s one more to pin on your Pinterest boards!Cauliflower Au Gratin is a yummy side dish you'll love! Featuring fresh cauliflower florets baked in a creamy cheese sauce, it's delicious!

Apple Cinnamon Baked Oatmeal Bites

It’s easy to make a dozen moist Apple Cinnamon Baked Oatmeal Bites (no added sugar) in under 30 minutes for a yummy breakfast or snack!
It's easy to make a dozen moist Apple Cinnamon Baked Oatmeal Bites (no added sugar) in under 30 minutes for a yummy breakfast or snack!

If you’re looking for a tasty, easy to prepare breakfast treat that contains no extra added sugar, may I suggest these apple cinnamon baked oatmeal bites? I found the recipe on Pinterest a while ago, and am just now getting around to sharing the recipe here on my blog.

These yummy, muffin-sized breakfast bites are sweetened naturally with two medium-ripe bananas and an apple! Another plus is… not only do they taste great, they are low calorie (under 90 calories each). That’s a WIN-WIN!

This recipe makes one dozen apple cinnamon baked oatmeal bites, and they are ridiculously EASY to prepare (into the oven in about 10 minutes). Basically, if you can stir ingredients, you can make these yummy baked oatmeal bites. Here’s how easy they are to make:

Scroll Down For A Printable Recipe Card At The Bottom Of The Page

Make The Batter For Apple Cinnamon Baked Oatmeal Bites

In a medium-sized bowl, mash two medium-ripe bananas with the backside of a fork. For this recipe it’s important the bananas are not overly ripe or too mushy (completely brown on the outside) OR not ripe enough (too firm- green on the peels). You want them soft and ripe enough they are easy to mash (a few brown spots on the peels). The bananas are the ingredient that will add most of the sweetness to the oatmeal bites, so you want them “just right”.

Add one egg to the banana mixture, and continue to stir until the mashed bananas and egg are combined.

Bananas are being mashed using the backside of a fork.An egg is added to the bananas mixture and beaten in with a fork until combined.

Now you will add the old-fashioned oats, cinnamon, baking powder, milk and a pinch of salt to the banana mixture in the bowl. Stir these ingredients well, until the “batter” is mixed together. Add the diced apple pieces, and stir until they have been fully incorporated into the batter.

NOTE: You can use unpeeled OR peeled apples in this recipe. Either way is perfectly fine! I tend to not peel them, because I like the pop of color in the apple cinnamon baked oatmeal bites! I also recommend using a firm sweet apple, like Fuji, Honeycrisp, Golden Delicious, McIntosh, etc. to help add sweetness to the baked oatmeal bites, since there is no added sugar in the recipe. 

Old-fashioned oats, cinnamon, milk, salt and baking powder are added to banana mixture.Diced apples are added to the batter for the apple cinnamon baked oatmeal bites.

Cooking Apple Cinnamon Baked Oatmeal Bites

Line 12 standard-sized muffin cups with paper liners OR lightly spray each cup with non-stick baking spray. Because the batter is quite chunky, I recommend using the paper liners, but ultimately that’s your choice. Evenly divide the apple cinnamon baked oatmeal bites batter into the cups. Each cup will end up being about 2/3 full.
Bake in a preheated 375°F. oven (on the middle rack) for 15-16 minutes, or until a toothpick inserted into the top center comes out clean. Remove the muffin pan from the oven, and let them cool for a few minutes, before removing each one out of the pan. As you can see in the 2 photos below, there is not much visible difference in the color before baking (top photo) and after baking (bottom photo).

Apple cinnamon baked oatmeal bites batter is evenly divided into paper-lined muffin tins.After baking, the apple cinnamon baked oatmeal bites cool to room temperature.

Transfer the apple cinnamon baked oatmeal bites to a wire rack to cool completely. As they cool, you may see them pull away from the paper liners a bit. That’s perfectly fine!

After cooling on a wire rack, the 12 baked oatmeal bites are ready to eat.

Ready To Enjoy Some Apple Cinnamon Baked Oatmeal Bites?

Once they have cooled to room temperature, these little bites of oatmeal apple goodness are ready to eat! They are moist, flavorful, and filled with soft, tender pieces of apple! I truly feel these breakfast treats taste their best at room temperature (and not served hot). Again… that is your choice, whether to serve them at room temperature or slightly warm.

You can store any leftovers in an airtight container on the counter. They do not have to be refrigerated, and will stay moist for 3-4 days. You can also wrap them really well and store them in your freezer for 2-3 months, if desired.
The paper liner pulled away reveals one of the finished apple cinnamon baked apple bites.
I really enjoy these simple breakfast bites and hope you will, too! Sometimes the simplest breakfasts can be filling and tasty, and this is one of them. I usually eat two of them for each meal, because of their low calorie count, Thank you so much for stopping by this blog. I hope you have a wonderful day… and come back soon! God Bless You!
Looking For More Recipes Using Old-Fashioned OATS?

You can find all of my recipes in the Recipe Index, which is located at the top of the page. I have lots of breakfast recipes, with quite a few featuring OATS, including:

Interested In More Recipes?

Thank you for visiting this website. I appreciate you using some of your valuable time to do soIf you’re interested, I publish a newsletter 2 times per month (1st and 15th) with all the latest recipes, and other fun info. I would be honored to have you join our growing list of subscribers, so you never miss a great recipe!
There is a Newsletter subscription box on the top right side (or bottom) of each blog post, depending on the device you use, where you can easily submit your e-mail address (only) to be included in my mailing list.

You Can Also Find Me On Social Media:

Facebook page: The Grateful Girl Cooks!
Pinterest:
The Grateful Girl Cooks!
Instagram:
jbatthegratefulgirlcooks

Author's signature

The original recipe source: Lidia Simic, at: https://yummiestfood.com/apple-cinnamon-baked-oatmeal/

0 from 0 votes
Cinnamon Apple Baked Oatmeal Bites
Prep Time
10 mins
Cook Time
15 mins
Total Time
25 mins
 

It's easy to make a dozen moist Apple Cinnamon Baked Oatmeal Bites (no added sugar) in under 30 minutes for a yummy breakfast or snack!

Category: Breakfast, Snack
Cuisine: American
Keyword: apple cinnamon baked oatmeal bites
Servings: 12
Calories Per Serving: 87 kcal
Author: JB @ The Grateful Girl Cooks!
Ingredients
  • 2 cups old-fashioned oats
  • 2 bananas , medium-ripe
  • 1 large egg
  • ½ cup milk
  • 1 teaspoon ground cinnamon
  • 1 teaspoon baking powder
  • 1 pinch salt
  • 1 medium apple , diced (peeled or unpeeled)
Instructions
  1. Preheat oven to 375°F. Insert paper liners into 12 standard-sized muffin cups OR lightly spray cups with non-stick baking spray.

  2. In medium-sized bowl, mash bananas with a fork. Add egg; continue stirring until bananas and egg are combined. Add oats, cinnamon, baking powder, milk and a pinch of salt to banana mixture. Stir well, until mixed. Add diced apple; stir until fully incorporated into batter.

  3. Evenly divide batter into prepared muffin cups (about 2/3 full). Bake at 375°F. on middle rack for 15-16 minutes, or until a toothpick inserted into the top center comes out clean. Remove pan from oven; let cool a few minutes, before removing them from the pan. Transfer apple cinnamon baked oatmeal bites to a wire rack to cool completely before serving.

  4. You can store these in an airtight container for 3-4 days on the counter (no refrigeration needed). They can be stored in freezer for 2-3 months IF well-wrapped in airtight container.

Recipe Notes

Caloric calculation was made using 1% milk.

Nutrition Facts
Cinnamon Apple Baked Oatmeal Bites
Amount Per Serving (1 g)
Calories 87 Calories from Fat 9
% Daily Value*
Fat 1g2%
Saturated Fat 1g6%
Trans Fat 1g
Cholesterol 16mg5%
Sodium 15mg1%
Potassium 190mg5%
Carbohydrates 17g6%
Fiber 2g8%
Sugar 5g6%
Protein 3g6%
Vitamin A 63IU1%
Vitamin C 2mg2%
Calcium 40mg4%
Iron 1mg6%
* Percent Daily Values are based on a 2000 calorie diet.

Here’s one more to pin on your Pinterest boards!It's easy to make a dozen moist Apple Cinnamon Baked Oatmeal Bites (no added sugar) in under 30 minutes for a yummy breakfast or snack!

Ham ‘n Cheese Crescent Bites

Ham ‘n Cheese Crescent Bites are yummy, & easy to make with only 4 ingredients! A crescent roll braid is filled w/ ham, cheese, & honey mustard.
Ham 'n Cheese Crescent Bites are yummy, & easy to make with only 4 ingredients! A crescent roll braid filled w/ ham, cheese, & honey mustard.

Do you use crescent rolls? We do, and I find them VERY convenient to have around for a variety of purposes besides a quick side dish with dinner! I love to use them for a variety of other uses, including quick lunches or breakfast! That little can of dough is amazing!

The recipe I am sharing today is called Ham ‘n Cheese Crescent Bites. Crescent roll dough is filled with ham, cheese, and honey mustard, braided up in a long roll, and baked. It’s really easy to make… here’s how:

Scroll Down For A Printable Recipe Card At The Bottom Of The Page

What Ingredients Do I Need?

There are only a few main ingredients needed for this dish! You will need a can of refrigerated crescent roll dough, cooked and chopped ham, honey mustard, and cheddar cheese. That’s all you need for the basic recipe.

**I usually also add sliced green onions to mine (optional), but if you don’t like them, just leave them out! If desired you can garnish the finished bites with chopped parsley, green onions or chives, but that is also optional.

Okay… let’s get started! Place the ham, honey mustard and grated cheese in a medium bowl, and stir well, to combine. If you want to add the green onions, this is where to add them.

The main ingredients are crescent roll dough, honey mustard, ham and cheese.Ingredients are stirred together until combined in a small bowl.

Preparing The Crescent Roll Braid

Remove the crescent roll dough from the can. Don’t separate the individual rolls. Roll the dough out into a rectangle on a lightly greased baking sheet. Seal all the perforations in the dough. Spoon the ham, mustard and cheese filling down the middle of the dough rectangle (lengthwise).

Ham and cheese filling is placed down the center of crescent roll dough.

Cut 10 or 12 strips on each side of the dough (your choice). Make sure to slice almost all the way to the filling in the middle. Starting at the bottom, lift one strip up and across the filling at a slight angle.

Now lift the corresponding strip on the other side up and over the filling to kind of “meet in the middle” in a braided fashion. Repeat the process (left, right, left, right) OR (right, left, right, left), alternating strips, until all strips have been “braided”.

Slits are cut into the dough on each side of the ham and cheese filling.The crescent roll dough is braided together over the ham and cheese filling.

Time To Bake!

Place the baking sheet with the braided ham ‘n cheese crescent bites into a preheated 375°F oven. NOTE: When I make these, I let it bake for about 22-25 minutes total. A couple minutes before it is finished baking (shown in the photo below), I like to top it with a couple extra  Tablespoons of grated cheddar cheese. TIP: You don’t have to add the grated cheese, but it sure looks good once it melts on top of the crescent braid.

Once the ham ‘n cheese crescent bites are finished baking, the braid will be golden brown all across the top, and any added cheddar cheese will have melted.

When almost finished baking, more cheddar cheese is added to the top of the braid.

Serving The Ham ‘n Cheese Crescent Bites

Once nicely browned on top, remove the ham ‘n cheese crescent bites from the oven. Garnish with chopped chives, parsley or green onions, if desired. Let it cool for a couple minutes before attempting to slice it, to give the cheese a chance to solidify a bit inside. Slice into six portions, and serve immediately.

The braid of ham 'n cheese crescent bites is golden brown once baked.Six portions of ham 'n cheese crescent bites are cut for serving.

You can see all the yummy ham and cheese filling inside each piece. This is a great tasting quick lunch (or dinner) I’m sure you and your family will enjoy! Ham ‘n cheese crescent bites are so simple to make, and hardly take any time at all to whip up!

You can see meat and cheese inside one of the ham 'n cheese crescent bites..

Thank you for stopping by… I really appreciate it. Hope you have the chance to make these ham ‘n cheese crescent bites soon, and trust you will enjoy them, too. God Bless You.

Looking For More Recipes Using CRESCENT ROLLS?

You can find all of my blog recipes in the Recipe Index, located at the top of the page. I have several recipes that feature crescent rolls, including:

Interested In More Recipes?

Thank you for visiting this website. I appreciate you using some of your valuable time to do soIf you’re interested, I publish a newsletter 2 times per month (1st and 15th) with all the latest recipes, and other fun info. I would be honored to have you join our growing list of subscribers, so you never miss a great recipe!
There is a Newsletter subscription box on the top right side (or bottom) of each blog post, depending on the device you use, where you can easily submit your e-mail address (only) to be included in my mailing list.

You Can Also Find Me On Social Media:

Facebook page: The Grateful Girl Cooks!
Pinterest:
The Grateful Girl Cooks!
Instagram:
jbatthegratefulgirlcooks

Author's signature

Original recipe source: https://www.plainchicken.com/ham-cheese-braid/

0 from 0 votes
Ham 'n Cheese Crescent Bites
Prep Time
10 mins
Cook Time
20 mins
Total Time
30 mins
 

Ham 'n Cheese Crescent Bites are yummy, & easy to make with only 4 ingredients! A crescent roll braid filled w/ ham, cheese, & honey mustard.

Category: Appetizer/Snack, Dinner, Lunch
Cuisine: American
Keyword: crescent rolls, ham 'n cheese crescent bites
Servings: 6
Calories Per Serving: 288 kcal
Author: JB @ The Grateful Girl Cooks!
Ingredients
  • 1 can refrigerated crescent rolls
  • cup cooked, chopped ham
  • cup grated cheddar cheese
  • ¼ cup honey mustard dressing
  • 2 Tablespoons chopped green onions (OPTIONAL)
Optional Toppings:
  • 2-3 Tablespoons grated cheddar cheese , added to top, last 2-3 minutes of baking
  • chopped parsley, green onions, or chives
Instructions
  1. Preheat oven to 375°F. Very lightly grease/spray a large baking sheet.

  2. Place ham, honey mustard and grated cheese (plus green onions, if using) in a medium bowl; stir well, to combine.

  3. Remove crescent roll dough from can. Don't separate individual rolls. Roll dough out into a rectangle on the baking sheet. Seal all perforations in the dough. Spoon ham/cheese filling lengthwise down middle of dough.

  4. Cut 10 or 12 strips on each side of the dough. Make sure to slice almost all the way to the filling in the middle. Starting at the bottom, lift one strip up and across the filling at a slight angle. Now lift corresponding strip on the other side up and over the filling to kind of overlap in the middle, in a braided fashion. Repeat process (left, right, left, right) OR (right, left, right, left), alternating strips, until all strips have been "braided".

  5. Place baking sheet onto the middle rack in preheated 375°F oven. Bake for 22-25 minutes. NOTE: If desired, a couple minutes before it is finished baking, top the braid with a couple extra Tablespoons grated cheddar. When done, the braid should be golden brown on top, and any added cheddar cheese will have melted. Remove from oven. If desired, garnish with chopped parsley, chives or green onion. Let cool a few minutes, then slice into 6 portions. Serve, and enjoy!

Nutrition Facts
Ham 'n Cheese Crescent Bites
Amount Per Serving (1 (1/6 of total))
Calories 288 Calories from Fat 162
% Daily Value*
Fat 18g28%
Saturated Fat 8g50%
Cholesterol 35mg12%
Sodium 841mg37%
Potassium 112mg3%
Carbohydrates 19g6%
Sugar 6g7%
Protein 12g24%
Vitamin A 126IU3%
Calcium 93mg9%
Iron 1mg6%
* Percent Daily Values are based on a 2000 calorie diet.

Here’s one more to pin on your Pinterest boards!Ham 'n Cheese Crescent Bites are yummy, & easy to make with only 4 ingredients! A crescent roll braid filled w/ ham, cheese, & honey mustard.


Homemade Honey BBQ Sauce

Make Homemade Honey BBQ Sauce in under 10 minutes with common ingredients! Sweet, tangy and a perfect basting sauce for chicken, beef or pork!

Today I want to share a delicious homemade barbeque sauce that I’m confident you’re gonna love! It can be made in less than 10 minutes, and is a very versatile sauce that can be used in many ways. Whether it is used on baked or grilled chicken, pork or beef, or used to make pulled pork, beef or chicken sandwiches, the flavor of this sauce will really impress you (with very little work involved).

The recipe came from one of my old “Taste of Home” magazines, and it is a definite KEEPER. I keep all the ingredients needed for this yummy sauce in our pantry, so it is convenient and easy to make whenever we need it. It’s so easy to make, and takes less time to whip up a batch then it does to drive to the store to buy a bottle of bbq sauce. That’s a win-win in my book! Let me show you just how simple it is to make this homemade honey BBQ sauce:

Scroll Down For A Printable Recipe Card At The Bottom Of The Page

What Ingredients Will I Need To Make This BBQ Sauce?

To make homemade honey BBQ sauce you will need several common pantry ingredients. They are tomato sauce, brown sugar, molasses, honey, Worcestershire sauce, mustard, garlic, oregano, chili powder and pepper.

The ingredients used to make homemade honey bbq sauce.

Make The Homemade Honey BBQ Sauce

Measure all the ingredients for the BBQ sauce into a medium-sized saucepan. Stir the ingredients well, until they’re fully combined. Bring the homemade honey BBQ sauce to a full boil on medium heat. Once it has boiled for a minute, remove the pan from the heat.

That’s it! You’ve just made a batch of homemade honey BBQ sauce, and it’s ready to be used to enhance the flavor of chicken, pork or beef! You can use it right away, or if using later, store it covered in the refrigerator up to 3-4 days. When ready to use the sauce, simply bring it back to room temperature. See how EASY that was?

Ingredients for bbq sauce are placed in a medium saucepan, then stirred together.Homemade honey BBQ sauce is brought to a boil in pan, then is ready to use.

Time To Grill (Or Bake!)

When ready to grill (or bake) a favorite meat dish, liberally brush the homemade honey BBQ sauce on your favorite meats. We love this BBQ sauce on grilled pork chops and grilled or baked chicken. The sauce can also be enjoyed on ribs, and pulled pork, chicken or BBQ beef sandwiches, too. 

This sauce has a fantastic taste, and the flavors really shine. I truly think you will love this sauce as much as we do! The recipe as written, will make about 1⅓ cups of sauce, so you may or may not have some sauce left over, depending on the amount of meat you are cooking. You can store it covered in the fridge for a few days, OR you can freeze it in an airtight container for use at a later date. Simply thaw, and reheat the BBQ sauce in a small sauce pan before using.

Pork chops on the grill, coated with the honey BBQ sauce.Pieces of chicken brushed with homemade honey BBQ sauce, cooking on the grill.

Thank you for stopping by my blog today. I sincerely hope you have the opportunity to make this homemade honey BBQ sauce, and trust you and those you love will really enjoy it. Please come back soon for another visit and more yummy, family-friendly recipes.

Looking For More HOMEMADE SAUCE Recipes?

You can find all of my recipes in the Recipe Index, located at the top of the page. I have some wonderful tasting recipes for SAUCES that you’ll enjoy, including:

Interested In More Recipes?

Thank you for visiting this website. I appreciate you using some of your valuable time to do soIf you’re interested, I publish a newsletter 2 times per month (1st and 15th) with all the latest recipes, and other fun info. I would be honored to have you join our growing list of subscribers, so you never miss a great recipe!
There is a Newsletter subscription box on the top right side (or bottom) of each blog post, depending on the device you use, where you can easily submit your e-mail address (only) to be included in my mailing list.

You Can Also Find Me On Social Media:

Facebook page: The Grateful Girl Cooks!
Pinterest:
The Grateful Girl Cooks!
Instagram:
jbatthegratefulgirlcooks

Author's signature

Original recipe source: “Taste of Home” magazine, August/September 2008 edition, page 14 , published by Reiman Media Group, Inc.

0 from 0 votes
Homemade Honey BBQ Sauce
Prep Time
5 mins
Cook Time
3 mins
Total Time
8 mins
 

Make Homemade Honey BBQ Sauce in under 10 minutes with common ingredients! Sweet, tangy and a perfect basting sauce for chicken, beef or pork!

Category: Condiments, Sauces
Cuisine: American
Keyword: homemade honey bbq sauce
Servings: 11 (2 T. per serving-1 ⅓ cups total)
Calories Per Serving: 37 kcal
Author: JB @ The Grateful Girl Cooks!
Ingredients
  • 8 ounces tomato sauce (1 can)
  • 2 Tablespoons brown sugar
  • 2 Tablespoons molasses
  • 2 Tablespoons honey
  • teaspoons Worcestershire sauce
  • teaspoons prepared yellow mustard
  • 1 large garlic clove , minced
  • ¼ teaspoon chili powder
  • ¼ teaspoon dried oregano
  • teaspoon ground black pepper
Instructions
  1. Measure all the ingredients into a medium-sized saucepan. Stir well, until fully combined.

  2. Bring sauce to a full boil on medium heat. Once it has boiled for 1 minute, remove pan from the heat.

  3. Brush sauce onto beef, chicken or pork (for grilling or baking). Leftovers can be stored (covered) in refrigerator up to 3-4 days, or can be frozen in an airtight container (to thaw and reheat later).

Nutrition Facts
Homemade Honey BBQ Sauce
Amount Per Serving (1 (2 Tablespoons))
Calories 37 Calories from Fat 9
% Daily Value*
Fat 1g2%
Saturated Fat 1g6%
Sodium 127mg6%
Potassium 137mg4%
Carbohydrates 9g3%
Fiber 1g4%
Sugar 9g10%
Protein 1g2%
Vitamin A 105IU2%
Vitamin C 2mg2%
Calcium 15mg2%
Iron 1mg6%
* Percent Daily Values are based on a 2000 calorie diet.

Here’s one more to pin on your Pinterest boards!Make Homemade Honey BBQ Sauce in under 10 minutes with common ingredients! Sweet, tangy and a perfect basting sauce for chicken, beef or pork!

Roasted Hasselback Potatoes

Roasted Hasselback Potatoes are a delicious side dish. Best known for their unique “fan-shaped” slices, they’re buttery, and easy to make.
Roasted Hasselback Potatoes are a delicious side dish. Best known for their unique "fan-shaped" slices, they're buttery, and easy to make.

If you enjoy baked or roasted potatoes, then this unique way to enjoy them might be a good option for you. Roasted Hasselback potatoes are incredibly simple to make, with only a few common ingredients, and their unique “fan-like” appearance makes this a unique side dish.

I did a little research on “why” they are called Hasselback potatoes. Guess what I learned? This unique way of roasting sliced russet potatoes originated in Stockholm, Sweden in 1953 where they were first served at a restaurant called the “Hasselbaken”. Apparently a chef-in-training created the recipe (and slicing technique), and that is where they began their step into infamy. Who knew?

These simple, but yummy potatoes are a perfect side dish to a variety of meats and/or main dishes, and most of the prep time is baking time. There is a simple technique that can be used to help slice the potatoes, and I will share that tip further down in this post. Here’s a look at how to make Roasted Hasselback Potatoes:

Scroll Down For A Printable Recipe Card At The Bottom Of The Page

Preparing To Slice The Potatoes

Preheat your oven to 425°F before beginning. Before slicing the potatoes, make sure to scrub each one well, to remove any dirt from the peel, and then dry between paper towels. This recipe requires the potatoes be thinly sliced most of the way through, without cutting all the way through to the bottom of the potato. There is a great trick or tip for doing this easily. Slicing the potatoes can be very easy if you use this simple technique!

 Place two wooden spoons directly next to each other on a work surface. Once the spoons are aligned, place one potato at a time on top of the spoons, and rotate 90° for slicing.

Two wooden spoons are placed side by side to assist in slicing Hasselback potatoes.A potato is placed on top of two wooden spoons, side by side, in order to slice it.

Slicing The Potatoes

Cut thin slices in the potato with a sharp knife. The wooden spoons holding the potato will “prevent” you from cutting all the way through. This happens because the knife will hit the spoon, causing it to stop slicing near the bottom, but not through the entire potato. You might need to slightly press down the opposite small ends of the potato, to ensure the tip end of the potato is touching the spoons. Repeat with remaining potatoes.

Melt butter in the microwave, and then brush HALF (1½ Tablespoons) of the melted butter over the top of the potatoes, allowing some to drip down between the slices. Place the potatoes in a greased or sprayed baking dish, sprinkle potatoes lightly with salt (to taste). Place the baking dish into a preheated oven.

Thin slices are cut in each potato, almost all the way through to the bottom.Melted butter and salt are added to the potatoes in a baking dish before roasting.

Roasting The Potatoes

Bake the potatoes, uncovered, for 30 minutes, then remove them from the oven. Brush the top of the potatoes with the remaining melted butter, and then sprinkle each potato with 1/2 Tablespoon of dry bread crumbs. Put the dish back into the oven and continue roasting them for another 20 minutes.

Halfway through baking time, more butter and bread crumbs are added to roasted Hasselback potatoes.

Remove the pan from the oven again, and sprinkle the potatoes with finely grated Parmesan cheese (about 1/2 Tablespoon each, or more if desired). Pop the dish back into the oven, and let them continue baking for 5-10 minutes more.

Once done, the potatoes should be tender and the cheese will be melted on top. You can check for tenderness by gently inserting a butter knife into one of the slices.

Grated Parmesan cheese is added to top of potatoes, and then they finish baking.

Time To Eat Roasted Hasselback Potatoes!

Sprinkle the potatoes with fresh chopped parsley, and serve them hot! The outside of the potatoes and bread crumbs will be crisp, but the inside will be tender, and lightly seasoned with salt and butter. Roasted Hasselback potatoes are easy to eat also, because of the nice thin slices already prepared!

If desired, dollop the potatoes with sour cream for serving (optional, but GOOD). These yummy, unique roasted Hasselback potatoes are a perfect side dish for beef, chicken, pork, OR fish. I really hope you enjoy this simple vegetable side dish!

The roasted Hasselback potatoes are served, garnished with chopped parsley.Roasted Hasselback Potatoes, served on a white plate, are a perfect side dish!

Thanks for stopping by my blog today. I hope you have the opportunity to try this recipe for roasted Hasselback potatoes, and trust you will enjoy them. Have a great day, and come back for another visit soon!

Looking For More POTATO Recipes?

You can find all of my recipes in the Recipe Index, located at the top of the page. I have some wonderful recipes featuring potatoes you might enjoy, including:

Interested In More Recipes?

Thank you for visiting this website. I appreciate you using some of your valuable time to do soIf you’re interested, I publish a newsletter 2 times per month (1st and 15th) with all the latest recipes, and other fun info. I would be honored to have you join our growing list of subscribers, so you never miss a great recipe!
There is a Newsletter subscription box on the top right side (or bottom) of each blog post, depending on the device you use, where you can easily submit your e-mail address (only) to be included in my mailing list.

You Can Also Find Me On Social Media:

Facebook page: The Grateful Girl Cooks!
Pinterest:
The Grateful Girl Cooks!
Instagram:
jbatthegratefulgirlcooks

Author's signature

Original recipe source: unknown… found handwritten on 3×5 index card in an OLD recipe box. No source noted.

0 from 0 votes
Roasted Hasselback Potatoes
Prep Time
5 mins
Cook Time
1 hr
Total Time
1 hr 5 mins
 

Roasted Hasselback Potatoes are a delicious side dish. Best known for their unique "fan-shaped" slices, they're buttery, and easy to make.

Category: Side Dish, Vegetable
Cuisine: All Cuisines
Keyword: roasted hasselback potatoes
Servings: 2
Calories Per Serving: 310 kcal
Author: JB @ The Grateful Girl Cooks!
Ingredients
  • 2 medium Russet potatoes
  • 2 Tablespoons butter , divided
  • salt (to taste)
  • 1 Tablespoon dry bread crumbs
  • 2 Tablespoons grated Parmesan cheese
  • 1 teaspoon chopped fresh parsley
Instructions
  1. Preheat oven to 425°F before beginning. Grease or spray a baking dish.

  2. Scrub potatoes well, to remove dirt; dry with paper towels. Place two wooden spoons next to each other. Once aligned, place a potato on top of the spoons (lengthwise); rotate spoons 90° for slicing. Cut thin slices (about ½") in potato with sharp knife. The wooden spoons holding the potato will "prevent" you from cutting all the way through. Slightly press down the small ends of the potato, to ensure tip of potato is touching spoons. Repeat with other potato. Place potatoes in a greased/ sprayed baking dish,

  3. Melt butter; brush HALF (1½ Tablespoons) of butter over top of potatoes; let some drip down between slices. Sprinkle lightly with salt (to taste). Place baking dish in preheated oven.

  4. Bake potatoes uncovered, at 425°F. for 30 minutes; remove dish from oven. Brush top of potatoes with remaining butter; sprinkle each potato with ½ Tablespoon of dry bread crumbs. Put dish back in oven; bake another 20 minutes. Remove pan from oven; sprinkle potatoes with Parmesan cheese ( ½ Tablespoon each, or more if desired). Put back in oven; let bake for 5-10 minutes more. Once done, potatoes should be tender and cheese will be melted. Check for tenderness by gently inserting butter knife into one of the slices.

  5. To serve, sprinkle potatoes with parsley, and serve hot! If desired, dollop potatoes with sour cream for serving (optional, but good). Enjoy!

Recipe Notes

NOTE: The caloric calculation is an estimate, based on a standard-sized medium Russet potato. Calories will vary, as different sizes of potatoes used may calculate out to less or more calories.

Nutrition Facts
Roasted Hasselback Potatoes
Amount Per Serving (1 potato)
Calories 310 Calories from Fat 117
% Daily Value*
Fat 13g20%
Saturated Fat 8g50%
Trans Fat 1g
Cholesterol 35mg12%
Sodium 224mg10%
Potassium 908mg26%
Carbohydrates 42g14%
Fiber 3g13%
Sugar 2g2%
Protein 7g14%
Vitamin A 399IU8%
Vitamin C 12mg15%
Calcium 96mg10%
Iron 2mg11%
* Percent Daily Values are based on a 2000 calorie diet.

Here’s one more to pin on your Pinterest boards!Roasted Hasselback Potatoes are a delicious side dish. Best known for their unique "fan-shaped" slices, they're buttery, and easy to make.

Yum Yum Chicken

Yum Yum Chicken is an EASY (10 minute prep.) delicious dish. Chicken pieces are covered in a simple, flavorful sauce, and baked until done.

Many, MANY years ago I came up with a recipe for super simple, easy to make, baked chicken. Our family liked the chicken the first time I made it, and said it was yummy. So I named it Yum Yum Chicken. True story. Nothing exciting about it, but that’s how it got it’s name, and I’ve been making this simple dish ever since!

Honestly, this could NOT be any easier to make, and it really does taste yummy, especially when served with steamed rice, which goes perfectly with the simple sauce that tops the pieces of chicken. I originally came up with this ridiculously easy recipe by “dinking around in the kitchen” to see what I could come up with.

Basically I was looking for something that wouldn’t take too much time to prepare. I worked full-time when our sons were growing up, so anything that was quick, easy, and filling to make for dinner (after work) was always a winner! This recipe only takes about 10 minutes of preparation before throwing it in the oven. HOORAY! Let me show you how easy it is to make yum yum chicken:

Scroll Down For A Printable Recipe Card At The Bottom Of The Page

Make The Sauce For The Chicken

The sauce will go on top of the chicken when it is baked. It is SO EASY to make! In a medium sized bowl, combine a can of cream of mushroom soup, a can of cream of chicken soup, wine, milk, celery, green bell pepper and 3/4 of an envelope of dried onion soup mix. Give these ingredients a stir to fully combine (the sauce will be fairly thick). Set the sauce aside.

Ingredients for the yum yum chicken sauce are combined in a small bowl.Sauce ingredients are combined before adding it to the chicken.

Prepare The Chicken For Baking

Preheat your oven to 375° F. Place a cut up chicken (8 pieces) in a lightly greased or sprayed 9″ x 13″ baking dish in a single layer. Pour or spoon the sauce over the chicken, spreading the sauce to make sure all the chicken pieces are covered. And now, just like that, the only thing left to do is BAKE the yum yum chicken!

Chicken pieces are placed in a 13"x9" baking pan in a single layer.A sauce is poured over the yum yum chicken, and then is baked for one hour.

Bake The Yum Yum Chicken

Bake the chicken at 375° F., uncovered, for one hour. When done, the chicken will be cooked to an internal temperature of 165° F., and the sauce will be golden brown and bubbly around the edges of the pan. Remove the pan from the oven, and let the chicken rest 3-4 minutes before serving.

After an hour of baking, the yum yum chicken is golden brown, and ready to serve.

Serving Yum Yum Chicken

Place pieces of the chicken onto serving plates. Spoon some of the extra sauce over the chicken, and serve. I recommend serving rice on the side with this dish, because it tastes so good with the sauce!

That’s it! See how EASY this yum yum chicken was to make? YEP. It is a great recipe that you can quickly put together, then go rest or do something else while it bakes! That’s my kind of recipe! The baked chicken tastes good, too!

Rice and green beans are served alongside the yum yum chicken, on a white plate.Yum Yum Chicken, topped with sauce and served with green beans and rice on the side.

Thank you for stopping by today for a visit. I hope you’ll have the chance to make yum yum chicken for those you love. Have a great day, and come back again soon.

Looking For More CHICKEN Recipes?

You can find all of my chicken recipes in the Recipe Index, which is located at the top of the page. I have LOTS of them you’ll enjoy, including:

Interested In More Recipes?

Thank you for visiting this website. I appreciate you using some of your valuable time to do soIf you’re interested, I publish a newsletter 2 times per month (1st and 15th) with all the latest recipes, and other fun info. I would be honored to have you join our growing list of subscribers, so you never miss a great recipe!
There is a Newsletter subscription box on the top right side (or bottom) of each blog post, depending on the device you use, where you can easily submit your e-mail address (only) to be included in my mailing list.

You Can Also Find Me On Social Media:

Facebook page: The Grateful Girl Cooks!
Pinterest:
The Grateful Girl Cooks!
Instagram:
jbatthegratefulgirlcooks

Author's signature

↓↓ PRINTABLE RECIPE BELOW ↓↓

0 from 0 votes
Yum Yum Chicken
Prep Time
10 mins
Cook Time
1 hr
Total Time
1 hr 10 mins
 

Yum Yum Chicken is an EASY (10 minute prep.) delicious dish. Chicken pieces are covered in a simple, flavorful sauce, and baked until done.

Category: Dinner, Entree
Cuisine: American
Keyword: baked chicken, yum yum chicken
Servings: 6
Calories Per Serving: 337 kcal
Author: JB @ The Grateful Girl Cooks!
Ingredients
  • 3 pound whole chicken , cut into 8 pieces
  • 10.5 ounces cream of mushroom soup (1 can)
  • 10.5 ounces cream of chicken soup (1 can)
  • ¼ cup dry white wine (can substitute red)
  • ¼ cup milk
  • 1 large celery stalk (or 2 medium), sliced
  • ¼ large green bell pepper , chopped
  • ¾ envelope dried onion soup mix
Instructions
  1. Preheat oven to 375°F. Lightly grease or spray a 9x13 baking dish.

  2. In a medium sized bowl, combine cream of mushroom soup, cream of chicken soup, wine, milk, celery, green bell pepper and 3/4 of an envelope of dried onion soup mix. Give ingredients a stir to fully combine (sauce will be fairly thick ). Set aside.

  3. Place cut up chicken (8 pieces) in prepared baking dish in single layer. Pour or spoon sauce over chicken, spreading sauce to make sure all chicken pieces are covered.

  4. Bake at 375° F. (uncovered), for one hour. When done, chicken will be cooked to an internal temperature of 165° F. and sauce will be golden brown and bubbly around the edges of pan. Remove pan from oven; let chicken rest 3-4 minutes before serving. Spoon extra sauce over each piece of chicken, to serve. Enjoy!

Recipe Notes

PLEASE NOTE: The caloric calculation is an ESTIMATE only, based on the total calories of all the recipe ingredients divided by 8 servings (or pieces) of chicken. Your calorie count will differ slightly, depending on the piece of chicken eaten, and the net weight of each piece (i.e. breast, leg, wing, etc.).

Nutrition Facts
Yum Yum Chicken
Amount Per Serving (1 g)
Calories 337 Calories from Fat 189
% Daily Value*
Fat 21g32%
Saturated Fat 6g38%
Trans Fat 1g
Cholesterol 89mg30%
Sodium 1183mg51%
Potassium 364mg10%
Carbohydrates 10g3%
Fiber 1g4%
Sugar 1g1%
Protein 24g48%
Vitamin A 291IU6%
Vitamin C 7mg8%
Calcium 42mg4%
Iron 2mg11%
* Percent Daily Values are based on a 2000 calorie diet.

Here’s one more to pin on your Pinterest boards!Yum Yum Chicken is an EASY (10 minute prep.) delicious dish. Chicken pieces are covered in a simple, flavorful sauce, and baked until done.

Blueberry Breakfast Loaf

A Blueberry Breakfast Loaf is easy to make, moist, delicious, filled with juicy sweet blueberries, and is ready to bake in 10 minutes.A Blueberry Breakfast Loaf is easy to make, moist, delicious, filled with juicy sweet blueberries, and is ready to bake in 10 minutes.

If you’re looking for a simple and delicious loaf of blueberry bread, may I suggest this one? This blueberry breakfast loaf could not be any simpler to prepare. It can be made in about 10 minutes, then into the oven it goes!

Moist and bursting with blueberries, it tastes amazing as a quick breakfast treat or a simple snack! The bread can be made using fresh or frozen blueberries, so it is a convenient and delicious recipe you can make all year long.

I really think you’ll enjoy the taste of this blueberry breakfast loaf, so I’m sharing the recipe with you today. The original recipe was one I found over 20 years ago in one of my Taste of Home magazines. Here’s how to make it:

Scroll Down For A Printable Recipe Card At The Bottom Of The Page

Prepare The Batter

Before you begin, preheat your oven to 350° F. This recipe comes together fast, so you want the oven hot, once the batter is ready to go.

Place flour, granulated sugar, baking powder and salt in a large mixing bowl. Stir or whisk them to combine. Once combined, add fresh or frozen blueberries and orange zest to the mixture.

NOTE: If using frozen blueberries, do NOT thaw them before adding them to the mixture.

Flour, sugar, baking powder and salt are combined in a large bowl.Blueberries (fresh or frozen) and orange zest are added to dry ingredients.

In a separate bowl, whisk eggs, milk and vegetable oil together. Pour these wet ingredients into the flour mixture, and stir only until all ingredients have been combined. Do not over mix.

Eggs, milk and vegetable oil are whisked together before adding to batter.Wet ingredients are added to the blueberry breakfast loaf batter.

Time To Bake The Blueberry Breakfast Loaf

Pour the batter into a greased (bottom and sides) 9″ x 5″ x 3″ loaf pan. Place the loaf on the middle rack in the oven.

Bake at 350°F. for 1 hour, or until a toothpick inserted in the middle of the loaf comes out clean. The blueberry breakfast loaf should be golden brown on top once done.

Blueberry breakfast loaf batter in a greased loaf pan, ready for baking.The baked blueberry breakfast loaf is golden brown on top after cooking.

Remove the pan from the oven, and let the bread cool, still in the pan, for 10 minutes. After it has rested 10 minutes, run a butter knife around the edges, then invert pan to remove the loaf.

Transfer the loaf to a wire rack, and let it cool completely before slicing and serving.

A side view of the blueberry breakfast loaf, out of the pan and on wire rack.

Time For A Slice Of Blueberry Breakfast Loaf!

Once the blueberry breakfast loaf has cooled to room temperature, it is ready to serve. Slice the loaf into 8 pieces, serve, and enjoy! It is filled with juicy blueberries, and tastes really GOOD!

Slices of the blueberry breakfast loaf reveal the juicy blueberries inside.

I really hope you enjoy this delicious bread. It turns out wonderful every time! Thanks so much for stopping by. I hope you will come back for another visit and more delicious recipes soon.

Looking For More BREAD Recipes?

You can find all of my recipes in the Recipe Index, located at the top of the page. I have some delicious bread recipes, including:

Want More Recipes? Get My FREE Newsletter!

I publish a newsletter 2 times per month (1st and 15th) with lots of recipes, tips, etc..
Would you like to join our growing list of subscribers?

There is a Newsletter subscription box on the top right (or bottom) of each blog post, depending on the device you use.
You can submit your e-mail address there, to be added to my mailing list.

Find Me On Social Media:

Facebook page: The Grateful Girl Cooks!
Pinterest:
The Grateful Girl Cooks!
Instagram:
jbatthegratefulgirlcooks

Author's signature

Original recipe source: “Taste of Home Magazine”, Aug./Sept. 1997 edition, page 45, published by Reiman Publications, Inc.

↓↓ PRINTABLE RECIPE BELOW ↓↓

0 from 0 votes
Blueberry Breakfast Loaf
Prep Time
10 mins
Cook Time
1 hr
Total Time
1 hr 10 mins
 

A Blueberry Breakfast Loaf is easy to make, moist, delicious, filled with juicy sweet blueberries, and is ready to bake in 10 minutes.

Category: Bread, Breakfast
Cuisine: American
Keyword: blueberry breakfast loaf
Servings: 8
Calories Per Serving: 304 kcal
Author: JB @ The Grateful Girl Cooks!
Ingredients
  • 2 cups all purpose flour
  • 1 cup granulated sugar
  • 1 Tablespoon baking powder
  • ¼ teaspoon salt
  • cups fresh OR frozen blueberries (if frozen, do NOT thaw)
  • 1 teaspoon orange zest (finely grated peel)
  • 2 large eggs
  • 1 cup milk
  • 3 Tablespoons vegetable oil
Instructions
  1. Preheat oven to 350° F. Grease or spray a 9" x 5" x 3" loaf pan. Set aside.

  2. Place flour, granulated sugar, baking powder and salt in a large mixing bowl. Stir or whisk to combine. Once combined, add fresh or frozen blueberries and orange zest to the mixture. NOTE: If using frozen blueberries, do NOT thaw them before adding them to the mixture.

  3. In a separate bowl, whisk eggs, milk and vegetable oil together. Pour into flour mixture; stir only until ingredients have been combined. Do not over mix.

  4. Pour batter into prepared loaf pan. Place loaf pan on the middle rack in oven. Bake at 350°F. for 1 hour, or until a toothpick inserted in the middle of the loaf comes out clean. Loaf should be golden brown on top when done.

  5. Remove from oven; let bread cool, still in the pan, for 10 minutes. After 10 minutes, run a butter knife around the edges, then invert pan to remove the loaf. Transfer bread to a wire rack; let cool completely before slicing and serving. Enjoy!

Nutrition Facts
Blueberry Breakfast Loaf
Amount Per Serving (1 slice)
Calories 304 Calories from Fat 63
% Daily Value*
Fat 7g11%
Saturated Fat 5g31%
Trans Fat 1g
Cholesterol 48mg16%
Sodium 106mg5%
Potassium 269mg8%
Carbohydrates 55g18%
Fiber 2g8%
Sugar 29g32%
Protein 6g12%
Vitamin A 141IU3%
Vitamin C 3mg4%
Calcium 116mg12%
Iron 2mg11%
* Percent Daily Values are based on a 2000 calorie diet.

Here’s one more to pin on your Pinterest boards!A Blueberry Breakfast Loaf is easy to make, moist, delicious, filled with juicy sweet blueberries, and is ready to bake in 10 minutes.

Southwestern Rice Salad

Southwestern Rice Salad is a yummy side or meatless main dish. Rice, black beans, corn, and peppers are mixed in a lightly seasoned dressing.

If you’re looking for a delicious and unique salad, side dish, or meatless main dish, I’d like to recommend this Southwestern Rice Salad. I got the original recipe about 15 years ago from one of my “Taste of Home” magazines. At the time I thought it sounded really interesting, so I saved the recipe. Guess what? It is REALLY tasty!

The salad features cooked rice with black beans, corn, carrots, bell peppers, garlic, cilantro, red onion, tomatoes and wait for it… crunchy salted peanuts!!! The salad is dressed with a simple Southwest-inspired salad dressing, and then is served chilled. Who knew something so unusual sounding could taste so good? But it IS good!

The entire salad can be ready in 30 minutes. If you want to save time, prep the veggies and other ingredients while the rice is cooking. That will shave some time off the preparation! I also recommend chilling the salad after it is finished and dressed (for best flavor), but that is up to you. Here’s how to make Southwestern Rice Salad:

Scroll Down For A Printable Recipe Card At the Bottom Of The Page

Prepare The Rice

Place uncooked long grain rice in a saucepan with water. Bring the water to a boil, then reduce the heat to low and cover the pan. Simmer the rice (covered) on low heat for 15 minutes, then remove the pan from the heat. The rice should be tender and the water will have been absorbed.

Let the rice sit (still covered), for 5 minutes, then rinse with cold water to cool it down. Drain the rice after rinsing and place the cooled, cooked rice in a large serving bowl.

Long grain white rice is cooked in water until done and fluffy.Cooked rice is rinsed then drained before adding it to salad bowl.

Time To Make The Southwestern Rice Salad

TIP: If you want to save time, do the following steps while the rice is cooking. In a large skillet, heat vegetable oil until hot on medium heat. Add chopped green pepper, red onion, carrots, and minced garlic. Sauté these veggies until they are crisp-tender. Stir often while cooking so the garlic won’t burn in the skillet (and become bitter).This should take 4-5 minutes. 

 When done, add this veggie mixture to the cooled rice in the bowl, and stir well, to combine.

Chopped green pepper, carrot, red onion, and garlic are cooked in oil until tender.The cooked veggies are added to the cooled rice in salad bowl.

The next ingredients you will add to the Southwestern rice salad are corn (frozen, but thawed), black beans, tomatoes, salted peanuts and chopped fresh cilantro. Place them in the bowl with the rice and stir gently, until all the ingredients are combined. Isn’t it colorful? 

Corn, black beans, tomatoes, cilantro and salted peanuts are added to the Southwestern rice salad.Southwestern Rice Salad is very colorful after adding all the ingredients.

Make The Salad Dressing

The last thing you need to prepare is the simple salad dressing to coat the Southwestern rice salad. It’s EASY! Use a wire whisk or a fork to fully mix olive oil, fresh lemon juice, cayenne pepper and ground cumin in a small bowl. Mix these salad dressing ingredients for about a minute to ensure the oil and juice are fully integrated. Now you’re ready to add it to the salad!

Pour the salad dressing over the Southwestern rice salad, and toss well, to ensure all the salad is mixed well with the dressing. Once done, refrigerate the salad until it is time to serve. The flavors really come together the longer the salad is refrigerated, so if you have the chance to make this salad early in the day, the better. If not, you can certainly serve the salad right away, if that is your preference.

Salad dressing for the salad is made with lemon juice, olive oil, cayenne and ground cumin.

Ready To Serve Southwestern Rice Salad

Once the salad is dressed and refrigerated for a bit, it is ready to enjoy! Southwestern rice salad is filling, thanks in part to the black beans and rice, so it can be enjoyed as a meatless main dish, or you can enjoy it as a side dish for chicken, beef and pork. The salad has lots of flavor, and makes enough for 12 servings, so there is plenty to go around.

Store any leftovers, covered, in the refrigerator for up to 4-5 days. My husband keeps getting spoonfuls of leftovers out of the fridge throughout the day to eat as a snack or to have with his lunch or dinner. He definitely loves this lightly seasoned, chilled salad! The crunchy peanuts are a welcome surprise, too!

After chilling in the refrigerator, the Southwestern Rice Salad is served in a white bowl.A close up look at the Southwestern Rice Salad, full of veggies.

I hope you have the chance to make this yummy, filling Southwestern rice salad. I truly believe you and those you love will enjoy it! Thanks for stopping by today, and I sincerely hope you will come back again soon. Have a great day!

Looking For More SALAD Recipes?

You can find ALL of my recipes in the Recipe Index, which is located at the top of the page. I have lots of great tasting salad recipes for you to enjoy, including:

Interested In More Recipes?

Thank you for visiting this website. I appreciate you using some of your valuable time to do soIf you’re interested, I publish a newsletter 2 times per month (1st and 15th) with all the latest recipes, and other fun info. I would be honored to have you join our growing list of subscribers, so you never miss a great recipe!
There is a Newsletter subscription box on the top right side (or bottom) of each blog post, depending on the device you use, where you can easily submit your e-mail address (only) to be included in my mailing list.

You Can Also Find Me On Social Media:

Facebook page: The Grateful Girl Cooks!
Pinterest:
The Grateful Girl Cooks!
Instagram:
jbatthegratefulgirlcooks

Author's signature

Original recipe source: “Taste of Home” magazine, June/July 2006 edition, page 8, published by Reiman Publications, Inc.

0 from 0 votes
Southwestern Rice Salad
Prep Time
15 mins
Cook Time
15 mins
Total Time
30 mins
 

Southwestern Rice Salad is a yummy side or meatless main dish. Rice, black beans, corn, and peppers are mixed in a lightly seasoned dressing.

Category: Main Course Salad, Salad/Side Dish
Cuisine: Southwestern
Keyword: Southwestern rice salad
Servings: 12
Calories Per Serving: 305 kcal
Author: JB @ The Grateful Girl Cooks!
Ingredients
  • 1⅓ cups water
  • cup long grain white rice , uncooked
  • 1 Tablespoon vegetable oil
  • ¾ cup chopped green bell pepper
  • ½ cup chopped red onion (or shallot)
  • 1 medium carrot , peeled and chopped
  • 3 large garlic cloves , minced
  • 16 ounces frozen corn , thawed
  • 15 ounces canned black beans , rinsed and drained
  • 2 medium Roma tomatoes , chopped
  • 1 cup salted peanuts
  • cup fresh cilantro , finely chopped
For Salad Dressing:
  • cup extra virgin olive oil
  • cup fresh lemon juice
  • ¾ teaspoon ground cayenne pepper
  • ½ teaspoon ground cumin
Instructions
  1. Place rice in a saucepan with water; bring water to a boil. Reduce heat to low, cover pan. Simmer rice (covered) on low heat for 15 minutes; remove pan from heat. Let rice sit (covered), for 5 minutes; rinse rice with cold water; drain. Put rice in large serving bowl.

  2. TIP: If you want to save time, do the following steps while rice is cooking. In large skillet, heat vegetable oil on medium. Add green pepper, red onion, carrots, and minced garlic. Sauté until crisp-tender (4-5 minutes), stirring often so garlic won't burn. Add to rice; stir.

  3. Add corn, beans, tomatoes, peanuts and cilantro to rice; stir to combine.

  4. Use a wire whisk or fork to fully mix olive oil, lemon juice, cayenne and ground cumin in a small bowl. Mix well to ensure oil and juice are fully combined. Pour dressing over salad; toss well, to coat. Cover and refrigerate salad until time to serve. Store leftovers, covered, in refrigerator up to 4-5 days. Enjoy!

Nutrition Facts
Southwestern Rice Salad
Amount Per Serving (1 (1/12th of total))
Calories 305 Calories from Fat 180
% Daily Value*
Fat 20g31%
Saturated Fat 4g25%
Sodium 198mg9%
Potassium 410mg12%
Carbohydrates 28g9%
Fiber 5g21%
Sugar 1g1%
Protein 8g16%
Vitamin A 1056IU21%
Vitamin C 16mg19%
Calcium 38mg4%
Iron 2mg11%
* Percent Daily Values are based on a 2000 calorie diet.

Here’s one more to pin on your Pinterest boards!Southwestern Rice Salad is a yummy side or meatless main dish. Rice, black beans, corn, and peppers are mixed in a lightly seasoned dressing.

Greek-Style Chicken Wings

Greek-Style Chicken Wings can be oven-baked, or cooked in an air fryer! These marinated wings are served with homemade tzatziki sauce for dipping.Greek-Style Chicken Wings can be baked or cooked in an air fryer! These marinated wings are served with homemade tzatziki sauce for dipping.

Do you enjoy eating chicken wings? We sure do! A couple of years ago I purchased an air fryer with some gift cards I was given on my birthday. That was the beginning of my love for cooking (and eating) chicken wings.

This recipe for Greek-style chicken wings is simple. The wings can either be baked in the oven OR can be prepared in an air fryer, whichever is most convenient for you. I have included directions for both in the recipe card.

Greek-style chicken wings are marinated several hours, so remember to plan ahead if you are making this recipe! The marinated, seasoned wings are then cooked, then served with a simple Greek inspired homemade tzatziki sauce for dipping. It’s an easy recipe to prepare, and the wings taste wonderful! Here’s how to make them:

Scroll Down For A Printable Recipe Card At The Bottom Of The Page

Marinating The Greek-Style Chicken Wings

Because these wings taste best once they have marinated for several hours, be sure to plan ahead! Making the marinade is EASY! Simply combine the ingredients in a bowl. The marinade is made from lemon juice, olive oil, honey, oregano, garlic, and salt.

Once fully combined, pour the marinade over the chicken wings. You can either have the wings in a large re-sealable bag or in a shallow large container with a lid. Turn the wings, to ensure all are coated with marinade, then cover, and refrigerate for 6-8 hours (or overnight).

A Greek marinade is mixed together for the chicken wings.Pouring the marinade over the chicken wings before refrigerating.

Make The Tzatziki Sauce For Serving

I also make the dipping sauce ahead of time, because it will need time to fully chill, so the flavors can develop well. The sauce, also known as tzatziki sauce, is made with plain yogurt, feta cheese, chopped cucumber, dill, garlic and salt is a cinch to make!

Place the tzatziki ingredients in a blender or food processor. Blend or process until the sauce is smooth. Transfer the sauce to a small serving bowl, cover, and refrigerate until fully chilled and you are ready to serve. The sauce can be made up to 1 day ahead.

Ingredients for tzatziki sauce are placed in a blender to combine.After blending ingredients, the tzatziki sauce (for dipping) is smooth and creamy.

Baking In Oven Directions

If you are BAKING the Greek-style chicken wings, preheat the oven to 400°F. Drain the marinade off the chicken wings (discard the marinade). Place the wings on a wire rack sitting on top of a 9×13 or 15×10 baking pan.

Bake the wings for 35-40 minutes, flipping them over to the other side halfway through the cooking time. Once they have finished baking, I usually turn the oven to BROIL, and keeping the wings about 5-6 inches away, and brown them under the broiler for a couple minutes to help to “darken and crisp them up”. Keep an eye on them so they don’t burn! When browned, they are ready to serve.

Greek-style chicken wings are baked after marinating in sauce.Chicken wings are broiled after baking, to brown them up more.

 Air Fryer Directions

If you are using an air fryer to cook these Greek-style chicken wings, preheat your air fryer to 380° F. Place the marinated wings in the air fryer basket. Lay the wings into the basket, trying to keep as many of them in a single layer as possible.

Cook for 12 minutes, then turn the wings over to the other side. Place the basket back into the fryer, and continue to cook for an additional 12 minutes. Increase the temperature to 400°F., and cook for 4-5 more minutes. When done, the wings should be browned all over, and crispy on the outside. They are now ready to serve.

Greek-style chicken wings cooking in air fryer after marinating in sauce.

Serve The Greek-Style Chicken Wings

Serve the Greek-style chicken wings with small bowls of tzatziki sauce for dipping on the side. You can also serve the wings with the traditional slices of carrots and celery on the side, if desired. The carrots and celery taste great, dipped in the sauce, as well.

The Greek-style chicken wings are serving with dipping sauce, carrots and celery.

I hope you enjoy these Greek-style chicken wings, whether you bake them OR air fry them! If you like wings, be sure to check out my yummy recipes for baked Asian chicken wings, and buffalo honey hot wings, too!

Be sure to check out ALL of my recipes in the Recipe Index, which is located at the top of the page. There a LOT of great recipes to make and enjoy! Have a great day, thank you for visiting my blog, and I hope you come back soon.

Interested In More Recipes?

Thank you for visiting this website. I appreciate you using some of your valuable time to do soIf you’re interested, I publish a newsletter 2 times per month (1st and 15th) with all the latest recipes, and other fun info. I would be honored to have you join our growing list of subscribers, so you never miss a great recipe!
There is a Newsletter subscription box on the top right side (or bottom) of each blog post, depending on the device you use, where you can easily submit your e-mail address (only) to be included in my mailing list.

You Can Also Find Me On Social Media:

Facebook page: The Grateful Girl Cooks!
Pinterest:
The Grateful Girl Cooks!
Instagram:
jbatthegratefulgirlcooks

Author's signature

Original recipe source: “Taste of Home” magazine, April/May 2007 edition, page 23, published by Reiman Publications, Inc.

0 from 0 votes
Greek-Style Chicken Wings
Prep Time
15 mins
Cook Time
40 mins
Marinating Time (inactive)
6 hrs
Total Time
6 hrs 55 mins
 

Greek-Style Chicken Wings can be oven-baked, or cooked in an air fryer! Marinated wings are served with homemade tzatziki sauce for dipping.

Category: Appetizer, Main Dish
Cuisine: American, Greek
Keyword: Greek-style chicken wings
Servings: 4
Calories Per Serving: 581 kcal
Author: JB @ The Grateful Girl Cooks!
Ingredients
Marinade For Wings:
  • 3 Tablespoons fresh lemon juice
  • 2 Tablespoons olive oil
  • 2 Tablespoons honey
  • 1/4 teaspoon salt
  • 1 large garlic clove, minced
  • 3 pounds chicken wings (approx. 20 wings)
For Tzatziki Dipping Sauce:
  • 1/2 cup plain yogurt
  • 1/2 cup chopped, peeled cucumber
  • 1/2 cup crumbled feta cheese
  • 2 teaspoons dried dill weed or 2 Tablespoons fresh, chopped dill
  • 1 large garlic clove, peeled
  • 1 dash salt
Instructions
  1. Make Marinade For Chicken Wings: Whisk marinade ingredients well in a small bowl (lemon juice, olive oil, honey, oregano, garlic and salt). Pour marinade over chicken wings (use large re-sealable plastic bag or covered, shallow container). Toss wings, to ensure they're coated with marinade; cover and refrigerate 6-8 hours (or overnight).

  2. Make tzatziki sauce: Place yogurt, cucumber, feta, dill, garlic and salt in blender or food processor. Blend or process until sauce is smooth. Transfer sauce to small serving bowl; cover and refrigerate until fully chilled. Sauce can be made up to 1 day ahead.

If Oven-Baking:
  1. Preheat oven to 400° F. Drain marinade off wings (discard marinade). Place wings on a wire rack fitted on top of a 9x13 or 15x10 baking pan. Bake wings on the middle rack 35-40 minutes, turning them over halfway through cooking time. Once done, turn oven to BROIL, keeping wings 5-6 inches away from broiler element. Brown them under broiler for 1-2 minutes to help brown them. Don't let them burn! Once browned and cooked through, they're ready to serve.

If Using An Air Fryer:
  1. Preheat your air fryer to 380° F. Place marinated wings in air fryer basket, in a single layer, if possible. Cook for 12 minutes, then turn wings over. Place basket back into the fryer; continue to cook for 12 more minutes. Increase temperature to 400°F. and cook 4-5 more minutes. Once wings are crispy brown and cooked through, they're ready to serve.

To Serve:
  1. Place hot wings on serving plates. Serve with tzatziki sauce for dipping, and slices of celery and carrots on the side. Enjoy!

Nutrition Facts
Greek-Style Chicken Wings
Amount Per Serving (1 (1/4 of total))
Calories 581 Calories from Fat 369
% Daily Value*
Fat 41g63%
Saturated Fat 12g75%
Trans Fat 1g
Cholesterol 160mg53%
Sodium 512mg22%
Potassium 361mg10%
Carbohydrates 12g4%
Fiber 1g4%
Sugar 11g12%
Protein 40g80%
Vitamin A 408IU8%
Vitamin C 7mg8%
Calcium 163mg16%
Iron 2mg11%
* Percent Daily Values are based on a 2000 calorie diet.

Here’s one more to pin on your Pinterest boards!Greek-Style Chicken Wings can be oven-baked, or cooked in an air fryer! Marinated wings are served with homemade tzatziki sauce for dipping.

Pumpkin Spice Waffles

Pumpkin Spice Waffles are an amazing breakfast treat all year long! Golden brown, crispy, and simple to make- you’re gonna love ’em!
Pumpkin Spice Waffles are an amazing breakfast treat all year long! Golden brown, crispy, and simple to make- you're gonna love 'em!

Do you enjoy waffles? We sure do in our home! Every few weeks, my husband will ask if we can have waffles for breakfast, and out comes our trusty ol’ waffle iron. We don’t have waffles too often (gotta keep our girlish figures, right? *wink wink*), but when we do, we love ’em!

The easy recipe I want to share today is for pumpkin spice waffles. With the inclusion of canned pumpkin puree and pumpkin spice mix in the batter, there is a really nice Fall-inspired flavor to these yummy breakfast treats! They’re crispy, golden brown, and delicious! Remember- even though they are “Fall-inspired” doesn’t mean you can’t enjoy this hearty breakfast year-round! Here’s how to make them:

Scroll Down For A Printable Recipe Card At The Bottom Of The Page

Make The Batter

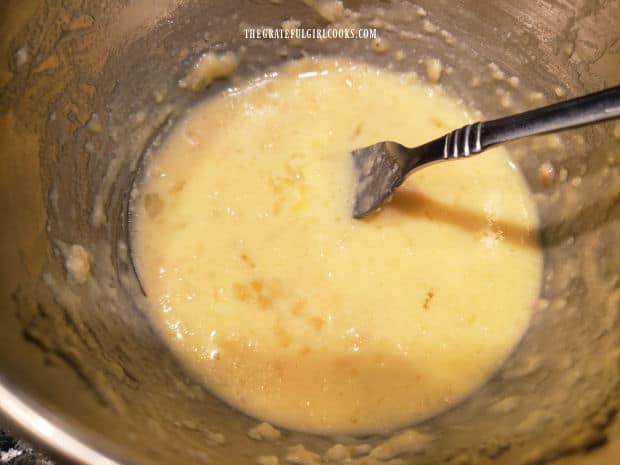
Whisk buttermilk, pumpkin puree, melted butter and eggs together in a large mixing bowl. Continue to whisk these wet ingredients until the mixture is smooth.

Pumpkin puree, eggs, buttermilk and butter are whisked together for the batter.The wet ingredients are whisked for the pumpkin spice waffles batter.

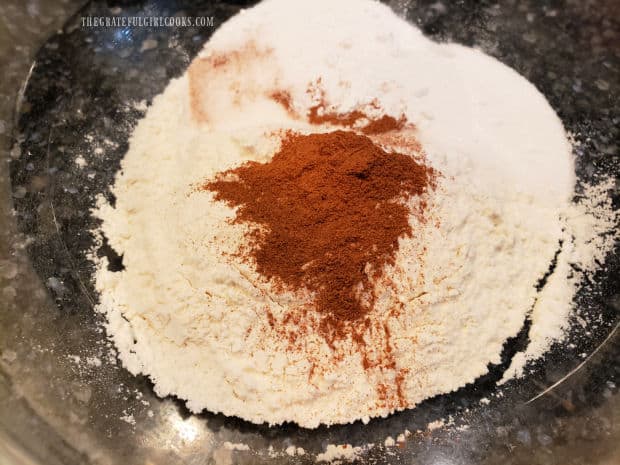
In a separate large mixing bowl, whisk (or stir) together flour, sugar, baking powder, salt, and pumpkin pie spice. NOTE: I make my own pumpkin pie spice mix… you can find my recipe here.

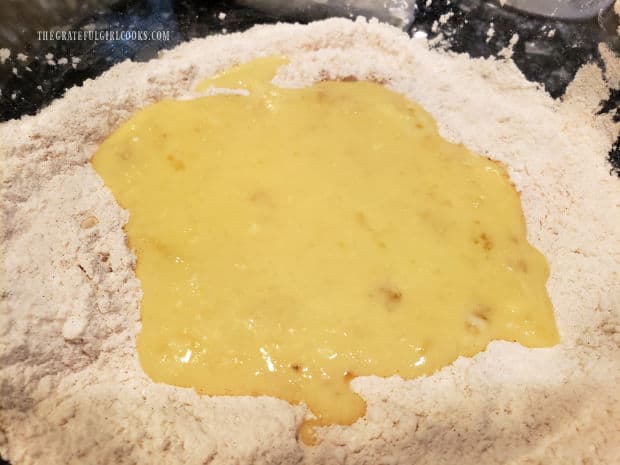
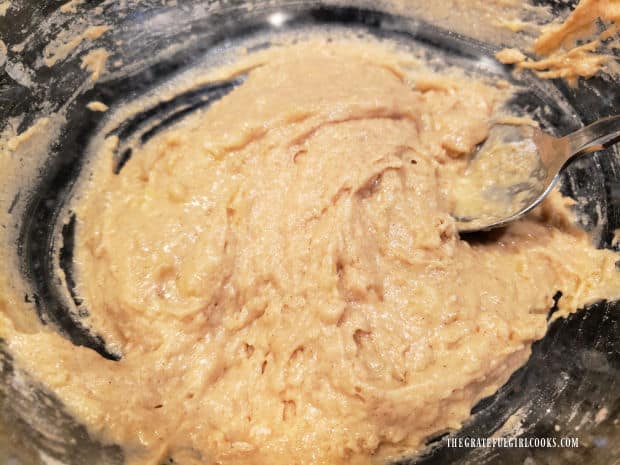
Pour the wet batter into the bowl with the dry ingredients. Stir the batter only until all ingredients are mixed and moistened. It’s okay if the batter is still a little bit lumpy… just don’t overmix.

Flour sugar and spices are combined for the waffle batter.Pumpkin-flavored batter is added to the dry ingredients for the waffles.

Cook The Pumpkin Spice Waffles

Preheat your waffle iron, brushing with oil, if required by manufacturer instructions. If using a standard sized waffle iron, you will use about 1/2 cup of batter for each waffle (for a yield of 4-6 waffles). If using a Belgian waffle maker (as shown below), you will use about 1 cup of batter per waffle (for a yield of 3 waffles). 

Cook the waffles according to manufacturer instructions and timing recommendations. Depending on the type waffle make you use, they will typically cook for somewhere between 3-5 minutes. When done, the pumpkin spice waffles should be crispy and lightly browned. Remove waffle, and serve immediately.

Note: The batter for this recipe is fairly thick, so do not use with a “pour into the top” type of waffle iron (some newer models). The first time I made these I tried a new type of waffle iron I had been given, where you pour the batter through a type of funnel into the top without opening the waffle iron. Complete failure, cause the batter was too thick for the funnel loader. My bad.

One of the pumpkin spice waffles cooking in a waffle iron.Once done, pumpkin spice waffles are golden brown and crispy on the outside.

To serve, top the hot pumpkin spice waffles with a bit of butter, and drizzle with maple syrup. Serve hot, and enjoy!

Butter and drizzled maple syrup top off the pumpkin spice waffles.

We really enjoy the warm Fall-inspired flavors of these pumpkin spice waffles. I hope you will too! Thanks for stopping by, and I hope you come back again soon. Have a GREAT day!

Looking For More Waffle OR Pancake Recipes?

You can find all of my waffle or pancake recipes in the Recipe Index, which is located at the top of the page. I have several, including:

Interested In More Recipes?

Thank you for visiting this website. I appreciate you using some of your valuable time to do soIf you’re interested, I publish a newsletter 2 times per month (1st and 15th) with all the latest recipes, and other fun info. I would be honored to have you join our growing list of subscribers, so you never miss a great recipe!
There is a Newsletter subscription box on the top right side (or bottom) of each blog post, depending on the device you use, where you can easily submit your e-mail address (only) to be included in my mailing list.

You Can Also Find Me On Social Media:

Facebook page: The Grateful Girl Cooks!
Pinterest:
The Grateful Girl Cooks!
Instagram:
jbatthegratefulgirlcooks

Author's signature

Original recipe source: https://damndelicious.net/2019/11/22/pumpkin-spice-waffles/

0 from 0 votes
Pumpkin Spice Waffles
Prep Time
10 mins
Cook Time
15 mins
Total Time
25 mins
 

Pumpkin Spice Waffles are an amazing breakfast treat all year long! Golden brown, crispy, and simple to make- you're gonna love 'em!

Category: Breakfast
Cuisine: American
Keyword: pumpkin spice waffles
Servings: 5 (4-6) standard size waffles
Calories Per Serving: 332 kcal
Author: JB @ The Grateful Girl Cooks!
Ingredients
  • cups all purpose flour
  • 2 teaspoons brown sugar
  • 1 teaspoon pumpkin pie spice
  • teaspoons baking powder
  • 1 teaspoon salt
  • 1 teaspoon baking soda
  • cups buttermilk
  • 1 cup canned pumpkin puree NOT pumpkin pie filling
  • 2 large eggs
  • ¼ cup butter, melted
Instructions
  1. Whisk buttermilk, pumpkin puree, melted butter and eggs together in a large mixing bowl. Continue to whisk until mixture is smooth.

  2. In a separate large mixing bowl, whisk (or stir) together flour, sugar, baking powder, salt, and pumpkin pie spice. Pour wet batter into bowl with the dry ingredients. Stir only until all ingredients are mixed and moistened. It's okay if batter is a little bit lumpy... don't overmix.

  3. Preheat waffle iron, brushing with oil, if suggested by manufacturer instructions. If using a standard sized waffle iron, use about 1/2 cup of batter for each waffle (yield of 4-6 waffles). If using a Belgian waffle maker, use about 1 cup of batter per waffle (yield of 3 waffles).  Cook according to manufacturer instructions. Depending on the type waffle make you use, they will typically cook for somewhere between 3-5 minutes. When done, waffles should be crispy and lightly browned. Remove waffle; serve immediately, topped with butter and maple syrup. Enjoy!

Recipe Notes

NOTE: Caloric calculation was made based on 4 servings.

Nutrition Facts
Pumpkin Spice Waffles
Amount Per Serving (1 g)
Calories 332 Calories from Fat 126
% Daily Value*
Fat 14g22%
Saturated Fat 8g50%
Trans Fat 1g
Polyunsaturated Fat 1g
Monounsaturated Fat 4g
Cholesterol 105mg35%
Sodium 861mg37%
Potassium 385mg11%
Carbohydrates 43g14%
Fiber 3g13%
Sugar 6g7%
Protein 10g20%
Vitamin A 8118IU162%
Vitamin C 2mg2%
Calcium 159mg16%
Iron 3mg17%
* Percent Daily Values are based on a 2000 calorie diet.

Here’s one more to pin on your Pinterest boards!Pumpkin Spice Waffles are an amazing breakfast treat all year long! Golden brown, crispy, and simple to make- you're gonna love 'em!