Skillet Grilled Rockfish

Skillet Grilled Rockfish is an easy, tasty dish that’s ready in 15 minutes! Well-seasoned fish fillets are cooked in butter until browned.
Skillet Grilled Rockfish is an easy, tasty dish that's ready in 15 minutes! Well-seasoned fish fillets are cooked in butter until browned.

A couple of years ago, my husband brought home some rockfish from the grocery store. Since we had never ever had rockfish before, it took a few minutes to come up with a plan on how to fix it. My recipe for pan-seared rockfish with fresh herbs was my first try, and we really loved it! We are big fans of rockfish, and love it’s delicate, mild flavor.

Nowadays we keep a package or two in our freezer, and have found it be be delicious, versatile, perfect for grilling, stovetop cooking or baking, and yummy on fish tacos! This recipe (as printed below) is for two servings, but the recipe can EASILY be doubled or tripled. Let me show you how easy it is to make this version of skillet grilled rockfish!

Scroll Down For A Printable Recipe Card At The Bottom Of The Page

Make The Spice Mix For The Fish

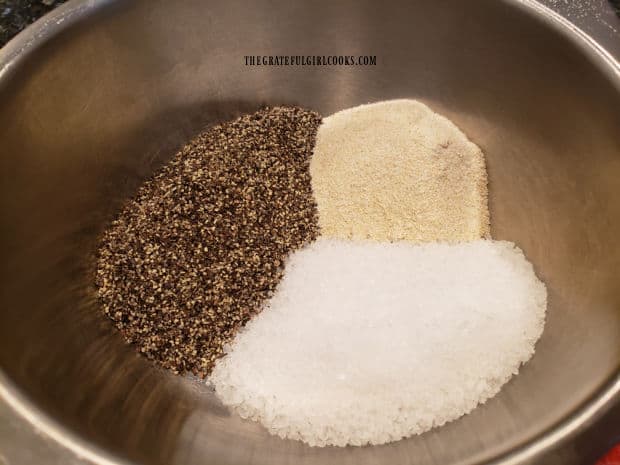
The spice mix for the rockfish is made using several common ingredients. They are flour, cornmeal, onion powder, basil, garlic powder, thyme, cayenne pepper, salt & pepper. You can combine them in a small bowl or place the ingredients directly into a re-sealable plastic bag (and mix them together).

The spice mix gives the fish a nice flavor, but it’s not overpowering AT ALL. The flour and cornmeal help to form a nice crust on the fish after cooking in melted butter (it browns nicely), and the variety of spices make it taste good!

A seasoning mix for the rockfish is mixed in a small bowl.

Lightly pat the rockfish fillets semi-dry on paper towels, then place them into a plastic re-sealable bag with the spice mixture inside. Gently shake or flip the bag over several times until the fish has been coated with the spices.

Rockfish fillets are combined with the spice mix in a re-sealable bag.After the rockfish fillets are coated with spice mix, they're ready to cook.

Time To Make Skillet Grilled Rockfish!

Now that the rockfish has been seasoned, it’s time to cook them. Melt butter in a large skillet (preferably cast iron) on medium heat. Once the butter has melted and the skillet is really hot (but not smoking), place the rockfish into the skillet. Let the fish cook for 5-6 minutes, without moving them in the pan. This will allow it time to form a nicely browned crust on the bottom.

Skillet grilled rockfish fillets are cooked in melted butter in a skillet.

Once you can see that the bottom of the fish has a nice browned color to it, carefully turn the fish over to the other side. Continue to cook for another 5-6 minutes.

NOTE: The cooking time may vary a tiny bit, due to varying thicknesses of fish being used. Once done cooking, both sides of the fish should be crusty and browned. The fish should also flake easily with a fork.

The skillet grilled rockfish fillets are flipped over halfway through cooking time.

Time To Eat The Skillet Grilled Rockfish!

And just like that… the skillet grilled rockfish is done, and ready to eat! See how easy this dish is to make? Transfer the fish to serving plates, and garnish with a lemon wedge, if desired. Serve immediately, and enjoy your easy, delicious seafood dinner!

A serving of skillet grilled rockfish on a plate with broccoli, rice and garlic bread.When done cooking, the crusty, browned rockfish should flake easily.

I really hope you will have the opportunity to make skillet grilled rockfish for yourself or your family. We sure enjoy it, and hope you will, too. Thanks for stopping by, and have a wonderful day.

Looking For More ROCKFISH Recipes?

You can find all of my seafood recipes in the Recipe Index, which is located at the top of the page. I have several recipes featuring rockfish, including:

Interested In More Recipes?

Thank you for visiting this website. I appreciate you using some of your valuable time to do soIf you’re interested, I publish a newsletter 2 times per month (1st and 15th) with all the latest recipes, and other fun info. I would be honored to have you join our growing list of subscribers, so you never miss a great recipe!
There is a Newsletter subscription box on the top right side (or bottom) of each blog post, depending on the device you use, where you can easily submit your e-mail address (only) to be included in my mailing list.

You Can Also Find Me On Social Media:

Facebook page: The Grateful Girl Cooks!
Pinterest:
The Grateful Girl Cooks!
Instagram:
jbatthegratefulgirlcooks

Author's signature

Recipe adapted from: “Taste of Home” magazine, June/July 2005 edition, page 40, published by Reiman Publications, Inc.

0 from 0 votes
Skillet Grilled Rockfish
Prep Time
5 mins
Cook Time
10 mins
Total Time
15 mins
 

Skillet Grilled Rockfish is an easy, tasty dish that's ready in 15 minutes! Well-seasoned fish fillets are cooked in butter until browned.

Category: Entree-Seafood, Main Dish
Cuisine: American
Keyword: skillet grilled rockfish
Servings: 2
Calories Per Serving: 331 kcal
Author: JB @ The Grateful Girl Cooks!
Ingredients
For Spice Mix:
  • cup all purpose flour
  • cup cornmeal
  • ½ teaspoon garlic powder
  • ½ teaspoon onion powder
  • ½ teaspoon dried basil
  • ¼ teaspoon dried thyme
  • teaspoon (EACH) salt and pepper
  • teaspoon cayenne pepper
For Fish:
  • 12 ounces rockfish fillets (two 6 ounce fillets)
  • 2 Tablespoons butter
  • 2 lemon wedges (for garnish-optional)
Instructions
  1. Combine spice mix ingredients in a small bowl OR place directly into a re-sealable plastic bag (and mix them together).

  2. Lightly pat fish dry on paper towels; place fish into bag with spice mix. Gently shake/flip bag several times until fish is covered with spices. Tip: only season TWO pieces of fish at a time.

  3. Melt butter in large skillet (preferably cast iron) on medium heat. Once melted, and skillet is hot (but not smoking), put rockfish in skillet. Let fish cook for 5-6 minutes, without moving them in the pan. This allows time to form a nicely browned crust on the bottom. When bottom of fish is nicely browned, carefully turn fish to other side. Continue to cook for 5-6 more minutes. NOTE: Cooking time may vary a bit, due to different thicknesses of fish. When done, both sides of fish should be crusty/browned, and should flake easily with a fork.

  4. Transfer fish to plates. Serve immediately, with a lemon wedge on top of fish, if desired. Enjoy!

Nutrition Facts
Skillet Grilled Rockfish
Amount Per Serving (1 fillet)
Calories 331 Calories from Fat 126
% Daily Value*
Fat 14g22%
Saturated Fat 8g50%
Trans Fat 1g
Cholesterol 115mg38%
Sodium 373mg16%
Potassium 749mg21%
Carbohydrates 16g5%
Fiber 2g8%
Sugar 1g1%
Protein 34g68%
Vitamin A 438IU9%
Vitamin C 10mg12%
Calcium 44mg4%
Iron 2mg11%
* Percent Daily Values are based on a 2000 calorie diet.

Here’s one more to pin on your Pinterest boards!Skillet Grilled Rockfish is an easy, tasty dish that's ready in 15 minutes! Well-seasoned fish fillets are cooked in butter until browned.


Cream Of Asparagus Soup

Make four servings of delicious Cream of Asparagus Soup in under 30 minutes! It’s so easy to make – serve as a main dish OR as a side dish.
Make four servings of delicious Cream of Asparagus Soup in under 30 minutes! It's so easy to make - serve as a main dish OR as a side dish.

We love asparagus, especially in the Spring when it is readily available at much lower than normal prices! Recently my husband picked up a couple large bunches of asparagus at the grocery store, so we enjoyed some of them pan-steamed until crisp-tender and served with chicken.

The rest of the fresh asparagus was used for this wonderful tasting cream of asparagus soup! YUYM! The original recipe came from one of my OLD “Taste of Home” magazines (from 21 years ago!), but it is a timeless, fantastic recipe you’re gonna love! One of the reasons I love this soup is because not all of the asparagus is pureed until creamy. Half of the soup is pureed in a blender or food processor to make it creamy; but some of the tender small pieces of asparagus are left intact in the soup. I like that!

This cream of asparagus soup is incredibly EASY to make, as well. If you enjoy fresh asparagus, I’m confident you’ll enjoy a bowl of this delicious soup. Here is how to make four servings of cream of asparagus soup:

Scroll Down For A Printable Recipe Card At The Bottom Of The Page

Prepare The Vegetables For The Soup

The first thing you will do is sauté chopped onion and minced garlic in a large saucepan. Heat oil on medium-low heat until hot, but not smoking. Add the veggies, then cook for 3-4 minutes (until tender). Stir often, to ensure the garlic does not burn and become bitter. 

Chopped onion and minced garlic are cooked in oil in a large saucepan.

Add the fresh asparagus pieces, low-sodium chicken broth, and red pepper flakes to the saucepan. Bring the broth to a boil, then reduce the heat to Low, and cover the saucepan. Let this mixture simmer (covered) on low for 13-15 minutes, or until the asparagus is tender. Once done, remove the pan from the heat.

Asparagus, chicken broth, and red pepper flakes are added to the cream of asparagus soup in pan.

Make The Cream Base For The Soup

Remove about HALF of the asparagus mixture (including broth), and place it in a blender (or food processor). Add cream cheese, sour cream and dried dill weed or fresh chopped dill. Process these ingredients in the blender or food processor until smooth and creamy. 

Half the soup mixture is transferred out of the saucepan into a blender for processing.Cream cheese, sour cream and dried dill are added to asparagus in blender and processed until creamy.

Pour the creamed mixture back into the saucepan with the remaining ingredients, and stir to fully combine the cream of asparagus soup. Turn the heat to Medium, and cook, just until the soup is heated through. The cream of asparagus soup will be thick, creamy, and have small pieces of tender asparagus in there, as well.

Pureed cream of asparagus soup is added back into remaining ingredients in saucepan.After stirring, the cream of asparagus soup is thick and creamy.

Serve The Cream Of Asparagus Soup

Once the cream of asparagus soup is fully heated through, it is time to serve! See how easy that was? Ladle the hot soup into four bowls, and lightly sprinkle each portion with ground nutmeg on top. That’s it! Grab a spoon, and enjoy this delicious, thick, creamy, soup! Store any leftover soup in an airtight container in the refrigerator for up to 3-4 days. Reheat in a saucepan or in the microwave.

The cream of asparagus soup is sprinkled with ground nutmeg and served hot, in a white bowl.

I truly hope you try this delicious cream of asparagus soup. We LOVE it, and trust you will, too. Thank you for taking time out of your busy day to visit my blog. Have a great day, and come back for another visit real soon.

Looking For More SOUP Recipes?

You can find all of my soup recipes in the Recipe Index, which is located at the top of the page. I have lots of them you’ll enjoy, including:

Interested In More Recipes?

Thank you for visiting this website. I appreciate you using some of your valuable time to do soIf you’re interested, I publish a newsletter 2 times per month (1st and 15th) with all the latest recipes, and other fun info. I would be honored to have you join our growing list of subscribers, so you never miss a great recipe!
There is a Newsletter subscription box on the top right side (or bottom) of each blog post, depending on the device you use, where you can easily submit your e-mail address (only) to be included in my mailing list.

You Can Also Find Me On Social Media:

Facebook page: The Grateful Girl Cooks!
Pinterest:
The Grateful Girl Cooks!
Instagram:
jbatthegratefulgirlcooks

Author's signature

Original recipe source: “Taste of Home” magazine, April/May 2000 edition, page 17, published by Reiman Publications, Inc.

0 from 0 votes
Cream of Asparagus Soup
Prep Time
10 mins
Cook Time
15 mins
Total Time
25 mins
 

Make four servings of delicious Cream of Asparagus Soup in under 30 minutes! It's so easy to make - serve as a main dish OR as a side dish.

Category: Main Course, Side Dish, Soup
Cuisine: American
Keyword: cream of asparagus soup
Servings: 4
Calories Per Serving: 119 kcal
Author: JB @ The Grateful Girl Cooks!
Ingredients
  • 1 teaspoon vegetable oil
  • 1 medium yellow onion , finely chopped
  • 2 medium garlic cloves , minced
  • 3 cups fresh cut asparagus (1" slices) woody bottom part of stem removed/discarded
  • cups low-sodium chicken broth (or regular)
  • teaspoon crushed red pepper flakes
  • 3 ounces light cream cheese , OR regular, cut in small cubes
  • 2 Tablespoons light sour cream (or regular)
  • 1 teaspoon dried dill weed , OR 1 Tablespoon chopped fresh dill
  • ½ teaspoon ground nutmeg , for garnish
Instructions
  1. Heat oil on medium-low heat until hot, but not smoking. Add onion and garlic; cook 3-4 minutes (until tender). Stir often, to ensure garlic doesn't burn and become bitter. 

  2. Add asparagus pieces, chicken broth, and red pepper flakes to saucepan. Bring broth to a boil, then reduce heat to Low. Cover the saucepan. Let simmer (covered) on low 13-15 minutes, or until asparagus is tender. Once done, remove pan from the heat.

  3. Remove HALF the asparagus mixture (including broth); place in blender or food processor. Add the cream cheese, sour cream and dill. Process until smooth and creamy. Pour creamed mixture back into saucepan (with remaining ingredients), and stir to fully combine soup. Cook on Medium heat only until soup is heated through.

  4. Ladle hot soup into four bowls; lightly sprinkle each portion with ground nutmeg. Grab a spoon, and enjoy this delicious, thick, creamy, soup! Store any leftover soup in an airtight container in refrigerator for up to 3-4 days. Reheat in a saucepan or in a microwave.

Nutrition Facts
Cream of Asparagus Soup
Amount Per Serving (1 (1/4 of total))
Calories 119 Calories from Fat 54
% Daily Value*
Fat 6g9%
Saturated Fat 4g25%
Cholesterol 14mg5%
Sodium 153mg7%
Potassium 452mg13%
Carbohydrates 11g4%
Fiber 3g13%
Sugar 5g6%
Protein 8g16%
Vitamin A 931IU19%
Vitamin C 8mg10%
Calcium 84mg8%
Iron 3mg17%
* Percent Daily Values are based on a 2000 calorie diet.

Here’s one more to pin on your Pinterest boards!Make four servings of delicious Cream of Asparagus Soup in under 30 minutes! It's so easy to make - serve as a main dish OR as a side dish.

Orange Cashew Chicken

Orange Cashew Chicken is a yummy twist on a Chinese classic! Chicken, veggies and cashews are cooked in a thick, Asian-inspired orange sauce.

Many, many years ago… long before I ever even had the remotest thought of starting a blog, I jotted down a recipe on an index card and filed it away in an old wooden recipe box of mine. Back in the days before Pinterest… and before I even had a computer! Recently I stumbled upon this old recipe, and decided to share it here on the blog, because it is soooo good! I don’t even know who to properly credit for the old original recipe, but this orange cashew chicken sure tastes great!

The recipe is INCREDIBLY EASY to make, and it’s not an understatement to say I LOVE IT! When I make it, I do the prep work ahead of time (cut the veggies/chicken, and make the sauce (easy peasy). Then when I’m ready to cook our meal all that is needed is to stir-fry the chicken and veggies for about 8 minutes, add the sauce, and cook 2 more minutes to let the sauce thicken. That’s it!

If you enjoy traditional cashew chicken, you can check out my recipe for that, too. But… you’ve just got to try this one for orange cashew chicken. I truly think you will love it! Here’s how easy it is to make:

Scroll Down For A Printable Recipe Card At The Bottom Of The Page

Prepping First Is The Key!

If you prep the ingredients first, this dish is a cinch to cook in only about 10 minutes! Pat boneless, skinless chicken breasts dry with paper towels. TIP: The reason you want to dry them this way is so that when they hit the hot skillet, the extra moisture doesn’t “steam” the chicken. You want the chicken to “sear” and brown slightly.

Cut the chicken breasts into 1″ cubes. Thinly slice two medium carrots, and roughly chop up the celery until you have 1/2 cup. Set aside (or refrigerate, if saving for later in the day) until ready to prepare this dish.

In a small bowl, combine the orange sauce ingredients, and whisk or stir together until fully combined. The sauce ingredients are orange juice (fresh or commercially prepared work well), cornstarch, soy sauce, honey, and ginger (fresh or dried). Set aside.

Chicken breast, carrots and celery are cut and ready to stir-fry.An Asian-inspired orange sauce is whisked and is ready to add to orange cashew chicken.

Stir-Fry The Chicken And Veggies

When ready to cook, heat 2 Tablespoons of vegetable oil on medium-high heat in a large skillet. Let the oil get really hot (but not smoking) before adding anything to the skillet. This will allow the chicken to brown nice and quick.

Add the chicken, carrots and celery to the hot oil. Cook the chicken and veggies for about 8-9 minutes, stirring often. When done, the chicken will be lightly browned, and the veggies will be tender. Once done, reduce the heat to medium-low.

Carrots, celery and chicken are stir-fried in hot oil until cooked and tender.After stir-frying, the chicken is lightly browned and veggies are tender.

Add The Orange Sauce

Give the orange sauce a good stir, then add it to the skillet with the chicken mixture. Stir to combine, and bring the sauce to a boil. Cook for 2 minutes, stirring constantly as the sauce will quickly thicken in the skillet.

Once the sauce has cooked for 2 minutes, add the cashews to the skillet. Stir, to coat everything very well with the thickened sauce.

The sauce is added to the orange cashew chicken and cooked for 2 minutes.Roasted cashews are added to the thick orange sauce, chicken and veggies in skillet.

At this point, the chicken, veggies and cashews should be hot, and the sauce will be nice and thick. That means the orange cashew chicken is ready to serve! See how easy that was?

Once heated through, the orange cashew chicken is ready for serving.

Time To Serve The Orange Cashew Chicken!

Orange Cashew Chicken is best when served on top of a bed of steamed rice. I highly recommend serving this dish with rice (a perfect pairing)! Sprinkling the chicken with sliced green onions and sesame seeds is a nice garnish and pop of color for this dish as well, but that is optional.

The chicken and veggies are tender, and the thick orange sauce is… wonderfully scrumptious! All the flavors of this orange cashew chicken “play well together”. I truly feel you and your friends or family will love this dish, too!

Orange Cashew Chicken is served on white rice, garnished with green onions and sesame seeds.

Thanks for taking the time to visit my blog today. I hope you have a great day, and trust you will come back soon for more great recipes like this one! Take care, and may God Bless You.

Looking For More “Asian-Inspired” Recipes?

You can find all of my recipes in the Recipe Index, which is located at the top of the page. I have quite a few recipes for Asian-inspired foods, including:

Interested In More Recipes?

Thank you for visiting this website. I appreciate you using some of your valuable time to do soIf you’re interested, I publish a newsletter 2 times per month (1st and 15th) with all the latest recipes, and other fun info. I would be honored to have you join our growing list of subscribers, so you never miss a great recipe!
There is a Newsletter subscription box on the top right side (or bottom) of each blog post, depending on the device you use, where you can easily submit your e-mail address (only) to be included in my mailing list.

You Can Also Find Me On Social Media:

Facebook page: The Grateful Girl Cooks!
Pinterest:
The Grateful Girl Cooks!
Instagram:
jbatthegratefulgirlcooks

Author's signature

Original recipe source: unknown (found my handwritten recipe card in an old recipe box from many years ago-no source noted)

0 from 0 votes
Orange Cashew Chicken
Prep Time
10 mins
Cook Time
10 mins
Total Time
20 mins
 

Orange Cashew Chicken is a yummy twist on a Chinese classic! Chicken, veggies and cashews are cooked in a thick, Asian-inspired orange sauce.

Category: Entree
Cuisine: Asian
Keyword: orange cashew chicken
Servings: 4
Calories Per Serving: 410 kcal
Author: JB @ The Grateful Girl Cooks!
Ingredients
  • 1 pound boneless, skinless chicken breasts (I use 2 LARGE breasts)
  • 2 medium carrots peeled
  • ½ cup chopped celery
  • 2 Tablespoons Vegetable oil
  • ½ cup roasted cashews
For Orange Sauce:
  • ¾ cup orange juice fresh or commercially prepared
  • ¼ cup honey
  • 3 Tablespoons soy sauce (low sodium, if available)
  • 2 Tablespoons corn starch
  • ¼ teaspoon dried ginger (or 1 tsp. fresh, finely grated ginger)
  • ½ teaspoon orange zest (finely grated peel) OPTIONAL
For Serving (Optional): Hot steamed rice, sesame seeds and sliced green onions
    Instructions
    1. Pat chicken dry with paper towels. Cut chicken into 1" cubes. Thinly slice carrots, and roughly chop celery. Set aside (or refrigerate, if saving for later in the day) until ready to cook.

    2. Make Sauce: In small bowl, whisk or stir sauce ingredients together until combined. Set aside.

    3. Heat oil on medium-high heat in large skillet until really hot (but not smoking). Add chicken, carrots and celery to hot oil. Stir-fry for 8-9 minutes, stirring often. When done, chicken will be lightly browned on all sides, and veggies will be tender. Once done, reduce heat to medium-low.

    4. Stir sauce, then add it to chicken mixture. Stir to combine; bring sauce to a boil. Cook for 2 minutes, stirring constantly. Once sauce has thickened, add the cashews,; stir to combine with chicken, veggies and sauce.

    5. Serve orange cashew chicken on top of hot, steamed rice. If desired (optional), sprinkle the top of each serving with sesame seeds, and a few sliced green onions. Serve hot... and enjoy!

    Recipe Notes

    NOTE: The caloric calculation does not include rice (optional for serving with this dish).

    Nutrition Facts
    Orange Cashew Chicken
    Amount Per Serving (1 (1/4 of total))
    Calories 410 Calories from Fat 162
    % Daily Value*
    Fat 18g28%
    Saturated Fat 8g50%
    Trans Fat 1g
    Cholesterol 73mg24%
    Sodium 567mg25%
    Potassium 774mg22%
    Carbohydrates 36g12%
    Fiber 2g8%
    Sugar 24g27%
    Protein 28g56%
    Vitamin A 5279IU106%
    Vitamin C 27mg33%
    Calcium 37mg4%
    Iron 2mg11%
    * Percent Daily Values are based on a 2000 calorie diet.

    Here’s one more to pin on your Pinterest boards!Orange Cashew Chicken is a yummy twist on a Chinese classic! Chicken, veggies and cashews are cooked in a thick, Asian-inspired orange sauce.

    Making Stabilized Whipped Cream

    Making stabilized whipped cream is easy! This sweetened cream will hold it’s shape for days- perfect for decorating pies, cheesecakes, etc.!
    Making stabilized whipped cream is easy! This sweetened cream will hold it's shape for days- perfect for decorating pies, cheesecakes, etc.!

    Ever baked a gorgeous pie or dessert, topped it with some piped whipped cream, only to see that whipped cream collapse or lose it’s shape after a few hours (or the next day)? I have, and that’s why I make and decorate with STABILIZED whipped cream which holds it’s shape for days, just like the pretty pies at a bakery!

    Did you know making stabilized whipped cream is EASY to make by adding a simple ingredient? Yep that’s right! By adding unsweetened gelatin, you will be able to pipe gorgeous whipped cream decorations onto your favorite desserts, and they will still look fantastic 3-4 days later!  I’ve used stabilized whipped cream quite recently to decorate a Mint Brownie Pie (shown above), and on a Lemon Cream Cheese Tart, Here’s how to make it:

    Scroll Down for A Printable Recipe Card At the Bottom Of The Page

    Making Stabilized Whipped Cream

    TIP: Before beginning, place a large mixing bowl and a whisk attachment (for stand mixer or electric mixer) in the freezer for 5 minutes to get them chilled. This will help the whipped cream to thicken a bit quicker when you make it!

    Okay… here we go. Unflavored gelatin (or gelatin) is the secret ingredient! You can find this at most grocery stores in either the baking section or the jello section. The way I buy it is in small envelopes (see photo below). This recipe yields two cups of whipped cream, and will only use a TEASPOON of gelatin powder, which is less than one envelope of the powder, and this stuff will last a long time, so it’s a good investment.

    Add 4 teaspoons of water to a small, microwave-safe bowl. Sprinkle the gelatin powder on top, and let it sit, undisturbed for 3-4 minutes. Then place the bowl of gelatin in the microwave. Cook on high for 10 seconds… just long enough to fully dissolve the gelatin! Give it a stir, then let the gelatin cool a little before adding it to the whipped cream (as shown below).

    Unflavored gelatin powder is used to make stabilized whipped cream.Gelatin powder is sprinkled on top of water and is left to sit for 3-4 minutes.

    Preparing The Whipped Cream

    Remove the bowl and whisk attachment from the freezer. It should be nice and COLD! Whip heavy whipping cream, powdered sugar, and vanilla extract on high speed until it starts to thicken a bit and soft peaks can be formed.

    Whipping cream, powdered sugar and vanilla are beaten until soft peaks form.

    Slowly add the microwaved and cooled gelatin to the whipped cream while whipping on medium speed until stiff peaks form. TIP: It’s important to not just DUMP the gelatin all at once into the whipping cream mixture or else it might get clumpy, okay? 

    Gelatin and water are microwaved until powder dissolves, then let cool.Gelatin mixture is slowly added to whipped cream, as it is being beaten.

    How Do I Know When It Is Ready To Use?

    You can tell if the peaks are stiff enough by turning off the mixer, and lifting the whisk attachment up from the whipping cream several times. When “done”, stiff peaks of whipping cream will stand up firmly on their own, and they shouldn’t collapse or fall over in the bowl.

    That is how you will know the stabilized whipped cream is ready! You can transfer it to a pastry bag and refrigerate it until you are ready to decorate or serve your dessert. You can store the stabilized whipped cream for several days in the pastry bag or in a sealed container. It will hold it’s shape for several days on a refrigerated dessert.

    Whipping cream is beaten until it easily forms stiff peaks.Making stabilized whipped cream lets you pipe it onto desserts and it will hold it's shape.

    That’s it! See how easy it is? Pretty soon you can be making stabilized whipped cream, too! Your beautiful desserts with their nice whipped cream decorations will thank you for it!

    Interested In More Recipes?

    Thank you for visiting this website. I appreciate you using some of your valuable time to do soIf you’re interested, I publish a newsletter 2 times per month (1st and 15th) with all the latest recipes, and other fun info. I would be honored to have you join our growing list of subscribers, so you never miss a great recipe!
    There is a Newsletter subscription box on the top right side (or bottom) of each blog post, depending on the device you use, where you can easily submit your e-mail address (only) to be included in my mailing list.

    You Can Also Find Me On Social Media:

    Facebook page: The Grateful Girl Cooks!
    Pinterest:
    The Grateful Girl Cooks!
    Instagram:
    jbatthegratefulgirlcooks

    Author's signature

    Original recipe source: Danielle, at livewellbakeoften.com.how-to-make-stabilized-whipped-cream/

    0 from 0 votes
    Making Stabilized Whipped Cream
    Prep Time
    10 mins
    Cook Time
    0 mins
    Total Time
    10 mins
     

    Making stabilized whipped cream is easy! This sweetened cream will hold it's shape for days- perfect for decorating pies, cheesecakes, etc.!

    Category: Dessert, Tip, Topping
    Cuisine: American
    Keyword: stabilized whipped cream
    Servings: 1 (2 cups total)
    Calories Per Serving: 957 kcal
    Author: JB @ The Grateful Girl Cooks!
    Ingredients
    • 4 teaspoons water
    • 1 teaspoon unflavored gelatin powder
    • 1 cup heavy whipping cream
    • ¼ cup powdered sugar (confectioner's)
    • ½ teaspoon vanilla extract
    Instructions
    1. Before beginning, place a large mixing bowl and a whisk attachment (for stand mixer or electric mixer) in the freezer for 5 minutes to get them cold. This helps whipped cream to thicken quicker!

    2. Add 4 tsp. water to a small, microwave-safe bowl. Sprinkle gelatin on top; let it sit, undisturbed for 3-4 minutes. Place bowl of gelatin in microwave. Cook on high for 10 seconds... just long enough to dissolve gelatin! Stir, then let gelatin cool before adding to whipped cream

    3. Remove bowl and whisk attachment from freezer. Beat whipping cream, powdered sugar, and vanilla (using whisk attachment) on HIGH until it begins thickening and soft peaks can be formed.

    4. Slowly add cooled gelatin to whipped cream while whipping on LOW speed. Once combined, turn mixer to MEDIUM speed; beat until stiff peaks form. TIP: Don't dump gelatin all at once into whipping cream or it might clump.

    5. You can tell if the peaks are stiff by turning off the mixer. Lift up the whisk attachment from the whipping cream several times. Stiff peaks of whipping cream will stand up firmly on their own, and won't collapse or fall over. Transfer whipped cream to a pastry bag to decorate. Store stabilized whipped cream for several days in pastry bag or sealed container. It will hold it's shape for several days on a refrigerated dessert.

    Recipe Notes

    NOTE: Caloric total is for the entire 2 cups of prepared whipped cream.

    Nutrition Facts
    Making Stabilized Whipped Cream
    Amount Per Serving (1 TOTAL AMOUNT (2 cups))
    Calories 957 Calories from Fat 792
    % Daily Value*
    Fat 88g135%
    Saturated Fat 55g344%
    Cholesterol 326mg109%
    Sodium 100mg4%
    Potassium 183mg5%
    Carbohydrates 37g12%
    Sugar 30g33%
    Protein 8g16%
    Vitamin A 3499IU70%
    Vitamin C 1mg1%
    Calcium 158mg16%
    Iron 1mg6%
    * Percent Daily Values are based on a 2000 calorie diet.

    Here’s one more to pin on your Pinterest boards!Making stabilized whipped cream is easy! This sweetened cream will hold it's shape for days- perfect for decorating pies, cheesecakes, etc.!

    Lemon Cream Cheese Tart

    This Lemon Cream Cheese Tart is a bit tangy, a bit sweet, and tastes fantastic! A creamy lemon filling is baked on a shortbread-style crust.
    This Lemon Cream Cheese Tart is a bit tangy, a bit sweet, and tastes fantastic! A creamy lemon filling is baked on a shortbread-style crust.

    Recently I made a Lemon Cream Cheese Tart, which my husband and I enjoyed on a snow and ice-covered Valentines Day. We each enjoyed a piece, and then gave the remaining slices to several neighbors as a Valentines treat (since we were snowbound, AND so we wouldn’t gobble up the entire thing ourselves!). It is so incredibly GOOD!

    At 7pm on Valentines night, our power went out due to snow and ice, so we were glad we had enjoyed our homemade dinner and dessert earlier! Our power ended up being out Sunday night through Tuesday afternoon, but our generator helped keep the food in our fridge cold (hooray). Candles and flashlights also quickly became our best friends!

    All that said… this lemon cream cheese tart tastes wonderful! The foundation for it is a shortbread-style crust, and the yummy lemon and cream cheese filling is amazing! Put them together, and top with sweetened whipped cream… it’s dessert perfection!

    I received a printed recipe card for this dessert at a women’s event over 15 years ago (which indicated the original recipe was from Bon Appetit magazine). This dessert is sooo delicious, and we love it! It’s also fairly simple and straightforward to make. Here’s how:

    Scroll Down For A Printable Recipe Card At The Bottom Of The Page

    Make The Crust

    The first thing you will do is to preheat your oven to 425°F. The next thing to do is make the crust! The easiest way to make it is with a food processor, but you can also use a hand-held pastry blender or two forks for this step, if desired.

    Place flour and powdered sugar in a food processor, and add chunks of really cold butter. Pulse until the butter becomes about the size of peas and mixture forms small clumps. NOTE: If using pastry blender or 2 forks, cut in the butter into the flour mixture in a bowl until it reaches the same consistency.

    Pour the crumbly crust mixture into a 9″ tart pan (that has a removable bottom).

    Butter, flour and powdered sugar are processed until tiny crumbs form for crust.Crumbly crust mixture is poured into a tart pan (with a removable bottom).

    Time To Bake The Crust

    FIRMLY press the crumb mixture onto the bottom and up the sides of the tart pan. Continue to press until you have a firm crust and sides. Once the crust is pretty solid, put the pan in the freezer for 15 minutes (this helps really chill the butter).

    Remove the pan from the freezer. Place it on the middle rack in a preheated 425°F. oven. Bake the tart crust for 15 minutes, or until the crust is golden brown. When done, remove the crust from the oven and immediately reduce the oven temperature to 350° F. Place the pan on a wire rack, and allow it to cool completely before adding the lemon filling.

    Crust mixture is firmly pressed into the tart pan to form a solid base and sides.After baking, the crust for the lemon cream cheese tart is golden brown.

    Prepare The Lemon Cream Cheese Filling

    You can make the lemon cream cheese filling while the tart crust bakes OR while the tart crust is cooling after baking. Your choice. You can beat the filling with an electric mixer OR you can place the ingredients in a food processor to thoroughly mix.

    I like to use a food processor, because I feel like it really gets the filling smooth and mixed well. I have tried it with electric mixers, but sometimes, if the cream cheese isn’t soft enough, the cream cheese doesn’t “break down” as completely. You will just have to continue beating until it becomes smooth.

    Beat (or process) softened cream cheese until very smooth. Add granulated sugar, lemon juice, eggs, and finely grated lemon zest (peel). Continue to process until smooth and well-blended.

    A lemon and cream cheese filling is mixed together for the tart.

    Bake The Lemon Cream Cheese Tart

    Pour the lemon cream cheese mixture over the top of the COOLED tart crust. It will come almost up to the top of the pan. Carefully place the lemon cream cheese tart on the middle rack in the oven. Bake the lemon cream cheese tart 350°F. for 30 minutes.

    When done, transfer the tart pan to a wire rack and allow to cool to room temperature. Once at room temperature, cover the tart with plastic wrap. Place tart pan in the refrigerator to chill at LEAST one hour, but more if you have time. This tart can be prepared, covered and refrigerated up to one day ahead.

    The tart crust is covered with the lemon cream cheese filling and then baked.

    Once the lemon cream cheese tart has been completely chilled, carefully remove the tart from the pan, by carefully pushing up from the bottom. TIP: If it does not release easily, run a butter knife carefully around the sides of the pan.

    When ready to serve, the chilled lemon cream cheese tart is removed from the pan.

    Garnish And Serve The Lemon Cream Cheese Tart

    The lemon cream cheese tart is now ready to serve, as is, OR you can “fancy it up” a bit with whipped cream. I make stabilized whipped cream to decorate this dessert, which means the cream will hold it’s shape for several days, so I can decorate the entire tart. It’s also fun to garnish the tart with lemon slices and/or fresh mint leaves, for extra color!

    You also slice pieces, and then garnish each slice with aerosol whipped cream or you can make your own whipped cream (not stabilized) to decorate each slice. I have included instructions for homemade in the Notes section of the printable recipe at the bottom of this post.

    Lemon Cream Cheese Tart, garnished with whipped cream, lemon slice and mint leaf.A slice of lemon cream cheese tart, served on a white plate.

    I truly hope you will have the opportunity to make this delicious lemon tart! The crust is sturdy, very easy to cut, and pairs well with the sweetness and tartness of the lemon topping in this dessert.

    Thank you for stopping by, and I trust you will come back soon for more yummy recipes. Have a GREAT day!

    Looking For More Delicious TART Recipes?

    You can find all of my recipes in the Recipe Index, located at the top of the page. I have several delicious fruit tart recipes, including:

    Interested In More Recipes?

    Thank you for visiting this website. I appreciate you using some of your valuable time to do soIf you’re interested, I publish a newsletter 2 times per month (1st and 15th) with all the latest recipes, and other fun info. I would be honored to have you join our growing list of subscribers, so you never miss a great recipe!
    There is a Newsletter subscription box on the top right side (or bottom) of each blog post, depending on the device you use, where you can easily submit your e-mail address (only) to be included in my mailing list.

    You Can Also Find Me On Social Media:

    Facebook page: The Grateful Girl Cooks!
    Pinterest:
    The Grateful Girl Cooks!
    Instagram:
    jbatthegratefulgirlcooks

    Author's signature

    Original recipe source: Bon Appetit Magazine, (October 1995 edition).

    0 from 0 votes
    Lemon Cream Cheese Tart
    Prep Time
    30 mins
    Cook Time
    30 mins
    Refrigeration Time (minimum-inactive)
    1 hr
    Total Time
    2 hrs
     

    This Lemon Cream Cheese Tart is a bit tangy, a bit sweet, and tastes fantastic! A creamy lemon filling is baked on a shortbread-style crust.

    Category: Dessert
    Cuisine: American
    Keyword: lemon cream cheese tart
    Servings: 8 (or 10 smaller slices)
    Calories Per Serving: 282 kcal
    Author: JB @ The Grateful Girl Cooks!
    Ingredients
    For Crust:
    • 1 cup all purpose flour
    • 8 Tablespoons COLD butter =1 stick
    • cup powdered sugar confectioner's sugar
    For Filling:
    • 5 ounces cream cheese at room temperature
    • ½ cup granulated sugar
    • 7 Tablespoons fresh lemon juice
    • 4 teaspoons finely grated lemon peel
    • 2 large eggs
    Optional: whipping cream, lemon slice, mint leaves for topping (see NOTE below)
      Instructions
      1. Preheat oven to 425° F.

      2. MAKE CRUST: Place flour and powdered sugar in food processor; add cold butter chunks. Pulse until butter becomes the size of peas and mixture forms small clumps. (If using pastry blender or forks in a bowl for this step, cut in butter until it reaches the same consistency). Place crust mixture in a 9" tart pan (with removable bottom).

      3. FIRMLY press crust mixture onto bottom and up the sides of tart pan. Continue to press until you have a solid crust and sides. Put pan in the freezer for 15 minutes (to chill butter). Remove pan from freezer. Place on middle rack in a preheated oven. Bake crust for 15 minutes, or until golden brown. When done, remove pan from oven- REDUCE OVEN TEMP TO 350° F. Place pan on a wire rack; let crust cool completely before adding lemon filling.

      4. MAKE LEMON FILLING: Using a food processor or electric mixer, process or beat softened cream cheese until smooth. Add granulated sugar, lemon juice, eggs, and lemon zest. Continue to process until smooth and well-blended.

      5. Pour the lemon filling into the COOLED tart crust (it will come almost to top of the pan). Carefully place tart on middle rack in oven. Bake at 350°F. for 30 minutes. When done, transfer tart pan to a wire rack; allow tart to cool to room temp. Once at room temp., cover with plastic wrap; refrigerate at LEAST one hour, (but more if you have the time). Tart can be prepared, covered and refrigerated up to one day ahead.

      6. Once completely chilled, carefully remove the tart from the pan, by carefully pushing up from the bottom. TIP: If it does not release easily, run a butter knife carefully around the sides of the pan to loosen the crust.

      7. To serve: Cut tart into slices. Garnish each slice (or top of the tart) with a dollop (or dollops) of whipped cream, a lemon slice, and a fresh mint leaf, if desired. Store leftovers, covered, in refrigerator. Enjoy!

      Recipe Notes

      NOTE: It is recommended you top each slice (at serving) with whipped cream if you are NOT using a stabilized whipped cream (to prevent whipped cream from losing shape). Can also use aerosol whipped cream, OR can beat 1/2 cup chilled heavy whipping cream and 2 teaspoons powdered sugar in a chilled bowl until stiff peaks form, then pipe decoratively around the top of the tart or individual slices before serving.

      Nutrition Facts
      Lemon Cream Cheese Tart
      Amount Per Serving (1 slice (1/8 of total))
      Calories 282 Calories from Fat 135
      % Daily Value*
      Fat 15g23%
      Saturated Fat 9g56%
      Trans Fat 1g
      Cholesterol 86mg29%
      Sodium 202mg9%
      Potassium 97mg3%
      Carbohydrates 32g11%
      Fiber 1g4%
      Sugar 19g21%
      Protein 5g10%
      Vitamin A 516IU10%
      Vitamin C 6mg7%
      Calcium 41mg4%
      Iron 1mg6%
      * Percent Daily Values are based on a 2000 calorie diet.

      Here’s one more to pin on your Pinterest boards!This Lemon Cream Cheese Tart is a bit tangy, a bit sweet, and tastes fantastic! A creamy lemon filling is baked on a shortbread-style crust.

      Homemade Balsamic Vinaigrette

      It’s EASY to make Homemade Balsamic Vinaigrette, with only a few simple ingredients! This is a tasty way to top a favorite mixed green salad!
      It's EASY to make Homemade Balsamic Vinaigrette, with only a few simple ingredients! This is a tasty way to top a favorite mixed green salad!

      I love to make salad dressings from scratch. Over the years I’ve found some wonderful tasting recipes which I’ve added to this blog as time permits. Today I want to share with you a SUPER EASY recipe for homemade balsamic vinaigrette. I found the original recipe years ago in one of my cookbooks. It tastes wonderful, and I think you will love it! The recipe yield almost a cup of vinaigrette, so there is enough for quite a few salads.

      Using fairly common ingredients, it only takes a few minutes to mix up a batch, which is incredibly convenient. Perfect for mixed green salads, this is a “go to” easy dressing to make in a pinch, or if you’re just wanting to try a new variety of salad dressing. Save yourself a trip to the grocery store, and make this dressing in the comfort of your own home in about 5 minutes or less!

      Scroll Down For A Printable Recipe Card At The Bottom Of The Page

      What Ingredients Will I Need?

      The ingredients you will need to make this vinaigrette are fairly common household ingredients. They are olive oil, balsamic vinegar, lemon juice, minced garlic, sugar, salt, pepper, and dried basil.

      NOTE: If you have fresh basil available you can substitute that for dried basil. If you use fresh basil you will need a bit more in quantity than dried, but I have noted that amount in the printable recipe card. 

      Common ingredients are used to make homemade balsamic vinaigrette.

      How To Make Homemade Balsamic Vinaigrette

      Making this homemade balsamic vinaigrette couldn’t be any easier! Be sure to use a container with a secure-fitting lid. I like to use a pint jar when I make this. This recipe yields almost a cup of vinaigrette, so a pint jar is just the right size for the dressing. A pint jar holds approximately 8 ounces of liquid, and can be used to mix and store the salad dressing.

      Measure the ingredients for the homemade balsamic vinaigrette into the container you are using. Securely attach the lid, and holding the lid on tight, shake the jar (or container) for a minute or two to fully combine the ingredients.

      All ingredients for the vinaigrette are put in a pint jar before mixing.A pint jar is used to mix up the homemade balsamic vinaigrette.

      Drizzle the homemade balsamic vinaigrette over your favorite mixed green salad. Store any leftover vinaigrette, covered, in the refrigerator.

      As the salad dressing chills in the fridge, it may thicken slightly. The next time you want to use it, simply take it out of the fridge a few minutes before using, and give it a good shake to re-mix.

      The vinaigrette is drizzled onto a mixed green salad.

      That’s it! See how easy it was to make homemade balsamic vinaigrette from scratch? This salad dressing has great flavor, and is a quick way to make your own salad dressing right in your own kitchen!

      Homemade Balsamic Vinaigrette used on mixed green salad.

      Thanks for stopping by today. I hope you have the opportunity to make this salad dressing sometime. It really is quite delicious! Take care, and come back again soon, ok?

      Looking For More Salad Dressing Recipes?

      You can find all of my salad dressing recipes in the Recipe Index, located at the top of the page. I have quite a few I believe you will enjoy, including:

      Interested In More Recipes?

      Thank you for visiting this website. I appreciate you using some of your valuable time to do soIf you’re interested, I publish a newsletter 2 times per month (1st and 15th) with all the latest recipes, and other fun info. I would be honored to have you join our growing list of subscribers, so you never miss a great recipe!
      There is a Newsletter subscription box on the top right side (or bottom) of each blog post, depending on the device you use, where you can easily submit your e-mail address (only) to be included in my mailing list.

      You Can Also Find Me On Social Media:

      Facebook page: The Grateful Girl Cooks!
      Pinterest:
      The Grateful Girl Cooks!
      Instagram:
      jbatthegratefulgirlcooks

      Author's signature

      Original recipe source: The cookbook “What’s For Dinner?”, by Maryana Vollstedt, page 55, published by Chronicle Books, 1997

      0 from 0 votes
      Homemade Balsamic Vinaigrette
      Prep Time
      5 mins
      Cook Time
      0 mins
      Total Time
      5 mins
       

      It's EASY to make Homemade Balsamic Vinaigrette, with only a few simple ingredients! This is a tasty way to top a favorite mixed green salad!

      Category: Salad Dressing
      Cuisine: American
      Keyword: homemade balsamic vinaigrette
      Servings: 15 Tablespoons
      Calories Per Serving: 89 kcal
      Author: JB @ The Grateful Girl Cooks!
      Ingredients
      • cup extra virgin olive oil
      • 3 Tablespoons balsamic vinegar
      • 2 teaspoons fresh lemon juice
      • 1 clove garlic minced
      • ¼ teaspoon dried basil or 1 Tablespoon fresh, chopped
      • ½ teaspoon granulated sugar
      • ½ teaspoon salt
      • teaspoon black pepper
      Instructions
      1. Measure all ingredients into the container you are using (container needs to hold at least 8 ounces). Securely attach the lid, and holding the lid on tight, shake the jar (or container) for a minute or two to fully combine the ingredients.

      2. Drizzle vinaigrette on a favorite green salad, serve and enjoy!

      3. Store unused vinaigrette in an airtight, covered container in the refrigerator. Before each use, remove from fridge a few minutes beforehand, and shake very well, to re-combine ingredients.

      Nutrition Facts
      Homemade Balsamic Vinaigrette
      Amount Per Serving (1 Tablespoon)
      Calories 89 Calories from Fat 90
      % Daily Value*
      Fat 10g15%
      Saturated Fat 1g6%
      Sodium 79mg3%
      Potassium 6mg0%
      Carbohydrates 1g0%
      Fiber 1g4%
      Sugar 1g1%
      Protein 1g2%
      Vitamin A 1IU0%
      Vitamin C 1mg1%
      Calcium 2mg0%
      Iron 1mg6%
      * Percent Daily Values are based on a 2000 calorie diet.

      Here’s one more to pin on your Pinterest boards!It's EASY to make Homemade Balsamic Vinaigrette, with only a few simple ingredients! This is a tasty way to top a favorite mixed green salad!

      Lemon Pasta And Peas

      Lemon Pasta and Peas is an easy, delicious, meatless dish. Pasta and peas, with lemon juice, olive oil, garlic and Parmesan will be a big hit!
      Lemon Pasta and Peas is an easy, delicious, meatless dish. Pasta and peas, with lemon juice, olive oil, garlic and Parmesan will be a big hit!

      I received two new cookbooks from my family this past Christmas to add to my cookbook collection. Both cookbooks were written by the same couple (Steve and Kathy Doocy), and had been on top of the best seller list at one time or another. It was fun to read the stories behind the foods and mark some of the recipes I wanted to try.

      This recipe for lemon pasta and peas is the first one I tried from “The Happy In A Hurry Cook Book”. The Doocy’s originally got the recipe  from their friend Madeleine (it’s her “go to” pasta dish). It is a simple, meatless dish, can be made quickly (under 20 minutes), and has wonderful flavor. We enjoyed it with a slice of rotisserie chicken on the side (my hubby wanted some protein).

      Once the pasta is almost fully cooked, you add frozen peas to the pasta water in the pan (which quickly cooks them!). The remaining ingredients (the flavor factor) are then added to the cooked, drained pasta and peas.  That’s it… see how EASY this meal is to make?! Here’s how to make this simple dish:

      Scroll Down For A Printable Recipe At The Bottom Of The Page

      Cook The Pasta And Peas

      The first thing you need to do is bring a large pan of salted water to a boil. Once the water has come to a boil, add the pasta to the pan, and cook. TIP: You will need to cook the pasta for 1 minute less than the pkg. directions tell you for al dente.

      Add the frozen peas (yes, still FROZEN) to the pan of boiling pasta. Let them cook for 2 more minutes right in there with the pasta. NOTE: The recipe calls for using one (12 oz.) bag of frozen peas. If you would prefer LESS peas in this dish, simply add HALF the bag.

      Spaghetti noodles cooking for the lemon pasta and peas dish.Frozen peas are added directly into the boiling pasta and water.

      Remove one cup of the hot pasta water, and set it aside for later. Pour the pasta and peas into a strainer or colander, and drain the remaining water from the pan, but do not rinse. Return the hot drained pasta and peas to the pan, and immediately begin seasoning the dish (off of the heat).

      A cup of boiling pasta water is reserved to use later in the dish.

      Seasoning The Lemon Pasta And Peas For Serving

      While the drained pasta is still hot, add olive oil, fresh lemon juice, and minced garlic, tossing to coat the pasta and peas well. Once combined, add the grated Parmesan cheese, salt and pepper, and give it another good toss to combine.

      Now you will add a little bit of the reserved hot starchy pasta water. Give the pasta good stir as you add the water. This will help the pasta to not be dry, and help to melt the Parmesan cheese. You won’t need to use all of the pasta water… just use enough to coat the pasta to your liking, ok?

      Olive oil, lemon juice and garlic are added to drained pasta and peas.Parmesan cheese, salt & pepper added to drained pasta and peas.

      Time To Enjoy Lemon Pasta And Peas

      Now the lemon pasta and peas are ready to serve (while they’re still hot). If you find that the pasta has cooled down too much, simply reheat it quickly in the microwave. Serve immediately, and enjoy this easy, delicious pasta dish!

      Lemon pasta and peas ready to serve while hot.

      Don’t Want It To Be Meatless?

      If you want to add protein to the dish, add a slice or two of rotisserie chicken on the side. You could also add cooked, cubed chicken or pork into the pasta as well. Whatever makes you happy! My hubby asked for some protein with his, so I added a slice of rotisserie chicken breast on the side.

      A piece of rotisserie chicken, served on the side of lemon pasta and peas.

      I hope you enjoy this recipe for lemon pasta and peas. Any leftovers will keep for several days in the refrigerator, stored in an airtight container, and can be reheated easily in a microwave. Thank you for stopping by, and I hope you will come back soon!

      Looking For More PASTA Recipes?

      You can find all of my blog recipes in the Recipe Index, located at the top of the page. I have quite a few delicious pasta recipes, including:

      Interested In More Recipes?

      Thank you for visiting this website. I appreciate you using some of your valuable time to do soIf you’re interested, I publish a newsletter 2 times per month (1st and 15th) with all the latest recipes, and other fun info. I would be honored to have you join our growing list of subscribers, so you never miss a great recipe!
      There is a Newsletter subscription box on the top right side (or bottom) of each blog post, depending on the device you use, where you can easily submit your e-mail address (only) to be included in my mailing list.

      You Can Also Find Me On Social Media:

      Facebook page: The Grateful Girl Cooks!
      Pinterest:
      The Grateful Girl Cooks!
      Instagram:
      jbatthegratefulgirlcooks

      Author's signature

      Original recipe source: “The Happy In A Hurry Cook Book”, by Steve and Kathy Doocy, page 163, published by William Morrow, 2020

      0 from 0 votes
      Lemon Pasta and Peas
      Prep Time
      5 mins
      Cook Time
      15 mins
      Total Time
      20 mins
       

      Lemon Pasta and Peas is an easy, delicious, meatless dish. Pasta and peas, with lemon juice, olive oil, garlic and Parmesan will be a big hit!

      Category: Dinner, Pasta
      Cuisine: Italian
      Keyword: lemon pasta and peas
      Servings: 6
      Calories Per Serving: 449 kcal
      Author: JB @ The Grateful Girl Cooks!
      Ingredients
      • 1 pound spaghetti pasta
      • 12 ounces frozen sweet green peas
      • ½ cup fresh lemon juice approx. 2-3 lemons
      • 3 Tablespoons olive oil
      • 2 large garlic cloves minced
      • ¾ cup grated Parmesan cheese or Pecorino Romano
      • ½ teaspoon salt
      • ½ teaspoon ground black pepper
      Instructions
      1. Bring a large pan of salted water to a boil on medium-high heat. Once water boils, add pasta and cook. Note: cook pasta for 1 minute less than pkg. directions tell you for al dente. Add frozen peas (yes, still FROZEN) and let them cook 2 minutes, in with the pasta.

      2. Remove 1 cup of hot pasta water; set aside. Pour pasta/peas into a strainer; drain remaining water from pan. Do not rinse pasta. Return hot drained pasta/peas to pan (off the heat).

      3. Add olive oil, fresh lemon juice, and minced garlic to pasta, tossing or stirring to coat. Now add Parmesan cheese, salt, black pepper, and toss to combine. pour in a little bit of reserved hot pasta water; stir, then add more as needed, to melt cheese and help pasta to not be dry. You won't need to use all of the pasta water.

      4. Serve immediately while hot, and enjoy this easy, delicious pasta dish!

      Nutrition Facts
      Lemon Pasta and Peas
      Amount Per Serving (1 (1/6 of total))
      Calories 449 Calories from Fat 108
      % Daily Value*
      Fat 12g18%
      Saturated Fat 3g19%
      Cholesterol 11mg4%
      Sodium 393mg17%
      Potassium 350mg10%
      Carbohydrates 67g22%
      Fiber 5g21%
      Sugar 6g7%
      Protein 18g36%
      Vitamin A 544IU11%
      Vitamin C 31mg38%
      Calcium 173mg17%
      Iron 2mg11%
      * Percent Daily Values are based on a 2000 calorie diet.

      Here’s one more to pin on your Pinterest boards!Lemon Pasta and Peas is an easy, delicious, meatless dish. Pasta and peas, with lemon juice, olive oil, garlic and Parmesan will be a big hit!

      Popcorn Italiano

      Popcorn Italiano is an easy, Italian-inspired snack. Popped corn is seasoned with butter, Parmesan cheese and Italian seasonings, then baked.
      Popcorn Italiano is an easy Italian-inspired snack. Popped corn is seasoned with butter, Parmesan cheese and Italian seasonings, then baked.

      Popcorn is one of my “go to” snacks. Usually we just have it drizzled with butter and salt… you know, the old-fashioned way! Sometimes I like to add Parmesan cheese to the mix, and that tastes great, too! I think it’s kind of FUN to experiment with different flavors on popcorn!

      Today I want to share a simple, but yummy recipe with you for Popcorn Italiano! I found the recipe years ago in one of my old Taste Of Home magazines, and gave it a try out of curiosity. YUM! Plain popped popcorn is combined with butter, Parmesan cheese and a few Italian-inspired spices. After it’s well-seasoned, it’s baked for a short time, which cooks and crisps up the buttery, cheesy seasoning onto the popcorn.

      If you like to try new things, try this yummy popcorn. It’s really good, and has lots of flavor! Here’s how to make this tasty, easy snack:

      Scroll Down For A Printable Recipe Card At The Bottom Of the Page

      Pop The Popcorn First

      Begin by preheating your oven to 350°F. You will want the oven ready to go once the popcorn has been popped and seasoned.

      For this recipe you will need 2½ quarts of popped popcorn. Pop the popcorn (hot air popcorn maker, stovetop saucepan or microwave), using your preferred method. If you’re making this in a saucepan or hot air popcorn maker, start with 1/3 cup un-popped kernels. This will give you the amount of popped popcorn you need for this recipe. Set the finished popcorn aside while you prepare the seasoned butter sauce. 

      NOTE: I’ve never made this recipe using microwavable popcorn. However, if using microwave popcorn, use PLAIN, unbuttered popcorn. You will most likely need a couple of bags (about 10 cups total popped popcorn) to give you the equivalent of 2½ quarts of popped popcorn.

      Plain popped popcorn in a bowl, ready for buttery seasoning sauce.

      Make The Sauce And Season The Popcorn

      Now it’s time to make the buttery Italian seasoning for the popcorn. Melt butter in a small saucepan, then remove the pan from the heat. Add grated Parmesan cheese and spices (garlic powder, oregano, basil, onion powder, and salt) to the butter. Stir until fully combined.

      Melted butter, Parmesan cheese and Italian spices in saucepan.Buttery Italian-inspired sauce is ready to pour over popped popcorn.

      Pour all of the warm sauce over the popcorn and mix well, stirring as you go, until the popcorn has been well coated.

      Seasoned butter is drizzled over popped popcorn and stirred to combine.

      Bake The Popcorn Italiano

      Pour the seasoned popcorn into a 13 x 9″ baking pan. Bake the Popcorn Italiano for 13 minutes, giving it a quick stir halfway through the baking time. Once done baking, remove the pan from the oven and transfer the seasoned popcorn into a serving bowl (or bowls). It will be hot, crispy and the flavors will be “sealed” and browned onto the popcorn.

      Popcorn Italiano is baked for 13-15 minutes in a 13"x9" pan.

      That’s it! Serve this flavorful popcorn Italiano hot, and enjoy this crunchy snack. You will definitely get the “taste” of delicious Italian flavors in every bite of this popcorn. 

      Time to eat some crunchy, tasty Popcorn Italiano!A close up of the Popcorn Italiano shows the seasoning on the pieces.

      Thank you for stopping by and checking out this fun, unique recipe for Popcorn Italiano. It really does taste good, and I hope you enjoy it. Come back soon, and have a great day.

      Looking For More SNACK Recipes?

      Yu can find all of my recipes in the Recipe Index, which is located at the top of the page.. I have quite a few snack and appetizer recipes you might enjoy, including:

      Interested In More Recipes?

      Thank you for visiting this website. I appreciate you using some of your valuable time to do soIf you’re interested, I publish a newsletter 2 times per month (1st and 15th) with all the latest recipes, and other fun info. I would be honored to have you join our growing list of subscribers, so you never miss a great recipe!
      There is a Newsletter subscription box on the top right side (or bottom) of each blog post, depending on the device you use, where you can easily submit your e-mail address (only) to be included in my mailing list.

      You Can Also Find Me On Social Media:

      Facebook page: The Grateful Girl Cooks!
      Pinterest:
      The Grateful Girl Cooks!
      Instagram:
      jbatthegratefulgirlcooks

      Author's signature

      Original recipe source: “Taste of Home” magazine, Sept./Oct. 1998 issue, page 54, published by Reiman Publications

      0 from 0 votes
      Popcorn Italiano
      Prep Time
      7 mins
      Cook Time
      13 mins
      Total Time
      20 mins
       

      Popcorn Italiano is an easy Italian-inspired snack. Popped corn is seasoned with butter, Parmesan cheese and Italian seasonings, then baked.

      Category: Appetizer/Snack
      Cuisine: American
      Keyword: popcorn Italiano
      Servings: 5 (2 cups per serving)
      Calories Per Serving: 165 kcal
      Author: JB @ The Grateful Girl Cooks!
      Ingredients
      • cup popcorn kernels = 2½ quarts popped
      • 5 Tablespoons butter
      • ¼ cup grated Parmesan cheese
      • ½ teaspoon dried oregano
      • ½ teaspoon garlic powder
      • ½ teaspoon dried basil
      • ¼ teaspoon onion powder
      • ¼ teaspoon salt
      Instructions
      1. Preheat oven to 350°F.

      2. You will need 2½ quarts of popped popcorn. Pop the popcorn (hot air popcorn maker, stovetop saucepan or microwave), using your preferred method. NOTE: If making in saucepan or hot air popcorn maker, start with 1/3 cup un-popped kernels. This will produce the amount of popped popcorn needed. if using microwave popcorn, use PLAIN, unbuttered popcorn. You will need 10 cups total popped popcorn to give you amount needed. Set popped popcorn aside when done. 

      3. Melt butter in a small saucepan; remove pan from heat. Add grated Parmesan cheese, garlic powder, oregano, basil, onion powder and salt. Stir until fully combined. Drizzle sauce over popcorn and stir to combine, until popcorn is well coated.

      4. Pour seasoned popcorn into a 13 x 9" baking pan. Bake 13 minutes, giving it a stir halfway through baking time. Once done, remove pan from oven; transfer hot popcorn into serving bowl (or bowls). Serve immediately and enjoy!

      Recipe Notes

      NOTE: If popping corn from scratch you will need to use 1/3 cup of popcorn kernels to yield 2.5 quarts popped popcorn.  If using microwave popcorn, you will need 10 cups of plain, unbuttered popped popcorn to equal 2.5 quarts.

      Nutrition Facts
      Popcorn Italiano
      Amount Per Serving (1 (2 cup serving))
      Calories 165 Calories from Fat 117
      % Daily Value*
      Fat 13g20%
      Saturated Fat 8g50%
      Trans Fat 1g
      Cholesterol 35mg12%
      Sodium 294mg13%
      Potassium 49mg1%
      Carbohydrates 9g3%
      Fiber 2g8%
      Sugar 1g1%
      Protein 3g6%
      Vitamin A 397IU8%
      Vitamin C 1mg1%
      Calcium 65mg7%
      Iron 1mg6%
      * Percent Daily Values are based on a 2000 calorie diet.

      Here’s one more to pin on your Pinterest boards!Popcorn Italiano is an easy Italian-inspired snack. Popped corn is seasoned with butter, Parmesan cheese and Italian seasonings, then baked.

      Navy Bean Soup

      Navy Bean Soup is delicious and filling! Slowly cooked dried navy beans, carrots, garlic, celery, onion, broth & spices create a robust soup.
      Navy Bean Soup is delicious and filling! Slowly cooked dried navy beans, carrots, garlic, celery, onion, broth & spices create a robust soup.

      Do you enjoy soup? We really do, especially in the cold of winter when a big bowl of piping hot soup takes the chill off the day! Today I want to share with you a recipe that I originally found in an old Italian cookbook of mine (from Williams-Sonoma). It is really tasty, warming, and filling.

      The recipe uses dried navy beans, so the only “downside” (if there is one), is that it will take some time to soak and cook the beans until they have slightly softened. Typically I soak the beans early in the day, then add them to the soup later and then let the soup cook low and slow to infuse the beans with flavor, and to soften them perfectly! It’s inactive prep time, so you do other things while they soak!

      So… as long as you plan ahead a little bit, you will have no problems making this absolutely DELICIOUS navy bean soup. Yes… it will take a bit of your time on your part, but it is worth it! Don’t forget, a lot of the time involved is inactive time (soaking, cooking, etc.) Let me show you how to make navy bean soup:

      Scroll Down For A Printable Recipe Card At The Bottom Of The Page

      Prepare The Navy Beans

      Bags of navy beans can be found in most grocery stores, and are a very economical main ingredient for the soup. Because this recipe calls for dried navy beans, that means you’ll need to plan ahead to soak them (which helps soften them).  I usually do this step early in the day, so the beans have several hours to soak.

      To do this, first rinse the navy beans in a strainer. Once rinsed, place the beans in a large bowl and completely cover with water. Let them soak for at least 3 hours, and then drain.

      Dried navy beans are soaked in water for hours to soften them.

      Ready To Cook the Navy Bean Soup

      Okay… the beans have soaked. Now it’s time to start making the soup. Place olive oil into a large soup pot, and let it get warm (on medium heat). Add chopped celery, carrots and onion to the pot, and cook for about 8-10 minutes (stirring occasionally) until the veggies have softened.

      Once the veggie have softened, add minced garlic and minced fresh rosemary to the pot, and stir  to combine. Cook this mixture for a couple minutes, stirring often so the garlic doesn’t burn.

      Carrots, celery and onion are cooked in olive oil in a large soup pot.

      Add the chicken stock (or vegetable stock) and the drained, softened navy beans to the pot. Stir to combine, and then bring it to a boil on MEDIUM heat. Once boiling, reduce the heat to LOW, and let the navy bean soup simmer for about 1½ hours, uncovered. You will know it is done when the beans are soft to the bite, and the liquid has reduced in quantity. Let the soup cool for 5 minutes.

      Chicken stock, navy beans and seasonings are cooked in soup pot.Beans have softened and liquid has reduced in the navy bean soup.

      Thickening The Navy Bean Soup

      Now you’re ready for the last step… thickening the navy bean soup for eating! It’s EASY. Remove about 1/3 of the bean mixture and place it in a blender (or food processor). Process the bean/soup mixture until it becomes a puree, smooth in texture.

      Return the pureed bean mix to the soup pot, and stir well, to fully incorporate the puree into the soup. This will really help thicken the soup! Gently reheat the soup until it’s hot enough to serve. Season the navy bean soup with salt and black pepper, to suit your personal taste.

      Some beans are pureed, then added back into the navy bean soup.Pureed navy beans will help thicken the soup.

      Garnish, Serve, and Enjoy!

      Once you have the soup seasoned to your liking, it is time to serve/ Ladle the navy bean soup into individual serving bowls. Garnish each portion with chopped parsley and grated Parmesan cheese. Serve piping hot, and enjoy this thick, creamy and delicious soup!

      Bowl of navy bean soup, garnished with Parmesan cheese and parsley.Taking a spoonful of thick navy bean soup from a white bowl.

      I really hope you have a chance to make and enjoy eating this soup. We sure enjoy it, and trust you will, too! Thank you for stopping by, and sincerely hope you will come back soon. Have a GREAT day!

      Looking For More SOUP Recipes?

      You can find all of my soup recipes in the Recipe Index, located at the top of the page. I have lots of delicious soup recipes, including:

      Interested In More Recipes?

      Thank you for visiting this website. I appreciate you using some of your valuable time to do soIf you’re interested, I publish a newsletter 2 times per month (1st and 15th) with all the latest recipes, and other fun info. I would be honored to have you join our growing list of subscribers, so you never miss a great recipe!
      There is a Newsletter subscription box on the top right side (or bottom) of each blog post, depending on the device you use, where you can easily submit your e-mail address (only) to be included in my mailing list.

      You Can Also Find Me On Social Media:

      Facebook page: The Grateful Girl Cooks!
      Pinterest:
      The Grateful Girl Cooks!
      Instagram:
      jbatthegratefulgirlcooks

      Author's signature

      Original recipe source: The cookbook “Williams-Sonoma Italian Favorites”, page 22, published in 2004 by Oxmoor House and Williams-Sonoma, Inc.

      0 from 0 votes
      Navy Bean Soup
      Prep Time
      10 mins
      Cook Time
      1 hr 30 mins
      Inactive (Bean Soaking Time)
      3 hrs
      Total Time
      4 hrs 40 mins
       

      Navy Bean Soup is delicious and filling! Slowly cooked dried navy beans, carrots, garlic, celery, onion, broth & spices create a robust soup.

      Category: Main Course, Soup
      Cuisine: American
      Keyword: navy bean soup
      Servings: 6
      Calories Per Serving: 332 kcal
      Author: JB @ The Grateful Girl Cooks!
      Ingredients
      • cups small navy beans (dried)
      • 3 Tablespoons olive oil
      • 1 medium yellow onion , finely chopped
      • 1 large carrot , peeled/finely chopped
      • 1 stalk celery , finely chopped
      • 2 cloves garlic , minced
      • 1 teaspoon fresh rosemary , minced
      • 7 cups low-sodium chicken broth , or vegetable broth
      • salt & pepper, to taste
      To Garnish:
      • ½ cup grated Parmesan cheese
      • 1 Tablespoon Italian flat leaf parsley , chopped
      Instructions
      1. Rinse beans in a strainer. Once rinsed, place beans in large bowl; cover completely with water. Let beans soak at least 3 hours; drain.

      2. Once beans have soaked at least 3 hours: Place olive oil into a large soup pot; heat oil until warm on medium heat. Add celery, carrots and onion; cook 8-10 minutes (stirring occasionally) until veggies have softened. Add garlic and rosemary; stir  to combine. Cook 2 minutes, stirring often, so garlic doesn't burn.

      3. Add chicken stock (or vegetable stock or water) and the drained beans. Stir to combine, and bring to a boil on MEDIUM heat. Once boiling, reduce heat to LOW; simmer soup gently for 1½ hours, uncovered. It is done when beans are soft to the bite., and liquid has reduced. Let cool for 5 minutes.

      4. Remove about 1/3 of the bean mixture; place in a blender (or food processor). Process bean/soup mixture until it becomes a smooth puree. Return puree to soup; stir well, to mix puree into soup. Gently reheat soup until hot. Season with salt and pepper, to taste.

      5. Ladle hot soup into serving bowls. Garnish each portion with chopped parsley and grated Parmesan cheese. Serve, and enjoy!
      Recipe Notes

      NOTE: If you do not have access to chicken or vegetable broth, you can substitute 7 cups water. However... the flavor will be much better using the broth.

      Nutrition Facts
      Navy Bean Soup
      Amount Per Serving (1 (1/6 of total))
      Calories 332 Calories from Fat 108
      % Daily Value*
      Fat 12g18%
      Saturated Fat 3g19%
      Cholesterol 7mg2%
      Sodium 227mg10%
      Potassium 950mg27%
      Carbohydrates 39g13%
      Fiber 13g54%
      Sugar 4g4%
      Protein 21g42%
      Vitamin A 2108IU42%
      Vitamin C 3mg4%
      Calcium 193mg19%
      Iron 4mg22%
      * Percent Daily Values are based on a 2000 calorie diet.

      Here’s one more to pin on your Pinterest boards!Navy Bean Soup is delicious and filling! Slowly cooked dried navy beans, carrots, garlic, celery, onion, broth & spices create a robust soup.

      Mint Brownie Pie

      Mint Brownie Pie is a perfect St. Patrick’s Day (or any other day) dessert! Mint cream cheese filling tops a brownie base. Easy and yummy!
      Mint Brownie Pie is a perfect St. Patrick's Day (or any other day) dessert! Mint cream cheese filling tops a brownie base. Easy and yummy!
      If you’re looking for a fantastic dessert to have on St. Patrick’s Day, or Christmas, OR any other day of the year, may I suggest this mint brownie pie? It tastes wonderful, due to a brownie layer on bottom and a creamy mint filling on top! It is sooo good!
      A couple of months ago I made (and photographed) this delicious dessert, and was able to share quite a few pieces with several of our neighbors.

      It was so yummy I could have eaten the entire thing by myself (seriously!)… but my husband and I decided to share this treat (and the calories) with others!

      I had the recipe because it came from one of my “Taste of Home” magazines (from 1999) that I have saved for many, many years. This mint brownie pie is a favorite, and decided this was the time to share the recipe on my blog. Here’s how to make it:

      Scroll Down For A Printable Recipe Card At The Bottom Of The Page

      Prepare The Brownie Base Layer

      The first thing (after preheating your oven) you will do is make a brownie base for the dessert. To do this, melt butter and unsweetened chocolate in a medium saucepan, stirring often.

      Once melted, add granulated sugar, and stir well, to fully blend ingredients. Remove the pan from the heat.

      Unsweetened chocolate and butter are melted in a saucepan.Granulated sugar is added to the melted chocolate and butter in saucepan.

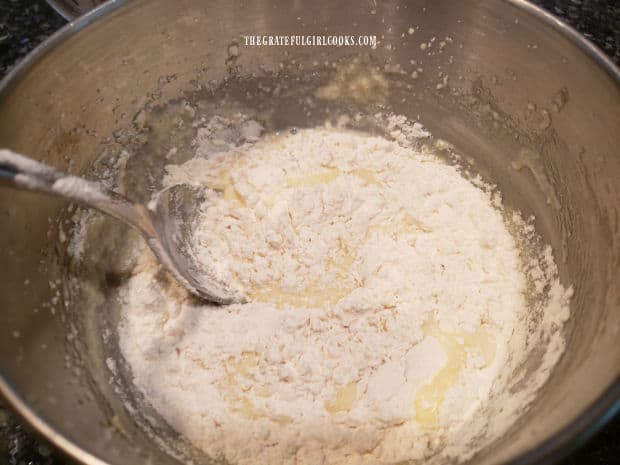
      Whisk 2 eggs and vanilla extract in a small bowl, and add this to the chocolate mixture. Mix well, to combine. Stir in  flour, a little at a time. Continue to stir after each addition until all the flour has been blended into the chocolate.

      Whisked eggs and vanilla extract are added to chocolate in saucepan.Flour is stirred into the chocolate mixture, a little at a time.

      Bake The Brownie Base

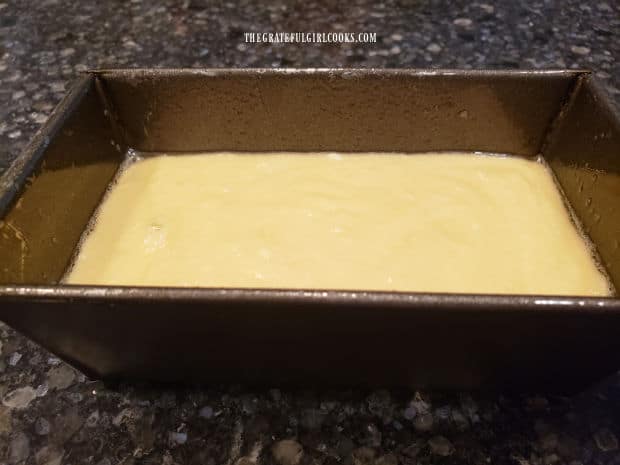
      Pour the mint brownie pie batter into a greased (bottom and sides) 9″ springform pan. Place the pan on the middle rack of a preheated oven.

      Bake at 350° F. for 18-20 minutes OR until a toothpick inserted in the middle of the brownie pie comes out clean and free of batter.

      Remove the mint brownie pie from the oven and let it cool (still in pan) on a wire rack. Do not open the pan or remove the brownie base from the pan.

      Mint brownie pie batter is poured into a greased springform pan.After baking, the mint brownie pie chocolate layer cools in the pan on a wire rack.

      Make The Mint Cream Cheese Topping

      Now it’s time to make the mint cream cheese topping while the brownie base cools to room temperature. Using an electric mixer, beat softened cream cheese and sugar until it becomes smooth.

      Add green food coloring (if using) and peppermint extract to the cream cheese filling, and mix well until combined and all color has blended in. The food coloring is optional, but I recommend it, especially if you’re making this dessert for St. Patrick’s Day!

      Use a few drops or as much as you wish to achieve a mint green color. Once the filling is fully tinted and blended, gently fold in whipped topping.

      When the brownie layer has completely cooled, gently add the mint cream cheese filling on top. Spread the filling to cover the entire top surface. Cover the pan, and refrigerate the mint brownie pie for one hour (at least).

      Whipped topping is gently folded into the green tinted cream cheese filling.The mint cream cheese filling is spread on the surface of the mint brownie pie.

      Refrigerate Then Decorate The Mint Brownie Pie!

      After the mint brownie pie has been chilled in the refrigerator for at least an hour, it’s ready to remove from the springform pan and decorate for serving. Run a butter knife all the way around between the pan and the pie to assist in releasing the pie from the pan.

      Melt chocolate chips and drizzle the chocolate decoratively over the surface of the mint brownie pie, any way you wish.

      I also like to pipe stabilized whipped cream (which holds its shape for days) on top and sprinkle with finely grated chocolate. Those are optional, but really do make the dessert look great.

      If you’re using aerosol whipped cream, spray onto individual pieces just before serving, as it will not hold it’s shape for any length of time.

      Melted chocolate is drizzled decoratively over the top of the mint brownie pie.Whipped cream is piped on top of the mint brownie pie and grated chocolate is added for garnish.

      Grab A Slice Of Mint Brownie Pie… And Dig In!

      Slice the mint brownie pie into 10 wedges, serve… and enjoy this decadent dessert! I’m confident you and those you love will really love this yummy treat!

      The dense, fudgy bottom layer, and the creamy, mint cream cheese topping makes a wonderful treat for the ol’ taste buds. YUM!

      A slice of mint brownie pie, served on a white plate.

      Thank you for stopping by to check out this scrumptious recipe. If you’re looking for more St. Patrick’s day dishes, check out my recipes for Irish Chocolate Pots de Créme, Irish Soda Bread, Guinness Baked Cheese Dip, Irish Colcannon With Bacon, and Corned Beef and Cabbage.

      I hope you will be able to come back again soon for more family-friendly recipes. Have a GREAT day, and may God bless you.

      Looking For More DESSERT Recipes?

      You can find more dessert recipes in my Recipe Index, which is located located at the top of this page. I have many dessert recipes you will really love, including:

      Want More Recipes? Get My FREE Newsletter!

      I publish a newsletter 2 times per month (1st and 15th) with lots of recipes, tips, etc..
      Would you like to join our growing list of subscribers?

      There is a Newsletter subscription box on the top right (or bottom) of each blog post, depending on the device you use.
      You can submit your e-mail address there, to be added to my mailing list.

      Find Me On Social Media:

      Facebook page: The Grateful Girl Cooks!
      Pinterest:
      The Grateful Girl Cooks!
      Instagram:
      jbatthegratefulgirlcooks

      Author's signature

      Original recipe source: “Taste of Home” magazine, February/March 1999 edition, page 67, published by Reiman Publications, Inc.

      ↓↓ PRINTABLE RECIPE BELOW ↓↓

      0 from 0 votes
      Mint Brownie Pie
      Prep Time
      15 mins
      Cook Time
      20 mins
      Inactive Refrigeration Time
      1 hr
      Total Time
      1 hr 35 mins
       

      Mint Brownie Pie is a perfect St. Patrick's Day (or any other day) dessert! Mint cream cheese filling tops a brownie base. Easy and yummy!

      Category: Dessert
      Cuisine: American
      Keyword: mint brownie pie
      Servings: 10 slices
      Calories Per Serving: 362 kcal
      Author: JB @ The Grateful Girl Cooks!
      Ingredients
      For Brownie Layer:
      • 6 Tablespoons butter (no substitutes)
      • 2 ounces unsweetened chocolate (2 one oz. squares)
      • 1 cup granulated sugar
      • 2 large eggs
      • ½ teaspoon vanilla extract
      • ½ cup all purpose flour
      Mint Cream Cheese Layer:
      • 8 ounces cream cheese , softened
      • ¾ cup granulated sugar
      • ½ teaspoon peppermint extract
      • green food coloring (optional, but recommended)
      • 8 ounces frozen whipped topping, thawed
      For Decorating:
      • ¼ cup semi-sweet chocolate chips , melted
      • 2 teaspoons vegetable shortening
      • Piped whipped cream and grated chocolate (optional)
      Instructions
      1. Melt butter and unsweetened chocolate in medium saucepan, stirring often. Once melted, add granulated sugar, and stir to fully blend ingredients. Remove pan from heat. Whisk eggs and vanilla extract in small bowl; add to chocolate mixture. Stir well, to combine. Stir in flour, a little at a time. Stir after each addition until all flour has been blended into chocolate.

      2. Pour batter into greased (bottom and sides) 9" springform pan. Place pan on middle rack in preheated oven. Bake at 350° F. for 18-20 minutes OR until a toothpick inserted in middle of brownie layer comes out clean. Remove from the oven and let cool (still in pan) on a wire rack. Do not remove brownie base from pan.

      3. Make mint cream cheese topping while brownie layer cools. Using an electric mixer, beat softened cream cheese and sugar until it becomes smooth. Add green food coloring (if using) and peppermint extract to cream cheese; mix well until combined and all color is blended in. Use a few drops or as much as you wish to achieve a mint green color. Once filling is tinted and blended, gently fold in whipped topping. When brownie layer is completely cooled, add cream cheese filling on top. Spread filling to cover top surface. Cover pan; refrigerate for one hour (at least).

      4. Remove chilled dessert from refrigerator. Release dessert from springform pan and decorate for serving. Melt chocolate chips; drizzle chocolate decoratively over surface of pie, any way you wish. Slice into wedges and serve. NOTE: I also decorate top with piped on stabilized whipped cream (which holds its shape for days) and sprinkle with finely grated chocolate. Those are optional, but really make the dessert look great. If using aerosol whipped cream, spray onto individual pieces just before serving, as it will not hold it's shape for any length of time. Store leftovers, covered, in refrigerator.

      Nutrition Facts
      Mint Brownie Pie
      Amount Per Serving (1 slice)
      Calories 362 Calories from Fat 153
      % Daily Value*
      Fat 17g26%
      Saturated Fat 10g63%
      Trans Fat 1g
      Cholesterol 34mg11%
      Sodium 185mg8%
      Potassium 163mg5%
      Carbohydrates 51g17%
      Fiber 2g8%
      Sugar 42g47%
      Protein 4g8%
      Vitamin A 377IU8%
      Calcium 70mg7%
      Iron 2mg11%
      * Percent Daily Values are based on a 2000 calorie diet.

      Here’s one more to pin on your Pinterest boards!Mint Brownie Pie is a perfect St. Patricks Day (or any other day) dessert! Mint cream cheese filling tops a brownie base. Easy and yummy!