Fresh Peach Cobbler

Classic Fresh Peach Cobbler, (enhanced with cinnamon and vanilla) is a simple, delicious Summer dessert, served with vanilla ice cream!

Who likes peach cobbler? We REALLY do! Every summer when big, juicy peaches are abundant, fresh, and ripe, I make at least one fresh peach cobbler! I love to go to U-pick farms and pick lots of fresh peaches, which I can then use to make cobblers, jam, canning pie filling, pies, muffins, or ice cream.

Last weekend, my husband and I got out of town and enjoyed a scenic drive through Oregon’s famous Columbia Gorge (Multnomah Falls, Columbia River, etc.).

One of our stops was a wonderful farm stand (off the beaten path), about 1½ hours from our home. We bought a flat of fresh picked large peaches, and some other goodies.

Once we got home, it was time to enjoy them! We ate several right out of the box (with juice dripping!), some will be canned to enjoy later, and others were used to make this delicious, fresh peach cobbler!

Scroll Down For A Printable Recipe Card At The Bottom Of The Page

Fresh peaches are used to make this delicious fruit cobbler.

This cobbler tastes amazing, and I know you will enjoy it, too! I do not recommend using canned peaches… go for FRESH and RIPE, and you will not be disappointed!

Did I mention how easy it is to make this dessert? Yep. Probably the “hardest” thing you will need to do is peel and slice the peaches. Here’s how to make Fresh Peach Cobbler:

Make The Batter

Preheat the oven to 375°F. While it is preheating, make the batter for the cobbler. It’s a cinch! Sift flour, granulated sugar, baking powder and salt into a large mixing bowl.

Pour in milk, and stir (or whisk) the ingredients together only until they’re fully combined (there might be a few small lumps… no worries!) This is the batter for your peach cobbler.

Milk is added to the sifted dry ingredients for the cobbler batter.Cobbler batter is stirred just until all ingredients are incorporated.

Add melted butter to a 9×13 baking dish (can also use a 7×12 pan). Pour the batter right on top of the melted butter, BUT DO NOT STIR IT IN. Set the baking dish aside while you prepare the fruit filling.

The batter is poured on top of melted butter in baking pan.The cobbler batter is NOT stirred once added to the baking dish.

Make The Fresh Peach Cobbler Filling

Now it’s time to make the yummy peach filling. Place the peeled, sliced peaches, lemon juice, vanilla extract, cinnamon and sugar into a large saucepan. Give it a good stir, to combine ingredients, and then bring to a boil over medium-high heat.

Stir the fruit filling constantly while it comes to a boil. Once it begins boiling, remove the pan from the heat.

Peaches, sugar, vanilla, cinnamon and lemon juice are measured into saucepan.Peach cobbler filling is brought to a boil, then removed from heat.

Spoon or pour the peach filling evenly on top of the batter in the baking dish, BUT DO NOT STIR THEM IN! The peach filling will be sitting on top of the batter (which is sitting on top of the melted butter). That’s how it should be!

Butter first, batter second, and fruit last! As the fresh peach cobbler bakes, the batter will rise up (magically) and cover all those yummy peaches! Now your cobbler is ready to bake.

The cobbler filling is poured or spooned over the batter in baking dish.The fruit filling is NOT stirred once it goes into the baking dish.

Bake The Fresh Peach Cobbler

Bake the fresh peach cobbler in a 375°F. oven for between 40-45 minutes. When done, the top of the cobbler will be nice and golden brown on top, and the filling should be bubbly around the edges of the baking dish. The smell is wonderful as the dessert bakes, by the way.

When done, carefully remove the hot cobbler from the oven. Transfer the dish to a wire rack to cool down slightly. It will be easier to serve, while it is still warm (but not totally hot).

You can even bake the cobbler ahead of time, if desired, and then just reheat each portion, if that is more convenient.

Fresh peach cobbler, straight from the oven, cooling on a wire rack.

Ready To Eat!

When you’re ready to serve the warm fresh peach cobbler, grab a large serving spoon and dish it up into individual bowls or onto plates. By all means add some ice cream to top it off, if possible.

Enjoying peach cobbler with a big ol’ scoop of vanilla ice cream is a timeless, old-fashioned combination!

The incredible flavors of the cinnamon-vanilla flavored peach filling, along with the golden soft topping will make it hard to resist a second helping. This cobbler even tastes wonderful at room temperature!

Fresh peach cobbler is served a la mode with vanilla bean ice cream.

I really hope you enjoy this fresh peach cobbler as much as we do. Thank you for stopping by for a visit. I hope you have the opportunity to visit again in the future.

Be sure to check out my recipe index (top of the page), with over 850 delicious recipes currently categorized for your convenience. Have a wonderful day.

Looking For More COBBLER or CRISP Recipes?

You can find all of my cobbler and crisp recipes in the Recipe Index, which is located at the top of the page. I have several I know you will enjoy, including:

Want More Recipes? Get My FREE Newsletter!

I publish a newsletter 2 times per month (1st and 15th) with lots of recipes, tips, etc..
Would you like to join our growing list of subscribers?

There is a Newsletter subscription box on the top right (or bottom) of each blog post, depending on the device you use.
You can submit your e-mail address there, to be added to my mailing list.

Find Me On Social Media:

Facebook page: The Grateful Girl Cooks!
Pinterest:
The Grateful Girl Cooks!
Instagram:
jbatthegratefulgirlcooks

Author's signature

Original recipe source: Ashley, at: https://www.centercutcook.com/fresh-peach-cobbler/

↓↓ PRINTABLE RECIPE BELOW ↓↓

0 from 0 votes
Fresh Peach Cobbler
Prep Time
15 mins
Cook Time
45 mins
Total Time
1 hr
 

Classic Fresh Peach Cobbler, (enhanced with cinnamon and vanilla) is a simple, delicious Summer dessert, served with vanilla ice cream!

Category: Desssert
Cuisine: American
Keyword: fresh peach cobbler
Servings: 10
Calories Per Serving: 336 kcal
Author: JB @ The Grateful Girl Cooks!
Ingredients
  • 6-8 large fresh, ripe peaches
  • 1 Tablespoon fresh lemon juice
  • 1 teaspoon vanilla extract
  • 1 teaspoon ground cinnamon
  • 2 cups granulated sugar (divided)
  • ½ cup butter, melted
  • 1 cup all purpose flour
  • 1 Tablespoon baking powder
  • ¼ teaspoon salt
  • 1 cup milk
Instructions
  1. Preheat oven to 375°F. While oven preheats, make the batter. Sift flour, 1 CUP of sugar (save remaining 1 cup of sugar for peach filling), baking powder and salt into a large mixing bowl. Pour in milk, and stir ingredients together only until they're combined (don't over-mix). Set aside.

  2. Add melted butter to the bottom of a 9x13 baking dish (can also use a 7x12). Pour the batter on top of the melted butter, BUT DO NOT STIR IT. Set baking dish aside.

  3. Place peach slices, lemon juice, vanilla, cinnamon and remaining 1 cup of sugar into a large saucepan. Stir to combine ingredients, then bring to a boil over medium-high heat, stirring constantly. Once it begins boiling, remove pan from heat.

  4. Spoon or pour peach filling evenly on top of the batter in baking dish, BUT DO NOT STIR IT. The peach filling sits on top of the batter, (which is sitting on top of the butter). As the cobbler bakes, the batter will rise up (magically) and cover the peaches!

  5. Bake at 375°F. for 40-45 minutes. When done, the top of the cobbler should be nice and golden brown, and filling should be bubbly around the edges of the dish. Carefully remove cobbler from oven, and transfer pan to a wire rack, to let it cool slightly before serving. It's easier to dish it up warm (and not totally hot). Serve with vanilla ice cream, and enjoy!

Nutrition Facts
Fresh Peach Cobbler
Amount Per Serving (1 g)
Calories 336 Calories from Fat 90
% Daily Value*
Fat 10g15%
Saturated Fat 6g38%
Cholesterol 26mg9%
Sodium 151mg7%
Potassium 369mg11%
Carbohydrates 62g21%
Fiber 2g8%
Sugar 50g56%
Protein 3g6%
Vitamin A 672IU13%
Vitamin C 8mg10%
Calcium 94mg9%
Iron 1mg6%
* Percent Daily Values are based on a 2000 calorie diet.

Here’s one more to pin on your Pinterest boards!Classic Fresh Peach Cobbler, (enhanced with cinnamon and vanilla) is a simple, delicious Summer dessert, served with vanilla ice cream!


Poppyseed Apple Raisin Coleslaw

Crisp Poppyseed Apple Raisin Coleslaw, w/ purple cabbage, carrots, Granny Smith apples, & raisins, is tossed with poppyseed dressing, and served cold.

Do you enjoy a cold, crisp and crunchy coleslaw? We do, especially during the warm Spring and Summer months. Coleslaw is one of those easy side dishes that just seems to compliment sandwiches, burgers, fried chicken, and other main dishes. This recipe only has 4 ingredients (plus dressing), and is super simple to make.

I’ve posted a couple other coleslaw recipes here on the blog in the past, including Purple Coleslaw and Pineapple Peanut Coleslaw. Each one is unique and delicious side salad.

Today’s poppyseed apple raisin coleslaw is one I created, after my husband came home from our local Farmer’s market with a big purple cabbage in tow. I asked him to bring home a couple veggies that I could have around to use for our dinners. He surprised me with a head of purple cabbage (did NOT expect that!). After straining my brain as how to use it, I decided to create something new.

Let me tell you… this turned out to be a great tasting coleslaw. Crunchy from cabbage and carrots, slightly tart/crisp from Granny Smith apples, and chewy sweet from plump raisins, this is a coleslaw you’ll enjoy! Here’s how to make it:

Scroll Down For A Printable Recipe Card At The Bottom Of The Page

Plump Those Raisins!

Many, many years ago I learned a little tip to help plump up raisins. When I make this coleslaw, I simply soak the raisins while I am doing the prep work on the other ingredients. It plumps them up a bit, and I feel it makes them more juicy. It doesn’t take any more time to do this step, if you let them soak while you grate and chop the cabbage, apples and carrots.

Place the raisins into a medium bowl, and cover them completely with boiling water. Let them sit, undisturbed, while you chop the apples and carrots, and grate the cabbage (takes about 10 minutes). When done, place the raisins in a strainer and drain off the water, before adding to the coleslaw.

Raisins are plumped in boiling water for 10 minutes.The raisins are drained after being plumped up in boiling hot water.

Prepare The Poppyseed Apple Raisin Coleslaw

Grate the cabbage into a large mixing bowl. You can do this using a box grater, or a food processor with a grating disc/blade. For this recipe (making 4-5 servings) you will need 3 cups of grated cabbage.

Purple cabbage for the coleslaw is grated into a large bowl.Three cups of grated purple coleslaw becomes the base for this salad.

Slice and chop the peeled carrot into small bite-sized pieces. Do the same with the Granny Smith apple, BUT LEAVE THE PEEL ON THE APPLE. It adds a pop of green color to the salad. Granny Smith apples also lend a slight tartness and crisp bite to the coleslaw, which is a great contrast to the sweet, chewy raisins.

Pour poppyseed dressing over the coleslaw ingredients, and toss gently to fully coat the salad. I used my homemade poppyseed dressing, which tastes delish, but any store-bought poppyseed dressing will taste great, too!

Chopped carrots, apples, and raisins are added to the grated purple cabbage.Poppyseed dressing is added, and then coleslaw is gently tossed to combine.

Chill Then Serve The Poppyseed Apple Raisin Coleslaw

After the poppyseed apple raisin coleslaw (dressing and slaw) is fully combined, cover the bowl, and refrigerate the coleslaw for at least one hour, or until well-chilled, for best flavor.

Poppyseed apple raisin coleslaw is best served cold, so if you can chill it longer, go for it (up to 6 hours). When ready to serve the coleslaw, give it a quick stir, transfer the salad to a nice serving bowl (if desired), and dish it up. I think you will be surprised how delicious it is!

The colorful poppyseed apple raisin coleslaw is served in a large white bowl.A close up view of the delicious poppyseed apple raisin coleslaw, ready to eat.

When I first made this and told my husband what ingredients were in the coleslaw he gave me “THAT LOOK”. He said he would try “a tiny bite”, but that he “didn’t think he would like it”. Well… he was being honest with me, but he was wrong. He LOVED it, and told me he was surprised at how good it was. YEP. It tastes great!

Hope you have the opportunity to make this dish for yourself or for those you love. It’s quick and easy to make, and is a colorful, delicious side dish, that will pair well with a number of lunch or dinner dishes! Have a great day, friends.

Looking For More Side Dish Recipes?

You can find all of my recipes in the Recipe Index, which is located at the top of the page. I have quite a few recipes for side dishes, including:

Interested In More Recipes?

Thank you for visiting this website. I appreciate you using some of your valuable time to do soIf you’re interested, I publish a newsletter 2 times per month (1st and 15th) with all the latest recipes, and other fun info. I would be honored to have you join our growing list of subscribers, so you never miss a great recipe!
There is a Newsletter subscription box on the top right side (or bottom) of each blog post, depending on the device you use, where you can easily submit your e-mail address (only) to be included in my mailing list.

You Can Also Find Me On Social Media:

Facebook page: The Grateful Girl Cooks!
Pinterest:
The Grateful Girl Cooks!
Instagram:
jbatthegratefulgirlcooks

Author's signature

0 from 0 votes
Poppyseed Apple Raisin Coleslaw
Prep Time
10 mins
Cook Time
0 mins
Refrigeration (inactive prep time-minimum)
1 hr
Total Time
1 hr 10 mins
 

Crisp Poppyseed Apple Raisin Coleslaw, w/ purple cabbage, carrots, Granny Smith apples, & raisins, is tossed with poppyseed dressing, and served cold.

Category: Salad/Side Dish, Vegetables
Cuisine: All Cuisines, American
Keyword: poppyseed apple raisin coleslaw
Servings: 4
Calories Per Serving: 95 kcal
Author: JB @ The Grateful Girl Cooks!
Ingredients
  • 3 cups grated purple cabbage
  • 1 medium carrot , peeled, sliced & chopped
  • ½ large Granny Smith apple , unpeeled, sliced & chopped
  • ½ cup raisins
  • cup poppyseed dressing
Instructions
  1. Place raisins in a medium bowl; cover completely with boiling water. Let sit, undisturbed, while you prep other ingredients (about 10 minutes). When done, place raisins in a strainer to drain.

  2. Grate cabbage into a large bowl. Slice and chop peeled carrot into small bite-sized pieces. Do the same with the apple, BUT LEAVE THE PEEL ON.

  3. Add apples, carrots and raisins to slaw. Pour poppyseed dressing over coleslaw; toss gently to coat ingredients.

  4. Cover bowl, and refrigerate coleslaw for at least 1 hour, or until well-chilled, for best flavor. This is best served cold; you can chill it for up to 6 hours. To serve, give coleslaw a quick stir, transfer to a serving bowl (if desired), and dish it up. Enjoy! Cover/refrigerate leftovers for up to 2-3 days.
Recipe Notes

NOTE: Caloric calculation was made based on 4 total servings. Caloric calculation for this salad does NOT include poppyseed salad dressing, as homemade or store bought versions may vary quite a bit in calorie count.

Nutrition Facts
Poppyseed Apple Raisin Coleslaw
Amount Per Serving (1 g)
Calories 95 Calories from Fat 9
% Daily Value*
Fat 1g2%
Saturated Fat 1g6%
Sodium 34mg1%
Potassium 390mg11%
Carbohydrates 24g8%
Fiber 4g17%
Sugar 6g7%
Protein 2g4%
Vitamin A 3308IU66%
Vitamin C 41mg50%
Calcium 40mg4%
Iron 1mg6%
* Percent Daily Values are based on a 2000 calorie diet.

Here’s one more to pin on your Pinterest boards!Crisp Poppyseed Apple Raisin Coleslaw, w/ purple cabbage, carrots, Granny Smith apples, & raisins, is tossed with poppyseed dressing, and served cold.

Awesome Grilled Pork Chops

Awesome Grilled Pork Chops are easy, flavorful & juicy! They’re brined in salt/water/sugar overnight, and coated with spices before grilling.
Awesome Grilled Pork Chops are easy, flavorful & juicy! They're brined in salt/water/sugar overnight, and coated with spices before grilling.

Do you enjoy pork chops? We do, and have them every two or three weeks! Today I want to share a recipe for grilled pork chops that are ridiculously EASY to make, juicy (not dry), and taste WONDERFUL!

The only catch is that you need to plan ahead, because the pork chops will need to soak overnight in a simple brine (which adds flavor, tenderness, and keeps ’em juicy).

The brine only takes a couple minutes to make, and then into the fridge they go. The next day, it only takes a minute or two to make a dry spice rub, and place on the brined chops. Then all that is necessary is someone to grill the pork chops on the ol’ BBQ!

It’s really a totally EASY recipe to make, and I’m confident you’ll enjoy these grilled pork chops! The recipe calls for bone-in chops, but you can substitute boneless if you want (we prefer the bone-in!) Here’s how to make them:

Scroll Down For A Printable Recipe Card At The Bottom Of The Page

Prepare The Brine For The Pork Chops

Making the brine solution is easy! Basically, brining is a technique where meats of all kinds are soaked for several hours in a water/salt (etc.) solution to increase flavor, tenderize, and keep meats juicy. For an interesting quick read on the pros of brining, check out this article.

For this brine, you will combine salt, water and sugar in a large saucepan. Stir and cook the brine on medium heat, until the sugar and salt particles have dissolved.

Take the pan off the heat, and add ice cubes. Let the ice cubes melt; once the brine is at room temperature, it’s ready for the pork chops! See how easy it is to make?

Place the pork chops in a large container with a lid, or in a gallon-sized resealable plastic bag. The container needs to be large enough so the pork chops are in a single layer (to soak up that brine!).

Turn to coat both sides. Let the chops brine overnight (covered) in the refrigerator.

A sweet/salty brine is prepared for the pork chops.The pork chops are refrigerated overnight in a sweet/salty brine.

Make The Spice Mix For The Easy Grilled Pork Chops

The pork chops are coated in a flavorful spice mixture on all sides, before putting them on the grill. The ingredients are paprika, garlic powder, cumin, onion powder, ground mustard, black pepper, and chili powder.

Combine the spices, and then set the spice mixture aside until you’re ready to cook the brined pork chops.

Spices are combined to make a dry rub for pork chops.Spice mix, ready to rub onto both sides of each pork chop before grilling.

Ready To Grill!

Rinse off the brine and then pat each pork chop dry with paper towels. Generously sprinkle each chop with the spice mixture (on all sides). Rub the spice mixture onto the surface of each pork chop so that it adheres to the meat.

Place the pork chops onto a hot grill. Cook for approximately 10-11 minutes, and then turn chops over. Cook for an additional 10-11 minutes or until the pork reaches an internal temperature of 145°F.

Four bone-in pork chops coated with dry rub spice mix, and ready to grill.The chops are cooked on the bbq grill over hot coals.

The thickness of the chops used will determine the actual length of cooking time. **Our chops were about an inch thick, and took about 11 minutes per side**.

Once done, remove the pork chops from the grill and let them sit for 4-5 minutes, to let the juices redistribute throughout the meat.

Awesome grilled pork chops are cooking and well browned on the bbq.

Time To Eat Some Awesome Grilled Pork Chops!

Once done, transfer the meat to a serving platter, and get ready to enjoy these awesome grilled pork chops!

We enjoyed them served with green beans, garden fresh Sun-Gold cherry tomatoes and creamy scalloped potatoes on the side.

The chops are quite juicy, and taste absolutely wonderful!

Time to serve the awesome grilled pork chops (on a large platter).Awesome Grilled Pork Chops, served with scalloped potatoes, green beans, and tomatoes.

I hope you enjoy this recipe for awesome grilled pork chops! Pretty sure you’re really going to like them.

Thank you so much for stopping by, and please pop in again sometime for another visit, and some wonderful recipes! Have a GREAT day.

Looking For More PORK CHOP Recipes?

You can find all of my pork recipes in the Recipe Index, located at the top of the page. I have quite a few, including:

Want More Recipes? Get My FREE Newsletter!

I publish a newsletter 2 times per month (1st and 15th) with lots of recipes, tips, etc..
Would you like to join our growing list of subscribers?

There is a Newsletter subscription box on the top right (or bottom) of each blog post, depending on the device you use.
You can submit your e-mail address there, to be added to my mailing list.

Find Me On Social Media:

Facebook page: The Grateful Girl Cooks!
Pinterest:
The Grateful Girl Cooks!
Instagram:
jbatthegratefulgirlcooks

Author's signature

Original recipe source: Stephanie, at: https://www.plainchicken.com/the-ultimate-pork-chops/

↓↓ PRINTABLE RECIPE BELOW ↓↓

0 from 0 votes
Awesome Grilled Pork Chops
Prep Time
10 mins
Cook Time
22 mins
Brining Time (inactive)
8 hrs
Total Time
8 hrs 32 mins
 

Awesome Grilled Pork Chops are easy, flavorful & juicy! They're brined in salt/water/sugar overnight, and coated with spices before grilling.

Category: Entree
Cuisine: American
Keyword: awesome grilled pork chops
Servings: 4
Calories Per Serving: 291 kcal
Author: JB @ The Grateful Girl Cooks!
Ingredients
  • ¼ cup salt
  • ¼ cup granulated sugar
  • 2 cups water
  • 2 cups ice cubes
  • 4 1" thick bone-in pork chops (approx. 6 ounces per chop)
Spice Mixture:
  • 3 Tablespoons paprika
  • 1 teaspoon ground cumin
  • 1 teaspoon garlic powder
  • 1 teaspoon onion powder
  • 1 teaspoon ground mustard
  • 1 teaspoon chili powder
  • 1 teaspoon black pepper
Instructions
  1. Make Brine: Combine salt, water and sugar in large saucepan. Stir; cook brine on medium heat until sugar and salt dissolves. Remove pan from heat; add ice cubes. Let brine cool to room temp.

  2. Place pork chops in a large container in a single layer, or in a gallon-sized resealable plastic bag. Add the room temp. brine. Let the chops brine overnight, or 8-12 hours in the refrigerator (covered, if using container) .

  3. Make Spice Mix: Combine spices in bowl; set aside until ready to cook brined pork chops.

  4. When Ready To Grill: Rinse brine off chops; pat dry with paper towels. Generously sprinkle chops with spice mix (all sides). Rub spices onto each pork chop so it adheres. Place chops on hot grill. Grill approx. 10-11 minutes; turn chops over. Cook additional 10-11 minutes, or until pork reaches internal temperature of 145°F. Remove from grill. Let chops sit for 4-5 minutes before serving. Enjoy!
Recipe Notes

PLEASE NOTE: The salt/sugar in the brine is not included in the caloric calculation (for sodium or sugar content), since almost all of the brine is rinsed off the meat prior to cooking.

Nutrition Facts
Awesome Grilled Pork Chops
Amount Per Serving (1 g)
Calories 291 Calories from Fat 117
% Daily Value*
Fat 13g20%
Saturated Fat 4g25%
Cholesterol 88mg29%
Sodium 84mg4%
Potassium 585mg17%
Carbohydrates 17g6%
Fiber 2g8%
Sugar 13g14%
Protein 28g56%
Vitamin A 2734IU55%
Calcium 41mg4%
Iron 2mg11%
* Percent Daily Values are based on a 2000 calorie diet.

Here’s one more to pin on your Pinterest boards!Awesome Grilled Pork Chops are easy, flavorful & juicy! They're brined in salt/water/sugar overnight, and coated with spices before grilling.

Blackberry Crisp

Blackberry Crisp is an easy, old-fashioned dessert you’ll love! Fresh blackberries, topped with a crumb streusel, baked and served a la mode.
Blackberry Crisp is an easy, old-fashioned dessert you'll love! Fresh blackberries, topped with a crumb streusel, baked and served a la mode.

We have blackberry vines growing over our back fence from a forest park behind our home. The vines grow like ravenous beasts in the Spring and early Summer here in Oregon, and it is all I can do to NOT hack at them with the clippers to tame them. HOWEVER… if I’m “nice” and let them grow unhindered, even though they’re a nuisance, we harvest several quarts of fresh wild blackberries each summer.

I pick as many berries as I can (and I have red stains on my fingers and battle scars from the thorns to prove it). Then we take the trimmers to the vines, and cut the vines as far back over the other side of the fence as possible. We keep them clipped back until the following year, and then we battle them and pick blackberries all over again! It’s a LOVE-HATE relationship!

We love to make cobblers, bars, jam, muffins, scones and pies using our “FREE” blackberries each year. This recipe I am sharing today is a super easy way to incorporate fresh blackberries into an easy to make, classic dessert.

Scroll Down For A Printable Recipe Card At The Bottom Of The Page

How To Make Blackberry Crisp

Lightly grease a 2 quart baking dish OR 9″ square pan with non-stick baking spray. Add the fresh blackberries to the baking dish, and very gently toss with flour and granulated sugar. This mixture will help absorb some of the juices as the berries bake, and will just slightly sweeten the blackberries.

Fresh blackberries in baking dish waiting for streusel topping.

Prepare The Crumb Topping

In a large bowl, combine packed brown sugar, old-fashioned oats, flour, and cinnamon. Gently mix these ingredients with a fork or whisk until combined.

Cut in COLD butter with a pastry blender or two forks until the topping mixture is crumbly and the butter is cut to “about” the size of peas. This is the crumb topping for your blackberry crisp!

Oats, flour, cinnamon and brown sugar are combined in bowl. Cold butter is cut into the streusel ingredients until crumbly.

Time To Bake The Blackberry Crisp

Evenly distribute the crumb topping over the blackberries, using all the topping to cover the berries completely. Place the berry crisp into a preheated 375°F oven on the middle rack.

TIP: I usually place a sheet of aluminum foil on the rack UNDER the baking dish, just in case the blackberry juice bubbles up and out of the dish. It is rare when that happens, but if it does, it sure makes cleanup much easier!

Bake the blackberry crisp for 40 minutes. Once done, it should be bubbly around the edges, and the topping should be nicely browned. You can see (in the 2nd photo below), how the crisp reduces in volume (from the top of the baking dish to much lower than the rim).

Blackberry Crisp, with crumb topping is ready to bake.The blackberry crisp is bubbly and golden brown once fully baked.

Ready To Eat!

When the blackberry crisp is done cooking, transfer it from the oven to a wire rack, to cool down about 10 minutes or so before serving. This also helps the juices to stabilize a bit before you scoop out the portions.

Serve the cobbler warm, with a nice, big ol’ scoop of vanilla ice cream. I whipped up a batch of homemade vanilla ice cream to have with this delicious dessert! A little scoop of ice cream is the absolute perfect way to top off and enjoy this dessert.

A la mode blackberry crisp, served in white bowl.A scoop of vanilla ice cream tops off the blackberry crisp for serving.

I hope you enjoy this yummy dessert like we do. For me it’s wonderful to be able to enjoy the fresh summer blackberries from our very own backyard. Such a nice treat… I almost don’t mind the thorns sticking me as I grab more and more off the vines!

Have a great day, and thank you so much for stopping by for a visit. I hope you have the opportunity to come back soon. Take care.

Looking For More COBBLER or CRISP Recipes?

You can find all of my recipes for cobblers or crisps in the Recipe Index, which is located at the top of the page. I have some yummy recipes, including:

Interested In More Recipes?

Thank you for visiting this website. I appreciate you using some of your valuable time to do soIf you’re interested, I publish a newsletter 2 times per month (1st and 15th) with all the latest recipes, and other fun info. I would be honored to have you join our growing list of subscribers, so you never miss a great recipe!
There is a Newsletter subscription box on the top right side (or bottom) of each blog post, depending on the device you use, where you can easily submit your e-mail address (only) to be included in my mailing list.

You Can Also Find Me On Social Media:

Facebook page: The Grateful Girl Cooks!
Pinterest:
The Grateful Girl Cooks!
Instagram:
jbatthegratefulgirlcooks

Author's signature

Recipe adapted from: “The New Pillsbury Family Cookbook”, published by the Pillsbury Co., 1973, page 131

0 from 0 votes
Blackberry Crisp
Prep Time
10 mins
Cook Time
40 mins
Total Time
50 mins
 

Blackberry Crisp is an easy, old-fashioned dessert you will love! Fresh blackberries, topped with butter-crumb streusel, baked, and served a la mode.

Category: Dessert
Cuisine: American
Keyword: blackberry crisp
Servings: 6
Calories Per Serving: 437 kcal
Author: JB @ The Grateful Girl Cooks!
Ingredients
  • 6 cups fresh blackberries
  • ¼ cup all purpose flour
  • ¼ cup granulated sugar
For Crumb Topping:
  • ½ cup old-fashioned oats
  • ¾ cup brown sugar (packed)
  • ¾ cup all purpose flour
  • 1 teaspoon ground cinnamon
  • ½ cup COLD butter
Instructions
  1. Preheat oven to 375°F. Lightly grease a 2 quart baking dish OR 9" square pan with non-stick baking spray.

  2. Place blackberries in prepared baking dish; add flour and granulated sugar. Toss gently to lightly coat berries.

  3. Make Crumb Topping: In a large bowl, combine packed brown sugar, oats, flour, and cinnamon. Gently mix with a fork or whisk until combined. Cut in COLD butter with a pastry blender or two forks until topping is crumbly and butter is cut to "about" the size of peas. Evenly distribute topping over blackberries, using all the topping to cover completely.

  4. BEFORE BAKING TIP: Place a sheet of aluminum foil on the rack UNDER the baking dish before baking, in case blackberry juice bubbles up and out of the dish. It sure makes cleanup much easier! Place blackberry crisp on the middle rack of oven. Bake at 375°F. for 40 minutes. When done, it should be bubbly around the edges, and the topping should be nicely browned.

  5. When done, transfer dish to wire rack. Let cool for about 10 minutes. Serve crisp warm, with a scoop of vanilla ice cream (optional, but totally recommend). enjoy!

Nutrition Facts
Blackberry Crisp
Amount Per Serving (1 g)
Calories 437 Calories from Fat 153
% Daily Value*
Fat 17g26%
Saturated Fat 10g63%
Cholesterol 41mg14%
Sodium 145mg6%
Potassium 311mg9%
Carbohydrates 70g23%
Fiber 9g38%
Sugar 42g47%
Protein 5g10%
Vitamin A 781IU16%
Vitamin C 30mg36%
Calcium 78mg8%
Iron 2mg11%
* Percent Daily Values are based on a 2000 calorie diet.

Here’s one more to pin on your Pinterest boards!Blackberry Crisp is an easy, old-fashioned dessert you'll love! Fresh blackberries, topped with a crumb streusel, baked and served a la mode.

Easy Cheesy Enchiladas

Make a yummy batch of Easy Cheesy Enchiladas in a flash, with cheddar and jack cheese, canned enchilada sauce, onions, and corn tortillas.

One of my lifetime friends gave me her family’s “recipe” for making basic cheese enchiladas over 42 years ago. I have been making them, in one form or another ever since! The recipe (as shown in the printable recipe card at the bottom of the page) is her recipe for basic cheese enchiladas, perfect for “Meatless Mondays” (or anytime, for that matter!).

My friend, Nadine, says lightly frying the corn tortillas in hot oil BEFORE filling them, is the secret to making them. Nadine says it’s because the slightly cooked tortillas won’t tear as easily as dry tortillas might when filling them.

I’ve always made our enchiladas this way, and now (42 years later), I’ve probably used this little basic recipe hundreds of times! You can even go WILD (ha ha) and add seasoned ground beef, chicken, turkey or shredded pork, if you want to add some “meat”.

We have enjoyed these little enchiladas so long now, I feel like they are part of our family! It really doesn’t take much effort to make a pan of eight enchiladas (and the recipe can be easily doubled). Here’s how to make them:

Scroll Down For A Printable Recipe Card At The Bottom Of The Page

Preparing To Make Enchiladas

Preheat your oven to 350° Place the chopped onion, and grated jack and cheddar cheeses into individual bowls. NOTE: Set aside about 1/4 cup each of the two cheeses and save for later. You will need this cheese to sprinkle on top of the filled enchiladas before baking.

I like to set the bowls close together, right next to where I will be filling the enchiladas, so it is easy for me to grab the ingredients.

Chopped onion, grated cheddar and jack cheese are ready to fill tortillas.

Quick Fry To Soften Tortillas

Heat the oil in a small skillet (large enough for the tortillas, though!). You only need a small amount of oil, (usually about 3 Tablespoons) to barely cover the bottom of the skillet. You amount may vary, based on the size skillet you are using.

Heat the oil on medium-high heat until it is very hot, but NOT smoking. Lay a tortilla in the hot oil, and let it cook for about 15 seconds, then flip it to the other side, using tongs.

Cook 15 more seconds, and then carefully (using tongs) lift the tortilla out of the hot oil, letting the excess oil drip back into skillet, and place tortilla on a paper towel.

Repeat process with all 8 tortillas. When done, carefully blot the tortillas with paper towels to soak up any extra oil. Stack the tortillas on top of each other. Now you’re ready to fill the tortillas, and they should be nice and pliable, so they don’t tear.

Corn tortillas are quickly fried in hot oil to soften before adding enchilada filling.Quickly fried tortillas are blotted dry with paper towels before adding enchilada filling.

Filling And Rolling Easy Cheesy Enchiladas

Before filling the enchiladas, spoon just enough of the enchilada sauce in a 9×13 baking dish to cover the bottom. Then, as you fill each enchilada, place it directly on top of the enchilada sauce.

If you’re interested in making your own enchilada sauce (it’s a cinch!), check out my recipe for Easy Homemade Enchilada Sauce!

To fill the enchiladas, place a small handful of grated cheddar cheese right down the middle of the tortilla. Top with the grated jack cheese, and then sprinkle with chopped onion.

TIP: You will have to “guesstimate” on the amount of cheese used to fill each tortilla. Remember you need to divide the cheeses and onions evenly between 8 tortillas!

Once filled, roll the tortilla tightly up and over the filling. Place it in the prepared baking dish, with the seam side DOWN. Repeat this process for each enchilada. Your fingers can get a little messy, but who cares? It’s homemade enchiladas!

Each corn tortilla is filled with jack and cheddar cheese and chopped onions.Tortillas and filling are rolled, then placed on top of enchilada sauce in baking pan.

Finishing Enchiladas BEFORE Baking

Lay each remaining filled enchilada tightly next to the others. Pour or spoon the remaining enchilada sauce over the top of the enchiladas, until all are fully covered. Cover any exposed tortilla with the sauce (that will help them not dry out while baking).

Use all the sauce to cover those enchiladas! Once done, sprinkle the reserved cheddar and jack cheeses over the top of the enchiladas. If you want more, simply add as much as you wish. Sometimes I even add a bit more chopped onion or chopped black olives, too!

Additional enchilada sauce is put on top of the enchiladas in the baking pan.Grated cheeses are sprinkled on top of the easy cheesy enchiladas before baking.

Time To Bake

Easy cheesy enchiladas should be baked in a preheated 350°F. oven. Bake them for approximately 20 minutes. When done, the sauce and cheese should be bubbly around the edges, the cheese on top will be melted, and enchiladas will be heated through.

Transfer the baking dish to a wire rack, and let the easy cheesy enchiladas cool for just a couple minutes. This lets the cheese slightly firm up, so they are easier to remove from the dish for serving.

Enchiladas are baked for 20 minutes until cheese melts and they're heated through.

Serving Easy Cheesy Enchiladas

Use a spatula to remove each enchilada from the pan, and transfer to individual serving plates. These enchiladas go really well with my crock pot refried beans or Spanish rice.

Some of our favorite ways to serve cheesy enchiladas include adding chopped cilantro the the top of each enchilada. It’s really your own personal taste that will determine how you top them (and totally optional to add any extra topping at all!).

You can also just go with a dollop of sour cream on each one, OR you can go wild, and add fresh guacamole AND sour cream. However you serve these enchiladas, I’m pretty sure you will enjoy them. We sure do!

Easy cheesy enchiladas, garnished with chopped cilantro for serving.

The easy cheesy enchiladas can be garnished with sour cream for serving.Fresh guacamole and sour cream are another garnish for the baked cheese enchiladas.

I hope you enjoy these easy cheesy enchiladas. We sure do! It’s a perfectly delicious tasting “meatless meal”. Thank you for stopping by, and I sincerely hope you will stop by again. The printable recipe card is below.

Looking for for Mexican/Southwestern Main Dishes?

You can find all of my recipes in the Recipe Index, located at the top of the page. I have quite a few Mexican or Southwestern inspired recipes, including:

Want More Recipes? Get My FREE Newsletter!

I publish a newsletter 2 times per month (1st and 15th) with lots of recipes, tips, etc..
Would you like to join our growing list of subscribers?

There is a Newsletter subscription box on the top right (or bottom) of each blog post, depending on the device you use.
You can submit your e-mail address there, to be added to my mailing list.

Find Me On Social Media:

Facebook page: The Grateful Girl Cooks!
Pinterest:
The Grateful Girl Cooks!
Instagram:
jbatthegratefulgirlcooks

Author's signature

Original recipe source: my friend Nadine Massey, over 42 years ago

↓↓ PRINTABLE RECIPE BELOW ↓↓

0 from 0 votes
Easy Cheesy Enchiladas
Prep Time
15 mins
Cook Time
20 mins
Total Time
35 mins
 

Make a yummy batch of Easy Cheesy Enchiladas in a flash, with cheddar and jack cheese, canned enchilada sauce, onions, and corn tortillas.

Category: Main Dish
Cuisine: Mexican, Southwest
Keyword: easy cheesy enchiladas
Servings: 8 enchiladas
Calories Per Serving: 305 kcal
Author: JB @ The Grateful Girl Cooks!
Ingredients
  • 8 medium corn tortillas
  • 19 ounces red enchilada sauce (canned) , 1 lb. 3 ounce can
  • 2 cups grated cheddar cheese , divided
  • 2 cups grated jack cheese , divided
  • cup onion (yellow) , chopped
  • enough oil to cover bottom of small skillet (approx. 3 Tablespoons)
OPTIONAL GARNISH: sour cream, guacamole, chopped cilantro
    Instructions
    PREP:
    1. Preheat oven to 350° Place chopped onion, and grated jack and cheddar cheeses into individual bowls. NOTE: Set aside about 1/4 cup each of the two cheeses and save for later. You will need this cheese to sprinkle on top of the filled enchiladas before baking. Pour just enough of the enchilada sauce in a 9x13 baking dish to cover the bottom.

    Making Enchiladas:
    1. Heat oil in a small skillet (large enough for tortillas) on medium-high heat until very hot, but NOT smoking. Lay a tortilla in hot oil; let it cook for about 15 seconds, then flip it to other side, using tongs. Cook 15 seconds, and then carefully (using tongs) lift tortilla from oil, letting excess oil drip into skillet; place on a paper towel. Repeat process with all tortillas. Blot tortillas with paper towels to soak up oil.

    2. Fill enchiladas: place a small handful of grated cheddar cheese down the middle of the tortilla. Top with grated jack cheese, and then sprinkle with chopped onion, dividing cheeses and onion evenly between 8 tortillas. Once filled, roll tortilla tightly up and over the filling. Place in prepared baking dish, seam side DOWN. Repeat process with each enchilada.

    3. Pour or spoon remaining sauce over enchiladas, until fully covered. Once done, sprinkle reserved cheddar and jack cheeses over the top.

    4. Baked at 350°F. for approx. 20 minutes. When done, sauce and cheese should be bubbly around the edges, cheese melted, and enchiladas heated through. Transfer dish to a wire rack; let cool for 2 minutes, before serving. OPTIONAL: Serve, topped with sour cream, cilantro, guacamole or other toppings of your choice. Enjoy.

    Recipe Notes

    Oil used to quickly "fry" tortillas not included in caloric calculation. Most oil remains unused (and amount to cover skillet bottom will vary per user).

    Nutrition Facts
    Easy Cheesy Enchiladas
    Amount Per Serving (1 enchilada)
    Calories 305 Calories from Fat 171
    % Daily Value*
    Fat 19g29%
    Saturated Fat 11g69%
    Cholesterol 55mg18%
    Sodium 923mg40%
    Potassium 109mg3%
    Carbohydrates 18g6%
    Fiber 3g13%
    Sugar 5g6%
    Protein 17g34%
    Vitamin A 949IU19%
    Vitamin C 2mg2%
    Calcium 437mg44%
    Iron 1mg6%
    * Percent Daily Values are based on a 2000 calorie diet.

    Here’s one more to pin on your Pinterest pages!Make a yummy batch of Easy Cheesy Enchiladas in a flash, with cheddar and jack cheese, canned enchilada sauce, onions, and corn tortillas.

    Garlic-Infused Olive Oil

    Need Garlic-Infused Olive Oil for a recipe? It’s easy to make your own in minutes (with 2 ingredients), for salad dressings, veggies, & other dishes.
    Need Garlic-Infused Olive Oil for a recipe? It's easy to make your own in minutes (with 2 ingredients), for salad dressings, veggies, & other dishes.

    I love to use garlic-infused olive oil in various recipes, like vegetables, salad dressings, etc. For several years I have bought bottles of it from a local olive oil and balsamic vinegar tasting room near our home. Well, I ran out of it a couple months ago, and discovered my local store had gone out of business… uh oh. POOF… it is gone! That made me very sad.

    I knew of no other stores close to my home (worth making a separate trip to), so I decided to make some myself. Guess what my research showed me? The process is easy, and the resulting garlic-infused olive oil tastes wonderful! In only a few minutes, I had a great tasting copycat for the product I was used to buying, it costs a lot less, AND I made it in my own kitchen. Here’s how simple it is:

    Scroll Down For A Printable Recipe Card At The Bottom Of The Page

    Photo showing inside of our local olive oil and vinegar tasting room.

    Prepare The Fresh Garlic Cloves

    To make your own garlic-infused olive oil, it’s important to use FRESH garlic, and a good quality olive oil. I do not recommend jarred or canned minced garlic for this recipe. Trust me- you want to use fresh garlic for the very best flavor!

    Peel all the paper peel/skin off of the garlic cloves. This recipe yields 1 cup of infused olive oil, so you will need between 6-8 large garlic cloves (I used 6). Place one peeled clove at a time under the flat, wide blade of a large kitchen knife.

    Pound the flat, broad side of the knife hard, with the ball of your hand, to smash the garlic clove underneath. It should only take one “pounding” to flatten and split the clove open. Repeat with the other cloves, one at a time.

    Cloves of garlic must be stripped of the papery thin skin covering.Smashing each clove of garlic with the broad flat side of a knife.

    Infusing Garlic Into The Oil

    Once you have “flattened” each of the garlic cloves, place them in a small saucepan with one cup of olive oil. Turn the heat to LOW, and let the oil cook for 5 minutes.

    The garlic cloves have each been smashed with the knife to release the flavor.Cooking the smashed garlic cloves with olive oil.

    The oil will begin to slightly boil as it is heated. The flattened garlic cloves will release their aromatic flavor into the hot oil. This is how it becomes garlic-“infused” olive oil. When done, use a slotted spoon to remove the browned, crispy garlic cloves from the oil. You can discard the garlic cloves, or use them in any other way you choose.

    Garlic-infused olive oil is cooking away in the pan.The crispy garlic cloves are removed from the garlic-infused olive oil.

    Finish Preparing The Garlic-Infused Olive Oil

    After removing the garlic, you’ll probably have some leftover “crispy bits” left in the pan with the olive oil. You will need to strain the oil, once it has cooled, in order to remove them.

    Place a small wire mesh strainer over a bowl or measuring cup, and carefully pour the infused oil through the strainer into the container. Any tiny bits of crispy garlic will now have been removed from your oil. Once the olive oil is completely cooled, pour it through a funnel into the bottle or jar that you will be storing the oil in. Olive oil should be stored (covered), away from direct sunlight, in a dark, cool location.

    NOTE: There are differing opinions and research on how long a non-commercial infused olive oil can be safely stored. Homemade infused olive oil using the method I’ve described should ideally be used within 4-5 days. It can also be frozen for safe, long-term storage.

    The olive oil is strained into a cup to remove any small crispy garlic pieces.A funnel is used to add the garlic-infused olive oil to a bottle for storage.

    That’s it… now you have 8 ounces of delicious, garlic-infused olive oil to pan-sear meats, use in salad dressings, or vegetable stir-frys, etc. Thank you for stopping by. I hope you have the opportunity to try infusing olive oil, and trust you will find it convenient to have in your own kitchen. The printable recipe card is below, for your convenience. Take care, and have a GREAT day!

    Interested In More Recipes?

    Thank you for visiting this website. I appreciate you using some of your valuable time to do soIf you’re interested, I publish a newsletter 2 times per month (1st and 15th) with all the latest recipes, and other fun info. I would be honored to have you join our growing list of subscribers, so you never miss a great recipe!
    There is a Newsletter subscription box on the top right side (or bottom) of each blog post, depending on the device you use, where you can easily submit your e-mail address (only) to be included in my mailing list.

    You Can Also Find Me On Social Media:
    Facebook page: The Grateful Girl Cooks!
    Pinterest: The Grateful Girl Cooks!
    Instagram: jbatthegratefulgirlcooks

    Author's signature

    0 from 0 votes
    Garlic-Infused Olive Oil
    Prep Time
    3 mins
    Cook Time
    5 mins
    Total Time
    8 mins
     

    Need Garlic-Infused Olive Oil for a recipe? It's easy to make your own in minutes (with 2 ingredients), for salad dressings, veggies, & other dishes.

    Category: Condiments
    Cuisine: All Cuisines
    Keyword: garlic-infused olive oil
    Servings: 1 cup
    Calories Per Serving: 218 kcal
    Author: JB @ The Grateful Girl Cooks!
    Ingredients
    • 1 cup olive oil extra virgin or regular
    • 6-8 large FRESH garlic cloves do NOT use canned or jarred minced garlic
    Instructions
    1. Remove paper/skin off garlic cloves. Place one peeled clove at a time under the flat, wide blade of a large kitchen knife. Pound the flat, broad side of the knife hard, with the ball of your hand, to smash garlic clove underneath. Repeat with remaining cloves, one at a time.

    2. Place one cup of olive oil in a small saucepan. Add smashed garlic cloves. Turn heat to LOW, and cook for 5 minutes. When done, use a slotted spoon to remove browned, crispy garlic cloves from oil. Discard cloves.

    3. Strain oil, to remove any remaining crispy bits in oil. Place a wire mesh strainer over a bowl or measuring cup; carefully pour oil through strainer into container. Once oil has completely cooled, pour it through a funnel into a bottle or jar that you will be storing the oil in. Store oil (covered), away from sunlight, in a dark, cool location. Infused olive oil made using this method should be used within 4-5 days. It can also be frozen for safe long-term storage.

    Recipe Notes

    Caloric calculation made using extra virgin olive oil.  One cup of oil will yield approx.16 Tablespoons. Each Tablespoon of this oil is approximately 13.62 calories. 

    Nutrition Facts
    Garlic-Infused Olive Oil
    Amount Per Serving (1 g)
    Calories 218 Calories from Fat 198
    % Daily Value*
    Fat 22g34%
    Saturated Fat 3g19%
    Sodium 3mg0%
    Potassium 72mg2%
    Carbohydrates 6g2%
    Fiber 1g4%
    Sugar 1g1%
    Protein 1g2%
    Vitamin C 6mg7%
    Calcium 33mg3%
    Iron 1mg6%
    * Percent Daily Values are based on a 2000 calorie diet.

    Here’s one more to pin on your Pinterest boards!Need Garlic-Infused Olive Oil for a recipe? It's easy to make your own in minutes (with 2 ingredients), for salad dressings, veggies, & other dishes.

    Creamy Lime Mousse

    Looking for a light, delicious, flavor-filled EASY dessert? Try this cold, creamy lime mousse, which is made in 5 minutes using only 4 ingredients!
    Looking for a light, delicious, flavor-filled EASY dessert? Try this cold, creamy lime mousse, which is made in 5 minutes using only 4 ingredients!

    Summer is heating up, so it’s the perfect time to make desserts that cool us off, when temperatures are in the 90’s. This creamy lime mousse fits the bill quite nicely. It is cold, creamy, loaded with lime flavor, and is super easy to make! I wrote down the recipe on an index card in an old recipe box many years ago, and don’t remember where it came from originally. But… it’s a KEEPER, so I wanted to share it.

    Come to think of it, this dessert would be perfect ANY TIME of year, especially if you need to whip something up quickly with hardly any effort. Slightly tart and slightly sweet… it’s so good. Here’s how easy it is to make this delightful mousse:

    Scroll Down for A Printable Recipe Card At The Bottom Of The Page

    How To Make Creamy Lime Mousse

    Combine heavy whipping cream, granulated sugar, lime juice and zest, and vanilla extract in a large mixing bowl. Mix gently for just a moment to combine ingredients.

    NOTE: I use a microplane to finely grate the peel of the lime. If you do not own a microplane, simply use the smallest holes on a box or hand grater to finely grate the lime peel. It’s important to zest only the green part of the lime peel, and not the white part, as it can add bitterness to this dish.

    Whipping cream, sugar, vanilla, lime juice & zest in a mixing bowl.

    OPTIONAL BUT NICE: If you want you can add one drop of green food coloring (optional) to the creamy lime mousse if you want a very light shade of green. You do NOT need it for this dessert to be perfect, but sometimes I like it to have a slight green hue (for presentation).

    A drop of green food coloring is added to the mousse ingredients.

    How Long to Beat The Mousse

    Beat the mixture on high speed using an electric mixer. You will need to beat it until SOFT PEAKS form. This usually will take about 4 minutes.

    You can test for the soft peaks by stopping the beaters, and using the bottom of the beater, pull up on the mousse to see if a soft peak will hold its shape. Once the creamy lime mousse forms soft peaks, it is done!

    The creamy lime mousse is beaten for about 4 minutes, until soft peaks form.

    Transfer the creamy lime mousse to four small dessert dishes, dividing it evenly. At this point it is okay to go ahead and eat the mousse, BUT… it’s even BETTER if you chill it for an hour or more. This mousse tastes best when served very cold.

    It’s super easy (and convenient) to whip up this dessert in the morning, and then cover each dish and let them chill all day. Then when you’re ready for them, they are cold and ready to enjoy!

    The mousse is transferred to 4 small dessert dishes, and then refrigerated.

    Time To Serve Creamy Lime Mousse

    When I serve this dessert, I think it looks wonderful to top each mousse cup with a spray or dollop of whipped cream. I also add a sprinkle of lime zest, and a fresh lime slice to each dish for presentation. It helps to “doll up” this simple, but yummy dessert. We eat with our eyes first, right? And that’s it… grab a spoon and dig in! Hope you enjoy this wonderful treat.

    Creamy lime mousse is garnished with lime zest, whipping cream, and a slice of lime.A spoonful of the creamy lime mousse is ready to eat!

    Thanks for stopping by today. I hope you have the opportunity to try this simple, but delicious dessert. It will keep well for 2-3 days, if covered well and refrigerated (without garnishes). If you enjoy mousse, you might also want to check out my recipe for easy chocolate mousse. YUM. Take care, and have a great day.

    Looking For More Delicious, Creamy Desserts?

    You can find all of my recipes in the Recipe Index, located at the top of the page. I have some delicious creamy desserts like this mousse, including:

    Interested In More Recipes?

    Thank you for visiting this website. I appreciate you using some of your valuable time to do soIf you’re interested, I publish a newsletter 2 times per month (1st and 15th) with all the latest recipes, and other fun info. I would be honored to have you join our growing list of subscribers, so you never miss a great recipe!
    There is a Newsletter subscription box on the top right side (or bottom) of each blog post, depending on the device you use, where you can easily submit your e-mail address (only) to be included in my mailing list.

    You Can Also Find Me On Social Media:
    Facebook page: The Grateful Girl Cooks!
    Pinterest: The Grateful Girl Cooks!
    Instagram: jbatthegratefulgirlcooks

    Author's signature

    Original recipe source: unknown (found in an old recipe box, handwritten on a 3×5 index card)

    0 from 0 votes
    Creamy Lime Mousse
    Prep Time
    5 mins
    Cook Time
    0 mins
    Total Time
    5 mins
     

    Looking for a light, delicious, flavor-filled EASY dessert? Try this cold, creamy lime mousse, which is made in 5 minutes using only 4 ingredients!

    Category: Dessert
    Cuisine: American
    Keyword: creamy lime mousse
    Servings: 4
    Calories Per Serving: 259 kcal
    Author: JB @ The Grateful Girl Cooks!
    Ingredients
    • 1 cup heavy whipping cream
    • ¼ cup granulated sugar
    • 2 Tablespoons lime juice , fresh squeezed
    • 1 Tablespoon finely grated lime peel , zest of 1 lime (approx.)
    • 1 teaspoon vanilla extract
    • 1 drop green food coloring (OPTIONAL)
    Instructions
    1. Combine heavy whipping cream, granulated sugar, lime juice and zest, and vanilla in a large mixing bowl. Mix gently to combine ingredients. OPTIONAL: Add one drop of green food coloring to the mousse if you want a very light shade of green.

    2. Beat the mixture on high speed using an electric mixer. You will need to beat it until SOFT PEAKS form. This usually will take about 4 minutes. Transfer mousse to four small dishes, dividing it evenly. At this point it is okay to eat the mousse, BUT... it's even better if you chill it for an hour. The mousse is at its best served very cold.

    3. To serve (optional): top each serving with a spray or dollop of whipped cream. Add a sprinkle of lime zest, and a fresh lime slice to each dish for a colorful presentation. Enjoy!
    Recipe Notes

    OPTIONAL GARNISHES: aerosol whipped cream, lime wedges, additional lime zest, and/or mint leaves

    Nutrition Facts
    Creamy Lime Mousse
    Amount Per Serving (1 g)
    Calories 259 Calories from Fat 198
    % Daily Value*
    Fat 22g34%
    Saturated Fat 14g88%
    Cholesterol 82mg27%
    Sodium 23mg1%
    Potassium 45mg1%
    Carbohydrates 15g5%
    Sugar 13g14%
    Protein 1g2%
    Vitamin A 875IU18%
    Vitamin C 3mg4%
    Calcium 39mg4%
    * Percent Daily Values are based on a 2000 calorie diet.

    Here’s one more to pin on your Pinterest boards!Looking for a light, delicious, flavor-filled EASY dessert? Try this cold, creamy lime mousse, which is made in 5 minutes using only 4 ingredients!

    Cauliflower Mushroom Skillet

    Cauliflower Mushroom Skillet is an easy to prepare, delicious veggie side dish, enhanced with the flavors of onions, garlic, butter and fresh herbs.
    Cauliflower Mushroom Skillet is an easy to prepare, delicious veggie side dish, enhanced with the flavors of onions, garlic, butter and fresh herbs.

    Looking for a flavorful vegetable side dish that doesn’t take too long to prepare, and tastes great? May I suggest this cauliflower mushroom skillet, which can be on the table in just under 25 minutes? It’s DELICIOUS.

    Fresh ingredients abound in this simple vegetable side dish recipe. It is a definite low-carb dish, and it “plays well” with most main dishes, including chicken, beef, pork and fish!

    Scroll Down For A Printable Recipe Card At The Bottom Of The Page

    How To Make This Cauliflower Mushroom Skillet

    Heat butter and olive oil in a large skillet (on medium-high heat) until the butter has melted.  Add the chopped onions to the skillet, and cook them, stirring occasionally for about 3-4 minutes, until light golden brown and softened.

    TIP: If you prefer, you can substitute ghee for the butter. **You can also make this dish vegan (if desired) by using all olive oil, instead of the butter OR ghee.**

    Chopped onions are cooked in olive oil and butter until softened.

    Add whole, cleaned mushrooms (with stems trimmed) to the butter and onion mixture in the skillet. Cook the mushrooms for about 4 minutes (still on medium-high heat). Turn the mushrooms occasionally, letting get nice and golden brown in color on all sides.

    Add the cauliflower florets (all about the same size) to the skillet, and cook for 9-10 minutes. At the end of the cooking time, the mushrooms should be browned nicely, and the cauliflower should be golden brown. The edges of the cauliflower florets should also be a bit crispy! Bottom line… get those veggies browned on all sides as best you can.

    Whole, cleaned mushrooms are added to the skillet.Cauliflower florets are added to the mushrooms in the skillet.

    Add The Vegetable Stock

    Now it’s time to add the vegetable stock (or chicken stock, if using) to the veggies in the skillet. Keep the heat on medium-high heat after you add the stock to the pan. Let it cook for 2-3 minutes (stirring occasionally), until the liquid has slightly reduced in volume.

    Vegetable (or chicken) stock is poured into the skillet with the veggies.

    The final step is to add HALF (1 Tablespoon) of the chopped fresh parsley, minced garlic cloves, and chopped fresh thyme leaves to the skillet. Stir all the ingredients together, and continue to let cook for about 30 seconds, then remove the pan from the heat. TIP: Don’t let it cook too long or the minced garlic might burn and become bitter (and you do not want that to happen)!

    Season To Taste

    Season the dish with salt and pepper, to suit your personal taste, and then transfer the hot veggies to a serving dish. Now you’re almost ready to enjoy this yummy veggie side dish!

    The cauliflower mushroom skillet is seasoned with salt/pepper and garnished with parsley.

    Time To Serve The Cauliflower Mushroom Skillet

    To serve the finished cauliflower mushroom skillet, sprinkle the top of the veggies with the reserved Tablespoon of chopped parsley. Make sure to serve this dish quickly after removing it from the heat, so it stays nice and hot! You should have enough veggies for 4 small servings. YUM.

    A bowl of the cauliflower mushroom skillet side dish, ready to eat.A close up look at the cauliflower mushroom skillet in a white serving bowl.

    I truly hope you enjoy this simple, but delicious cauliflower mushroom skillet. The dish has a good amount of flavor, and some yummy, “good for you” veggies! Thank you for stopping by for a visit. Have a wonderful rest of the day.

    Looking For More VEGGIE SIDE DISH RECIPES?

    You can find all of my vegetable side dishes in the Recipe Index, which is located at the top of the page. I have lots of delicious recipes for vegetables, including:

    Interested In More Recipes?

    Thank you for visiting this website. I appreciate you using some of your valuable time to do soIf you’re interested, I publish a newsletter 2 times per month (1st and 15th) with all the latest recipes, and other fun info. I would be honored to have you join our growing list of subscribers, so you never miss a great recipe!
    There is a Newsletter subscription box on the top right side (or bottom) of each blog post, depending on the device you use, where you can easily submit your e-mail address (only) to be included in my mailing list.

    You Can Also Find Me On Social Media:
    Facebook page: The Grateful Girl Cooks!
    Pinterest: The Grateful Girl Cooks!
    Instagram: jbatthegratefulgirlcooks

    Author's signature

    Recipe adapted from: Christina, at: eatwell101.com/garlic-mushrooms-cauliflower-recipe

    0 from 0 votes
    Cauliflower Mushroom Skillet
    Prep Time
    5 mins
    Cook Time
    20 mins
    Total Time
    25 mins
     

    Cauliflower Mushroom Skillet is an easy to prepare, delicious veggie side dish, enhanced with the flavors of onions, garlic, butter and fresh herbs.

    Category: Side Dish, Vegetable Dish
    Cuisine: All Cuisines
    Keyword: cauliflower mushroom skillet
    Servings: 4
    Calories Per Serving: 186 kcal
    Author: JB @ The Grateful Girl Cooks!
    Ingredients
    • 1 Tablespoon extra virgin olive oil
    • 4 Tablespoons unsalted butter (substitute ghee, if desired)
    • ½ medium yellow onion , chopped
    • 1 pound button mushrooms , cleaned, stems trimmed off
    • ½ head cauliflower , cut into uniform-sized florets
    • 3 Tablespoons vegetable or chicken stock (low sodium)
    • 2 Tablespoons fresh parsley , chopped
    • 1 teaspoon fresh thyme leaves , chopped
    • 4 cloves garlic , minced
    • salt and pepper, to taste
    Instructions
    1. Heat butter and olive oil in a large skillet (medium-high heat) until butter melts.  Add onions; cook, stirring occasionally for 3-4 minutes, until onions are golden brown and softened.

    2. Add mushrooms. Cook 3-4 minutes (on medium-high). Turn mushrooms occasionally, to brown on all sides. Add cauliflower; cook 9-10 minutes, stirring occasionally. When done, mushrooms are well-browned. Cauliflower should be lightly browned/crispy on the edges.

    3. Add vegetable (or chicken) stock. Cook on medium-high for 2-3 minutes (stirring occasionally), until liquid has slightly reduced in volume.

    4. Add 1 Tablespoon parsley (reserving 1 T. for garnish), minced garlic, and thyme. Stir ingredients together; continue to cook for about 30 seconds, then remove skillet from heat. TIP: Don't cook too long or garlic might burn (and become bitter). Season with salt and pepper (to taste). Transfer veggies to serving dish; garnish veggies with reserved Tablespoon of parsley. Serve immediately. Enjoy!
    Recipe Notes

    Note: Salt and pepper were not included in the caloric calculation, because they are used to "season to taste". The amount may vary from person to person.

    Nutrition Facts
    Cauliflower Mushroom Skillet
    Amount Per Serving (1 (1/4 of total))
    Calories 186 Calories from Fat 135
    % Daily Value*
    Fat 15g23%
    Saturated Fat 8g50%
    Cholesterol 30mg10%
    Sodium 76mg3%
    Potassium 619mg18%
    Carbohydrates 10g3%
    Fiber 3g13%
    Sugar 4g4%
    Protein 5g10%
    Vitamin A 566IU11%
    Vitamin C 42mg51%
    Calcium 34mg3%
    Iron 1mg6%
    * Percent Daily Values are based on a 2000 calorie diet.

    Here’s one more to pin on your Pinterest boards!Cauliflower Mushroom Skillet is an easy to prepare, delicious veggie side dish, enhanced with the flavors of onions, garlic, butter and fresh herbs.


    Honey Lime Grilled Chicken

    Enjoy the Southwestern flavor of delicious Honey Lime Grilled Chicken. Chicken thighs are marinated, then grilled/basted with the easy to make sauce.
    Enjoy the Southwestern flavor of delicious Honey Lime Grilled Chicken. Chicken thighs are marinated, then grilled/basted with the easy to make sauce.

    Looking for an easy to prepare, but full of flavor chicken recipe? May I recommend this one for honey lime grilled chicken? Chicken thighs are seasoned and flavored in a simple flavor-packed marinade. After marinating, the seasoned chicken thighs are grilled on a bbq (or cooked on stovetop), and are basted with a glaze (made using part of the reserved marinade)!

    This simply marinated, glazed and grilled chicken taste wonderful. The chicken thighs are juicy, and are complimented by the tangy glaze they’re coated with, while grilling. The sweet honey, fresh lime juice, along with some Southwest-inspired spices result in some quite tasty pieces of chicken.

    This is a perfect recipe for hot summer nights. To make it REALLY convenient, you can marinate the chicken early in the day, and then grill ’em up later in the evening, for a quick dinner! YUM. Here’s how to make this chicken:

    What’s In The Marinade?

    The marinade (which also doubles as a basting sauce later) is super easy to make, in hardly any time at all. The ingredients are olive oil, honey, lime juice, fresh ginger, cumin, coriander, oregano, minced garlic and salt.

    The ingredients used for the honey lime marinade.

    Prepare The Honey Lime Marinade

    Measure the marinade ingredients into a medium saucepan. Stir the ingredients well, to fully combine. Put the ingredients into a saucepan, because you will remove some to use as a marinade, and then cook the remaining sauce into a slightly thickened basting glaze.

    All the marinade ingredients are placed into a medium saucepan.Once mixed, some honey lime sauce is removed to marinate the chicken pieces.

    Marinate The Chicken Thighs

    Measure out 4 Tablespoon of the marinade into a large gallon-sized re-sealable bag. NOTE: *I did not have a large gallon-sized bag available, but had 2 quart sized bags. I put 2 Tablespoons marinade into each of the 2 small bags. Add the chicken thighs, and “massage” the bag(s) well, to ensure all sides of the chicken are covered with marinade.

    Place bag(s) in the refrigerator and marinate the chicken for at least 30 minutes. You can marinate the chicken for up to 12 hours, so this is easy to prepare early in the day. You can let the chicken hang out in the refrigerator until you’re ready to grill it. TIP: The longer the chicken marinates, the greater the flavor!

    Chicken thighs marinating in honey lime sauce in re-sealable plastic bags.

    Make A Basting Sauce For The Honey Lime Grilled Chicken

    While the chicken is marinating, you can make the basting glaze, using the remaining marinade in the saucepan. Heat the sauce on Medium heat until it comes to a boil. Once it begins boiling, keep an eye on the sauce, stirring occasionally. It will bubble quite a bit (and you don’t want it to bubble up and out of your saucepan!).

    Continue to boil the sauce for between 1-2 minutes, or until the mixture becomes more like a slightly thicker syrup. As it continues to cook, the liquid will reduce in volume by about a half. Once done, remove the pan from the heat, and set aside, until you’re ready to grill the chicken.

    Remaining honey lime marinade is cooked down into a basting glaze for grilling..the basting glaze has reduced in volume and is syrupy, for brushing on chicken.

    Time To Cook The Honey Lime Grilled Chicken!

    When ready to cook the honey lime grilled chicken, you have two options: you can grill it outside on a bbq OR you can cook it on the stove top in a large skillet. *Inside cooking directions can be found in the printable recipe card at the bottom of the post.

    FOR OUTSIDE GRILLING: preheat grill (or charcoal briquettes) to a medium high heat. Once hot, transfer chicken pieces directly onto bbq grate. Sprinkle chicken lightly with salt and pepper (if desired). Baste the chicken thighs often with the honey lime glaze as it cooks (baste and grill on all sides).

    The chicken will take about 15 minutes to cook (more or less, depending on heat source AND size of chicken pieces). The chicken is considered safely “done” when it’s internal temperature reaches 160°F. It should be nice and golden brown in color.

    Marinated chicken thighs are grilled, and basted with honey lime glaze as they cook..

    Ready To Enjoy

    Once you remove the chicken from the grill, cover it (to keep it warm), and let it rest for about 4-5 minutes to let the juices redistribute inside the chicken.

    We enjoyed the honey lime grilled chicken, garnished with fresh parsley, and served with a cauliflower/mushroom side dish, and steamed rice. The chicken was moist, and very flavorful. I think you will love it, too!

    Honey lime grilled chicken pieces on a white platter, ready to be eaten.Rice and a veggie dish are served along with the honey lime grilled chicken.

    Thank you so much for stopping by. I truly hope you will consider trying this easy, delicious honey lime grilled chicken recipe. Take care, and have a great day.

    Looking For More CHICKEN Recipes?

    You can find all of my chicken recipes in the Recipe Index, located at the top of the page. I have LOTS of delicious recipes using chicken, including:

    Interested In More Recipes?

    Thank you for visiting this website. I appreciate you using some of your valuable time to do soIf you’re interested, I publish a newsletter 2 times per month (1st and 15th) with all the latest recipes, and other fun info. I would be honored to have you join our growing list of subscribers, so you never miss a great recipe!
    There is a Newsletter subscription box on the top right side (or bottom) of each blog post, depending on the device you use, where you can easily submit your e-mail address (only) to be included in my mailing list.

    You Can Also Find Me On Social Media:
    Facebook page: The Grateful Girl Cooks!
    Pinterest: The Grateful Girl Cooks!
    Instagram: jbatthegratefulgirlcooks

    Author's signature

    Original recipe source: Chris, at: thecafesucrefarine.com/mexican-honey-lime-grilled-chicken/

    0 from 0 votes
    Honey Lime Grilled Chicken
    Prep Time
    5 mins
    Cook Time
    15 mins
    Marinating Time (inactive)
    30 mins
    Total Time
    50 mins
     

    Enjoy the Southwestern flavor of delicious Honey Lime Grilled Chicken. Chicken thighs are marinated, then grilled/basted with the easy to make sauce.

    Category: Entree, Main Course
    Cuisine: Southwest
    Keyword: honey lime grilled chicken
    Servings: 6
    Calories Per Serving: 350 kcal
    Author: JB @ The Grateful Girl Cooks!
    Ingredients
    • 3 pounds boneless, skinless chicken thighs (6 pieces) , visible fat removed
    • salt/pepper (to lightly season chicken before grilling) , OPTIONAL-amount used as desired
    Honey Lime Marinade & Basting Sauce:
    • ¼ cup fresh lime juice
    • 3 Tablespoons honey
    • 2 Tablespoons extra virgin olive oil
    • 3 cloves garlic , finely minced
    • 1 teaspoon finely grated fresh ginger
    • 1 teaspoon dried oregano
    • 1 teaspoon coriander
    • 1 teaspoon ground cumin
    • 1 teaspoon salt
    Instructions
    1. Measure marinade ingredients into a medium saucepan. Stir well, to fully combine.

    2. Measure 4 Tablespoons of marinade out; transfer into a large re-sealable plastic bag (or divide evenly between 2 smaller bags). Add chicken thighs, and "massage" bag(s) well, to ensure each piece is covered with marinade. Place bag(s) in refrigerator; marinate chicken for at least 30 minutes, or up to 12 hours.

    3. While chicken marinates, make basting glaze. Cook remaining marinade in saucepan on Medium heat until it comes to a boil. Once boiling, keep an eye on it, stirring often, so it doesn't bubble up and out of the pan. Boil sauce for 1-2 minutes, until mixture becomes a slightly thick syrup. As it cooks, liquid will reduce in volume by about half. Once done, remove pan from heat; set aside.

    Cooking Outside On Grill:
    1. Preheat gas grill (or charcoal briquettes) to medium high heat. Once hot, transfer chicken pieces directly onto bbq grate. Sprinkle chicken lightly with salt/pepper (if desired). Baste chicken often with honey lime glaze as it cooks (baste and grill on all sides). Chicken will take about 15 minutes to cook (more or less, depending on heat source AND size of chicken pieces). The chicken is safely "done" when it's internal temperature reaches 160°F. It should be nice and golden brown in color. Remove chicken when done, and let rest for 4-5 minutes before serving, to let juices redistribute through meat.

    Cooking Inside On Stovetop:
    1. Heat oil in a large skillet on medium-high heat. When it is really hot (but not smoking), add chicken, but do not over-crowd the skillet. Season lightly with salt/pepper (if desired). Cook for about 10-12 minutes, basting with the glaze, and turning chicken frequently. Chicken is safely "done" when it reaches an internal temperate of 160°F. Remove chicken when done, and let rest for 4-5 minutes before serving, to let juices redistribute through meat.

    Recipe Notes

    NOTE: Caloric calculation is approximate, due to varying sizes of chicken thighs that might be used.

    Nutrition Facts
    Honey Lime Grilled Chicken
    Amount Per Serving (1 thigh)
    Calories 350 Calories from Fat 126
    % Daily Value*
    Fat 14g22%
    Saturated Fat 3g19%
    Cholesterol 215mg72%
    Sodium 591mg26%
    Potassium 579mg17%
    Carbohydrates 10g3%
    Fiber 1g4%
    Sugar 9g10%
    Protein 44g88%
    Vitamin A 54IU1%
    Vitamin C 3mg4%
    Calcium 32mg3%
    Iron 2mg11%
    * Percent Daily Values are based on a 2000 calorie diet.

    Here’s one more to pin on your Pinterest boards!Enjoy the Southwestern flavor of delicious Honey Lime Grilled Chicken. Chicken thighs are marinated, then grilled/basted with the easy to make sauce.

    Candied Sweet Potatoes

    Candied Sweet Potatoes are delicious, and easy to make for a simple dinner or a holiday feast! Soft, caramelized, & baked in an amazing sauce, you’ll love ’em!
    Candied Sweet Potatoes are delicious, and easy to make for dinner or a holiday feast! Soft, caramelized, & baked in an amazing sauce, you'll love 'em!

    Whoa! If you’re looking for an easy, delicious side dish for dinner, may I suggest these amazing candied sweet potatoes? You don’t have to wait until Thanksgiving or other traditional holidays to enjoy these buttery, soft delicious veggies.

    And guess what? This recipe uses FRESH sweet potatoes… and they are a CINCH to make!

    Fresh sweet potato slices are coated in an amazing butter, brown sugar, and maple syrup sauce, which is seasoned with cinnamon, nutmeg, ginger, vanilla, and orange zest!

    I’m not joking… the sauce is AMAZING. The candied sweet potatoes are then baked, coated in all that yummy sauce until they become soft and tender, and practically perfect in every way. YUM! Here’s how to make them:

    Scroll Down For A Printable Recipe Card At The Bottom Of The Page

    Prepare The Sweet Potatoes

    The first thing you will need to do is peel the copper-skinned sweet potatoes with a vegetable peeler or knife, and take a small slice off both ends of each potato. You can use either 3 medium sized sweet potatoes or 2 large ones, as I did.

    Once the sweet potatoes are peeled, cut each potato into 1/2″ thick round slices. Don’t cut them too thick or they will take too long to bake.

    If you cut them too thin, they will take less time to bake. I even drug out a tape measure to get an idea of just what 1/2″ thickness was! You know… for quality control! Ha Ha!

    Peeling the sweet potatoes is the first step necessary for making this recipe.Sweet potatoes are peeled, then cut into 1/2" thick round slices.

    Spray an oven-safe (approx. 1½- 2 quart) baking dish with non-stick spray, and place the sliced sweet potatoes in the dish.

    Sprinkle the potatoes lightly with salt, and then set dish aside while you make the yummy sauce.

    Peeled, fresh sweet potato rounds are placed into a greased baking dish.

    Make The Sauce For The Candied Sweet Potatoes

    Place the butter in a medium saucepan, and melt on low heat. Once melted, add the water, maple syrup, brown sugar, orange zest, cinnamon, nutmeg and ginger (do NOT add the vanilla), and stir to combine.

    Turn the heat up to medium. While stirring, bring the sauce to a low boil. Once it begins boiling, remove the spoon and let the sauce boil (gently) for 2 minutes (without stirring at all).

    When it has gently boiled for two minutes, remove the pan from the heat, and stir in the vanilla extract.

    Butter, maple syrup, water, brown sugar, orange zest and spices are cooked for sauce.Vanilla extract is added to the butter and spice sauce in pan.

    Pour the hot (and yummy smelling) sauce over the sliced sweet potatoes. Stir or use tongs to coat the slices well with the buttery sweet sauce.

    Sauce is poured over the sweet potato rounds, to coat before baking.

    Time To Bake The Candied Sweet Potatoes

    Okay, now the candied sweet potatoes are ready for the oven. Bake in a preheated 375°F. oven, uncovered, for 20 minutes. Remove the potatoes from the oven, and give them a quick, gentle stir to keep them coated in sauce.

    Before placing them back in the oven, cover the dish with aluminum foil, and pop ’em back into the hot oven.

    Bake for an additional 20 minutes, then remove and stir again to coat the slices. At this point, stick a butter knife into one of the slices to check for tenderness. The candied sweet potatoes were perfectly tender, so I knew they were done!

    If the knife cannot be easily inserted and removed (like butter!), pop ’em back in the oven again for another 5-10 minutes, then check again (mine took 45 total). They should be slightly caramelized on the outside, but creamy and soft on the inside!

    NOTE: If you are doubling the recipe and using a 9×13″ baking dish, it may take up to an hour to bake all the sweet potatoes evenly. Just be sure to check on their tenderness after the 40 minute mark.

    Close up of candied sweet potatoes with sprigs of fresh thyme on top.

    Time To Serve Candied Sweet Potatoes

    Once the sweet potatoes are done, remove the pan from the oven. Spoon a bit more sauce on top when serving. If desired, lightly sprinkle the top of the sweet potatoes with flaky sea salt (optional, but it’s a good contrast to the sweet sauce).

    You can also garnish the dish with sprigs of fresh thyme or rosemary, if desired.

    My husband and I absolutely LOVE these flavor-packed, tender, candied sweet potatoes! The sauce is soooo good, I could eat it right out of the pan (maybe I DID!). It tends to thicken just a little bit as the sweet potatoes cool slightly.

    The candied sweet potatoes were a delicious side dish (along with my home canned green beans) for our grilled lemon chicken breasts.

    Candied sweet potatoes on plate with grilled lemon chicken and green beans.

    I really hope you will take the opportunity to try this delicious veggie side dish. The recipe can easily doubled to serve 8-10 people, which makes this a GREAT holiday or large gathering veggie side dish. I know you will love it.

    Take care, thank you for stopping by, and have a GREAT day!

    Looking For More VEGETABLE SIDE DISH Recipes?

    You can find all of my side dish recipes in the Recipe Index, located at the top of the page. I have quite a few veggie side dishes, including:

    Interested In More Recipes?

    Thank you for visiting this website. I appreciate you using some of your valuable time to do soIf you’re interested, I publish a newsletter 2 times per month (1st and 15th) with all the latest recipes, and other fun info. I would be honored to have you join our growing list of subscribers, so you never miss a great recipe!
    There is a Newsletter subscription box on the top right side (or bottom) of each blog post, depending on the device you use, where you can easily submit your e-mail address (only) to be included in my mailing list.

    You Can Also Find Me On Social Media:
    Facebook page: The Grateful Girl Cooks!
    Pinterest: The Grateful Girl Cooks!
    Instagram: jbatthegratefulgirlcooks

    Author's signature

    Recipe adapted from: https://sallysbakingaddiction.com/candied-sweet-potatoes/

    0 from 0 votes
    Candied Sweet Potatoes
    Prep Time
    15 mins
    Cook Time
    45 mins
    Total Time
    1 hr
     

    Candied Sweet Potatoes are delicious, and easy to make for dinner or a holiday feast! Soft, caramelized, & baked in an amazing sauce, you'll love 'em!

    Category: Side Dish, Vegetable Dish
    Cuisine: American
    Keyword: candied sweet potatoes
    Servings: 4
    Calories Per Serving: 383 kcal
    Author: JB @ The Grateful Girl Cooks!
    Ingredients
    • 2 large sweet potatoes , or 3 medium
    • ¼ teaspoon salt
    • ¼ cup butter , equals 4 Tablespoons (½ stick)
    • Tablespoons water
    • cup pure maple syrup
    • ½ cup brown sugar (packed)
    • teaspoons orange zest
    • ½ teaspoon ground cinnamon
    • ¼ teaspoon ground nutmeg
    • ¼ teaspoon ground ginger
    • ½ teaspoon vanilla extract
    • sea salt (optional, to sprinkle as garnish)
    Instructions
    1. Preheat oven to 375°F. Spray a 2 quart baking dish with non-stick spray (sides and bottom).

    2. Peel sweet potatoes , then cut each one into 1/2" thick round slices. Place slices in prepared dish. Sprinkle potatoes with salt, and then set dish aside.

    3. MAKE SAUCE: Melt butter on low heat in a medium pan. Add water, maple syrup, brown sugar, orange zest, cinnamon, nutmeg and ginger; stir to combine. Turn heat to medium. While stirring, bring sauce to a low boil. Once it begins boiling, remove spoon and let sauce boil for 2 minutes (without stirring). Remove pan from heat; stir in vanilla extract. Pour sauce over sweet potatoes. Toss gently, to coat slices well.

    4. Bake, uncovered, in 375°F. oven for 20 minutes. Remove potatoes from oven, and gently stir, to keep them coated in sauce. Cover the dish with aluminum foil, and place dish back into oven. Bake for an additional 20 minutes; remove and stir again. Insert a butter knife into a slice to check for tenderness. If knife cannot be easily inserted and removed (like butter!), pop 'em back in the oven for another 5-10 minutes, then check again (mine took 45). They should be slightly caramelized on the outside, but creamy and soft on the inside! NOTE: If you are doubling the recipe (5-6 potatoes) and using a 9x13" baking dish, it may take up to an hour to bake all the sweet potatoes evenly. Just be sure to check on the tenderness after the 40 minute mark.

    5. When done, remove pan from oven. Uncover pan; let cool for about 10 minutes before serving. To serve: Spoon a bit of sauce on top. Lightly sprinkle sweet potatoes with flaky sea salt (optional, but a good contrast to sweet sauce). Garnish with sprigs of fresh thyme or rosemary, if desired. Enjoy!
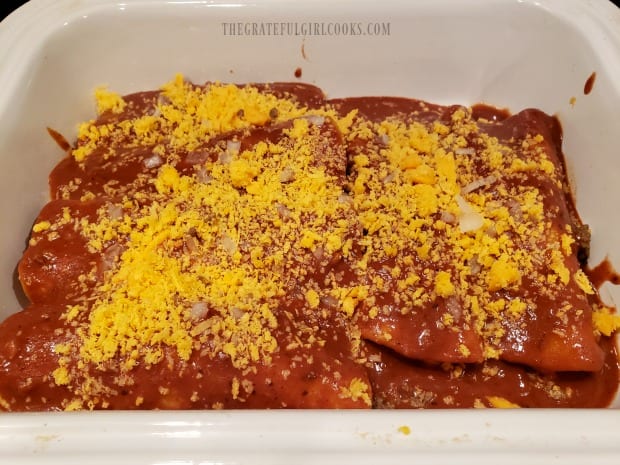
    Recipe Notes

    TIP: According to the original recipe author, this dish can be frozen for up to 3 months. Thaw in refrigerator. When ready to re-heat, cover dish with foil, and reheat in 350°F. oven for 25-30 minutes (or until fully heated through).

    Nutrition Facts
    Candied Sweet Potatoes
    Amount Per Serving (1 g)
    Calories 383 Calories from Fat 108
    % Daily Value*
    Fat 12g18%
    Saturated Fat 7g44%
    Cholesterol 31mg10%
    Sodium 349mg15%
    Potassium 632mg18%
    Carbohydrates 69g23%
    Fiber 5g21%
    Sugar 40g44%
    Protein 3g6%
    Vitamin A 24472IU489%
    Vitamin C 5mg6%
    Calcium 88mg9%
    Iron 1mg6%
    * Percent Daily Values are based on a 2000 calorie diet.

    Here’s one more to pin on your Pinterest boards!Candied Sweet Potatoes are delicious, and easy to make for dinner or a holiday feast! Soft, caramelized, & baked in an amazing sauce, you'll love 'em!