Mini Dutch Babies

Mini Dutch Babies are simple to make, and will be a hit at any breakfast or brunch. Mix in blender, bake, then top with fruit fillings or maple syrup!

Looking for a FUN way to serve breakfast or brunch? You’ve gotta try these yummy mini Dutch babies! Set out a platter of them, along with a variety of colorful and yummy toppings, and you will be amazed how crazy everyone goes for them!

The topping possibilities are endless, and these little Dutch babies are ridiculously EASY to make – this will be a popular breakfast or brunch… guaranteed! Here’s how to make them for those you love (a printable recipe card is also available at the bottom of this post):

Scroll Down For A Printable Recipe Card At The Bottom Of The Page

Lots Of Toppings Make This A Great Breakfast!

Before you begin preparing and cooking the mini Dutch babies, it’s a good idea to get all your toppings ready to go. That way, when they come out of the oven, you are ready to roll! When you offer a variety of toppings, it makes this a FUN and easy breakfast bar!

Our mini Dutch babies were served with the options shown below: Maple syrup, whipped cream, sliced fresh strawberries, apple pie filling, blueberry pie filling, lemon wedges and sifted powdered sugar. Each of these really compliment the Dutch babies with added color and flavor!  My all-time favorite way to enjoy them is to squeeze fresh lemon juice onto the Dutch baby, and then sift powdered sugar over the top. YUM!

Strawberries, apple pie & blueberry fillings, lemon, powders sugar, whipped cream and syrup ready for Dutch babies.

Prepare The Batter

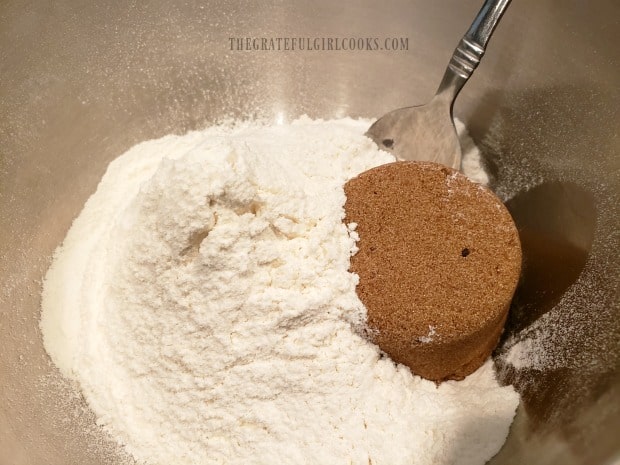
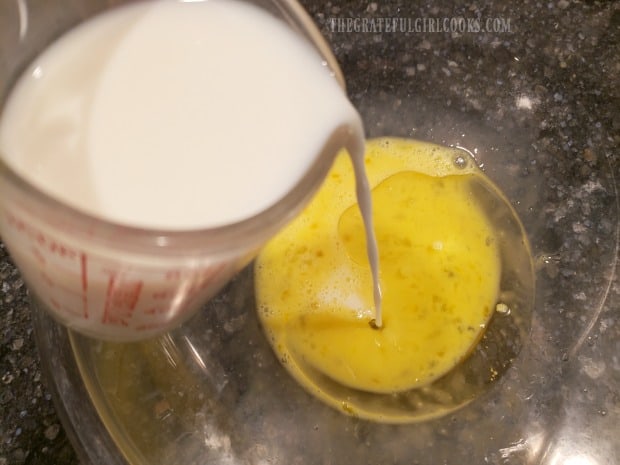
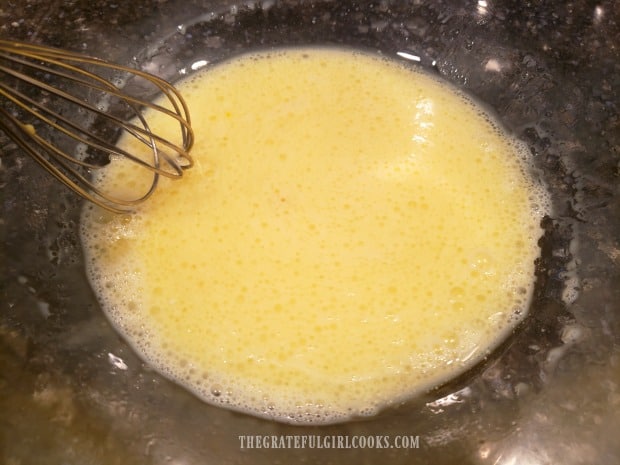
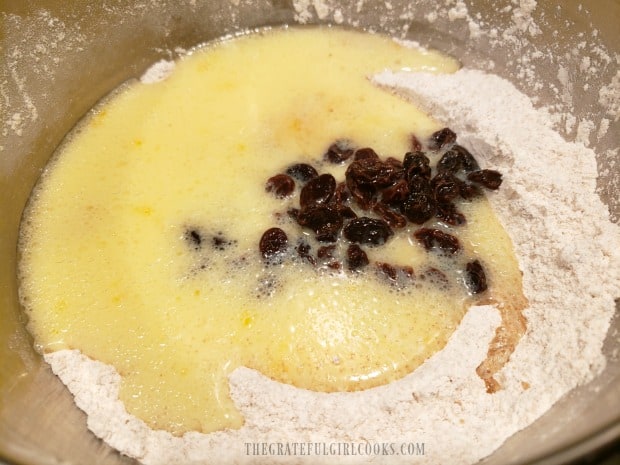
The batter is super easy to prepare using a blender. The ingredients are milk, eggs, flour, salt, vanilla extract, orange zest (optional but good), and butter. Place all the ingredients EXCEPT FOR THE BUTTER into a blender. Cover and blend on medium-high speed for about a minute. Scrape down the sides of the blender and make sure any flour “clumps” are incorporated/blended into the batter.

The batter is made using flour, eggs, vanilla, butter, salt and milk.All batter ingredients (except butter) are mixed in a blender.

Melt the butter, let it cool for a minute, and then SLOWLY drizzle it into the top of the blender while it is running on low speed. You need to slowly drizzle that melted butter in, because that helps to “temper” the raw eggs in the batter, instead of scrambling them!

Melted butter is streamed into the batter, a bit at a time.

Bake The Mini Dutch Babies

Preheat oven to 400°F.  Grease each muffin cup well (bottom and sides) with non-stick spray, butter or oil. Carefully pour the batter (evenly  divided) into the muffin tin(s). I pour the batter straight from the blender, for convenience. The muffin cups should be filled halfway with batter. 

NOTE: This recipe makes approximately 18 mini Dutch babies. If you only have one  (12 cup) muffin tin, simply repeat the process with the 2nd batch, using up the rest of the batter.

Mini Dutch babies are baked in standard sized muffin tins.

Bake the mini Dutch babies in a preheated 400°F oven for 15 minutes, or until they are lightly browned and are puffy on the top.  Remove the muffin tin from the oven and place on a wire rack.

As the Dutch babies cool slightly, the puffy top will collapse (as air dissipates), which will naturally form a small “crater” in the middle. That is PERFECTLY done, because the crater will hold the various toppings you serve with these little treats.

Once removed from oven, the mini Dutch babies will create their own crater in the middle.

Time To Serve The Mini Dutch Babies!

Once the “craters” have formed, it’s time to serve these delicious and colorful little treats. Lift each mini Dutch baby out of the muffin tin, and place a few warm ones on each plate. Let your family or friends then choose the toppings they want for each one. Aren’t they CUTE?

To serve, fill the mini Dutch babies with favorite fruit toppings.Top each one with sifted powdered sugar, whipped cream or maple syrup.

This is such a fun, EASY breakfast or brunch, and your family or guests will enjoy choosing the toppings to enjoy on their yummy breakfast treats. I hope you have the opportunity to make and enjoy mini Dutch babies soon. They’re delicious!

Thanks for stopping by, and I trust you will have a fantastic day. There is a complete, printable recipe card at the bottom of this post, if you decide you would like to try this recipe. Enjoy!

Looking For More BREAKFAST Ideas?

You can find all of my breakfast recipes, from egg dishes, smoothies, pancakes, muffins, scones, etc. in the Recipe Index, located at the top of the page. I have quite a few, including:

Interested In More Recipes?

Thank you for visiting this website. I appreciate you using some of your valuable time to do soIf you’re interested, I publish a newsletter 2 times per month (1st and 15th) with all the latest recipes, and other fun info. I would be honored to have you join our growing list of subscribers, so you never miss a great recipe!
There is a Newsletter subscription box on the top right side (or bottom) of each blog post, depending on the device you use, where you can easily submit your e-mail address (only) to be included in my mailing list.

You Can Also Find Me On Social Media:
Facebook page: The Grateful Girl Cooks!
Pinterest: The Grateful Girl Cooks!
Instagram: jbatthegratefulgirlcooks

Author's signature

Original recipe source: Laura Powell, at https://www.realmomkitchen.com/mini-german-pancakes/

0 from 0 votes
Mini Dutch Babies
Prep Time
5 mins
Cook Time
15 mins
Total Time
20 mins
 

Mini Dutch Babies are simple to make, and will be a hit at any breakfast or brunch. Mix in blender, bake, then top with fruit fillings or maple syrup!

Category: Breakfast, Brunch
Cuisine: All Cuisines, American
Keyword: mini Dutch babies
Servings: 18 (approx.)
Calories Per Serving: 78 kcal
Author: JB @ The Grateful Girl Cooks!
Ingredients
  • 1 cup milk , I use 1%
  • 6 large eggs
  • 1 cup all purpose flour
  • ½ teaspoon salt
  • 1 teaspoon vanilla extract
  • 1 teaspoon grated orange zest , optional, but good!
  • ¼ cup butter , melted (= 4 Tablespoons or ½ stick)
Instructions
  1. TIP: Before you begin preparing and cooking the mini Dutch babies, it's a good idea to get all your toppings ready to go. See optional toppings below.

Make The Mini Dutch Babies:
  1. Place milk, eggs, flour, salt, vanilla, and orange zest in blender. **Do NOT add butter yet. Cover and blend on medium-high speed for about a minute. Scrape down sides of blender and make sure any flour "clumps" are incorporated/blended into batter.

  2. Melt butter, let it cool for a minute, and then SLOWLY drizzle it into the top of the blender while it is running on low speed. You need to slowly drizzle melted butter in, because it helps "temper" the raw eggs in the batter, instead of scrambling them!

  3. Preheat oven to 400°F.  Grease each muffin cup well (bottom and sides) with non-stick spray, butter or oil. Pour batter (evenly  divided) into muffin tin(s), filling each muffin cup half full.  Bake for 15 minutes, or until puffy on top and golden brown. Transfer pan to a wire rack. **As the Dutch babies cool slightly, the puffy top will collapse (as air dissipates), which forms a small "crater" in the middle.

  4. Remove Dutch babies from muffin tin(s), and serve warm, along with your favorite toppings!

Recipe Notes

Optional Toppings: (not included in caloric calculation) - blueberry or apple pie filling, strawberries, maple syrup, whipped cream, lemon wedges and sifted powdered sugar.

Nutrition Facts
Mini Dutch Babies
Amount Per Serving (1 g)
Calories 78 Calories from Fat 36
% Daily Value*
Fat 4g6%
Saturated Fat 2g13%
Cholesterol 69mg23%
Sodium 117mg5%
Potassium 50mg1%
Carbohydrates 6g2%
Fiber 1g4%
Sugar 1g1%
Protein 3g6%
Vitamin A 194IU4%
Calcium 28mg3%
Iron 1mg6%
* Percent Daily Values are based on a 2000 calorie diet.

Here’s one more to pin on your Pinterest boards!Mini Dutch Babies are simple to make, and will be a hit at any breakfast or brunch. Mix in blender, bake, then top with fruit fillings or maple syrup!

Air Fryer Cheesy Pan Pizza

Make a delicious Air Fryer Cheesy Pan Pizza for lunch/dinner. Use canned biscuit dough for crust & Mozzarella/Parmesan cheeses, pizza sauce & spices!

Do you have an air fryer? We are still enjoying experimenting with different recipes using the air fryer I got last year with a gift card. One of the quick meals I came up with (while experimenting) is this recipe for Air Fryer Cheesy Pan Pizza.  Guess what? To make it extra easy, you use refrigerated, canned biscuit dough to form the pan pizza crust! YEP!

Pizza Making Experiments

We love pizza, and occasionally use different methods to make it. I’ve made BBQ Chicken TORTILLA Pizzas, Pizzas Cooked On The BBQ, and of course, traditional pepperoni pizza! I’ve even made Apple Pie Dessert Pizza! But this one, using biscuit dough, once I thought of it, sounded like something I wanted to try.

We had a can of biscuits hanging out in the refrigerator, so I started thinking about the ingredients in the dough. Finally I decided to make a deep dish pizza crust with it, just to try it. The recipe I came up with uses 4 biscuits total, and yields two cute little 6″ pan pizzas, with hardly any effort. Perfect, and VERY convenient! Now we can eat them any time for a quick lunch or dinner. Here’s how to make ’em:

Scroll Down for A Printable Recipe Card At The Bottom Of The Page

Make The “Easy” Pizza Crust

NOTE:  This recipe makes two individual pizzas, so remember to divide the ingredients between two, and repeat this process for each pizza. My air fryer could only cook one 6″ pizza at a time, so I cooked them in two batches.

Place the dough for two biscuits onto a lightly floured surface, stacked on top of each other. Use a rolling pin, and roll the dough out into a 6″ circle. This will be the crust for your pizza. Easy peasy.

Two canned, refrigerated biscuits are used for the pizza crust dough.The biscuit dough is rolled out into a 6" circle for the pizza pan.

Prepare The Air Fryer Cheesy Pan Pizza

Lightly spray a 6″ oven-safe, rimmed round baking pan with non-stick spray (mine was in an air fryer accessory kit). Place the crust into the pan. Stretch and gently pull the dough to cover the bottom of the pan, and about an inch up the sides of the pan.

Sprinkle a small handful of the mozzarella cheese over the dough. The cheese (as it melts) will help form a barrier, so the bottom crust does not get soggy from the pizza sauce.

Place the dough into a 6" oven-proof pan, pulling dough up sides of pan to form rim.Sprinkle the bottom of the crust with some of the grated mozzarella cheese.

Now spoon the pizza (or spaghetti) sauce over the cheese, and top with shredded Parmesan cheese. Add grated mozzarella cheese, and sprinkle lightly with Italian seasoning (I make my own). The last step is to either lightly spray or drizzle olive oil over the top of the pizza.

Spoon sauce over pizza, then top with grated Parmesan.Top with mozzarella cheese, Italian seasoning and a drizzle/spray of olive oil.

Time To Cook Your Air Fryer Cheesy Pan Pizza

Now your air fryer cheesy pan pizza is ready to cook! Place the pan pizza into a preheated 380°F air fryer, and cook the pizza for 5 minutes. After 5 minutes, open the air fryer- carefully and quickly remove the pizza from the pan, and place it back in the air fryer (minus pan).

The pizza should have firmed up enough to hold its shape, and will be stable enough (without the pan) to continue cooking, so the bottom crust browns nicely and firms up. Pop the pizza back into the air fryer (directly on basket grate), and cook for an additional 3-4 minutes.

Cook the air fryer pizza for 5 minutes, before removing pizza from pan.The pizza is removed from pan and finishes cooking in the air fryer.

How Do I Know If It Is Done?

When done, the cheese should be bubbly and melted, and the pizza will be fully heated through. Take a quick peek at the bottom crust of your pizza – it should be browned, crispy and firm. The photo below shows how golden brown and firm the crust should be, too.

Transfer your air fryer cheesy pan pizza to a cutting board, let it sit for one minute, then slice it into 4 small pieces with a pizza cutter or sharp knife. Repeat process for the remaining pizza. Serve hot, and enjoy.

The bottom crust gets nice and golden brown when cooked in the air fryer.Slices of the air fryer cheesy pan pizza, on a plate, ready to eat.

I hope you will consider trying these little miniature pan pizzas. They really are good, and not too difficult at all to make. Thanks for stopping by, and have a great day.

Looking For More AIR FRYER Recipes?

You can find all of my air fryer recipes in the Recipe Index, which is located at the top of the page. I have several you might enjoy, including:

Interested In More Recipes?

Thank you for visiting this website. I appreciate you using some of your valuable time to do soIf you’re interested, I publish a newsletter 2 times per month (1st and 15th) with all the latest recipes, and other fun info. I would be honored to have you join our growing list of subscribers, so you never miss a great recipe!
There is a Newsletter subscription box on the top right side (or bottom) of each blog post, depending on the device you use, where you can easily submit your e-mail address (only) to be included in my mailing list.

You Can Also Find Me On Social Media:
Facebook page: The Grateful Girl Cooks!
Pinterest: The Grateful Girl Cooks!
Instagram: jbatthegratefulgirlcooks

Author's signature

0 from 0 votes
Air Fryer Cheesy Pan Pizza
Prep Time
6 mins
Cook Time
9 mins
Total Time
15 mins
 

Make a delicious Air Fryer Cheesy Pan Pizza for lunch/dinner. Use canned biscuit dough for crust & Mozzarella/Parmesan cheeses, pizza sauce & spices!

Category: Entree, Lunch, Snack
Cuisine: Italian
Keyword: air fryer cheesy pan pizza
Servings: 2 pizzas
Calories Per Serving: 492 kcal
Author: JB @ The Grateful Girl Cooks!
Ingredients
  • 4 refrigerated, canned biscuits (dough)
  • 1 cup mozzarella cheese , divided
  • 4-5 Tablespoons spaghetti or pizza sauce , divided
  • ½ cup grated Parmesan cheese , divided
  • ½ teaspoon Italian seasoning
  • 2 teaspoons olive oil , (approx.) to spray or drizzle
Instructions
REPEAT THIS PROCESS FOR EACH PIZZA
  1. Place 2 biscuit dough rounds onto a lightly floured surface, stacked on top of each other. Roll the dough out into a 6" circle using rolling pin. Lightly spray a 6" oven-safe, rimmed round baking pan with non-stick spray. Place dough circle into pan. Stretch and gently pull dough to cover bottom of pan, and about 1" inch up the sides of pan.

  2. Sprinkle ¼ cup mozzarella cheese over dough. Spoon 2 T. pizza sauce over cheese, then sprinkle with ¼ cup Parmesan cheese. Add ¼ cup grated mozzarella cheese, and sprinkle lightly with ¼ teaspoon Italian seasoning. Lightly spray or drizzle olive oil over top of pizza.

  3. Place pan pizza into basket of a preheated 380°F air fryer; cook for 5 minutes. After 5 minutes, open air fryer- carefully/quickly remove pizza from pan; place pizza back in air fryer directly onto basket grate (minus pan). Pizza should be firm enough to hold its shape, and will be stable enough (without pan) to continue cooking, so bottom crust browns nicely and firms up. Cook for an additional 3-4 minutes, until cooked through, cheese is bubbly, and the bottom crust is browned and firm.

  4. Remove pizza from air fryer once done; transfer to a cutting board. Let rest for one minute, then slice into 4 wedges, serve and enjoy! Repeat process for remaining pizza.

Nutrition Facts
Air Fryer Cheesy Pan Pizza
Amount Per Serving (1 pizza)
Calories 492 Calories from Fat 261
% Daily Value*
Fat 29g45%
Saturated Fat 12g75%
Cholesterol 59mg20%
Sodium 1398mg61%
Potassium 299mg9%
Carbohydrates 31g10%
Fiber 1g4%
Sugar 4g4%
Protein 27g54%
Vitamin A 618IU12%
Vitamin C 2mg2%
Calcium 754mg75%
Iron 3mg17%
* Percent Daily Values are based on a 2000 calorie diet.

Here’s one more to pin on your Pinterest boards!Make a delicious Air Fryer Cheesy Pan Pizza for lunch/dinner. Use canned biscuit dough for crust & Mozzarella/Parmesan cheeses, pizza sauce & spices!

Easy Greek Salad Dressing

Make Easy Greek Salad Dressing in under 5 minutes. Use this delicious dressing (w/ chopped kalamata olives) on a favorite Greek or mixed green salad.

If you’re looking for a great tasting salad dressing that is perfect to drizzle on any mixed green salad, may I suggest this one? The recipe makes a small batch (enough for 4 small servings). It’s a great way to compliment any salad (especially a GREEK salad!). This salad dressing can be made easily in just a few minutes, and I think you will really enjoy it.

Scroll Down For A Printable Recipe Card At The Bottom Of The Page

What’s In The Salad Dressing?

The ingredients for the salad dressing are olive oil, red wine vinegar, sugar, minced garlic, salt, pepper, and chopped kalamata olives. Kalamata olives are a type of Greek olive, that have a wonderful, tangy flavor, and add tons of flavor to the dressing. YUM.

Getting the ingredients ready to make the salad dressing.

How To Make This Easy Greek Salad Dressing

Finely chop the pitted kalamata olives. You want them fairly small. The recipe only used 6 olives, but let me tell you, they will add a LOT of flavor to the salad dressing. You can store the rest of the jar of olives in the refrigerator for another batch later on!

Add the chopped olives, and the rest of the ingredients to a small jar or container with a lid. One “small batch” of this salad dressing is only about 1/3 of a cup, so you won’t need a large container, unless you plan to double or triple the recipe.

Kalamata olives are finely chopped, and add great flavor to this salad dressing.The ingredients for the easy Greek salad dressing are placed in a sealed container.

Cover the jar or container, and (holding the lid on), shake the easy Greek salad dressing vigorously for about a minute. This will allow the sugar to dissolve, and the oil and vinegar to emulsify, and “come together”. That’s IT! See how EASY that was?

Pour the easy Greek salad dressing over a wonderful Greek salad OR you can use it on any mixed green salad that you enjoy.
After shaking the jar, the Greek salad dressing is emulsified and ready to use.Drizzle the salad dressing over a favorite Greek salad.

Storing The Salad Dressing

Store any leftover dressing in a covered container in the refrigerator. The olive oil may solidify once chilled, but all you need to do is remove the jar from the refrigerator about 15 minutes before using again. It will return to room temperature, and then just give it a few good shakes before using.

The recipe can be easily doubled or tripled if that is more convenient for you.  The yield from this small batch is approximately 1/3 cup, which is enough for several side salads (1 Tablespoon per side salad), or one large salad.

Store the easy Greek salad dressing in a covered container in the refrigerator.

Hope you enjoy this delicious salad dressing. I enjoy keeping a small batch around for variety, and just used it last evening on a delicious mixed green salad. It’s really good! Thank you for stopping by, and I truly hope you enjoy your day.

Looking For More SALAD DRESSING Recipes?

You can find all of my recipes in the Recipe Index, located at the top of the page. I have quite a few easy salad dressing recipes, including:

Interested In More Recipes?

Thank you for visiting this website. I appreciate you using some of your valuable time to do soIf you’re interested, I publish a newsletter 2 times per month (1st and 15th) with all the latest recipes, and other fun info. I would be honored to have you join our growing list of subscribers, so you never miss a great recipe!
There is a Newsletter subscription box on the top right side (or bottom) of each blog post, depending on the device you use, where you can easily submit your e-mail address (only) to be included in my mailing list.

You Can Also Find Me On Social Media:
Facebook page: The Grateful Girl Cooks!
Pinterest: The Grateful Girl Cooks!
Instagram: jbatthegratefulgirlcooks

Author's signature

Original recipe source: http://thepioneerwoman.com/cooking/2011/04/greek-salad/

0 from 0 votes
Easy Greek Salad Dressing
Prep Time
5 mins
Cook Time
0 mins
Total Time
5 mins
 

Make Easy Greek Salad Dressing in under 5 minutes. Use this delicious dressing (w/ chopped kalamata olives) on a favorite Greek or mixed green salad.

Category: Condiment, Salad Dressing
Cuisine: Greek
Keyword: easy Greek salad dressing
Servings: 4
Calories Per Serving: 135 kcal
Author: JB @ The Grateful Girl Cooks!
Ingredients
  • ¼ cup extra virgin olive oil
  • 2 Tablespoons red wine vinegar
  • 1 teaspoon granulated sugar
  • 6 kalamata olives , pitted / finely chopped
  • 1 clove garlic , minced
  • ¼ teaspoon salt
  • 2-3 pinches ground black pepper
Instructions
  1. Add all ingredients to a small jar or container with a secure lid. NOTE: If doubling or tripling recipe, use larger container.

  2. Cover the jar or container, and (holding the lid on securely), shake the salad dressing vigorously for about a minute. This allows the sugar to dissolve, and the oil and vinegar to emulsify, and "come together".

  3. Serve, and enjoy on your favorite Greek or mixed green salad! Store any leftover salad dressing in covered container in refrigerator. NOTE: After refrigerating, the olive oil will slightly thicken. Let salad dressing sit at room temperature 15 minutes before serving, to allow it to thin out again. Shake or stir dressing to re-blend, and serve.

Nutrition Facts
Easy Greek Salad Dressing
Amount Per Serving (1.5 Tablespoons)
Calories 135 Calories from Fat 126
% Daily Value*
Fat 14g22%
Saturated Fat 2g13%
Sodium 240mg10%
Carbohydrates 2g1%
Fiber 1g4%
Sugar 1g1%
Protein 1g2%
Vitamin A 24IU0%
Calcium 3mg0%
Iron 1mg6%
* Percent Daily Values are based on a 2000 calorie diet.

Here’s one more to pin on your Pinterest boards!Make Easy Greek Salad Dressing in under 5 minutes. Use this delicious dressing (w/ chopped kalamata olives) on a favorite Greek or mixed green salad.

Black Bean Butternut Squash Chili

Black Bean Butternut Squash Chili is a hearty meatless dish, with all the flavor of a traditional chili. It’s thick, delicious, and simple to prepare!
Black Bean Butternut Squash Chili is a hearty meatless dish, with all the flavor of a traditional chili. It's thick, delicious, and simple to prepare!

Do you enjoy chili? We sure do. Every couple of months I make my Mom’s old-fashioned chili, and it is my absolute favorite “go to” chili recipe. One of our sons and his girlfriend are vegetarians, and my sister-in-law is a vegan. When they come over for a chili dinner, I make my traditional chili recipe and simply leave the meat out. I am always on the “hunt” for vegetarian recipes I can fix for them.

However, sometimes ya just gotta try new recipes, and for me, the thrill of the hunt for a “new” recipe is exciting. I found this yummy, meatless chili recipe on the app called My Fitness Pal. It’s a fiber and protein-filled dish, and is another GREAT alternative for anyone looking for a meatless chili, with all the flavors you know and love.

It’s also low-calorie, easy to make, and I know my vegetarian and vegan family members will love it. I can’t wait for them to try it, too! Here’s how to make this yummy black bean butternut squash chili (a printable recipe card is at the bottom of this post):

Scroll Down For A Printable Recipe Card At The Bottom Of The Page

How To Prepare The Butternut Squash

The first thing you will need to do is prepare the butternut squash. I prefer to use fresh, but you can substitute frozen butternut squash, if necessary. Preparing the fresh squash is not difficult at all (but it will take 4-5 minutes). HINT: You won’t need to use the entire squash for your chili. Perhaps you would enjoy using the leftover squash to make Maple Cinnamon Butternut Squash for another meal’s side dish?

Use a vegetable peeler to remove the outer peel from the butternut squash. Once peeled, carefully slice off both ends of the squash. Slice the squash in half horizontally. Scoop out the seeds and “stringy pith” from the cavity of the squash, and discard.

Slice the squash into half-moon shaped rings (1″ thickness), and then cut the rings into bite-sized cubes of butternut squash. Try to keep them around 1″, because they will cook faster than large chunks.

Use a vegetable peeler to peel the butternut squash.Cut butternut squash in half length-wise, and remove seeds.Slice the squash, then cut into small cubes before cooking.

Make The Black Bean Butternut Squash Chili

Now it’s time to get the black bean butternut squash chili ready to cook. No worries… it’s simple! Place all the ingredients into a large stock pot. Add the water and give the chili a good stir, to fully combine ingredients. See how easy that is? Now the chili is ready to cook!

The ingredients for the black bean butternut squash chili in a large stockpot.Water is added to the soup pot and then chili is cooked.

Cook The Chili

Cook the black bean butternut squash chili on medium-low heat for 30-40 minutes. Cover the pot of chili for the first 15 minutes, then uncover the pot for the rest of the cooking time.

You will know it is done when the cubes of butternut squash become tender. Take a bite of the squash at the 30 minute mark, then continue cooking, if necessary until the squash is softened. The chili will thicken as the water reduces during the cooking time. Take a small sample bite, and add salt, if desired, to suit your taste.

After cooking, the chili will thicken and butternut squash will be tender.

Serve The Black Bean Butternut Squash Chili

Once your chili is done cooking, it is ready to serve! Ladle the black bean butternut squash chili into serving bowls, and if desired, garnish each bowl of chili with a dollop of sour cream and/or fresh cilantro, for a pop of color and added flavor.

A bowl of black bean butternut squash chili garnished with cilantro and sour cream.

Hope you enjoy a nice hot bowl of this delicious black bean butternut squash chili.  The black beans and butternut squash provide a nice dose of fiber, which helps to fill the old tummy up! Plus, it really does taste wonderful, and I am confident you will really enjoy it.

Black Bean Butternut Squash Chili, ready to enjoy!

Hope you have the opportunity to try this recipe for yummy, meatless chili. You might also enjoy my recipe for Tasty Turkey Chili. Thank you so much for stopping by. I hope you will come by for a visit again. Take care, and have a great day!

Looking For More MEATLESS MEALS?

You can find all of my recipes in the Recipe Index, which is located at the top of the page. I have several meatless meals you might enjoy, including:

Interested In More Recipes?

Thank you for visiting this website. I appreciate you using some of your valuable time to do soIf you’re interested, I publish a newsletter 2 times per month (1st and 15th) with all the latest recipes, and other fun info. I would be honored to have you join our growing list of subscribers, so you never miss a great recipe!
There is a Newsletter subscription box on the top right side (or bottom) of each blog post, depending on the device you use, where you can easily submit your e-mail address (only) to be included in my mailing list.

You Can Also Find Me On Social Media:
Facebook page: The Grateful Girl Cooks!
Pinterest: The Grateful Girl Cooks!
Instagram: jbatthegratefulgirlcooks

Author's signature

Recipe adapted from: https://blog.myfitnesspal.com/butternut-squash-black-bean-chili-recipe/

0 from 0 votes
Black Bean Butternut Squash Chili
Prep Time
15 mins
Cook Time
35 mins
Total Time
50 mins
 

Black Bean Butternut Squash Chili is a hearty meatless dish, with all the flavor of a traditional chili. It's thick, delicious, and simple to prepare!

Category: Entree, Soup
Cuisine: Southwestern
Keyword: black bean butternut squash chili
Servings: 6
Calories Per Serving: 224 kcal
Author: JB @ The Grateful Girl Cooks!
Ingredients
  • 30 ounces canned black beans (2 cans) , rinsed and drained
  • 2 cups butternut squash , peeled, cut into 1" cubes
  • 15 ounces canned diced tomatoes , including juice
  • 1 cup corn kernels , fresh or frozen
  • 1 medium red onion , diced
  • 2 Tablespoons chili powder
  • 2 Tablespoons ground cumin
  • 2 Tablespoons smoked paprika
  • 1 teaspoon minced garlic
  • 3 cups water
  • salt, to taste
  • Sour cream, cilantro (OPTIONAL for garnish)
Instructions
  1. Remove peel from squash. Carefully slice off both ends; cut squash in half horizontally. Scoop out seeds and stringy pith; discard. Slice into half-moon shaped rings (1" thickness); cut rings into 1" bite-sized cubes, for a total of 2 cups. (you won't use the whole squash).

  2. Place ingredients into a large stock pot; stir well. Cook on medium-low heat for 30-40 minutes. **Cover pot of chili for the first 15 minutes, then uncover for the rest of the cooking time**. Taste a bite of squash after 30 minutes. If soft and tender, chili is done. If not, continue cooking until tender. Chili will thicken as water reduces while cooking. Taste; season with salt, as desired.

  3. Serve chili with a dollop of sour cream and fresh cilantro, if desired (optional, but good). Enjoy!

Recipe Notes

NOTE: I use fresh corn kernels (cut off one cob) and fresh butternut squash, but you can substitute frozen corn kernels or butternut squash, if necessary. If using frozen butternut squash, your cooking time may vary, as it might take less time to become tender.

Nutrition Facts
Black Bean Butternut Squash Chili
Amount Per Serving (1 g)
Calories 224 Calories from Fat 18
% Daily Value*
Fat 2g3%
Saturated Fat 1g6%
Sodium 740mg32%
Potassium 1014mg29%
Carbohydrates 44g15%
Fiber 15g63%
Sugar 6g7%
Protein 12g24%
Vitamin A 7091IU142%
Vitamin C 22mg27%
Calcium 133mg13%
Iron 6mg33%
* Percent Daily Values are based on a 2000 calorie diet.

Here’s one more to pin on your Pinterest boards!Black Bean Butternut Squash Chili is a hearty meatless dish, with all the flavor of a traditional chili. It's thick, delicious, and simple to prepare!

Fresh Strawberry Muffins

Make a dozen delicious fresh strawberry muffins for those you love. They are cinnamon-sugar topped, and bursting with FRESH, juicy strawberries.

We love muffins for breakfast in our home! I probably make muffins about twice a month! That might not sound like a lot to you, but since there are only TWO of us at home these days, a dozen muffins go pretty far!

I typically like to freeze some OR give a few to family members or friends, in order to spread out the “muffin love”.

Strawberry muffins always taste wonderful, and I’ve made several different recipe versions over the years. Recently I tried a NEW (to me) recipe, and it was so good, I decided to post it here.

I happily shared several of these muffins with our neighbors, so we didn’t have to eat the entire dozen by ourselves (nobody needs THAT)! 

Scroll Down For A Printable Recipe Card At the Bottom Of The Page

Use FRESH Strawberries

This muffin recipe is very straightforward, and simple to prepare. One catch is that you will need to use FRESH strawberries!

Frozen strawberries become mushy once thawed, and produce too much syrup for this light batter, so using fresh fruit is necessary.

This year has been a bumper crop for our little raised garden bed of strawberries in the backyard! I went out and picked a large amount (in photo below) over the course of two mornings, just to make these delicious, fresh strawberry muffins.

Here’s how to make them.

Fresh strawberries from our garden will be added to muffin batter.

Make The Muffin Batter

Making the muffin batter is very easy. The first thing you will need to do is cream softened butter with granulated sugar (using an electric or stand mixer) for a couple of minutes.

Add a large egg, and then continue mixing these ingredients until they have been fully combined.

Butter and sugar are creamed using a mixer, and then an egg is added to batter.The batter is fully mixed together before adding dry ingredients and milk.

In a medium bowl, sift together all purpose flour, baking powder and salt. Add a little bit of flour mixture to the batter, alternating it with some milk.

Continue to add flour mixture, then some milk, beating a little bit at a time until blended. Add vanilla extract to the batter, and blend.

Dry ingredients (flour, baking powder, salt) are slowly added to muffin batter in batches..Milk is added to muffin batter in batches (alternating with dry ingredients).

Add Strawberries – GENTLY!

Now it’s time to add chopped fresh strawberries to the batter. This is where you need to be careful. The strawberries must be gently stirred or folded into the batter.

By gently folding in the strawberries, it will help prevent the muffin batter from turning red (or pink), or possibly looking like a murder scene.

Be Gentle. Stir/Fold only until the strawberries are worked into the batter.

Chopped fresh strawberries are added to the bowl of muffin batter.The fresh strawberries are GENTLY mixed into the muffin batter.

Preparing Fresh Strawberry Muffins For Baking

This recipe will yield 12 muffins. Spray a standard, 12 cup muffin tin (each cup) with non-stick spray OR line each cup with paper muffin liners.

TIP: Lightly spray the paper liners. A co-worker (whose hubby was a professional baker) told me over 25 years ago that he always lightly sprayed paper liners, so I’ve done it ever since, to prevent sticking!

Evenly divide the batter between the prepared muffin cups (they’ll be about 2/3 of the way full). Use a scoop or large spoon to do this.

In a small bowl, mix 1 Tablespoon of granulated sugar with 3/4 teaspoon of ground cinnamon. Sprinkle this cinnamon-sugar mixture over the top of each muffin, dividing the mixture evenly.

Once they’re all topped with cinnamon-sugar, your fresh strawberry muffins are ready to bake!

Batter is placed into greased paper liners in muffin tin.A cinnamon sugar mixture is sprinkled over top of fresh strawberry muffins before baking.

Ready For The Oven

Bake the fresh strawberry muffins in a preheated 400°F oven. The muffins will take between 20-25 minutes to bake.

Because ovens can vary widely in temperature settings (and run hot), it is wise to check the muffins for done-ness at the 20 minute mark.

TIP: You can place a large piece of aluminum foil directly under the muffin tin while baking. If any strawberry juice oozes out and over the edges of the muffin tin, you’ll have an easier cleanup. Mine did not do this, but “just in case”, you might want to consider this useful tip.

You can tell when the muffins are done by inserting a toothpick into the center of a muffin. If it comes out clean (free of batter), the muffins are finished baking.

The muffins will be a light golden brown in color. Remove the pan from the oven, and let the muffins rest (still in the pan) for 2-3 minutes.

Baked fresh strawberry muffins, hot from the oven.

The Fresh Strawberry Muffins Are Ready To Eat!

Transfer the fresh strawberry muffins to a wire rack, and let them cool a bit. We prefer to eat these muffins just slightly warm, or at room temperature.

The flavor of the strawberries seems to be more prevalent when they are not served totally smokin’ hot. Just my experience!

The strawberry muffins cooling on a wire rack.One of the fresh strawberry muffins, cut in half, buttered, and ready to eat!

I sure hope you have the opportunity to try these yummy fresh strawberry muffins. If you store them in an airtight container, they will keep for 2-3 days.

Fresh strawberry muffins also freeze well (for 1-2 months), IF you have any leftovers. They are so good, you might not have any leftovers. Amen.

Thanks for stopping by, and I hope you come back soon. Take care, be kind to others, and have a wonderful day. There are a lot of hurting people out there that might just need YOU to encourage them today.

Looking For More MUFFIN Recipes?

You can find all of my muffin recipes in the Recipe Index, located at the top of the page, I have quite a few you might enjoy, including:

Want More Recipes? Get My FREE Newsletter!

I publish a newsletter 2 times per month (1st and 15th) with lots of recipes, tips, etc..
Would you like to join our growing list of subscribers?

There is a Newsletter subscription box on the top right (or bottom) of each blog post, depending on the device you use.
You can submit your e-mail address there, to be added to my mailing list.

Find Me On Social Media:

Facebook page: The Grateful Girl Cooks!
Pinterest:
The Grateful Girl Cooks!
Instagram:
jbatthegratefulgirlcooks

Author's signature

Recipe adapted from: Monica, at: oldermommystillyummy.com/strawberry-muffins/

↓↓ PRINTABLE RECIPE BELOW ↓↓

0 from 0 votes
Fresh Strawberry Muffins
Prep Time
15 mins
Cook Time
20 mins
Total Time
35 mins
 

Make a dozen delicious fresh strawberry muffins for those you love. They are cinnamon-sugar topped, and bursting with FRESH, juicy strawberries.

Category: Breakfast, Snack
Cuisine: American
Keyword: fresh strawberry muffins
Servings: 12 muffins
Calories Per Serving: 214 kcal
Author: JB @ The Grateful Girl Cooks!
Ingredients
  • ½ cup butter , softened
  • ¾ cup granulated sugar
  • 1 large egg
  • 2 cups all purpose flour
  • ½ teaspoon salt
  • 2 teaspoons baking powder
  • ½ cup milk
  • ¾ teaspoon vanilla extract
  • cups chopped fresh strawberries
  • 1 Tablespoon granulated sugar (for topping)
  • ¾ teaspoon ground cinnamon (for topping)
Instructions
  1. Preheat oven to 400°F. Spray a standard 12 cup muffin tin with non-stick spray, or insert paper liners into each muffin cup.

  2. Use electric mixer to cream softened butter with granulated sugar (1-2 minutes). Add egg; continue mixing until fully combined.

  3. In a medium bowl, sift flour, baking powder and salt together. Add flour mixture and milk to the batter, a little at a time (alternating between the two), beating after each addition. Add vanilla extract, and mix well. Remove mixer. Gently stir or fold chopped strawberries into batter. Stir only until strawberries are incorporated into the batter. Evenly divide batter between 12 prepared muffin cups (they will be about 2/3 of the way full).

  4. In a small bowl, combine 1 Tablespoon granulated sugar with ¾ teaspoon cinnamon. Sprinkle this cinnamon-sugar mixture over the top of each muffin, dividing mixture evenly between the 12 muffins.

  5. Bake muffins in preheated 400°F oven for 20-25 minutes. Check for done-ness at the 20 minute mark, by inserting a toothpick into the center of a muffin. If it comes out clean (free of batter), muffins are done. Muffins will be light golden brown in color. Remove pan from oven; let muffins cool (still in pan) for 2-3 minutes. Transfer muffins to a wire rack to finish cooling before serving. Enjoy!

Nutrition Facts
Fresh Strawberry Muffins
Amount Per Serving (1 muffin)
Calories 214 Calories from Fat 72
% Daily Value*
Fat 8g12%
Saturated Fat 5g31%
Cholesterol 36mg12%
Sodium 176mg8%
Potassium 138mg4%
Carbohydrates 32g11%
Fiber 1g4%
Sugar 15g17%
Protein 3g6%
Vitamin A 278IU6%
Vitamin C 11mg13%
Calcium 53mg5%
Iron 1mg6%
* Percent Daily Values are based on a 2000 calorie diet.

Here’s one more to pin on your Pinterest boards!Make a dozen delicious fresh strawberry muffins for those you love. They are cinnamon-sugar topped, and bursting with FRESH, juicy strawberries.

Grilled Lemon Chicken Breasts

Fire up your BBQ and make delicious, grilled lemon chicken breasts! A flavorful lemon marinade coats the chicken, then it’s grilled until done. EASY!
Fire up your BBQ and make delicious, grilled lemon chicken breasts! A flavorful lemon marinade coats the chicken, then it's grilled until done. EASY!

Summer is officially here in Oregon, and the temperatures have been slowly climbing upward. I don’t know about you, but we grill a lot of our dinners outside during the summer, to avoid heating up our kitchen. This recipe for grilled lemon chicken breasts is a fantastic, light and easy main dish, and I know you will love it like we do!

The recipe itself is super easy. I found it on a pellet grill/smoker blog, but decided instead of cooking it on our Traeger, to grill them on our trusty old charcoal-grill Weber. The good news? You only need to make a simple lemon marinade and let the chicken soak in it, before grilling. The bad news? YOU NEED TO PLAN AHEAD! The chicken breasts will need to marinate for 3-4 hours to soak up all that yummy flavor!

Since the marinade only takes a few minutes to make, it is easy to mix it up early in the day, and then toss chicken breasts in for a long swim, until you’re ready to grill them! See how easy it is? Here’s the “How-To’s”:

Scroll Down For A Printable Recipe Card At The Bottom Of The Page

Make The Lemon Marinade

Making the lemon marinade is EASY. Combine lemon juice, lemon zest, honey, salt, pepper, fresh thyme leaves, and coarsely chopped fresh garlic in a small bowl. Slowly drizzle in the olive oil, whisking continuously as you add it in, until completely incorporated into the other ingredients.

Honey, Lemon juice and zest, garlic, and spices are mixed for the marinade.Olive oil is whisked into the lemon marinade until incorporated.

Marinade The Chicken

Place the chicken breasts in a LARGE zip-loc bag OR place in a single layer in a large container with a lid. Give the marinade a good stir, and then pour it over the chicken. If using a bag, gently massage the bag until chicken breasts are fully covered with marinade. If using a container (as I did), turn to fully coat the chicken with the marinade.

Place the sealed bag or container in the refrigerator for a minimum of 4 hours, turning the bag (or the chicken) over occasionally to keep the chicken coated. Letting the chicken fully marinade helps enfuse the meat with the delicious flavors of lemon, honey, garlic, and spices.

Chicken breasts are coated with the marinade, then refrigerated.Marinated chicken breasts are refrigerated for 3-4 hours before grilling.

Time To Make Grilled Lemon Chicken Breasts!

After the chicken is done marinating, it’s time to cook them. Prepare your bbq per manufacturer instructions. Once the coals or heat source is at a medium-high level, remove the chicken from the marinade (letting excess drip back into container). Place on hot grill and let them cook, flipping them to the other side half way through cooking time. If desired, baste the chicken while it cooks with some of the remaining marinade to keep it moist. Discard the rest.

The chicken (approx. 6 ounce pieces) will typically take between 20-30 minutes to fully cook through to a safe internal temperature of 165°F. Larger or smaller pieces of chicken will obviously require more OR less cooking time, because the weight of chicken breasts will vary. The temperatures on different types of bbq’s can vary widely as well.

Check the chicken for done-ness towards the end of the cooking time. A couple of our chicken breasts were much larger and thicker than the others (11 ounces), and took 35 minutes to reach 165°F.

Grilled Lemon Chicken Breasts cooking over hot coals on BBQ.The chicken is turned half way through grilling to brown both sides.

Serve The Grilled Lemon Chicken Breasts

If you would like to garnish the finished chicken with grilled lemon wedges (it looks good!), you can. Simply cut a whole lemon into 4 wedges, and place on the grill, cut side down, for the last 5 minutes of cooking time for the chicken, to quickly char it on all cut sides. (See photo below).

Serve the grilled lemon chicken breasts with the charred lemon quarters and a sprig or two of fresh thyme or rosemary, as a beautiful presentation. You can squeeze more lemon juice from the charred wedges over the chicken, if desired.

We enjoyed this delicious chicken along with some home-canned green beans from our garden, and some scrumptious candied sweet potatoes.. It was a delicious dinner (and I will use our leftover chicken with pasta, or on top of a mixed green salad).

Grilled Lemon Chicken Breasts are served, garnished with charred lemon wedges and rosemary sprigs.Sweet potatoes, & green beans served with grilled lemon chicken breasts.

I really hope you enjoy this recipe for grilled lemon chicken breasts. We LOVE it (especially the EASY part!), and hope you have the opportunity to make it for those you love. A complete, printable recipe card is at the bottom of this post, for your convenience.

Thank you for using some of your valuable time to stop by for a visit. Hope you will come back again. Take care, and have a GREAT day.

Looking For More CHICKEN Recipes?

You can find all of my chicken recipes in the Recipe Index, which is located at the top of the page. I have LOTS of them to explore, including:

Interested In More Recipes?

Thank you for visiting this website. I appreciate you using some of your valuable time to do soIf you’re interested, I publish a newsletter 2 times per month (1st and 15th) with all the latest recipes, and other fun info. I would be honored to have you join our growing list of subscribers, so you never miss a great recipe!
There is a Newsletter subscription box on the top right side (or bottom) of each blog post, depending on the device you use, where you can easily submit your e-mail address (only) to be included in my mailing list.

You Can Also Find Me On Social Media:
Facebook page: The Grateful Girl Cooks!
Pinterest: The Grateful Girl Cooks!
Instagram: jbatthegratefulgirlcooks

Author's signature

Original recipe source: https://www.traegergrills.com/recipes/lemon-chicken-breast

0 from 0 votes
Grilled Lemon Chicken Breasts
Prep Time
5 mins
Cook Time
35 mins
Marinating Time (inactive)
4 hrs
Total Time
4 hrs 40 mins
 

Fire up your BBQ and make delicious, grilled lemon chicken breasts! A flavorful lemon marinade coats the chicken, then it's grilled until done. EASY!

Category: Entree
Cuisine: American
Keyword: grilled lemon chicken breasts
Servings: 6
Calories Per Serving: 286 kcal
Author: JB @ The Grateful Girl Cooks!
Ingredients
  • 1 large lemon (juice + zest)
  • 2 teaspoons honey
  • 1 clove garlic large clove, coarsely chopped
  • 2 teaspoons kosher salt
  • 1 teaspoon coarse ground black pepper
  • 2 sprigs fresh thyme leaves , strip leaves from stems
  • ½ cup extra virgin olive oil , can substitute vegetable oil
  • 6 medium chicken breasts (boneless, skinless) approx. 6 ounces per chicken breast
For Garnish:
  • 1 large lemon , cut in 4 wedges, grilled for garnish (optional)
  • 2-3 sprigs fresh thyme or rosemary
Instructions
  1. Combine lemon juice, zest, honey, salt, pepper, thyme leaves, and chopped fresh garlic in a small bowl. Slowly drizzle in olive oil, whisking continuously as you add it, until incorporated into other ingredients.

  2. Place chicken in a LARGE zip-loc bag OR in a single layer in a large container with a lid. Pour marinade over chicken. If using sealed bag, gently massage bag until chicken is fully covered with marinade. If using a container, turn to fully coat chicken with marinade. Place bag or covered container in refrigerator for a minimum of 4 hours.

  3. Prepare BBQ grill per manufacturer instructions. Once coals or heat source is at a medium-high temperature, remove chicken from marinade. Place chicken directly on hot grill grate and cook without moving them. Half way through cooking time, turn chicken to the other side. If desired, baste chicken with remaining marinade while grilling. Discard leftover marinade. Chicken (approx. 6 ounces per piece) will typically take between 20-30 minutes to fully cook through to a safe internal temperature of 165°F. This time can vary, due to sizes/weight/thickness of chicken pieces, bbq temperature, etc. Be sure to check internal temperature of chicken towards end of cooking time. When done (165°F), remove from grill; let chicken rest for 3-4 minutes before serving, to allow internal juices to redistribute throughout meat.

  4. If you want grilled lemon wedges for serving with the grilled chicken, simply cut a whole lemon into 4 wedges, and place on the grill, cut side down, for the last 5 minutes of the chicken's grilling time, to quickly char it on all cut sides. Serve chicken breasts with charred lemon quarters on top and 1-2 sprigs of fresh thyme or rosemary, for a beautiful presentation. Enjoy!

Recipe Notes

Note: Caloric calculation was made using HALF the amount of marinade required for the recipe. This is because MOST of the marinade will be discarded AFTER marinating the chicken, and will not be consumed.

Nutrition Facts
Grilled Lemon Chicken Breasts
Amount Per Serving (1 g)
Calories 286 Calories from Fat 117
% Daily Value*
Fat 13g20%
Saturated Fat 2g13%
Cholesterol 109mg36%
Sodium 586mg25%
Potassium 667mg19%
Carbohydrates 4g1%
Fiber 1g4%
Sugar 2g2%
Protein 36g72%
Vitamin A 67IU1%
Vitamin C 17mg21%
Calcium 16mg2%
Iron 1mg6%
* Percent Daily Values are based on a 2000 calorie diet.

Here’s one more to pin on your Pinterest boards!Fire up your BBQ and make delicious, grilled lemon chicken breasts! A flavorful lemon marinade coats the chicken, then it's grilled until done. EASY!

Coconut Pineapple Smoothie

Enjoy a simple, delicious Coconut Pineapple Smoothie, made w/ coconut Greek yogurt, banana, pineapple, and coconut milk (or other refrigerated milk).

Well, well, well… Summer is almost here! I don’t know about you, but when it’s hot outside, I enjoy a cold fruit smoothie for breakfast or a snack.  Thick, cold and creamy, and full of flavor, this coconut pineapple smoothie with only 4 ingredients is a personal favorite of mine!

One of the other COOL things about this smoothie is that it can also be FROZEN, to enjoy later in the day as a frozen (like ice cream) treat. YUMMO. You can read about that further down in this post.  Here’s how to make this delicious smoothie:

Scroll Down For A Printable Recipe Card At the Bottom Of The Page

What’s IN This Smoothie?

This coconut pineapple smoothie only has 4 basic ingredients, plus an optional garnish. They are: frozen pineapple chunks, a frozen banana, coconut-flavored Greek yogurt, and milk. I love to use refrigerated coconut milk (not the canned kind), but any milk that you enjoy or have on hand will do the trick.

Ingredients for the smoothie are yogurt, pineapple, banana and milk.

Let’s Get This Blending Party Started

Making the smoothie is a cinch. We ALL KNOW it is not rocket science to make a smoothie, but here’s what ya need to do. Pour the milk into a blender.

Add the frozen pineapple chunks, coconut yogurt and banana (peeled and still frozen). By using frozen banana and pineapple, you will NOT need to add ice (which could water down the drink a bit).

Mix on high speed (pulsing if needed), until the mixture is completely blended, creamy and smooth. TIP: You may need to stop the blender and scrape down the sides a couple of times to make sure the ingredients fully combine.

This usually takes only 1-2 minutes. Once fully blended, your coconut pineapple smoothie is ready to serve.

All four ingredients are placed in a blender, and mixed until smooth.Once the ingredients are fully blended, the coconut pineapple smoothie is ready.

Ready To Serve The Coconut Pineapple Smoothie!

The recipe will make enough for two medium sized servings, but if you’re really hungry, then by all means go for it, and make it one huge smoothie! It will be really cold, due to the addition of that frozen pineapple and banana.

Here is a coconut pineapple smoothie, served with a straw.

One of my FAVORITE ways to enjoy this smoothie is to add a small pinch of ground cinnamon to the top of the drink before serving.

I love the little hint of cinnamon flavor. This is absolutely optional, but I highly recommend it, because it looks good and tastes good.

The coconut pineapple smoothie has a sprinkle of ground cinnamon on top for garnish.

You Can Freeze The Coconut Pineapple Smoothie, Too!

Another way I enjoy this, is to only drink half of the finished smoothie. Then I take the other serving and place it in a sealed freezer-safe container and place it in the freezer for 1 hour or more. This will become an amazing afternoon snack!

Once it has frozen most of the way through, remove it from the freezer, grab a spoon and dig in. It will “feel” like you are eating coconut pineapple ice cream.

When partially frozen, it will have the texture of thick frozen yogurt. Leave it in the freezer longer than a couple hours, and it will become very firm, so you need to let it sit out for 10 minutes or so to soften it up before scooping.

Freezing a portion of the smoothie is a great way to enjoy it in another form, like ice cream You can also freeze it for another day, then let it defrost to drinking consistency, and enjoy round #2 of the smoothie as a beverage.

The smoothie can also be frozen to be eaten later like ice cream.After freezing for an hour, the smoothie "ice cream" is ready to scoop and enjoy!

I hope you enjoy this delicious fruit smoothie recipe, perfect for any time of the day, or any time of the year! Thanks for stopping by. Take care, and have a wonderful day, full of love, hope, and joy.
Looking For More SMOOTHIE Recipes?

You can find all of my smoothie recipes in the Recipe Index, located at the top of the page. A few of our family favorites include:

Want More Recipes? Get My FREE Newsletter!

I publish a newsletter 2 times per month (1st and 15th) with lots of recipes, tips, etc..
Would you like to join our growing list of subscribers?

There is a Newsletter subscription box on the top right (or bottom) of each blog post, depending on the device you use.
You can submit your e-mail address there, to be added to my mailing list.

Find Me On Social Media:

Facebook page: The Grateful Girl Cooks!
Pinterest:
The Grateful Girl Cooks!
Instagram:
jbatthegratefulgirlcooks

Author's signature

↓↓ PRINTABLE RECIPE BELOW ↓↓

0 from 0 votes
Coconut Pineapple Smoothie
Prep Time
3 mins
Cook Time
0 mins
Total Time
3 mins
 

Enjoy a simple, delicious Coconut Pineapple Smoothie, made w/ coconut Greek yogurt, banana, pineapple, and coconut milk (or other refrigerated milk).

Category: Beverage, Breakfast, Snack
Cuisine: All Cuisines
Keyword: coconut pineapple smoothie
Servings: 2
Calories Per Serving: 150 kcal
Author: JB @ The Grateful Girl Cooks!
Ingredients
  • 5.3 ounces Coconut Greek yogurt (Oikos Triple Threat)
  • ½ cup frozen pineapple chunks (do not thaw)
  • 1 medium frozen banana (do not thaw) , peeled and cut in chunks
  • ½ cup coconut milk or other milk , refrigerated (not canned)
  • 1 pinch ground cinnamon (for garnish-optional)
Instructions
  1. Pour milk into blender. Add frozen pineapple chunks, coconut yogurt and frozen banana chunks. By using frozen banana and pineapple, you will NOT need to add ice (which could water down the drink).

  2. Mix on high speed (pulsing if needed), until mixture is completely blended, creamy and smooth. TIP: You may need to stop the blender and scrape down the sides a couple of times to make sure the ingredients fully combine. Once fully blended, the coconut pineapple smoothie is ready to serve.

  3. Garnish each drink with a pinch of ground cinnamon, if desired. Enjoy!

  4. IF FREEZING: Place smoothie in covered, freezer-safe container. Freeze for 1-2 hours. If freezing longer than that, remove frozen smoothie from freezer about 10 minutes before eating to allow it to soften up a bit.

Nutrition Facts
Coconut Pineapple Smoothie
Amount Per Serving (1 g)
Calories 150 Calories from Fat 9
% Daily Value*
Fat 1g2%
Saturated Fat 1g6%
Cholesterol 3mg1%
Sodium 34mg1%
Potassium 285mg8%
Carbohydrates 30g10%
Fiber 4g17%
Sugar 20g22%
Protein 8g16%
Vitamin A 67IU1%
Vitamin C 11mg13%
Calcium 34mg3%
Iron 1mg6%
* Percent Daily Values are based on a 2000 calorie diet.

Here’s one more to pin on your Pinterest boards!Enjoy a simple, delicious Coconut Pineapple Smoothie, made w/ coconut Greek yogurt, banana, pineapple, and coconut milk (or other refrigerated milk).

Easy Tortellini Soup

Enjoy a piping hot bowl of yummy, Italian-inspired, Easy Tortellini Soup, made in under 30 minutes with only a few key ingredients and spices.

Even though the weather has been heating up this week, I want to share this soup recipe with you, cause it’s YUMMY, no matter what time of year it is. This recipe for easy tortellini soup is just that… EASY! It also happens to be delicious (in case that matters, too – ha ha!).

If you enjoy Italian food, and the spices associated with it, you’re gonna enjoy this soup. It has a tomato-based broth, with Italian spices, fragrant garlic, cheese tortellini pasta, chopped spinach, and is topped with a sprinkling of grated Parmesan cheese. Because it doesn’t require a long cooking time, you’ll be slurping up this delicious soup in NO TIME! Here’s how simple it is to make:

Scroll Down For A Printable Recipe Card At The Bottom Of The Page

Prepare The Tortellini

Cook the fresh, frozen, or dry tortellini in salted water, according to the package directions. Once done cooking, drain the tortellini, and set aside. I like to cook the tortellini AND the spinach (see below) at the same time, to save time.

Cheese tortellini are cooked per package directions, and then drained.

Prepare The Spinach

Cook the chopped spinach according to the package instructions. Once cooked, put the spinach into a strainer which is placed on top of a bowl.  Press down with the back of a spoon to press out the spinach juice into the bowl below.

The juice will collect in the bowl sitting underneath the strainer. Keep pressing (a lot) to drain off as much of the juice as you can. Discard the juice once finished. Set the spinach aside. Now it’s SOUP time, and it will come together REALLY quickly!

Frozen chopped spinach is thawed, then drained of excess liquid in a strainer.

How To Make Easy Tortellini Soup

Place the butter into the saucepan you will be using. Melt the butter on medium heat, and then add the minced garlic. Cook on medium heat for about a minute, stirring constantly, so the garlic doesn’t burn. Burnt garlic has a bitter taste, and you do NOT want that in your tortellini soup!

Now add the chicken broth to the pan, and heat it until it comes to a boil. Once boiling, reduce the heat to a low simmer, and then add the cooked, drained tortellini. Simmer for 5 minutes on low heat, stirring occasionally.
Butter and garlic is cooked in the soup pan for about a minute.Cooked and drained tortellini is added to the broth in the soup pan.
Finish Making This Easy Tortellini Soup

Once the soup has simmered for 5 minutes, add the diced tomatoes (including juice), drained spinach, salt, and Italian seasoning. Stir well, to fully combine the ingredients. Continue to heat the tortellini soup on low heat for 5 more minutes, or until the soup is fully heated through.

Drained spinach, tomatoes, and spices are added to the tortellini soup.The easy tortellini soup is cooked until heated through.

Serving Easy Tortellini Soup

Once the soup is fully heated through, it is ready to be served and gobbled up! Ladle the soup into individual bowls, and sprinkle grated Parmesan cheese on top. The Parmesan cheese garnish is optional, but trust me, it makes this Italian-inspired soup taste SO GOOD!

This wonderfully easy tortellini soup tastes great, especially if you serve it with a nice piece of crusty garlic bread on the side! Yum… I really hope you enjoy it. Store any leftover soup (covered) in your refrigerator for up to 2-3 days.

The finished tortellini soup is topped with finely grated Parmesan cheese.A close up photo of the easy tortellini soup.

This truly is a simple soup to make, and it tastes wonderful. We were able to share some with one of our neighbors who lives alone, and he enjoyed it, too!  I hope you have the opportunity to make it for those you love, and trust you will enjoy it, too! Thanks for stopping by, take care, and have a great day.
Looking For More TORTELLINI Recipes?

You can find all of my recipes in the Recipe Index, located at the top of the page. I have several tortellini recipes, which include:
Looking For More SOUP Recipes?

You can find all of my soup recipes in the Recipe Index, located at the top of the page. I have quite a few delicious soup recipes I think you will enjoy, including:

Interested In More Recipes?

Thank you for visiting this website. I appreciate you using some of your valuable time to do soIf you’re interested, I publish a newsletter 2 times per month (1st and 15th) with all the latest recipes, and other fun info. I would be honored to have you join our growing list of subscribers, so you never miss a great recipe!
There is a Newsletter subscription box on the top right side (or bottom) of each blog post, depending on the device you use, where you can easily submit your e-mail address (only) to be included in my mailing list.

You Can Also Find Me On Social Media:
Facebook page: The Grateful Girl Cooks!
Pinterest: The Grateful Girl Cooks!
Instagram: jbatthegratefulgirlcooks

Author's signature

0 from 0 votes
Easy Tortellini Soup
Prep Time
15 mins
Cook Time
10 mins
Total Time
25 mins
 

Enjoy a piping hot bowl of yummy, Italian-inspired, Easy Tortellini Soup, made in under 30 minutes with only a few key ingredients and spices.

Category: Entree, Soup
Cuisine: American, Italian
Keyword: tortellini soup
Servings: 6
Calories Per Serving: 191 kcal
Author: JB @ The Grateful Girl Cooks!
Ingredients
  • 8 ounces fresh, frozen, or dried cheese tortellini
  • 10 ounces frozen chopped spinach
  • 1 Tablespoon butter
  • 2 cloves garlic , minced
  • 28 ounces chicken broth
  • 14.5 ounces diced tomatoes (canned) , undrained
  • 1 Tablespoon Italian seasoning
  • ½ teaspoon salt
  • 6 Tablespoons grated Parmesan cheese (optional, for garnish)
Instructions
  1. Cook fresh, frozen, or dry tortellini in salted water, according to pkg. directions. Once done, drain tortellini; set aside.

  2. Cook spinach according to pkg. directions. When done, put spinach into a strainer placed on top of a bowl.  Press down with the back of a spoon to press out juice into bowl below. Drain off as much juice as possible. Discard juice, and set spinach aside.

  3. Melt butter on medium heat in large soup pan. Once melted, add minced garlic. Cook for 1 minute, stirring constantly, so garlic doesn't burn. Add chicken broth to pan, and heat until it comes to a boil. Once boiling, reduce heat to a low simmer. Add tortellini. Simmer for 5 minutes on low heat, stirring occasionally. Add diced tomatoes (including juice), spinach, salt, and Italian seasoning. Stir well, to combine ingredients. Continue to heat soup for 5 more minutes, or until fully heated through.

  4. Ladle hot soup into bowls, and sprinkle grated Parmesan cheese on each serving. Serve, and enjoy! Store any leftover soup (covered), in refrigerator, for up to 2-3 days.

Nutrition Facts
Easy Tortellini Soup
Amount Per Serving (1 (1/6 of total))
Calories 191 Calories from Fat 63
% Daily Value*
Fat 7g11%
Saturated Fat 3g19%
Cholesterol 24mg8%
Sodium 1068mg46%
Potassium 415mg12%
Carbohydrates 23g8%
Fiber 4g17%
Sugar 3g3%
Protein 11g22%
Vitamin A 5736IU115%
Vitamin C 19mg23%
Calcium 214mg21%
Iron 3mg17%
* Percent Daily Values are based on a 2000 calorie diet.

Here’s one more to pin on your Pinterest boards!Enjoy a piping hot bowl of yummy, Italian-inspired, Easy Tortellini Soup, made in under 30 minutes with only a few key ingredients and spices.

Brown Sugar Pork Chops

Brown Sugar Pork Chops are an easy and delicious dish, featuring seared pork chops baked in a simple garlic, butter, spices and brown sugar sauce!

Do you enjoy pork chops? We do, even though we don’t eat them too often. We used to prefer thick boneless chops, but have slowly gravitated back toward using bone-in chops in most of my recipes.

It’s good (for those who love to cook) to keep a few wonderful, “tried and true” recipes in “the old kitchen tool belt”. THIS is definitely one of those kind of recipes, so I’m happy to share it with you, and hope you enjoy it.

Brown sugar pork chops are a favorite way we enjoy “the other white meat”. They are simple to prepare, and taste wonderful!

Basically what you will do is brown the pork chops, make a simple sauce, and then bake the sauce-covered pork chops. It’s all so easy (and ready in about 35 minutes), so here’s how to make them:

Scroll Down For A Printable Recipe Card At The Bottom Of The Page

Season And Pan-Sear The Pork Chops

For this recipe you can use either bone-in or boneless pork chops (about 1″ thick). We prefer the bone-in, because the meat seems to stay a bit more juicy. Regardless of which type (bone-in or boneless) you decide to use, you’ll still enjoy these yummy pork chops!

NOTE: This recipe makes 4 pork chop servings- I was only making them for my husband and I this time, which is reflected in these photos.

The first thing you will need to do (after preheating your oven) is to season and pan-sear the pork chops. Pat the chops dry with paper towels, then lightly season BOTH sides with salt and ground black pepper.

Pork chops are seasoned with salt and pepper on both sides before pan-searing.

Heat the olive oil on medium-high heat in a large oven-proof skillet. Once the oil is very hot (but not smoking), carefully add the pork chops in one layer. They should sizzle when they hit the hot oil in the skillet. The hot oil will serve to give the chops a nicely browned exterior.

Cook the chops (without moving them) for 5-6 minutes. They should be well browned on the bottom. Carefully turn them to the other side, and continue cooking for another 5 minutes.

Transfer the pork chops to a plate or platter, and cover with foil to help keep them warm while you make the sauce. Do NOT clean out the skillet, because any little browned bits left in there will help flavor the sauce!

The meat is seasoned and then pan-seared in olive oil in a hot skillet.The pork chops are seared until browned, and then flipped to cook the other side.

Prepare The Brown Sugar Sauce

Now it’s time to quickly make the brown sugar sauce for the pork chops. Add butter to the skillet you cooked the pork chops in, and melt it on low heat.

Once melted, add the brown sugar, Italian seasoning, and minced garlic. Stir well to combine, and cook for 1 minute, stirring constantly, so the garlic doesn’t burn.

The brown sugar sauce will bubble quite a bit, but keep stirring! After one minute, add the pork chops back into the skillet, and turn off the heat.

Melted butter, garlic, brown sugar and Italian seasoning combine to make sauce for pork chops.Brown sugar sauce for pork chops is cooked before adding pork chops.

Bake The Pork Chops

When the pork chops are back in the skillet, spoon enough of the sauce over each one to cover the top. Pop the skillet into a preheated 400°F. oven, and bake the chops (uncovered) for 12-15 minutes.

The pork chops are safely cooked through once they reach an internal temperature of 145-160°F.

Chops are added to sauce, and covered with sauce before baking.

Serve The Brown Sugar Pork Chops

Once the brown sugar pork chops are done baking, they’re ready to be served. Spoon more of the pan sauce over the top of each chop, and then garnish with lemon wedges, chopped chives (or parsley), if desired.

Brown sugar pork chops are garnished with chives and lemon wedges before serving.

Our favorite way to enjoy these yummy brown sugar pork chops is to serve them placed on top of a bed of mashed potatoes. The meat and slightly sweet sauce taste wonderful when paired with creamy, buttery potatoes!

You can also serve these tasty chops with buttered orzo pasta or egg noodles, but mashed potatoes remain our favorite choice! We enjoyed fresh steamed asparagus served on the side, too! Gotta get those veggies in!

My husband told me that this recipe for brown sugar pork chops is one of his favorites, and that makes me happy! I suspect these fantastic tasting pork chops will make your taste buds happy, too.

The brown sugar pork chops are served on mashed potatoes, with asparagus on the side.

Thanks for stopping by today. I sincerely hope you have the opportunity to make this delicious dish for yourself and those you love. Also, if you have an air fryer, be sure to try my recipe for Air Fryer Pork Chops For Two, a quick and delicious recipe you’ll love!

Take care, and have a great day. A complete, printable recipe card is located below, for your convenience.

Looking For More PORK CHOP Recipes?

You can find all of my pork recipes in the Recipe Index, which is located at the top of the page. I have quite a few pork chop recipes, including:

Want More Recipes? Get My FREE Newsletter!

I publish a newsletter 2 times per month (1st and 15th) with lots of recipes, tips, etc..
Would you like to join our growing list of subscribers?

There is a Newsletter subscription box on the top right (or bottom) of each blog post, depending on the device you use.
You can submit your e-mail address there, to be added to my mailing list.

Find Me On Social Media:

Facebook page: The Grateful Girl Cooks!
Pinterest:
The Grateful Girl Cooks!
Instagram:
jbatthegratefulgirlcooks

Author's signature

Original recipe source: dinneratthezoo.com/brown-sugar-pork-chops/

↓↓ PRINTABLE RECIPE BELOW ↓↓

4.5 from 4 votes
Brown Sugar Pork Chops
Prep Time
10 mins
Cook Time
25 mins
Total Time
35 mins
 

Brown Sugar Pork Chops are an easy and delicious dish, featuring seared pork chops baked in a simple garlic, butter, spices and brown sugar sauce!

Category: Entree
Cuisine: American
Keyword: brown sugar pork chops
Servings: 4
Calories Per Serving: 420 kcal
Author: JB @ The Grateful Girl Cooks!
Ingredients
  • 4 bone-in or boneless pork chops , approx. 1" thick
  • salt and pepper , enough to lightly season chops
  • 2 teaspoons extra-virgin olive oil
  • 3 Tablespoons butter
  • 3 Tablespoons brown sugar
  • 2 teaspoons minced garlic
  • 1 teaspoon Italian seasoning
Optional Garnish: chopped chives (or parsley), lemon wedges
    Instructions
    1. Preheat oven to 400°F. Pat pork chops dry with paper towels; lightly season BOTH sides with salt and pepper.

    2. Heat olive oil on medium-high heat in a large oven-proof skillet. Once oil is very hot (but not smoking), carefully add pork chops in one layer. They should sizzle when they hit the hot oil. Cook chops for 5-6 minutes, without moving them. Turn them over, and continue cooking the other side for 5 minutes. Transfer pork chops to a platter, and cover with foil to keep them warm. Do NOT clean out the skillet.

    3. Make the sauce: Melt butter on low heat using the same skillet. Add brown sugar, Italian seasoning, and minced garlic. Stir well, and cook for 1 minute, stirring constantly, so the garlic doesn't burn. Add pork chops back into the skillet, and turn off the heat.

    4. Spoon enough sauce over each pork chop to cover. Place skillet into 400°F. oven and bake (uncovered) for 12-15 minutes. The pork is safely cooked once the chops reach an internal temperature of 145-160°F. When done, they are ready to be served.

    5. To serve, spoon pan sauce over pork chops; garnish with lemon wedges, chopped chives (or parsley) if desired. Serve chops on a bed of mashed potatoes, orzo pasta, or egg noodles. Enjoy!

    Nutrition Facts
    Brown Sugar Pork Chops
    Amount Per Serving (1 pork chop)
    Calories 420 Calories from Fat 234
    % Daily Value*
    Fat 26g40%
    Saturated Fat 11g69%
    Cholesterol 140mg47%
    Sodium 171mg7%
    Potassium 603mg17%
    Carbohydrates 10g3%
    Fiber 1g4%
    Sugar 9g10%
    Protein 35g70%
    Vitamin A 262IU5%
    Vitamin C 1mg1%
    Calcium 55mg6%
    Iron 1mg6%
    * Percent Daily Values are based on a 2000 calorie diet.

    Here’s one more to pin on your Pinterest boards!Brown Sugar Pork Chops are an easy and delicious dish, featuring seared pork chops baked in a simple garlic, butter, spices and brown sugar sauce!

    Orange Herb Vinaigrette

    It’s EASY to make this delicious Orange Herb Vinaigrette in under 5 minutes, to add flavor and color to your favorite mixed green or couscous salads.
    It's EASY to make this delicious Orange Herb Vinaigrette in under 5 minutes, to add flavor and color to your favorite mixed green or couscous salads.

    If you’re looking for a new salad dressing that has a ton of flavor, may I suggest this orange herb vinaigrette? I originally found it in a recipe I was trying a few years ago, and have made this salad dressing many times since then.

    It only takes a few minutes to throw together, which is another win-win for busy folks, and it tastes great on orzo or couscous salads, as well as on a chilled mixed green salad. YUMMO! Here’s how to make this simple dressing:

    Scroll Down For A Printable Recipe Card At The Bottom Of The Page

    Ingredients Needed For Orange Herb Vinaigrette

    To make this orange herb vinaigrette you will need the following ingredients (shown below). They are oil, white wine vinegar, an orange, honey, and some dried spices (turmeric, tarragon, thyme, salt & pepper).

    I typically use vegetable oil for this vinaigrette, but you can substitute canola or grapeseed oil, as well, for the same great taste. It’s also helpful to have a microplane (seen in photo below) to finely grate or “zest” the orange peel. TIP: If you don’t have access to a microplane zester, use the smallest opening on a box grater. The orange “zest” is added, in addition to the juice of the orange, for an abundance of citrus flavor.

    The ingredients needed to make the vinaigrette salad dressing.

    Mix Up The Vinaigrette

    Just in case you’re wondering, I don’t mean “confuse the vinaigrette” when I say “mix up the vinaigrette”. OK? OK. Just makin’ sure we’re on the same page here (wink, wink). Place all the ingredients EXCEPT for the salt and pepper into a small bowl or measuring cup. Whisk well, with a wire whisk or a small fork, until the ingredients are fully combined and the vinaigrette has emulsified.

    To “emulsify” salad dressing means to mix so thoroughly that ingredients that normally don’t combine well (like oil and water), can “come together” in a way that transforms them into a stabilized unit. Most vinaigrettes are emulsified, to fully incorporate the vinegar and oil, which are pretty standard ingredients.

    Once the orange herb vinaigrette is fully mixed, it is ready to use on the salad.

    Ready To Serve!

    Once the vinaigrette has emulsified, season it lightly to taste, with the salt and ground black pepper. Give it another quick stir, and the vinaigrette is ready to be used.

    Drizzle this salad dressing over your favorite mixed green salad, orzo or couscous salad. In the photo below, you can the vinaigrette being drizzled over my Cranberry Orange Israeli Couscous. It tastes FANTASTIC! Hope you like it, too.

    The orange herb vinaigrette is poured on an Israeli couscous salad and then tossed.

    In no time at all you can create this wonderful homemade salad dressing. I’m confident you will enjoy it, using your own ingredients, and made in your own kitchen. Thanks for stopping by today, and spending some of your valuable time on this blog. Take care, and have a great day. See below for the printable recipe card.

    Looking For More SALAD DRESSING Recipes?

    You can find all of my salad dressing recipes in the Recipe Index, located at the top of the page. I have quite a few, including:

    Interested In More Recipes?

    Thank you for visiting this website. I appreciate you using some of your valuable time to do soIf you’re interested, I publish a newsletter 2 times per month (1st and 15th) with all the latest recipes, and other fun info. I would be honored to have you join our growing list of subscribers, so you never miss a great recipe!
    There is a Newsletter subscription box on the top right side (or bottom) of each blog post, depending on the device you use, where you can easily submit your e-mail address (only) to be included in my mailing list.

    You Can Also Find Me On Social Media:
    Facebook page: The Grateful Girl Cooks!
    Pinterest: The Grateful Girl Cooks!
    Instagram: jbatthegratefulgirlcooks

    Author's signature

    Original recipe source (a blog no longer around): http://artisinalfood.blogspot.com/2011/12/israeli-couscous-with-cranberries-and.html

    0 from 0 votes
    Orange Herb Vinaigrette
    Prep Time
    5 mins
    Cook Time
    0 mins
    Total Time
    5 mins
     

    It's EASY to make this delicious Orange Herb Vinaigrette in under 5 minutes, to add flavor and color to your favorite mixed green or couscous salads.

    Category: Salad, Salad Dressing
    Cuisine: All Cuisines
    Keyword: orange herb vinaigrette
    Servings: 8 Tablespoons (approx. 1/2 cup)
    Calories Per Serving: 62 kcal
    Author: JB @ The Grateful Girl Cooks!
    Ingredients
    • 3 Tablespoons vegetable oil (or canola/grapeseed oil)
    • Tablespoons white wine vinegar
    • 1 Tablespoon honey
    • 1 medium orange (juice and zest)
    • ½ teaspoon turmeric
    • ½ teaspoon dried thyme
    • ½ teaspoon dried tarragon
    • salt/pepper, to taste
    Instructions
    1. Place all ingredients EXCEPT for salt and pepper in a small bowl or measuring cup. Whisk well, with a wire whisk or a small fork, until the ingredients are fully combined and the vinaigrette has emulsified. NOTE: To "emulsify" salad dressing means to mix so thoroughly that ingredients that normally don't combine well (like oil and water), can "come together" in a way that transforms them into a stabilized unit.

    2. Season lightly with salt and black pepper, to taste. Stir again, and then drizzle over salad to serve.

    3. Store any leftover vinaigrette in a sealed container in the refrigerator for up to 2-3 days. Remove vinaigrette from refrigerator a few minutes before serving, and stir well, to re-blend before using.

    Nutrition Facts
    Orange Herb Vinaigrette
    Amount Per Serving (1 Tablespoon)
    Calories 62 Calories from Fat 45
    % Daily Value*
    Fat 5g8%
    Saturated Fat 4g25%
    Sodium 1mg0%
    Potassium 30mg1%
    Carbohydrates 4g1%
    Fiber 1g4%
    Sugar 4g4%
    Protein 1g2%
    Vitamin A 37IU1%
    Vitamin C 9mg11%
    Calcium 8mg1%
    Iron 1mg6%
    * Percent Daily Values are based on a 2000 calorie diet.

    Here’s one more to pin on your Pinterest boards!It's EASY to make this delicious Orange Herb Vinaigrette in under 5 minutes, to add flavor and color to your favorite mixed green or couscous salads.