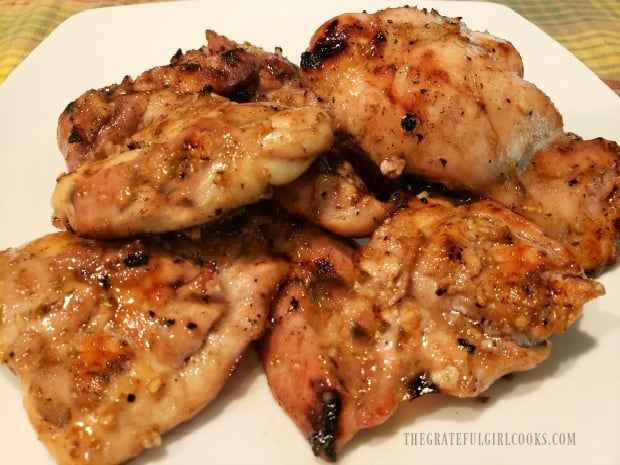
Creamy Mushroom Chicken Thighs

Delicious Creamy Mushroom Chicken Thighs are pan-seared, then covered in a cream sauce with garlic, mushrooms, herbs, and Parmesan cheese to serve!

If you’re looking for a delicious chicken recipe, may I suggest THIS ONE? It is so good! In a nutshell, you brown seasoned chicken thighs, make a quick sauce with milk or cream, mushrooms, garlic, herbs and cheese, then cover the chicken with sauce, and serve! We LOVE this dish!

The sauce is creamy, thanks in part to using either whipping cream, half and half OR canned evaporated milk. It’s your choice! I use evaporated milk for less calories, but if calories don’t matter, go for the whipping cream or half and half. YUM! Several of the spices used double up, meaning the same spices are used to season the chicken AND the sauce.

The recipe is easy to follow, and I recommend serving the finished chicken on top of brown or white rice, or egg noodles, for a filling main course! Hope you enjoy it! Here’s the “play by play” on how to make this wonderful dish:

Scroll Down for A Printable Recipe Card At The Bottom Of The Page

Season The Chicken Thighs

The first thing you will need to do is make the seasoning mix for the chicken. It’s EASY! Simply stir together garlic powder, onion powder, dried thyme and rosemary, along with salt and black pepper.

Pat the boneless, skinless chicken thighs dry with paper towels, and trim off any extra fat. Sprinkle the spice mixture evenly over the chicken thighs, and pat gently to adhere the spices.

A dry spice mix is made to season chicken thighs.Boneless, skinless chicken thighs are seasoned with spices and are ready to cook.

Brown The Chicken

Measure 2 Tablespoons of olive oil into a large skillet. Heat on medium-high heat. Once oil is hot, but not smoking, carefully add the chicken spice side down, in a single layer. Once they are in the skillet, do not move the chicken. Sear the thighs in the hot oil about 7-8 minutes, or until browned.

Carefully turn the chicken to the other side, and cook for an additional 7-8 minutes. Depending on the thickness of the chicken thighs used, this may take a minute or two longer. Cook until second side is browned, and the center of the chicken is no longer pink. Once the chicken is cooked, remove thighs from the skillet, transfer to a plate, and cover to keep them warm while you make the sauce.

NOTE: If you have to cook the chicken in batches, due to skillet size, cook each batch in 1 Tablespoon oil (half of the total amount).

Seasoned chicken thighs are pan-seared in hot olive oil in skillet.The chicken thighs are cooked on both sides until golden brown.

Prepare The Creamy Mushroom Garlic Sauce

Now it’s time to make the creamy sauce. Use the same skillet you used to cook the chicken in, but do NOT clean it. All the brown bits on the bottom will help to flavor your creamy mushroom garlic sauce!

Melt the butter in the skillet (medium heat), and then add the sliced mushrooms. Cook the mushrooms for about 2-3 minutes until they soften. Now add minced garlic, thyme, rosemary, and parsley to the skillet. Stir to combine, and cook for one more minute, stirring often, so the garlic doesn’t burn.

Sliced mushrooms are first cooked in skillet to begin creating a sauce.Garlic and herbs are added to the cooked mushrooms in skillet

Finish The Creamy Sauce

Pour in the whipping cream, half and half, OR evaporated milk (your choice). Any of those three will work perfectly. NOTE: I used evaporated milk (less calories) in the sauce, and it was delicious! Bring the liquid to a simmer (on medium heat). Once it is simmering (but NOT boiling), reduce the heat to LOW.

Keep on cooking the sauce until the liquid has reduced in volume a bit, and has thickened slightly. Add freshly grated Parmesan cheese, and stir to combine. Continue cooking for about 1-2 minutes, or until the cheese has melted. Add the chicken thighs back into the skillet and spoon sauce over the top of each piece.

Cream or evaporated milk is added to the mushrooms to make a sauce.Cooked chicken thighs are added back into sauce and covered.

Finish The Creamy Mushroom Chicken Thighs!

Cook the chicken and sauce until heated through (this will take a couple minutes). Stir and spoon sauce over the chicken while it reheats. Taste test the sauce, and add additional salt and pepper, to suit your taste.

Right before serving, sprinkle the top of the creamy mushroom chicken thighs with grated Parmesan and chopped fresh parsley, if desired. This is optional, but it sure looks great!

Grated Parmesan cheese and parsley are added to garnish creamy mushroom chicken thighs.

Ready To Serve Creamy Mushroom Chicken Thighs

Transfer the chicken thighs to a serving platter and spoon any of the sauce left in the skillet over the pieces. Serve each piece of chicken on top of a bed of white or brown rice (or egg noodles), top with sauce, and enjoy!

Creamy Mushroom Chicken Thighs are served on a white platter.The chicken thighs were served on brown rice, with green beans on the side.

I really hope you will consider trying this delicious recipe for creamy mushroom chicken thighs! The sauce is delicious, and the chicken tastes WONDERFUL! May you find moments of great joy as you go throughout your day. God Bless You.

Looking For More CHICKEN Recipes?

You can find all of my recipes in the Recipe Index, located at the top of the page. I have a lot of chicken recipes you’ll enjoy, including:

Interested In More Recipes?

Thank you for visiting this website. I appreciate you using some of your valuable time to do soIf you’re interested, I publish a newsletter 2 times per month (1st and 15th) with all the latest recipes, and other fun info. I would be honored to have you join our growing list of subscribers, so you never miss a great recipe!
There is a Newsletter subscription box on the top right side (or bottom) of each blog post, depending on the device you use, where you can easily submit your e-mail address (only) to be included in my mailing list.

You Can Also Find Me On Social Media:
Facebook page: The Grateful Girl Cooks!
Pinterest: The Grateful Girl Cooks!
Instagram: jbatthegratefulgirlcooks

Author's signature

Original recipe source: Karina, at cafedelites.com/chicken-thighs/

0 from 0 votes
Creamy Mushroom Chicken Thighs
Prep Time
10 mins
Cook Time
20 mins
Total Time
30 mins
 

Delicious Creamy Mushroom Chicken Thighs are pan-seared, then covered in a cream sauce with garlic, mushrooms, herbs, and Parmesan cheese to serve!

Category: Dinner, Entree
Cuisine: American
Keyword: creamy mushroom chicken thighs
Servings: 6
Calories Per Serving: 327 kcal
Author: JB @ The Grateful Girl Cooks!
Ingredients
For Chicken/Spice Mix:
  • 6 medium chicken thighs (boneless, skinless)
  • 1 teaspoon garlic powder
  • 1 teaspoon onion powder
  • ½ teaspoon dried thyme
  • ½ teaspoon dried rosemary
  • ½ teaspoon salt
  • ¼ teaspoon black pepper
  • 2 Tablespoons olive oil
For Mushroom Sauce:
  • 1 Tablespoon butter
  • 8 ounces sliced mushrooms (button)
  • 4 cloves garlic (minced) (or 1 Tablespoon minced)
  • 1 Tablespoon parsley (fresh, chopped)
  • ½ teaspoon dried rosemary
  • ½ teaspoon dried thyme
  • cups evaporated milk (canned)* *can substitute whipping cream/half and half)
  • ½ cup Parmesan cheese , grated
Instructions
  1. Stir together garlic powder, onion powder, thyme, rosemary, salt and pepper in a small bowl. Pat chicken thighs dry with paper towels, and trim off any extra fat. Sprinkle spice mixture evenly over chicken, and pat gently, to adhere spices.

  2. Heat olive oil in a large skillet on medium-high heat. Once oil is hot, but not smoking, carefully add chicken (spice side down), in a single layer. Once in skillet, do not move chicken. Sear the thighs for 7-8 minutes, until browned on bottom. Carefully turn chicken to other side; cook another 7-8 minutes. Depending on chicken thickness used this may take 1-2 minutes longer. Cook until second side is browned, and center of chicken is no longer pink. Once done, remove thighs from skillet, transfer to a plate, and cover them to keep warm. NOTE: If you have to cook chicken in batches, due to skillet size, cook each batch in 1 Tablespoon oil (half of the total amount).

  3. Make sauce: Use the same skillet, but do NOT clean it. All the brown bits in the skillet will help flavor sauce! Melt butter (medium heat), and then add mushrooms. Cook 2-3 minutes until they soften. Add minced garlic, thyme, rosemary, and parsley. Stir to combine; cook for 1 minute, stirring often so garlic doesn't burn.

  4. Pour in evaporated milk, whipping cream, OR half and half (your choice). Bring liquid to a simmer (medium heat). Once simmering (but NOT boiling), reduce heat to LOW. Continue cooking until liquid has reduced in volume and thickened slightly (1-2 minutes). Add grated Parmesan cheese; stir to combine. Cook 1-2 minutes, or until cheese melts. Add chicken thighs back into skillet and spoon sauce over each piece. Cook until chicken is heated through (2-3 minutes).

  5. Serve chicken on a bed of steamed rice or egg noodles, topped with additional sauce. Serve and enjoy!

Nutrition Facts
Creamy Mushroom Chicken Thighs
Amount Per Serving (1 thigh + sauce)
Calories 327 Calories from Fat 162
% Daily Value*
Fat 18g28%
Saturated Fat 7g44%
Cholesterol 137mg46%
Sodium 516mg22%
Potassium 613mg18%
Carbohydrates 9g3%
Fiber 1g4%
Sugar 7g8%
Protein 31g62%
Vitamin A 360IU7%
Vitamin C 4mg5%
Calcium 279mg28%
Iron 2mg11%
* Percent Daily Values are based on a 2000 calorie diet.

Here’s one more to pin on your Pinterest boards!Delicious Creamy Mushroom Chicken Thighs are pan-seared, then covered in a cream sauce with garlic, mushrooms, herbs, and Parmesan cheese to serve!


Homemade Teriyaki Marinade

Make easy homemade teriyaki marinade in 5 minutes! This Asian-inspired sauce flavors and tenderizes chicken, steak, pork & seafood, before cooking.

Why buy teriyaki marinade when it is so very easy to make it at home? Especially with this coronavirus quarantine going on right now. You can make your own from HOME! This handy dandy marinade can be made quickly to enhance many meat entrees. It’s so quick and easy to make, it sure can save time running to the store!

Marinating is an easy way to basically BATHE the chicken (or other meats) in FLAVOR! A marinade helps to tenderize meats and permeate them with delicious seasoning that will carry over into the cooking process!

This homemade teriyaki marinade is fantastic, and I’ve used it so many times over the course of MANY years! My favorite way to use this sauce is on chicken, which you can see in my photos below. I adapted this recipe from several of my own recipes that use different types of teriyaki sauce or glaze. Today I want to share the quick recipe with you.

Scroll Down for A Printable Recipe Card At The Bottom Of The Page

It’s EASY To Make Homemade Teriyaki Marinade!

To make the marinade, you will need a medium sized mixing bowl, a whisk, and 7 ingredients (including water). Place all of the marinade ingredients into the bowl.

The ingredients for the marinade are low sodium soy sauce, honey, brown sugar, garlic, fresh ginger, apple cider vinegar and water. Whisk these together until the honey is fully dissolved, and the ingredients are fully combined. See all that minced garlic? YUM!

Ingredients for homemade teriyaki marinade are whisked together in a bowl.

Marinating Chicken Breasts

This recipe makes enough marinade to coat 4 large chicken breasts. When I took these photos I made a full batch of marinade (as written in the recipe below), but was only cooking two chicken breasts, as you can see. The recipe is EASILY doubled or tripled, however, depending on the quantity you will need.

Place the mixed marinade into a resealable storage bag or into a covered container. Add the fresh or thawed chicken (or other meat you are marinating). Seal the bag. Use your hands to “smoosh” the bag around so the chicken becomes fully covered in marinade. If using a container, cover the chicken with marinade using a spoon, or by dredging all sides in the sauce, until covered. Place a lid on the container.

Chicken breasts are added to the marinade in a resealable bag.The teriyaki marinade covers the meat to give it flavor.

Marinating Time!

Place the sealed bag or covered container into the refrigerator to let the meat marinate. The time to marinate will depend on the recipe you are using. Follow your recipe’s directions for length of marinating time, but I would recommend always at least 30 minutes for peak flavors to permeate the meat!  Once done marinating, remove the chicken (or other meat) from the marinade, and let the excess drain off. Discard the marinade that has been in contact with raw meat.

NOTE: When we grill teriyaki chicken or steak outside, I set aside a few Tablespoons of the marinade BEFORE adding the meat. We can then use the reserved marinade to brush on the chicken or steak while they’re on the grill.

Two chicken breasts after being marinated for 30 minutes.

Time To Cook The Marinated Meat

We enjoy teriyaki chicken or steak, cooked over hot coals on our Weber BBQ, as weather permits. We live in Oregon, so we BBQ outside as often as we can, when it is not raining.

Teriyaki chicken breasts cooking on a Weber BBQ.

Marinated meats, like these chicken breasts can also be cooked indoors on a cast iron grill, on a George Foreman electric grill, or baked or broiled in the oven! However you choose to cook the meat, the teriyaki flavor will shine through!

Chicken breasts with homemade teriyaki marinade cooking on cast iron grill.

I hope you enjoy this delicious homemade teriyaki marinade. It really will enhance the flavor of your favorite cuts of meats! Have a great day, and thank you for stopping by. Hope you stay healthy and full of hope! We are all in this together!

Looking For Other SAUCE Recipes?

You can find all of my recipes in the Recipe Index, located at the top of the page. A few different sauces you might enjoy include:

Interested In More Recipes?

Thank you for visiting this website. I appreciate you using some of your valuable time to do soIf you’re interested, I publish a newsletter 2 times per month (1st and 15th) with all the latest recipes, and other fun info. I would be honored to have you join our growing list of subscribers, so you never miss a great recipe!
There is a Newsletter subscription box on the top right side (or bottom) of each blog post, depending on the device you use, where you can easily submit your e-mail address (only) to be included in my mailing list.

You Can Also Find Me On Social Media:
Facebook page: The Grateful Girl Cooks!
Pinterest: The Grateful Girl Cooks!
Instagram: jbatthegratefulgirlcooks

Author's signature

0 from 0 votes
Homemade Teriyaki Marinade
Prep Time
5 mins
Cook Time
0 mins
Total Time
5 mins
 

Make easy homemade teriyaki marinade in 5 minutes! This Asian-inspired sauce flavors and tenderizes chicken, steak, pork & seafood, before cooking.
Category: Condiments, Marinades, Sauces
Cuisine: Asian
Keyword: homemade teriyaki marinade
Servings: 1
Calories Per Serving: 230 kcal
Author: JB @ The Grateful Girl Cooks!
Ingredients
  • cup soy sauce (low sodium, preferably)
  • 2 Tablespoons water
  • 2 Tablespoons honey
  • 1 Tablespoon brown sugar , light or dark
  • 2 cloves garlic , minced
  • 1 teaspoon fresh ginger , finely grated
  • 1 teaspoon apple cider vinegar
Instructions
  1. Measure soy sauce, honey, brown sugar, garlic, fresh ginger, apple cider vinegar and water into a medium sized mixing bowl. Whisk until the honey is fully dissolved, and ingredients are fully combined.

  2. NOTE: When we grill teriyaki chicken or steak outside, I set aside a few Tablespoons of the marinade BEFORE adding the meat. We then use the reserved marinade to brush on the chicken or steak while they're over the hot fire, to help keep them moist.

  3. Pour marinade into a resealable storage bag or container with a lid. Add fresh or thawed chicken (or other meat you are marinating). Seal the bag. Use your hands to "smoosh" the bag around so the meat becomes fully covered in marinade. If using a container, cover the chicken with marinade using a spoon, or by dredging all sides in the sauce, until covered. Place a lid on the container. Refrigerate/marinate meat for length of time specified in YOUR recipe. I recommend a minimum of 30 minutes, though, for best flavor! When finished marinating, drain excess from meat, and discard the marinade that has been in contact with the raw meat.

  4. Proceed with your recipe directions from this point forward. Enjoy!

Recipe Notes

NOTE: The caloric calculation is for the entire batch of marinade, which is enough to cover 4 chicken breasts.

Nutrition Facts
Homemade Teriyaki Marinade
Amount Per Serving (1 g)
Calories 230 Calories from Fat 9
% Daily Value*
Fat 1g2%
Saturated Fat 1g6%
Sodium 2840mg123%
Potassium 153mg4%
Carbohydrates 56g19%
Fiber 1g4%
Sugar 48g53%
Protein 5g10%
Vitamin C 2mg2%
Calcium 25mg3%
Iron 2mg11%
* Percent Daily Values are based on a 2000 calorie diet.

Here’s one more to pin on your Pinterest boards!Make easy homemade teriyaki marinade in 5 minutes! This Asian-inspired sauce flavors and tenderizes chicken, steak, pork & seafood, before cooking.

Zucchini Nut Bread

This simple recipe for zucchini nut bread yields two standard-sized loaves. The bread is EASY to make (honest!), and tastes absolutely delicious!This simple recipe for zucchini nut bread yields two standard-sized loaves. The bread is EASY to make (honest!), and tastes absolutely delicious!

My husband and I are spending “quality time” staying at home during the ongoing viral health scare currently spreading it’s reach around the world.

A few days ago I decided to make a couple loaves of my old “stand by” zucchini nut bread recipe to have around the house, for us to enjoy for breakfast or an afternoon snack, as we “hunker down”.

This delicious recipe makes two standard sized loaves of zucchini bread, which equals out to about 16 slices. Since it is a very easy recipe to prepare, it was a fantastic way to use one of my large zucchinis in the fridge, to make several breakfasts (or snacks).

This is a wonderful slightly sweet, cinnamon spiced bread, and it tastes wonderful! Here’s how to make it:

Scroll Down For A Printable Recipe Card At The Bottom Of The Page

Prepare The Batter For Zucchini Nut Bread

Place the eggs in a large mixing bowl (or the base of a stand mixer), and lightly beat them. Add granulated sugar, vegetable oil, and vanilla extract to the eggs.

Mix well (with stand mixer or hand held electric mixer), to fully combine these “wet ingredients”.

Eggs, sugar, oil, and vanilla are mixed together in large bowl.

Preparing The Zucchini

Grate the zucchini onto absorbent paper towels, leaving the peel ON. Once you’re finished grating, lightly press the zucchini with more paper towels, to dry the zucchini and remove LOTS of moisture.

Add the grated zucchini to the wet ingredients in the bowl, and beat again, just until the ingredients are combined.

Unpeeled zucchini is grated, then dabbed with paper towels to absorb moisture.The grated zucchini is added to the wet bread ingredients and mixed together.

Now add the dry ingredients (flour/cinnamon/salt/baking soda and baking powder) to the wet ingredients, and mix until everything is combined.

If you are using a stand mixer, once the ingredients are fully combined, remove the bowl from the base.

The "dry" ingredients are then combined with the "wet" ingredients in bowl.

STIR in the chopped pecans (or walnuts, if using). Whoo Hoo… that’s it! Now the batter for your zucchini nut bread is ready to bake!

Chopped pecans (or walnuts) are stirred into the bread batter.

Baking The Zucchini Nut Bread

Lightly grease or spray two 9×5″ bread loaf pans on the bottom and sides. Divide the zucchini nut bread batter between the two pans.

Place the pans on the middle rack in a preheated 325°F oven. Bake for 1 hour, or until a toothpick inserted into the top of the bread comes out clean.

Remove the baking pans to a wire rack and let cool for 10-15 minutes, before attempting to remove the zucchini nut bread from the pan. When ready to remove, run a butter knife around the edges of the pan, then turn pan over, to release the bread.

Zucchini nut bread batter is evenly divided into 2 greased loaf pans to bake.Here are the golden brown loaves of zucchini nut bread. hot from the oven.

Time To Slice The Bread And EAT!

Once the bread has been removed from the pan, and has cooled slightly, you can slice into this yummy treat, and serve it! We always enjoy  cutting a slice of zucchini nut bread, and eating it with some butter spread on it. YUM! It’s so good, and has a slight cinnamon flavor, too!

CAN YOU FREEZE THIS BREAD? YES!!!! We usually eat one loaf and freeze the other. If freezing, let the loaf (or loaves) completely cool down.

Once cool, wrap each loaf tightly in plastic wrap, and then in aluminum foil, and store in the freezer, to have a loaf to enjoy another time!


Cooling loaves of bread on wire racks, before slicing.One slice of warm zucchini nut bread, smeared with butter, and ready to eat!

Hope you enjoy this recipe for zucchini nut bread! Thank you for taking the time to stop by for a visit. Have a wonderful day, even if circumstances look less than optimal. Beauty and joy can be found all around, if you earnestly seek to find it.

May God bless you (and those you love) with good health and deep love for each other. Hang in there!

Looking For Other “SWEET” BREAD Recipes?

You can find ALL of my recipes in the Recipe Index, which is located at the top of the page. I have some delicious “sweet” bread recipes you might enjoy, including:

Want More Recipes? Get My FREE Newsletter!

I publish a newsletter 2 times per month (1st and 15th) with lots of recipes, tips, etc..
Would you like to join our growing list of subscribers?

There is a Newsletter subscription box on the top right (or bottom) of each blog post, depending on the device you use.
You can submit your e-mail address there, to be added to my mailing list.

Find Me On Social Media:

Facebook page: The Grateful Girl Cooks!
Pinterest:
The Grateful Girl Cooks!
Instagram:
jbatthegratefulgirlcooks

Author's signature

Original recipe source: unknown (found in an old recipe box many years ago, handwritten on a 3×5 index card)

↓↓ PRINTABLE RECIPE BELOW ↓↓

0 from 0 votes
Zucchini Nut Bread
Prep Time
15 mins
Cook Time
1 hr
Total Time
1 hr 15 mins
 

This simple recipe for zucchini nut bread yields two standard-sized loaves. The bread is EASY to make (honest!), and tastes absolutely delicious!

Category: Bread, Breakfast, Snack
Cuisine: American
Keyword: zucchini nut bread
Servings: 16 (2 loaves)
Calories Per Serving: 263 kcal
Author: JB @ The Grateful Girl Cooks!
Ingredients
  • 3 large eggs , lightly beaten
  • 2 cups granulated sugar
  • 1 cup vegetable oil
  • 3 teaspoons vanilla extract
  • 2 cups unpeeled, grated zucchini (approx. 1 large zucchini)
  • 3 cups all purpose flour
  • 3 teaspoons ground cinnamon
  • 1 teaspoon baking soda
  • 1 teaspoon salt
  • ¼ teaspoon baking powder
  • 1 cup chopped pecans (or walnuts)
  • non stick spray or grease (for pans)
Instructions
  1. Preheat oven to 325°F. Grease or spray two 9x5 loaf pans on the bottom and sides. Set aside.

  2. Place eggs in large mixing bowl (or the base of a stand mixer), and beat lightly. Add granulated sugar, vegetable oil and vanilla. Mix well (with stand mixer or hand held electric mixer), to combine.

  3. Grate unpeeled zucchini onto absorbent paper towels. Once done, press zucchini with more paper towels, to remove LOTS of moisture. Add zucchini to wet ingredients in bowl, and beat again, just until incorporated. Add flour/cinnamon/salt/baking soda and baking powder, and mix until everything is combined. STIR in the chopped pecans (or walnuts, if using).

  4. Divide batter between two greased loaf pans. Place pans on middle rack in preheated oven. Bake for 1 hour, or until a toothpick inserted into top of the bread comes out clean. Transfer baking pans to a wire rack; let cool 10-15 minutes, before attempting to remove bread. To remove, run a butter knife around the edges of the pan, then turn pan over, to release bread. Let cool (if desired), then slice and enjoy!

Recipe Notes

NOTE: If freezing, let bread cool completely. Wrap loaf in plastic wrap, then in aluminum foil, and store in freezer.

Nutrition Facts
Zucchini Nut Bread
Amount Per Serving (1 slice (1/16th of total))
Calories 263 Calories from Fat 63
% Daily Value*
Fat 7g11%
Saturated Fat 2g13%
Cholesterol 40mg13%
Sodium 231mg10%
Potassium 119mg3%
Carbohydrates 45g15%
Fiber 1g4%
Sugar 26g29%
Protein 5g10%
Vitamin A 88IU2%
Vitamin C 3mg4%
Calcium 26mg3%
Iron 2mg11%
* Percent Daily Values are based on a 2000 calorie diet.

Here’s one more to pin on your Pinterest boards!This simple recipe for zucchini nut bread yields two standard-sized loaves. The bread is EASY to make (honest!), and tastes absolutely delicious!

Bacon Broccoli Pasta Casserole

Enjoy bacon broccoli pasta casserole, a cheesy, family-friendly baked dish with bacon, Parmesan, mozzarella, mushrooms, carrots, onions and broccoli.

Do you enjoy casseroles? We do, and I especially enjoy having leftovers, which are fantastic to have around for lunches or another dinner. Today I want to share with you a recipe I came up with “on the fly”. I simply used food items I found in my pantry and refrigerator, and experimented with, until I ended up with a wonderful tasting dish!

The casserole is fully prepped on the stove top in a large saucepan (or Dutch Oven), and then it is finished by baking for 15 minutes. It has great flavor, and is fairly simple to prepare. Here’s how:

Scroll Down For A Printable Recipe Card At The Bottom Of The Page

Cook the Bacon, Carrot And Onions

The first thing you will need to do is to cook the bacon, chopped onions and grated carrots. Stack the bacon slices on top of each other, and then cut into 1″ wide pieces. This will allow the bacon to cook faster.

Place the sliced bacon in a large saucepan (or Dutch Oven), and cook it on medium-high heat, stirring often to separate bacon pieces.  Once the bacon has cooked for a 2-3 minutes, add the butter, chopped onions and grated carrots to the pan. Stir to combine, and continue to cook until bacon is cooked through (approx. 5 minutes).

Bacon pieces, chopped onions, are grated carrots are prepped then cooked together.

Add Liquids, Mushrooms And Pasta

Pour a can of cream of mushroom soup, a can of mushroom slices (drained), and water into the saucepan with the bacon, etc. Season with salt and pepper, and stir to combine. Bring this to a boil on medium heat.

Once the liquid is boiling in the pan, add four cups of dry bowtie pasta, and stir to combine. Once the pasta has been added, turn down the heat to LOW, and cover the pan. Cook for approximately 15 minutes, or until pasta is fully cooked. Stir occasionally.

Mushrooms, cream of mushroom soup, water and seasoning cook in large saucepan.Bow tie pasta noodles are added, to cook in the liquid in saucepan.

Add Broccoli And Cheeses

After the pasta is fully cooked, add cooked broccoli, mozzarella and part of the Parmesan cheese (1/4 cup) to the pan. Stir and cook for 4-5 more minutes, so the cheeses will melt into the pasta.

Cooked broccoli, mozzarella and Parmesan cheeses are added to the saucepan.

Time To Bake The Bacon Broccoli Pasta Casserole!

Spray a casserole dish with non-stick baking spray. Pour the bacon pasta casserole into the dish, and spread to cover. Sprinkle the top with the remaining grated Parmesan cheese, and then cover the pan with aluminum foil.

Bake the bacon broccoli pasta casserole in a preheated 350°F oven for 15 minutes. When done, remove the casserole from the oven, and serve.

Bacon broccoli pasta casserole is placed in baking dish and topped with Parmesan to bake.Here is the hot casserole after being removed from the oven.

Portion out the bacon broccoli pasta casserole into individual serving bowls or onto plates, and then dig in! There are a lot of flavors to enjoy in this tasty dish!

A bowl of the bacon broccoli pasta casserole, ready to eat.A close-up look at the pasta casserole, before it is eaten.

I really hope you enjoy this bacon broccoli pasta casserole. Yes, there are a few prep steps involved, but the end result is a lovely pasta casserole you (and those you love) can enjoy! Have a wonderful day.

Looking for More CASSEROLE RECIPES?

You can find all of my recipes in the Recipe Index, located at the top of the page. I have several casserole dishes you might enjoy, including:

Interested In More Recipes?

Thank you for visiting this website. I appreciate you using some of your valuable time to do soIf you’re interested, I publish a newsletter 2 times per month (1st and 15th) with all the latest recipes, and other fun info. I would be honored to have you join our growing list of subscribers, so you never miss a great recipe!
There is a Newsletter subscription box on the top right side (or bottom) of each blog post, depending on the device you use, where you can easily submit your e-mail address (only) to be included in my mailing list.

You Can Also Find Me On Social Media:

Facebook page: The Grateful Girl Cooks!
Pinterest: The Grateful Girl Cooks!
Instagram: jbatthegratefulgirlcooks

Author's signature

0 from 0 votes
Bacon Broccoli Pasta Casserole
Prep Time
30 mins
Cook Time
15 mins
Total Time
45 mins
 

Enjoy bacon broccoli pasta casserole, a cheesy, family-friendly baked dish with bacon, Parmesan, mozzarella, mushrooms, carrots, onions and broccoli.

Category: Casserole, Main Course
Cuisine: American
Keyword: bacon broccoli pasta casserole
Servings: 6
Calories Per Serving: 386 kcal
Author: JB @ The Grateful Girl Cooks!
Ingredients
  • 6 slices bacon
  • 1 Tablespoon butter
  • cup brown onion chopped
  • 3 medium carrots grated
  • 10½ ounces cream of mushroom soup (canned)
  • 4 ounces canned mushrooms (sliced) , drained
  • cups water
  • ½ teaspoon salt and pepper ( ½ tsp. each)
  • 4 cups bow-tie pasta (12 ounce box)
  • 1 cup broccoli , pre-cooked and cut into small florets
  • cup shredded mozzarella cheese
  • ¾ cup grated Parmesan cheese divided (reserve ½ C. for topping)
Instructions
  1. Stack bacon slices on top of each other, and cut into 1" wide pieces. Place bacon in a large saucepan (or Dutch Oven); cook for 2-3 minutes on medium-high heat, stirring often to separate pieces.  Add butter, chopped onions and grated carrots to pan. Stir to combine, and continue to cook until bacon is cooked through (approx. 5 minutes).

  2. Add cream of mushroom soup, mushroom slices (drained), and water into the saucepan with bacon, etc. Season with salt and pepper; stir to combine. Bring to a boil on medium heat. Once boiling, dry pasta; stir to combine. Turn down heat to LOW, and cover pan. Cook (covered) for approx. 15 minutes, or until pasta is fully cooked. Stir occasionally. While this is cooking, preheat oven to 350°F.

  3. Add cooked broccoli, mozzarella and 1/4 cup of the Parmesan cheese to the pasta. Cook 3-4 minutes on low, stirring often, until cheese has melted.

  4. Spray an oven-proof casserole dish with non-stick baking spray. Pour pasta casserole into dish. Sprinkle with remaining Parmesan cheese, and cover dish with aluminum foil.

  5. Bake the bacon broccoli pasta casserole at 350°F for 15 minutes. When done, remove casserole from oven, remove foil, and serve.

Nutrition Facts
Bacon Broccoli Pasta Casserole
Amount Per Serving (1 (1/6 of total))
Calories 386 Calories from Fat 162
% Daily Value*
Fat 18g28%
Saturated Fat 8g50%
Cholesterol 38mg13%
Sodium 1047mg46%
Potassium 394mg11%
Carbohydrates 39g13%
Fiber 3g13%
Sugar 4g4%
Protein 18g36%
Vitamin A 5398IU108%
Vitamin C 16mg19%
Calcium 202mg20%
Iron 1mg6%
* Percent Daily Values are based on a 2000 calorie diet.

Here’s one more to pin on your Pinterest boards!Enjoy bacon broccoli pasta casserole, a cheesy, family-friendly baked dish with bacon, Parmesan, mozzarella, mushrooms, carrots, onions and broccoli.

Easy Potato Chowder

Make four servings of yummy, filling, easy potato chowder in about 30 minutes, from start to finish, using a few simple and common ingredients!

My mom used to make this easy potato chowder for our family as I was growing up. The recipe is incredibly EASY, inexpensive, and can be made fairly quickly (about 30 minutes) with common pantry items. It is a delicious, filling soup, which tastes wonderful on a chilly day!

The end result is a creamy chowder with cubes of tender potatoes, celery, and onions, seasoned with salt, pepper, butter, and a few green onions for garnish. These simple ingredients, along with milk, make up this delicious potato chowder! Here’s how easy it is to make!

Scroll Down For A Printable Recipe Card At The Bottom Of The Page

Prepare The Veggies

First things first… prepare the veggies! Chop onions, thinly slice celery, and peel and cut the potato into small 1″ cubes. Don’t make the cubes of potato too big, so they will cook fairly quickly. NOTE: I used Russet potatoes, but other varieties can be easily substituted.

Melt butter in a large saucepan, and then add the chopped onions and sliced celery. Cook on medium heat, stirring often, for 4-5 minutes, until the onions and celery have softened.

Chopped onions and celery are cooked in butter to tenderize.

Add the cubed raw potatoes to the saucepan, and stir to combine. Continue to cook on medium heat for 10 minutes, stirring often. The small cubes of potato will begin to soften as they cook.

Cubed raw potatoes are added to onions, celery and butter in pan to cook and soften.

Season Veggies And Add Flour To Thicken Chowder

After the potatoes have cooked for 10 minutes (and have become tender), remove the pan from the heat. Season the veggies with salt and black pepper. Add the all purpose flour to the pan, and stir to fully combine. The flour coats the vegetables, and will act as a thickener for the chowder, once the milk has been added.

The potatoes are seasoned with salt and pepper.Flour is added into the potatoes to thicken soup as it cooks.

Time To Turn This Into Easy Potato Chowder!

Now it is time to add the milk to the saucepan! Slowly pour 4 cups of milk into the saucepan. I used 1% milk, but feel free to use any kind you prefer. Stir well, once all the milk is in, to fully combine the ingredients.

Return the pan to the stove top and cook on medium, bringing it up to heat slowly. Be careful to not let the soup boil after adding the milk. Just bring it up to a very hot serving temperature slowly. As it cooks, the soup will thicken.

Milk is added to the pan to thicken and cook into the soup.

When the easy potato chowder has thickened and is very hot (but not boiling), taste test a potato cube to make sure they are tender. At this point, adjust the seasoning to your taste by adding more salt and pepper, if desired.

Want Your Chowder Even Thicker?

If at the last minute you decide you want the chowder to be even thicker (a personal choice), here’s a little secret tip I’ve used a couple of times to do that: Once the chowder is at serving temp, simply stir in about 1/2 cup of instant potato flakes! Yep… give them a stir into the soup, and instant thickener! This is completely OPTIONAL, but it does work!

The potato chowder has thickened, is heated through, and is ready to serve.

Serve The Easy Potato Chowder

Once the soup is heated to serving temp, ladle it out into individual serving bowls. Sprinkle some thinly sliced green onions over the top, if desired, and grab a spoon! Go ahead… dig in!

The easy potato chowder is delicious, and we love to serve it with warm bread or rolls on the side. We usually get about 4 good sized bowls of chowder from this recipe (as written), but it can EASILY be doubled! Hope you enjoy it!

Sliced green onions are added to the easy potato chowder, right before serving.You can see the chunks of potatoes in the finished chowder.

Well, this really is an easy soup to make for lunch OR dinner! Sure hope you have the opportunity to try it soon, and trust you will enjoy it, too. Have a wonderful day, and thank you for visiting.

Looking For More Potato SOUP Recipes?

You can find all of my soup recipes in the Recipe Index, located at the top of the page. A few of our favorite soups that include potatoes are:

Interested In More Recipes?

Thank you for visiting this website. I appreciate you using some of your valuable time to do soIf you’re interested, I publish a newsletter 2 times per month (1st and 15th) with all the latest recipes, and other fun info. I would be honored to have you join our growing list of subscribers, so you never miss a great recipe!
There is a Newsletter subscription box on the top right side (or bottom) of each blog post, depending on the device you use, where you can easily submit your e-mail address (only) to be included in my mailing list.

You Can Also Find Me On Social Media:
Facebook page: The Grateful Girl Cooks!
Pinterest: The Grateful Girl Cooks!
Instagram: jbatthegratefulgirlcooks

Author's signature

Original recipe source: My Mom

0 from 0 votes
Easy Potato Chowder
Prep Time
15 mins
Cook Time
15 mins
Total Time
30 mins
 

Make four servings of yummy, filling, easy potato chowder in about 30 minutes, from start to finish, using a few simple and common ingredients!

Category: Dinner, Soup
Cuisine: American
Keyword: easy potato chowder
Servings: 4
Calories Per Serving: 309 kcal
Author: JB @ The Grateful Girl Cooks!
Ingredients
  • ¼ cup butter (½ stick or 4 Tablespoons)
  • 1 cup brown onion , finely chopped
  • ½ cup celery , thinly sliced
  • cup potatoes (approx. 2 medium) , peeled and cut into 1" cubes-I used russets.
  • teaspoons salt ( + more to taste as desired)
  • ½ teaspoon black pepper
  • cup all purpose flour
  • 4 cups milk
  • ½ cup instant potato flakes (OPTIONAL) (if desired for thicker soup)
  • 1 stem green onion (green part) (OPTIONAL GARNISH) , thinly sliced
Instructions
  1. Chop onions, thinly slice celery; peel/ cut potato into small 1" cubes. Small potato cubes are important, so they cook quickly. Melt butter in a large saucepan; add the onions and celery. Cook on medium heat, stirring often, for 4-5 minutes, until onions/celery have softened.

  2. Add potato cubes to the pan; stir to combine. Cook on medium for 10 minutes, stirring often. Remove pan from heat. Season with salt and pepper. Add flour to the pan; stir to combine.

  3. Add 4 cups of milk into the pan. Stir well, to fully combine ingredients. Return pan to the heat and cook on medium, bringing it up to serving temperature slowly. Don't let soup boil after adding milk. As it cooks, the soup will thicken. Taste test a potato cube to make sure they are tender (if not tender, let chowder cook a couple more minutes). Adjust seasonings to your taste by adding additional salt and pepper, if desired.

  4. Once chowder is heated to serving temp (and potatoes are tender), ladle it into individual bowls. Sprinkle thinly sliced green onions over the top, if desired. Serve, and enjoy!

  5. OPTIONAL TIP: Want Your Chowder Even Thicker? When chowder has thickened and is very hot , if you decide you want the chowder to be even thicker (a personal choice), here's a little tip I've used a couple of times: Simply stir in about 1/2 cup of instant potato flakes! Yep... give them a stir into the soup, and instant thickener! This is completely OPTIONAL, but it does work!

Recipe Notes

NOTE: Caloric calculation was made using 1% milk, and NO instant potato flakes.

Nutrition Facts
Easy Potato Chowder
Amount Per Serving (1 g)
Calories 309 Calories from Fat 126
% Daily Value*
Fat 14g22%
Saturated Fat 9g56%
Cholesterol 42mg14%
Sodium 1092mg47%
Potassium 730mg21%
Carbohydrates 36g12%
Fiber 2g8%
Sugar 15g17%
Protein 11g22%
Vitamin A 874IU17%
Vitamin C 7mg8%
Calcium 321mg32%
Iron 1mg6%
* Percent Daily Values are based on a 2000 calorie diet.

Here’s one more to pin on your Pinterest boards!Make four servings of yummy, filling, easy potato chowder in about 30 minutes, from start to finish, using a few simple and common ingredients!

Air Fryer Sweet Potatoes

It’s EASY to make absolutely delicious air fryer sweet potatoes! Topped with cinnamon, brown sugar, and butter, this filling veggie tastes amazing!
It's EASY to make absolutely delicious air fryer sweet potatoes! Topped with cinnamon, brown sugar, and butter, this filling veggie tastes amazing!

Do you enjoy sweet potatoes? We’ve been enjoying them recently, especially since I began cooking them in our Cosori air fryer. Sweet potatoes are incredibly high in Vitamin A, and loaded with beta carotene and fiber, so they’re not only filling, but delicious, too!

Sweet potatoes taste wonderful just the way they are… plainly cooked and unadorned. BUT we like to “spruce ’em up” with a couple of “add-ons” (butter, cinnamon and brown sugar) after they cook for even more great flavor! YUM!

My Grandma And Her Sweet Potatoes!

When I think about sweet potatoes, I ALWAYS think of my Grandma Viola. My grandma lived in Texas until her death, but used to come spend a couple months at a time at my parents home in California in her later years.

I remember my mom telling me that my elderly Grandma would eat a baked sweet potato or yam every night for dinner. She did that because she’d take out her dentures each evening, so a baked sweet potato would be soft enough to eat “without her teeth”. Ha Ha! True story!

Scroll Down For A Printable Recipe Card At the Bottom Of The Page

Preparing Air Fryer Sweet Potatoes For Cooking

Making sweet potatoes in an air fryer is SUPER EASY and a bit quicker than baking them! NOTE: See the NOTES section of the printable recipe card below for instructions for baking them, if you do not have access to an air fryer.

Pick out sweet potatoes that are medium-sized, and both similar in weight. I made two, since I was only making them for my husband and myself. Scrub the potatoes very well, to remove any dirt. Once you’ve finished washing them, pat them dry with paper towels or a dish towel.

The sweet potatoes are washed, dried, and pieced with a fork before cooking.

Preheat your air fryer to 390°F. This typically takes 4-5 minutes. While the machine is preheating, lightly spritz or rub each sweet potato with vegetable or olive oil on all sides. Pierce the potatoes in several places (top and bottom) with a fork, because this helps them not to burst open during cooking!

When the air fryer is finished preheating, place the oiled and fork-pierced sweet potatoes into the basket.

Each sweet potato is rubbed or spritzed with oil lightly, before cooking.
Time To Cook Air Fryer Sweet Potatoes!

Cook the air fryer sweet potatoes at a temperature of 390°F for 30-35 minutes. Your cooking time may vary, due to differing weights of potatoes used. Each of the potatoes shown weighed about 9 ounces, and ended up taking 35 minutes to fully cook. If using larger or smaller potatoes, your cooking time will need to be altered slightly to adapt.

Check them at the 30 minute mark by pausing the machine and inserting a butter knife into the middle of the potatoes. When the knife meets no resistance, and the sweet potatoes are soft, they are fully cooked. If not quite done, place them back in the air fryer and continue cooking until ready.

Cook air fryer sweet potatoes at 390°F for 30 minutes, then check for doneness.

Once The Sweet Potatoes Are Fully Cooked

Once the potatoes are fully cooked, the skins will have darkened considerably, and be slightly crispy on the outside. Some of the juices may have also oozed out of the fork-punctures. Transfer the HOT potatoes directly to your serving plates.

When done, the skin on the sweet potatoes is very crisp and darkened in color.

Slice the sweet potatoes from top to bottom, and squeeze both ends of the potato to fluff up the insides.

Cut the sweet potato open, and fluff the insides with a fork.

Add 1 teaspoon butter and 1 heaping teaspoon brown sugar to each of the air fryer sweet potatoes, and then sprinkle lightly with cinnamon. Mix the toppings into the fluffed sweet potato, and then dig in! They are SO GOOD!

Two of the air fryer sweet potatoes, filled with butter, cinnamon and brown sugar.Mix the butter, brown sugar and cinnamon into the sweet potato and serve.

I hope you enjoy this recipe for air fryer sweet potatoes! We sure do. Have a wonderful day, friends, and thank you for taking the time to visit. Come back soon!

Looking For More AIR FRYER Recipes?

You can find all of my Air Fryer recipes in the Recipe Index, located at the top of the page. I have several, including:

Interested In More Recipes?

Thank you for visiting this website. I appreciate you using some of your valuable time to do soIf you’re interested, I publish a newsletter 2 times per month (1st and 15th) with all the latest recipes, and other fun info. I would be honored to have you join our growing list of subscribers, so you never miss a great recipe!
There is a Newsletter subscription box on the top right side (or bottom) of each blog post, depending on the device you use, where you can easily submit your e-mail address (only) to be included in my mailing list.

You Can Also Find Me On Social Media:
Facebook page: The Grateful Girl Cooks!
Pinterest: The Grateful Girl Cooks!
Instagram: jbatthegratefulgirlcooks

Author's signature

0 from 0 votes
Air Fryer Sweet Potatotes
Prep Time
5 mins
Cook Time
30 mins
Total Time
35 mins
 

It's EASY to make absolutely delicious air fryer sweet potatoes! Topped with cinnamon, brown sugar, and butter, this filling veggie tastes amazing!

Category: Vegetable Dish
Cuisine: American
Keyword: air fryer sweet potatoes
Servings: 2
Calories Per Serving: 288 kcal
Author: JB @ The Grateful Girl Cooks!
Ingredients
For Potatoes:
  • 18 ounces sweet potatoes , approx. 9 ounces each
  • vegetable oil or olive oil , to rub on sweet potato skin before cooking
To Serve:
  • 2 teaspoons butter , or more to taste
  • 2 teaspoons brown sugar , a heaping teaspoon
  • cinnamon , a light sprinkling over each potato
Instructions
  1. Pick sweet potatoes that are medium-sized, and similar in weight. Scrub potatoes well, to remove any dirt. Pat them dry with paper towels or a dish towel.

  2. Preheat air fryer to 390°F. Lightly spritz or rub each sweet potato with vegetable or olive oil on all sides. Pierce potatoes in several places (top and bottom) with a fork. When machine is preheated, place sweet potatoes into air fryer basket.

  3. Cook at 390°F for 30-35 minutes. Your cooking time may vary, due to differing weights of potatoes used. Check them at the 30 minute mark. Insert a butter knife into the middle of the potatoes. If knife meets no resistance, they are fully cooked. If not done, place them back in the air fryer and continue cooking until ready. Transfer potatoes to serving plates.

To Serve:
  1. Slice potatoes open lengthwise, and squeeze both ends of the potato to fluff up the insides. Add 1 teaspoon butter and 1 heaping teaspoon brown sugar to each potato, and then sprinkle lightly with cinnamon. Mix the toppings into the fluffed sweet potato, and then dig in! Enjoy!

Recipe Notes

Caloric calculations and cooking time for this recipe were made using one 9 ounce sweet potato per serving. Please note: As the weight of potatoes can vary widely, calories per serving and cooking times will tend to vary, as well.
NO AIR FRYER? NO PROBLEM! Follow all directions, but place prepared sweet potatoes on a foil or parchment paper-lined baking sheet. Bake at 425°F for between 45-60 minutes, time dependent on the weight of the potatoes.

Nutrition Facts
Air Fryer Sweet Potatotes
Amount Per Serving (1 potato + toppings)
Calories 288 Calories from Fat 54
% Daily Value*
Fat 6g9%
Saturated Fat 4g25%
Cholesterol 11mg4%
Sodium 177mg8%
Potassium 860mg25%
Carbohydrates 55g18%
Fiber 8g33%
Sugar 15g17%
Protein 4g8%
Vitamin A 36322IU726%
Vitamin C 6mg7%
Calcium 77mg8%
Iron 2mg11%
* Percent Daily Values are based on a 2000 calorie diet.

Here’s one more to pin on your Pinterest boards!It's EASY to make absolutely delicious air fryer sweet potatoes! Topped with cinnamon, brown sugar, and butter, this filling veggie tastes amazing!


Butterfinger Bars

Butterfinger Bars are incredible tasting, crisp, buttery oat bars, topped with a creamy milk chocolate/peanut butter icing. This easy recipe makes 24!
Many years ago (about 15), a friend, who was a parent of a student at the school I worked at, gave me a homemade dessert bar. She called her crisp, chocolate treats Butterfinger Bars. Not sure why she gave them this name, but since I LOVE Butterfinger candy bars, I “forced” myself to try one.

Ha Ha… I could have eaten 18 of them, they were so good. I asked her for the recipe, and she graciously wrote it down for me. Now, mind you, this is NOT A COPYCAT RECIPE for the delicious candy bar. This is its own bar cookie recipe that I’m confident you will LOVE, and I am happy to share it with you today!

Scroll Down For A Printable Recipe Card At The Bottom Of The Page

Okay… But What Is In This Bar Cookie?

Well, I’m glad you asked! The bar cookies are made with only FOUR common ingredients: old-fashioned oats, brown sugar, granulated sugar and butter. They are baked into a crisp bar cookie base, and then are frosted with a milk chocolate and peanut butter topping, once cool. Really, really simple!

The butterfinger bars have a crisp cookie base, and a creamy luscious topping of chocolate and peanut butter! These are seriously addicting bar cookies, especially if you enjoy chocolate and peanut butter. I think they’re even better the day AFTER you make them! Let me show you how EASY it is to make two dozen!

Make The Butterfinger Bars Base

Preheat your oven to 425°F. while you make the oat mixture base. It only takes a few minutes to make, so you will want your oven hot and ready to bake, once you’re done.

Mix oats (uncooked), brown and granulated sugars with melted butter in a large mixing bowl. Stir these ingredients together very well, until you have a crumbly, but butter-coated mixture.

Melted butter, oats, brown and granulated sugar in mixing bowl.The ingredients are fully combined before pressing mixture into baking pan.

Spray a 9×13 baking pan with non-stick spray, and pour the oat mixture into the dish. Spread the crumbs over the entire bottom of the pan. Use the back of a large spoon to firmly press the ingredients together in the pan.

When done, you should have a very firmly compacted oat mixture base in the pan (shown in the 2nd photo below, before baking). Now it is ready to bake! Bake the butterfinger bars at 425°F for 10-12 minutes. When done, they will be golden brown around the edges. Remove the pan to a wire rack to cool.

The bar cookie mixture is spread evenly into a lightly greased 9x13 baking dish.The mixture is packed down firmly into the pan before going into the oven.

Make The Chocolate Peanut Butter Frosting

While the butterfinger bars are cooling (after baking), make the chocolate peanut butter frosting! Fear not- it is SUPER EASY! Melt milk chocolate chips (or giant sized Hershey bar) in a double boiler, along with the peanut butter.

WHAT IS A DOUBLE BOILER? A double boiler has a bottom saucepan filled about 3/4 of the way with water, and then a slightly smaller pan (with chocolate and peanut butter in it) sitting in (on top of) the water. Bring the pan with water to a gentle boil, while stirring the chocolate and peanut butter. Be careful to not let any water get into the chocolate mixture.

The heat from the boiling water below will gently melt (without burning) the chocolate chips and the peanut butter in the upper pan. Continue to stir until you have a creamy frosting, and then remove from the heat. TIP: For this recipe, it is best to NOT use all natural peanut butter.

Milk chocolate chips and peanut butter for frosting are melted in a double boiler.

Time To Frost The Butterfinger Bars!

Okay… now you should have a creamy frosting and a tray of completely cooled butterfinger bars! Pour the frosting over the bars, and then spread it, to cover the entire surface. Let the bars cool completely, so the frosting can firm up, before attempting to slice.

The chocolate peanut butter frosting is poured onto cooled bar cookies, and spread.Frosting is spread over the top of the butterfinger bars, and then rests to firm up.

See How CRISP The Butterfinger Bars Are?

Getting the butterfinger bars out of the pan can be a bit of a challenge due to their crispness. Run a butter knife around the edges of the pan, and then use a really sharp knife to cut the butterfinger bars in half. Lift an entire half of the bars from the pan.

They are so crisp they should hold together very well. Cut the half into three equal portions, and then cut each third into 4 pieces, using a very sharp knife to make the cuts. Repeat with the other half of the bars!

Half of the crisp butterfinger bars are cut and lifted out of pan.Each half of the pan of bar cookies is cut into 3 pieces, then cut into 4 pieces per slice..

Now It’s Time To EAT!

Once the bars are cut into portions, you should have 24 square butterfinger bars! They are now ready to serve, and eat! The bars will be crisp, and the frosting creamy… and guess what? They also freeze well, so you can wrap up any leftovers really well, and save several for another time. They’re so good!

Grabbing a bite of one of the butterfinger bars to munch on!

Hope you enjoy these yummy chocolate frosted butterfinger bars! We sure do! Have a great day, and thank you for visiting!

Looking For More BAR COOKIE Recipes?

You can find all of my bar cookie recipes in the Recipe Index, located at the top of the page. A few favorites include:

Interested In More Recipes?

Thank you for visiting this website. I appreciate you using some of your valuable time to do soIf you’re interested, I publish a newsletter 2 times per month (1st and 15th) with all the latest recipes, and other fun info. I would be honored to have you join our growing list of subscribers, so you never miss a great recipe!
There is a Newsletter subscription box on the top right side (or bottom) of each blog post, depending on the device you use, where you can easily submit your e-mail address (only) to be included in my mailing list.

You Can Also Find Me On Social Media:
Facebook page: The Grateful Girl Cooks!
Pinterest: The Grateful Girl Cooks!
Instagram: jbatthegratefulgirlcooks

Author's signature

Recipe Source: My friend Annette Goetz gave me the recipe over 15 years ago

0 from 0 votes
Butterfinger Bars
Prep Time
10 mins
Cook Time
10 mins
Total Time
20 mins
 

Butterfinger Bars are incredible tasting, crisp, buttery oat bars, topped with a creamy milk chocolate/peanut butter icing. This easy recipe makes 24!
Category: Dessert
Cuisine: American
Keyword: butterfinger bars
Servings: 24
Calories Per Serving: 286 kcal
Author: JB @ The Grateful Girl Cooks!
Ingredients
  • non-stick cooking spray (for pan)
For Bars:
  • 4 cups old-fashioned oats
  • 1 cup brown sugar , I used dark
  • ½ cup granulated sugar
  • 1 cup butter (2 sticks) , melted
For Icing:
  • 11.5 ounces milk chocolate chips (1 bag) , or 12 ounce Hershey's milk chocolate bar
  • ¾ cup creamy peanut butter , do not use natural peanut butter
Instructions
  1. Preheat oven to 425°F.

  2. Mix oats, brown and granulated sugars with melted butter in a large mixing bowl. Stir well, until fully combined. Lightly coat a 9x13 baking pan (bottom and sides) with non-stick spray, then pour oat mixture into dish. Spread mixture over bottom of the pan. Use the back of a large spoon to firmly press the ingredients together. When done, you should have a very firmly compacted oat mixture base.

  3. Bake at 425°F for 10-12 minutes. When done, they will be crisp, golden brown around the edges. Transfer pan to a wire rack to cool.

Make The Frosting:
  1. Make the frosting while the bars are cooling. Melt milk chocolate chips (or 12 oz. milk chocolate Hershey bar) in a double boiler, along with the peanut butter. (See blog post for info on double boiler). Bring lower pan with water to a gentle boil, while stirring the chocolate chips and peanut butter in the pan above. Continue to stir until frosting is smooth and creamy, then remove from heat. TIP: For this recipe, it is best to NOT use all natural peanut butter. Once bars have cooled to room temp, they're ready to frost. Pour frosting over bars, and spread, to cover the entire surface. Let bars rest, so frosting can firm up, before attempting to cut or serve.

  2. To slice: Run a butter knife around edges of the pan, and then use a sharp knife to cut the pan of bars down the middle in half. Lift an entire half of the bars from pan. They are so crisp they should hold together well. Cut this half into three equal sized long slices. Now slice each third into 4 pieces, using a sharp knife to make the cuts. Repeat with remaining half of the bars, and you will have 24 square bars, ready to eat. Store leftovers in an airtight container. Enjoy!

Recipe Notes

TIP: If substituting a Hershey large milk chocolate bar for the chocolate chips, be sure to break it into smaller chunks before melting it with the peanut butter! It will melt a LOT faster that way!

Nutrition Facts
Butterfinger Bars
Amount Per Serving (1 bar cookie)
Calories 286 Calories from Fat 144
% Daily Value*
Fat 16g25%
Saturated Fat 8g50%
Cholesterol 22mg7%
Sodium 117mg5%
Potassium 116mg3%
Carbohydrates 33g11%
Fiber 2g8%
Sugar 22g24%
Protein 5g10%
Vitamin A 267IU5%
Vitamin C 1mg1%
Calcium 36mg4%
Iron 1mg6%
* Percent Daily Values are based on a 2000 calorie diet.

Here’s one more to pin on your Pinterest boards!Butterfinger Bars are incredible tasting, crisp, buttery oat bars, topped with a creamy milk chocolate/peanut butter icing. This easy recipe makes 24!

Orange Glazed Carrots

Orange Glazed Carrots are a simple but delicious side dish, featuring buttery, marmalade coated carrots, pecans, fresh ginger and cinnamon!
Orange Glazed Carrots are a simple but delicious side dish, featuring buttery, marmalade glazed carrots, pecans, fresh ginger and cinnamon!

Most of my life I have not been a huge fan of cooked carrots. We enjoy them in casseroles, or cooked with a pot roast, and have occasionally oven-roasted them (see here for my recipe). I think they taste pretty good cooked or roasted, it’s just not my favorite way to eat them.

Well, my opinion of cooked carrots changed recently because of THIS recipe for orange glazed carrots! The recipe uses frozen carrots, which is really convenient, too!

Oh. My. Goodness. These little orange things are so good I could have eaten the entire bowl of ’em by myself! But I didn’t (thank goodness!).

Cooked sliced carrots are coated in a simple marmalade glaze that also has cinnamon, butter, pecans, and finely grated ginger. Whoa… this veggie side dish is a treat for the taste buds! Here’s how to make this dish:

Scroll Down For A Printable Recipe Card At The Bottom Of The Page

First Things First – Cook the Carrots!

Cook the frozen sliced carrots, according to the package instructions. Using frozen sliced carrots makes this recipe sooo easy! When done, drain the water out of the pan. Set the carrots aside while you cook the marmalade glaze.

Frozen carrots are cooked before adding them to a marmalade glaze.

Making The Orange Marmalade Glaze Is EASY!

Melt the butter in a skillet on low heat. Add orange marmalade to the melted butter (I used my homemade!), and stir to combine. Continue to keep the heat on very low while you make the orange marmalade glaze.

Once the two ingredients are combined, grate fresh ginger into the glaze. Use a micro-plane or the very small section of your hand held box grater to do this.

Orange marmalade and melted butter are combined in skillet.Fresh ginger is finely grated and added to marmalade and butter in skillet.

Now add the chopped pecans, and stir everything to combine, while still cooking on low heat.

Add the cooked, well-drained carrots to the skillet. Stir well, to coat the carrots with the sweet, sticky orange glaze.

Chopped pecans are added to marmalade glaze in skillet.The cooked carrots are now added to the orange glaze in skillet.

Final Step!

The last thing you need to do is sprinkle the cinnamon over the carrots and stir well, to combine all the ingredients with that wonderful glaze.

Cook the orange glazed carrots until everything is fully heated through, and then it’s ready to eat! The glaze should be covering all the carrots, and be really hot at this point!

A light sprinkling of cinnamon adds to the flavor of the orange glazed carrots.

Time To Serve The Orange Glazed Carrots!

Carefully transfer the hot, orange glazed carrots to a serving bowl. Now this simple side dish is ready to dig into, alongside your favorite dinner entree! We enjoyed it alongside juicy pork tenderloin slices.

The buttery carrots will be tender, slightly sweet from the orange marmalade, and those yummy pecans give them a bit of crunch! Fresh ginger and cinnamon provide extra flavor to this yummy vegetable dish!

The orange glazed carrots with pecans are served in a white bowl.A close up view of a bowl of orange glazed carrots, ready to eat!

This Recipe Can Also Be Made In A Slow Cooker

This recipe can also be adapted to prepare in a slow cooker, using fresh, sliced carrots. I have included those instructions in the NOTES section of the printable recipe card at the bottom of this page, for your convenience!

Well, I trust you enjoy making and eating these yummy orange glazed carrots. They compliment many main dishes, and I hope you (and those you love), will really like them. Have a wonderful day, and may God bless you.

Looking For More VEGGIE SIDE DISHES?

You can find all of my side dish recipes in the Recipe Index, located at the top of the page. A few favorite veggie side dishes include:

Want More Recipes? Get My FREE Newsletter!

I publish a newsletter 2 times per month (1st and 15th) with lots of recipes, tips, etc..
Would you like to join our growing list of subscribers?

There is a Newsletter subscription box on the top right (or bottom) of each blog post, depending on the device you use.
You can submit your e-mail address there, to be added to my mailing list.

Find Me On Social Media:

Facebook page: The Grateful Girl Cooks!
Pinterest:
The Grateful Girl Cooks!
Instagram:
jbatthegratefulgirlcooks

Author's signature

Original recipe source: Unknown (found handwritten on a 3×5 card in an OLD recipe box)

↓↓ PRINTABLE RECIPE BELOW ↓↓

0 from 0 votes
Orange Glazed Carrots
Prep Time
8 mins
Cook Time
5 mins
Total Time
13 mins
 

Orange Glazed Carrots are a simple but delicious side dish, featuring buttery, marmalade glazed carrots, pecans, fresh ginger and cinnamon!

Category: Side Dish, Vegetable Dish
Cuisine: American
Keyword: orange glazed carrots
Servings: 4
Calories Per Serving: 180 kcal
Author: JB @ The Grateful Girl Cooks!
Ingredients
  • 12 ounces frozen sliced carrots
  • 3 Tablespoons butter
  • 3 Tablespoons orange marmalade
  • 1 teaspoon finely grated fresh ginger
  • 2 Tablespoons chopped pecans (or walnuts)
  • teaspoon cinnamon
Instructions
  1. Cook frozen sliced carrots until tender, according to package instructions (usually 6-8 minutes). When done, drain water from pan. Set carrots aside.

  2. Make The Glaze: Melt butter in a skillet, on very low heat. Add orange marmalade, and stir to combine. Continue to cook on low heat. Add finely grated fresh ginger, followed by the chopped pecans, stirring to combine.

  3. Now add the cooked, drained carrots to the skillet. Stir well, to coat carrots with glaze. Sprinkle with cinnamon. Stir to combine, and heat on low until the carrots are fully heated through. Serve hot, and enjoy!

Recipe Notes

NOTE: This recipe can also be made in a slow cooker. Place 6 peeled, sliced FRESH carrots with other ingredients into slow cooker, and cook on LOW HEAT for 2-3 hours, or until carrots have become tender.

Nutrition Facts
Orange Glazed Carrots
Amount Per Serving (1 g)
Calories 180 Calories from Fat 108
% Daily Value*
Fat 12g18%
Saturated Fat 6g38%
Cholesterol 23mg8%
Sodium 142mg6%
Potassium 294mg8%
Carbohydrates 19g6%
Fiber 3g13%
Sugar 13g14%
Protein 2g4%
Vitamin A 14471IU289%
Vitamin C 6mg7%
Calcium 41mg4%
Iron 1mg6%
* Percent Daily Values are based on a 2000 calorie diet.

Here’s one more to pin on your Pinterest boards!Orange Glazed Carrots are a simple but delicious side dish, featuring buttery, marmalade glazed carrots, pecans, fresh ginger and cinnamon!

Easy Ground Beef Stroganoff

Looking for a quick, inexpensive dinner that tastes good? Easy Ground Beef Stroganoff can be made in about 25 minutes from start to finish!

My husband and I love beef stroganoff. Most of the time I make classic beef stroganoff, with beef tenderloin (or occasionally stew meat), which needs to cook longer, to fully tenderize the meat.

Occasionally when I want the taste of the original recipe, but am pressed for time, or want to take the easy way out, I make this EASY ground beef stroganoff! Today I want to share this simple recipe with you.

This recipe can be cooked and on the table in under 30 minutes, and has great flavor! It’s also very easy to make, which is always a win-win! Using ground beef tends to be a fairly inexpensive way to feed 4 people. Here’s how to make this easy ground beef stroganoff!

Scroll Down For A Printable Recipe Card At The Bottom Of The Page

Cook The Ground Beef And Onions

Sauté the ground beef and chopped onions on medium heat in a large skillet. Continue to cook until meat is browned and cooked through.

This will only take a few minutes. Once the meat is fully cooked, remove the skillet from the heat, and drain any accumulated grease from the pan.

Ground beef and chopped onions are pan-seared until fully cooked.Browned ground beef and onions have cooked, and grease has been drained.

Stir in the mushroom pieces, cream of mushroom soup, red wine (or beef broth or water), salt, pepper, and garlic powder. Cover the skillet and simmer on low for 15 minutes.

Mushrooms, red wine, and mushroom soup are added to ground beef stroganoff mixture.

Prepare Egg Noodles In Separate Pan

While the stroganoff is cooking, prepare the egg noodles in a separate saucepan, according to the package instructions.

When the noodles are done cooking, drain, stir in butter, and keep the noodles warm until you’re ready to dish this meal up.

Egg noodles are cooked, drained, then buttered before topping with stroganoff.

Hot, buttered noodles are a wonderful classic base for this dish, but you can also substitute steamed rice under the stroganoff, if you prefer.

Finish The Ground Beef Stroganoff

After the easy ground beef stroganoff has cooked (covered) for 15 minutes, remove the lid from the skillet. Add the sour cream, and stir this mixture well, to fully blend it in.

Heat this meat mixture, uncovered, on medium-low heat until heated through. DO NOT LET IT BOIL AFTER ADDING SOUR CREAM.

Sour cream is added to the ground beef stroganoff.The ground beef stroganoff is heated through before serving.

Time To Serve Easy Ground Beef Stroganoff

Divide the hot, buttered egg noodles on each plate. Top the noodles with some of the beef stroganoff. You can sprinkle the dish with fresh or dried parsley for garnish, if desired.

Hot, buttered egg noodles are topped with the ground beef stroganoff to serve.

We enjoyed my yummy broccoli corn casserole alongside the stroganoff. The ground beef stroganoff, hot buttered noodles, and a veggie dish made this a well-rounded and filling meal.

Easy ground beef stroganoff on noodles, with broccoli casserole on the side.

Thanks for visiting my blog today. I appreciate your time, and hope you have the opportunity to try this simple, but delicious recipe! It is really good, and I hope you enjoy it.

Don’t forget to check out my yummy recipes for classic beef stroganoff or meatballs stroganoff! Have a wonderful day, and may God bless you!

Looking For More Recipes Using GROUND BEEF?

You can find all of my recipes in the Recipe Index, located at the top of the page. A few favorites include:

Want More Recipes? Get My FREE Newsletter!

I publish a newsletter 2 times per month (1st and 15th) with lots of recipes, tips, etc..
Would you like to join our growing list of subscribers?

There is a Newsletter subscription box on the top right (or bottom) of each blog post, depending on the device you use.
You can submit your e-mail address there, to be added to my mailing list.

Find Me On Social Media:

Facebook page: The Grateful Girl Cooks!
Pinterest:
The Grateful Girl Cooks!
Instagram:
jbatthegratefulgirlcooks

Author's signature

Original recipe source: unknown (found handwritten on a recipe card in a very old recipe box)

↓↓ PRINTABLE RECIPE BELOW ↓↓

0 from 0 votes
Easy Ground Beef Stroganoff
Prep Time
10 mins
Cook Time
15 mins
Total Time
25 mins
 

Looking for a quick, inexpensive dinner that tastes good? Easy Ground Beef Stroganoff can be made in about 25 minutes from start to finish!

Category: Entree
Cuisine: American
Keyword: ground beef stroganoff
Servings: 4
Calories Per Serving: 454 kcal
Author: JB @ The Grateful Girl Cooks!
Ingredients
  • 1 pound ground beef
  • 1 small brown onion , chopped
  • 4 ounces mushroom pieces (canned) , drained
  • 10.5 ounces cream of mushroom soup , one small can
  • ¼ cup red wine, water or beef broth , whichever you prefer (I used red wine)
  • ½ teaspoon salt
  • ¼ teaspoon (each) black pepper and garlic powder
  • ½ cup sour cream (regular or low-fat)
  • 2 cups dry egg noodles , cooked according to pkg. directions
  • 1 Tablespoon butter
Instructions
  1. Sauté ground beef and onions on medium heat in large skillet. Cook until meat is browned and cooked through. Remove skillet from heat, and drain accumulated grease from pan.

  2. Stir in mushrooms, cream of mushroom soup, red wine (or beef broth or water), salt, pepper, and garlic powder. Cover skillet and simmer on low heat for 15 minutes.

  3. **While the stroganoff is cooking, prepare egg noodles in a separate saucepan, according to package instructions. When noodles are done cooking, drain, and stir in butter. Keep warm.

  4. After it has cooked (covered) for 15 minutes, remove lid. Add sour cream, and stir well, to fully blend it in. Cook on medium-low heat (uncovered), until heated through. DO NOT LET IT BOIL AFTER ADDING SOUR CREAM. To Serve: Place egg noodles on plates. Top with beef stroganoff. Sprinkle with fresh or dried parsley, if desired. Enjoy!

Recipe Notes

NOTE: Recipe caloric calculation was calculated using red wine, and light sour cream. 

Nutrition Facts
Easy Ground Beef Stroganoff
Amount Per Serving (1 (1/4 of total))
Calories 454 Calories from Fat 234
% Daily Value*
Fat 26g40%
Saturated Fat 11g69%
Cholesterol 114mg38%
Sodium 1064mg46%
Potassium 617mg18%
Carbohydrates 23g8%
Fiber 2g8%
Sugar 2g2%
Protein 29g58%
Vitamin A 182IU4%
Vitamin C 2mg2%
Calcium 74mg7%
Iron 4mg22%
* Percent Daily Values are based on a 2000 calorie diet.

Here’s one more to pin on your Pinterest boards!Looking for a quick, inexpensive dinner that tastes good? Easy Ground Beef Stroganoff can be made in about 25 minutes from start to finish!

The Best Brownie Frosting

This easy to make, 6-ingredient recipe for The Best Brownie Frosting makes enough thick chocolate icing for a 9×13 pan of your favorite brownies!
This easy to make, 6-ingredient recipe for The Best Brownie Frosting makes enough thick chocolate icing for a 9x13 pan of your favorite brownies!

In our home, we LOVE brownies!  Typically I make them from scratch (see my recipe here), but occasionally I make them using a box mix, if I find an incredible SALE! Then I purchase a few boxes to keep around… in case of “must have chocolate” emergencies!

Once I make brownies, I love to put yummy chocolate frosting on them for a perfect finishing touch! My husband likes his brownies without frosting… NOT ME! How can he possibly not like more creamy chocolate spread all over the top of a chocolate brownie? I suppose that is one of life’s great mysteries. But I digress… so… back to the recipe.

Well, THIS recipe for the best brownie frosting is my favorite, because it’s super easy,  only has a few ingredients, and needs no special equipment to make. Just stir the ingredients up, and you’re done! Spread it on a pan of freshly made brownies, and enjoy! Here’s how to whip up a batch, which is enough to frost a 9×13″ pan full of brownies!

Scroll Down for A Printable Recipe Card At The Bottom Of The Page

How To Make The Best Brownie Frosting

Place softened, room temperature butter (NOT melted), unsweetened cocoa powder, light corn syrup, and vanilla extract in a medium sized bowl. Honey can be substituted for the corn syrup, if desired.

Stir these ingredients well with a spoon. That’s right, there’s no need for an electric mixer! Just keep on stirring until it comes together into a thick dark brown mixture.

Ingredients are mixed together in a small bowl for the brownie frosting.Once mixed together, the frosting becomes dark brown in color.

Now add the powdered sugar into the bowl, along with 2-3 Tablespoons of milk. Give the frosting a good stir until this also is completely mixed together. You will want the best brownie frosting to be thick, creamy and spreadable. If you find it is too thick, add a couple drops more of the milk.  If you get it too thin, simply add just a bit more powdered sugar.

Powdered sugar and a small amount of milk are mixed into the best brownie frosting.Now the icing is ready to spread on baked and cooled brownies.

Spread The Frosting Out On A Pan Of Brownies

Once you’ve made your pan of brownies, whether they are homemade or a box mix, remove the brownies from the oven, and LET THEM COOL COMPLETELY BEFORE FROSTING. Don’t frost while the brownies are warm, because that will end up making the softened butter in the frosting melt, which then changes the texture of the frosting. NO good.

A 9x13 pan of brownies, covered with the best brownie frosting!

Once the brownies are completely covered with the best brownie frosting, let them rest for about 15 minutes. This gives the frosting time to slightly firm up just a bit. Once they have “rested” (it’s so exhausting being a brownie, right?), slice and serve your brownies!

Here are the brownies, covered with the creamy chocolate frosting.

Hope you enjoy this wonderful creamy chocolate topping on your brownies! I’ve tried lots of homemade and canned frostings, and honestly still feel like this is the best brownie frosting ever! Enjoy… and have a GREAT day!

Looking For More BAR COOKIE Recipes?

You can find all of my recipes in the Recipe Index, located at the top of the page. I have quite a few bar cookie recipes, including:

Interested In More Recipes?

Thank you for visiting this website. I appreciate you using some of your valuable time to do soIf you’re interested, I publish a newsletter 2 times per month (1st and 15th) with all the latest recipes, and other fun info. I would be honored to have you join our growing list of subscribers, so you never miss a great recipe!
There is a Newsletter subscription box on the top right side (or bottom) of each blog post, depending on the device you use, where you can easily submit your e-mail address (only) to be included in my mailing list.

You Can Also Find Me On Social Media:
Facebook page: The Grateful Girl Cooks!
Pinterest: The Grateful Girl Cooks!
Instagram: jbatthegratefulgirlcooks

Author's signature

Original recipe source: Unknown. Wrote recipe down 30+ years ago, w/out author’s name.

0 from 0 votes
The Best Brownie Frosting
Prep Time
5 mins
Cook Time
0 mins
Total Time
5 mins
 

This easy to make, 6-ingredient recipe for The Best Brownie Frosting makes enough thick chocolate icing for a 9x13 pan of your favorite brownies!

Category: Desserts, Miscellaneous
Cuisine: American
Keyword: brownie frosting
Servings: 1 batch-for 9x13 pan of brownies
Calories Per Serving: 1753 kcal
Author: JB @ The Grateful Girl Cooks!
Ingredients
  • 6 Tablespoons butter (softened) , room temperature (not melted)
  • 6 Tablespoons unsweetened cocoa powder
  • 2 Tablespoons light corn syrup , or honey
  • 1 teaspoon vanilla extract
  • 2 cups powdered sugar
  • 2-3 Tablespoons milk , plus a few drops more, if necessary
Instructions
  1. Place softened, room temperature butter (NOT melted), unsweetened cocoa powder, light corn syrup, and vanilla extract in a medium sized bowl. Stir until fully combined.

  2. Add the powdered sugar, along with 2-3 Tablespoons of milk. Give the frosting a good stir until this is completely mixed together. You will want frosting to be thick, creamy and spreadable. If too thick, add a couple drops more of the milk.  If too thin, simply add a bit more powdered sugar.

  3. Once you've made your brownies, whether homemade or box mix, remove brownies from oven, and LET THEM COOL COMPLETELY BEFORE FROSTING. Spread frosting over top of brownies. Once completely covered with frosting, let them rest for 10-15 minutes. This gives the frosting time to slightly firm up. Slice and serve your brownies, and enjoy!

Recipe Notes

NOTE: The recipe calculation is for the entire batch of frosting. Since a 9x13 pan of brownies is typically cut into 24 servings, the caloric calculation for each serving of frosting averages out to about 74 calories (per serving of frosting).

Nutrition Facts
The Best Brownie Frosting
Amount Per Serving (1 batch)
Calories 1753 Calories from Fat 657
% Daily Value*
Fat 73g112%
Saturated Fat 46g288%
Cholesterol 182mg61%
Sodium 652mg28%
Potassium 502mg14%
Carbohydrates 293g98%
Fiber 10g42%
Sugar 271g301%
Protein 8g16%
Vitamin A 2158IU43%
Calcium 96mg10%
Iron 4mg22%
* Percent Daily Values are based on a 2000 calorie diet.

Here’s one more to pin on your Pinterest boards!This easy to make, 6-ingredient recipe for The Best Brownie Frosting makes enough thick chocolate icing for a 9x13 pan of your favorite brownies!