Hearty Minestrone Soup

Hearty Minestrone Soup is filling and DELICIOUS! This classic Italian soup, with meat, veggies, tomatoes, beans, and macaroni is sure to please.

The first time I had this hearty minestrone soup was when my Father-in-Law died over 40 years ago. A friend of the family was there for his memorial, and fixed a massive pot of this soup for the family at my in-laws home after the service.

The day of his memorial service was very cold and snowy (January), so this hot, delicious, filling meal was a God-send, as well as a sweet, thoughtful “gift” to our family!  A long-time family friend named Veda Quatro made the soup, gave me her recipe, and we’ve enjoyed this hearty, flavor-packed soup ever since that day!

The recipe makes 12 servings, and is CRAZY DELICIOUS. It takes a bit of time and prep work to make, but honestly, the results are wonderful, and will be worth your time! If you will only be serving a few people, you will enjoy having the leftovers for lunches or a quick meal! YUM!

Four Steps To Making Hearty Minestrone Soup!

There are basically 4 steps to making this soup. Cook the stew meat in broth, cook ground beef, onions and spices, cook the veggies, and add the final batch of veggies and pasta to the soup 30 minutes before serving!

It’s really not that hard to make… honest! Here’s how to cook a large batch of this yummy soup:

Step #1 – Cooking The Stew Meat

Place 5 quarts of water into a HUGE soup pot. Add the beef bouillon cubes and the stew meat. NOTE: You can substitute 5 quarts beef broth for water and bouillon, if more convenient. Cook on high for about 20 minutes, or until the stew meat is cooked through. Once done, turn off heat, and transfer the stew meat with a slotted spoon to a plate to rest.

NOTE: Trust me… you will want to use a LARGE soup pot or divide the recipe between two standard sized soup pots for this recipe, because it makes a LOT of soup, once completed!

Stew meat is cooked in beef broth in a large stock pot.

Step #2

Heat the oil in a large skillet on medium heat. Add the ground beef, drained stew meat, chopped onion, pepper, and chopped parsley. Cook this mixture until the ground beef is browned and fully cooked through.

As soon as the ground beef is fully cooked, add the minced garlic, and continue to cook, stirring often, for one minute.

Stew meat, ground beef, onions, and parsley are browned in skillet.

Minced garlic is added to the browned meat mixture.

Drain the grease from the skillet (discard) and then add the cooked beef and onion mixture into the broth and stir, to combine.

Cooked beef and onion mixture is added to beef broth.

Step #3

On to the next step! Gather the sliced celery, carrots and shredded cabbage, and add them to the pot of hearty minestrone soup! Pour in the canned diced tomatoes, Italian seasoning, and then give everything a good stir, to combine. Add the salt, stir then taste the soup, and add  additional salt, if desired, to suit your personal taste.

Continue to cook the hearty minestrone soup (uncovered) on medium heat for about 30 minutes, or until the veggies become tender. The soup liquid will reduce in volume slightly as the mixture cooks.

NOTE: If making soup ahead for serving later in the day… turn off the heat after this step, and let soup sit until 30 minutes before you want to serve, then go to Step #4.

Carrots, celery and green cabbage are prepped for the minestrone soup.Hearty minestrone soup is cooking away in a large stock pot.

Step #4 – The FINAL Step Before Serving

About 30 minutes BEFORE serving, add the uncooked macaroni noodles, frozen peas, kidney beans and zucchini slices to the pot of soup.

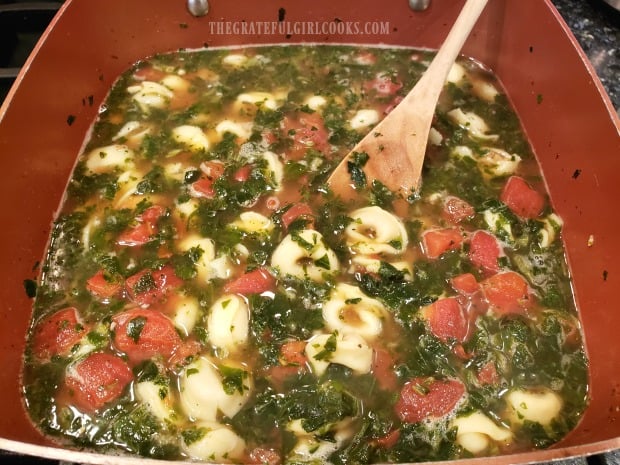
Cook the hearty minestrone soup on medium heat (still uncovered) for 30 minutes, and then it will be ready to serve! The broth will slightly reduce as it continues to cook, and the macaroni will fully cook in the soup!

Zucchini, peas, and uncooked macaroni noodles are added to the soup.The macaroni noodles cook fully in the hot minestrone soup.

Time To Serve Hearty Minestrone Soup!

After 30 minutes your huge pot of homemade, hearty minestrone soup is ready to serve! Give it a final taste, and add additional salt, if desired. Ladle the steaming soup into bowls, sprinkle with grated Parmesan cheese, and serve!

A bowl of hearty minestrone soup, topped with grated Parmesan cheese.Beef, veggies macaroni, tomatoes and beans are featured in hearty minestrone soup.

I really hope you will give this hearty minestrone soup a try! It is fabulous, and feeds a small village, or provides you with quite a few leftover bowls of delicious soup! YUM!!! Have a great day.

Looking For More SOUP Recipes?

You can find all of my soup recipes in the Recipe Index, located at the top of the page. I have many soup recipes on the blog, including:

Interested In More Recipes?

Thank you for visiting this website. I appreciate you using some of your valuable time to do soIf you’re interested, I publish a newsletter 2 times per month (1st and 15th) with all the latest recipes, and other fun info. I would be honored to have you join our growing list of subscribers, so you never miss a great recipe!
There is a Newsletter subscription box on the top right side (or bottom) of each blog post, depending on the device you use, where you can easily submit your e-mail address (only) to be included in my mailing list.

You Can Also Find Me On Social Media:
Facebook page: The Grateful Girl Cooks!
Pinterest: The Grateful Girl Cooks!
Instagram: jbatthegratefulgirlcooks

Author's signature

Recipe adapted from: Family friend Veda Quatro’s original recipe (1979)

0 from 0 votes
Hearty Minestrone Soup
Prep Time
30 mins
Cook Time
1 hr
Total Time
1 hr 30 mins
 

Hearty Minestrone Soup is filling and DELICIOUS! This classic Italian soup, with meat, veggies, tomatoes, beans, and macaroni is sure to please.

Category: Entree, Soup
Cuisine: Italian
Keyword: hearty minestrone soup
Servings: 12
Calories Per Serving: 241 kcal
Author: JB @ The Grateful Girl Cooks!
Ingredients
  • 5 quarts water
  • pounds beef stew meat , cut into cubes
  • 4 large beef bouillon cubes
  • 2 Tablespoons vegetable oil
  • ½ pound ground beef
  • 1 medium brown onion , chopped
  • ¼ teaspoon ground black pepper
  • ½ cup fresh parsley , finely chopped
  • 2 cloves garlic , minced
  • 1 cup celery , sliced
  • 2 cups green cabbage , shredded
  • cups carrots , sliced or diced
  • 43.5 ounces diced, canned tomatoes (=three 14.5 ounce cans)
  • teaspoons Italian seasoning
  • 2 teaspoons salt , plus additional, to desired taste
  • 1 cup zucchini , sliced thin, then cut slices in half
  • 1 cup frozen peas , do not thaw
  • 15.5 ounces kidney beans (canned) , rinsed and drained
  • 2 cups elbow macaroni , uncooked
  • grated Parmesan cheese for garnish (optional)
Instructions
  1. STEP #1: Place 5 quarts of water into a HUGE soup pot. Add the beef bouillon cubes and the stew meat. NOTE: Substitute 5 quarts beef broth for water and bouillon, if more convenient. Cook on high for 20 minutes, or until stew meat is cooked through. Once done, turn off heat, and transfer stew meat with a slotted spoon to a plate to rest.

  2. STEP #2: Heat oil in a large skillet on medium heat. Add ground beef, drained stew meat, chopped onions, black pepper, and parsley. Cook until ground beef is browned and cooked through. Add minced garlic, and cook, stirring often, for one minute. Drain grease from skillet (discard) and then add this mixture to the broth and stir to combine.

  3. STEP #3: Add celery, carrots and cabbage to the pot of soup. Pour in canned diced tomatoes and Italian seasoning; stir, to combine. Add salt, stir then taste the soup, and add additional salt, if desired. Continue to cook soup (uncovered) on medium heat for 30 minutes, or until the veggies become tender. The soup liquid will reduce in volume slightly as the mixture cooks. NOTE: If making soup ahead for serving later in the day -turn off heat after this step, and let soup sit until 30 minutes before you want to serve, then go to Step #4.

  4. STEP #4: 30 minutes BEFORE serving, add the uncooked macaroni noodles, frozen peas, kidney beans and zucchini slices to the soup. Cook on medium high heat (still uncovered) for 30 minutes, stirring occasionally, and then it's ready to serve! Give it a final taste; add additional salt, if desired. Ladle soup into bowls, sprinkle with grated Parmesan cheese, and serve! Enjoy!

Recipe Notes

TIP: The original author of this recipe (Veda) told me this tip: If you need to stretch out any leftover soup, just add another can of diced tomatoes or kidney beans, to make it go further!

Nutrition Facts
Hearty Minestrone Soup
Amount Per Serving (1 g)
Calories 241 Calories from Fat 54
% Daily Value*
Fat 6g9%
Saturated Fat 3g19%
Cholesterol 13mg4%
Sodium 974mg42%
Potassium 689mg20%
Carbohydrates 36g12%
Fiber 7g29%
Sugar 9g10%
Protein 12g24%
Vitamin A 3271IU65%
Vitamin C 26mg32%
Calcium 82mg8%
Iron 3mg17%
* Percent Daily Values are based on a 2000 calorie diet.

Here’s one more to pin on your Pinterest boards!Hearty Minestrone Soup is filling and DELICIOUS! This classic Italian soup, with meat, veggies, tomatoes, beans, and macaroni is sure to please.

Chicken Veggie TexMex Skillet

Southwest flavors shine in this deliciously seasoned, low-calorie Chicken Veggie TexMex Skillet, with zucchini, onion, yellow squash, & bell peppers!

Anybody out there enjoy fajitas? I sure do, and chicken fajitas (in flour tortillas) are my favorite. This recipe for chicken veggie TexMex skillet is one I came up with while trying to cut out some carbs from my diet a few years ago. I wanted to enjoy the TASTE of fajitas, but with far less calories from tortillas, sour cream and guacamole!

Well… here’s a tasty solution! Southwestern-inspired spices, chicken breast strips, onions, peppers and green and yellow zucchini squash are featured in this simple dish! Everything can be eaten as is (no tortillas), for a “healthier” yet delicious TexMex meal!

It’s REALLY GOOD, and you get your protein (chicken) AND veggies, without a lot of extra calories! Here’s how to make a chicken veggie TexMex skillet:

Scroll down For A Printable Recipe Card At The Bottom Of The Page

Prepare The Chicken

Pat two large boneless, skinless chicken breasts dry with paper towels. Slice into strips, about 2″ long and 1″ wide. Mix together the Southwest-inspired spices and sprinkle lightly over the chicken pieces. The spices used are ground cumin, garlic powder, chili powder, salt, pepper, and cayenne pepper.

Boneless, skinless chicken breasts are cut into strips before cooking.Salt, chili powder, cayenne pepper, pepper, cumin and garlic powder are the seasonings for chicken.

Pan-Sear The Seasoned Chicken

Heat 1½ Tablespoons vegetable oil in a large skillet, over medium-high heat. Once the oil is very hot (but NOT smoking), add the chicken pieces. They should sizzle when they hit the pan.

TexMex seasoned chicken is pan-seared in hot oil in a skillet.

Cook the chicken until the pieces are lightly browned on the bottom. This will take 2-3 minutes, depending on how hot the oil in the skillet is.

Turn each piece of chicken over, and finish cooking on the second side (a minute or two). Once the chicken is cooked all the way through and golden brown, remove the skillet from the heat, and set aside.

The chicken strips are turned halfway through cooking to brown the other side.

Prepare And Cook The Veggies

Prepare the veggies by slicing the onion and the red and green bell peppers into thin strips. Cut the squash into “planks”, as shown below, and then combine the all the veggies.

To cut the zucchini and yellow squash, remove both ends. Cut the squash in half, as shown in Step #1 below.  Now cut the half portion in half (step #2- below). Finally (step #3-below), slice each piece into planks, about 1/2″ wide.

Zucchini and yellow squash are cut into plank shapes using 3 steps, as shown.

Cook The Veggies

Heat the remaining 1½ Tablespoons of oil on medium-high heat in a large skillet. Once the oil is hot, but not smoking, add the prepared veggies, and stir. Lightly season with additional salt and pepper (if desired).

Continue to cook the veggies, stirring often, for 5-6 minutes, or until they have softened, and are fully heated through.

Veggies are cooked to add to the chicken veggie TexMex skillet.

Last Step For The Chicken Veggie TexMex Skillet!

Once the veggies have cooked through, add the seasoned chicken pieces back into the pan. Stir to combine all the ingredients in the chicken veggie TexMex skillet, and cook until the entire dish is heated through. When ready to serve, portion out the chicken and veggies onto plates.

We enjoy eating it, as is, as a delicious low-calorie dish of meat and veggies. HOWEVER, if you really want something else to go with it, place it on top of steamed rice, or throw it in a warmed tortilla!

You can even go crazy and top it with grated cheese, sour cream or guacamole, if calories aren’t a concern! .

Chicken Veggie TexMex Skillet is fully cooked and ready to eat!

 I truly hope you enjoy this dish. Thank you for spending a bit of your valuable time on this blog today, friends. I appreciate it, and hope you have the opportunity to make this meal for those you love.
Have a wonderful day, take care, and may God bless you!

Looking For More CHICKEN Recipes?

You can find ALL of my recipes in the Recipe Index, located at the top of the page. I have LOTS of recipes featuring chicken, including:
Interested In More Recipes?

Thank you for visiting this website. I appreciate you using some of your valuable time to do soIf you’re interested, I publish a newsletter 2 times per month (1st and 15th) with all the latest recipes, and other fun info. I would be honored to have you join our growing list of subscribers, so you never miss a great recipe!
There is a Newsletter subscription box on the top right side (or bottom) of each blog post, depending on the device you use, where you can easily submit your e-mail address (only) to be included in my mailing list.

You Can Also Find Me On Social Media:
Facebook page: The Grateful Girl Cooks!
Pinterest: The Grateful Girl Cooks!
Instagram: jbatthegratefulgirlcooks

Author's signature

0 from 0 votes
Chicken Veggie TexMex Skillet
Prep Time
15 mins
Cook Time
15 mins
Total Time
30 mins
 

Southwest flavors shine in this deliciously seasoned, low-calorie Chicken Veggie TexMex Skillet, with zucchini, onion, yellow squash, & bell peppers!

Category: Entree
Cuisine: Southwestern
Keyword: chicken veggie texmex skillet
Servings: 3
Calories Per Serving: 245 kcal
Author: JB @ The Grateful Girl Cooks!
Ingredients
  • 2 large chicken breasts (boneless skinless) , cut into 2" strips
  • Tablespoons vegetable oil , for cooking chicken
  • ¼ teaspoon ground cumin
  • ¼ teaspoon chili powder
  • ¼ teaspoon salt and pepper (¼ tsp. EACH)
  • teaspoon cayenne pepper
  • teaspoon garlic powder
  • Tablespoons vegetable oil , for cooking veggies
  • 3 cups zucchini and yellow squash (1½ cups EACH) , cut into 2" long x 1" wide planks
  • ½ medium red bell pepper , seeded and cut in thin strips
  • ¼ medium green bell pepper , seeded and cut in thin strips
  • ½ medium brown onion , thinly sliced
Instructions
  1. Pat two large boneless, skinless chicken breasts dry with paper towels. Slice into strips approx. 2" long by 1" wide. Mix spices together and sprinkle lightly over chicken, to season. Mix by hand, to distribute spices onto chicken.

  2. Heat 1½ Tablespoons vegetable oil in a large skillet, on medium-high heat. Once oil is very hot (but NOT smoking), add chicken. Chicken should sizzle when it hits the pan. Cook until lightly browned on the bottom (approx. 2-3 minutes). Turn each piece of chicken over, and finish cooking for and additional 1-2 minutes. Once chicken is fully cooked through and golden brown, remove skillet from heat, and set aside.

  3. Slice onion and red and green bell peppers into thin strips. Cut squash into "planks", and then combine all veggies. Heat 1½ Tablespoons of oil on medium-high heat in large skillet. Once oil is hot, but not smoking, add veggies, and stir. Lightly season with additional salt and pepper (optional- if desired). Continue to cook, stirring often, for 5-6 minutes, or until veggies have softened, and are fully cooked through.

  4. Once the veggies have cooked, add the seasoned chicken pieces to the veggies. Stir to combine all ingredients, and cook on medium heat until heated through. To serve, portion out chicken and veggies onto plates. Enjoy!

Nutrition Facts
Chicken Veggie TexMex Skillet
Amount Per Serving (1 (1/3 of total))
Calories 245 Calories from Fat 153
% Daily Value*
Fat 17g26%
Saturated Fat 12g75%
Cholesterol 48mg16%
Sodium 296mg13%
Potassium 688mg20%
Carbohydrates 8g3%
Fiber 2g8%
Sugar 5g6%
Protein 18g36%
Vitamin A 1012IU20%
Vitamin C 58mg70%
Calcium 28mg3%
Iron 1mg6%
* Percent Daily Values are based on a 2000 calorie diet.

Here’s one more to pin on your Pinterest boards!Southwest flavors shine in this deliciously seasoned, low-calorie Chicken Veggie TexMex Skillet, with zucchini, onion, yellow squash, & bell peppers!


Chocolate Espresso Muffins (Air Fryer)

Chocolate Espresso Muffins are a cinch to make in an Air Fryer! These delicious breakfast or snack treats take 25 minutes, from start to finish!

Today I want to share a delicious recipe for yummy chocolate espresso muffins COOKED IN AN AIR FRYER! These muffins are ridiculously EASY to make, and taste really GOOD! I’ve also included directions for preparing them in an oven (see recipe card below), in case you don’t have access to an air fryer.

We are sure enjoying the air fryer I ordered last year using gift cards I was given for my birthday. In air fryers, highly heated air cooks all types of food, and gives it the “effect” of frying without having to use lots of cooking oil. I found this particular recipe in the cookbook that came along with the Cosori air fryer I got last year.

Scroll Down For A Printable Recipe Cad At the Bottom Of the Page

TRUE STORY OF MUFFIN FAILURE!

When I first got my air fryer last year, I’m embarrassed to tell you this, BUT I made these muffins without a muffin tin! I filled up paper liners (cause the cookbook said to fill up the muffin cups, and paper liners are KINDA muffin cups, right?), then cooked them. Probably one of the dumbest things I’ve ever done in the kitchen!

I had NO idea what I was doing with this newfangled air fryer thing of mine! BIG MISTAKE! They cooked all right, but came out looking like hard chocolate hockey pucks! Ugh. Seriously… the batter had spread and flattened way out in the paper liners (probably begging for mercy). True Story. I was mortified! Into the trash they went.

**Moral of That Sad Story: Don’t Be Like ME. When making muffins in an air fryer, you will need to have muffin tins that fit in the basket of your air fryer. DUH. The End.** Once I figured it out, there have been no problems with ’em ever since! The ones I have hold 4 muffins each (I ordered them online). This recipe yields 8 muffins, so I cooked them in 2 batches!

Time To Make The Batter For Chocolate Espresso Muffins!

Measure all purpose flour, sugar, cocoa powder, espresso powder (or instant coffee), baking powder, salt and baking soda into a medium sized bowl. Whisk these “dry” ingredients together to fully combine them.

Dry ingredients for muffins are whisked together until blended.

In a separate bowl, whisk together the milk, egg, vanilla extract, oil and vinegar. Once combined, pour these “wet” ingredients into the bowl with the “dry” ingredients. Whisk well, to fully incorporate all ingredients. THIS is your batter for the chocolate espresso muffins! EASY!

Wet ingredients for the chocolate espresso muffins are added to dry ingredients.The muffin batter is mixed together before adding to paper liners.

Prepare To Cook The Chocolate Espresso Muffins In The Air Fryer

You will need muffin tins that are small enough to fit in your air fryer. Spray the muffin cups with non-stick cooking spray OR fill with paper liners, and then lightly spray. Divide the batter between 8 muffin cups. Each muffin cup should be about 3/4 of the way full.

Batter is poured into paper liners in muffin tins, and then cooked in an air fryer.

Cooking The Muffins In An Air Fryer

Preheat the air fryer to 300°F. Once the air fryer is preheated, quickly but carefully put your filled muffin tin into the basket. Be careful, because the air fryer is hot at this point!

Cook the chocolate espresso muffins at 300°F for 15 minutes. I recommend checking on them for “done-ness” at the 13 minute mark. Pause the machine and check by inserting a toothpick into the top center of a muffin. Continue to cook until done. This is important because temperatures can vary between different brands of air fryers.

Four chocolate espresso muffins are cooked at a time in the air fryer.

This is how the muffins looks like after cooking them in the air fryer. A little wonky at times (this was my 3rd batch), but absolutely delicious! Transfer the muffins from the pans to a wire rack to cool. Pop the remaining batch of muffins into the air fryer, and then you’re done!

The finished air fryer muffins turned out really nice!

Ready To Enjoy These Muffins!

The photo below shows one of the chocolate espresso muffins, sliced in half. The inside is perfectly cooked! This was a fun way to make breakfast muffins… in an air fryer… who knew?

A peek at the inside of one of the air fryer chocolate muffins.Chocolate espresso muffins on a plate, ready to eat!

Can Chocolate Espresso Muffins Be Baked In An OVEN?

Yes! If you do not have access to an air fryer, these muffins can be baked in a traditional oven. They will only take a few minutes more to bake! Prepare the batter using the  instructions below (in the recipe card). Cook them in a 375°F oven for between 15 and 20 minutes. Insert a toothpick into the center of the muffin to check for doneness. If it comes out clean, they are ready!

Thanks for visiting! Hope you enjoy these yummy tasting muffins. If you enjoy muffins, you will enjoy my recipes for cranberry orange muffins, dark chocolate almond chia muffins, and many others listed in the Recipe Index at the top of the page.  I hope you have a wonderful day, friends. Make it a good one!

Looking For More AIR FRYER Recipes?

You can find all of my recipes in the Recipe Index, located at the top of the page. I have several air fryer recipes, including:

Interested In More Recipes?

Thank you for visiting this website. I appreciate you using some of your valuable time to do soIf you’re interested, I publish a newsletter 2 times per month (1st and 15th) with all the latest recipes, and other fun info. I would be honored to have you join our growing list of subscribers, so you never miss a great recipe!
There is a Newsletter subscription box on the top right side (or bottom) of each blog post, depending on the device you use, where you can easily submit your e-mail address (only) to be included in my mailing list.

You Can Also Find Me On Social Media:
Facebook page: The Grateful Girl Cooks!
Pinterest: The Grateful Girl Cooks!
Instagram: jbatthegratefulgirlcooks

Author's signature

Original recipe source: “Cosori Air Fryer Recipes”, (this recipe booklet came with the purchase of my Cosori air fryer), page 108

0 from 0 votes
Chocolate Espresso Muffins (Air Fryer)
Prep Time
10 mins
Cook Time
15 mins
Total Time
25 mins
 

Chocolate Espresso Muffins are a cinch to make in an Air Fryer! These delicious breakfast or snack treats take 25 minutes, from start to finish!

Category: Breakfast, Snack
Cuisine: American
Keyword: chocolate espresso muffins
Servings: 8 muffins
Calories Per Serving: 247 kcal
Author: JB @ The Grateful Girl Cooks!
Ingredients
  • 1 cup all purpose flour
  • ¾ cup light brown sugar
  • ½ cup cocoa powder
  • ½ teaspoon baking powder
  • ½ teaspoon salt
  • ½ teaspoon espresso powder *see Notes Section
  • ½ teaspoon baking soda
  • 1 large eggs
  • ¾ cup milk
  • 1 teaspoon vanilla extract
  • 1 teaspoon apple cider vinegar
  • cup vegetable oil
  • non stick cooking spray
Instructions
  1. Measure flour, sugar, cocoa powder, espresso powder (or instant coffee), baking powder, salt and baking soda into a medium sized bowl. Whisk together to fully combine.

  2. In a separate bowl, whisk together milk, egg, vanilla, oil and vinegar. Once combined, pour into the bowl with the flour, cocoa powder, etc. Whisk well, to fully mix ingredients, and remove any lumps in the batter.

  3. You will need muffin tins small enough to fit your air fryer basket. Spray muffin cups with non-stick cooking spray OR fill with paper liners, and then lightly spray. Divide batter between 8 muffin cups. Each muffin cup should be about 3/4 of the way full.

For Air Fryer:
  1. Preheat air fryer to 300°F. Once preheated, quickly but carefully place filled muffin tin into the basket. Be careful, because air fryer is hot! Cook at 300°F for 15 minutes. Check for "done-ness" at the 13 minute mark. Pause machine and check, by inserting a toothpick into center of a muffin. Continue to cook until done, and toothpick comes out clean. Transfer pan from air fryer basket to a wire rack to cool. Let cool for 5 minutes, before removing muffins from pan. Cook remaining batch of muffins, and enjoy, once cooled to room temperature!

For Oven:
  1. Prepare muffins following instructions above. Cook muffins at 375°F for 15-20 minutes. Insert a toothpick into center of the muffin to check for doneness. If it comes out clean, they are ready! Let cool for 5 minutes before removing them from pan.
Recipe Notes

**No espresso powder? Substitute 3/4 teaspoon finely ground instant coffee granules!**

Nutrition Facts
Chocolate Espresso Muffins (Air Fryer)
Amount Per Serving (1 muffin)
Calories 247 Calories from Fat 99
% Daily Value*
Fat 11g17%
Saturated Fat 8g50%
Cholesterol 27mg9%
Sodium 241mg10%
Potassium 194mg6%
Carbohydrates 37g12%
Fiber 2g8%
Sugar 21g23%
Protein 4g8%
Vitamin A 82IU2%
Calcium 69mg7%
Iron 2mg11%
* Percent Daily Values are based on a 2000 calorie diet.

Here’s one more to pin on your Pinterest boards!Chocolate Espresso Muffins are a cinch to make in an Air Fryer! These delicious breakfast or snack treats take 25 minutes, from start to finish!

Cajun Chicken Strips

Making these yummy Cajun Chicken Strips couldn’t be easier! Dry spice seasoned chicken is pan-seared in butter for this EASY, quick lunch or dinner!
Making these yummy Cajun Chicken Strips couldn't be easier! Dry spice seasoned chicken is pan-seared in butter for this EASY, quick lunch or dinner!

Do you enjoy chicken strips, or tenders, as they are often called? We sure do, and today I want to share a ridiculously EASY way to make CAJUN chicken strips! There’s no long prep time, and before you know it, you can be munching on this delicious chicken!

Whether you prefer to call them chicken strips, chicken planks, or chicken tenders, these “pieces of chicken” are really yummy, and are a quick dish to whip up for lunch or dinner!

In this simple recipe, chicken breasts are cut into strips, coated in a mild Cajun spice mix, and then pan-seared and browned in butter until done. BOOM! Talk about EASY!!!! This is a GREAT recipe to have in your “bag of tricks”. Here’s how to make this dish:
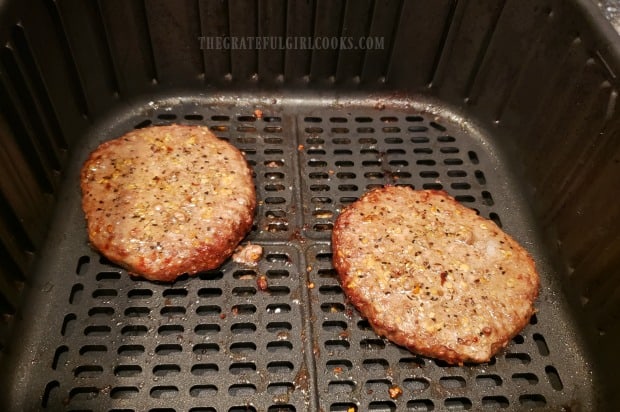
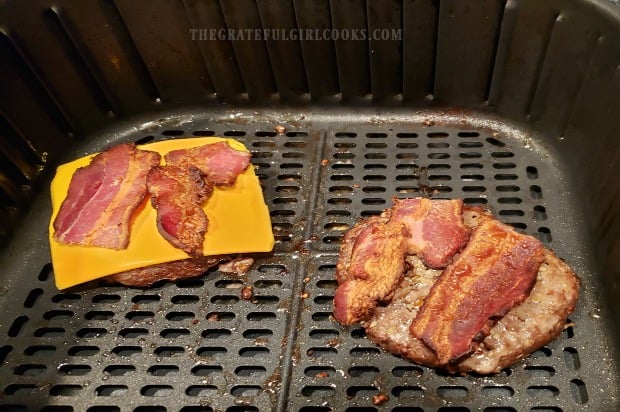
Scroll Down For A Printable Recipe Card At The Bottom Of The Page

Prepare The Chicken

Place boneless, skinless chicken breasts on a cutting mat or board. Slice the chicken into strips, about 3/4″ wide. Pat the chicken pieces dry, using paper towels, to absorb some of the moisture.

Boneless chicken breasts are cut into strips before adding spices.

Season The Chicken Strips

Measure the spices for the seasoning mix into a resealable container or plastic bag. The spices you will need are flour, poultry seasoning (mine’s homemade), garlic powder, paprika, cayenne pepper, salt and pepper.

Once the spices are mixed, add the chicken strips, and mix together until the chicken is well coated. You “might” need to do this in batches, depending on the amount of chicken strips you will be making.

The spices for the chicken strips seasoning are ready to mix.

Chicken strips are added to spice mix in plastic bag, and combined to coat.

Time To Cook The Cajun Chicken Strips!

Once the chicken is seasoned, it’s time to cook the strips! You might need to cook the chicken in a couple batches, depending on the size skillet you are using.

Melt the butter in a large skillet, and let the skillet get very hot (but not smoking). Add the Cajun chicken strips in a single layer, but be sure to not overcrowd the skillet. Cook the chicken strips for about 4 minutes without moving them.

Butter is melted and heated in skillet before adding seasoned chicken strips.Cajun chicken strips are added to the hot skillet to brown.

Carefully flip the chicken strips to the other side after about four minutes. The chicken should be well-browned on the bottom before you turn them over.

Continue to sear the chicken for 4-5 minutes, or until the chicken is cooked all the way through. Remove the chicken from the skillet, once done. If your chicken strips are really thick, it may take a couple minutes longer to cook all the way through.

The chicken strips are flipped to cook the other side after browning.

Time To Eat Some Cajun Chicken Strips!

Once the chicken is cooked through and is golden brown on all sides, these yummy chicken strips are ready to serve! They have a very mild kick to them (but not too much), and taste wonderful served as is, or with a dipping sauce (Ranch dressing or Bleu cheese).

A plate full of cajun chicken strips, cooked and ready to eat!Close up of browned chicken strips with cajun seasoning on a plate.

We have even had these served alongside a delicious broccoli corn casserole (so we could get our veggies in, too!). The chicken is tender, seasoned nicely, and was a super simple twist on plain chicken strips!

A few Cajun chicken strips, served with broccoli corn casserole on the side.

Hope you will consider trying out this really easy recipe for Cajun chicken strips. They are flavorful, but mild enough for kids and adults who don’t like things too spicy! Thank you for stopping by and spending some of your valuable time on this blog. I hope you enjoy a wonderful day!

Looking For More CHICKEN Recipes?

You can find all of my recipes in the Recipe Index, located at the top of the page. I have many chicken recipes for you to enjoy, including:

Want More Recipes? Get My FREE Newsletter!

I publish a newsletter 2 times per month (1st and 15th) with lots of recipes, tips, etc..
Would you like to join our growing list of subscribers?

There is a Newsletter subscription box on the top right (or bottom) of each blog post, depending on the device you use.
You can submit your e-mail address there, to be added to my mailing list.

Find Me On Social Media:

Facebook page: The Grateful Girl Cooks!
Pinterest:
The Grateful Girl Cooks!
Instagram:
jbatthegratefulgirlcooks

Author's signature

Original recipe source: unknown. Found handwritten on a 3×5 card in one of my old recipe boxes.

↓↓ PRINTABLE RECIPE BELOW ↓↓

0 from 0 votes
Cajun Chicken Strips
Prep Time
10 mins
Cook Time
8 mins
Total Time
18 mins
 

Making these yummy Cajun Chicken Strips couldn't be easier! Dry spice seasoned chicken is pan-seared in butter for this EASY, quick lunch or dinner!

Category: Dinner
Cuisine: Cajun
Keyword: cajun chicken strips
Servings: 4
Calories Per Serving: 255 kcal
Author: JB @ The Grateful Girl Cooks!
Ingredients
  • pounds boneless, skinless chicken breasts , cut into 3/4" strips
  • 1 teaspoon poultry seasoning
  • ¼ teaspoon cayenne pepper
  • ½ teaspoon paprika
  • 1 Tablespoon flour
  • ¾ teaspoon garlic powder
  • ¼ teaspoon salt and pepper (¼ tsp. each)
  • 2 Tablespoons butter
Instructions
  1. Place boneless, skinless chicken breasts onto a cutting mat or board. Slice chicken into long strips, about 3/4" wide. Pat chicken pieces dry, using paper towels, to absorb some of the moisture. Set aside.

  2. Measure spices into a resealable container or plastic bag, and stir, to combine. Once mixed, add chicken strips; mix until chicken is well coated. You "might" need to do this in batches, depending on the amount of chicken you make.

  3. Melt butter in a large skillet. Once skillet is very hot, add chicken strips in a single layer. Don't overcrowd skillet. Cook for 4 minutes without moving them. Once bottom is well-browned, carefully flip chicken to the other side. Continue to cook for 4-5 minutes, until chicken is cooked through. Note: If your chicken strips are really thick, it may take a couple minutes longer to cook all the way through. Remove chicken from skillet, once done. Serve chicken strips as is, or with a dipping sauce! Enjoy!

Nutrition Facts
Cajun Chicken Strips
Amount Per Serving (1 (1/4 of total))
Calories 255 Calories from Fat 90
% Daily Value*
Fat 10g15%
Saturated Fat 5g31%
Cholesterol 124mg41%
Sodium 393mg17%
Potassium 629mg18%
Carbohydrates 2g1%
Fiber 1g4%
Sugar 1g1%
Protein 37g74%
Vitamin A 414IU8%
Vitamin C 2mg2%
Calcium 13mg1%
Iron 1mg6%
* Percent Daily Values are based on a 2000 calorie diet.

Here’s one more to pin on your Pinterest boards!Making these yummy Cajun Chicken Strips couldn't be easier! Dry spice seasoned chicken is pan-seared in butter for this EASY, quick lunch or dinner!

Broccoli Corn Casserole

Broccoli Corn Casserole is a delicious, easy to prepare, baked veggie side dish, with corn, broccoli, onions, spices, and a buttery crumb topping!

Over 40 years ago I got a recipe box, and started keeping track of ideas I found in magazines, books, etc. I would quickly scrawl them out on a 3×5 index card, and then file them away to cook “someday”.

Well… this recipe for broccoli corn casserole is one of those recipes! Recently I went rooting around in this very old recipe box, looking for ideas, and found this one.

Now it didn’t have the recipe source on it (had no idea so many years ago that I would blog about food), so I don’t know where it came from.

What I CAN tell you is that this broccoli corn casserole is EASY TO MAKE AND YUMMY. Cream-style corn, frozen or fresh broccoli, onion, egg, and simple spices are the foundation of this simple side dish!

The ingredients are mixed together, then the casserole is topped with a buttery topping and baked until done. It’s delicious! Here’s how to make it:

Scroll Down For A Printable Recipe Card At The Bottom Of The Page

A Little Bit Of Prep

Two things need to be done before assembling the casserole. I found it easy to do both at the same time, which shaved some time off the prep.

Cook broccoli florets whether you will be using frozen or fresh. EASY. Once cooked, you can cut them into smaller pieces.

In a separate skillet, cook the chopped onions for about 4-5 minutes until cooked through (no need for oil or anything!). Set broccoli and onions aside.

Broccoli and chopped onions are cooked before assembling casserole.

Assemble The Broccoli Corn Casserole

Okay… now it’s time to put this simple casserole together! Grab a medium sized mixing bowl, and add a can of cream-style corn, the cooked broccoli, onions, salt, pepper, and garlic powder.

Stir these ingredients together until fully combined. Once combined, add a well-beaten egg to the mixture, and stir, to incorporate.

NOTE: The reason to add the egg AFTER everything else is combined is so the onions and broccoli have cooled a bit, so the egg won’t scramble when added.

Creamed corn, onions, broccoli and spices are combined in bowl.Beaten egg is added to the broccoli corn casserole ingredients.

Spray a 1½ quart oven-safe dish with non-stick cooking spray. Pour the broccoli corn casserole ingredients into the dish.

The casserole is poured into a greased oven-safe dish before baking.

Add The Buttery Crumb Topping

Place crackers in a resealable plastic bag, and finely crush them using a rolling pin or mallet. I used Ritz crackers, but you can certainly use what you have available.

Once the crackers are crushed well, mix the crumbs with melted butter until a nice topping comes together. Sprinkle the crumb topping evenly over the surface of the casserole.

Crackers are smashed into crumbs and combined with melted butter for topping.Buttery crumb topping is added to top of broccoli corn casserole before cooking.

Bake The Bacon Corn Casserole

Place the dish onto the middle rack of a preheated 350°F oven, and let the veggie casserole bake for 30-35 minutes. When done, the crumb topping should be light golden brown and any liquid should be bubbly around the edges.

If you want the topping to be more deeply browned, leave the dish on the middle rack and turn the oven broiler on for just a couple minutes. Keep an eye on it!

After baking, the casserole cools for a couple minutes before serving.

Time To EAT!

Once the broccoli corn casserole is finished baking, remove it from the oven. Place the dish on a wire rack and let it cool for about 5 minutes before serving. This allows time for the casserole to firm up just a bit after cooking.

The veggie casserole will pair nicely with chicken, pork beef or fish. I served it with some simple Cajun chicken strips this time, and it was a wonderful side dish!

Leftovers can be stored (covered) in the refrigerator for several days. The casserole can be reheated in the oven or the microwave.

A peek at the insides of the broccoli corn casserole.Chicken strips are served with the broccoli corn casserole.

Hope you enjoy this simple side dish! We really did, and love the fact that it is so very easy to make! Have a wonderful day, and thanks for visiting. Come back soon!

Looking For More Vegetable Dishes?

You can find all of my recipes in the Recipe Index, located at the top of the page. I have lots of yummy vegetable recipes for you to choose from, including:

Want More Recipes? Get My FREE Newsletter!

I publish a newsletter 2 times per month (1st and 15th) with lots of recipes, tips, etc..
Would you like to join our growing list of subscribers?

There is a Newsletter subscription box on the top right (or bottom) of each blog post, depending on the device you use.
You can submit your e-mail address there, to be added to my mailing list.

Find Me On Social Media:

Facebook page: The Grateful Girl Cooks!
Pinterest:
The Grateful Girl Cooks!
Instagram:
jbatthegratefulgirlcooks

Author's signature

Original recipe source: unknown (recipe found on a 3×5 index card in an old recipe box).

↓↓ PRINTABLE RECIPE BELOW ↓↓

0 from 0 votes
Broccoli Corn Casserole
Prep Time
15 mins
Cook Time
30 mins
Total Time
45 mins
 

Broccoli Corn Casserole is a delicious, easy to prepare, baked veggie side dish, with corn, broccoli, onions, spices, and a buttery crumb topping!

Category: Side Dish, Vegetable Dish
Cuisine: American
Keyword: broccoli corn casserole
Servings: 6
Calories Per Serving: 143 kcal
Author: JB @ The Grateful Girl Cooks!
Ingredients
  • 14.75 ounces cream style corn (canned)
  • 10 ounces broccoli, cooked , fresh OR frozen
  • 1 large egg , beaten
  • 1 small brown onion , chopped and sauteed
  • ½ teaspoon salt
  • ¼ teaspoon pepper
  • ¼ teaspoon garlic powder
  • 2 Tablespoons butter , melted
  • ½ cup crackers (crushed) , I used 10 Ritz crackers
Instructions
  1. Cook broccoli florets (frozen or fresh). Once cooked, cut them into smaller pieces. In separate skillet, cook onions for 4-5 minutes until cooked through (no need for oil). Set broccoli and onions aside.

  2. In a medium bowl, add corn, broccoli, onions, salt, pepper, and garlic powder. Stir these ingredients together until combined. Add a beaten egg to the mixture, and stir until incorporated. NOTE: Add egg AFTER everything else is combined so onions and broccoli have cooled a bit, so the egg won't scramble when added. Spray a 1½ quart oven-safe dish with non-stick cooking spray, and then pour casserole ingredients into dish.

  3. Place crackers in a resealable plastic bag, and finely crush them using a rolling pin or mallet. Once crushed well, mix crumbs with melted butter to combine. Sprinkle crumb topping evenly over surface of casserole.

  4. Place dish onto the middle rack of a preheated 350°F oven, and bake for 30-35 minutes. When done, crumb topping should be golden brown and casserole should be bubbly around the edges. TIP: If you want topping to be deeply browned, leave the dish on middle rack and turn broiler on for a couple minutes. Keep an eye on it! Remove dish from oven. Place dish on wire rack to cool for 5 minutes before serving. This allows time for the casserole to firm up just a bit after cooking. Serve, and enjoy! Store leftovers (covered) in refrigerator.

Recipe Notes

For the cracker topping, I used Ritz crackers, but almost any type of cracker will work.

Nutrition Facts
Broccoli Corn Casserole
Amount Per Serving (1 g)
Calories 143 Calories from Fat 54
% Daily Value*
Fat 6g9%
Saturated Fat 3g19%
Cholesterol 45mg15%
Sodium 499mg22%
Potassium 279mg8%
Carbohydrates 20g7%
Fiber 2g8%
Sugar 4g4%
Protein 4g8%
Vitamin A 514IU10%
Vitamin C 46mg56%
Calcium 40mg4%
Iron 1mg6%
* Percent Daily Values are based on a 2000 calorie diet.

Here’s one more to pin on your Pinterest boards!Broccoli Corn Casserole is a delicious, easy to prepare, baked veggie side dish, with corn, broccoli, onions, spices, and a buttery crumb topping!

Chocolate Caramel Clusters

Five ingredients are all you need to quickly make yummy Caramel Chocolate Clusters, with chow mein noodles, peanut butter, chocolate chips & caramels!

Looking for a quick, yet tasty snack or treat that only has 5 ingredients (and one of them is water)? Check out this recipe for chocolate caramel clusters, an easy, classic “stand-by” treat you’ll be glad to have in your recipe box! These chocolate crispy treats are a total cinch to make. Caramels, chocolate chips, crunchy peanut butter and water are melted together in a small pan.

Once melted, the “sauce” is added to chow mein noodles and mixed, dropped by spoonfuls, and then cooled to room temperature before eating! That’s it! Here’s how easy these chocolate caramel clusters are to make. Here’s how to make them:

Scroll Down For A Printable Recipe Card At The Bottom Of The Page

How To Make Chocolate Caramel Clusters

Measure chow mein noodles into a large mixing bowl, then set the bowl aside. Do this before you cook the other ingredients, because you want to have them ready to mix with the caramel chocolate mixture as soon as it comes off the heat.

Crunchy chow mein noodles are measured into mixing bowl.

Make The Chocolate Peanut Butter Caramel Topping

In a small saucepan, combine the caramels, chocolate chips, crunchy peanut butter and water. Cook on low heat, stirring continually until all ingredients have melted and are well combined. This will only take a few minutes.

NOTE: Make sure to keep stirring! You do NOT want the caramels or chocolate to burn on the bottom of the pan! Just sayin’!

Peanut butter, chocolate chips, water and caramels are cooked in saucepan.The melted chocolate, peanut butter and caramel mixture, ready to pour!

Combine The Ingredients

As soon as the chocolate caramel mixture is fully melted and combined, remove  the pan from the heat, and immediately pour it over the chow mein noodles. Stir quickly, to cover all the noodles with the hot chocolate mixture!

Melted caramel and chocolate mixture is poured over chow mein noodles.Once chow mein noodles are covered, they're ready to shape into clusters.

Time To Make Chocolate Caramel Clusters!

As soon as all the ingredients are fully incorporated, drop by teaspoonfuls onto wax paper or aluminum foil. Be sure to leave a tiny bit of space between each piece.

The recipe, as written below in the printable recipe card, should make between 20-30 chocolate caramel clusters. I decided to make mine using heaping teaspoons, and ended up with 20 clusters for these photos. You can determine the amount you need, and make them the size you desire.

The chocolate caramel clusters are dropped by teaspoonfuls onto foil to firm up.

Once all of the chocolate caramel clusters have been shaped and “dropped”, let them stand until they are firm. The yummy chocolate mixture will need time to harden, before serving!

Once the treats are completely firm, pull them off of the wax paper or foil, and enjoy! Store leftover clusters in an airtight container at room temperature, or in the refrigerator (your choice). They are yummy treats!

Chocolate caramel clusters waiting for chocolate to firm up, before being eaten.

I hope you enjoy these chocolate clusters. Whether you feel they are a cookie, or candy, I hope you enjoy them! It’s a quick way to make lots of delicious treats for your family, friends, or any occasion where you have to bring a dessert! Have a GREAT day!

Looking For More Chocolate Treats?

You can find all of my recipes in the Recipe Index, located at the top of the page. A few favorite chocolate treats you might enjoy include:

Interested In More Recipes?

Thank you for visiting this website. I appreciate you using some of your valuable time to do soIf you’re interested, I publish a newsletter 2 times per month (1st and 15th) with all the latest recipes, and other fun info. I would be honored to have you join our growing list of subscribers, so you never miss a great recipe!
There is a Newsletter subscription box on the top right side (or bottom) of each blog post, depending on the device you use, where you can easily submit your e-mail address (only) to be included in my mailing list.

You Can Also Find Me On Social Media:
Facebook page: The Grateful Girl Cooks!
Pinterest: The Grateful Girl Cooks!
Instagram: jbatthegratefulgirlcooks

Author's signature

Original recipe source unknown (I found it over 20 years ago on a 3×5 card in an OLD recipe box)

0 from 0 votes
Chocolate Caramel Clusters
Prep Time
15 mins
Cook Time
0 mins
Total Time
15 mins
 

Five ingredients are all you need to quickly make yummy Caramel Chocolate Clusters, with chow mein noodles, peanut butter, chocolate chips & caramels!

Category: Candy, Dessert
Cuisine: American
Keyword: chocolate caramel clusters
Servings: 20
Calories Per Serving: 136 kcal
Author: JB @ The Grateful Girl Cooks!
Ingredients
  • 15 Kraft caramels (approx. 4 ounces)
  • ¼ cup semi-sweet chocolate chips
  • 2 Tablespoons crunchy peanut butter
  • 2 Tablespoons water
  • 2 cups chow mein noodles
Instructions
  1. Measure chow mein noodles into a large mixing bowl, then set aside.

  2. In a small saucepan, combine caramels, chocolate chips, crunchy peanut butter and water. Cook on low heat, stirring continually until all ingredients have melted and are well combined. This will only take a few minutes. NOTE: Make sure to keep stirring! You do NOT want caramels or chocolate to burn onto the bottom of the pan!

  3. As soon as chocolate caramel mixture is fully melted, remove pan from heat and immediately pour hot mixture over chow mein noodles. Stir quickly, to fully cover noodles!

  4. Quickly drop chocolate clusters by teaspoonfuls onto wax paper or aluminum foil before chocolate firms up. Be sure to leave space between each piece. The recipe, as written, will make between 20-30 chocolate caramel clusters, based on how big or small you make the spoonfuls. Let clusters cool until chocolate has firmed up completely, then they're ready to eat! Store extras in an airtight container at room temperature, or in refrigerator. Enjoy!

Nutrition Facts
Chocolate Caramel Clusters
Amount Per Serving (1 g)
Calories 136 Calories from Fat 27
% Daily Value*
Fat 3g5%
Saturated Fat 1g6%
Cholesterol 1mg0%
Sodium 174mg8%
Potassium 39mg1%
Carbohydrates 24g8%
Fiber 2g8%
Sugar 6g7%
Protein 4g8%
Vitamin A 3IU0%
Calcium 12mg1%
Iron 1mg6%
* Percent Daily Values are based on a 2000 calorie diet.

Here’s one more to pin on your Pinterest boards!Five ingredients are all you need to quickly make yummy Caramel Chocolate Clusters, with chow mein noodles, peanut butter, chocolate chips & caramels!

Asian Chicken Thigh Skillet

Asian Chicken Thigh Skillet is a delicious, EASY dish to make. Chicken thighs are pan-seared, then covered and cooked in a simple Asian garlic sauce!

If you’re looking for a simple, yet DELICIOUS way to cook chicken thighs, may I suggest this dish? It truly is a simple dish to make, and is packed with flavor!

Skinless chicken thighs (bone-in or no-bone) are pan seared, then are cooked for a short time in a 4-ingredient Asian sauce, along with minced garlic and red pepper flakes. The result is perfectly cooked chicken thighs, covered in an amazing tasting sauce, and then served on a bed of rice!

The Asian Chicken Thigh Skillet only takes about half an hour to make, and requires very few ingredients. **NOTE: The recipe calls for using SIX chicken thighs, but as you will see, I only made four thighs, so my photos will reflect that!

Scroll Down For A Printable Recipe Card At The Bottom Of The Page

Make The Asian Sauce

The first thing you will need to do is make a quick, Asian-inspired sauce. Easy! Simply mix together soy sauce, vinegar, honey and ground ginger in a small bowl. Once fully combined, set the bowl of Asian sauce aside.

A sauce is made with soy sauce, vinegar, honey and ground ginger.

Brown The Chicken Thighs

The next step is to brown the chicken thighs! To do this, first heat the oil on medium-high heat in a large skillet. I used a cast iron skillet, but it really doesn’t matter. Once the oil is very hot, but NOT smoking, carefully add the skinless chicken thighs to the hot oil.

Let the chicken cook (without disturbing) for 5 minutes, and then carefully turn each piece to the other side. The chicken thighs should be lightly browned before turning them over. Continue to cook for 5 more minutes on the second side.

Skinless chicken thighs are browned in hot oil in skillet.The chicken thighs are flipped over once browned.

Add Seasonings And Sauce To The Asian Chicken Thigh Skillet

At this point, you need to add the minced garlic and red pepper flakes to the skillet, and stir, to combine. Continue to cook for about 2 minutes, stirring often, to keep the garlic from burning.

Garlic, red pepper flakes and sauce are added to the Asian Chicken Thigh Skillet.

Pour the Asian sauce you previously set aside into the skillet. Stir well, to combine. Cover the skillet, turn the heat down to medium and let the chicken cook, undisturbed, for 15 minutes.

Asian Chicken Thigh Skillet is covered to let meat cook in sauce for 15 minutes.

Time To Finish The Asian Chicken Thigh Skillet!

After the 15 minutes of covered cooking time, carefully remove the cover on the skillet. Let the chicken and sauce cook uncovered for about 2 minutes, stirring occasionally. While cooking, spoon the sauce on top of each piece of chicken several times.

The sauce will slightly thicken as it cooks, and the chicken will become beautifully browned, thanks to the flavor-filled sauce. When done, the chicken should have an internal temperature of 165°F, and then it is ready to serve!

Some of the Asian sauce is spooned on top of chicken thighs before serving.

Time To Enjoy This Asian Chicken Thigh Skillet!

Once the chicken is cooked through to the proper temperature, and the sauce has slightly thickened, it is time to eat!

We enjoy this chicken best when served on top of some steamed rice! Spoon some of the sauce over each piece of chicken when serving, for an added flavor boost! Can you see all that minced garlic on top of the chicken? That’s some GOOD flavor there, friends!

Finished Asian chicken thigh skillet dish is served on top of steamed rice.Chicken thigh with sauce is served on steamed rice, with broccoli on the side.

I really hope you will consider trying this simple recipe for Asian Chicken Thigh Skillet! We truly enjoy this meal, and trust you will, too! Have a wonderful day, and thank you for visiting!

Looking For Other CHICKEN Recipes?

You can find all of my recipes in the Recipe Index, located at the top of the page. I have many chicken recipes, including:

Interested In More Recipes?

Thank you for visiting this website. I appreciate you using some of your valuable time to do soIf you’re interested, I publish a newsletter 2 times per month (1st and 15th) with all the latest recipes, and other fun info. I would be honored to have you join our growing list of subscribers, so you never miss a great recipe!
There is a Newsletter subscription box on the top right side (or bottom) of each blog post, depending on the device you use, where you can easily submit your e-mail address (only) to be included in my mailing list.

You Can Also Find Me On Social Media:
Facebook page: The Grateful Girl Cooks!
Pinterest: The Grateful Girl Cooks!
Instagram: jbatthegratefulgirlcooks

Author's signature

Original recipe source: unknown (recipe found written on a 3×5 card from many, many years ago)

3 from 1 vote
Asian Chicken Thigh Skillet
Prep Time
15 mins
Cook Time
17 mins
Total Time
32 mins
 

Asian Chicken Thigh Skillet is a delicious, EASY dish to make. Chicken thighs are pan-seared, then covered and cooked in a simple Asian garlic sauce!

Category: Entree
Cuisine: Asian
Keyword: Asian chicken thigh skillet
Servings: 6
Calories Per Serving: 325 kcal
Author: JB @ The Grateful Girl Cooks!
Ingredients
  • 6 medium chicken thighs , skin removed
  • ¼ cup vinegar
  • 3 Tablespoons soy sauce
  • 2 Tablespoon honey
  • 2 Tablespoons peanut oil (or veg. oil)
  • 10 cloves garlic , coarsely chopped
  • 1 teaspoon dried red pepper flakes
  • cooked rice (optional-for serving)
Instructions
  1. In a small bowl, mix together soy sauce, vinegar, honey and ground ginger. Set aside.

  2. Heat oil on medium-high heat in a large skillet. Once oil is very hot, but NOT smoking, carefully add skinless chicken thighs. Let cook (without disturbing) for 5 minutes, and then carefully turn them to the other side. The chicken thighs should be lightly browned before turning them over. Continue to cook 5 more minutes on second side.

  3. Add minced garlic and red pepper flakes to skillet, and stir, to combine. Cook for 1-2 minutes, stirring often, to keep garlic from burning. Pour reserved sauce into skillet. Stir well, to combine. Cover skillet, turn heat down to medium and let chicken cook, undisturbed, for 15 minutes.

  4. After 15 minutes, carefully remove cover from skillet. Let chicken and sauce cook uncovered for 2 minutes, stirring occasionally. While cooking, spoon sauce over top of chicken thighs several times. Sauce will slightly thicken as it cooks, and will become beautifully browned, thanks to the flavor-filled sauce. When done, chicken should have an internal temperature of 165°F, and then it is ready to serve! Serve over steamed rice, spoon some sauce over the top of the chicken, and enjoy!

Nutrition Facts
Asian Chicken Thigh Skillet
Amount Per Serving (1 thigh)
Calories 325 Calories from Fat 216
% Daily Value*
Fat 24g37%
Saturated Fat 6g38%
Cholesterol 111mg37%
Sodium 360mg16%
Potassium 273mg8%
Carbohydrates 9g3%
Fiber 1g4%
Sugar 6g7%
Protein 19g38%
Vitamin A 187IU4%
Vitamin C 2mg2%
Calcium 18mg2%
Iron 1mg6%
* Percent Daily Values are based on a 2000 calorie diet.

Here’s one more to pin on your Pinterest boards!Asian Chicken Thigh Skillet is a delicious, EASY dish to make. Chicken thighs are pan-seared, then covered and cooked in a simple Asian garlic sauce!


Air Fryer Italian Meatballs

It’s so EASY to make delicious Air Fryer Italian Meatballs, to add to a favorite sauce for pasta, or to make a yummy meatball sandwich!
It's so EASY to make delicious Air Fryer Italian Meatballs, to add to a favorite sauce for pasta, or to make a yummy meatball sandwich!

If you have an air fryer, then you know how many foods can be cooked or “fried” in them, without using a lot of oil. Normally I fry my meatballs for spaghetti in oil, in a large skillet on the stove, but wanted to give the old air fryer a go at it, too!

Using an air fryer has become a fun challenge for me, ever since I used birthday gift cards to purchase one last year. My husband and I have sure enjoyed using ours and trying new recipes. We appreciate this appliance that cooks with highly heated air rather than using a lot of oil to prepare food.

So… this time I made meatballs! The result was delicious tasting air fryer Italian meatballs, which were added to homemade spaghetti sauce, and then combined with hot cooked pasta! The process for making the meatballs was practically effortless, and I would whole-heartedly make them this way again!. Here’s how to make Italian meatballs in an air fryer.

Scroll Down For A Printable Recipe Card At The Bottom Of The Page

Prepare The Meatballs

This step is simple. Simply combine ground beef, breadcrumbs, egg, milk, spices (including salt and pepper), and Parmesan cheese in a medium sized bowl.

Ingredients for meatballs, ready to be combined in large bowl.The meat mixture is fully combined and ready to form into meatballs.

Measure out heaping Tablespoons of the meat mixture and roll each portion between the palms of you hands to form meatballs. Place them on aluminum foil or wax paper, and then lightly spritz them with non-stick baking spray or oil on top and bottom.

The air fryer Italian meatballs recipe calls for only a half pound of ground beef, so the recipe (as written below), should yield about 11-12 medium-sized meatballs, which yields approximately 3 servings.

Place the meatballs in the refrigerator for 10 minutes before cooking. Begin preheating your air fryer towards the end of the refrigeration time.

Meatballs are spritzed with cooking spray or oil before cooking.

Time To Cook the Air Fryer Italian Meatballs!

Okay, now you should have 11-12 lightly sprayed (and lightly chilled meatballs), right? Right! Preheat your air fryer to 400°F. Once the air fryer is pre-heated, place the meatballs into the basket, leaving a bit of space between each one.

I have a Cosori 5.8 quart air fryer, so all the meatballs fit nicely in the basket. If you are making a double portion, you may have to cook the air fryer Italian meatballs in two batches.

Air fryer Italian meatballs in the fryer, ready to be cooked.

Cooking Meatballs In An Air Fryer

Cook the meatballs at 400°F. for approximately 8 minutes in the air fryer. Half way through the cooking time, gently flip the meatballs to the other side using tongs. I found this was so much easier than turning meatballs in a skillet where they sometimes stick to the oiled pan, regardless!

Since some air fryers tend to run really HOT, plan to check on the meatballs around the 7 minute mark, to ensure you don’t overcook them. Mine cooked perfectly in 8 minutes, but it is always best to keep an eye on them.

The cooked air fryer Italian meatballs are crispy and browned when done.Meatballs have been removed from fryer, and are ready to add to sauce.

Okay, They Are Fully Cooked – Now What?

You can eat the meatballs as soon as they are fully cooked, just the way they are. BUT… I think they are best added to a pot of spaghetti or marinara sauce!

Just toss them into the pan, and spoon the sauce over the meatballs. Heat the sauce and meatballs through before serving.

Spaghetti sauce is heated, along with the air fryer cooked meatballs.

When done, add the meatballs and sauce to cooked pasta OR make a wonderful tasting meatball sandwich! Honestly, the meatballs aren’t hard at all to make! Using an air fryer to cook them let me work on other parts of the meal (hands free) while they were cooking!

The air fryer Italian meatballs have good flavor (thanks to garlic powder, Parmesan, onion powder and oregano), and will be a wonderful addition to your meal! Throw some extra Parmesan cheese on top and dig In!

Air fryer Italian meatballs are served along with pasta and sauce!

I hope you will have an opportunity to try this recipe. We are really enjoying our air fryer, and are grateful for the many food items that can be prepared in it. Hope you have a wonderful day!

Looking For More AIR FRYER Recipes?

You can find all of my recipes in the Recipe Index, located at the top of the page. A few Air Fryer recipes include:

Interested In More Recipes?

Thank you for visiting this website. I appreciate you using some of your valuable time to do soIf you’re interested, I publish a newsletter 2 times per month (1st and 15th) with all the latest recipes, and other fun info. I would be honored to have you join our growing list of subscribers, so you never miss a great recipe!
There is a Newsletter subscription box on the top right side (or bottom) of each blog post, depending on the device you use, where you can easily submit your e-mail address (only) to be included in my mailing list.

You Can Also Find Me On Social Media:
Facebook page: The Grateful Girl Cooks!
Pinterest: The Grateful Girl Cooks!
Instagram: jbatthegratefulgirlcooks

Author's signature

Original recipe source:  The “Cosori Air Fryer Recipes” owner’s recipe book that came with the purchase of my air fryer. Page 22

0 from 0 votes
Air Fryer Italian Meatballs
Prep Time
15 mins
Cook Time
8 mins
Total Time
23 mins
 

It's so EASY to make delicious Air Fryer Italian Meatballs, to add to a favorite sauce for pasta, or to make a yummy meatball sandwich!

Category: Entree
Cuisine: Italian
Keyword: Air fryer Italian meatballs
Servings: 3 (3-4 meatballs per person)
Calories Per Serving: 246 kcal
Author: JB @ The Grateful Girl Cooks!
Ingredients
  • ½ pound ground beef (75/25 recommended)
  • ¼ cup panko breadcrumbs
  • 1 large egg
  • cup milk
  • 3 Tablespoons grated Parmesan cheese
  • 1 Tablespoon dried parsley
  • 2 teaspoons dried oregano
  • 1 teaspoon garlic powder
  • 1 teaspoon onion powder
  • ¼ teaspoon salt and pepper (¼ tsp. each)
  • non-stick cooking spray
Instructions
  1. Combine ground beef, breadcrumbs, egg, milk, salt, pepper, spices, and Parmesan cheese in a medium sized bowl. Mix until all ingredients are incorporated.

  2. Measure out heaping Tablespoons of the meat mixture and roll each portion between the palms of you hands to form meatballs. Place them on aluminum foil or wax paper, and then lightly spritz them with non-stick baking spray or oil on top and bottom. The mixture should make about 11-12 medium-sized meatballs, which yields approximately 3 servings. Place the meatballs in the refrigerator for 10 minutes before cooking. Begin preheating your air fryer towards the end of the refrigeration time.

  3. Preheat air fryer to 400°F. Once pre-heated, place meatballs into basket, leaving space between each one. If you are making a double portion, you may have to cook the meatballs in two batches. Cook the meatballs at 400°F. for approximately 8 minutes in the air fryer. Half way through cooking time, gently turn meatballs to other side using tongs. Check on meatballs around the 7 minute mark, to ensure you don't overcook them.

  4. Once meatballs are done, they're ready to eat. Eat them as is, or add them to a pot of spaghetti sauce to combine with cooked pasta, or make a meatball sandwich! Enjoy!

Nutrition Facts
Air Fryer Italian Meatballs
Amount Per Serving (1 (approx. 3-4 meatballs))
Calories 246 Calories from Fat 135
% Daily Value*
Fat 15g23%
Saturated Fat 6g38%
Cholesterol 127mg42%
Sodium 392mg17%
Potassium 310mg9%
Carbohydrates 7g2%
Fiber 1g4%
Sugar 1g1%
Protein 20g40%
Vitamin A 187IU4%
Vitamin C 1mg1%
Calcium 128mg13%
Iron 3mg17%
* Percent Daily Values are based on a 2000 calorie diet.

Here’s one more to pin on your Pinterest boards!It's so EASY to make delicious Air Fryer Italian Meatballs, to add to a favorite sauce for pasta, or to make a yummy meatball sandwich!

Mocha Chocolate Chip Cookies

Make 4 dozen Mocha Chocolate Chip Cookies in no time at all! These delicious treats are easy to make, chewy, and have a hint of coffee liqueur flavor!

Do you like cookies? I’m pretty sure just about everyone that breathes loves a good cookie! Recently I hauled out one of my old cookie cookbooks (published 22 years ago!), and made a “new to us” recipe for mocha chocolate chip cookies. Wow… are they ever GOOD!

Many years ago there were “Mrs. Field” Cookie stores in practically every large shopping mall. There was just something about grabbing a freshly baked cookie while out on a shopping run that was hard to resist! Well, thanks to my old Mrs. Fields Cookie cookbook, I can make these yummy mocha chocolate chip cookies conveniently AT MY HOME!

The “mocha” flavor is not a smack you in the face kinda flavor… it’s more subtle! The cookies get that little bit of mocha flavor from pairing a small amount of instant coffee with a little bit of coffee liqueur! When that is added to the chocolate cocoa powder in the cookie dough, you’ve got a winning combination!

The recipe doesn’t take too long to make, either! Prep time is about 15 minutes, and the cookies take about 20 minutes to bake. Before ya know it, you’ve made 4 dozen DELICIOUS mocha chocolate chip cookies!

Scroll Down For A Printable Recipe Card At The Bottom Of The Page

Prepare The Cookie Dough

Before starting the dough, remember to preheat your oven to 300°F. Measure the flour, cocoa powder, salt and baking soda into a medium sized bowl. Whisk to combine these dry ingredients, and then set the bowl aside.

Flour, cocoa powder, baking soda and salt are combined in large bowl.

In a SEPARATE small bowl, dissolve the instant coffee powder (or crystals) in the coffee liqueur (or STRONG coffee, if not using liqueur). Set the bowl aside.

Instant coffee powder is dissolved in coffee liqueur before adding to cookie dough.

Measure the granulated and dark brown sugars into a large mixing bowl. Blend these sugars together using an electric mixer on medium speed until combined.

Add the softened butter and beat until this mixture is thoroughly combined. It will be kind of grainy and paste-like, but just keep on beating this mixture until combined. Now add two eggs and the dissolved coffee mixture to the bowl, and continue to beat (still on medium speed) until all ingredients are combined.

Granulated and brown sugars are mixed together.Butter is mixed into the brown and granulated sugars in bowl.Eggs, and dissolved coffee powder are added to the cookie dough.

Add The Reserved Dry Ingredients To The Cookie Dough

Slowly add the flour mix to the dough for the mocha chocolate chip cookies a little bit at a time, beating on LOW speed as you add it. Continue beating on low until all the flour has been added.

TIP: This cookie dough will be VERY thick. You may wish to switch to a large spoon (and STIR) when about half of the flour mix has been added, because this is a really thick batter! Once all the flour has been incorporated, stir in the chocolate chips until combined.

Dry ingredients are added to the batter for the mocha chocolate chip cookies.Chocolate chips are added to the cookie dough, and stirred to combine.

Time To Bake Some Mocha Chocolate Chip Cookies!

Now that the cookie dough is ready, it’s time to bake some cookies! Drop the cookie dough using rounded Tablespoons onto ungreased cookie sheets. You will want to leave a couple inches in between each ball of dough!

Bake the mocha chocolate chip cookies for 20-22 minutes at 300°F. Check them at 20 minutes (mine were done then!), and when done remove the baking sheets from the oven. Let the cookies rest for about a minute, then transfer them with a spatula to a wire rack to finish cooling.

Mocha chocolate chip cookies are scooped out onto baking sheet for cooking.The cookies bake for about 20 minutes, then cool on a wire rack.

YUM – Time To Enjoy a Cookie Or Two!

Now all that is left to do is pour yourself a small glass of cold milk, grab a cookie or two, and enjoy a delicious treat! Hey- why not go crazy, and put your feet up, too? You deserve a break! The cookies are chewy, and taste wonderful! I really do think you (and those you love) will enjoy these cookies, thanks to the recipe from good old Mrs. Fields!

A glass of cold milk is served with the mocha chocolate chip cookies.Three mocha chocolate chip cookies on a white plate.

Thanks for visiting! I hope you enjoy these yummy mocha chocolate chip cookies as much as we did! They really are good, and any leftovers freeze well! Have a wonderful day… I hope you come back soon!

Looking For More Cookie Recipes?

You can find all of my cookie recipes in the Recipe Index, located at the top of the page. A few favorites include:

Interested In More Recipes?

Thank you for visiting this website. I appreciate you using some of your valuable time to do soIf you’re interested, I publish a newsletter 2 times per month (1st and 15th) with all the latest recipes, and other fun info. I would be honored to have you join our growing list of subscribers, so you never miss a great recipe!
There is a Newsletter subscription box on the top right side (or bottom) of each blog post, depending on the device you use, where you can easily submit your e-mail address (only) to be included in my mailing list.

You Can Also Find Me On Social Media:
Facebook page: The Grateful Girl Cooks!
Pinterest: The Grateful Girl Cooks!
Instagram: jbatthegratefulgirlcooks

Author's signature

Recipe adapted from the cookbook: “Mrs. Fields Best Ever Cookie Book!”, published by Mrs. Fields Development Corporation via Time-Life Custom Publishing, 1998, page 21.

0 from 0 votes
Mocha Chocolate Chip Cookies
Prep Time
15 mins
Cook Time
20 mins
Total Time
35 mins
 

Make 4 dozen Mocha Chocolate Chip Cookies in no time at all! These delicious treats are easy to make, chewy, and have a hint of coffee liqueur flavor!

Category: Desssert
Cuisine: American
Keyword: mocha chocolate chip cookies
Servings: 48 cookies
Calories Per Serving: 136 kcal
Author: JB @ The Grateful Girl Cooks!
Ingredients
  • cups all purpose flour
  • cup unsweetened cocoa powder
  • ¼ teaspoon salt
  • ½ teaspoon baking soda
  • 2 teaspoons instant coffee crystals (powder)
  • 1 Tablespoon coffee liqueur (I used Kahlua) (can substitute STRONG coffee)
  • 1 cup granulated sugar
  • ¾ cup (packed) dark brown sugar
  • 1 cup salted butter, softened (2 sticks)
  • 2 large eggs
  • 2 cups semi-sweet chocolate chips
Instructions
  1. Preheat oven to 300°F. Place flour, cocoa powder, salt and baking soda into a medium bowl. Whisk to combine; set bowl aside.

  2. In separate small bowl, dissolve instant coffee crystals in coffee liqueur (or STRONG coffee, if not using liqueur). Set bowl aside.

  3. Measure granulated and dark brown sugars into a large mixing bowl. Blend using an electric mixer on medium speed until combined. Add softened butter; beat until combined. It will be grainy. Add eggs and dissolved coffee mixture, and beat (on medium speed) until combined.

  4. Add flour mix to the dough a little at a time, beating on LOW speed as you add it. Continue beating mixture on low until all flour has been added. Cookie dough will be VERY thick. TIP: Switch to a large spoon (and stir) when about half of the flour mix has been added, because this is a really thick batter! Once all flour has been incorporated, stir in chocolate chips.

  5. Drop cookie dough by rounded Tablespoons onto ungreased cookie sheets. Leave a couple inches between each cookie! Bake for 20-22 minutes at 300°F. Check them at 20 minutes, and when done, remove from oven. Let cookies rest for a minute, then transfer with a spatula to a wire rack to finish cooling. Enjoy!

Nutrition Facts
Mocha Chocolate Chip Cookies
Amount Per Serving (1 cookie)
Calories 136 Calories from Fat 63
% Daily Value*
Fat 7g11%
Saturated Fat 4g25%
Cholesterol 19mg6%
Sodium 63mg3%
Potassium 69mg2%
Carbohydrates 17g6%
Fiber 1g4%
Sugar 10g11%
Protein 2g4%
Vitamin A 135IU3%
Calcium 12mg1%
Iron 1mg6%
* Percent Daily Values are based on a 2000 calorie diet.

Here’s one more to post on your Pinterest boards!Make 4 dozen Mocha Chocolate Chip Cookies in no time at all! These delicious treats are easy to make, chewy, and have a hint of coffee liqueur flavor!

Poultry Seasoning Mix

Make your own homemade poultry seasoning mix from scratch in under 5 minutes with this quick and easy recipe!

Recently I added one more homemade spice mix to my ever growing spice cabinet. This time I brought together several common spices, and mixed them all together, to make homemade poultry seasoning mix!

I tend to keep a lot of spices around to use in the many recipes I make for our family (and for this blog). Sometimes we run out of certain spice mixes, so I like to know how to quickly whip up a batch when necessary.

Scroll Down for a Printable Recipe Card At The Bottom Of The Page

What Spices Are In This Seasoning Mix?

Making poultry spice mix is totally simple!  Here are the “cast of characters”! Oregano, onion powder, paprika, salt, ground black pepper, sage, cayenne pepper (optional), garlic powder and thyme are the spices used. The cayenne pepper is optional, but I recommend it, if you have some handy!

The ingredients used to make homemade poultry seasoning mix.

Measure and Mix Ingredients Together For The Poultry Seasoning Mix

Measure out the spices into a small bowl. Here they are (below), just looking pretty! They are showing off their individual colors before they are all mixed together in one big pile!

Poultry seasoning ingredients measured out on a white plate.

Anyways, mix the spices together until they are fully combined. TA DA! You have just made your very own poultry spice mix!

The recipe, as shown below on the printable recipe card, makes a total of 8 teaspoons of spice mix. You can easily double or triple the recipe, based on your need for this spice mix! I use it often, especially in my delicious recipe for Really GOOD Meatloaf (yes it has poultry seasoning it!)

All the ingredients for this seasoning mix are stirred together until blended.

How To Store Poultry Seasoning Mix

Once the spices are thoroughly combined, pour the mix into an airtight, sealed container. I usually try to use a small canning jar for my homemade spice mixes. Spices keep best in a dark place, or in the pantry or cupboard, away from sunlight.

An airtight jar or container holds the poultry seasoning mix for storage.

In the photo below, you can see other homemade spice mixes in our pantry. These are recipes are also on my blog. They include Italian Seasoning, Jerk Seasoning, Allspice, Pumpkin Pie Spice Mix, Dry Rub (for chicken/pork), and Homemade Cajun Seasoning. I also have a recipe for homemade taco seasoning mix that is wonderful!

Hope you will check out those recipes, as well. I can’t tell you how many times I have used these in various recipes, since making them! Every single one of them was made using spices I already had, so it saved me from going out and buying the mixes at the grocery store! YAY!

A few of the other homemade spice mixes in my pantry.

I hope you have the opportunity to try making your own spice mixes. It’s so easy, anyone can do it! Hope you have a fantastic day, and thanks for reading! Be sure to check out ALL of my recipes in the Recipe Index, located at the top of the page.

Interested In More Recipes?

Thank you for visiting this website. I appreciate you using some of your valuable time to do soIf you’re interested, I publish a newsletter 2 times per month (1st and 15th) with all the latest recipes, and other fun info. I would be honored to have you join our growing list of subscribers, so you never miss a great recipe!
There is a Newsletter subscription box on the top right side (or bottom) of each blog post, depending on the device you use, where you can easily submit your e-mail address (only) to be included in my mailing list.

You Can Also Find Me On Social Media:
Facebook page: The Grateful Girl Cooks!
Pinterest: The Grateful Girl Cooks!
Instagram: jbatthegratefulgirlcooks

Author's signature

Original recipe source: Raschell at misshomemade.com/poultryseasoningrecipe.html

0 from 0 votes
Poultry Seasoning Mix
Prep Time
5 mins
Cook Time
0 mins
Total Time
5 mins
 

Make your own homemade poultry seasoning mix from scratch in under 5 minutes with this quick and easy recipe!

Category: Condiments
Cuisine: American
Keyword: poultry seasoning mix
Servings: 8 teaspoons
Calories Per Serving: 3 kcal
Author: JB @ The Grateful Girl Cooks!
Ingredients
  • 1 Tablespoon salt
  • 1 teaspoon paprika
  • ½ teaspoon oregano
  • ½ teaspoon garlic powder
  • ½ teaspoon ground black pepper
  • ½ teaspoon ground thyme
  • ½ teaspoon ground sage
  • ½ teaspoon onion powder
  • ½ teaspoon cayenne pepper , optional, but I used
Instructions
  1. Measure all ingredients into a small bowl. Stir well, to fully combine.

  2. Store poultry seasoning in an airtight, sealed container in pantry (or other dark place). Use as needed.

Nutrition Facts
Poultry Seasoning Mix
Amount Per Serving (1 teaspoon)
Calories 3 Calories from Fat 9
% Daily Value*
Fat 1g2%
Saturated Fat 1g6%
Sodium 873mg38%
Potassium 6mg0%
Carbohydrates 1g0%
Fiber 1g4%
Sugar 1g1%
Protein 1g2%
Vitamin A 175IU4%
Vitamin C 1mg1%
Calcium 2mg0%
Iron 1mg6%
* Percent Daily Values are based on a 2000 calorie diet.

Here’s one more to pin on your Pinterest boards!Make your own homemade poultry seasoning mix from scratch in under 5 minutes with this quick and easy recipe!