Vanilla Glazed Pear Bread

Make a large, delicious loaf of Vanilla Glazed Pear Bread, or use the recipe to make 12 muffins, filled with fresh pears & topped with a sweet glaze!

Once the weather begins to cool, I start thinking of the many “cool weather” dishes I can make! In the summer when it is hot here, I find I don’t bake as much, because I don’t want to heat up the kitchen. But cool mornings in Fall? Now THAT is another story!

The original recipe for this delicious vanilla glazed pear bread was for pear muffins, but I decided to tweak the recipe into a loaf of bread. Now if you prefer muffins, then by all means… go for it!

The recipe will yield 12 muffins or one 9″x5″ loaf! Making this bread (or muffins) is very easy! Here’s how to make it!

Scroll Down For A Printable Recipe Card At The Bottom Of The Page

Prep The Pears

There is no need to peel the pears, so that makes this dish even easier! Slice the pears in half, lengthwise, and then remove the stem and core. I use a melon baller to do this, but a spoon works wonderfully, too!

Once that is done, thinly slice the pears, and then cut each slice into small cubes. Place the pears into a large mixing bowl. Add ground cinnamon, granulated sugar, and fresh squeezed lemon juice to the pears, and stir the ingredients gently together. Set the bowl aside.

Fresh pears are cored, sliced and cut into cubes.Pear chunks are mixed with cinnamon, sugar and lemon juice before adding to batter.

Prepare The Batter For Vanilla Glazed Pear Bread

In a separate small bowl, combine the sour cream, egg, 1 teaspoon of vanilla extract, and the milk. Whisk these together to form a thin batter, and set aside.

Sour cream, vanilla, egg, and milk are whisked together to make bread batter.

Sift flour baking powder, baking soda and salt together into another large mixing bowl. Use a spoon (or your fingers) to make a deep well in the middle.

Pour some of the batter and some of the pears into the well. Note: Do this in small batches! Stir to blend, and then gradually add in more batter and fruit.

Repeat until everything has been added, and only stir until it is just barely blended together. Don’t over mix! Your finished batter will end up being very thick.

Chopped pear mixture and batter are combined, a little at a time to make vanilla glazed pear bread batter.

Time To Bake The Vanilla Glazed Pear Bread

Once batter is ready, it is time to bake the vanilla glazed pear bread. Spray bottom and sides of a 9″x5″ bread pan (or muffin tin if making muffins) with non-stick cooking spray. Spoon the batter into pan and spread evenly. Lightly sprinkle the batter with cinnamon, if desired (optional).

If making muffins, fill the tins about 2/3 full. Place the loaf (or muffin) pan into a preheated 375° F oven. Bake for 30-35 minutes, or until the tops of the bread loaf or muffins are golden brown.

Test them at the 30 minute mark by inserting a toothpick into the center. A loaf will usually take the full 35 minutes, but check it at 30, to be safe.

Thick batter is placed into a greased loaf pan for baking.

When done, remove the bread (or muffins) from the oven. Let the bread sit in the pan for 5 minutes, and then carefully remove from the pan to a wire rack to finish cooling. I moved mine from the wire rack (after it cooled for 10 minutes) to a piece of aluminum foil, for glazing.

Pear bread is done when it is golden brown on top and cooked through.The bread cools (out of the pan) for several minutes before being glazed.

Make Vanilla Glaze To Spread On The Pear Bread

While the bread or muffins are cooling, make the vanilla glaze. It’s EASY! Place powdered sugar, ground ginger, cinnamon, vanilla, and warm water in a small bowl. Mix these ingredients together until a  spreadable glaze is made.

If your glaze is too thick to spread with a pastry brush, add a teensy bit more water. Spread the vanilla glaze over the entire top of the warm (or completely cooled) bread (or each muffin). 

Using a pastry brush makes this a very easy task! I glaze the bread after it cooled 10-12 minutes, and let some glaze drip down the sides of the loaf, because I think it looks great that way!

Vanilla glaze is mixed together and then brushed onto top of loaf.A loaf of vanilla glazed pear bread is ready to eat!

Serve The Vanilla Glazed Pear Bread

Once the bread has cooled, and the glaze has firmed up, the vanilla glazed pear bread is ready to enjoy! Slice the loaf into thin slices, and give it a taste! It is soooo good.

Do you see all those pear chunks inside? YUMMO! The loaf will yield about 10 thin slices, so there will be plenty to enjoy with tea or coffee!

A slice of pear bread is cut and is ready to enjoy.You can see all the fruit chunks in the slice.

We really enjoyed this vanilla glazed pear bread, and I sincerely hope you do, too! It is moist from the fresh fruit, and tastes wonderful! Hope you will consider trying the recipe, and also hope you and those you love will enjoy it as much as we do! Have a great day.

Looking For More Sweet Baked Bread Recipes?

You can find all of my recipes in the Recipe Index, located at the top of the page. A few sweet baked bread recipes you might enjoy include:

Want More Recipes? Get My FREE Newsletter!

I publish a newsletter 2 times per month (1st and 15th) with lots of recipes, tips, etc..
Would you like to join our growing list of subscribers?

There is a Newsletter subscription box on the top right (or bottom) of each blog post, depending on the device you use.
You can submit your e-mail address there, to be added to my mailing list.

Find Me On Social Media:

Facebook page: The Grateful Girl Cooks!
Pinterest:
The Grateful Girl Cooks!
Instagram:
jbatthegratefulgirlcooks

Author's signature

Original Recipe Source: https://www.weightwatchers.com/us/recipe/glazed-pear-muffins-1/5626a5f84236657004995e21

↓↓ PRINTABLE RECIPE BELOW ↓↓

0 from 0 votes
Vanilla Glazed Pear Bread
Prep Time
15 mins
Cook Time
35 mins
Total Time
50 mins
 

Make a large, delicious loaf of Vanilla Glazed Pear Bread, or use the recipe to make 12 muffins, filled with fresh pears & topped with a sweet glaze!

Category: Bread/Breakfast
Cuisine: American
Keyword: vanilla glazed pear bread
Servings: 10
Calories Per Serving: 196 kcal
Author: JB @ The Grateful Girl Cooks!
Ingredients
  • 2 large Bosc or Anjou pears , with skin
  • ½ teaspoon cinnamon
  • cup granulated sugar
  • 1 teaspoon fresh lemon juice
  • ½ cup sour cream (light or regular)
  • 1 large egg
  • 1 teaspoon vanilla extract , divided
  • cup milk (2%, 1% or fat-free)
  • 2 cups all purpose flour
  • 1 teaspoon baking powder
  • ½ teaspoon baking soda
  • ½ teaspoon salt
For Vanilla Glaze:
  • ½ cup powdered sugar
  • ¼ teaspoon vanilla extract
  • ¼ teaspoon ground ginger
  • teaspoon cinnamon
  • 1 Tablespoon warm water , + more, if necessary
Instructions
  1. Preheat oven to 375°F. Slice pears in half lengthwise, and remove the core. Thinly slice pears; cut each slice into small cubes. Put pears in a large bowl. Add ground cinnamon, granulated sugar, and lemon juice; stir ingredients gently together. Set aside.

  2. In a separate small bowl, combine sour cream, egg, 1 teaspoon vanilla extract, and milk. Whisk together to form batter; set aside.

  3. Sift flour baking powder, baking soda and salt into a large bowl. Use a spoon or fingers to make a deep well in the middle. Pour some of the batter and some of the pears into the well. Note: Do this in small batches! Stir to blend, and then gradually add in more batter and fruit. Do this until everything has been added and only mix just until it is just barely blended together. Do not overmix! The finished batter will be very thick. Spray bottom and sides of a 9"x5" bread pan (or muffin tin if making muffins) with non-stick cooking spray. Spoon batter into pan and spread evenly. Lightly sprinkle the batter with cinnamon (optional).

  4. If making muffins, fill tins about 2/3 full. Place loaf pan (or muffin tin) into a preheated 375° F oven. Bake for 30-35 minutes, or until top of the bread loaf or muffins are golden brown. Test it at 30 minutes by inserting a toothpick into the center. If toothpick comes out free of batter, it's done. When done, remove the bread (or muffins) from the oven. Let bread rest in pan for 5 minutes, then carefully remove and transfer to a wire rack to finish cooling.

  5. While the bread or muffins are cooling, make the vanilla glaze. Place powdered sugar, ground ginger, cinnamon, vanilla, and warm water in a small bowl. Mix together until a  spreadable glaze is made. If glaze is too thick to spread with a pastry brush, add a tiny bit more water. Spread the vanilla glaze over the entire top of the warm (or completely cooled) bread (or each muffin).  Once loaf or muffins have cooled and glaze has firmed up, it is ready to eat!

Nutrition Facts
Vanilla Glazed Pear Bread
Amount Per Serving (1 thin slice)
Calories 196 Calories from Fat 18
% Daily Value*
Fat 2g3%
Saturated Fat 1g6%
Cholesterol 26mg9%
Sodium 192mg8%
Potassium 165mg5%
Carbohydrates 40g13%
Fiber 2g8%
Sugar 18g20%
Protein 4g8%
Vitamin A 95IU2%
Vitamin C 2mg2%
Calcium 54mg5%
Iron 1mg6%
* Percent Daily Values are based on a 2000 calorie diet.
Here’s one more to pin on your Pinterest boards!Make a large, delicious loaf of Vanilla Glazed Pear Bread, or use the recipe to make 12 muffins, filled with fresh pears & topped with a sweet glaze!

How To Can Apple Pie Filling

Learn how to can apple pie filling for your pantry! Once canned, having homemade pie filling already made for pies, cobblers, etc. is a real time saver!
Learn how to can apple pie filling for your pantry! Once canned, having homemade pie filling already made for pies, cobblers, etc. is a time saver!

Okay, lets be honest. Making canned apple pie filling takes some time to pull off, but can I remind you that the results will be worth it, in time saved down the road? You will be able to pull a jar right out of your pantry and whip up a dessert in much less time! YEEHAW!

This “recipe” came straight out of my treasured canning book called “Ball Complete Book Of Home Preserving”, and it’s a real keeper! Once made, you can use this apple pie filling for pies, cobblers or crisps, turnovers, or even as a topping for PANCAKES!

The recipe (as written below in the recipe card) will give you a yield of 3 quart jars (plus a pint) OR it will give you about 7 smaller pint jars of apple pie filling. **Please note that I DOUBLED the recipe, and made 7 QUART sized jars of pie filling (as shown in photos)!

Scroll Down for A Printable Recipe Card At The bottom Of The Page

Prepare Canning Equipment

Before canning apple pie filling, prepare quart (or pint) size canning jars, flat lids and screw bands, as well as a water bath canner, according to the manufacturer instructions, and USDA safe canning guidelines.

Prepare The Apples

There are several wonderful varieties of apples that are great for pie filling. A few that come to mind are Granny Smith, Honeycrisp, Jonathan, and my favorite, Gravensteins (shown below). I love to go pick them at local U-Pick Farms! It takes quite a few apples to make 7 quarts, as you can imagine! Basically, each quart sized jar will require approximately 3 pounds of apples!

Picked some Gravenstein apples to use in many recipes.

Peel, remove the core, and slice the apples. Treat the apples with lemon juice, fruit fresh or follow my old-fashioned tip here, to keep the apples from darkening once exposed to air.

It will take about 3-40 minutes to peel, slice and treat all those apples. My suggestion is to get someone to help you, if possible! This is a GREAT way to get a friend or other family member involved, in order to save time! This is especially helpful if doubling the recipe!

Blanch The Apple Slices

You will need to blanch the apple slices (once they’re peeled , sliced and treated). Bring a large pot of water to a boil. Add 6 cups of sliced apples at a time to the boiling water. Cook for 1 minute, then remove and keep them warm while you finish blanching all the apples.

Apples are peeled, cored, sliced and treated to prevent browning.

Prepare The Pie Filling

A lot of folks thicken pie fillings with flour or cornstarch. That’s fine for making a pie. However, when CANNING apple pie filling, these ingredients don’t hold up too well in storage, so a product called ClearJel (for cooking, not instant) is typically used. ClearJel is a type of cooking starch (approved for home canning) that can be ordered online from many retailers.

To make the pie filling, measure granulated sugar, ClearJel, water, apple juice, cinnamon and nutmeg into a LARGE stainless steel saucepan. Bring this to a boil on medium-high heat. Stir constantly, and continue to cook until it starts to bubble and thickens. Add the lemon juice, and cook for 1 more minute, continuing to stir constantly! Take off heat when done.

The thickener for the apple pie filling is cooked until thickened.

Add The Apple Slices To Pie Filling

Transfer the warm (drained) apple slices to this thickened pie filling in the large saucepan, and fold them into the mixture. Heat the apple pie filling just until heated through, before placing the filling into your hot, prepared jars.

Time To Can Apple Pie Filling!

Once heated through, ladle the hot pie filling into prepared canning jars, being sure to leave 1 inch of headspace in each jar. Use a plastic utensil to remove the air bubbles from the jars, making adjustments to the headspace if necessary, by adding or removing filling.

Wipe the jar rims clean with a wet cloth or paper towel, to help ensure a good seal. Place flat lid centered on top, and add the jar ring. Screw the band on until it is fingertip tight.

How To Can Apple Pie Filling

Place the hot jars on an elevated rack and lower into simmering water in canner. Make sure that the water completely covers the tops of the jars (by about an inch). Place lid on canner. Bring the water to a gentle rolling boil, and process the jars for 25 minutes AFTER it begins boiling. The processing time is the same for both pint and quart sized jars.

When you can apple pie filling, the jars must be processed in a water bath canner.

When processing time is finished, turn off heat, and carefully remove lid from the pan. Wait for 5-10 minutes, and then remove the HOT jars from the pan, using canning tongs. Transfer jars to a dish towel on counter. IMPORTANT NOTE: Don’t place hot jars directly onto your counter top, as temperature variances (hot jars vs. cold counter top) might cause jars to crack.

Four jars of apple pie filling resting on dish towel after processing.

Let The Jars Cool Completely

Let the jars of apple pie filling cool completely (overnight or 12 hours) without disturbing. Once completely cooled, check to make sure jars sealed. The jar lids should have NO GIVE in them if properly sealed. If you find one has not sealed properly, it is not safe to store. Refrigerate it, and use it within a week.

Wipe the jars clean with a wet cloth, then label (with date canned), and place them in your pantry for long term storage. There you go… you just learned how to can apple pie filling!

The jars of apple pie filling are cleaned, seal is checked, and are labeled for storage.

Even though it is a labor-intensive process to make pie filling, the benefit comes later! It’s very convenient to make a pie, cobbler or dessert requiring apple pie filling by grabbing an “already made” jar right out of the pantry!

Looking For More CANNING Recipes?

You can find all of my canning recipes in the Recipe Index, located at the top of the page. I have recipes for a variety of foods and jams. They include:

Interested In More Recipes?

Thank you for visiting this website. I appreciate you using some of your valuable time to do soIf you’re interested, I publish a newsletter 2 times per month (1st and 15th) with all the latest recipes, and other fun info. I would be honored to have you join our growing list of subscribers, so you never miss a great recipe!
There is a Newsletter subscription box on the top right side (or bottom) of each blog post, depending on the device you use, where you can easily submit your e-mail address (only) to be included in my mailing list.

You Can Also Find Me On Social Media:
Facebook page: The Grateful Girl Cooks!
Pinterest: The Grateful Girl Cooks!
Instagram: jbatthegratefulgirlcooks

Author's signature

Original recipe source: my beloved “Ball Complete book Of Home Preserving”, published 2006, The Jarden Corporation, page 170.

0 from 0 votes
How To Can Apple Pie Filling
Prep Time
45 mins
Cook Time
25 mins
Total Time
1 hr 10 mins
 

Learn how to can apple pie filling for your pantry! Once canned, having homemade pie filling already made for pies, cobblers, etc. is a time saver!

Category: Canning and Preserving, Dessert
Cuisine: American
Keyword: can apple pie filling
Servings: 7 pints (or 3 qts + 1 pint)
Calories Per Serving: 462 kcal
Author: JB @ The Grateful Girl Cooks!
Ingredients
  • 12 cups apples , peeled, cored, sliced, treated to prevent browning
  • cups granulated sugar
  • ¾ cup ClearJel
  • teaspoons ground cinnamon
  • ½ teaspoon ground nutmeg
  • cups cold water
  • cups unsweetened apple juice
  • ½ cup lemon juice
Instructions
  1. Prepare quart (or pint) size canning jars, flat lids and screw bands, and water bath canner, according to the manufacturer instructions, and USDA safe canning guidelines.

  2. Peel, remove the core, and slice the apples. Treat the apples with lemon juice (not from the ingredient list), fruit fresh or another method, to keep the apples from darkening once exposed to air. Once they're peeled , sliced and treated, blanch the slices . Bring a large pot of water to a boil. Add 6 cups of sliced apples at a time to the boiling water. Cook for 1 minute, then remove and keep them warm while you finish blanching all the apples.

  3. To make the pie filling, measure granulated sugar, ClearJel, water, apple juice, cinnamon and nutmeg into a LARGE stainless steel saucepan. Bring this to a boil on medium-high heat. Stir constantly, and continue to cook until it bubbles and thickens. Add ½ cup lemon juice, and cook for 1 more minute, stirring constantly! Take off heat when done. Transfer warm (drained) apple slices into pie filling in large saucepan, and fold them into the mixture. Re-heat filling only until heated through, before placing the filling into hot, prepared jars.

  4. Ladle hot pie filling into prepared canning jars, leaving 1 inch of headspace in each jar. Use a long utensil inserted several times into jars, to remove the air bubbles, making adjustments to the headspace if necessary, by adding or removing filling. Wipe jar rims clean, to help ensure a good seal. Place flat lid on top, and add the jar ring. Screw the band on until it is fingertip tight. Place the hot jars onto an elevated rack and lower rack and jars into simmering water in canner. Make sure the water completely covers the tops of the jars (by about an inch). Place lid on canner.

  5. Bring the water to a gentle rolling boil, and process the jars for 25 minutes AFTER it begins boiling. When processing time is finished, turn off heat. Remove lid from pan. Wait 5-10 minutes, and then remove the VERY HOT jars from the pan, using canning tongs. Transfer jars to a dish towel on counter. IMPORTANT NOTE: Don't place hot jars directly onto your counter top, as temperature variances (boiling hot jars vs. cold counter top) might cause jars to crack. Let the jars of apple pie filling cool completely (overnight or 12 hours) without disturbing.

  6. Once completely cooled, check to make sure jars sealed. The jar lids should have NO GIVE in them if properly sealed. If you find one has not sealed properly, it is not safe to store. Refrigerate it, and use it within a couple weeks. Wipe the jars clean with a wet cloth, then label (with date canned), and place them in your pantry for long term storage. Enjoy!

Recipe Notes

NOTE: If treating apples with lemon juice to prevent browning, you will need a couple extra lemons for this purpose.

Nutrition Facts
How To Can Apple Pie Filling
Amount Per Serving (1 g)
Calories 462 Calories from Fat 9
% Daily Value*
Fat 1g2%
Saturated Fat 1g6%
Sodium 9mg0%
Potassium 337mg10%
Carbohydrates 120g40%
Fiber 6g25%
Sugar 110g122%
Protein 1g2%
Vitamin A 116IU2%
Vitamin C 17mg21%
Calcium 25mg3%
Iron 1mg6%
* Percent Daily Values are based on a 2000 calorie diet.

Here’s one more to pin on your Pinterest boards!Learn how to can apple pie filling for your pantry! Once canned, having homemade pie filling already made for pies, cobblers, etc. is a time saver!

Mashed Potato Loaded Fritters

Use your leftovers to make yummy Mashed Potato Loaded Fritters, filled with bacon, green onions, cheddar cheese, & coated with crispy panko crumbs!

I love potatoes! We always enjoy baked potatoes, mashed potatoes, chili and cheese stuffed spuds, potato hash with rosemaryloaded hash browns-waffle-style, au gratin potatoes, and our family favorite, potato salad!

The question is… what can you make with mashed potato leftovers? We usually have a small amount left over after a big meal. Well, I was wondering the same thing when I had some leftovers a while ago. I put on my thinking cap, and came up with this recipe for mashed potato loaded fritters, made them, and thought they were fantastic!

Here’s how easy it is to make this tasty side dish using leftover mashed potatoes. I even used leftover cooked bacon, too! The results were worth it, because the fritters turned out to be quite delicious!

Scroll Down For A Printable Recipe Card At The Bottom Of The Page

Prepare The Mashed Potato Loaded Fritters

Place mashed potatoes, crumbled bacon, green onions, regular bread crumbs, flour, egg, salt, pepper, garlic powder and cheddar cheese in a medium sized mixing bowl. Stir these ingredients together until all have been fully blended into the mashed potatoes.

Bacon, cheese, onion, egg,bread crumbs and mashed potatoes ready to make fritters.Ingredients are combined before forming into fritter patties.

Pour the panko crumbs out onto a dinner plate. Divide the potato mixture into 4 equal sized balls, and then shape and flatten them out in your hands to form a patty.

Place the potato patties, one at a time in the panko crumbs on plate, and gently cover all sides with the crumbs, lightly pressing them onto patty to adhere. Once fully coated, set aside and repeat until all 4 potato fritters are covered with panko crumbs.

The loaded potato fritters are shaped into patties.Each fritter is coated in panko crumbs before frying.Four mashed potato loaded fritters ready to be fried.

Time To Cook The Mashed Potato Loaded Fritters!

Now you’re ready to cook them until crispy! Pour enough oil into a large skillet to cover the bottom with about 1/2″ of oil. Heat oil on medium-high heat until very hot (but not smoking!).

Carefully (use a spatula) place each of the mashed potato loaded fritters into the hot oil. You should hear it sizzle when the fritters go into the hot oil. Do not move them once they hit the skillet, to ensure a good pan-searing.

Let the fritters cook for approximately 3 minutes in the hot oil, until the bottom side is deep golden brown and crispy! Carefully turn the fritters to the other side, and continue cooking for an additional 3-4 minutes until golden brown and crispy on the bottom side again.

They cook for 3-4 minutes in hot oil before turning to other side.You can see how golden brown the fritters are, after turning to other side.

Once done (and crispy brown on all sides), transfer the mashed potato loaded fritters to a wire rack to drain off any remaining oil. I placed a sheet of aluminum foil under the rack for easy cleanup. Let them drain for just a minute, and then they are ready to serve!

Mashed potato loaded fritters draining on wire rack after removing from hot oil.

Serve The Mashed Potato Loaded Fritters

To serve these delicious, crispy potato fritters, transfer them to a platter or individual plates. This recipe makes 4 fritters total (1 fritter per serving). Serve hot, and dollop the fritters with sour cream and chopped chives or green onions before serving, if desired.

I definitely recommend topping them with sour cream and chives, because that adds more delicious flavor to this veggie side dish! Grab a fork and dig in! These mashed potato loaded fritters are delicious! They’re crispy on the outside and soft on the inside!

Dollop the mashed potato loaded fritters with sour cream and chopped chives to serve.Cut into the crunchy outside of the fritter to see inside this delicious side dish!

TIP: Be sure to serve these fritters immediately after making them, because they are BEST, when served fresh! They still will taste good, but will lose their crispy crunchiness if allowed to sit for hours or are refrigerated.

Hope you will consider trying these mashed potato loaded fritters! They are a GREAT way to use up those leftover mashed potatoes! Have a GREAT day!

Looking For More POTATO Recipes?

You can find ALL my recipes in the Recipe Index, located at the top of the page. I have some delicious recipes featuring potatoes you might enjoy, including:

Interested In More Recipes?

Thank you for visiting this website. I appreciate you using some of your valuable time to do soIf you’re interested, I publish a newsletter 2 times per month (1st and 15th) with all the latest recipes, and other fun info. I would be honored to have you join our growing list of subscribers, so you never miss a great recipe!
There is a Newsletter subscription box on the top right side (or bottom) of each blog post, depending on the device you use, where you can easily submit your e-mail address (only) to be included in my mailing list.

You Can Also Find Me On Social Media:
Facebook page: The Grateful Girl Cooks!
Pinterest: The Grateful Girl Cooks!
Instagram: jbatthegratefulgirlcooks

Author's signature

0 from 0 votes
Mashed Potato Loaded Fritters
Prep Time
10 mins
Cook Time
6 mins
Total Time
16 mins
 

Use your leftovers to make yummy Mashed Potato Loaded Fritters, filled with bacon, green onions, cheddar cheese, & coated with crispy panko crumbs!

Category: Side Dish, Vegetable Dish
Cuisine: American
Keyword: mashed potato loaded fritters
Servings: 4 fritters
Calories Per Serving: 290 kcal
Author: JB @ The Grateful Girl Cooks!
Ingredients
  • cups mashed potatoes (prepared)
  • 2 slices bacon (pre-cooked) , crisp and crumbled
  • 1 large egg
  • 1 stem scallion (green onion) , sliced (green & white parts)
  • ¼ cup cheddar cheese
  • 3 Tablespoons dry bread crumbs (regular)
  • 1 Tablespoon all purpose flour
  • teaspoon salt, pepper, and garlic powder ( ⅛ tsp. each)
  • vegetable oil , enough to cover skillet with 1/2 inch
  • 1 cup PANKO bread crumbs , to roll fritters in
  • sour cream and chopped chives (OPTIONAL, for garnish)
Instructions
  1. Place mashed potatoes, crumbled bacon, green onions, regular bread crumbs, flour, egg, salt, pepper, garlic powder and cheddar cheese in a medium sized mixing bowl. Stir together until all ingredients have been fully blended into mashed potatoes.

  2. Pour panko crumbs out on a dinner plate. Divide the potato mixture into 4 equal sized balls, and then shape/flatten them out in your hands to form a patty. Place patties, one at a time in the panko crumbs, and gently cover all sides, turning and lightly pressing them onto patty to adhere. Once fully coated, set aside. Repeat until all fritters are covered with panko crumbs.

  3. Pour enough oil into a large skillet to cover the bottom with about 1/2" of oil. Heat oil on medium-high heat until very hot (but not smoking!). Carefully (use a spatula) place each of the mashed potato loaded fritters into the hot oil. You should hear it sizzle.. Do not move them once they hit the skillet, to ensure a seared crust on the outside. Let fritters cook for approx. 3 minutes, until the bottom is deep golden brown and crispy! Carefully turn the fritters to other side, and continue cooking an additional 3-4 minutes until golden brown and crispy on the bottom. Once done (and crispy brown on all sides), transfer fritters to a wire rack to drain off any excess oil. I placed a sheet of aluminum foil under the rack for easy cleanup. Let them drain for just a minute, and then they are ready to serve!

  4. Place potato fritters on a platter or individual plates. Serve hot, and dollop each fritter with sour cream and some chopped chives or green onions, if desired (recommended). Enjoy!

Recipe Notes

Caloric calculation does not include optional garnish of sour cream and chives.

Nutrition Facts
Mashed Potato Loaded Fritters
Amount Per Serving (1 fritter)
Calories 290 Calories from Fat 117
% Daily Value*
Fat 13g20%
Saturated Fat 8g50%
Cholesterol 64mg21%
Sodium 390mg17%
Potassium 290mg8%
Carbohydrates 33g11%
Fiber 2g8%
Sugar 2g2%
Protein 10g20%
Vitamin A 147IU3%
Vitamin C 15mg18%
Calcium 105mg11%
Iron 2mg11%
* Percent Daily Values are based on a 2000 calorie diet.

Here’s one to pin on your Pinterest boards!Use your leftovers to make yummy Mashed Potato Loaded Fritters, filled with bacon, green onions, cheddar cheese, & coated with crispy panko crumbs!

Mango Avocado Salsa

Make delicious mango avocado salsa in 10 minutes! It’s a perfect topping for fish, chicken & pork, or can be served as an appetizer w/ tortilla chips!
Make delicious mango avocado salsa in 10 minutes! It's a perfect topping for fish, chicken & pork, or can be served as an appetizer w/ tortilla chips!

Do you enjoy salsa? We sure do! I always keep jars of home canned salsa in our pantry, including traditional salsa and peach salsa. It’s also very easy to whip up a batch of fresh peach salsa in the summer for a quick appetizer, when peaches are ripe and plentiful.

If you have never tried fresh mango avocado salsa, then hopefully this post will show you how easy it is to make, in just under 10 minutes! This salsa tastes wonderful as an appetizer or snack (served with crunchy tortilla chips!). It also is fantastic as a topping for chicken, fish and pork, because it adds so much flavor to the meat! Here’s how to make it:

Scroll Down For A Printable Recipe Card At The Bottom Of The Page

Prepare The Mango For The Salsa

If you have never cubed a fresh mango before, have no fear… it’s easier than you might think! There is a huge pit (seed) in the middle of a mango, so you will not be able to cut straight through the middle. Instead, slice the mango from top to bottom on all sides of the pit.

Once that is done, take a sharp paring knife and make gridline cuts from top to bottom on each mango section, and side to side, forming small cubes. Be careful not to cut all the way through the peel (or your fingers).

Mango is sliced into cubes before adding them to salsa.

Repeat with all sections. To remove the cubes easily from the mango peel, use your hands to hold both ends of the section and “flip”, pushing up from the bottom peel in the middle, until the mango cubes are fully exposed (see photo below).

Run a knife along the bottom of the cubes, along the peel to cut them away. Repeat this until all sections of the mango are cubed and cut away from the fruit. See the huge pit in the mango, seen below in the upper left corner?

The mango is flipped to expose the cubes, and then they are cut away from the peel.

Prepare The Mango Avocado Salsa

Place chopped cilantro, red onion, and a finely chopped jalapeno (seeds removed) into a medium mixing bowl. Squeeze the juice of half of a large lime into the mixture. Add the cubed mango and stir to combine. NOTE: If you will be making this mango avocado salsa several hours ahead of serving time, cover and refrigerate (without adding the avocado) until just before serving!

Salsa ingredients are stirred together before adding the avocado.Cilantro, red onion, mango, jalapeno and lime juice are mixed together for salsa.

Add Avocado Just Before Serving!

Right before serving, cut and cube the avocado. The avocado is best cut and cubed at this point because, it will have less time to turn brown in the salsa.

Cubing the avocado is done almost the same way as the mango. Slice the avocado in half, and remove the seed. Slice from top to bottom and side to side in small gridline cubes, without cutting all the way through the peel.

Avocados are halved, then cut into cubes to add to the salsa.

Take a large spoon and guide it all along the the inside of the avocado peel, which will remove the cubes easily. You can place the chunks of avocado directly into the bowl with the rest of the mango avocado salsa!

Once all avocado cubes have been added, gently stir the mango avocado salsa to combine ingredients. Ta Da! You just made a really great tasting salsa.

Once cubed, a spoon is used to remove the cubes from the avocado.Ingredients for the mango avocado salsa are gently combined before serving.

Serving Mango Avocado Salsa

You’re now ready to serve the salsa! Enjoy it with crisp tortilla chips to your heart’s content OR use it to top a nice piece of grilled chicken, fish or pork! The creamy avocado and the sweet mango (and other ingredients) add so much flavor to dishes like this seafood dish below (Dover Sole).

The mango avocado salsa is used as a topping for grilled fish fillets.

I truly hope you will have the opportunity to make this delicious salsa for those you love. It’s fresh, tastes delicious, can be doubled easily, and is super easy to make!  Have a wonderful day! Don’t forget to check out ALL my recipes in the Recipe Index, located at the top of the page. Thanks for stopping by, and come back soon.

Interested In More Recipes?

Thank you for visiting this website. I appreciate you using some of your valuable time to do soIf you’re interested, I publish a newsletter 2 times per month (1st and 15th) with all the latest recipes, and other fun info. I would be honored to have you join our growing list of subscribers, so you never miss a great recipe!
There is a Newsletter subscription box on the top right side (or bottom) of each blog post, depending on the device you use, where you can easily submit your e-mail address (only) to be included in my mailing list.

You Can Also Find Me On Social Media:

Facebook page: The Grateful Girl Cooks!
Pinterest:
The Grateful Girl Cooks!
Instagram:
jbatthegratefulgirlcooks

Author's signature

0 from 0 votes
Mango Avocado Salsa
Prep Time
10 mins
Cook Time
0 mins
Total Time
10 mins
 

Make delicious mango avocado salsa in 10 minutes! It's a perfect topping for fish, chicken & pork, or can be served as an appetizer w/ tortilla chips!

Category: Appetizer, Topping
Cuisine: American
Keyword: mango avocado salsa
Servings: 4
Calories Per Serving: 112 kcal
Author: JB @ The Grateful Girl Cooks!
Ingredients
  • 1 large mango , cut into cubes
  • cup cilantro , chopped
  • ¼ cup red onion , chopped
  • ¼ cup fresh jalapeno , seeds removed and finely chopped
  • ½ large lime (juice of)
  • 1 large avocado , cut into cubes
Instructions
  1. Place peeled and cubed mango, chopped cilantro, red onion, and jalapeno in a medium sized mixing bowl. Squeeze the juice of half of a large lime over the ingredients and stir to combine.

    NOTE: If preparing this salsa a few hours before using it, cover and refrigerate the salsa at this point (without adding the avocado).

  2. Just before you plan to serve the salsa, add the avocado cubes, and "gently" stir, to combine salsa ingredients. Serve, and enjoy, as an appetizer or as a topping for various main dishes!

Tips For Cubing Mango and Avocado:
  1. Mango: Cut from top to bottom on all sides of the pit. Take a sharp paring knife and make cuts from top to bottom, and side to side, forming small cubes. Be careful not to cut all the way through the peel. Repeat with all sections. To remove the cubes easily from the mango peel, use your hands to hold both ends of the section and "flip", pushing up from the bottom peel in the middle, until the mango cubes are fully exposed. Run a knife along the bottom of the cubes, along the peel to cut them away. Repeat this until all sections of the mango are cubed and cut away from the fruit.

  2. Avocado: Slice the avocado in half, and remove the seed. Slice from top to bottom and side to side, in small cubes, without cutting all the way through the peel. Take a large spoon and guide it all along the the inside of the avocado peel, which will remove the cubes easily.

Nutrition Facts
Mango Avocado Salsa
Amount Per Serving (1 (1/4 of total))
Calories 112 Calories from Fat 72
% Daily Value*
Fat 8g12%
Saturated Fat 1g6%
Sodium 5mg0%
Potassium 342mg10%
Carbohydrates 12g4%
Fiber 4g17%
Sugar 7g8%
Protein 2g4%
Vitamin A 670IU13%
Vitamin C 29mg35%
Calcium 11mg1%
Iron 1mg6%
* Percent Daily Values are based on a 2000 calorie diet.

Here’s one more to pin on your Pinterest boards!Make delicious mango avocado salsa in 10 minutes! It's a perfect topping for fish, chicken & pork, or can be served as an appetizer w/ tortilla chips!

How To Can Pineapple

Learn how to can pineapple (chunks or spears), for long term storage. Buy fresh pineapple on sale and can it for convenience, and to enjoy year round.

Have you ever wondered how to can pineapple? Well I have, and my curiosity led me back once again, to my trusty canning book called “Ball Complete Book of Home Preserving”. I can’t tell you how much I have relied on this handy “cookbook” over the years. Guess what? Canning pineapple is not too difficult at all!

I enjoyed learning how to can pineapple, and have used this recipe several times to prepare canned pineapple for our home pantry (especially handy when pineapples are on sale)! Even though it’s easy for most folks to buy canned pineapple at the grocery store, home canning is a great skill to have toward becoming more self-reliant! It’s convenient to have home canned food in storage when there is really bad weather, an emergency, or you just can’t get to the store!

You will need to have a water bath canner, some fresh, sweet and RIPE pineapples, water and little sugar (for the syrup), plus canning jars and lids, but that’s it! The “process” is quite simple, and I would like to share it with you today!

Scroll Down For A Printable Recipe Card At the Bottom Of The Page

A Couple Important Things You Need To Know

There are a couple things you need to know about how to can pineapple:

  • Prepare canner, jars and lids according to manufacturer instructions and USDA safe canning guidelines. Make sure they are clean, hot, and ready to go, before you heat the pineapple in the syrup.
  • If using PINT sized jars , you will need about 1½ pounds of pineapple per jar.
  • If using QUART sized jars, you will need about 3 pounds of pineapple per jar.

I used pint sized jars and made a very small batch (which is reflected in my photos). You can easily double or triple the amount of pineapple you wish to can.

The printable recipe card at the bottom of this post gives the ingredients to make 2 pints, but you can easily change the quantity of the ingredients! Use the calculator in the recipe card, to see ingredients necessary to can your desired amount of jars.

Prepare The Pineapple For Canning

You will need to remove the crown, peel, core and slice the fresh pineapple into spears or chunks before processing. To do this, first slice off both ends of the pineapple, stand it upright, and then slice away the peel (from top to bottom) all around the pineapple. Use a sharp knife, and don’t forget to carve out all the little brown “eyes” on the pineapple!

Remove the crown and peel, to prepare the fruit for processing.All the peel and brown "eyes" are cut out of the pineapple before slicing.

Once peeled, slice the pineapple in half, from top to bottom. Remove the middle core, because it is really fibrous and a bit “woody”.

If you are canning pineapple spears, cut the cored pineapple into long spears. Remember that the spears will have to fit into the jars with a ½ inch headspace. If canning pineapple chunks (this is what I did), cut the fruit into spears, and then slice each spear into bite-sized chunks (about 1 inch each). Set aside.

Core is cut out of the fresh pineapple.Pineapple spears are cut (or it is cut into chunks), for canning.

Make Extra Light Syrup For Canning The Pineapple

You will need to quickly make a syrup to can the pineapple in. Syrups are comprised of sugar and water, and they can range from really sweet to really light on the sugar spectrum. I canned my pineapple chunks in extra light syrup, because they are already naturally sweet.

I forgot to take a photo, but measure water and sugar into a large stainless steel saucepan.  Stir to combine. Bring this mixture to a boil on MEDIUM-HIGH heat, stirring constantly as the sugar dissolves. Once sugar dissolves and syrup comes to a boil, turn the heat down to LOW.

Add the pineapple chunks to the hot syrup, and heat, stirring often, only until pineapple has been heated through. This will take only about 1 minute. If you are canning LOTS of jars of pineapple, do this step in batches, keeping each batch warm. Remove from heat, and fill jars.

How To Can Pineapple

Fill the hot prepared canning jars with the pineapple pieces. Using a slotted spoon is extremely helpful to remove them from the hot syrup. Pack the pineapple into jars to withing 1/2 inch of the top.

Use a ladle to fill jar and cover the pineapple pieces with hot syrup, remembering to leave a 1/2 inch headspace in jar. Use a plastic utensil inserted into the jars to remove the air bubbles, and adjust the headspace, if necessary.

Preparing the equipment (jars, lids & canner) is part of learning how to can food.

Wipe the rims of jars clean with a wet cloth. This helps to remove any syrup that might cause jar not to seal. Apply the flat lid, and screw on the band, to fingertip tightness. Repeat process with remaining jar(s).

A flat lid is ready to place on a filled canning jar, before processing.

Processing Times For Canning Pineapple

Place filled jars onto an elevated rack, and lower them into simmering water in canner. Make sure the water covers the entire jar by at least one inch above the top. Place lid on canner, and then bring the water to a gentle rolling boil.

Process PINT jars for 15 minutes AFTER water comes to a boil. Process QUART jars for 20 minutes AFTER water comes to a boil. When done, turn off heat, remove canner lid, and wait for about 5 minutes before removing hot jars using canning tongs.

Jars are processed in a water bath canner.

Place the HOT jars onto a dish towel. Avoid placing jars directly on your counter top, because temperature variances (cold counter versus boiling HOT jars) could cause jars to crack. Nobody wants THAT! Let jars cool completely for 12 hours or overnight without disturbing. Once they are completely cool, wipe jars to remove any sticky residue, label, and store in pantry (or other cool, dark area).

Just like that, you learned how to can pineapple in jars for long term storage!

That’s it! You just learned how to can pineapple! It honestly isn’t that labor intensive, if you ask me. I LOVE the convenience of having jars of delicious home canned pineapple in our pantry, to conveniently have to use in various recipes! Thanks for visiting, and I hope you will consider trying this recipe for canning pineapple! Have a GREAT day.

Looking For More CANNING Recipes?

You can find all of my canning recipes in the Recipe Index, located at the top of the page. I have a variety of canning recipes available, including:

Interested In More Recipes?

Thank you for visiting this website. I appreciate you using some of your valuable time to do soIf you’re interested, I publish a newsletter 2 times per month (1st and 15th) with all the latest recipes, and other fun info. I would be honored to have you join our growing list of subscribers, so you never miss a great recipe!
There is a Newsletter subscription box on the top right side (or bottom) of each blog post, depending on the device you use, where you can easily submit your e-mail address (only) to be included in my mailing list.

You Can Also Find Me On Social Media:
Facebook page: The Grateful Girl Cooks!
Pinterest: The Grateful Girl Cooks!
Instagram: jbatthegratefulgirlcooks

Author's signature

Original recipe source: “Ball Complete Book Of Home Preserving, published 2006 by The Jarden Corporation, page 152 (pineapple) and page 142 (syrup)

0 from 0 votes
How To Can Pineapple
Prep Time
20 mins
Cook Time
15 mins
Total Time
35 mins
 

Learn how to can pineapple (chunks or spears), for long term storage. Buy fresh pineapple on sale and can it for convenience, and to enjoy year round.

Category: Canning and Preserving
Cuisine: American
Keyword: how to can pineapple
Servings: 2 pint jars
Calories Per Serving: 437 kcal
Author: JB @ The Grateful Girl Cooks!
Ingredients
  • 3 pounds pineapple , cut into bite sized chunks
For Extra Light Syrup
  • ½ cup granulated sugar
  • 5 cups water
Instructions
  1. Remove the crown, peel, core and slice fresh, RIPE pineapple into spears or 1" chunks before processing. Set aside.

  2. Measure water and sugar into a large stainless steel saucepan.  Stir to combine. Bring this mixture to a boil on MEDIUM-HIGH heat, stirring constantly as sugar dissolves. Once sugar dissolves and syrup comes to a boil, turn heat down to LOW. Add the pineapple chunks to the hot syrup, and heat, stirring often, only until pineapple has been heated through (about 1 minute). Remove from heat, and fill jars.

  3. Fill warm, prepared canning jars with the hot pineapple pieces. Using a slotted spoon is extremely helpful to remove them from the hot syrup. Pack the pineapple into jars to within 1/2 inch of the top. Use a ladle to fill jar and cover the pineapple pieces with hot syrup, remembering to leave a 1/2 inch headspace in jar. Use a plastic utensil inserted into the jars to remove the air bubbles, and adjust the headspace, if necessary. Wipe rims of jars clean with a wet cloth. This helps to remove any syrup that might cause jar not to seal. Apply the flat lid, and screw on the band, to fingertip tightness. Repeat process with remaining jar(s).

  4. Place filled jars onto an elevated rack, and lower them into simmering water in canner. Make sure the water covers the entire jar by at least one inch above the top. Place lid on canner, and then bring water to a gentle rolling boil. Process PINT jars for 15 minutes AFTER water comes to a boil. Process QUART jars for 20 minutes AFTER water comes to a boil. When done, turn off heat, remove canner lid, and wait for about 5 minutes before removing hot jars using canning tongs.

  5. Place HOT jars onto a dish towel. Avoid placing jars directly on your counter top, because temperature variances (cold counter versus boiling HOT jars) could cause jars to crack. Let jars cool completely for 12 hours or overnight without disturbing. Once completely cool, wipe jars to remove any sticky residue, label, and store in pantry (or other cool, dark area).

Recipe Notes

Note: Caloric calculation was based on using half of the extra light syrup to fill 2 pint jars (you won't need it all for 2 pint jars). Syrup recipe as written will yield about 5¼ cups syrup total. 

If canning in QUART sized jars, you will need approximately 3 pounds of pineapple and about 1 to 1½ cups syrup per quart jar. Quart sized jars should be processed for 20 minutes.

Nutrition Facts
How To Can Pineapple
Amount Per Serving (1 g)
Calories 437 Calories from Fat 9
% Daily Value*
Fat 1g2%
Saturated Fat 1g6%
Sodium 7mg0%
Potassium 742mg21%
Carbohydrates 114g38%
Fiber 10g42%
Sugar 92g102%
Protein 4g8%
Vitamin A 395IU8%
Vitamin C 325mg394%
Calcium 88mg9%
Iron 2mg11%
* Percent Daily Values are based on a 2000 calorie diet.

Here’s one more to pin on your Pinterest boards!Learn how to can pineapple (chunks or spears), for long term storage. Buy fresh pineapple on sale and can it for convenience, and to enjoy year round.

Wild Rice Salad in Pumpkin Vinaigrette

Enjoy this wild rice salad, with dried cranberries, cauliflower, green onions, and toasted pecans, seasoned with an easily made pumpkin vinaigrette!

Do you enjoy chilled rice salads? The only time in my life I’ve ever had a rice salad was on a houseboating adventure about 20 years ago with another family and we were served one with dinner! I remember it well, because it was so good!

Fast forward to THIS rice salad, which comes from a recipe I stumbled upon while looking through some old cookbooks of mine. Wild rice salad in pumpkin vinaigrette sounded very interesting to me, so I made it, with only a couple slight changes.

WOW! It is delicious, and very easy to make! Here’s how to make this great salad or side dish:

Scroll Down For A Printable Recipe Card At The Bottom Of The Page  

Prepare The Long Grain and Wild Rice

The rice is made using a long grain and wild rice boxed mix (4.35 ounce or 6 ounce box). I used a Rice-a-Roni Long Grain and Wild Rice box mix that came with the seasoning mix in the box. It is easily found in grocery stores nationwide.

Prepare the rice exactly according to the package directions, and then set it aside, once done, until it cools completely (approx. 25 minutes).

Wild rice is prepared according to box instructions.

Toast The Pecans While Rice Cools

While the rice is cooling, toast the chopped pecans. There are two ways to do this. Choose which method works best for you:

  • #1- Place chopped pecans in a dry skillet, and cook over low heat for 5-6 minutes, stirring often, until lightly toasted and fragrant. Remove from heat. Let cool.
  • #2- Lay chopped pecans in a single layer on baking sheet. Bake in 350° F oven for 8-10 minutes until lightly toasted and fragrant. Remove from heat. Let cool.

Pecans can be toasted in a skillet or in the oven.

Make The Pumpkin Vinaigrette For The Wild Rice Salad

While the rice is still cooling, whip up the easy to make pumpkin vinaigrette, which will dress the wild rice salad!

In a medium bowl, whisk together pumpkin puree, white wine vinegar, honey, salt, pepper, and dried thyme. Whisk until fully blended, and then slowly drizzle in the olive oil, while still whisking. Continue to whisk until all ingredients are fully blended and emulsified.

Preparing the pumpkin vinaigrette for the wild rice salad is easy!

Make The Wild Rice Salad

Place the cooled wild rice into a salad bowl. Add the toasted pecans, dried cranberries, cauliflower, and chopped green onions to the rice. Gently stir to combine.

Pour all of the pumpkin vinaigrette over the salad, and gently stir well, to fully combine all the wild rice salad ingredients with the vinaigrette.

Cover the bowl with plastic wrap, and refrigerate for 2-3 hours. This allows time for the flavors in this salad to really intermingle for best taste!

Wild rice, pecans, green onions, cranberries and cauliflower are combined in bowl.The pumpkin vinaigrette is poured over the wild rice salad, then stirred in.

Serve The Wild Rice Salad in Pumpkin Vinaigrette

After the wild rice salad in pumpkin vinaigrette has been fully chilled, it is time to serve and enjoy it! Fluff the salad up a little bit with a fork, and it’s ready to serve!

The wild rice salad is ready to eat!

All that is left to do is grab a fork… and dig in! I really think you will love this wild rice salad as much as we do! It’s delicious!

Crunchy toasted pecans, cauliflower, chewy dried cranberries and pumpkin vinaigrette combine to make a fantastic tasting wild rice salad you’ll be proud to serve!

Wild rice salad in pumpkin vinaigrette served in a white bowl.

We loved this salad, and enjoyed it for several days afterwards as leftovers! One of our sons stopped by for a visit, and he sampled it (many times-ha ha!), and loved it, as well.

Hope you will enjoy making and eating this delicious wild rice salad, too! Thanks for stopping by and please come back again soon for more family-friendly recipes. Take care, and have a great day.

Looking For More Recipes Featuring RICE?

You can find all of my recipes in the Recipe Index, located at the top of the page. A few you might enjoy include:

Want More Recipes? Get My FREE Newsletter!

I publish a newsletter 2 times per month (1st and 15th) with lots of recipes, tips, etc..
Would you like to join our growing list of subscribers?

There is a Newsletter subscription box on the top right (or bottom) of each blog post, depending on the device you use.
You can submit your e-mail address there, to be added to my mailing list.

Find Me On Social Media:

Facebook page: The Grateful Girl Cooks!
Pinterest:
The Grateful Girl Cooks!
Instagram:
jbatthegratefulgirlcooks

Author's signature

Original recipe source: “Southern Living 2009 Annual Recipes Cookbook”, published in 1999 by Oxmoor House, Inc., page 195.

↓↓ PRINTABLE RECIPE BELOW ↓↓

5 from 1 vote
Wild Rice Salad in Pumpkin Vinaigrette
Prep Time
30 mins
Cook Time
0 mins
Chilling Time (Inactive)
2 hrs
Total Time
2 hrs 30 mins
 

Enjoy this wild rice salad, with dried cranberries, cauliflower, green onions, and toasted pecans, seasoned with an easily made pumpkin vinaigrette!

Category: Salad/Side Dish
Cuisine: American
Keyword: wild rice salad
Servings: 8 (1/2 cup per serving)
Calories Per Serving: 223 kcal
Author: JB @ The Grateful Girl Cooks!
Ingredients
For Salad:
  • 4.35 ounce Long grain and wild rice mix (boxed mix w/ spices)
  • ½ cup chopped pecans , toasted
  • 1 cup cauliflower , chopped into tiny 1" florets
  • ½ cup dried cranberries
  • ¾ cup green onions , chopped
For Pumpkin Vinaigrette:
  • ¼ cup canned pumpkin puree (NOT pumpkin pie mix)
  • ¼ cup white wine vinegar
  • 1 Tablespoon honey
  • ½ teaspoon salt
  • ¼ teaspoon ground black pepper
  • ¼ teaspoon dried thyme
  • cup olive oil
Instructions
  1. Prepare the wild rice mix according to package directions, and set aside once done, until it cools completely (approx. 25 minutes).

  2. While the rice is cooling, toast the chopped pecans. There are two ways to do this:

    #1- Place chopped pecans in a dry skillet, and cook over low heat for 5-6 minutes, stirring often, until lightly toasted and fragrant. Remove from heat. Let cool.

    #2- Lay chopped pecans in a single layer on baking sheet. Bake in 350° F oven for 8-10 minutes until lightly toasted and fragrant. Remove from heat. Let cool.

  3. While rice is still cooling, make the vinaigrette. In a medium bowl, whisk together pumpkin puree, white wine vinegar, honey, salt, pepper, and dried thyme. Whisk until fully blended, and then slowly drizzle in the olive oil, while still whisking. Continue to whisk until all ingredients are fully blended and emulsified.

  4. Place cooled wild rice into a salad bowl. Add pecans, cranberries, cauliflower, and green onions. Gently stir to combine. Pour all of the pumpkin vinaigrette over the salad. Gently stir , to fully combine all salad ingredients with vinaigrette. Cover bowl with plastic wrap, and refrigerate for 2-3 hours. This refrigeration allows time for the flavors in salad to really intermingle for best taste! After refrigerating, fluff the salad up with a fork, and serve. Enjoy chilled OR at room temp!

Nutrition Facts
Wild Rice Salad in Pumpkin Vinaigrette
Amount Per Serving (1 (1/2 cup per serving))
Calories 223 Calories from Fat 126
% Daily Value*
Fat 14g22%
Saturated Fat 2g13%
Sodium 153mg7%
Potassium 173mg5%
Carbohydrates 23g8%
Fiber 3g13%
Sugar 8g9%
Protein 3g6%
Vitamin A 1285IU26%
Vitamin C 8mg10%
Calcium 19mg2%
Iron 1mg6%
* Percent Daily Values are based on a 2000 calorie diet.

Here’s one more to pin on your Pinterest boards!Enjoy this wild rice salad, with dried cranberries, cauliflower, green onions, and toasted pecans, seasoned with an easily made pumpkin vinaigrette!

Quick Broccoli in Vinaigrette

Quick broccoli in vinaigrette is a fast, easy way to serve a tasty veggie side dish! Enjoy steamed broccoli, drizzled with a tangy balsamic dressing.

Do you ever get tired of the same old vegetable side dishes, and long for something that’s not too difficult to make, but tastes good? I do, so when I saw this recipe for quick broccoli in vinaigrette in a really old “Cooking Light” cookbook, I knew I had to give it a try!

This recipe is so incredibly easy! Broccoli spears are steamed, and then are enhanced, flavor-wise, by topping them with a homemade balsamic vinaigrette. The vinaigrette only takes a few minutes to whip up, with very common ingredients. The tangy addition of this vinaigrette imparts unique flavor to otherwise “routine” broccoli!

Scroll Down For A Printable Recipe Card At the Bottom Of The Page

Making A Dressing For The Broccoli in Vinaigrette Is EASY!

To make the easy vinaigrette, measure balsamic vinegar, dijon mustard, olive oil, salt and pepper into a small bowl. Use a whisk or a fork to blend these ingredients together, until completely blended. Set vinaigrette aside while you steam the broccoli.

Ingredients for balsamic dressing in small bowl.The balsamic vinaigrette which will be drizzled over the steamed vegetable.

Prepare The Broccoli

Trim the leaves, and cut off the really tough ends of the broccoli. Give the broccoli a quick rinse, then cut the broccoli into spears. Place the broccoli spears into a steamer basket or rack, and steam (covered) over boiling water for 5 minutes. When done, the broccoli should be crisp/tender in texture.

NOTE: My photos only show HALF of the broccoli the recipe calls for – only my hubby and I were going to eat this! The recipe (as written in the printable recipe card at the bottom) will serve 6.

Broccoli is cleaned, then cut into long spears before cooking.The spears are steamed on a rack over water, in a saucepan.

Immediately transfer the steamed broccoli out of the steamer and onto a serving plate. Drizzle the broccoli spears with the balsamic vinaigrette, using all of it.

The balsamic vinaigrette is drizzled over the steamed broccoli.

Serve The Quick Broccoli in Vinaigrette

Sprinkle the broccoli with white sesame seeds for garnish, if desired. Serve the broccoli in vinaigrette immediately. Hope you enjoy it!

Quick broccoli in vinaigrette is garnished with sesame seeds before serving.Tangy balsamic dressing adds flavor to the cooked broccoli spears.

I hope you will consider trying this totally EASY vegetable side dish! If you enjoy broccoli like we do, be sure to check out my recipes for Broccoli Salad, Bacon Broccoli Quiche, and Broccoli Cauliflower Bake! Have a GREAT day!

Looking For More VEGGIE SIDE DISH Recipes?

You can find all of my veggie side dish recipes in the Recipe Index, located at the top of the page. A few you might enjoy include:

Interested In More Recipes?

Thank you for visiting this website. I appreciate you using some of your valuable time to do soIf you’re interested, I publish a newsletter 2 times per month (1st and 15th) with all the latest recipes, and other fun info. I would be honored to have you join our growing list of subscribers, so you never miss a great recipe!
There is a Newsletter subscription box on the top right side (or bottom) of each blog post, depending on the device you use, where you can easily submit your e-mail address (only) to be included in my mailing list.

You Can Also Find Me On Social Media:
Facebook page: The Grateful Girl Cooks!
Pinterest: The Grateful Girl Cooks!
Instagram: jbatthegratefulgirlcooks

Author's signature

Original recipe source: “Cooking Light 1994 Cookbook”, published by Oxmoor House, Inc., 1993, page 49

0 from 0 votes
Quick Broccoli in Vinaigrette
Prep Time
10 mins
Cook Time
5 mins
Total Time
15 mins
 

Quick broccoli in vinaigrette is a fast, easy way to serve a tasty veggie side dish! Enjoy steamed broccoli, drizzled with a tangy balsamic dressing.

Category: Side Dish, Vegetable Dish
Cuisine: American
Keyword: broccoli in vinaigrette
Servings: 6
Calories Per Serving: 55 kcal
Author: JB @ The Grateful Girl Cooks!
Ingredients
  • pounds fresh broccoli
  • 2 Tablespoons balsamic vinegar
  • 1 teaspoon dijon mustard
  • ½ teaspoon olive oil
  • ¼ teaspoon ground black pepper
  • teaspoon salt
  • 1 Tablespoon sesame seeds (optional, for garnish)
Instructions
  1. To make vinaigrette, measure balsamic vinegar, dijon mustard, olive oil, salt and pepper into a small bowl. Use a whisk or a fork to blend ingredients together, until completely blended. Set vinaigrette aside while you steam broccoli.

  2. Trim the leaves, and cut off really tough ends of the broccoli. Give broccoli a quick rinse, then cut into spears. Place broccoli spears into a steamer basket or rack, and steam (covered) over boiling water for 5 minutes. When done, the broccoli should be crisp/tender in texture.

  3. Immediately transfer the steamed broccoli out of steamer and onto a serving plate. Drizzle the broccoli spears with the balsamic vinaigrette, using all of it. Sprinkle with sesame seeds, if using. Serve hot, and enjoy!

Nutrition Facts
Quick Broccoli in Vinaigrette
Amount Per Serving (1 g)
Calories 55 Calories from Fat 9
% Daily Value*
Fat 1g2%
Saturated Fat 1g6%
Sodium 97mg4%
Potassium 371mg11%
Carbohydrates 9g3%
Fiber 3g13%
Sugar 3g3%
Protein 4g8%
Vitamin A 706IU14%
Vitamin C 101mg122%
Calcium 66mg7%
Iron 1mg6%
* Percent Daily Values are based on a 2000 calorie diet.

Here’s one more to pin on your Pinterest boards!Quick broccoli in vinaigrette is a fast, easy way to serve a tasty veggie side dish! Enjoy steamed broccoli, drizzled with a tangy balsamic dressing.

How To Make Italian Seasoning

Learn how to make Italian seasoning mix in under 5 minutes! It’s easy, and a handy spice mix to have in the pantry to help season Italian meals!
Learn how to make Italian seasoning mix in under 5 minutes! It's easy, and a handy spice mix to have in the pantry to help season Italian meals!

Have you ever been looking at a recipe and realize the recipe calls for Italian seasoning? Does it seem like too much trouble to make a separate trip to the store to buy some? Well… fear not! Today you can see just how easy it is to make it right in your own kitchen!

Scroll Down For A Printable Recipe Card At The Bottom Of The Page

What Spices Are IN Italian Seasoning Mix?

The cast of characters for this Italian seasoning are basil, garlic powder, parsley, rosemary, pepper, onion powder, oregano, thyme and red pepper flakes.

The spices used to make Italian seasoning mix, on a plate.

How Do You Make Italian Seasoning Mix?

The spices in this recipe need to be crushed together. The best way to do this is by measuring out all the ingredients into a food processor or a spice/coffee grinder. Pulse spices together until they are pretty finely ground. There you go… you just leaned how to make Italian seasoning! I’ll bet you didn’t even break into a sweat, either!

The spices are ground in a food processor or coffee grinder.

This recipe will yield a total of about 1/2 cup of Italian seasoning mix, which is about 8 Tablespoonfuls. Place the spices into a container with a lid, label it, and add it to your pantry! The spices should hold their peak flavor for up to 6 months or so. Use this mix anytime a recipe calls for Italian seasoning.

After you make Italian seasoning, it is stored in an airtight container.Once you make Italian seasoning, add it to airtight container with lid, and store.

Looking For More Spice Mix Recipes?

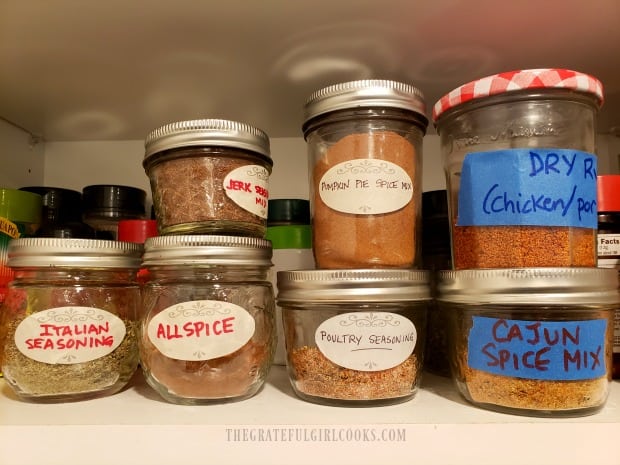
Here is the Italian seasoning (below) in it’s new home in our pantry. It has settled in next to some of the other homemade spice mixes (all on my blog). These mixes include jerk seasoning mix, dry rub (for chicken/pork), allspice, cajun seasoning and pumpkin pie spice mix. I also make my own taco seasoning (not shown).

Store the Italian seasoning spice mix in pantry.

See how easy it is to make this spice mix? I really hope you will whip some up soon, and trust you will enjoy using it in some of your favorite Italian dishes! Have a wonderful day.

Looking For More Simple Tips?

You can find ALL my recipes in the Recipe Index, located at the top of the page. I have several helpful tips you might be interested in, including:

Interested In More Recipes?

Thank you for visiting this website. I appreciate you using some of your valuable time to do soIf you’re interested, I publish a newsletter 2 times per month (1st and 15th) with all the latest recipes, and other fun info. I would be honored to have you join our growing list of subscribers, so you never miss a great recipe!
There is a Newsletter subscription box on the top right side (or bottom) of each blog post, depending on the device you use, where you can easily submit your e-mail address (only) to be included in my mailing list.

You Can Also Find Me On Social Media:
Facebook page: The Grateful Girl Cooks!
Pinterest: The Grateful Girl Cooks!
Instagram: jbatthegratefulgirlcooks

Author's signature

Original recipe source: https://www.onehundreddollarsamonth.com/easy-kitchen-tips-italian-seasoning-recipe/

0 from 0 votes
How To Make Italian Seasoning
Prep Time
5 mins
Cook Time
0 mins
Total Time
5 mins
 

Learn how to make Italian seasoning mix in under 5 minutes! It's easy, and a handy spice mix to have in the pantry to help season Italian meals!

Category: Spices
Cuisine: Italian
Keyword: How to make Italian seasoning, Italian seasoning
Servings: 8 Tablespoons (1/2 cup total)
Calories Per Serving: 15 kcal
Author: JB @ The Grateful Girl Cooks!
Ingredients
  • 3 Tablespoons dried basil
  • 3 Tablespoons dried parsley
  • Tablespoons dried oregano
  • 1 Tablespoon garlic powder
  • 1 teaspoon dried rosemary
  • 1 teaspoon onion powder
  • 1 teaspoon dried thyme
  • ½ teaspoon red pepper flakes
  • ¼ teaspoon black pepper
Instructions
  1. Measure all ingredients into a food processor, or coffee grinder.

  2. Pulse or grind until spices have become fairly finely ground. Remove, and transfer the mix to an airtight container with a lid. Label, and store in cool, dry and dark place. The spice mix should hold its peak flavor for up to 6 months.

Nutrition Facts
How To Make Italian Seasoning
Amount Per Serving (1 Tablespoon)
Calories 15 Calories from Fat 9
% Daily Value*
Fat 1g2%
Saturated Fat 1g6%
Sodium 8mg0%
Potassium 91mg3%
Carbohydrates 3g1%
Fiber 2g8%
Sugar 1g1%
Protein 1g2%
Vitamin A 90IU2%
Vitamin C 0.9mg1%
Calcium 69mg7%
Iron 2.3mg13%
* Percent Daily Values are based on a 2000 calorie diet.

Here’s one more to pin on your Pinterest boards!Learn how to make Italian seasoning mix in under 5 minutes! It's easy, and a handy spice mix to have in the pantry to help season Italian meals!


Freestyle 0 Point Cheesecake

Have a sweet tooth, but trying to cut out desserts? Try this easy and delicious, sugar free, Weight Watcher friendly, Freestyle 0 Point Cheesecake!

A couple months ago, I started to hear “chatter” about a VERY low calorie cheesecake “substitute” that is Weight Watchers Freestyle program friendly! Being curious, and always on the lookout for interesting sounding recipes to try, I decided to make it.

Now, please hear me on this. Cheesecake, in it’s “normal” form, (with all that yummy cream cheese) is my all time favorite dessert. I even have an amazing, decadent Chocolate Fudge Truffle Cheesecake on my blog! It is definitely scrumptious, but much higher in calories!

The low calories is why I was drawn to try this particular recipe. I wanted to try a dessert recipe (for my sweet tooth) that wouldn’t sabotage my weight loss efforts! After I tracked down the recipe creator’s website, I found this simple recipe for a low calorie, sugar free “crustless” cheesecake substitute.

I hardly ever use artificial sweeteners, but sometimes they are very nice to have around, for recipes like this! Guess what? I liked this cheesecake “substitute”, and even though it is not real cheesecake, it made me FEEL like I could enjoy a nice dessert, WITHOUT using all my daily calories or points!

Scroll Down For A Printable Recipe Card At The Bottom Of The Page

How To Make This Freestyle 0 Point Cheesecake

Place three eggs, vanilla extract and granulated sugar substitute in a large mixing bowl. I used granulated Stevia as the sugar substitute. Whisk these ingredients very well, until fully combined.

Eggs, vanilla extract and sugar substitute are mixed together in a bowl.

Add fat free, nonfat Greek yogurt and the dry cheesecake pudding mix (also sugar free/fat free) to the mixture. Continue to whisk until the cheesecake mixture is fully blended.

Non fat, plain Greek yogurt and sugar free cheesecake mix are added to the egg mixture in bowl.The filling for the Freestyle 0 point cheesecake is now ready!

Time To Bake The Cheesecake

There are two ways to bake the cheesecake. You can prepare this cheesecake in a pie pan, or you can use a 9″ springform pan. Either way will yield 8 slices!

If using a pie pan, spray the pan with non stick baking spray. Fill the pan with the cheesecake filling, and smooth the top surface evenly. If using a springform pan (this is what I did), cut a piece of parchment paper to fit the bottom. Fill the springform pan evenly with the cheesecake filling, and smooth the top surface evenly.

Bake the Freestyle 0 point cheesecake at 350° F. for 30 minutes. When done, the cheesecake will be a light golden color. It might even still look a little “wobbly” in the middle. Don’t worry! The cheesecake will set up once refrigerated after baking!

A springform pan is lined, filled with cheesecake filling, and baked for 30 minutes.

Refrigerate The Cheesecake Overnight

Once done, remove the freestyle 0 point cheesecake from the oven, and let it cool for 15-20 minutes. After that, cover it with plastic wrap (leave it in springform pan). Place it in the refrigerator and let the cheesecake fully chill overnight!

It’s hard to wait, but you’ve just got to leave it in the refrigerator overnight for it to set up properly AND because the flavor and texture gets even better! When ready to serve, release cheesecake from springform pan (if using), and slice the dessert into 8 slices.

The baked Freestyle 0 point cheesecake is baked, refrigerated, then cut into 8 slices.

Here’s a side view of the Freestyle 0 point cheesecake from the side. You can see it is not as high as a traditional cheesecake. There are instructions in the NOTES section of the printable recipe for making the cheesecake thicker.

A view of the sugar free cheesecake from the side, after baking.

Serving The Freestyle 0 Point Cheesecake

Try adding some fresh fruit slices to the top of the cheesecake for presentation and extra flavor! Fresh berries or sugar free fruit syrup are always colorful, too!

About 15 minutes before serving, I sliced some strawberries, and mixed them with a tiny bit of sugar substitute and 1 teaspoon water. Spoon some strawberries over cheesecake, and top with a tiny shot of whipped cream, if desired.

A slice of Freestyle 0 point cheesecake, with strawberries and whipped cream.

Hope you will consider trying this Freestyle 0 point cheesecake! Hopefully it will satisfy your sweet tooth, without sabotaging your weight loss efforts! Have a good day!

Looking For More Weight Watcher Friendly Recipes?

You can find ALL of my recipes in the Recipe Index, located at the top of the page. I have a few Weight Watcher friendly recipes you might enjoy, including:

Interested In More Recipes?

Thank you for visiting this website. I appreciate you using some of your valuable time to do soIf you’re interested, I publish a newsletter 2 times per month (1st and 15th) with all the latest recipes, and other fun info. I would be honored to have you join our growing list of subscribers, so you never miss a great recipe!
There is a Newsletter subscription box on the top right side (or bottom) of each blog post, depending on the device you use, where you can easily submit your e-mail address (only) to be included in my mailing list.

You Can Also Find Me On Social Media:
Facebook page: The Grateful Girl Cooks!
Pinterest: The Grateful Girl Cooks!
Instagram: jbatthegratefulgirlcooks

Author's signature

Original recipe source: https://thepounddropper.com/plain-jane-cheesecake/

5 from 1 vote
Freestyle 0 Point Cheesecake
Prep Time
10 mins
Cook Time
30 mins
Refrigeration (inactive time)
8 hrs
Total Time
8 hrs 40 mins
 

Have a sweet tooth, but trying to cut out desserts? Try this easy and delicious, sugar free, Weight Watcher friendly, Freestyle 0 Point Cheesecake!

Category: Dessert
Cuisine: American
Keyword: freestyle 0 point cheesecake
Servings: 8
Calories Per Serving: 99 kcal
Author: JB @ The Grateful Girl Cooks!
Ingredients
  • 3 large eggs
  • 3 Tablespoons sugar substitute (granulated) * I used Stevia
  • 1 Tablespoon vanilla extract
  • 3 cups nonfat, plain Greek yogurt
  • 1 ounce sugar free/fat free cheesecake pudding mix (instant) , small box (can substitute SF/FF vanilla pudding)
Instructions
  1. Preheat your oven to 350°F.

  2. Place three eggs, vanilla extract and granulated sugar substitute in a large mixing bowl. Whisk these ingredients very well, until fully combined. Add fat free, nonfat Greek yogurt and the dry cheesecake pudding mix (also sugar free/fat free) to the mixture. Continue to whisk until the cheesecake mixture is fully blended.

  3. Using A PIE PAN? Spray pie pan with a non stick spray. Fill the pie pan with the cheesecake filling, and smooth the top surface evenly.

    Using a SPRINGFORM PAN? Cut a piece of parchment paper to fit the bottom. Fill the springform pan with the cheesecake filling, and smooth the top surface evenly.

    Bake cheesecake at 350° F. for 30 minutes. When done, cheesecake will be a light golden color. It might even still look a little "wobbly" in the middle. Don't worry! The cheesecake will set up once refrigerated after baking!

  4. When done, remove cheesecake from oven, and let it cool for 15-20 minutes. After that, cover it with plastic wrap (leave it in springform pan). Place it in the refrigerator and let it fully chill overnight! This is for it to set up properly AND because the flavor and texture gets even better! When ready to serve, slice the dessert into 8 slices. Garnish, if desired with fruit of your choice. Enjoy!

Recipe Notes

*If you want a thicker slice of cheesecake, use 5 cups yogurt. Thicker cheesecake will take longer to cook.
*Use a granulated sugar substitute, because other types make the cheesecake tend to have a more "gritty" texture.

Nutrition Facts
Freestyle 0 Point Cheesecake
Amount Per Serving (1 slice (1/8th of total))
Calories 99 Calories from Fat 18
% Daily Value*
Fat 2g3%
Saturated Fat 1g6%
Cholesterol 84mg28%
Sodium 204mg9%
Potassium 154mg4%
Carbohydrates 6g2%
Sugar 3g3%
Protein 12g24%
Vitamin A 115IU2%
Calcium 109mg11%
Iron 0.4mg2%
* Percent Daily Values are based on a 2000 calorie diet.

Here’s one more to pin on your Pinterest boards!Have a sweet tooth, but trying to cut out desserts? Try this easy and delicious, sugar free, Weight Watcher friendly, Freestyle 0 Point Cheesecake!

Panko Crusted Rockfish

You’ll enjoy this simple, delicious recipe for panko crusted rockfish! Fish fillets are seasoned, coated with crispy panko crumbs, and pan-seared until done.
You'll enjoy this simple, delicious recipe for panko crusted rockfish! Fish fillets are seasoned, coated with crispy panko crumbs, and pan-seared.

Have you ever eaten rockfish before? It is a mild flavored, medium firm fish that my husband and I started buying over the past couple years. The first time my husband bought some fillets at the grocery store, and brought them home, I wasn’t sure WHAT to do with it, since I’d never tasted it before!

Long story short, I wound up creating a recipe we loved, and have been buying and using rockfish fillets in recipes ever since! We’ve enjoyed Cornmeal Spice-Crusted Rockfish, and Pan-Seared Rockfish with Fresh Herbs, to name a couple!

Scroll Down for A Printable Recipe Card At the Bottom Of The Page

How I Came Up With This Simple Recipe

I came up with this super simple recipe for panko crusted rockfish one evening when my husband was invited out for dinner with a friend at the last minute. I had some rockfish already thawed, so I decided to cook a nice meal just for me! Sure beats cold cereal or a peanut butter and jelly sandwich!

The idea of panko coating to make the fish nice and crispy on the outside sounded good. I made a simple seasoning mix to season the fish with, and boom! A delicious seafood dinner was enjoyed by ME. Here’s how easy this seafood dish is to make!

Make The Seasoning For The Fish

In a small bowl, combine the spices used to season the rockfish. These spices are garlic powder, onion powder, salt and pepper, Italian seasoning, paprika and dried parsley. EASY!

A few common spices are mixed to season the rockfish.

Prepare The Rockfish Fillets

Pat the rockfish fillets dry, using paper towels. Sprinkle one side of the fish with the seasoning mix, dividing it equally between the two pieces.

Each of the fish fillets are seasoned on one side before cooking.

Place the panko crumbs onto a dinner sized plate and spread them out. Place fish, one fillet at a time, onto the panko crumbs. Press down, to cover the bottom with the crumbs. Turn the fillet over and coat the other side with crumbs, as well.

Pat them firmly into the fish with your hands to make the crumbs adhere to the surface as much as possible. Set the fillet aside and repeat with other piece, keeping at it until you get as much of the fillet covered with panko crumbs, as possible.

The rockfish fillets are dredged in panko crumbs to coat both sides before cooking.

Pan-Sear The Panko Crusted Rockfish

Heat oil in a large skillet on medium heat until very hot, but not smoking.  Carefully place the fish into the hot oil, SEASONED SIDE DOWN. You should hear it sizzle when the fish goes into the skillet. Do not move the fish after it hits the skillet.

Cook for approximately 4 minutes, until you see the outside bottom edges of the panko crusted rockfish browning and getting crusty. Carefully turn each fillet to the other side, using a spatula. Cook the second side for about 4 minutes, until fish is cooked through and flakes easily.

Fish is pan-seared in hot oil.Panko custed fish is flipped and other side is cooked, as well.

Time To EAT!

Transfer the finished fish to serving plates, and dig in! I served the panko crusted rockfish with Quick Broccoli in Vinaigrette and a Wild Rice Salad (with pumpkin vinaigrette) on the side. It was a very satisfying and delicious meal!

Broccoli and rice salad were served with the panko crusted rockfish.

See how flaky the rockfish is inside? It sure tastes good, too. Trust me, this was SUCH a simple dish to prepare, in under 20 minutes from start to finish!

The panko crusted rockfish is cooked through, and flakes easily.

Hope you enjoy this recipe for crispy panko crusted rockfish!  I sure did. Be sure and check out the Recipe Index, located at the top of the page for a look at ALL of my Seafood recipes! Have a wonderful day.

Looking for More ROCKFISH Recipes?

You can find ALL my recipes in the Recipe Index, located at the top of the page. I have some other rockfish recipes you might want to check out, including:

Interested In More Recipes?

Thank you for visiting this website. I appreciate you using some of your valuable time to do soIf you’re interested, I publish a newsletter 2 times per month (1st and 15th) with all the latest recipes, and other fun info. I would be honored to have you join our growing list of subscribers, so you never miss a great recipe!
There is a Newsletter subscription box on the top right side (or bottom) of each blog post, depending on the device you use, where you can easily submit your e-mail address (only) to be included in my mailing list.

You Can Also Find Me On Social Media:
Facebook page: The Grateful Girl Cooks!
Pinterest: The Grateful Girl Cooks!
Instagram: jbatthegratefulgirlcooks

Author's signature

0 from 0 votes
Panko Crusted Rockfish
Prep Time
10 mins
Cook Time
8 mins
Total Time
18 mins
 

You'll enjoy this simple, delicious recipe for panko crusted rockfish! Fish fillets are seasoned, coated with crispy panko crumbs, and pan-seared.

Category: Entree-Seafood
Cuisine: American
Keyword: panko crusted rockfish
Servings: 2
Calories Per Serving: 316 kcal
Author: JB @ The Grateful Girl Cooks!
Ingredients
Seasoning For Fish:
  • ¼ teaspoon garlic powder
  • ¼ teaspoon onion powder
  • ¼ teaspoon dried parsley
  • teaspoon salt
  • teaspoon black pepper
  • teaspoon Italian seasoning
  • teaspoon paprika
Remainder of Ingredients:
  • 2 rockfish fillets (approx. 4-5 ounces each)
  • 1 cup Panko bread crumbs (must use panko crumbs for crunchiest crust!)
  • Tablespoons olive oil (or oil of your choice)
Instructions
  1. In a small bowl, combine the garlic powder, onion powder, salt, pepper, Italian seasoning, paprika and dried parsley. Pat the rockfish fillets dry, using paper towels. Sprinkle one side of the fish with the seasoning mix, dividing it equally between both pieces of fish.

  2. Place panko crumbs onto a dinner sized plate and spread them out. Place fish, one fillet at a time, onto the panko crumbs. Press down, to cover the bottom with the crumbs. Turn the fillet over and coat the other side with crumbs, as well. Pat them into the fish with your hands to make the crumbs adhere to the surface as much as possible. Set fish aside and repeat with other fillet.

  3. Heat oil in a large skillet on medium heat until very hot, but not smoking.  Carefully place fish into the hot oil, SEASONED SIDE DOWN. You should hear it sizzle when it goes into the skillet. Do not move the fish after it hits the skillet. Cook for approximately 4 minutes, until you see the outside bottom edges of the rockfish browning. Once well browned and crusty, carefully turn each fillet to the other side, using a spatula. Cook the second side for about 4 minutes, until fish is cooked through and flakes easily. Transfer the fish to serving plate once done, and enjoy!

Nutrition Facts
Panko Crusted Rockfish
Amount Per Serving (1 fillet (4 ounces))
Calories 316 Calories from Fat 126
% Daily Value*
Fat 14g22%
Saturated Fat 2g13%
Cholesterol 57mg19%
Sodium 450mg20%
Potassium 497mg14%
Carbohydrates 22g7%
Fiber 1g4%
Sugar 2g2%
Protein 25g50%
Vitamin A 62IU1%
Calcium 71mg7%
Iron 2mg11%
* Percent Daily Values are based on a 2000 calorie diet.

Here’s one more to pin on your Pinterest boards!You'll enjoy this simple, delicious recipe for panko crusted rockfish! Fish fillets are seasoned, coated with crispy panko crumbs, and pan-seared.