Kale Orange Salad

Kale Orange Salad, topped with a creamy citrus vinaigrette, crumbled goat cheese, fresh oranges, and jalapeño slices, may surprise you with just how GOOD it tastes!
Kale Orange Salad, topped with citrus vinaigrette, crumbled goat cheese, fresh oranges, and jalapeño slices, may surprise you with how GOOD it tastes!

KALE… most people either LIKE it or HATE it! I happen to like it. Several years ago I found a recipe for a kale and citrus salad online, from Ree Drummond, also known as The Pioneer Woman.  She had ordered a similar salad at a restaurant in Hollywood, loved it, then went home and recreated it! I enjoy her cookbooks and recipes, so I knew this kale orange salad just HAD to be GOOD!

Our little backyard raised bed garden, at the time, happened to be overflowing with kale! I use our homegrown kale in my recipe for Olive Garden’s “Zuppa Toscana” Soup (a favorite), so I try to have it around. After reading through the ingredient list, a kale orange salad sounded very interesting, so I harvested a bunch from our garden, and made this salad! YUM!

My husband and I really enjoyed this unique salad (and he’s not a HUGE kale fan)!  It’s also easy to make, which is always a big PLUS in my book! Here’s how to make this delicious salad:

Scroll Down For a Printable Recipe Card At the Bottom Of The Page

Prepare The Kale For The Salad

Rinse and drain the kale thoroughly, then place the leaves onto a cutting surface. Using a sharp knife, remove the long stem from the middle of the leaves (discard the stems). Once de-stemmed, thinly slice the kale, a handful of leaves at a time. Place all the sliced kale into a large salad bowl, and set aside.

Kale is rinsed, then finely chopped to prepare it for the kale orange salad.

Make The Salad Dressing For The Kale Orange Salad

Place the orange juice, olive oil, white wine vinegar, granulated sugar, minced garlic, salt and pepper in a small bowl.  Whisk these ingredients together until fully blended. Add the sour cream (or plain Greek yogurt, if using), and whisk again, to blend fully. The finished salad dressing will be smooth and creamy.

The citrus vinaigrette is prepared, to dress the finished kale orange salad.

You will need beautiful, peeled orange chunks for this salad. Below is a handy photo of how to peel an orange to get perfect little chunks, without all the bitter tasting white “pith” attached!

Cut a slice off the bottom of the orange. Stand up the orange with the sliced edge on the bottom. Carefully cut off the peel, from top to bottom, following the curve of the orange. Remove all the white “pith” from the outside of the orange. Slice the peeled orange into chunks.

Photo collage showing how to peel whole orange to add to the kale orange salad.

Assemble The Kale Orange Salad

Gather the salad bowl and the rest of the ingredients when ready to build the salad. This includes the thinly sliced kale, seeded and thinly sliced jalapeños, citrus salad dressing, orange chunks, and the goat cheese. (Oops… sorry about the slightly blurry photo).

Kale, jalapenos, orange chunks, goat cheese and salad dressing ready to make a kale orange salad.

Pour HALF the salad dressing over the sliced kale, and give it a good toss.  Add the oranges and the sliced jalapeños, and toss again, to ensure everything is covered with salad dressing. If the kale orange salad needs a bit more dressing, add more, until it is to your liking. TIP: Any extra salad dressing can be stored (covered), in the refrigerator for several days, and can be used on other salads.

Use a fork to crumble up the goat cheese, and add it to the kale orange salad right before you serve it! Give the salad one final toss, to combine ingredients, then serve!

The kale orange salad is tossed with the salad dressing before serving.

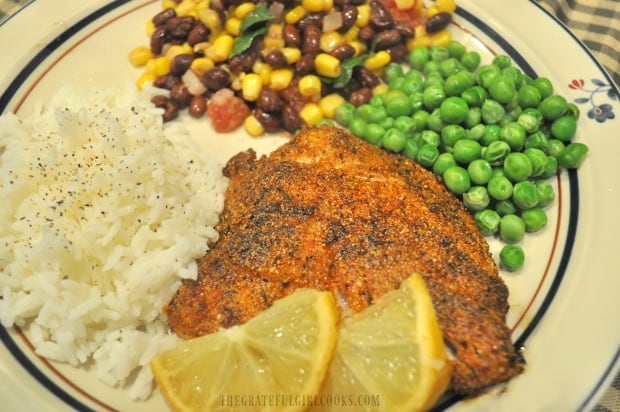
We enjoyed this simple, but yummy salad, along with a piece of pan seared creole salmon, and a small baked potato! The creamy goat cheese, along with the sweet oranges and creamy citrus salad dressing really make this a delicious side salad!

Baked potato and roasted salmon on dinner plate with the kale orange salad.

I hope you will consider trying this kale orange salad, and have a feeling you will be pleasantly surprised with the taste (even if you’re not a big KALE fan!). Have a wonderful day!

Looking For More SALAD Recipes?

Interested In More Recipes?

Thank you for visiting this website. I appreciate you using some of your valuable time to do soIf you’re interested, I publish a newsletter 2 times per month (1st and 15th) with all the latest recipes, and other fun info. I would be honored to have you join our growing list of subscribers, so you never miss a great recipe!
There is a Newsletter subscription box on the top right side (or bottom) of each blog post, depending on the device you use, where you can easily submit your e-mail address (only) to be included in my mailing list.

You Can Also Find Me On Social Media:

Facebook page: The Grateful Girl Cooks!
Pinterest:
The Grateful Girl Cooks!
Instagram:
jbatthegratefulgirlcooks

Author's signature

Original Recipe Source: http://tastykitchen.com/recipes/salads/kale-citrus-salad/

0 from 0 votes
Kale Orange Salad
Prep Time
20 mins
Cook Time
0 mins
Total Time
20 mins
 

Kale Orange Salad, topped with citrus vinaigrette, crumbled goat cheese, fresh oranges, and jalapeño slices, may surprise you with just how GOOD it tastes!

Category: Salad
Cuisine: American
Keyword: kale orange salad
Servings: 6
Calories Per Serving: 127 kcal
Author: JB @ The Grateful Girl Cooks!
Ingredients
For Salad:
  • 1 bunch kale , rinsed, stems removed
  • 1 large orange , peeled and cut into chunks
  • 1 medium fresh jalapeño pepper , seeded/sliced very thin
  • 4 ounces goat cheese (chevre)
For Salad Dressing:
  • 1/4 cup orange juice
  • 2 Tablespoons olive oil
  • 1 teaspoon white wine vinegar
  • 1 clove garlic , minced
  • 1 teaspoon granulated sugar
  • Salt and Pepper, to taste
  • 1 Tablespoon sour cream , or plain Greek yogurt
Instructions
  1. Prepare kale: Rinse and drain kale thoroughly, then place leaves onto cutting surface. Using a sharp knife, remove long stem from the middle of the leaves (discard the stems). Once de-stemmed, thinly slice kale, a handful at a time. Place sliced kale into a large salad bowl; set aside.

  2. Make The Salad Dressing: Place orange juice, olive oil, white wine vinegar, granulated sugar, minced garlic, salt and pepper in a small bowl.  Whisk together until fully blended. Add sour cream (or plain Greek yogurt, if using), and whisk again, to blend fully. Finished salad dressing will be smooth and creamy.

  3. Build Salad: Pour HALF the salad dressing over sliced kale in bowl; give it a good toss, to distribute salad dressing.  Add orange pieces and sliced jalapeños, and toss again, to ensure everything is coated with salad dressing. If salad needs a bit more dressing, add more until it is to your liking. TIP: Any extra dressing can be stored (covered), in refrigerator for several days, and can be used on other salads.

    Use a fork to crumble up the goat cheese, and add it to the kale orange salad right before you serve it! Give the salad one final toss, to combine ingredients, then serve! Enjoy!
Recipe Notes

Substitutions for the orange chunks in the Salad: 3 tangerines or clementines.

Nutrition Facts
Kale Orange Salad
Amount Per Serving (1 (1/6th of total))
Calories 127 Calories from Fat 81
% Daily Value*
Fat 9g14%
Saturated Fat 3g19%
Cholesterol 9mg3%
Sodium 79mg3%
Potassium 182mg5%
Carbohydrates 7g2%
Sugar 4g4%
Protein 4g8%
Vitamin A 2475IU50%
Vitamin C 50.4mg61%
Calcium 74mg7%
Iron 0.7mg4%
* Percent Daily Values are based on a 2000 calorie diet.

Here’s one more to pin on your Pinterest boards!Kale Orange Salad, topped with citrus vinaigrette, crumbled goat cheese, fresh oranges, and jalapeño slices, may surprise you with how GOOD it tastes!

Broiled Salmon with Pineapple Salsa

Broiled Salmon with Pineapple Salsa features spice rubbed salmon fillets, glazed with honey and brown sugar, topped with a simple fruit salsa.

It was a cold, rainy day recently… the kind you do NOT want to go outside in. I had laid out some salmon to fix for our dinner, and wanted to try a new recipe I had come upon in my cookbook collection. The recipe is from the editors at American’s Test Kitchen, so I knew it would be good.

We LOVE salmon, so I am always on the lookout for new ways to cook this healthy, delicious fish! This “tropical-sounding” salmon recipe with pineapple salsa was a perfect meal for this COLD rainy day, to help us dream of warm summer days! This is a perfect “Dinner For Two!”

Normally I pan-sear, bake or grill our salmon when we eat it. This “new to us” recipe called for BROILING the salmon. Hmmm… that sounded interesting, so into the kitchen I went, and this Broiled Salmon with Pineapple Salsa is the result. Oh my goodness… this broiled salmon dish is so quick and easy to make… and tastes so good! The cleanup was a breeze, too! We enjoyed this dish so much I want to share the recipe with you today. Here’s how to make it:

Scroll Down For A Printable Recipe Card At The Bottom Of The Page

Make Pineapple Salsa For The Broiled Salmon

The pineapple salsa for the broiled salmon couldn’t be any easier to make! Mix the pineapple pieces, sliced green onion, minced jalapeño, lime juice and cilantro together, in a medium bowl. Fresh pineapple is recommended, but you can CERTAINLY use canned just as easily!

Lightly season the salsa with a little salt and pepper (to taste), then set aside until the broiled salmon is ready to serve. That’s it – your pineapple salsa is done! See how EASY that was?

Pineapple salsa is mixed together to top broiled salmon.
Make The Spice Rub For The Broiled Salmon

The next thing to make is the spice rub which will season the salmon fillets before cooking. Combine brown sugar, ground coriander, ground ginger, granulated garlic, salt and pepper in a small bowl. Stir until blended, then set the spice mix aside.

Spice rub mixture in bowl, ready to season broiled salmon.

Prepare The Salmon Fillets

Prepare the salmon fillets for cooking by first placing them onto a layer of paper towels, and blotting them dry with additional paper towels.

Salmon fillets are blotted dry with paper towels before cooking.

Place the dried salmon fillets onto a baking sheet that has been covered with foil, and lightly sprayed with non-stick baking spray. Trust me… do this step! The foil will help the glazed broiled salmon not stick to the pan, and will make your cleanup much easier!

Stir the honey and water together until blended in a small cup. Using a pastry brush, “paint” this glaze over the top of each of the salmon fillets.

Honey and water glaze is brushed onto salmon before broiling.

Sprinkle the salmon fillets with the spice mixture, evenly dividing it between the two pieces. Use your fingers to lightly press the spices onto the salmon, so it adheres to the fish better.

The broiled salmon recipe calls for sprinkling fillets with spice mix before broiling.

The last thing you need to do right before cooking the salmon is lightly spray the top of each fillet with non-stick vegetable oil spray.

The honey glaze and the brown sugar in the spice rub will caramelize slightly while cooking, to form a type of “crust” on top. That extra bit of vegetable oil spray will also help to ensure a nice, slightly crispy “crust” on the broiled salmon!

Cook The Salmon Fillets

Place an oven rack about 6 inches from the broiler element. Preheat the broiler, then place the baking sheet with the salmon onto the rack.

Broil the salmon (keeping an eye on it), until it is nice and browned. This should take about 6-8 minutes, and the internal temperature (if tested) should be 125° F. Remove the broiled salmon from the oven, once done.

Seasoned salmon fillets are spritzed with non-stick baking spray before being broiled.

Serve The Broiled Salmon

To serve, transfer the broiled salmon to individual dinner plates. Top each salmon fillet with a generous portion of the pineapple salsa, dividing it equally between the two pieces of fish.

We had some white steamed rice, and a simple mixed green salad  with a balsamic dressing on the side for this meal. The bland white rice paired very well with the rich salmon and vibrant pineapple salsa!

Broiled salmon with pineapple salsa, served on plate with rice and green salad.

Close up photo of the pineapple salsa on top of the seasoned broiled salmon.

Sure hope you will give this broiled salmon recipe a try! It is light in calories, but big in flavor, and is really EASY to make! I really think you will enjoy this dish. Have a wonderful day!

Looking For More SALMON Recipes?

You can find all of my recipes in the Recipe Index, located at the top of the page.  I have many recipes using salmon, including:

Interested In More Recipes?

Thank you for visiting this website. I appreciate you using some of your valuable time to do soIf you’re interested, I publish a newsletter 2 times per month (1st and 15th) with all the latest recipes, and other fun info. I would be honored to have you join our growing list of subscribers, so you never miss a great recipe!
There is a Newsletter subscription box on the top right side (or bottom) of each blog post, depending on the device you use, where you can easily submit your e-mail address (only) to be included in my mailing list.

You Can Also Find Me On Social Media:

Facebook page: The Grateful Girl Cooks!
Pinterest:
The Grateful Girl Cooks!
Instagram:
jbatthegratefulgirlcooks

Author's signature

Original Recipe Source: My beloved cookbook titled “The Complete Cooking For Two Cookbook”, by America’s Test Kitchen, published in 2014 by the Editors at America’s Test Kitchen, pages 182-183.

0 from 0 votes
Broiled Salmon with Pineapple Salsa
Prep Time
15 mins
Cook Time
8 mins
Total Time
23 mins
 
Broiled Salmon with Pineapple Salsa features spice rubbed salmon fillets, glazed with honey and brown sugar, topped with a simple fruit salsa.
Category: Main Course
Cuisine: American
Keyword: broiled salmon
Servings: 2
Calories Per Serving: 304 kcal
Author: JB @ The Grateful Girl Cooks!
Ingredients
For Salsa:
  • 3/4 cup pineapple pieces (1/2") , can substitute canned pineapple
  • 1 scallion (green onion) , thinly sliced
  • 1/2 medium jalapeño pepper , stemmed, seeded, minced
  • 2 teaspoon fresh lime juice
  • 1 teaspoon fresh cilantro leaves , minced
  • Salt and Pepper , to taste
For Salmon:
  • vegetable oil spray
  • 2 6 oz. salmon fillets (skinless) ,
  • 2 teaspoons honey
  • 1/2 teaspoon brown sugar
  • 1/4 teaspoon water
  • 1/2 teaspoon ground coriander
  • 1/4 teaspoon ground ginger
  • 1/4 teaspoon granulated garlic
  • 1/4 teaspoon black pepper
  • 1/8 teaspoon salt
Instructions
  1. Make salsa: Mix pineapple, green onion, jalapeño, lime juice and cilantro together, in a medium bowl. Season with salt/pepper (to taste), then set aside. 

  2. Make spice rub: Place brown sugar, ground coriander, ground ginger, granulated garlic, salt & pepper in a small bowl. Stir until blended, then set aside.

  3. Prepare salmon: Place fillets onto a layer of paper towels, and blot dry with additional paper towels. Place salmon onto a baking sheet that has been covered with foil, and lightly sprayed with non-stick baking spray. Stir honey and water together until blended in a small cup. Brush this glaze over the top of each fillet. Sprinkle salmon with the spice mixture, dividing it between the two pieces. Lightly press spices onto salmon. Lightly spray each fillet with non-stick spray.

  4. Cook Salmon: Place an oven rack about 6 inches from the broiler element. Preheat broiler, then place the baking sheet with salmon onto the rack. Broil salmon (keep an eye on it), until nice and browned. This should take about 6-8 minutes, and the internal temperature (if tested) should be 125° F. Remove  salmon from oven, once done.

  5. To Serve: Transfer salmon to plates. Top each piece with a generous portion of the pineapple salsa, dividing it equally between the two fillets. Enjoy!
Recipe Notes

Variation Idea: Substitute 1/2 cup of diced fresh mango for the pineapple in the recipe.

Nutrition Facts
Broiled Salmon with Pineapple Salsa
Amount Per Serving (1 serving (with salsa))
Calories 304 Calories from Fat 90
% Daily Value*
Fat 10g15%
Saturated Fat 1g6%
Cholesterol 93mg31%
Sodium 222mg10%
Potassium 900mg26%
Carbohydrates 16g5%
Fiber 1g4%
Sugar 13g14%
Protein 34g68%
Vitamin A 200IU4%
Vitamin C 36.4mg44%
Calcium 28mg3%
Iron 1.5mg8%
* Percent Daily Values are based on a 2000 calorie diet.

Here’s one more to pin on your Pinterest boards!Broiled Salmon with Pineapple Salsa features spice rubbed salmon fillets, glazed with honey and brown sugar, topped with a simple fruit salsa.

Irish Soda Bread

Irish Soda Bread is a classic St. Patrick’s Day treat! This high-rising bread is very easy to make, filled with sweet raisins, and tastes amazing!
Irish Soda Bread is a classic St. Patrick's Day treat! This high-rising bread is very easy to make, filled with sweet raisins, and tastes amazing!

I subscribed to Taste Of Home magazines for many, many years, and have kept all of my issues! Let me tell you, I have lots of those magazines in my office! I keep them for inspiration, and still look through some of these back issues for great ideas!

Many years ago I cut out a recipe from the pages for a classic Irish soda bread, and have kept it all these years in my trusty recipe box! The recipe card doesn’t indicate which magazine issue it was from (month/year), so I have no way of knowing WHICH of my MANY Taste of Home magazines I clipped it from. But, since the recipe is so good, I want to share it with you today!

St. Patrick’s Day is just around the corner, and Irish soda bread can EASILY be part of your traditional Irish dinner, or ANY meal, for that matter! This delicious bread is so easy to prepare, and the taste is wonderful!  Serve a loaf of this bread, along with some corned beef and cabbage, and you’ve got yourself a wonderful Irish meal!

Scroll Down For A Printable Recipe Card At The Bottom Of The Page

How To Make Irish Soda Bread

Preheat your oven to 375° F.  While the oven preheats, place flour, brown sugar, baking powder, baking soda and salt in a large mixing bowl. Whisk or stir the dry ingredients together.  Use a pastry blender (or two forks), to cut in very cold butter, until the mixture is crumbly, and the butter has been reduced almost to the size of peas.

In a separate container, mix together buttermilk and one egg, and pour it into the bowl with the dry ingredients. Stir to combine, but only until the flour mixture is just moistened. Be careful not to over mix the dough!

Butter, eggs, and buttermilk is added to dry ingredients to make Irish soda bread dough.

The batter will be fairly sticky/tacky. Add the raisins, and fold them into the dough.

Raisins are added to the Irish soda bread dough.

Transfer the dough onto a floured work surface. Lightly sprinkle with additional flour, and knead the dough for 1 minute, adding flour as necessary. Shape the Irish soda bread dough into a round circle.

The dough for the Irish soda bread is kneaded, then formed into a circle before baking.

Place the round Irish soda bread loaf onto a well greased baking pan/sheet. Use a sharp knife, and cut a cross shape in the top of the loaf, cutting about 1/4″ deep.

A cross is cut into the top of the Irish soda bread before baking.

Lightly beat the one remaining egg, and brush it over the top of the loaf. Bake the Irish soda bread for 30-35 minutes in a preheated 375° F. oven.

When done, the loaf should be gorgeous and golden brown and “set” in the top/middle of the loaf. Transfer the loaf to a wire rack to cool for several minutes before slicing.

Irish soda bread is baked for about 30 minutes until done and golden brown.

Here, the baked Irish soda bread is cooling down on a wire rack before slicing.

When ready to serve the Irish soda bread, use a sharp serrated knife, and cut the loaf into 8 slices. The bread tastes fantastic when eaten warm, with a little bit of butter on it! YUM!

A slice is cut out of the Irish soda bread, to reveal the inside of the loaf.

Hope you enjoy this Irish soda bread for St. Patrick’s Day or ANY time of year! It truly is quite an easy bread to make, and really does taste wonderful. Thanks for reading… have a GREAT day!

Looking For More BREAD Recipes?

You can find all of my recipes in the Recipe Index, located at the top of the page. A few of our family’s favorite homemade bread recipes include:

Interested In More Recipes?

Thank you for visiting this website. I appreciate you using some of your valuable time to do soIf you’re interested, I publish a newsletter 2 times per month (1st and 15th) with all the latest recipes, and other fun info. I would be honored to have you join our growing list of subscribers, so you never miss a great recipe! 

There is a Newsletter subscription box on the top right side (or bottom) of each blog post, depending on the device you use, where you can easily submit your e-mail address (only) to be included in my mailing list.

You Can Also Find Me On Social Media:

Facebook page: The Grateful Girl Cooks!
Pinterest:
The Grateful Girl Cooks!
Instagram:
jbatthegratefulgirlcooks

Author's signature

Recipe Source: Gloria Warczak (from Cedarburg, Wisconsin), on a recipe card cut out of one of my old “Taste Of Home” Magazines (original date unknown, recipe was on page 13).

0 from 0 votes
Irish Soda Bread
Prep Time
10 mins
Cook Time
30 mins
Total Time
40 mins
 
Irish Soda Bread is a classic St. Patrick's Day treat! This high-rising bread is very easy to make, filled with sweet raisins, and tastes amazing!
Category: Bread
Cuisine: Irish
Keyword: Irish soda bread
Servings: 8 servings
Calories Per Serving: 215 kcal
Author: JB @ The Grateful Girl Cooks!
Ingredients
  • 2 cups all purpose flour
  • 2 Tablespoons brown sugar
  • 1 teaspoon baking powder
  • 1/2 teaspoon baking soda
  • 1/4 teaspoon salt
  • 3 Tablespoons butter (very cold)
  • 2 large eggs , divided use
  • 3/4 cup buttermilk
  • 1/3 cup raisins
Instructions
  1. Preheat oven to 375° F.  Place flour, brown sugar, baking powder, baking soda and salt in a large mixing bowl. Whisk the dry ingredients together.  Use a pastry blender (or two forks), to cut in very cold butter, until the mixture is crumbly, and the butter is about the size of peas.

  2. In a separate container, mix together buttermilk and one egg, and pour it into the bowl with the dry ingredients. Stir to combine, but only until flour mixture is just moistened. Do not overmix! The batter will be fairly sticky/tacky. Add the raisins, and fold them into the dough.

  3. Transfer the dough onto a floured work surface. Lightly sprinkle with additional flour, and knead dough for 1 minute, adding flour as necessary. Shape the dough into a round loaf. Place the loaf onto a well greased baking pan/sheet. Use a sharp knife, and cut a cross shape in the top of the loaf, cutting about 1/4" deep.

  4. Lightly beat the one remaining egg, and brush it over the top of loaf. Bake for 30-35 minutes in a preheated 375° F. oven. When done, the bread should be golden brown and "set" in the top/middle of the loaf. Transfer the loaf to a wire rack to cool for a few minutes before slicing. Slice loaf into 8 slices, spread with softened butter, serve and enjoy!

Nutrition Facts
Irish Soda Bread
Amount Per Serving (1 (1/8th of loaf))
Calories 215 Calories from Fat 54
% Daily Value*
Fat 6g9%
Saturated Fat 3g19%
Cholesterol 66mg22%
Sodium 225mg10%
Potassium 183mg5%
Carbohydrates 32g11%
Fiber 1g4%
Sugar 4g4%
Protein 5g10%
Vitamin A 245IU5%
Vitamin C 0.3mg0%
Calcium 66mg7%
Iron 1.9mg11%
* Percent Daily Values are based on a 2000 calorie diet.

Here’s one more to pin on your Pinterest boards!Irish Soda Bread is a classic St. Patrick's Day treat! This high-rising bread is very easy to make, filled with sweet raisins, and tastes amazing!

Cranberry Orange Quinoa Salad with Pecans

You’ll enjoy this delicious Cranberry Orange Quinoa Salad with toasted pecans, covered in a honey-orange dressing! It’s gluten-free, and very easy to make!
You'll enjoy this delicious Cranberry Orange Quinoa Salad with toasted pecans, covered in a honey-orange dressing! It's gluten-free, and easy to make!

Well, this cranberry orange quinoa salad with pecans may not LOOK “crazy fancy”, but it sure is delicious! This gluten-free quinoa salad is a very simple looking salad, but it packs a whole lot of flavor! You can learn more about quinoa here. I found the recipe on Pinterest, and thought it would be fun to try another new recipe using QUINOA!

Recently I made Cranberry Orange Israeli Couscous (using pearl couscous), and we loved it! Because of that, I thought it might be fun to try another recipe with the same flavor combination, but use QUINOA and a slightly different salad dressing. This “superfood quinoa” salad is the result… simple to make, and very flavorful!

Scroll Down for A Printable Recipe Card At The Bottom Of The Page

How To Make Cranberry Orange Quinoa Salad

The first thing you will need to do is rinse the quinoa! You can use a mesh strainer for this. Bring 2 cups of tap water to a boil on MEDIUM-HIGH heat in a medium-sized saucepan.

Add the rinsed quinoa to the pan, stir to combine, then bring the water back to a boil. Once water begins to boil, put a lid on the pan, and turn the heat down to LOW. Let the quinoa cook for about 15 minutes, OR until all the water has been absorbed by the quinoa.

Remove the saucepan from the heat once the quinoa is done. Remove the lid, then fluff up the quinoa, using a fork. Transfer the quinoa into a large salad bowl, and let it cool for about 10 minutes.

Quinoa is rinsed, then cooked to prepare it for cranberry orange quinoa salad.

Make The Salad Dressing While Quinoa Cools

While the quinoa cools, make the honey orange salad dressing (it’s so easy!).  Place the salad dressing ingredients in a small bowl.

The ingredients for the dressing are olive oil, fresh squeezed orange juice, apple cider vinegar, orange zest, honey, turmeric and thyme. Whisk the salad dressing ingredients together until they are fully combined.

Fresh orange juice, honey and herbs are used to make dressing for cranberry orange quinoa salad.

Pour the honey orange dressing over the warm quinoa, and stir well, to fully mix together. Once combined, add the dried cranberries into the cranberry orange quinoa salad, and stir well.

Taste a bite of the salad, and lightly season with salt and pepper, if desired. Place the salad (covered) into refrigerator, and let it chill for at least 30 minutes.

Salad dressing and cranberries are added to cooked quinoa to make cranberry orange quinoa salad.

Toast Pecans Before Adding To Cranberry Orange Quinoa Salad

Toasted, chopped pecans will be the last thing to add to the chilled cranberry orange quinoa salad right before you serve it! There are TWO ways you can toast the pecans… dry toasting them in a skillet, OR baking them in the oven. Your choice. I dry toasted them in a skillet.

To toast them in a skillet: Place chopped pecans in a dry skillet. Cook on low heat, stirring often, for 3-4 minutes until they become fragrant. To oven bake: Preheat oven to 350° F. Put the chopped pecans onto an ungreased cookie sheet and bake for 6-8 minutes.

Whichever method you use to toast the pecans, remove them from the heat when done, and let them cool BEFORE adding to the salad.  Once cooled, stir them into the refrigerated cranberry orange quinoa salad.

Chopped pecans are toasted, then added to the cranberry orange quinoa salad.

That’s it!  Now the cranberry orange quinoa salad is finished, chilled, and ready to serve! Fluff it up a bit with a fork again, and dig in! Simple, yet tasty!

The cranberry orange quinoa salad is chilled, then served!

Cranberry Orange Quinoa Salad in a bowl, ready to eat!

Hope you enjoy this easy, tasty cranberry orange quinoa salad.  Each serving is about 1/2 cup or so, for a total of 5 servings. Any leftover salad stores well in the refrigerator, for 3-4 days, if covered well, or in an airtight container. Have a great day!

Looking For More QUINOA Recipes?

You can find all of my published recipes in the Recipe Index, located at the top of the page. A few of our favorite recipes with quinoa include:

Interested In More Recipes?

Thank you for visiting this website. I appreciate you using some of your valuable time to do soIf you’re interested, I publish a newsletter 2 times per month (1st and 15th) with all the latest recipes, and other fun info. I would be honored to have you join our growing list of subscribers, so you never miss a great recipe!
There is a Newsletter subscription box on the top right side (or bottom) of each blog post, depending on the device you use, where you can easily submit your e-mail address (only) to be included in my mailing list.

You Can Also Find Me On Social Media:

Facebook page: The Grateful Girl Cooks!
Pinterest:
The Grateful Girl Cooks!
Instagram:
jbatthegratefulgirlcooks

Author's signature

Original Recipe Source: https://www.ambitiouskitchen.com/cranberry-pecan-quinoa-salad-with-honey-orange-dressing/

0 from 0 votes
Cranberry Orange Quinoa Salad with Pecans
Prep Time
25 mins
Cook Time
0 mins
Total Time
25 mins
 
You'll enjoy this delicious Cranberry Orange Quinoa Salad with toasted pecans, covered in a honey-orange dressing! It's gluten-free, and easy to make!
Category: Salad
Cuisine: American
Keyword: cranberry orange quinoa salad
Servings: 5 servings
Calories Per Serving: 251 kcal
Author: JB @ The Grateful Girl Cooks!
Ingredients
For Salad:
  • 1 cup uncooked quinoa
  • 1/3 cup dried cranberries
  • 1/3 cup pecans (chopped) , toasted
For Honey-Orange Salad Dressing:
  • 1 medium orange , zest AND juice
  • 1 Tablespoon olive oil
  • 2 teaspoons apple cider vinegar
  • 1 Tablespoon honey , or agave nectar
  • 1/2 teaspoon dried thyme
  • 1/2 teaspoon turmeric
  • salt and pepper, to taste
Instructions
  1. Rinse the quinoa in a mesh strainer. Bring 2 cups of water to a boil on MEDIUM-HIGH heat in a medium-sized saucepan. Add rinsed quinoa to the pan, stir to combine, then bring water back to a boil. Put a lid on the pan, and turn heat down to LOW. Cook quinoa for about 15 minutes OR until all the water has been absorbed by the quinoa. Once done, remove pan from the heat. Fluff up the quinoa, using a fork. Transfer quinoa to a large salad bowl, and let it cool for about 10 minutes.

  2. While quinoa cools, make the salad dressing.  Place ingredients in a small bowl (olive oil, orange juice, apple cider vinegar, orange zest, honey, turmeric and thyme). Whisk until fully combined.

  3. Pour the dressing over warm quinoa, and stir well. Once combined, add dried cranberries, and stir well. Taste a bite of the salad; lightly season with salt and pepper, if desired. Place the salad (covered) into refrigerator, and let it chill for at least 30 minutes.

  4. Toasted, chopped pecans will be the last thing to add to the chilled salad right before you serve it! There are 2 ways to toast pecans: 1) Toast them in a skillet: Place chopped pecans in a dry skillet. Cook on low heat, stirring often, for 3-4 minutes until they become fragrant. 2) Oven bake: Preheat oven to 350° F. Put the chopped pecans onto an ungreased cookie sheet and bake for 6-8 minutes. However you choose to toast the pecans, remove from heat when done; let them cool BEFORE adding to the salad.  Once cooled, stir them into the refrigerated salad, fluff with a fork, and serve! Enjoy!
Nutrition Facts
Cranberry Orange Quinoa Salad with Pecans
Amount Per Serving (1 (1/5th of total))
Calories 251 Calories from Fat 90
% Daily Value*
Fat 10g15%
Saturated Fat 1g6%
Sodium 2mg0%
Potassium 268mg8%
Carbohydrates 36g12%
Fiber 4g17%
Sugar 11g12%
Protein 5g10%
Vitamin A 60IU1%
Vitamin C 13.9mg17%
Calcium 32mg3%
Iron 2mg11%
* Percent Daily Values are based on a 2000 calorie diet.

Here’s one more to pin on your Pinterest boards!You'll enjoy this delicious Cranberry Orange Quinoa Salad with toasted pecans, covered in a honey-orange dressing! It's gluten-free, and easy to make!

Double Chocolate Scones

Double Chocolate Scones are easy to make, decadent chocolate scones, filled with white chocolate chips, and drizzled with a simple glaze on top!

Do you enjoy scones? We sure do, in our home! I’ve been making them for YEARS and YEARS, and always love searching for, and trying new scone recipes. 

Recently I found an old, handwritten recipe on a 3″x5″ index card I saved at least 15 years ago (LONG before the internet and  Pinterest made it so easy to save recipes!).

Unfortunately, I had not written down what magazine, newspaper or cookbook I found the original recipe in, so I can’t give due credit to the original author. 

All these years later, I still had not ever made these scones, but they sounded good. So… I made a couple basic changes to the original recipe and ended up with 8 delicious double chocolate scones! Here’s how to make them:

Scroll Down For A Printable Recipe Card At The Bottom Of The Page

Make The Dough For The Double Chocolate Scones

Preheat your oven to 375° F.  Mix flour, brown sugar, cocoa powder, baking soda, baking powder and salt in a large bowl.

Cut in VERY COLD butter, using a hand held pastry blender or two forks. Cut the butter into the dry ingredients until butter is reduced to the size of peas.

Mixing ingredients with butter to make double chocolate scones.

Add plain yogurt and one egg yolk to the mixture in the bowl. Stir mixture by hand, or with an electric beater until blended. The dough is fairly thick, so if you are mixing by hand, it will take a few minutes to bind together.

Add the white chocolate chips to the dough, and place the dough onto a lightly floured work surface. Knead the dough with the palm of your hand 10 times, folding the dough over, after each time. Do this until the dough comes together in a nice ball.

Eggs, plain yogurt, and white chocolate chips are added to the double chocolate scones dough.

Pat and shape the double chocolate scones dough out with your hands until it is formed into a 9″ wide circle.  Use a sharp knife or a pizza cutter to evenly cut the dough into 8 pie shaped wedges.

Place the eight scones onto an UNGREASED large baking sheet ( I used my ratty old pizza pan!). Leave about an inch in between each of the wedges, so they stay separated while baking.

The double chocolate scones dough is rolled into a 9 inch circle, then cut into 8 pieces.

Bake The Scones

Bake the double chocolate scones at 375° F. for 17-18 minutes. When done, remove pan from oven, and let the scones cool for 5-10 still on the pan. Because ovens can vary in temperatures, I would recommend checking the scones at the 15 minute mark, to check for “doneness”.

Place a piece of wax paper on the counter, and transfer the double chocolate scones from the pan to a wire rack (on top of the wax paper).

TIP: The wax paper will collect any drips when you drizzle the scones with glaze later, making your cleanup much easier!

Double chocolate scones are baked, then placed on wire rack to cool.

Glaze The Baked Double Chocolate Scones

Once the double chocolate scones have cooled, it is time to add the decorative glaze! The simple powdered sugar glaze helps make them look good, and adds an extra touch of sweetness to the finished scones!

Making the glaze is simple! Mix together powdered sugar and a few drops of water at a time, in a small bowl. Stir. Add a couple more drops of water, and stir. Continue to do this until the glaze is an easy to drizzle consistency… not too thick, and not too thin!

If glaze is too thick, add a couple drops of water. Got it too thin? Add more powdered sugar. Use a spoon or fork, and decoratively drizzle the glaze over the tops of the scones. The wax paper below will catch any messy drips!

A powdered sugar glaze is drizzled over the baked double chocolate scones before serving.

After glazing the scones, let the icing firm up (it will only take a few minutes), and then you double chocolate scones are ready to serve!

The glaze on top is allowed to firm up, before serving the double chocolate scones.

Serve The Double Chocolate Scones!

You can either just pick up a scone and enjoy it, as is, OR you can get all fancy with them! We usually just shove them into our mouths (truth), but sometimes, (especially for company) I want the presentation to be memorable! Remember… you eat with your EYES first, right?

I sifted cocoa powder very lightly on a small white plate, and then placed the double chocolate scone on top. A big dollop of aerosol whipped cream was sprayed next to the scone, and the whipped cream was garnished with a thin, half slice of a Cara Cara orange!

The double chocolate scone is served with a dollop of whipped cream and an orange slice.The double chocolate scone is cut in half to reveal the inside.

This recipe for double chocolate scones is a KEEPER! We really enjoyed them! I even put a few away in our freezer, so my husband and I can enjoy them for another breakfast soon!

Hope you have a wonderful day.  May your joys be many, and your sorrows few! Thank you for visiting this blog. I trust you will find some wonderful recipes to make for those you love!

Looking For More SCONE Recipes?

I have LOTS of scone recipes! They can be found in the Recipe Index, located at the top of the page.  They’re all good, but a few of our family favorites include:

Interested In More Recipes?

Thank you for visiting this website. I appreciate you using some of your valuable time to do soIf you’re interested, I publish a newsletter 2 times per month (1st and 15th) with all the latest recipes, and other fun info. I would be honored to have you join our growing list of subscribers, so you never miss a great recipe!
There is a Newsletter subscription box on the top right side (or bottom) of each blog post, depending on the device you use, where you can easily submit your e-mail address (only) to be included in my mailing list.

You Can Also Find Me On Social Media:

Facebook page: The Grateful Girl Cooks!
Pinterest:
The Grateful Girl Cooks!
Instagram:
jbatthegratefulgirlcooks

Author's signature

Original recipe source: Unknown

0 from 0 votes
Double Chocolate Scones
Prep Time
10 mins
Cook Time
17 mins
Total Time
27 mins
 
Double Chocolate Scones are easy to make, decadent chocolate scones, filled with white chocolate chips, and drizzled with a simple glaze on top!
Category: Bread/Breakfast
Cuisine: American
Keyword: double chocolate scones
Servings: 8 scones
Calories Per Serving: 408 kcal
Author: JB @ The Grateful Girl Cooks!
Ingredients
  • 2 cups all purpose flour
  • 1/3 cup brown sugar
  • 1/3 cup cocoa powder (unsweetened)
  • 2 teaspoons baking powder
  • 3/4 teaspoon baking soda
  • 1/8 teaspoon salt
  • 1/2 cup butter (very cold)
  • 1 egg yolk , beaten
  • 8 ounces plain yogurt , regular or Greek
  • 3/4 cup white chocolate chips
For Glaze:
  • 1/2 cup powdered sugar
  • water , as needed
Instructions
  1. Preheat oven to 375° F.  Mix flour, brown sugar, cocoa powder, baking soda, baking powder and salt in a large bowl. Cut in VERY COLD butter, using a hand held pastry blender or two forks. Cut the butter into dry ingredients until butter is reduced to the size of peas.

  2. Add yogurt and egg yolk to the bowl. Mix by hand, or with electric beater until fully blended. The dough is fairly thick, so if mixing by hand, it will take a few minutes to bind together. Add white chocolate chips to dough, and stir to combine. Place dough on lightly floured work surface. Knead dough with the palms of your hand 10 times, folding dough over, after each time. Do this until the dough comes together in a ball.

  3. Pat and shape dough with your hands until it is formed into a 9" wide circle.  Use a sharp knife or a pizza cutter to evenly cut dough into 8 pie shaped wedges. Put scones on an ungreased baking sheet, about 1" apart, so they stay separated while baking. Bake at 375° F. for 17-18 minutes. 

  4. When done, remove pan from oven, and let scones cool for 5-10 minutes, still on the pan. Place a piece of wax paper on the counter, with wire rack on top. Transfer scones to the wire rack. TIP: The wax paper will collect any drips when you drizzle the scones with glaze, making cleanup much easier!

  5. Make The Glaze: While scones cool, mix together powdered sugar and a few drops of water at a time, in a small bowl. Stir. Add a couple more drops of water, and stir. Continue to do this until the glaze is an easy to drizzle consistency... not too thick, and not too thin! Too thick? Add drops of water. Too thin? Add powdered sugar! Drizzle the glaze over the tops of the cooled scones, using a spoon or fork. Let glaze firm up, then scones are ready to serve. Enjoy!
Nutrition Facts
Double Chocolate Scones
Amount Per Serving (1 scone)
Calories 408 Calories from Fat 162
% Daily Value*
Fat 18g28%
Saturated Fat 11g69%
Cholesterol 60mg20%
Sodium 273mg12%
Potassium 249mg7%
Carbohydrates 54g18%
Fiber 2g8%
Sugar 27g30%
Protein 8g16%
Vitamin A 405IU8%
Calcium 133mg13%
Iron 2.2mg12%
* Percent Daily Values are based on a 2000 calorie diet.


Here’s one more to pin on your Pinterest boards!Double Chocolate Scones are easy to make, decadent chocolate scones, filled with white chocolate chips, and drizzled with a simple glaze on top!

Buffalo Honey Hot Wings

Buffalo Honey Hot Wings are the perfect appetizer for a crowd! Yummy chicken wings are covered in a mild buffalo honey sauce, and are baked, not fried!

I don’t know what it is about the Super Bowl, but it seems like a great time to eat yummy food, while watching grown men smash into each other and run all over artificial grass with a small little football! My husband and I don’t even watch football. Go figure! We haven’t for years and years, but this year my husband decided to watch the Super Bowl.

Naturally, this momentous occasion called for some delicious food, worthy of the occasion, so I found a great recipe to try on Pinterest! I ended up making two varieties of hot wings. This recipe for buffalo honey hot wings was one of them! Boy, were they GOOD!  The chicken wings are coated in an amazing spice mixture, baked (not fried), and then coated with a mild honey, molasses and buffalo sauce mixture, and served! YUM!

NOTE: The recipe, (as written in the printable recipe below), makes 24 hot wings.  When I made these, I cut the recipe in half (for 12 wings), since there were only two of us eating, so my photos below will reflect that!

Scroll Down For A Printable Recipe Card At The Bottom Of The Page

Make The Spice Rub For Buffalo Honey Hot Wings

While the oven is preheating to 400° F, mix together the spice rub for the chicken wings in a small bowl. Easy peasy! The spice rub adds incredible seasoning for the buffalo honey hot wings.

The spice rub consists of brown sugar, baking powder, onion powder, salt, pepper, paprika, garlic powder, cumin, chili powder, and celery seed. Set the spice mixture aside when done.Spice mix in bowl, ready to season buffalo honey hot wings.

Prepare The Chicken Wings

Cover a 9″x13″ cookie sheet with aluminum foil. Method #1: Spray the foil generously with non-stick cooking spray (the spray will help you remove the wings from pan after baking). Method #2: If you have a LARGE ovenproof wire rack, spray it generously with the non-stick spray and place it on top of the aluminum foil.

Rinse, then place the chicken wings onto paper towels, and blot them dry with additional paper towels. Once dry, place half the wings into a large bowl.

Pour half of the seasoning mixture onto the chicken wings in bowl. Mix with your hands or tongs, until the wings are covered on all sides with the spice rub. Place the coated wings onto the prepared baking sheet in a single layer (either on sprayed foil or sprayed wire rack). Repeat process with remaining wings.

Chicken wings are patted dry, then seasoned, to make buffalo honey hot wings.

Bake The Hot Wings

Once all the wings are prepped, it is time to bake them!  Put the baking sheet on an upper middle rack of the oven. Bake the buffalo honey hot wings at 400° F.  for 45-50 minutes.

Once baked, turn the oven setting to BROIL, and place the baking sheet with the wings 6-8″ away from the broiler element. Broil the wings until they reach the crispness you want, then turn them over and do the same on the other side. TIP: This step will take only a couple minutes. When broiling the wings, definitely keep an eye on them, so they will not burn!

Here are the buffalo honey hot wings, hot out of the oven after baking.

Prepare The Dipping Sauce For Buffalo Honey Hot Wings

While the chicken bakes, prepare the bleu cheese dressing, if you will be serving it on the side to dip the wings in, once done! You can make homemade bleu cheese dressing, but found it quick and easy to use bottled bleu cheese dressing.

I added a couple Tablespoons of crumbled bleu cheese to the bottled dressing, for more flavor and texture! Cover and place in refrigerator until you are ready to serve it as a dipping sauce for the buffalo honey hot wings. NOTE: Don’t like bleu cheese dressing? You can substitute Ranch dressing for dipping the finished wings into, if you prefer.

Bleu cheese dressing is ready to serve with the buffalo honey hot wings.

Prepare The Buffalo Honey Hot Wings Sauce

A few minutes before the chicken wings are done baking, prepare the buffalo honey hot wings sauce. This sauce will be used to coat the baked chicken wings.

Melt the butter in a medium saucepan over medium heat. Mix Frank’s ORIGINAL Hot Sauce together with cornstarch, and add this to the pan. Add the honey and molasses, and whisk ingredients together to blend.

Heat the buffalo sauce until it comes to a boil, whisking or stirring often. Once boiling, turn the heat down to a simmer. Continue to cook for 3-5 minutes, which slightly thickens the sauce, then taste test it. Want it sweeter? Add more honey. Want it spicier? Add more hot sauce.

The buffalo honey sauce for the chicken wings simmering in a saucepan.

Once finished cooking, remove the baked wings from the baking sheet and place them into a large bowl.  Pour the buffalo honey hot wings sauce over the chicken, and toss the wings (with a spoon or spatula) to coat them with the sauce.

The prepared sauce is poured over the baked buffalo honey hot wings before serving.

Serve The Buffalo Honey Hot Wings And Dig In!

Arrange the buffalo honey hot wings onto a serving platter.  We served them with the prepared bleu cheese dressing, and some celery and carrot sticks on the side!

Here's a close up of the buffalo honey hot wings on plate, with bleu cheese dressing and carrots on the side.

Buffalo honey hot wings on plate with celery sticks and bleu cheese dressing on the side.

The creamy “coolness” of the bleu cheese dressing pairs well with the sweet and slightly spicy buffalo wings. The crunchy carrots and celery sticks round out this fun appetizer, and make it look just like a platter of wings you would get at a restaurant!

A platter of buffalo honey hot wings, served with bleu cheese dressing, celery and carrots.

We truly LOVED these hot wings (they are NOT even too spicy hot!), and I KNOW I will make them again. They would be perfect to serve at any gathering of hungry friends or family! Hope you will consider trying them, too! Have a GREAT day!

Looking For More APPETIZER Recipes?

You can find all of my recipes in the Recipe Index, located at the top of the page. A few appetizer recipes you might also enjoy include:

Interested In More Recipes?

Thank you for visiting this website. I appreciate you using some of your valuable time to do soIf you’re interested, I publish a newsletter 2 times per month (1st and 15th) with all the latest recipes, and other fun info. I would be honored to have you join our growing list of subscribers, so you never miss a great recipe!
There is a Newsletter subscription box on the top right side (or bottom) of each blog post, depending on the device you use, where you can easily submit your e-mail address (only) to be included in my mailing list.

You Can Also Find Me On Social Media:

Facebook page: The Grateful Girl Cooks!
Pinterest:
The Grateful Girl Cooks!
Instagram:
jbatthegratefulgirlcooks

Author's signature

Original Recipe Source: Jen, at https://carlsbadcravings.com/buffalo-honey-hot-wings-traditional-buffalo-hot-wings-recipe/

0 from 0 votes
Buffalo Honey Hot Wings
Prep Time
10 mins
Cook Time
50 mins
Total Time
1 hr
 
Buffalo Honey Hot Wings are the perfect appetizer for a crowd! Yummy chicken wings are covered in a mild buffalo honey sauce, and are baked, not fried!
Category: Appetizers, Dinner
Cuisine: American
Keyword: buffalo honey hot wings
Servings: 24 chicken hot wings
Calories Per Serving: 133 kcal
Author: JB @ The Grateful Girl Cooks!
Ingredients
For Spice Rub:
  • 2 Tablespoons brown sugar
  • 2 Tablespoons baking powder
  • 2 teaspoons salt
  • 2 teaspoons black pepper
  • 2 teaspoons onion powder
  • 2 teaspoons chili powder
  • 2 teaspoons garlic powder
  • 2 teaspoons paprika
  • 2 teaspoons ground cumin
  • 1 teaspoon ground celery seed
For Wings:
  • 24 chicken wings, with skin (approx. 3 lbs.)
  • 2/3 cup Frank's ORIGINAL Hot Sauce (not hot wings sauce)
  • 2 teaspoons cornstarch
  • 1/4 cup honey
  • 1 Tablespoon molasses
  • 1 Tablespoon butter
Instructions
  1. While the oven is preheating to 400° F, mix together the spice rub for the chicken wings in a small bowl. Set aside.

  2. Cover a large cookie sheet with aluminum foil. Method #1: Spray foil with non-stick cooking spray (this helps you remove wings after baking). Method #2: If you have an ovenproof wire rack, spray it with non-stick spray and place it on top of the aluminum foil. Rinse, then place wings on paper towels, and blot dry with additional paper towels. Once dry, place half the wings into a large bowl. Pour half the seasoning mixture onto wings in bowl. Mix, until covered on all sides with spice mix. Place coated wings in a single layer either on sprayed foil or sprayed wire rack. Repeat process with remaining wings.

  3. Bake the buffalo honey hot wings at 400° F. for 45-50 minutes. Once baked, turn oven setting to BROIL, and place baking sheet 6-8" from the broiler element. Broil wings until they reach crispness desired, then turn them over and do the same on the other side. Keep an eye on them to ensure they do not burn!

  4. A few minutes before the wings are done cooking, make the sauce. Melt butter in a pan over medium heat. Mix Frank's ORIGINAL Hot Sauce with cornstarch, and add this to the pan. Add honey and molasses; whisk ingredients to blend. Heat sauce until it comes to a boil, whisking or stirring often. Turn heat down to a low simmer. Continue to cook for 3-5 minutes until sauce slightly thickens, then taste test it. Want it sweeter? Add more honey. Want it spicier? Add more hot sauce.

  5. Once done, place hot wings in a large bowl.  Pour the sauce over them, and toss with a spoon or spatula to coat them fully. They are now ready to eat! Transfer to serving platter and serve with bleu cheese dressing, carrot and celery sticks! Enjoy!
Nutrition Facts
Buffalo Honey Hot Wings
Amount Per Serving (1 wing)
Calories 133 Calories from Fat 72
% Daily Value*
Fat 8g12%
Saturated Fat 2g13%
Cholesterol 38mg13%
Sodium 442mg19%
Potassium 206mg6%
Carbohydrates 5g2%
Sugar 4g4%
Protein 8g16%
Vitamin A 220IU4%
Vitamin C 0.4mg0%
Calcium 57mg6%
Iron 0.8mg4%
* Percent Daily Values are based on a 2000 calorie diet.

Here’s one more to pin on your Pinterest boards!Buffalo Honey Hot Wings are the perfect appetizer for a crowd! Yummy chicken wings are covered in a mild buffalo honey sauce, and are baked, not fried!


Southwestern Chicken Soup

You’ll love this delicious Southwestern Chicken Soup, a Weight Watchers dish with corn, black beans, tomatoes, bell peppers, and avocado slices!
You'll love this delicious Southwestern Chicken Soup, a Weight Watchers dish with corn, black beans, tomatoes, bell peppers, and avocado slices!

Recently I tried a new (to us) soup recipe that I found on Weight Watchers.  The soup sounded really good, and since it was freezing cold outside (the middle of winter), I decided to make some. A bowl of hot soup really warms a gal up on a chilly February evening!

Whoa! This Southwestern chicken soup tastes amazing! The portion size is large (1¾ cups per serving = 3 Smart Points), and is packed with corn, black beans, tomatoes, in a Southwestern spiced broth. Trust me- this is one flavor-packed bowl of soup!

If you enjoy Southwestern flavored dishes, chances are you will LOVE this hearty soup! It’s very easy to make, so you can be serving up steaming hot bowls of Southwestern chicken soup before you know it!

Scroll Down For A Printable Recipe Card At The Bottom Of The Page

How To Make Southwestern Chicken Soup

Place one teaspoon of olive oil in a large soup pot or Dutch oven. Heat oil on medium-high heat until very hot, but not smoking. Lightly season chicken pieces with salt and pepper, then add to the pot.

Cook the chicken on all sides, stirring often, for approximately 5 minutes. The chicken should be very lightly browned and cooked all the way through. Once the chicken is done, remove it from pan with a slotted spoon, and transfer to a plate. Set chicken aside until later.

Cooking the chicken breast pieces for Southwestern chicken soup.

Add the remaining 1 teaspoon of olive oil back into the pan (the same one you cooked the chicken in). Heat oil on medium-high, then add the onion, bell pepper, and jalapeño to the pan.

Cook for 3 minutes, stirring often, until veggies have softened up a bit. Add the chili powder, minced garlic, and ground cumin to the pan, and stir to combine. Cook this mixture for an additional 30 seconds once combined.

Bell peppers, jalapeño and onions are cooked, to add to Southwestern chicken soup.

Spices for Southwestern chicken soup are added to onions, jalapeños and peppers in pan

Stir the chicken broth, diced tomatoes, black beans and corn into the soup. Bring the soup to a boil. Once soup begins to boil, put a lid on the pan, and turn the heat down to LOW. Continue to cook the Southwestern chicken soup on low heat (covered) for about 8-9 minutes. The veggies should be nice and tender at this point.

Broth, tomatoes and corn are added to the pan of Southwestern chicken soup.

Add The Cooked Chicken And Finish The Soup

Carefully add the cooked chicken pieces back into the hot Southwestern chicken soup. Stir the ingredients to combine, and continue to cook just until the chicken is fully heated through. It should only take about 2-3 minutes to reheat the chicken.

Remove the pot of soup from the heat, and stir in the fresh lime juice. The Southwestern Chicken Soup is now ready to garnish, then eat!

Cooked chicken pieces are added to the pot of Southwestern chicken soup.

See all those nice veggies and chicken chunks in this soup? You’re gonna enjoy this!

A ladle, full of yummy Southwestern chicken soup.

To Serve Southwestern Chicken Soup

When ready to serve, ladle the soup into bowls. Each serving of this hearty soup is 1¾ cups, so full bowls of Southwestern Chicken Soup are in order! Garnish each bowl of soup with 2 slices of ripe avocado, and a few cilantro leaves, and some crumbled corn chips. Grab a spoon and help yourself to a big bite of this delicious Southwestern chicken soup!

NOTE: The original Weight Watchers recipe did NOT use corn chips. I added 3 crumbled up corn chips to each bowl of soup, for a nice looking presentation and “crunch”. 

Southwestern Chicken Soup is served with avocado slices, corn chips and cilantro on top.

We really LOVED this soup!  My husband said this might have become his new FAVORITE soup! Wow! That’s saying a lot, since I make a lot of yummy soups! The leftovers were yummy, too! The soup will keep for 4 days in refrigerator and up to 3 months in the freezer.

Sure do hope you will consider trying this Southwestern chicken soup. It is incredibly easy to make, and tastes absolutely wonderful. If you follow the Weight Watchers program to track your food intake, this recipe has a value of 3 Smart Points (without corn chips). Have a great day!

Looking For More SOUP Recipes?

You can find all of my recipes in the Recipe Index, located at the top of the page. I have lots of soup recipes published, including:

Interested In More Recipes?

Thank you for visiting this website. I appreciate you using some of your valuable time to do soIf you’re interested, I publish a newsletter 2 times per month (1st and 15th) with all the latest recipes, and other fun info. I would be honored to have you join our growing list of subscribers, so you never miss a great recipe!
There is a Newsletter subscription box on the top right side (or bottom) of each blog post, depending on the device you use, where you can easily submit your e-mail address (only) to be included in my mailing list.

You Can Also Find Me On Social Media:

Facebook page: The Grateful Girl Cooks!
Pinterest:
The Grateful Girl Cooks!
Instagram:
jbatthegratefulgirlcooks

Author's signature

Original Recipe Source: https://www.weightwatchers.com/us/recipe/southwestern-chicken-soup/59779f66112c2b4e18b0fd84 

0 from 0 votes
Southwestern Chicken Soup
Prep Time
10 mins
Cook Time
25 mins
Total Time
35 mins
 

You'll love this delicious Southwestern Chicken Soup, a Weight Watchers dish with corn, black beans, tomatoes, bell peppers, and avocado slices!

Category: Entree, Soup
Cuisine: Southwestern
Keyword: Southwestern chicken soup
Servings: 4
Calories Per Serving: 401 kcal
Author: JB @ The Grateful Girl Cooks!
Ingredients
  • 2 teaspoons olive oil , divided use
  • 1 pound chicken breasts (boneless, skinless) , cut in 1/2" cubes
  • 1/2 teaspoon salt
  • 1/4 teaspoon black pepper
  • 1 medium onion , chopped
  • 1 small green bell pepper , seeded and chopped
  • 2 cloves garlic , minced
  • 1 medium jalapeño pepper , seeded and chopped
  • 1 Tablespoon chili powder
  • 2 teaspoons ground cumin
  • 29 ounces chicken broth (reduced sodium) (this is two 14.5 oz. cans)
  • 14.5 ounces canned diced tomatoes , drained
  • 1 cup frozen corn kernels (or fresh)
  • 15.25 ounces canned black beans , drained and rinsed
  • 1 Tablespoon fresh lime juice
  • 1/2 medium avocado , pitted, peeled, cut into 8 slices
  • 1/4 cup cilantro leaves
Instructions
  1. Heat 1 teaspoon of the olive oil in a large soup pot, on medium-high heat until very hot, but not smoking. Lightly season chicken pieces with salt and pepper, then add to pan Cook chicken on all sides, stirring often, for about 5 minutes. Chicken should be lightly browned and cooked all the way through. Once chicken is done, remove from pan, and transfer to a plate. Set chicken aside.

  2. Add remaining 1 teaspoon of oil back into the pan (the same one you cooked chicken in). Heat oil on medium-high, then add onion, bell pepper, and jalapeño. Cook for 3 minutes, stirring often, until veggies have softened a bit. Stir in the chili powder, minced garlic, and ground cumin. Cook this mixture for an additional 30 seconds once combined. Stir in chicken broth, diced tomatoes, black beans and corn.

  3. Bring the soup to a boil. Once it boils, put a lid on the pan, and turn heat to LOW. Continue to cook soup on low heat (covered) for about 8-9 minutes. The veggies should be nice and tender.

  4. Carefully add the cooked chicken back into soup. Stir to combine, and continue to cook until chicken is heated through. This should take 2-3 minutes. Remove pan from the heat, and stir in the fresh lime juice. 

  5. To serve, ladle the soup into bowls. Each serving is 1¾ cups. Garnish each bowl of soup with 2 avocado slices, and a few cilantro leaves. You can also add a few crumbled corn chips (optional) if you want! Serve, and enjoy!
Recipe Notes

OPTIONAL: You can crumble up two or three corn chips on top to garnish each bowl of soup. The corn chips are NOT included in caloric or WW points calculation.

Nutrition Facts
Southwestern Chicken Soup
Amount Per Serving (1 bowl (1¾ cups + 2 avocado slices per serving))
Calories 401 Calories from Fat 99
% Daily Value*
Fat 11g17%
Saturated Fat 2g13%
Cholesterol 72mg24%
Sodium 1085mg47%
Potassium 1457mg42%
Carbohydrates 40g13%
Fiber 12g50%
Sugar 6g7%
Protein 38g76%
Vitamin A 1070IU21%
Vitamin C 41.4mg50%
Calcium 112mg11%
Iron 5.3mg29%
* Percent Daily Values are based on a 2000 calorie diet.

Here’s one more to pin on your Pinterest boards!You'll love this delicious Southwestern Chicken Soup, a Weight Watchers dish with corn, black beans, tomatoes, bell peppers, and avocado slices!

Banana Chocolate Chip Muffins

EASY, delicious banana chocolate chip muffins can be ready and on the table in 30 minutes! You’ll LOVE these simple, yummy breakfast treats!
EASY, delicious banana chocolate chip muffins can be ready and on the table in 30 minutes! You'll LOVE these simple, yummy breakfast treats!

I’ve been making banana chocolate chip muffins for years, because we love them! Recently I tried a “slightly different” recipe I found on Pinterest, which has sour cream as one of the ingredients.

We had some super ripe bananas on the counter that were begging to be used… so they became yummy breakfast muffins!

This recipe is incredibly EASY to make with minimal “prep time” (10 minutes), and the addition of sour cream makes these banana chocolate chip muffins very moist and delicious! We really enjoyed them a lot, so I want to pass the simple recipe on to you today!
Scroll Down For A Printable Recipe Card At The Bottom Of The Page

How To Make Banana Chocolate Chip Muffins

Preheat your oven to 350° F.  Prepare a standard sized muffin tin, by inserting paper cupcake/muffin liners OR by greasing each muffin cup. Set the muffin tin aside.

Place very ripe bananas, sour cream, vanilla extract, softened butter and eggs into a large mixing bowl. Use an electric mixer to blend these ingredients well. You will still have little pieces of banana in the batter when done mixing.

Bananas, eggs, butter, sour cream, etc. are mixed together for batter for banana chocolate chip muffins.

Add granulated sugar, all purpose flour, baking soda and chocolate chips to the bowl. Stir these ingredients together until batter is fully blended.

Just like that, you have the batter made for these banana chocolate chip muffins! In less than 10 minutes prep time, you are ready to get these muffins portioned out, and in the oven!
Flour, sugar, soda and chocolate chips are mixed into banana chocolate chip muffins batter.

Bake The Banana Chocolate Chip Muffins

Pour or spoon the banana chocolate chip batter into the prepared muffin tin, equally dividing the batter into 12 portions. The batter will come up fairly high in each of the paper liners or muffin wells.

OPTIONAL: If you want, you can a few chocolate chips to the top of the muffins before baking (for appearance), but it is not necessary. I did not do this step, as you can see from the photos below.

Bake the banana chocolate chip muffins on the middle rack at 350° F for 20 minutes, or until the muffins are golden brown on top.  When done, remove the pan from the oven.

Banana chocolate chip muffins are prepared in muffin tins, then baked until golden brown.

Transfer the muffins to a wire rack to cool slightly before serving.  This recipe makes 12 delicious banana chocolate chip muffins (and they freeze well).

The banana chocolate chip muffins, cooling on a wire rack after baking.

Once cooled a bit, the muffins are ready for you (and those you love) to enjoy!  Behold… my cute little banana chocolate chip muffin, on a plate, ready to slice in half and enjoy with a tiny bit of softened butter (and a cup of coffee)!

One of the banana chocolate chip muffins, on a plate, ready to be eaten.

One of the banana chocolate chip muffins, sliced in half to show the inside.

We really enjoyed these scrumptious banana chocolate chip muffins. My husband really loved these muffins, too, even though he is not the world’s biggest banana muffin or banana bread fan! They were so easy to make, and taste delicious!

I gave a few of the muffins to our oldest son to enjoy, and froze a few for another time when we want a muffin for breakfast! YUM! Hope you try this EASY and quick recipe! I’m pretty sure you will love these muffins as much as we did! Have a GREAT day!

Looking for More MUFFIN Recipes?

You can find ALL of my muffin recipes in the Recipe Index, located at the top of the page. A few favorites you might enjoy include:

Want More Recipes? Get My FREE Newsletter!

I publish a newsletter 2 times per month (1st and 15th) with lots of recipes, tips, etc..
Would you like to join our growing list of subscribers?

There is a Newsletter subscription box on the top right (or bottom) of each blog post, depending on the device you use.
You can submit your e-mail address there, to be added to my mailing list.

Find Me On Social Media:

Facebook page: The Grateful Girl Cooks!
Pinterest:
The Grateful Girl Cooks!
Instagram:
jbatthegratefulgirlcooks

Author's signature

Original Recipe Source: https://designeddecor.com/tantalizing-tuesday-chocolate-chip-banana-muffins/

↓↓ PRINTABLE RECIPE BELOW ↓↓

0 from 0 votes
Banana Chocolate Chip Muffins
Prep Time
10 mins
Cook Time
20 mins
Total Time
30 mins
 
EASY, delicious banana chocolate chip muffins can be ready and on the table in 30 minutes! You'll LOVE these simple, yummy breakfast treats!
Category: Bread/Breakfast
Cuisine: American
Keyword: banana chocolate chip muffins
Servings: 12 muffins
Calories Per Serving: 306 kcal
Author: JB @ The Grateful Girl Cooks!
Ingredients
  • 3 bananas (very ripe)
  • 3 Tablespoons sour cream
  • 1 teaspoon vanilla extract
  • 1/2 cup butter (1 stick) , softened
  • 2 eggs
  • 1 cup granulated sugar
  • 2 cups all purpose flour
  • 1 teaspoon baking soda
  • 3/4 cup chocolate chips
Instructions
  1. Preheat oven to 350° F. Prepare a standard-sized muffin tin by inserting paper cupcake/muffin liners OR by greasing each muffin cup. Set the muffin tin aside.

  2. Place bananas, sour cream, vanilla extract, softened butter and eggs into a large mixing bowl. Use electric mixer to blend well. You will still have little pieces of banana in the batter when done. Add granulated sugar, all purpose flour, baking soda and chocolate chips to the bowl. Stir ingredients until batter is fully blended.

  3. Pour or spoon batter into prepared muffin tin, equally dividing batter into 12 portions. The batter will come up fairly high in each of the paper liners or muffin wells. OPTIONAL: You can add a few chocolate chips to the top of the batter before baking (for appearance), but it is not necessary.  

  4. Bake on the middle rack of preheated 350° F oven for 20 minutes, or until golden brown on top. When done, remove from oven. Transfer muffins out of pan to a wire rack to cool slightly before serving. Enjoy!
Nutrition Facts
Banana Chocolate Chip Muffins
Amount Per Serving (1 muffin)
Calories 306 Calories from Fat 99
% Daily Value*
Fat 11g17%
Saturated Fat 6g38%
Cholesterol 50mg17%
Sodium 179mg8%
Potassium 144mg4%
Carbohydrates 47g16%
Fiber 1g4%
Sugar 27g30%
Protein 4g8%
Vitamin A 330IU7%
Vitamin C 2.6mg3%
Calcium 28mg3%
Iron 1.3mg7%
* Percent Daily Values are based on a 2000 calorie diet.

Here’s one more to pin on your Pinterest boards!EASY, delicious banana chocolate chip muffins can be ready and on the table in 30 minutes! You'll LOVE these simple, yummy breakfast treats!

Sweet and Sour Pork

Who needs takeout when you can make this delicious Sweet and Sour Pork (with pineapple, onions and bell peppers) at home in about 30 minutes?

Recently I was taking an inventory of a freezer we have in our garage and found several thick boneless pork chops. I started searching for a “new” recipe I could make to use them, and stumbled upon this one for sweet and sour pork on Pinterest.

Note: If you don’t have the boneless pork chops, you can use a pork butt to make this dish, as well!

The original recipe came from Sabrina, on the blog “Dinner Then Dessert”, and I thought it sounded wonderful, since I have always LOVED sweet and sour pork!

Off into our kitchen I went, and in no time at all, we had this wonderful meal for dinner! The recipe is straightforward, easy to prepare, and absolutely DELICIOUS!

It’s fun to be able to share this recipe for sweet and sour pork with you today. If you are interested in reading a few legends about the origins of this favorite Chinese dish, you will want to check out this article.

Scroll Down For a Printable Recipe Card At The Bottom Of The Page

Make The Sweet And Sour Pork Sauce

Making the sauce for the sweet and sour pork couldn’t be any easier.  Place pineapple juice, rice vinegar, brown sugar, ketchup, cornstarch, soy sauce and food coloring (if using) in a medium sized dish. Whisk the sauce ingredients together until smooth. Set sauce aside.

NOTE: Notice the color of the sweet and sour pork sauce. I used the recommended 3 drops of food coloring which helped deepen the color of the sauce. If you choose to NOT use food coloring, that is totally okay, but remember… the sauce will have a bit less color to it!

The sauce for sweet and sour pork is easily made by whisking ingredients together in dish.

Preparing The Pork For Cooking

Prepare 3 bowls with the ingredients necessary to coat the pork pieces before cooking. One bowl, has corn starch, one has all purpose flour, and one has slightly beaten eggs.

Pork cubes and bowls with corn starch, eggs, and flour are ready to make sweet and sour pork!

Dredge the pork pieces in cornstarch (a couple pieces at a time), then dip in egg to cover, and then coat the pieces in flour.  As you finish each of the pieces of pork, place them onto a baking sheet.

Note: This step is fairly messy, as you dip each piece. Just keep at it! I try to use the same hand for dipping, and occasionally rinse or wipe some of the coating off that gets stuck on my fingers as I go!

Pieces of pork are coated in corn starch, then egg, and flour to make sweet and sour pork.

Pieces of pork are fully coated and are now ready to fry, to make sweet and sour pork.

Cooking The Sweet And Sour Pork

Pour oil into a large skillet to a depth of about 2-3 inches. Heat the oil on medium high heat until it is very hot (but not smoking).

TIP: You will need to cook the pork in batches, reheating oil in between batches! Don’t overcrowd the skillet, because you want the pork to cook evenly on all sides.

Carefully add the coated pork pieces into the hot oil.  Cook the pieces of pork for 2-3 minutes, turning once, until the meat is cooked through, is golden brown, and crispy on the outside.

Once done, carefully remove the pork with a slotted spoon (so oil drips back into skillet), and place onto a baking sheet.

The pork pieces for sweet and sour pork are fried in hot oil until browned and crispy.

To Finish The Sweet And Sour Pork

In a separate large skillet, add 2 Tablespoons oil, and heat on medium high. Once oil is hot, add the pineapple, bell peppers, and onion.  Cook the veggies, stirring occasionally for 3 minutes. The veggies should still be tender, but still slightly crisp when done.

Pour the sweet and sour sauce into the skillet. Stir to combine, and continue to heat through.  The sauce will thicken slightly as it cooks.  Right before you are ready to serve, add the pork back into the skillet, and stir to combine.

Heat only until the pork is heated through, and then the sweet and sour pork is ready to serve!

Pineapple, onions, bell peppers and sauce are heated to coat the sweet and sour pork.

Arrange a bed of rice onto each serving dish, and then top it with some of the sweet and sour pork!

The finished sweet and sour pork is served in a bowl, on rice, with chopsticks on the side.

There you have it! Sweet and Sour Pork, for the win!  Sure hope you enjoy this delicious Chinese meal! Grab some chopsticks and dig in! It tastes wonderful!

Sweet and Sour Pork is served on top of rice, and is ready to eat.

My husband and I really enjoy this meal. The Asian-inspired sauce permeates everything with wonderful flavor, and the veggies and pork are so good! Hope you will consider making this delicious classic “takeout” dish for those you love! Have a great day!

Looking For More Asian-Inspired Recipes?

You can find ALL of my recipes in the Recipe Index, which is located at the top of the page. I have many Asian-inspired recipes to choose from, including:

Interested In More Recipes?

Thank you for visiting this website. I appreciate you using some of your valuable time to do soIf you’re interested, I publish a newsletter 2 times per month (1st and 15th) with all the latest recipes, and other fun info. I would be honored to have you join our growing list of subscribers, so you never miss a great recipe!
There is a Newsletter subscription box on the top right side (or bottom) of each blog post, depending on the device you use, where you can easily submit your e-mail address (only) to be included in my mailing list.

You Can Also Find Me On Social Media:

Facebook page: The Grateful Girl Cooks!
Pinterest:
The Grateful Girl Cooks!
Instagram:
jbatthegratefulgirlcooks

Author's signature

Recipe Source: Sabrina, at https://dinnerthendessert.com/sweet-and-sour-pork/

↓↓ PRINTABLE RECIPE BELOW ↓↓

0 from 0 votes
Sweet and Sour Pork
Prep Time
15 mins
Cook Time
15 mins
Total Time
30 mins
 
Who needs takeout when you can make this delicious Sweet and Sour Pork (with pineapple, onions and bell peppers) at home in about 30 minutes?
Category: Main Dish
Cuisine: Asian
Keyword: sweet and sour pork
Servings: 6
Calories Per Serving: 458 kcal
Author: JB @ The Grateful Girl Cooks!
Ingredients
For Sauce:
  • 1 cup pineapple juice
  • 1/2 cup rice vinegar
  • 1/2 cup brown sugar
  • 1/4 cup ketchup
  • 1 Tablespoon cornstarch
  • 1 Tablespoon low sodium soy sauce
  • 3 drops red food coloring (optional-I used it)
For Remainder of Dish:
  • pounds boneless thick cut pork chops (or pork butt) , cut into 3/4" chunks
  • 1/2 cup cornstarch
  • 2 large eggs , slightly beaten
  • 1/4 cup all purpose flour
  • vegetable oil for frying pork (2-3" deep)
  • 2 Tablespoons vegetable oil (for frying veggies)
  • 1 cup pineapple chunks
  • 1 red bell pepper , cut in 1" pieces
  • 1 green bell pepper , cut in 1" pieces
  • 1/2 yellow onion , cut in 1" pieces
Instructions
  1. Make the sauce: Place pineapple juice, rice vinegar, brown sugar, ketchup, cornstarch, soy sauce and food coloring (if using) in a medium sized dish. Whisk ingredients until smooth. Set sauce aside.

  2. Prepare 3 bowls with ingredients to coat the pork pieces. One with corn starch, one with flour, and one with slightly beaten eggs. Dredge the pork pieces in cornstarch (a couple pieces at a time), then dip in egg to cover, and then coat the pieces in flour.  As you finish coating each piece, place onto a baking sheet.

  3. Pour oil into a large skillet to a depth of 2-3 inches. Heat oil on medium high heat until very hot (but not smoking). TIP: You will need to cook the pork in batches, reheating oil in between batches! Don't overcrowd the skillet, because you want the pork to cook evenly on all sides. Carefully add the coated pork pieces into hot oil.  Cook pork for 2-3 minutes, turning once, until cooked through, golden brown, and crispy on the outside. Once done, carefully remove the pork pieces with a slotted spoon (so oil drips back into skillet), and place onto a baking sheet. Repeat until all pork is cooked.

  4. In a separate large skillet, add 2 Tablespoons oil; heat on medium high. Once oil is hot, add pineapple, bell peppers, and onion.  Cook, stirring occasionally for 3 minutes. Veggies should be tender, and slightly crisp when done. Add sauce to skillet. Stir to combine, and heat through.  Sauce will thicken slightly as it cooks.  Right before you're ready to serve, add browned pork back into the skillet; stir to combine. Heat only until the pork is heated through, and then the sweet and sour pork is ready to eat! Serve on top of rice. Enjoy!
Recipe Notes

Caloric calculation made based on the use of pork butt.

Nutrition Facts
Sweet and Sour Pork
Amount Per Serving (1 g)
Calories 458 Calories from Fat 117
% Daily Value*
Fat 13g20%
Saturated Fat 6g38%
Cholesterol 138mg46%
Sodium 290mg13%
Potassium 724mg21%
Carbohydrates 58g19%
Fiber 2g8%
Sugar 39g43%
Protein 25g50%
Vitamin A 895IU18%
Vitamin C 55.2mg67%
Calcium 66mg7%
Iron 2.8mg16%
* Percent Daily Values are based on a 2000 calorie diet.

Here’s one more to pin on your Pinterest boards!Who needs takeout when you can make this delicious Sweet and Sour Pork (with pineapple, onions and bell peppers) at home in about 30 minutes?

Valencia Orange Hot Chocolate

Make decadent, gourmet Valencia Orange Hot Chocolate from scratch in under 10 minutes! This easy recipe makes 2 servings, and is packed with flavor!
Make decadent, gourmet Valencia Orange Hot Chocolate from scratch in under 10 minutes! Recipe makes 2 servings, and is packed with flavor!

I just found out that today is NATIONAL HOT CHOCOLATE DAY while writing this blog post.Who knew? Certainly not me… until a few minutes ago when I saw this “news” on Facebook. What??? I didn’t even KNOW there was such a thing, but I sure do love a yummy mug of hot chocolate every now and then!

Several days ago, it was FREEZING cold outside early in the morning. Having just come in from walking our dog a couple of miles, I was really cold, and knew a cup of hot chocolate would warm me up! I’ve made hot chocolate from scratch many times over the 40+ years we’ve been married, but this time wanted to “kick it up a notch”!

The decision was made to create a Valencia orange hot chocolate, because orange and chocolate is a favorite flavor combination of mine. I’ve used this flavor combo before, in my delicious recipe for chocolate chip orange scones. For this recipe, I tweaked the “normal” way I make hot chocolate from scratch, and this easy to make hot chocolate is the result! YUM! Best part? I didn’t have get in our car, drive somewhere, and pay close to $5 for a mug of it!

Scroll Down For A Printable Recipe Card At The Bottom Of The Page

How To Make Valencia Orange Hot Chocolate

Place the cocoa powder, granulated sugar, a dash of salt, and 1/4 cup of the milk (save the rest for later) into a medium sized saucepan. Note: The dash of salt helps bring out the flavor! Whisk these ingredients together. You will notice that there are a lot of lumps while the milk is still cold! That’s okay… they will go away, I promise!

Whisking cocoa powder, milk and sugar in saucepan for Valencia orange hot chocolate.

Heat this mixture on medium high heat, continuing to whisk as it cooks. As it cooks and the milk gets hot, the lumps will dissolve into smooth chocolate goodness. Continue to cook (and whisk) until the ingredients become fully blended, and the sugar has dissolved. Cook only until the chocolate starts to boil.

The Valencia orange hot chocolate is cooked until the sugar dissolves.

Once the milk begins to boil, add the remaining 2 cups of milk to the saucepan. Stir, then add the orange zest, orange extract and 2 heaping Tablespoons semi-sweet chocolate chips. The added butterfat from the chocolate chips adds to the creamy chocolate flavor, for sure!

Turn the heat down to a low simmer. Continue cooking on low heat, stirring often to prevent burning, until the Valencia orange hot chocolate is fully heated through, and all the chocolate chips have melted.

Taste Test The Valencia Orange Hot Chocolate Before Serving

At this point, you should taste test a spoonful of the hot chocolate. If you want more orange flavor, add a tiny bit more orange extract. If you want it sweeter, add a tiny bit more sugar (then heat until sugar has dissolved). Once you’ve fine-tuned the Valencia orange hot chocolate to your personal liking and everything is heated through, remove the pan from the heat. It is now ready to serve!

Additional milk is added to pan of Valencia orange hot chocolate and is heated through.

Serving Valencia Orange Hot Chocolate

Ladle or pour the Valencia orange hot chocolate into two mugs.  Garnish each mug of steaming hot chocolate with a nice amount of whipped cream (I used spray whipped cream). Sprinkle the whipped cream with grated (or zested) chocolate and orange zest. I used a microplane to zest the oranges and a few chocolate chips to make the topping.

Once hot, Valencia orange hot chocolate is put in mugs, and topped with whipped cream and orange zest.

Another Way To Serve Valencia Orange Hot Chocolate

Another way to serve the finished Valencia orange hot chocolate is to top it with whipped cream, then shave some chocolate “curls” on top to garnish. To make the chocolate “curls”, I use a milk chocolate bar (mini sized), and peel off the chocolate curls right onto the whipped cream, using a hand held vegetable peeler.

Valencia orange hot chocolate can be topped with whipped cream and chocolate curls.

However you enjoy your Valencia orange hot chocolate served – plain or fancy, definitely top it with some sweetened whipped cream (or marshmallows)! That simple addition, alone, will make every sip of this delicious hot drink even better!

Whipped cream, orange zest, and zested chocolate top a mug of Valencia orange hot chocolate.

Hope you enjoy this delicious Valencia orange hot chocolate!  It absolutely was a warming treat on a cold winter day, let me tell you!  If you enjoy hot chocolate, be sure to check out my post detailing how to make Hot Cocoa Bombs! I really think you will enjoy this decadent beverage. Hope you have a great day!

Looking For More HOT BEVERAGE Recipes?

You can find ALL my recipes in the Recipe Index, located at the top of the page. I have several yummy hot beverage recipes you might be interested in, including:

Interested In More Recipes?

Thank you for visiting this website. I appreciate you using some of your valuable time to do soIf you’re interested, I publish a newsletter 2 times per month (1st and 15th) with all the latest recipes, and other fun info. I would be honored to have you join our growing list of subscribers, so you never miss a great recipe!
There is a Newsletter subscription box on the top right side (or bottom) of each blog post, depending on the device you use, where you can easily submit your e-mail address (only) to be included in my mailing list.

You Can Also Find Me On Social Media:

Facebook page: The Grateful Girl Cooks!
Pinterest:
The Grateful Girl Cooks!
Instagram:
jbatthegratefulgirlcooks

Author's signature

↓↓ PRINTABLE RECIPE BELOW ↓↓

0 from 0 votes
Valencia Orange Hot Chocolate
Prep Time
2 mins
Cook Time
5 mins
Total Time
7 mins
 

Make your own decadent, gourmet Valencia Orange Hot Chocolate from scratch in under 10 minutes! This easy recipe makes 2 servings, and is packed with flavor!

Category: Beverage
Cuisine: American
Keyword: orange hot chocolate
Servings: 2 servings
Calories Per Serving: 268 kcal
Author: JB @ The Grateful Girl Cooks!
Ingredients
  • 2 Tablespoons cocoa powder
  • Tablespoons granulated sugar
  • cups low-fat milk (1%) , divided
  • 1 dash salt
  • 1 teaspoon orange zest
  • 3/4 teaspoon orange extract
  • 2 Tablespoons semi-sweet chocolate chips
For Garnish (OPTIONAL): whipping cream, orange zest, grated chocolate (semi-sweet or milk)
    Instructions
    1. Place the cocoa powder, granulated sugar, a dash of salt, and 1/4 cup of the milk (save the rest for later) into a medium saucepan. Whisk ingredients together. There will be lumps while the milk is still cold! Heat on medium high heat, continuing to whisk. As it cooks and the milk gets hot, the lumps will dissolve.

    2. Continue to cook (and whisk) until ingredients are fully blended, and sugar dissolves. Cook until chocolate begins to boil. Once it begins to boil, add remaining 2 cups of milk. Stir, then add the orange zest, orange extract and 2 heaping Tablespoons semi-sweet chocolate chips. Turn the heat down to low. Continue cooking, stirring often, until hot chocolate is heated through, and all chocolate chips have melted.

    3. Ladle or pour the hot chocolate into two mugs.  Garnish each mug of steaming hot chocolate with whipped cream, then sprinkle with orange zest and grated (or zested) chocolate. Serve, and enjoy!
    Recipe Notes

    NOTE: The caloric calculation per serving does NOT include the optional whipped cream, or chocolate garnishes. Also, this recipe is calculated using 1% low-fat milk. Full fat milk will make a creamier hot chocolate, but with additional calories.

    Nutrition Facts
    Valencia Orange Hot Chocolate
    Amount Per Serving (1 g)
    Calories 268 Calories from Fat 81
    % Daily Value*
    Fat 9g14%
    Saturated Fat 5g31%
    Cholesterol 14mg5%
    Sodium 138mg6%
    Potassium 559mg16%
    Carbohydrates 39g13%
    Fiber 2g8%
    Sugar 34g38%
    Protein 10g20%
    Vitamin A 520IU10%
    Vitamin C 1.3mg2%
    Calcium 348mg35%
    Iron 1.6mg9%
    * Percent Daily Values are based on a 2000 calorie diet.

    Here’s one more to pin on your Pinterest boards!Make your own decadent, gourmet Valencia Orange Hot Chocolate from scratch in under 10 minutes! Recipe makes 2 servings, and is packed with flavor!