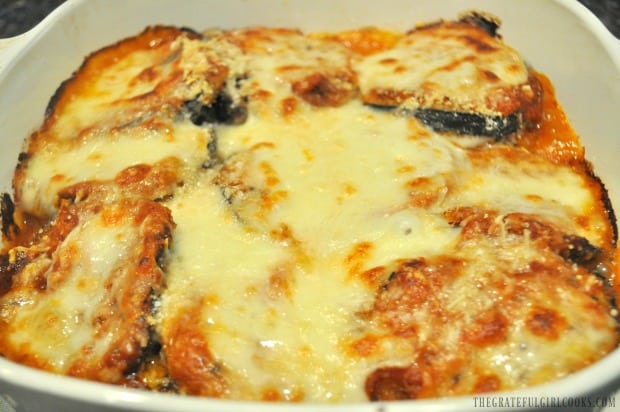
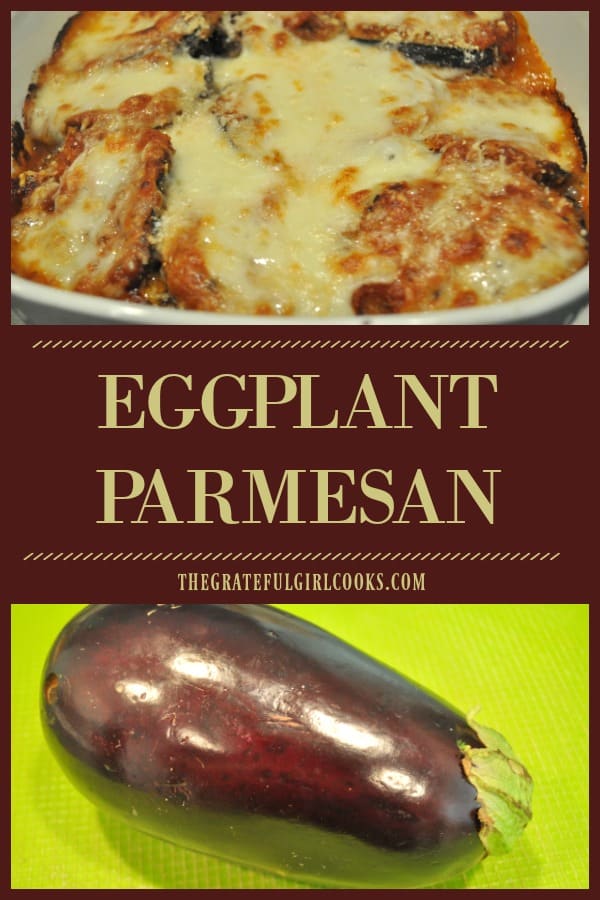
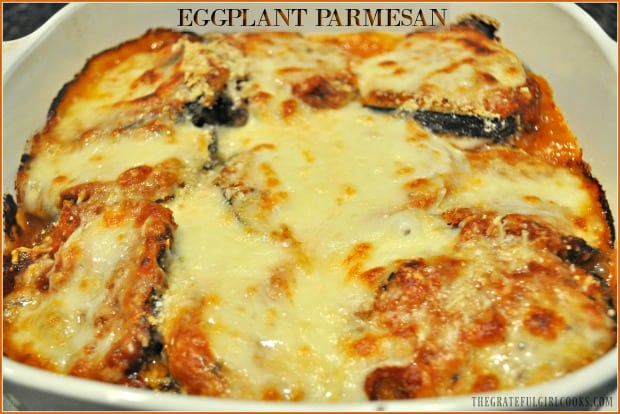
Eggplant Parmesan is a classic Italian meatless dish, with breaded eggplant slices baked with marinara sauce, mozzarella and Parmesan cheeses.
Do you enjoy eggplant parmesan? Lots of people love this classic Italian dish, and today I am going to show you how you can make it at home! You can read some interesting information about this dish’s origins here.
I found the original recipe on Pinterest, and made this meatless dish for my husband and I several months ago. Every now and then I love to make meatless dishes, and thought this one sounded really good, so I bought a gorgeous eggplant at our local Farmer’s Market.
Eggplant Parmesan has layers of lightly breaded eggplant slices, topped with marinara sauce, Parmesan and mozzarella cheeses. The eggplant slices are lightly browned, then layered in casserole dish with the sauce and the cheeses.
Eggplant parmesan is baked until cooked through, and all that gooey cheese is melted throughout. Here’s how to make this dish:
Scroll Down For A Printable Recipe Card At The Bottom Of The Page
How To Make Eggplant Parmesan
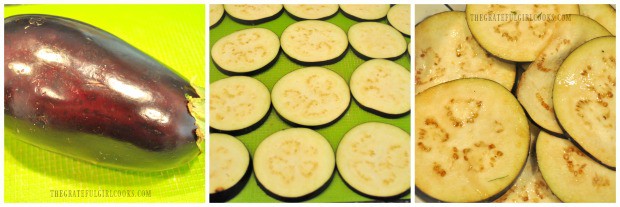
The first thing you will need to do is let excess water drain from the fresh eggplant. This step helps to reduce “sogginess” in the eggplant slices, by pulling out moisture before cooking.
Cut a large eggplant into 1/2″ thick slices. Salt BOTH sides of each slice. Put the salted eggplant slices in a large colander in the sink, or over a bowl.
Let the eggplant slices sit and “drain” or “sweat out” the liquid for 45 minutes. Once done draining, lightly brush off the excess salt.
Preparing The Eggplant To Make Eggplant Parmesan
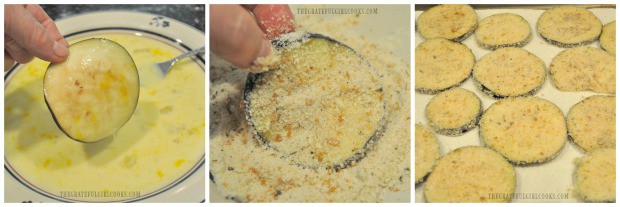
Preheat your oven to 375°F, and place two (shallow) plates on the kitchen counter. Spread the Italian seasoned breadcrumbs out, on one plate. Place the 3 slightly beaten eggs and milk on the other plate. Lightly whisk the eggs and milk together, until blended.
Dip each eggplant slice (one at a time) into the egg/milk mixture, making sure to cover both sides. Let excess liquid drip back onto plate. Dip the eggplant into the breadcrumbs, until both sides are covered, letting excess drop back onto plate.
Continue this step until all eggplant slices are breaded. Place breaded eggplant onto a paper towel covered 9×13 baking sheet in a single layer.
Browning The Eggplant
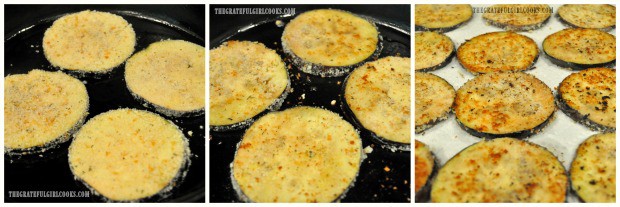
Put one Tablespoon of oil into a large skillet. Heat the skillet on medium high heat until hot, but not smoking. Once the skillet and oil are hot, add a few slices of eggplant at a time to the skillet. I was able to cook 4 at a time.
Cook eggplant on both sides, until they are lightly browned. Once browned, transfer them from the skillet to a paper towel lined baking sheet. Continue this step for all the slices, adding one Tablespoon oil for each group of eggplant slices that are browned.
Assembling The Eggplant Parmesan Casserole
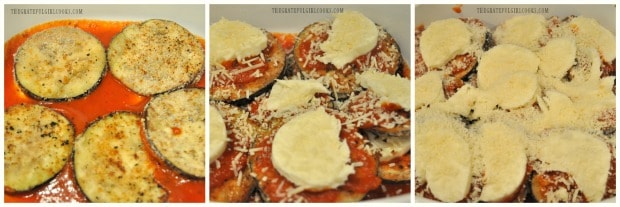
Now you are ready to assemble the eggplant parmesan! Spread 1 cup of marinara sauce on the bottom of a casserole dish. The first layer to go in is the eggplant slices. I used a 2.5 quart casserole dish, so I was able to get about 4 eggplant slices in each layer.
Once you have a layer of eggplant slices, add a spoonful of marinara sauce to the top of each slice. Don’t drown the layers in sauce! Top the sauce with a layer of mozzarella and parmesan cheeses. This time I used shredded Parmesan cheese, and slices of mozzarella cheese into my dish, but you can just as easily substitute grated mozzarella (instead of slices), if desired.
Repeat this process for a couple more layers (or until you run out of eggplant!). Make sure to reserve some of the parmesan and mozzarella cheeses to top the entire dish of eggplant parmesan, before baking.
Baking Eggplant Parmesan
Bake the eggplant parmesan for approximately 20-25 minutes at 375°F. When done, all that yummy cheese on top should be melted, golden brown and bubbly! Mine was done at 25 minutes.
NOTE: If you want the cheese to be more golden brown in color, you can always put it under the oven broiler for a couple minutes, if desired. Remember to keep a close eye on it, if you do this step! Nobody wants burned cheese on top, right?
Remove eggplant parmesan from oven, and let it sit for a couple minutes (to let the cheese solidify a bit). The only thing left to do is slice up a piece, serve it hot, and enjoy this classic Italian dish! You can also garnish the casserole with fresh, chopped basil, if desired.
I hope you enjoy this dish! For me, it’s always fun to experiment in the kitchen, and try new recipes. If you enjoy eggplant, be sure to check out my recipe for Baby Eggplant Mozzarella Bites! They’re delicious, too!
Have a wonderful day, please come back again soon, and thanks for stopping by!
Looking For More MEATLESS Meal Recipes?
You can find all my recipes in the Recipe Index, located at the top of the page. A few meatless favorites include:
- Easy Chile Relleno Casserole
- Easy Stovetop Macaroni and Cheese
- Florentine Lasagna Roll
- Lentil Stew
- Quinoa Enchilada Casserole
Want More Recipes? Get My FREE Newsletter!
I publish a newsletter 2 times per month (1st and 15th) with lots of recipes, tips, etc..
Would you like to join our growing list of subscribers?
There is a Newsletter subscription box on the top right (or bottom) of each blog post, depending on the device you use.
You can submit your e-mail address there, to be added to my mailing list.
Find Me On Social Media:
Facebook page: The Grateful Girl Cooks!
Pinterest: The Grateful Girl Cooks!
Instagram: jbatthegratefulgirlcooks
Original recipe source: https://www.tablefortwoblog.com/eggplant-parmesan/
↓↓ PRINTABLE RECIPE BELOW ↓↓

- 1 large eggplant , cut in 1/2" slices
- 2 Tablespoons salt
- 1½ cups Italian seasoned breadcrumbs
- 3 large eggs , lightly beaten
- 1/2 cup milk
- 4 Tablespoons olive oil , or vegetable oil
- 3 cups marinara sauce
- 2 cups mozzarella , shredded or slices
- 1 cup parmesan cheese , shredded
Cut a large eggplant into 1/2" thick slices. Salt BOTH sides of each slice. Put the salted slices in a large colander in the sink, or over a bowl. Let the eggplant sit and "drain" or "sweat out" the liquid for 45 minutes. Once done draining, lightly brush off excess salt.
Preheat oven to 375°F. Place two (shallow) plates on kitchen counter. Spread Italian breadcrumbs on one plate. Place eggs and milk on the other plate. Lightly whisk eggs and milk together. Dip each eggplant slice (one at a time) into egg/milk mixture, covering both sides. Let excess liquid drip back onto plate. Dip eggplant into breadcrumbs until both sides are covered, letting excess drop back onto plate. Continue this step until all eggplant slices are breaded. Place breaded eggplant onto a paper towel covered 9x13 baking sheet in a single layer.
Put 1 Tablespoon oil into a large skillet. Heat the skillet on medium high heat until hot, but not smoking. Once skillet and oil are hot, add a few slices of eggplant at a time to the skillet. Cook eggplant on both sides, until lightly browned. Once browned, transfer them from the skillet to a paper towel lined baking sheet. Repeat this step for all slices, adding one Tablespoon oil for each group of eggplant slices that are browned.
Spread 1 cup of marinara sauce on bottom of casserole dish. The first layer is eggplant slices (I used a 2.5 quart casserole dish, and was able to get about 4 eggplant slices per layer). Onto that layer, add a little marinara sauce to the top of each piece (approx. 1/4 cup). Top the sauce with a layer of shredded mozzarella and parmesan cheeses. Repeat this process for two more layers (or until you run out of eggplant). Make sure to reserve some of the parmesan and mozzarella cheeses to top the dish off with, before baking.
Bake, uncovered, for 20-25 minutes at 375°F. When done, the cheese on top should be melted, golden brown and bubbly! Note: If you want the cheese to be more golden brown in color, you can always put it under the oven broiler for a couple minutes, if desired. Remember to keep a close eye on it, if you do this step! Remove eggplant parmesan from oven, and let it sit for a couple minutes (to let the cheese solidify a bit). The only thing left to do is slice up a piece, and serve it hot! Enjoy!
Note that 45 minutes of the prep time listed is INACTIVE time (while zucchini drains).
You can also garnish the finished eggplant parmesan with chopped, fresh basil, if desired.
