Happy Thanksgiving!

Happy Thanksgiving!  We really do have so much to be thankful for, if you think about it.  Enjoy this holiday; hopefully you will be able to carve out some quiet time of reflection, and give thanks for God’s many blessings, large or small in your life.Happy Thanksgiving / The Grateful Girl Cooks!

One of the quotes I LOVE is this “There is ALWAY something to be thankful for”.  My sincere hope is that your day is filled with laughter, love, fantastic food, and the gift of family and friends. May your celebration be sweet!

From our home in Oregon to yours… Happy Thanksgiving!

Our dining room table is set and ready for a happy Thanksgiving.

May your Thanksgiving celebration be made even more special by sharing it with your loved ones. God Bless You, and truly hope you have a very happy Thanksgiving.

Interested In More Recipes?

Thank you for visiting this website. I appreciate you using some of your valuable time to do soIf you’re interested, I publish a newsletter 2 times per month (1st and 15th) with all the latest recipes, and other fun info. I would be honored to have you join our growing list of subscribers, so you never miss a great recipe!

There is a Newsletter subscription box on the top right side (or bottom) of each blog post, depending on the device you use, where you can easily submit your e-mail address (only) to be included in my mailing list.

You Can Also Find Me On Social Media:
Facebook page: The Grateful Girl Cooks!
Pinterest: The Grateful Girl Cooks!
Instagram: jbatthegratefulgirlcooks

Author's signature

Save

Save

Save

Save

Old-Fashioned Cake Doughnuts

You’ll be surprised how easy it is to prepare old-fashioned cake doughnuts, with hints of cinnamon and nutmeg. The recipe makes 12 doughnuts + holes!
You'll be surprised how easy it is to prepare old-fashioned cake doughnuts, with hints of cinnamon and nutmeg. The recipe makes 12 doughnuts + holes!
In spite of all the fancy gourmet doughnuts available at specialty shops nowadays, sometimes a simple Old-Fashioned Cake Doughnut, maybe sprinkled with powdered sugar or cinnamon-sugar hits the spot!

If and when we have doughnuts, it’s because my doughnut-crazy husband picks them up at a local doughnut shop. BUT… I wanted to try my hand at making this simple cake doughnut out of simple curiosity on the “how-to’s” of making them. I located a recipe that sounded good on Pinterest and gave it a go… with very good results!

These old-fashioned cake doughnuts do not contain yeast, so there is no time waiting for dough to rise, which is a real timesaver! They are made with simple ingredients that are typically found in most kitchens. These yummy doughnuts are very easy to prepare. Here’s how to make them:

Scroll Down For A Printable Recipe Card At The Bottom Of The Page

How To Make Cake Doughnuts

Sift flour, sugar, salt, baking powder, cinnamon and nutmeg into a medium-sized bowl.

Dry ingredients for doughnuts are sifted together.

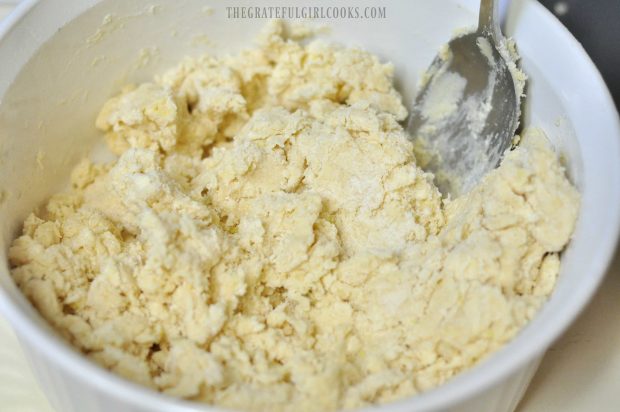
Mix in melted butter and stir until dough is crumbly. Stir in milk and beaten egg. Turn out the dough (it is sticky) onto a lightly floured work surface. Flour your hands a little bit,  and then knead the dough lightly, adding a sprinkle or two of flour if the dough remains sticky.

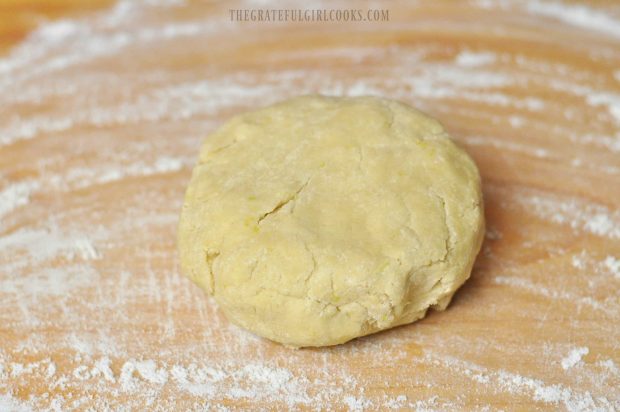
The dough is kneaded together on a floured surface.

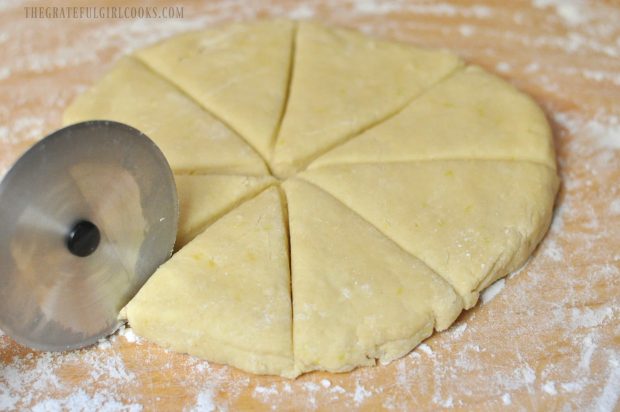
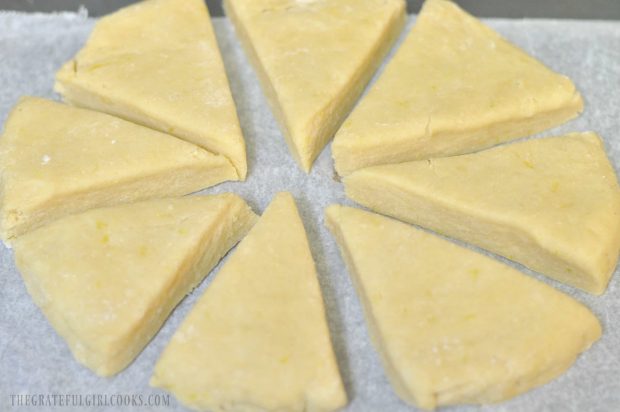
Doughnut dough is shaped into a circle before cutting out shapes.

Cut Out The Cake Doughnuts

Pat the dough out so that it is 1/4 inch thick. Dip a doughnut cutter or a biscuit cutter into flour, then cut out doughnuts. Be sure to dip the cutter into flour before cutting out each doughnut..

Because I used a biscuit cutter, I then used a very small cap from a bottle to cut out the center of the doughnuts. Gather scraps of leftover dough, and cut additional doughnuts out.

Circles are cut out of the dough with a biscuit or doughnut cutter.

A bottle cap can be used to cut out the doughnut holes.

Old-Fashioned Cake Doughnuts and holes ready to fry.

Cooking Old-Fashioned Cake Doughnuts

Heat oil to 375 degrees (make sure oil is at correct temperature before adding doughnuts).  I used my electric skillet with a temperature gauge on it, but a meat or candy thermometer would also work!

Carefully add the doughnuts, 3-4 at a time to the hot oil. Cook them for 3 minutes, turning them over at mid-point in the cooking time. I use two chopsticks (one in center of doughnut, one on outside) to carefully flip the doughnuts over.  Doughnuts should be golden brown on both sides.

The doughnuts are cooked in very hot oil to brown.

Old-Fashioned Cake Doughnuts are turning golden brown in the hot oil.

Old-Fashioned Cake Doughnuts Are Done Cooking – Now What?

Place the cooked doughnuts onto several layers of paper towels to drain. Make sure oil comes back to temperature and continue cooking doughnuts until all have been prepared.

Paper towels absorb the oil after frying the doughnuts.

Once the doughnuts have cooled off, they are ready to serve, as is (plain and simple).  If you want you can sprinkle some or all of the doughnuts with sifted powdered sugar OR sprinkle with a cinnamon-sugar mixture.

TIP: When using powdered sugar, make sure the doughnuts are totally cooled off before adding. If using cinnamon-sugar mixture, sprinkle it on while doughnuts are still hot.

Old-Fashioned Cake Doughnuts can be dusted with sifted powdered sugar before serving.

A cinnamon-sugar mixture coats these old-fashioned cake doughnuts.

However you enjoy eating cake doughnuts, I hope you consider making these. It’s nice to know that occasionally you can make your own, instead of having to go to a shop to buy them.

A plate of old-fashioned cake doughnuts and doughnut holes, ready to eat.

Have a blessed week, as you gather with family and/or friends, to give thanks to God for our many blessings, big or small. There is ALWAYS something to be grateful for!

Looking For More DOUGHNUT Recipes?

You can find all of my recipes in the Recipe Index, located at the top of the page. I have several doughnut recipes, including:

Interested In More Recipes?

Thank you for visiting this website. I appreciate you using some of your valuable time to do soIf you’re interested, I publish a newsletter 2 times per month (1st and 15th) with all the latest recipes, and other fun info. I would be honored to have you join our growing list of subscribers, so you never miss a great recipe!
There is a Newsletter subscription box on the top right side (or bottom) of each blog post, depending on the device you use, where you can easily submit your e-mail address (only) to be included in my mailing list.

You Can Also Find Me On Social Media:
Facebook page: The Grateful Girl Cooks!
Pinterest: The Grateful Girl Cooks!
Instagram: jbatthegratefulgirlcooks

Author's signature

Recipe Source:  http://baking.about.com/od/doughnutsanddonuts/r/plaincake.htm

0 from 0 votes
Old-Fashioned Cake Doughnuts
Prep Time
20 mins
Cook Time
3 mins
Total Time
23 mins
 

You'll be surprised how easy it is to prepare old-fashioned cake doughnuts, with hints of cinnamon and nutmeg. The recipe makes 12 doughnuts + holes!

Category: Breakfast
Cuisine: American
Keyword: cake doughnuts
Servings: 12
Calories Per Serving: 140 kcal
Author: JB @ The Grateful Girl Cooks!
Ingredients
  • 2 cups flour
  • 1/2 cup granulated sugar
  • 1 teaspoon salt
  • 1 Tablespoon baking powder
  • 1/4 teaspoon cinnamon
  • 1/8 teaspoon nutmeg
  • 2 Tablespoons butter , melted
  • 1/2 cup milk
  • 1 egg , beaten
  • approx. 1 quart oil , for frying
  • Optional: powdered sugar or cinnamon-sugar mixture for cooked doughnuts
Instructions
  1. Sift flour, sugar, salt, baking powder, cinnamon and nutmeg into a medium-sized bowl.
  2. Mix in melted butter-stir until dough is crumbly. Stir in milk and beaten egg. Turn out dough (it is sticky) onto a lightly floured work surface. Flour your hands and knead dough lightly, (adding a sprinkle or two of flour if dough remains sticky) until it comes together in a ball.
  3. Pat the dough out until it is 1/4 inch thick. Dip a doughnut cutter or a biscuit cutter into flour, then cut out doughnuts (dipping cutter into flour before cutting each one). Cut out center of the doughnuts if using biscuit cutter. Gather scraps of leftover dough, and cut additional doughnuts.
  4. Heat oil to 375 degrees (make sure oil is at correct temperature before adding dough). I used an electric skillet with temperature gauge, but a meat or candy thermometer would work! Carefully add doughnuts, 3-4 at a time to hot oil. Cook for 3 minutes, turning them over at mid-point in the cooking time. I use two chopsticks (one in center of doughnut, one on outside) to carefully flip the doughnuts over. Doughnuts should be golden brown on both sides. Place cooked doughnuts onto several layers of paper towels to drain. Bring oil back to temperature and continue cooking doughnuts and doughnut holes until all have been prepared.
  5. Once doughnuts have cooled, they are ready to serve. If desired, sprinkle doughnuts with sifted powdered sugar OR with a cinnamon-sugar mixture. If using powdered sugar, make sure doughnuts are totally cooled off before sprinkling. If using cinnamon-sugar mixture, sprinkle it on while doughnuts are still hot.
Recipe Notes

The quantity of doughnuts made will vary, depending on the size of the doughnut or biscuit cutter used. Caloric calculation does not include optional toppings such as powdered sugar or cinnamon-sugar.

Nutrition Facts
Old-Fashioned Cake Doughnuts
Amount Per Serving (1 doughnut)
Calories 140 Calories from Fat 27
% Daily Value*
Fat 3g5%
Saturated Fat 1g6%
Cholesterol 19mg6%
Sodium 221mg10%
Potassium 141mg4%
Carbohydrates 25g8%
Sugar 8g9%
Protein 2g4%
Vitamin A 95IU2%
Calcium 60mg6%
Iron 1.1mg6%
* Percent Daily Values are based on a 2000 calorie diet.

Here’s one more to pin on your Pinterest boards!You'll be surprised how easy it is to prepare old-fashioned cake doughnuts, with hints of cinnamon and nutmeg. The recipe makes 12 doughnuts + holes!
 

Save

Save

Save

Save

Save

Save

Save

Save

Save

Save

Save

Save

Save

Save

Save

Save

Save

Save

Save

Chicken Divan

Chicken Divan is a delicious, easy to make casserole, with chicken breasts and broccoli, baked in a creamy cheese sauce, and served on a bed of fluffy rice.Chicken Divan is a delicious, easy to make casserole, with chicken breasts and broccoli, baked in a creamy cheese sauce, and served on a bed of fluffy rice.
Over 39 years ago, just before getting married, a friend gave me this recipe for Chicken Divan. At this point in my life it would be difficult to count how many times I have made this fantastic casserole recipe over the years. It has been a family favorite!
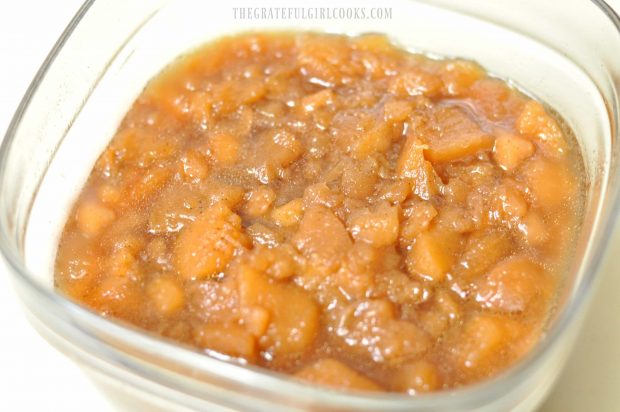
According to Wikipedia, Chicken Divan was named after the Divan Parisienne Restaurant in New York City where it was created for a contest their Chef entered. His recipe for a chicken casserole, with broccoli, in a creamy Mornay sauce won the contest and became the restaurant’s signature dish!

Scroll Down For A Printable Recipe Card At The Bottom Of The Page

How I Received This Recipe For Chicken Divan

Many years ago I was given the recipe by my friend Elnora when I was getting married. I worked for Elnora’s husband in the Music Department at the church I attended, and that is how we met. Now, over 40 years later, I am so grateful she gifted me with her recipe, because we truly LOVE this chicken divan.

The recipe makes a phenomenal tasting casserole that serves 8-10 people, and is VERY easy to prepare! Here’s how you make this: (by the way… when I took these photos I only made HALF the recipe, which is reflected in the photos).

Making Chicken Divan

Before assembling the casserole, cook boneless chicken breasts in boiling water until done. You can add onion, celery, and carrots to water for additional flavoring if desired. Remove  the chicken pieces when done, and let them cool. Once chicken is cool, cut it into bite-size pieces, and set aside.

Spray a 9×13 baking pan with non-stick spray. Arrange thawed broccoli across bottom of baking pan. Sprinkle generously with grated Parmesan cheese.

Broccoli and Parmesan in casserole dish

Arrange the chicken cubes on top of the broccoli.  Sprinkle the top of the casserole again with Parmesan cheese.

Chicken breast cubes placed on top of broccoli

In a medium bowl, combine cream of mushroom soup, sour cream, mayonnaise, grated Cheddar, lemon juice, curry powder, salt and pepper. Mix these ingredients until they are fully combined. The sauce will be fairly thick.

Sauce is mixed together for chicken divan.

Spoon or pour the sauce evenly over the top of the casserole, spreading it out, to cover.  Generously sprinkle the top with additional Parmesan cheese, then lightly sprinkle with paprika.

Chicken casserole is sprinkled with Parmesan cheese and paprika.

Time To Bake The Chicken Divan!

Place several small pads of butter on the top of the chicken divan casserole. Bake, uncovered, in a 350 degree oven for 35-40 minutes, until golden in color. The cheese sauce should be bubbly around the edges of the pan.

Pads of butter placed on top of casserole before baking

When the chicken divan is done, remove the pan to a hot pad, and let it sit for 5-6 minutes. This will allow the casserole time to firm up a bit (the sauce is VERY hot!).

Casserole will be golden brown and bubbly when done baking.

Time To Serve It And Eat!

When ready, serve hot over fluffy rice, and ENJOY this delicious chicken divan casserole! It’s wonderful, because you’ve got chicken, rice AND broccoli all in one dish. The leftovers are fabulous, as well.

We enjoy this chicken and broccoli casserole served over white rice

Chunks of chicken breast taste magnificent with the sauce and broccoli. Placing it on a bed of rice provides a great medium to soak up some of the delicious sauce! It’s SOOOO delicious!
Chicken divan over rice, on plate with fork

While I know this is not the most “health-conscious” or calorie-conscious meal, sometimes ya just gotta go for it and enjoy a great meal! Everything in moderation, right? Sure hope you will try this recipe… it’s a definite KEEPER!
Looking For Other CASSEROLE Recipes?

You can find all of my recipes in the Recipe Index, located at the top of the page. You might also enjoy my casserole recipes for:

Thank you for visiting this website. I appreciate you using some of your valuable time to do soIf you’re interested, I publish a newsletter 2 times per month with all the latest recipes, and other fun info. I would be honored to have you join our growing list of subscribers, so you never miss a great recipe! There is a Newsletter subscription box on the top right side (or bottom) of each blog post, depending on the device you use, where you can easily submit your e-mail address (only) to be included in my mailing list.

You can also follow me on social media:

Facebook page: The Grateful Girl Cooks!
Pinterest:
The Grateful Girl Cooks!
Instagram:
jbatthegratefulgirlcooks

Have a wonderful day, friends.

Author's signatureRecipe Source: Elnora Hall

0 from 0 votes
Chicken Divan
Prep Time
30 mins
Cook Time
40 mins
Total Time
1 hr 10 mins
 
Chicken Divan is a delicious, easy to make casserole, with chicken breasts and broccoli, baked in a creamy cheese sauce, and served on a bed of fluffy rice.
Category: Entree - Casserole
Cuisine: American
Keyword: chicken divan
Servings: 10 servings
Calories Per Serving: 482 kcal
Author: JB @ The Grateful Girl Cooks!
Ingredients
  • 3 boneless , skinless chicken breasts
  • 2 small packages frozen broccoli spears
  • 2 cans cream of mushroom soup
  • 1 cup mayonnaise
  • 1 carton (8 ounces) sour cream
  • 1 cup grated sharp cheddar cheese
  • 1 Tablespoon fresh squeezed lemon juice
  • 1 teaspoon curry powder
  • Salt and pepper , to taste
  • Parmesan cheese (fresh grated OR can use "green shaker can")
  • Paprika (to sprinkle on top of casserole prior to baking)
  • Butter (enough for small pads of butter on top of casserole)
  • Rice , prepared according to instructions on package
Instructions
  1. Cook chicken breasts in water (enough to cover); bring to a low boil, cook until chicken is done (about 25-30 mins.). See *NOTES. When done, remove chicken from water. Let cool, then cut into bite-sized cubes.
  2. Spray a 9x13 baking pan with non-stick spray. Place thawed broccoli evenly on bottom of baking pan. Sprinkle generously with Parmesan cheese. Evenly arrange the chicken pieces over the broccoli. Sprinkle again with Parmesan cheese.
  3. In a medium bowl, fully combine (with a spoon) cream of mushroom soup, sour cream, mayonnaise, grated cheddar cheese, lemon juice, curry powder, and salt and pepper (to taste). Pour or spoon sauce evenly over top of casserole. Spread out, to cover entire casserole. Generously sprinkle with Parmesan cheese, then lightly sprinkle with paprika. Dot the top of casserole with small pads of butter.
  4. Bake casserole, uncovered, at 350 degrees for 35-40 minutes, until casserole is bubbling all around the edges and is golden brown in color. Remove casserole. Let it sit for 5-6 minutes to allow time to firm up just a bit.
  5. Serve casserole hot over a bed of fluffy rice... and ENJOY!
Recipe Notes

Original recipe says to cook chicken with onion, celery & carrots for flavor. I have never done this, but include it in case you wish to do so. The original recipe also said to cook the frozen broccoli, but I find that if I thaw it out completely, then pat it dry, there is no need to cook it.

Nutrition Facts
Chicken Divan
Amount Per Serving (1 serving)
Calories 482 Calories from Fat 261
% Daily Value*
Fat 29g45%
Saturated Fat 9g56%
Cholesterol 61mg20%
Sodium 734mg32%
Potassium 433mg12%
Carbohydrates 36g12%
Fiber 1g4%
Sugar 1g1%
Protein 17g34%
Vitamin A 605IU12%
Vitamin C 41.7mg51%
Calcium 156mg16%
Iron 1.4mg8%
* Percent Daily Values are based on a 2000 calorie diet.

Here’s one more to pin on your Pinterest boards!Chicken Divan is a delicious, easy to make casserole, with chicken breasts and broccoli, baked in a creamy cheese sauce, and served on a bed of fluffy rice.


Save

Save

Save

Save

Save

Save

Save

Save

Save

Save

Save

Save

Save

Save

Lime, Cranberry & Raspberry Refresher

Lime Cranberry Raspberry Refresher is a family-friendly, delicious, sparkling, non-alcoholic beverage everyone can enjoy, especially on warm days!

Looking for a great tasting, bubbly beverage everyone can enjoy during the upcoming holidays?  How about a Lime Cranberry Raspberry Refresher? This non-alcoholic beverage also contains apple juice and sparkling water, and I think you will really like it!

The lime cranberry raspberry refresher recipe is absolutely simple to prepare (ready in 3 minutes!), and makes eight, 1 cup servings.  It is full of cranberry-raspberry juice, apple juice, and lime infused sparkling water, so this drink has plenty of flavor!

I found the recipe in a cookbook I own called “Cooking Light – Fresh Food Superfast”, changed the recipe up just a bit, and REALLY enjoyed it!  The cookbook got it right – a pitcher of this delicious drink certainly IS super fast to prepare!

Scroll Down For A Printable Recipe Card At the Bottom Of The Page

Lime Cranberry Raspberry Refresher Is Also Perfect For The Holidays!

If you want to make a festive non-alcoholic beverage that everyone can enjoy (including the kids), consider making this refreshing drink during the holidays.  You can add fresh or frozen raspberries and/or frozen cranberries to each drink, and garnish each glass with a lime wedge, to make it even more festive looking!

Looking For Other Refreshing, Family-Friendly Drinks?

If you enjoy or are searching for other sparkling beverages like this that are non-alcoholic, you might also really enjoy my recipes for Pineapple, Lime and Mint Agua Fresca , Watermelon, Lime and Mint Agua Fresca, or homemade Blackberry Soda.  All are equally delicious!

Showing another agua fresca refreshing drink with pineapple

Any of these cold, refreshing beverages would taste GREAT on a hot day… don’t ya think?

Showing another refreshing beverage with watermelon

Another refreshing beverage using fresh blackberries

Sure hope you enjoy this colorful, bubbly and flavorful lime cranberry raspberry refresher! We sure do. Have a wonderful day, and be sure to check out ALL of my recipes in the Recipe Index, located at the top of the page.

Interested In More Recipes?

Thank you for visiting this website. I appreciate you using some of your valuable time to do soIf you’re interested, I publish a newsletter 2 times per month (1st and 15th) with all the latest recipes, and other fun info. I would be honored to have you join our growing list of subscribers, so you never miss a great recipe!
There is a Newsletter subscription box on the top right side (or bottom) of each blog post, depending on the device you use, where you can easily submit your e-mail address (only) to be included in my mailing list.

You Can Also Find Me On Social Media:

Facebook page: The Grateful Girl Cooks!
Pinterest:
The Grateful Girl Cooks!
Instagram:
jbatthegratefulgirlcooks

Author's signature

Recipe Adapted from: The cookbook called “Cooking Light – Fresh Food Superfast”, page 150, published 2011, Time Home Entertainment, Inc.

0 from 0 votes
Lime, Cranberry & Raspberry Refresher
Prep Time
3 mins
Cook Time
0 mins
Total Time
3 mins
 
Lime Cranberry Raspberry Refresher is a family-friendly, delicious, sparkling, non-alcoholic beverage everyone can enjoy, especially on warm days!
Category: Beverage
Cuisine: American
Keyword: lime cranberry raspberry refresher
Servings: 8 servings
Calories Per Serving: 86 kcal
Author: JB @ The Grateful Girl Cooks!
Ingredients
  • 4 cups cranberry-raspberry juice
  • 2 cups apple juice
  • 2 cups lime flavored sparkling water
  • Ice cubes (optional, but recommended)
  • Fresh raspberries or frozen cranberries (optional)
  • Thin lime wedges (as garnish for glass-optional)
Instructions
  1. Pour the cranberry-raspberry juice and apple juice into a large pitcher. Stir in 2 cups sparkling LIME water, until combined.
  2. Serve drink over ice cubes.

  3. (Optional) Add frozen cranberries OR fresh or frozen raspberries to each glass (for decoration).

  4. Garnish glass with a thin lime wedge, if desired.
  5. Serve, and enjoy!
Recipe Notes

If you wish to make this up ahead of serving time, mix cranberry/raspberry juice and apple juice in pitcher. Cover and refrigerate. Just before serving, add cold lime sparkling water to pitcher. Serve over ice, and other garnishes.

Nutrition Facts
Lime, Cranberry & Raspberry Refresher
Amount Per Serving (1 serving (8 oz.))
Calories 86
% Daily Value*
Sodium 29mg1%
Potassium 160mg5%
Carbohydrates 22g7%
Sugar 21g23%
Vitamin A 55IU1%
Vitamin C 12.3mg15%
Calcium 21mg2%
Iron 0.4mg2%
* Percent Daily Values are based on a 2000 calorie diet.

Here’s one more to pin on your Pinterest boards!Lime Cranberry Raspberry Refresher is a family-friendly, delicious, sparkling, non-alcoholic beverage everyone can enjoy, especially on warm days!!


Save

Save

Save

Save

Save

Save

Save

Save

Save

Save

Save

Save

Save

Save

Save

Save

Save

Save

Save

Save

Save

Chocolate Cream Cheese Danish

You’re gonna LOVE this decadent chocolate cream cheese danish! This chocolate filled pastry is EASY to make, using store bought crescent roll dough!You're gonna LOVE this decadent chocolate cream cheese danish! This chocolate filled pastry is EASY to make, using store bought crescent roll dough!

If you enjoy a good pastry AND enjoy chocolate, I’m pretty sure you will love this recipe for a Chocolate Cream Cheese Danish I found online recently. Added bonus? It’s EASY to make! This pastry is super easy to prepare, because it starts with a can of store-bought crescent rolls, and only takes about 30 minutes total to prepare! Let me show you just how easy it is to make this treat!

Scroll Down For A Printable Recipe Card At The Bottom Of The Page

How To Make A Chocolate Cream Cheese Danish

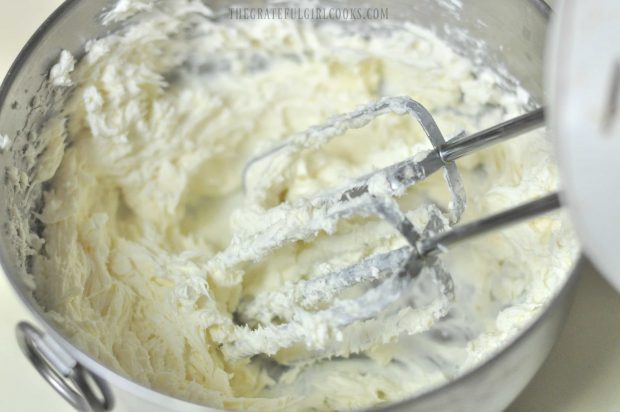
Before beginning, preheat your oven to 375 degrees F. (See? I told you this would be EASY!). Mix together room temperature cream cheese, sugar, flour and vanilla extract in a small bowl. I used an electric mixer to do this and it was mixed in a flash! Once it is creamy and thoroughly combined, set aside.

Cream cheese and flour in metal mixing bowl (filling for danish)

Open the can of crescent dough; without separating the triangles, unroll the dough and place it onto a parchment paper-lined baking sheet. Using your fingers, press the dough together to close all the holes (perforations) up, so you have one complete piece of dough.

Crescent dough rolled out on parchment paper to make chocolate cream cheese danish.

Filling The Pastry

Once you have pressed all the holes in the dough together, drop the cream cheese filling (by spoonfuls) in the center, down the length of the dough. Make sure to evenly spread the filling out, so that the filling for the chocolate cream cheese danish is between 2-3 inches wide.

Cream cheese filling for chocolate cream cheese danish, is placed on crescent dough.

Evenly sprinkle the chopped chocolate over the top of the cream cheese filling.

Chopped chocolate sprinkled onto cream cheese filling on dough

Cutting The Pastry Strips For “Braiding”

Starting at one end of the pastry, cut 1 inch strips (at a slight angle toward the top) into both sides of the dough. Cut in until it reaches the filling.

Pull the strips up and over the filling making sure to alternate sides (L,R,L,R, etc) until entire chocolate cream cheese danish has been “braided. Tuck in any extra bits of dough that you may end up with, on each end of the roll.

Dough with strips cut on sides, with chocolate and cream cheese in middle

Once the chocolate cream cheese danish has been braided and rolled, it’s time to bake it, after it gets one more special touch. Give the chocolate cream cheese danish an “egg bath” BEFORE baking. To do this, whisk an egg YOLK in a small bowl, then brush the surface of the pastry roll with the beaten yolk.

Brushing egg yolk onto the chocolate cream cheese danish.

Ready To Bake!

Bake the chocolate cream cheese danish at 375 degrees for 20 minutes, until the pastry is golden brown in color. Remove the pastry from the oven and place it (still on the parchment paper) onto a wire rack to cool.  Let it cool COMPLETELY.

Browned chocolate cream cheese danish, right out of the oven.

Make The Glaze For The Chocolate Cream Cheese Danish

While the chocolate cream cheese danish is cooling, make the glaze to top the pastry.  Mix together a simple glaze of powdered sugar, milk, and vanilla in a small bowl, until smooth. Once the pastry has cooled completely, decoratively drizzle the glaze back and forth across the pastry until all the glaze is gone.

The parchment paper will help to collect any run-off glaze, and will help to make it an easy cleanup.  Let the chocolate cream cheese danish rest, while the glaze firms up.

Glaze being spooned over top of baked chocolate cream cheese danish.

The pastry is ready to serve, once the glaze on top has become firm.  When ready to serve, cut the pastry into slices, grab a cup of coffee or tea… and dig in!

Slice of chocolate cream cheese danish on a plate with fork

This chocolate pastry is decadently rich, creamy, and filled with chocolate, so obviously it’s not something you want to eat every day, but for an occasional treat! It really is delicious!  A small piece goes a long way! Sure hope you enjoy this chocolate cream cheese danish. We sure do. Thanks for stopping by, and have a great day.

Looking For More Delicious Breakfast Treats Like This?

You can find all of my recipes in the Recipe Index, located at the top of the page. I have lots of yummy breakfast treats, including:

Interested In More Recipes?

Thank you for visiting this website. I appreciate you using some of your valuable time to do soIf you’re interested, I publish a newsletter 2 times per month (1st and 15th) with all the latest recipes, and other fun info. I would be honored to have you join our growing list of subscribers, so you never miss a great recipe!
There is a Newsletter subscription box on the top right side (or bottom) of each blog post, depending on the device you use, where you can easily submit your e-mail address (only) to be included in my mailing list.

You Can Also Find Me On Social Media:

Facebook page: The Grateful Girl Cooks!
Pinterest:
The Grateful Girl Cooks!
Instagram:
jbatthegratefulgirlcooks

Author's signatureRecipe Source:  http://www.laurenslatest.com/chocolate-cream-cheese-danish/

0 from 0 votes
Chocolate Cream Cheese Danish
Prep Time
10 mins
Cook Time
20 mins
Total Time
30 mins
 
You're gonna LOVE this decadent chocolate cream cheese danish! This chocolate filled pastry is EASY to make, using store bought crescent roll dough!
Category: Breakfast
Cuisine: American
Keyword: chocolate cream cheese danish
Servings: 8 servings
Calories Per Serving: 330 kcal
Author: JB @ The Grateful Girl Cooks!
Ingredients
For Pastry:
  • 1 can crescent rolls
  • 8 ounces cream cheese , softened (at room temp)
  • 1/2 cup granulated sugar
  • 2 Tablespoons all purpose flour
  • 1 teaspoon vanilla extract
  • 2 ounces chopped semi-sweet chocolate
  • 1 egg yolk , beaten (for brushing onto rolled pastry before baking)
For Glaze:
  • 1/2 cup powdered sugar
  • 1 teaspoon milk
  • 1/4 teaspoon vanilla extract
Instructions
  1. Before beginning, preheat your oven to 375 degrees F.
  2. Cream together softened cream cheese, granulated sugar, flour and vanilla until smooth. Set aside.
  3. Unroll the crescent dough without separating any of the triangles. Keep the dough all in one piece! Place dough onto a parchment paper-lined baking sheet, then press together all the perforations in the dough with your fingers.
  4. Spoon the cream cheese filling down the center of the dough lengthwise. Spread the dough out so it is 2-3 inches wide in center of roll.
  5. Evenly sprinkle chopped chocolate on top of the cream cheese filling.
  6. Cut 1 inch strips of dough evenly on each side of the filling (at a slight angle toward the top).
  7. Starting at top, lift pieces of dough and pull up and over filling, alternating sides as you go, so that you end up with a somewhat "braided" pastry. (Left side strip, Right side strip, etc.). Tuck any leftover pieces of dough into the ends.
  8. Beat an egg yolk in a small dish. Using a pastry brush, gently "paint" the yolk over the surface of the pastry until covered. Place pastry in a preheated 375 degree oven; bake for 20 minutes, until golden brown in color. Remove pastry (keeping the parchment paper underneath) to a wire rack. Let cool completely.
  9. Mix together glaze ingredients until smooth. Once pastry is completely cool, decoratively drizzle glaze over surface of pastry. Let glaze firm up, then cut into slices, serve and enjoy!
Nutrition Facts
Chocolate Cream Cheese Danish
Amount Per Serving (1 slice)
Calories 330 Calories from Fat 171
% Daily Value*
Fat 19g29%
Saturated Fat 9g56%
Cholesterol 56mg19%
Sodium 315mg14%
Potassium 79mg2%
Carbohydrates 37g12%
Sugar 26g29%
Protein 3g6%
Vitamin A 415IU8%
Calcium 35mg4%
Iron 1.1mg6%
* Percent Daily Values are based on a 2000 calorie diet.

Here’s one more to pin on your Pinterest boards!You're gonna LOVE this decadent chocolate cream cheese danish! This chocolate filled pastry is EASY to make, using store bought crescent roll dough!


Save

Save

Save

Save

Save

Save

Save

Save

Save

Save

Save

Honey BBQ Chicken Strips

Fantastic tasting honey BBQ chicken strips are marinated, seasoned & browned chicken breast tenders, covered with a sweet/sticky honey BBQ sauce and baked.Fantastic tasting honey BBQ chicken strips are marinated, seasoned & browned chicken breast tenders, covered with a sweet/sticky honey BBQ sauce and baked.
My husband and I really enjoyed a new (to us) recipe for Honey BBQ Chicken Strips that I made recently. Sweet and slightly sticky from a Honey/BBQ sauce, these nicely seasoned, browned, then baked chicken strips were fantastic!

Best part? The honey bbq chicken strips were full of flavor… and didn’t take too much time to make! NOTE: I only made a HALF recipe since only two of us were eating, so that is reflected in my photos.

Scroll Down For A Printable Recipe Card At The Bottom Of the Page

How To Make Honey BBQ Chicken Strips

Cut boneless skinless chicken breasts into strips. Season the chicken strips with salt and pepper. Place the chicken in a medium sized bowl, cover with 2 cups of buttermilk, and stir to fully coat the chicken pieces.

Cover the bowl with plastic wrap, and refrigerate/marinate chicken for at least 2 hours. When chicken is nearly done marinating, preheat oven to 350 degrees and prep the remaining ingredients.

Chicken strips dipped in buttermilk in white bowl

Make The Coating For Chicken and Mix The BBQ Sauce

  1. Mix together 2 cups buttermilk and hot sauce in a small bowl. Set the bowl aside.
  2. Stir together flour, salt, pepper, garlic powder and paprika in a second bowl. Set the bowl aside.
  3. Mix together the BBQ sauce, honey and apple cider vinegar in a third bowl. Set the bowl aside.

Buttermilk, spices, and honey BBQ sauce for chicken strips in 3 bowls

Prepare The Chicken Strips For Cooking

Once the chicken is done marinating, remove the chicken strips from the buttermilk and let excess buttermilk drip back into bowl. Dip and fully cover the chicken strips (one at a time) in:

  1. FLOUR MIXTURE (shake off excess), then
  2. BUTTERMILK MIXTURE (letting excess drip off), then
  3. Back in to the FLOUR MIXTURE. Set all the coated pieces of chicken on a large plate or platter until all pieces are finished being coated. It’s a tad messy, but keep going… it will be worth it!

Chicken breast strip dredged in flour for honey bbq chicken strips.

Floured chicken strips resting on plate

Cook The Chicken Strips

Heat vegetable oil in large skillet. Heat oil to 350-360 degrees (use a thermometer if you have one). Once the oil is at the correct temperature and is really hot, gently place the chicken strips in the oil. Cook in batches, if necessary.

Fry the chicken strips until they are golden brown, and then flip them over and cook the other side. Once both sides are golden brown, remove to wire rack or paper towels. The chicken will be baked after this step, so strips don’t have to be fully cooked through.

Chicken breast pieces for honey bbq chicken strips are cooking in hot oil in skillet.

Bake The Honey BBQ Chicken Strips

Using a pastry brush, cover the chicken strips with the BBQ/Honey mixture on both sides.  Place the coated strips onto parchment paper lined baking sheet. Bake the honey bbq chicken strips at 350 degrees for 20 minutes, until fully cooked.

Browned honey bbq chicken strips ready to bake in the oven.

Time To Serve Honey BBQ Chicken Strips

When done, remove the chicken strips from the oven. Sprinkle each of the pieces with sesame seeds and/or parsley (fresh or dried) for a garnish (optional). Serve the honey bbq chicken strips while hot… and enjoy!

Honey BBQ Chicken Strips on plate, with rice and salad

I served the honey bbq chicken strips for our dinner, with a small salad and rice on the side. The strips would also be a great “snack/appetizer” treat for munching on while watching football or a great game on TV with a friends or family! These delicious pieces of chicken have great flavor, and the sticky sweet BBQ sauce makes them “lip-smacking delicious”!

Close up photo of honey BBQ chicken strips.

I sure hope you will consider making these delicious honey bbq chicken strips. I am thankful to have found the recipe from Trish, at “Mom On Time Out”. It’s a “keeper”.  Have a blessed day!

Looking For More CHICKEN Recipes?

You can find all my recipes in the Recipe Index, located at the top of the page. I have LOTS of chicken recipes, including:

Interested In More Recipes?

Thank you for visiting this website. I appreciate you using some of your valuable time to do soIf you’re interested, I publish a newsletter 2 times per month (1st and 15th) with all the latest recipes, and other fun info. I would be honored to have you join our growing list of subscribers, so you never miss a great recipe!
There is a Newsletter subscription box on the top right side (or bottom) of each blog post, depending on the device you use, where you can easily submit your e-mail address (only) to be included in my mailing list.

You Can Also Find Me On Social Media:

Facebook page: The Grateful Girl Cooks!
Pinterest:
The Grateful Girl Cooks!
Instagram:
jbatthegratefulgirlcooks

Author's signature

Recipe Source: http://www.momontimeout.com/2015/08/honey-bbq-chicken-strips-recipe/

0 from 0 votes
Honey BBQ Chicken Strips
Prep Time
10 mins
Cook Time
35 mins
Total Time
45 mins
 
Fantastic tasting honey BBQ chicken strips are marinated, seasoned & browned chicken breast tenders, covered with a sweet/sticky honey BBQ sauce and baked.
Category: Entree
Cuisine: American
Keyword: honey BBQ chicken strips
Servings: 6 -8 servings
Calories Per Serving: 553 kcal
Author: JB @ The Grateful Girl Cooks!
Ingredients
  • 2 pounds chicken tenders or boneless chicken breasts , cut into long strips)
  • 1 teaspoon salt
  • 1 teaspoon black pepper
  • Vegetable oil (for frying... at least 1 inch deep)
  • 4 cups buttermilk (divided)
  • 1 Tablespoon hot sauce
  • 2 cups flour
  • 1 teaspoon salt
  • 1 teaspoon black pepper
  • 1 teaspoon garlic powder
  • 1 teaspoon paprika
  • 1 cup barbecue sauce
  • 1/4 cup honey
  • 1 Tablespoon apple cider vinegar
  • Sesame seeds/parsley (Optional, for garnish)
Instructions
  1. Season chicken strips with salt and pepper. Place in a medium sized bowl, cover with 2 cups of buttermilk, and stir to fully coat chicken pieces. Cover bowl, and refrigerate/marinate chicken for at least 2 hours. When chicken is nearly done marinating, preheat oven to 350 degrees and prep the remaining ingredients.
  2. In medium bowl, mix together 2 cups buttermilk and hot sauce. Set aside.
  3. In small bowl, stir together flour, salt, pepper, garlic powder and paprika. Set aside.
  4. In shallow bowl, mix together BBQ sauce, honey and apple cider vinegar. Set aside.
  5. When chicken is done marinating, remove strips from buttermilk and let excess drip off. Place chicken strips (coating one at a time) in FLOUR MIXTURE, then BUTTERMILK MIXTURE, then put back in FLOUR MIXTURE to coat. I set all the coated pieces on a large platter until all were coated.
  6. Heat vegetable oil in large skillet. Heat oil to 350-360 degrees (use a thermometer if you have one). Once the oil is at the correct temperature and is really hot, gently place the chicken strips in the oil. Fry until golden brown; flip over and cook other side. Cook in batches, if necessary.  Once both sides are golden brown, remove to wire rack or paper towels (chicken will be baked, so strips don't have to be fully cooked through).

  7. Using a pastry brush, cover the chicken strips with the BBQ/Honey mixture on both sides. Place the coated strips onto parchment paper lined baking sheet. Bake at 350 degrees for 20 minutes, until fully cooked. When done, remove from oven, sprinkle with sesame seeds and/or dried parsley for a garnish (optional). Serve and enjoy!
Nutrition Facts
Honey BBQ Chicken Strips
Amount Per Serving (1 serving (1.5 pieces))
Calories 553 Calories from Fat 90
% Daily Value*
Fat 10g15%
Saturated Fat 4g25%
Cholesterol 114mg38%
Sodium 1667mg72%
Potassium 951mg27%
Carbohydrates 71g24%
Fiber 1g4%
Sugar 35g39%
Protein 42g84%
Vitamin A 580IU12%
Vitamin C 3.7mg4%
Calcium 214mg21%
Iron 3mg17%
* Percent Daily Values are based on a 2000 calorie diet.

Here’s one more to pin on your Pinterest boards!Fantastic tasting honey BBQ chicken strips are marinated, seasoned & browned chicken breast tenders, covered with a sweet/sticky honey BBQ sauce and baked.

Save

Save

Save

Save

Save

Save

Save

Save

Save

Save

Save

Save

Save

Save

Save

Crispy Homemade French Fries

Crispy Homemade French Fries (restaurant quality) are EASY to make at home, using this classic 2 step process that ensures a crisp exterior, but soft inside!Crispy Homemade French Fries (restaurant quality) are EASY to make at home, using this classic 2 step process that ensures a crisp exterior, but soft inside!
I LOVE french fries, which is both a blessing and a curse. A blessing because Crispy Homemade French Fries are easy to make and delicious, and a curse, because they are easy to make and delicious! See my dilemma? Uh Huh.

I tried a recipe for beer battered fish last year, and ended up making some homemade french fries (chips) to serve on the side. Boy, oh boy… they were delicious, and actually very easy to make.  Crispy on the outside… soft on the inside. Thought I’d share it with you.

By the way… do you know the history of how french fries came to be? There’s an interesting article on Wikipedia that is full of interesting facts you might enjoy reading.

Scroll Down For A Printable Recipe Card At The Bottom Of The Page

Here’s How To Make Delicious Homemade French Fries:

Peel, rinse, and then cut the potatoes, by slicing them lengthwise into 1 inch slices. Cut each slice into finger thickness sized strips. Dry the potatoes as much as you can by patting them dry with paper towels.

Potatoes are cut into sticks before frying

Heat oil in large skillet or stock pot until it reaches 350 degrees. I used my electric skillet, which has a temperature gauge on it. (No electric skillet? Try using a meat or candy thermometer to get the accurate temperature).

Cooking Homemade French Fries

To ensure you get a good “fry” on the potatoes, make sure the oil is heated to 350 degrees.  Carefully add cut, dried potatoes into the hot oil. Let them cook for about 8 minutes, turning to cook on both sides.

French fries are cooked in oil for the first fry.

Remove the french fries from the hot oil. Use a slotted spatula or slotted spoon to help remove them, letting excess hot oil drip back into the skillet.

Homemade french fries are removed from hot oil with slotted spoon.

Place hot potatoes onto a baking pan or a wire rack with paper towels underneath, to drain the oil off of them (without the paper towels sticking to the fries). Then let the fries rest on paper towels for just a minute while you reheat oil back to temp.

Homemade french fries are placed on paper towels to drain after first frying.

Cook The Homemade French Fries A SECOND Time!

Heat the oil back to 350 degrees. Once oil is at temperature again, carefully add the fries for a second cooking (this is what gives them a crispy texture on the outside). Cook for 3-4 additional minutes, until crispy and hot! Remove chips and drain on paper towels once again.

Crispy Homemade French Fries are fried a second time.

Season to taste with salt (or seasoning salt). Serve and enjoy your crispy homemade french fries!

Homemade french fries are lightly seasoned with salt, then served.

It’s really easy to make delicious and crispy homemade french fries in the comfort of your own kitchen. The key is cooking them twice and the temperature of the oil being ACCURATE and hot enough. If I can do it, so can YOU.  Hope you have a great day, and please pass the ketchup to dip my fries in, okay?

Looking For More SIDE DISH Recipes?

You can find all my recipes in the Recipe Index, located at the top of the page. I have a good variety of side dishes you might enjoy, including:


Interested In More Recipes?

Thank you for visiting this website. I appreciate you using some of your valuable time to do soIf you’re interested, I publish a newsletter 2 times per month (1st and 15th) with all the latest recipes, and other fun info. I would be honored to have you join our growing list of subscribers, so you never miss a great recipe!
There is a Newsletter subscription box on the top right side (or bottom) of each blog post, depending on the device you use, where you can easily submit your e-mail address (only) to be included in my mailing list.

You Can Also Find Me On Social Media:
Facebook page: The Grateful Girl Cooks!
Pinterest: The Grateful Girl Cooks!
Instagram: jbatthegratefulgirlcooks

Have a FANTASTIC day!

Author's signature

0 from 0 votes
Crispy Homemade French Fries
Prep Time
5 mins
Cook Time
11 mins
Total Time
16 mins
 
Crispy Homemade French Fries (restaurant quality) are EASY to make at home, using this classic 2 step process that ensures a crisp exterior, but soft inside!
Category: Side Dish
Cuisine: American
Keyword: homemade french fries
Servings: 4 servings
Calories Per Serving: 216 kcal
Author: JB @ The Grateful Girl Cooks!
Ingredients
  • 3 large russet potatoes
  • Vegetable oil (enough for 2 inches depth in skillet)
  • Salt (or seasoning salt), to taste
Instructions
  1. Peel, rinse, then cut potatoes, by slicing potatoes lengthwise into 1 inch slices, then cutting each slice into finger thickness sized strips. Dry the potatoes as much as you can by patting them dry with paper towels. The drier the potato strips, the less oil splatters you should have.
  2. Heat oil (enough to cover skillet with 2 inches of oil) in large skillet or stock pot until it reaches 350 degrees. Use a thermometer (meat or candy) to gauge temperature. I used my electric skillet, which has a temperature gauge on it. Carefully place cut, dried potatoes into hot oil. Let them cook for about 8 minutes, turning to cook on both sides. Remove potatoes from hot oil (I used a slotted spatula to help remove them). Place hot potatoes onto a baking pan or a wire rack with paper towels underneath, to drain the oil off of them).
  3. Let them rest for just a minute while you reheat oil temperature back to 350 degrees.
  4. Carefully add the chips for a second "fry". Cook for 3-4 additional minutes, until crispy and hot! Carefully remove fries from hot oil with a slotted spatula or spoon and drain on paper towels.
  5. Season to taste with salt (or seasoning salt). Serve hot, and enjoy!
Nutrition Facts
Crispy Homemade French Fries
Amount Per Serving (1 -1/4 of total)
Calories 216 Calories from Fat 90
% Daily Value*
Fat 10g15%
Saturated Fat 8g50%
Sodium 7mg0%
Potassium 666mg19%
Carbohydrates 28g9%
Fiber 2g8%
Protein 3g6%
Vitamin C 9.1mg11%
Calcium 21mg2%
Iron 1.4mg8%
* Percent Daily Values are based on a 2000 calorie diet.

Here’s one more to pin on your Pinterest boards!Crispy Homemade French Fries (restaurant quality) are EASY to make at home, using this classic 2 step process that ensures a crisp exterior, but soft inside!


Save

Save

Save

Save

Save

Save

Save

Save

Save

Save

Save

Save

Save

Save

Save

Save

Save

Save

Save

Save

Save

Save

Save

Bacon, Mushroom, Spinach And Cheese Omelette

Hungry for a filling breakfast? Whip up this bacon mushroom cheese omelette, with fresh spinach leaves thrown in for good measure. It’s delicious!Hungry for a filling breakfast? Whip up this bacon mushroom cheese omelette, with fresh spinach leaves thrown in for good measure. It's delicious!
Do you enjoy omelettes? My husband and I sure do… but only eat them a couple times each month. The other day we enjoyed a homemade breakfast together.  I made us each a Bacon, Mushroom, Spinach and Cheese Omelette, and decided to share it on my blog… because it tasted fantastic!

Because we both work from our home, we had a late breakfast… which ended up being so filling we didn’t have to eat lunch! I’m so thankful to have opportunities occasionally to leisurely share a nice breakfast together, sip on orange juice and coffee, and talk about the day ahead of us.

What’s IN This Bacon Mushroom Cheese Omelette?

I am NOT going to post a printable “recipe” for this omelette, because I know a lot of people like different ingredients in their omelettes. That being said… (and in case you ARE wondering) for 2 omelettes I used: 6 large eggs, tiny bit of milk (approx. 3 Tablespoons), salt and pepper, 2 teaspoon of butter, 4 slices bacon, 6 mushrooms, couple handfuls of fresh baby spinach, and a couple handfuls of grated cheddar cheese.

Pre-Cook the Bacon

As to the “process”… this is how I made these delicious omelettes.  To start off, cut 4 pieces bacon into small strips (using kitchen scissors). Slice fresh mushrooms (about 6), then cook mushrooms AND bacon together on medium heat in a large skillet until bacon is done and crisp.

The bacon will cook a bit faster because it has been cut into tiny strips.  Remove bacon strips and mushrooms from the skillet and drain them on several thicknesses of paper towels. Set aside.

Cooking bacon in skillet

Cooked bacon pieces draining on paper towel

In medium bowl combine eggs, a little bit of milk, and salt and pepper. Whisk well to combine.

Whisking eggs and milk in metal bowl
Preparing The Omelette

Melt half the butter in a small non-stick skillet on medium-low.  Pour in half of the egg mixture for ONE omelette.

As the omelette begins to cook around the edges, slightly lift up the edges with the spatula, tilt pan, and let some of the egg mixture run under the cooked edges all around the pan. I use a rubber spatula to do this. You will slowly let the “runny” uncooked egg mixture run to the underneath side of the cooked egg, and it will cook.

Omelette egg mixture beginning to cook in skillet

Once almost all of the egg mixture has “cooked”, place a handful of fresh baby spinach leaves onto one HALF side of the omelette.  The spinach leaves will slightly wilt from the heat of the egg mixture.

Raw spinach added to omelette in skillet
Now add half of the cooked bacon/mushroom mixture to half of the omelette, on top of the spinach.

Cooked bacon added to omelette with spinach
Now add a small handful of grated cheese to HALF of the omelette (on top of the bacon/mushroom mixture). I used Cheddar for this one, but use whatever you prefer!

Grated cheddar cheese added to eggs, bacon and spinach in skillet

Almost Done!

Using a rubber spatula, carefully flip the “empty” side of the omelette over onto the stuffed half, to cover.  The heat from the eggs will slightly melt the cheese. Gently lift and slide the omelette out of the skillet and onto the serving plate.

If you want cheese totally melted, just put omelette (on microwaveable plate) into microwave for a few seconds.  Remove and serve hot.  Repeat same cooking process for the remaining ingredients to make second omelette.

Omelette flipped over halfway over bacon, spinach and cheese

This really is a hearty breakfast… a three egg omelette (can cut back to 2 eggs per person, if desired), a couple pieces of bacon, some healthy spinach and creamy cheddar cheese makes for a delicious start to the day!

Make It Your OWN!

If you wish, you can also cut the omelette in half for smaller appetites!  Add a piece of toast, some juice and coffee, and you will be quite full, satisfied, and ready to take on the day!

The beauty of making your own omelette is that you can create one using YOUR favorite ingredients. You can substitute ham for the bacon, add green onions, pepperjack cheese, salsa, etc. The possibilities are endless!  Here’s to starting the day with a great breakfast.

Thanks for stopping by this blog.  My sincere hope is that your day will be blessed by the One who made you and loves you the most.  I know that my own life has been changed forever for the better because of the undeserved grace and mercy God has shown me through His son, Jesus. For that I am truly GRATEFUL.

Interested In More Recipes?

Thank you for visiting this website. I appreciate you using some of your valuable time to do soIf you’re interested, I publish a newsletter 2 times per month (1st and 15th) with all the latest recipes, and other fun info. I would be honored to have you join our growing list of subscribers, so you never miss a great recipe!
There is a Newsletter subscription box on the top right side (or bottom) of each blog post, depending on the device you use, where you can easily submit your e-mail address (only) to be included in my mailing list.

You Can Also Find Me On Social Media:
Facebook page: The Grateful Girl Cooks!
Pinterest: The Grateful Girl Cooks!
Instagram: jbatthegratefulgirlcooks

Author's signature

Here’s one more to pin on your Pinterest boards!Hungry for a filling breakfast? Whip up this bacon mushroom cheese omelette, with fresh spinach leaves thrown in for good measure. It's delicious!

Save

Save

Save

Save

Save

Save

Save

Save

Save

Save

Save

Save

Save

Save

Save

How To Make Ahead and Pre-Freeze Pie Fillings

Learn how to make and pre-freeze pie fillings for your favorite fruit pie with this easy tutorial. This is a great way to save time making pies!Learn how to make and pre-freeze pie fillings for your favorite fruit pie with this easy tutorial. This is a great way to save time making pies!
I am grateful I was shown how to make ahead and pre-freeze pie fillings. Have you ever done this before? If you haven’t… it’s a real time saver, especially if you have lots of fruit pies to prepare!

Having the filling already made for a pie or two and frozen is very convenient! Not too great if you are trying to watch your calories, but handy, nonetheless!

How To Pre-Freeze Pie Fillings

This tip works on just about all fruit pies. To pre-freeze pie fillings, begin by making a fruit pie filling according to your recipe’s instructions. Here is a photo of peach pie filling, for example.

Filling for fruit pies is made up according to your own recipe.

Cover a standard sized pie dish with several layers of plastic wrap, making sure to let the edges extend about 4-5 inches over the rim of the pie plate on all sides.

A standard pie dish is completely covered with plastic wrap.

Pour the pie filling into the prepared pie dish, and evenly distribute ingredients.  Bring in all the sides of the plastic wrap, to completely cover the pie filling.

All of the prepared filling for one pie is then added to dish.

Tightly seal the pie filling with the plastic wrap.

Now wrap the pie filling (pie dish included) in aluminum foil. Cover completely.  Place pie plate into freezer, and let the filling completely freeze (overnight is best!).

Aluminum foil covers the plastic wrapped pie filling.

Remove the pie plate after the filling is solidly frozen. Re-cover pie filling with aluminum foil, label, and freeze until you’re ready to bake pie.

Once frozen solidly, the pie plate is removed and filling stays in freezer. When you pre-freeze pie fillings, they will hold their shape in freezer.

What Do I Do When I’m Ready To Bake My Pie?

Once you are ready to bake a pie, remove the aluminum foil and plastic wrap from pie filling. Place the frozen pie filling, unthawed, into an unbaked pie crust (using same pie plate the filling was frozen in).

If using a double crust, place additional pie dough on top of frozen filling, and crimp edges to form crust. Make small slits on top of pie to let steam release.  Your pie can go into the oven frozen.

Baking A Pie AFTER You Pre-Freeze Pie Fillings

Bake your pie at the temperature given for the recipe you are using, but remember you will need to bake pie longer (on average 25-35 minutes longer), because the pie filling is frozen.

To make sure pie is fully baked, look for slow bubbling juices to come to the top of the crust without bursting. That is a good sign the inside is fully cooked through.  If the crust begins to brown too much, simply add aluminum foil strips over the crimped crust edges.

When done, remove and let pie cool slightly before serving.  That’s it! This is a convenient way to get pies ready ahead of time, to save you precious minutes (especially around the holidays) when there are a bazillion other things to do.

Baked and ready to enjoy!

Hope you will give this handy tip a try! It really can be a real time-saver!  Blessings.

Interested In More Recipes?

Thank you for visiting this website. I appreciate you using some of your valuable time to do soIf you’re interested, I publish a newsletter 2 times per month (1st and 15th) with all the latest recipes, and other fun info. I would be honored to have you join our growing list of subscribers, so you never miss a great recipe!
There is a Newsletter subscription box on the top right side (or bottom) of each blog post, depending on the device you use, where you can easily submit your e-mail address (only) to be included in my mailing list.

You Can Also Find Me On Social Media:
Facebook page: The Grateful Girl Cooks!
Pinterest: The Grateful Girl Cooks!
Instagram: jbatthegratefulgirlcooks

Author's signature

Here’s one more to pin on your Pinterest boards!How To Make Ahead And Pre-Freeze Pie Fillings / The Grateful Girl Cooks!

Save

Save

Save

Save

Save

Save

Save

Save

Old-Fashioned Crumb Coffeecake

You’ll enjoy this simple, yet delicious old-fashioned crumb coffeecake from recipe originally prepared for Los Angeles City School District students many years ago.Simple yet delicious old-fashioned crumb coffeecake from recipe originally prepared for Los Angeles City School District students many years ago.
I saw a recipe pop up on a friend’s Facebook page for a coffeecake that was served to Los Angeles City School students years ago. Wow! That brought back great memories of enjoying a piece from the cafeteria with friends, while on class breaks.

I just HAD to make it,  and as a result, here’s the recipe for a delicious Old-Fashioned Crumb Coffeecake! The recipe is so easy to prepare! Here’s how to make this flavorful coffeecake:

Scroll Down For A Printable Recipe Card At The Bottom Of The Page

How To Make This Old-Fashioned Crumb Coffeecake

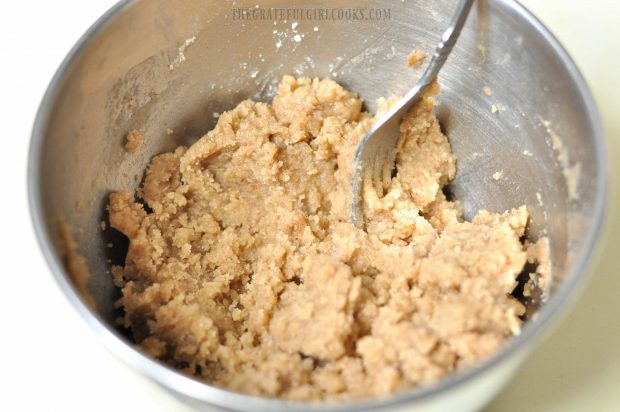
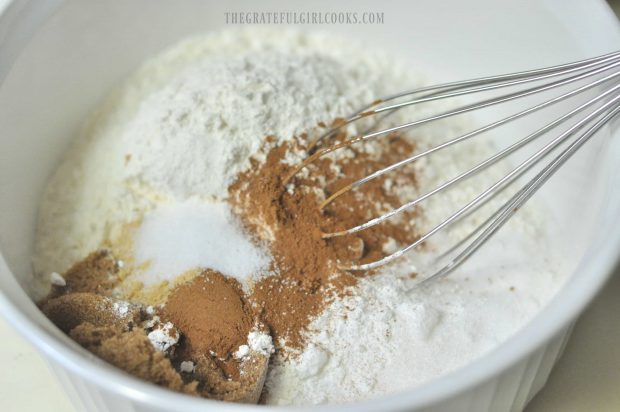
In a large bowl, mix together flour, brown sugar, granulated sugar, salt, nutmeg and oil. Mix until the ingredients become crumbly.  Set aside.

Flour, brown sugar, oil and spices are mixed in a bowl.A crumb topping is made for the coffeecake.

Measure out 1/2 cup of the crumb mixture and place it in a small separate bowl. Add 1 teaspoon of the cinnamon to this crumb mixture and mix to combine. Set aside.

Some of the crumb mixture is mixed with cinnamon.Cinnamon crumb mixture to add to coffeecake.

Mix And Add The Wet Ingredients

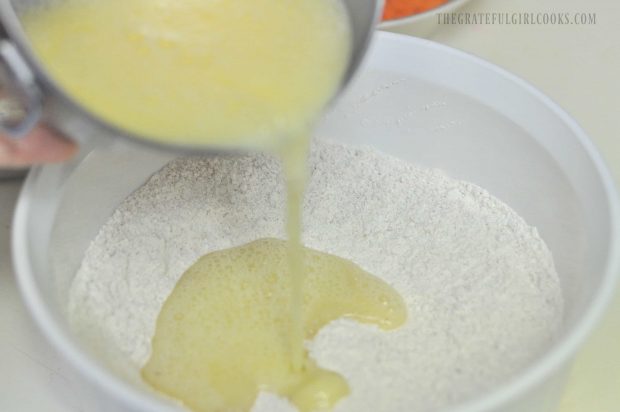
In another bowl, combine remaining teaspoon of cinnamon, baking soda, egg, and buttermilk. Mix this well with a fork or whisk. Add the buttermilk mixture to the flour mixture. Stir well to combine, but don’t over mix (only till ingredients are fully incorporated).

Buttermilk, eggs and cinnamon are mixed together, then added to the crumb coffeecake batter.Pouring wet ingredients into dry ingredients in bowl.Batter for the old-fashioned crumb coffeecake is now ready.

Prepare The Coffeecake For Baking

Grease a 9×13 pan (can use slightly smaller pan like an 8×12 for “taller” piece of coffeecake, but will need to adjust cooking time slightly). Pour in the batter and spread to distribute evenly.  Sprinkle the reserved crumb/cinnamon topping evenly over the top of the batter.

Coffeecake batter is poured into a 13x9" greased pan, for baking.

Streusel topping is added to the surface of the coffeecake batter.

Bake And Serve The Old-Fashioned Crumb Coffeecake!

Bake the old-fashioned crumb coffeecake in a 375 degree preheated oven for 30-40 minutes, until a toothpick inserted in middle of coffeecake comes out clean. TIP: Check the coffeecake at the 30 minute mark- mine only took 30 minutes to be fully baked! Be careful not to overcook the coffeecake or it can become dry.

When done, remove pan to a wire rack, and let the coffeecake cool before slicing and serving.

Crumb coffeecake has baked, and been cut into pieces to eat.

Hope you enjoy this tasty, simple old-fashioned crumb coffeecake!  It sure brought back memories for my husband and I, as we gobbled it up!

One piece of the old-fashioned crumb coffeecake, on a white plate.

Have a wonderful day. May you find encouragement for your heart and soul today! God bless you! Thanks for stopping by, and I hope you will come back soon for more delicious recipes.

Looking For More COFFEECAKE Recipes?

You can find all of my recipes in the Recipe Index, located at the top of the page. A few coffeecake recipes you might enjoy include:

Interested In More Recipes?

Thank you for visiting this website. I appreciate you using some of your valuable time to do soIf you’re interested, I publish a newsletter 2 times per month (1st and 15th) with all the latest recipes, and other fun info. I would be honored to have you join our growing list of subscribers, so you never miss a great recipe!
There is a Newsletter subscription box on the top right side (or bottom) of each blog post, depending on the device you use, where you can easily submit your e-mail address (only) to be included in my mailing list.

You Can Also Find Me On Social Media:
Facebook page: The Grateful Girl Cooks!
Pinterest: The Grateful Girl Cooks!
Instagram: jbatthegratefulgirlcooks

Author's signature

Recipe Source:  Article titled “Culinary SOS”, by Rose Dosti, Recipe submitted by Frances, (former pastry cook for LAUSD), published in the Los Angeles Times, January 27, 1994

0 from 0 votes
Old-Fashioned Crumb Coffeecake
Prep Time
10 mins
Cook Time
30 mins
Total Time
40 mins
 

Simple yet delicious old-fashioned crumb coffeecake from recipe originally prepared for Los Angeles City School District students many years ago.

Category: Breakfast
Cuisine: American
Keyword: crumb coffeecake
Servings: 12 servings
Calories Per Serving: 367 kcal
Author: JB @ The Grateful Girl Cooks!
Ingredients
  • 2 1/2 cups all purpose flour
  • 1 cup brown sugar (packed)
  • 1 cup granulated sugar
  • 1 teaspoon salt
  • 1 teaspoon ground nutmeg
  • 3/4 cup vegetable oil
  • 2 teaspoons cinnamon (divided)
  • 1 teaspoon baking soda
  • 1 large egg
  • 1 cup buttermilk
Instructions
  1. Preheat oven to 375 degrees.
  2. In a large mixing bowl, combine flour, brown and granulated sugars, salt, nutmeg and oil. Stir to combine until mixture is crumbly.
  3. Remove 1/2 cup of the crumbly mixture (for crumb topping)and place in small bowl. Add 1 teaspoon cinnamon to the reserved 1/2 cup crumbly mixture. Stir to combine. Set aside.
  4. In another bowl, combine remaining teaspoon cinnamon, baking soda, egg, and buttermilk. Whisk to combine ingredients. Add the liquid mixture to the flour mixture in large bowl. Stir to combine, but do not over mix.
  5. Grease or spray a 13x9 cake pan. Evenly spread the coffeecake batter in the pan. Sprinkle the reserved crumb topping evenly over the surface of the batter.
  6. Bake coffeecake for 30-40 minutes, or until a toothpick inserted into middle of cake comes out clean (mine only needed to cook for 30 minutes). Check coffeecake at the 30 minute mark, and be sure not to overcook (or coffeecake could be dry!).
  7. When done, remove pan to a wire rack and let coffeecake cool completely before serving.
Recipe Notes

If you use an 8x12 pan, be sure to adjust cooking times accordingly. Batter will be "thicker", so will need a bit more time to cook through.
13x9 pan=12 servings. If you want larger portions, this recipe will serve 8-10.

Nutrition Facts
Old-Fashioned Crumb Coffeecake
Amount Per Serving (1 piece)
Calories 367 Calories from Fat 135
% Daily Value*
Fat 15g23%
Saturated Fat 11g69%
Cholesterol 19mg6%
Sodium 318mg14%
Potassium 85mg2%
Carbohydrates 55g18%
Sugar 35g39%
Protein 3g6%
Vitamin A 60IU1%
Calcium 48mg5%
Iron 1.5mg8%
* Percent Daily Values are based on a 2000 calorie diet.

Here’s one more to pin on your Pinterest boards!Simple yet delicious old-fashioned crumb coffeecake from recipe originally prepared for Los Angeles City School District students many years ago.


Save

Save

Save

Save

Save

Save

Save

Save

Save

Save

Save

Save

Save

Save

Save

Save

Save

Save