Italian Orzo and Spinach Soup

Make a big pot of Italian Orzo Spinach Soup (delicious and easy to make), with pasta, spinach, Italian spices, and diced tomatoes in 30 minutes!Make a big pot of Italian Orzo Spinach Soup (delicious and easy to make), with pasta, spinach, Italian spices, and diced tomatoes in 30 minutes!
We’ve had some stormy, windy, and rainy weather in Oregon lately. I decided to make a big pot of Italian Orzo Spinach Soup for dinner! The soup sounded so scrumptious, comforting, and WARM on a wet, cold, and blustery day! It was wonderful (the soup, NOT the weather).

I found the recipe while searching Pinterest and decided to give it a try! Glad I did, because this was a very delicious meal, PLUS we had great leftovers for our family! Italian Orzo Spinach Soup is extremely easy to prepare! It also can be ready in about 30 minutes, which is fairly “do-able” on a busy night, after a long day!

Scroll down for A Printable Recipe Card At The Bottom Of The Page

How To Make Italian Orzo Spinach Soup

In a large soup pot, heat olive oil until very hot (on medium-high heat). Add diced onion, and sauté it, stirring occasionally for about 4-5 minutes. The onion will become translucent in color and soften.

Chopped onions are cooked in olive oil for soup

Add the diced carrots and celery to the onions, then add the minced garlic. Stir to combine, then cook the veggies, stirring occasionally for another 3-4 minutes.

Diced carrots, celery and garlic are cooked with onions for soup

Cook The Italian Orzo Spinach Soup

Now add your chicken stock, canned diced tomatoes, the orzo pasta, thyme, oregano, and rosemary. Stir all the ingredients together, then bring to a boil. Reduce heat to Low, then let the Italian orzo spinach soup cook on a low simmer, uncovered, for 10-12 minutes.

When done, the pasta should be al dente.  Be sure to stir the soup occasionally, scraping the bottom, to make sure the pasta doesn’t stick to the pot.

Italian spices, orzo, tomatoes, broth are added to soup

Add the fresh spinach to the hot soup. Stir to incorporate into the soup, then cook for 2 minutes. The spinach will wilt as it cooks in the soup.

Fresh baby spinach is added to Italian orzo soup

This is what the Italian orzo spinach soup will look like when it’s is done! The spinach will be wilted and the orzo pasta will have greatly expanded in size.

Italian orzo spinach soup is ready to serve in 30 minutes!

Time To Serve This Delicious Soup!

Now all that is left to do before serving is to taste test it. Season the soup with salt and pepper, to taste. To serve, ladle this delicious Italian orzo spinach soup into individual serving bowls. Top each bowl of soup with grated Parmesan cheese, for even better flavor! Serve… and enjoy a hot bowl of delicious, homemade Italian orzo spinach soup!

Grated Parmesan cheese is added to Italian orzo spinach soup before serving.

See how simple that was? In no time at all and with minimal effort, you can enjoy a big pot of Italian orzo spinach soup on a cold day! The leftovers are wonderful, as well. This would be a great soup to have for lunch with a side salad. YUM.  Sure hope you will consider making this Italian orzo spinach soup. I’m sure I will be making it again!

Looking For More SOUP Recipes?

You can find ALL my recipes in the Recipe Index, located at the top of the page. I have LOTS of great soup recipes you’ll enjoy, including:

Interested In More Recipes?

Thank you for visiting this website. I appreciate you using some of your valuable time to do soIf you’re interested, I publish a newsletter 2 times per month (1st and 15th) with all the latest recipes, and other fun info. I would be honored to have you join our growing list of subscribers, so you never miss a great recipe!
There is a Newsletter subscription box on the top right side (or bottom) of each blog post, depending on the device you use, where you can easily submit your e-mail address (only) to be included in my mailing list.

You Can Also Find Me On Social Media:

Facebook page: The Grateful Girl Cooks!
Pinterest:
The Grateful Girl Cooks!
Instagram:
jbatthegratefulgirlcooks

Have a blessed day.

Author's signature

Recipe Source: http://www.gimmesomeoven.com/italian-orzo-spinach-soup-recipe/

0 from 0 votes
Italian Orzo and Spinach Soup
Prep Time
5 mins
Cook Time
25 mins
Total Time
30 mins
 
Make a big pot of Italian Orzo and Spinach Soup (delicious and easy to make), with pasta, spinach, Italian spices, and diced tomatoes in 30 minutes!
Category: Soup
Cuisine: Italian
Keyword: Italian orzo spinach soup
Servings: 6 servings
Calories Per Serving: 329 kcal
Author: JB @ The Grateful Girl Cooks!
Ingredients
  • 2 Tablespoons olive oil
  • 1 small white onion (diced)
  • 1 cup diced carrots
  • 1 cup diced celery
  • 3 cloves garlic (minced)
  • 6 cups chicken OR vegetable stock
  • 1 can (14 ounces) fire-roasted diced tomatoes OR regular diced tomatoes
  • cups orzo pasta (uncooked)
  • ½ teaspoon dried thyme
  • ¼ teaspoon dried oregano
  • ¼ teaspoon dried rosemary
  • 4 cups fresh baby spinach leaves (loosely packed)
  • Salt and pepper , to taste
  • Grated Parmesan cheese (for garnish)
Instructions
  1. In a large soup pot, heat olive oil until very hot (on medium-high heat). Add diced onion, and sauté it, stirring occasionally for about 4-5 minutes. The onion will become translucent in color and soften.
  2. Add the diced carrots and celery, then add minced garlic. Stir to combine, then cook, stirring occasionally for another 3-4 minutes.
  3. Now add your chicken stock, canned diced tomatoes, the orzo pasta, thyme, oregano, and rosemary. Stir all the ingredients together, then bring to a boil. Reduce heat to Low, then let the soup cook on a low simmer, uncovered, for 10-12 minutes. When done, pasta should be al dente. Stir soup occasionally, scraping the bottom, to make sure pasta doesn't stick to the pot.
  4. Add the fresh spinach to the hot soup. Stir to incorporate into the soup, then cook for 2 minutes.
  5. Taste test soup. Season with salt and pepper, then ladle soup into individual serving bowls. Top each bowl of soup with grated Parmesan cheese, for even better flavor! Serve and enjoy!
Nutrition Facts
Italian Orzo and Spinach Soup
Amount Per Serving (1 serving)
Calories 329 Calories from Fat 81
% Daily Value*
Fat 9g14%
Saturated Fat 2g13%
Cholesterol 11mg4%
Sodium 574mg25%
Potassium 598mg17%
Carbohydrates 45g15%
Fiber 3g13%
Sugar 8g9%
Protein 14g28%
Vitamin A 5820IU116%
Vitamin C 10.9mg13%
Calcium 130mg13%
Iron 2.2mg12%
* Percent Daily Values are based on a 2000 calorie diet.

Here’s one more to pin on your Pinterest boards!Make a big pot of Italian Orzo Spinach Soup (delicious and easy to make), with pasta, spinach, Italian spices, and diced tomatoes in 30 minutes!


Save

Save

Save

Save

Save

Save

Save

Save

Save

Save

Save

Save

Save

Save

Save

Save

Save

Save

Starbucks Gingerbread (Copycat Recipe)

Starbucks Gingerbread (copycat recipe) is a yummy version of “a famous coffee place’s” beloved gingerbread loaf. Make it at home for a fraction of the price!Starbucks Gingerbread (copycat recipe) is a yummy version of "a famous coffee place's" beloved gingerbread loaf. Make it at home for a fraction of the price!
Our family recently gobbled up some of the most wonderful gingerbread with cream cheese icing I’ve ever made! It’s a knockoff recipe called Starbucks Gingerbread (Copycat Recipe), because it tastes as good (or better) than the kind available at our local “famous” coffee spot.

The gingerbread loaf is flavor-filled with lots of aromatic spices associated with Fall… cinnamon, nutmeg, cloves, and ginger, and is a very moist cake… definitely NOT dry!

This Starbucks gingerbread copycat recipe is perfect for a late afternoon snack, or a quick breakfast with a great cup of coffee or tea! My family thought it was absolutely fantastic, and it did not last long around our home, at all.

Scroll Down For A Printable Recipe Card At the Bottom Of The Page

How To Prepare Starbucks Gingerbread (copycat recipe)

First preheat your oven to 350 degrees.  Prepare a 9×5 inch bread loaf pan by spraying it with non-stick spray. To make your work easier, line the loaf pan with parchment paper. Leave some of the parchment paper well extended over the rim of the pan, so that you can easily lift the entire loaf out of the pan once cooled. Set pan aside.

Cream the room temperature butter and granulated sugar until it is fully combined. Add the vanilla and a room temperature egg. Beat the ingredients well until fully incorporated.

Mixing up the batter for Starbucks gingerbread loaf.

Add apple butter to the batter and mix well, to combine. I was fortunate to have some home canned Apple Butter available in our pantry. You can substitute applesauce for the apple butter, if desired. TIP: The blogger I got this recipe from used a 15 ounce can or pears, drained them and pureed them. That is another good substitute you could try.

Apple butter is added to Starbucks gingerbread batter.

Apple butter is mixed into the batter for Starbucks gingerbread (copycat recipe).

Sift the all purpose flour, baking soda, salt, ginger, cinnamon, cloves and nutmeg together. Slowly add the dry ingredients to the batter, mixing well to combine. Once the batter is fully mixed together, evenly spread it out in your prepared loaf pan.

Flour and spices are sifted before adding them to wet batter for Starbucks gingerbread.

Baking Starbucks Gingerbread (copycat recipe)

Place the batter-filled baking pan in a preheated oven. Bake at 350 degrees for about 55 minutes, or until a toothpick inserted into the top/middle part of the loaf comes out clean. TIP: Check the bread at 50 minutes to test for done-ness.

When the gingerbread is done, remove pan to a wire rack to cool. Once it has cooled, lift the Starbucks gingerbread loaf out of the pan, using the extended edges of the parchment paper.

Batter for Starbucks gingerbread (copycat recipe) is placed in paper lined bread pan to bake.

Make The Icing

While the gingerbread is baking, beat together 8 ounces of room temperature cream cheese. Trust me, it will blend much smoother if it’s at room temp. Add powdered sugar and vanilla, continuing to beat until icing is smooth and creamy, with no lumps. A bit too thick? Add a drop or two of water. Too thin? Add a bit more powdered sugar.

Frosting is mixed together for Starbucks gingerbread (copycat) while bread is baking.

Frost The Starbucks Gingerbread Loaf

Once the gingerbread has completely cooled, frost the top (and let it slightly run over the edges) of the gingerbread. You will end up with a LOT of frosting, which makes for a thick, creamy and amazing topping for the gingerbread.

If you don’t want that much frosting on the gingerbread (but it’s soooo good!), simply cut the icing quantity in half. Lightly dust the frosted gingerbread loaf with ground nutmeg.

Starbucks Gingerbread (copycat) is frosted once cool, then sprinkled with nutmeg.

Time To Eat!

Once the icing has had a chance to slightly firm up, slice yourself a piece, take a big bite, and ENJOY! It tastes TERRIFIC! A whole loaf with 8 slices can be made for a fraction of the cost of buying 8 pieces of this loaf at that “you-know-where” coffee spot!

A close up look at the Starbucks Gingerbread (Copycat Recipe) on a white plate.

Sure hope you will try this recipe for Starbucks gingerbread (a copycat recipe). I’m going to make it again around Christmas time, and I can’t wait!  Have a wonderful day!

Looking For More Recipes For “Sweet” Bread Loaves?

You can find all of my bread recipes in the Recipe Index, located at the top of the page. I have quite a few, including:

Interested In More Recipes?

Thank you for visiting this website. I appreciate you using some of your valuable time to do soIf you’re interested, I publish a newsletter 2 times per month (1st and 15th) with all the latest recipes, and other fun info. I would be honored to have you join our growing list of subscribers, so you never miss a great recipe! 

There is a Newsletter subscription box on the top right side (or bottom) of each blog post, depending on the device you use, where you can easily submit your e-mail address (only) to be included in my mailing list.

You Can Also Find Me On Social Media:

Facebook page: The Grateful Girl Cooks!
Pinterest:
The Grateful Girl Cooks!
Instagram:
jbatthegratefulgirlcooks

Author's signature

Recipe Source: http://theviewfromgreatisland.com/copycat-starbucks-gingerbread/

5 from 1 vote
Starbucks Gingerbread (Copycat Recipe)
Prep Time
10 mins
Cook Time
55 mins
Total Time
1 hr 5 mins
 
Starbucks Gingerbread (copycat recipe) is a yummy version of "a famous coffee place's" beloved gingerbread loaf. Make it at home for a fraction of the price!
Category: Starbucks Gingerbread (Copycat Recipe)
Cuisine: American
Keyword: Starbucks gingerbread
Servings: 8 slices
Calories Per Serving: 601 kcal
Author: JB @ The Grateful Girl Cooks!
Ingredients
For The Gingerbread Loaf:
  • 1/2 cup unsalted butter , room temperature
  • 1 cup granulated sugar
  • 1/2 teaspoon vanilla extract
  • 1 large egg , room temperature
  • 1 cup apple butter (can substitute applesauce or pear purée)
  • cups all purpose flour
  • 1 teaspoon baking soda
  • 1 teaspoon salt
  • 2 teaspoons ground ginger
  • 2 teaspoons ground cinnamon
  • 1 teaspoon ground cloves
  • ½ teaspoon ground nutmeg
For Cream Cheese Icing:
  • 8 ounces cream cheese , room temperature
  • 1 teaspoon vanilla extract
  • 2.5 cups powdered (confectioner's) sugar
Instructions
  1. Preheat your oven to 350 degrees F. Prepare a 9x5 inch bread loaf pan (Spray with non-stick spray, line with parchment paper with paper extending well past the rim of loaf pan for ease in lifting loaf out of pan once cool).
  2. Beat the butter and granulated sugar until completely mixed. Add vanilla and egg; beat well until batter is smooth and light. Add apple butter (or applesauce/pear puree). Blend well.
  3. In separate bowl, sift together the all purpose flour, baking soda, salt, ginger, cinnamon, cloves, and nutmeg. Slowly add the flour mixture to the wet mixture, a little at a time, mixing as you add. Once batter is fully mixed, evenly distribute it into the prepared loaf pan.
  4. Bake at 350 degrees for approximately 55 minutes. Check it at 50 minutes by inserting a toothpick into the top/middle of the loaf. If the toothpick comes out clean, the gingerbread is done. Once done, remove pan to a wire rack to cool completely before lifting the loaf from the pan.
  5. Prepare the icing while gingerbread is baking by using electric mixer and blending room temperature cream cheese, powdered sugar, and vanilla into a creamy, no lumps, thick icing.
  6. Once gingerbread has completely cooled, spread icing completely over the top (and let some run off the sides). Dust the icing with a small amount of ground nutmeg. Let icing firm up just a bit, then cut a piece, serve, and enjoy!
Recipe Notes

Note on Pear Purée: The original author of the recipe says she substituted a 15 ounce can of pears for the apple butter. She drained, then processed pears in food processor or blender until smooth.

Nutrition Facts
Starbucks Gingerbread (Copycat Recipe)
Amount Per Serving (1 g)
Calories 601 Calories from Fat 198
% Daily Value*
Fat 22g34%
Saturated Fat 13g81%
Cholesterol 82mg27%
Sodium 535mg23%
Potassium 110mg3%
Carbohydrates 97g32%
Fiber 1g4%
Sugar 75g83%
Protein 5g10%
Vitamin A 775IU16%
Vitamin C 0.2mg0%
Calcium 49mg5%
Iron 1.6mg9%
* Percent Daily Values are based on a 2000 calorie diet.

Here’s one more to pin on your Pinterest boards!Starbucks Gingerbread (copycat recipe) is a yummy version of "a famous coffee place's" beloved gingerbread loaf. Make it at home for a fraction of the price!


Save

Save

Save

Save

Save

Save

Save

Save

Save

Save

Save

Save

Save

Save

Save

Save

Save

Save

Save

Easy Island Glazed Pork Tenderloin

Easy to prepare in about 30 minutes, this scrumptious glazed pork tenderloin is coated with Island-inspired spices and a sweet/spicy glaze.Easy to prepare in about 30 minutes, this scrumptious glazed pork tenderloin is coated with Island-inspired spices and a sweet/spicy glaze.

If you are looking for an easy to prepare, budget friendly AND flavor-filled dinner, then you just have to try this Easy Island Glazed Pork Tenderloin! It tastes FANTASTIC! I enjoy cooking pork tenderloin, because it is fairly inexpensive. The pork tenderloin I used was one and a half pounds and cost $6.99, but gave us enough for 4 good sized servings.  It takes less time to cook than a large pork roast or thick chops.

This glazed pork tenderloin recipe is very easy to prepare, because there are not a lot of steps. A dry rub of “Island-inspired” spices are used to coat the tenderloin, and the meat is pan-seared. Next, a  sweet n’ slightly spicy glaze is added to the tenderloin, and then it bakes for about 25 minutes. That’s it!

There is so much phenomenal flavor on the pork, I really think you will enjoy this just as much as we did… it’s THAT good!  Here’s what you do to prepare this dish:

Scroll Down For A Printable Recipe Card At The Bottom Of The Page

How To Make This Glazed Pork Tenderloin

Preheat your oven to 350 degrees F. While oven is preheating, mix together the spices for the dry rub (salt, cinnamon, cumin, chili powder, and black pepper). Once mixed, rub the spices over the entire tenderloin (top, bottom and sides). Make sure to rub the spices into the meat, using your fingers.

Easy Island Glazed Pork Tenderloin / The Grateful Girl Cooks!

Easy Island Glazed Pork Tenderloin / The Grateful Girl Cooks!

Pan-Sear The Seasoned Tenderloin

Heat olive oil in an OVENPROOF skillet (see NOTES section of printable recipe for tip). Heat oil on medium-high. Once oil is very hot (but not smoking), add the seasoned tenderloin to the hot skillet. It should sizzle as it hits the hot oil.

Let it sear on one side for a couple minutes, then turn it over and brown the other side for two or three minutes. Turn the meat onto its side, as well, to give the tenderloin a nice brown appearance all over.

Easy Island Glazed Pork Tenderloin / The Grateful Girl Cooks!

Easy Island Glazed Pork Tenderloin / The Grateful Girl Cooks!

Prepare The Glaze

Mix up the glaze ingredients with a fork or spoon in a small bowl (brown sugar, minced garlic and sriracha sauce) until you end up with a thick glaze.

Easy Island Glazed Pork Tenderloin / The Grateful Girl Cooks!

Easy Island Glazed Pork Tenderloin / The Grateful Girl Cooks!

Glaze The Pork Tenderloin

Coat the tenderloin (top and sides) with the glaze. I used a spoon, and spread it all over. Some will run down the sides into the pan. No problem… it will be a wonderful sauce to drizzle over the cooked pork slices, when done.

Easy Island Glazed Pork Tenderloin / The Grateful Girl Cooks!

Bake The Easy Island Glazed Pork Tenderloin

Bake, uncovered, in a 350 degree oven for about 23-25 minutes. Cooking times will vary slightly, depending on the size tenderloin you are cooking, but make sure pork is cooked through, to an internal temperature of at least 145 degrees.

When the glazed pork tenderloin is done, remove the hot skillet (carefully) from the oven. Let pork sit, undisturbed for about 5 minutes to let the juices redistribute inside the pork.

Ready To Serve

Carve the glazed pork tenderloin into one inch slices, and place on serving plates. Make sure to spoon up some of that delicious glaze, and drizzle it over the slices of pork before serving!

Easy Island Glazed Pork Tenderloin / The Grateful Girl Cooks!

Easy Island Glazed Pork Tenderloin / The Grateful Girl Cooks!

Here is how I served this delicious Island glazed pork tenderloin, with a small baked potato and sautéed vegetable medley on the side. It was amazingly delicious; the meat was very tender (cut with a fork tender), and the flavor was outstanding!

Easy Island Glazed Pork Tenderloin / The Grateful Girl Cooks!

I really hope you will consider making this recipe for easy island glazed pork tenderloin. It is quick and easy to prepare, easy on the budget (4 servings for about $7) and truly… the spice combination is wonderful. We loved this dish, and I will definitely make it again.

Have a blessed day, and may God bless the work of YOUR hands in all you do for others!

Looking For More PORK Recipes?

You can find all of my recipes in the Recipe Index, located at the top of the page. I have lots of delicious recipes featuring pork you might enjoy, including:

Interested In More Recipes?

Thank you for visiting this website. I appreciate you using some of your valuable time to do soIf you’re interested, I publish a newsletter 2 times per month (1st and 15th) with all the latest recipes, and other fun info. I would be honored to have you join our growing list of subscribers, so you never miss a great recipe!
There is a Newsletter subscription box on the top right side (or bottom) of each blog post, depending on the device you use, where you can easily submit your e-mail address (only) to be included in my mailing list.

You Can Also Find Me On Social Media:
Facebook page: The Grateful Girl Cooks!
Pinterest: The Grateful Girl Cooks!
Instagram: jbatthegratefulgirlcooks

Easy Island Glazed Pork Tenderloin / The Grateful Girl Cooks!

Recipe Source:  http://www.lecremedelacrumb.com/2015/09/island-glazed-pork-tenderloin-html

0 from 0 votes
Easy Island Glazed Pork Tenderloin
Prep Time
5 mins
Cook Time
25 mins
Total Time
30 mins
 

Easy to prepare in about 30 minutes, this scrumptious glazed pork tenderloin is coated with Island-inspired spices and a sweet/spicy glaze.

Category: Entree
Cuisine: American
Keyword: glazed pork tenderloin
Servings: 4 servings
Calories Per Serving: 439 kcal
Author: JB @ The Grateful Girl Cooks!
Ingredients
  • pounds pork tenderloin (can use one medium-large tenderloin or 2 small)
  • 2 Tablespoons olive oil
For Spice Rub:
  • 2 teaspoons salt
  • 1 teaspoon ground cinnamon
  • 1 teaspoon cumin
  • 1 teaspoon chili powder
  • ½ teaspoon ground black pepper
For Glaze:
  • ¾ cup brown sugar (light or dark)
  • 2 Tablespoons minced garlic
  • 1 Tablespoon Sriracha sauce (SEE NOTES SECTION)
Instructions
  1. Preheat your oven to 350 degrees F.
  2. Mix together the spice rub (salt, cinnamon, cumin, chili powder, and black pepper) in a small bowl. Sprinkle the spice rub mix all over the pork tenderloin (on all sides). Use your fingers to rub the spices into the meat. Set aside.
  3. Measure the olive oil into an oven-proof skillet. Heat the oil on medium-high until it is pretty hot (but not smoking). Once oil is hot, add the pork to the skillet. Sear the meat for about 4-5 minutes total, turning pork occasionally until sides/top and bottom are all browned. Remove from heat.
  4. In a separate small bowl, mix the glaze ingredients together (brown sugar, minced garlic, and sriracha), until it becomes a thick glaze. Spread the glaze over the top and sides of the pork, to coat. Place the pork (in same ovenproof skillet) into your preheated oven. Cook, uncovered for 23-25 minutes at 350 degrees, until pork is cooked through. The length of cook time will vary, depending on size of tenderloin used (cooked pork tenderloin or pork roast should have a minimum internal temperature of 145 degrees). Once done, remove hot skillet from oven and let pork sit undisturbed for 5-6 minutes (to let juices redistribute through meat).
  5. To serve: Slice, place on serving plates, drizzle meat with extra glaze from skillet...and enjoy!.
Recipe Notes

Not familiar with Sriracha Sauce? It is an mildly hot chili sauce (usually located in Asian section at grocery store. Other hot sauces may be substituted, but sriracha is the best way to go for this recipe!
No ovenproof skillet? No problem. Sear meat in regular skillet. Place into casserole dish, add glaze, then bake!

Nutrition Facts
Easy Island Glazed Pork Tenderloin
Amount Per Serving (1 g)
Calories 439 Calories from Fat 117
% Daily Value*
Fat 13g20%
Saturated Fat 3g19%
Cholesterol 110mg37%
Sodium 1359mg59%
Potassium 772mg22%
Carbohydrates 44g15%
Sugar 40g44%
Protein 35g70%
Vitamin A 150IU3%
Vitamin C 4.8mg6%
Calcium 68mg7%
Iron 2.5mg14%
* Percent Daily Values are based on a 2000 calorie diet.

Here’s one more to pin on your Pinterest boards!Easy to prepare in about 30 minutes, this scrumptious glazed pork tenderloin is coated with Island-inspired spices and a sweet/spicy glaze.


Save

Save

Save

Save

Save

Save

Save

Save

Save

Save

Save

Save

Save

Save

Homemade Boursin Cheese

Homemade Boursin Cheese is a spreadable herb and garlic-flavored cheese. Served with crackers or crusty bread, it’s a perfect appetizer for any get together!Homemade Boursin Cheese is a spreadable herb and garlic-flavored cheese. Served with crackers or crusty bread, it's a perfect appetizer for any get together!

I’ve been testing recipes recently, to serve guests during the upcoming holidays. I have spent quality time in the kitchen, making various bruschetta and crostini appetizers.

One of the recipes I recently tried was this one, for a spreadable herb and garlic-flavored cheese. It’s called Homemade Boursin Cheese, to be exact! Homemade Boursin Cheese is so easy to make, and is CRAZY DELICIOUS!

Scroll Down For A Printable Recipe Card At The Bottom Of The Page

So, What Exactly Is Boursin Cheese?

That’s a GREAT question, and I’m so glad you asked. I researched it and found online (thanks Wikipedia) that besides the fact that it is a completely delicious cheese spread, it was created in Normandy, France in 1957 by Mr. Francois Boursin.

Mr. Boursin apparently got his inspiration from “fromage frais” (“fresh cheese”), in which his countrymen would enjoy fresh creamy cheese  they seasoned themselves – with their choice of fresh or dried herbs and garlic, then spread on bread.

Francois Boursin created a recipe for this delectable creamy cheese, and the recipe became known for being the first flavored FRESH cheese sold throughout France, and it’s popularity has spread throughout the world.

How To Make Homemade Boursin Cheese

The cheese is super simple to replicate, using whipped cream cheese and a variety of herbs and minced garlic. All the ingredients for boursin cheese are stirred together to blend and then refrigerated (covered) for 24 hours to let the flavors develop. That’s it!

Whipped cream cheese is the base ingredient used for homemade boursin cheese.

Dried herbs are added to softened cream cheese, then fully mixed together.

Dried herbs are added to whipped cream cheese to make homemade boursin cheese.

Fresh chopped chives and minced garlic are added to the boursin cheese mixture. The cheese is then mixed together, then covered and refrigerated. It only takes about 5 minutes to make homemade boursin cheese. Read on, to see why it needs to refrigerate overnight.

Fresh chopped chives are added to homemade boursin cheese in bowl.

Homemade Boursin Cheese Must Be Fully Refrigerated To Fully Develop Flavor

After the boursin cheese has been covered and refrigerated for 24 hours, it is ready to serve at any gathering of family and/or friends.

The reason it is refrigerated overnight is because this lets let the flavors fully come together to season the cheese. Yes… you will need to make the boursin cheese up a day before you want to serve it. Plan ahead! When we tasted the finished product, we were amazed at how much flavor was in the cheese!

Homemade Boursin Cheese in small bowl, before refrigerating overnight.

Time To Serve Some Homemade Boursin Cheese

Serve the finished boursin cheese with an assortment of crackers or small baguette slices.
Homemade Boursin Cheese is served with a variety of crackers.

This recipe is EASILY doubled or tripled to serve a small or large crowd, and it tastes amazing! Sure hope you will give this recipe a try!

Homemade Boursin Cheese is spread on crisp cracker, to serve.

I am definitely going to be making homemade boursin cheese again! I’m so glad I found this recipe, because it is such an EASY, PERFECT appetizer, and I recommend it heartily!

Sure hope you will consider making this delicious recipe! The prep time is less than 5 minutes, and 24 hours later, you will have an amazing appetizer spread to serve with your choice of crackers or bread! YUM!

Looking For More APPETIZER Recipes?

You can find these and other appetizer recipes in the Recipe Index, located at the top of the page.

Interested In More Recipes?

Thank you for visiting this website. I appreciate you using some of your valuable time to do soIf you’re interested, I publish a newsletter 2 times per month (1st and 15th) with all the latest recipes, and other fun info. I would be honored to have you join our growing list of subscribers, so you never miss a great recipe! 

There is a Newsletter subscription box on the top right side (or bottom) of each blog post, depending on the device you use, where you can easily submit your e-mail address (only) to be included in my mailing list.

You Can Also Find Me On Social Media:

Facebook page: The Grateful Girl Cooks!
Pinterest:
The Grateful Girl Cooks!
Instagram:
jbatthegratefulgirlcooks

Author's signatureRecipe Source:  http://theviewfromgreatisland.com/homemade-boursin-cheese-recipe/

0 from 0 votes
Homemade Boursin Cheese
Prep Time
5 mins
Cook Time
0 mins
Total Time
5 mins
 
Homemade Boursin Cheese is a spreadable herb and garlic-flavored cheese. Served with crackers or crusty bread, it's a perfect appetizer for any get together!
Category: Appetizer
Cuisine: French
Keyword: boursin cheese
Servings: 24 Tablespoons (1½ cups total)
Calories Per Serving: 51 kcal
Author: JB @ The Grateful Girl Cooks!
Ingredients
  • 12 ounces whipped cream cheese
  • 1 clove garlic , large clove-finely minced
2 "scant" teaspoons of each: NOT heaping!
  • 2 teaspoons dried parsley
  • 2 teaspoons dried oregano
  • 2 teaspoons dried tarragon
  • 2 teaspoons dried marjoram
  • 2 teaspoons dried thyme
  • 2 teaspoons dried sage
  • 2 teaspoons dried basil
  • 2 teaspoons dried chives (Note: I used fresh minced chives from our garden!)
Instructions
  1. Combine all ingredients in a medium sized bowl. Mix well (by hand) to fully incorporate all ingredients, and mixture is creamy.
  2. Cover bowl or place into an airtight covered container, and refrigerate cheese mixture for 24 hours to let flavors fully develop (for absolute best flavor).
  3. To serve, place bowl of Boursin cheese alongside a variety of gourmet crackers or French baguette slices. Spread cheese onto the crackers or bread with a small butter knife, and enjoy!
Recipe Notes

Prep time is just that... prep time to prepare the cheese. Does not take into account time for refrigeration.

Nutrition Facts
Homemade Boursin Cheese
Amount Per Serving (1 Tablespoon)
Calories 51 Calories from Fat 36
% Daily Value*
Fat 4g6%
Saturated Fat 2g13%
Cholesterol 15mg5%
Sodium 46mg2%
Potassium 41mg1%
Carbohydrates 1g0%
Protein 1g2%
Vitamin A 485IU10%
Vitamin C 2.9mg4%
Calcium 25mg3%
Iron 0.4mg2%
* Percent Daily Values are based on a 2000 calorie diet.

Here’s one more to pin on your Pinterest boards!Homemade Boursin Cheese is a spreadable herb and garlic-flavored cheese. Served with crackers or crusty bread, it's a perfect appetizer for any get together!


Save

Save

Save

Save

Save

Save

Save

Save

Save

Save

Save

Save

Save

Save

Save

Save

Save

Save

Save

Save

Spinach, Apple and Goat Cheese Salad with Apple Cider Vinaigrette

The other evening I made a Spinach, Apple and Goat Cheese Salad with Apple Cider Vinaigrette to go with dinner. It tasted wonderful, with crunchy apple slices, creamy goat cheese, spinach, dried cranberries, toasted pecans, and a fantastic dressing – amazing!Spinach, Apple and Goat Cheese Salad with Apple Cider Vinaigrette / The Grateful Girl Cooks!
Talk about a quick and easy salad (and homemade dressing)… wow! The entire salad and amazing vinaigrette dressing took only about 15 minutes from start to finish. My husband and I both loved it!

Here’s how you make this incredibly EASY salad:  Place baby spinach , thinly sliced apples, red onion, dried cranberries, toasted pecans (or walnuts), and goat cheese (half of total amount) into a large salad bowl.

Note: I sliced the apples right before serving. If preparing this salad ahead of time, remember to brush apple slices with lemon juice, to prevent them from darkening once exposed to air, OR slice the apples and add to salad just before serving.

Spinach, Apple and Goat Cheese Salad with Apple Cider Vinaigrette / The Grateful Girl Cooks!

Quickly whisk together the vinaigrette ingredients or place in a bottle or container with lid, and shake to fully combine.

Spinach, Apple and Goat Cheese Salad with Apple Cider Vinaigrette / The Grateful Girl Cooks!

Lightly drizzle the salad with vinaigrette.

Spinach, Apple and Goat Cheese Salad with Apple Cider Vinaigrette / The Grateful Girl Cooks!

Toss the salad to mix in the salad dressing, covering all ingredients.  Once salad has been tossed, top the salad with the other half of the goat cheese, and serve!  THAT’S IT!

See how easy that was? In case you are thinking that the salad is too easy to taste good, let me assure you, the vinaigrette is absolutely fantastic on this salad, AND the salad itself is FULL of great flavors AND textures (chewy, crunchy, creamy)!

Spinach, Apple and Goat Cheese Salad with Apple Cider Vinaigrette / The Grateful Girl Cooks!

I hope you have a wonderful day. Seek out someone you can encourage or give a helping hand to today.  We can ALL make a difference in this often hopeless world. Blessings.

Interested In More Recipes?

Thank you for visiting this website. I appreciate you using some of your valuable time to do soIf you’re interested, I publish a newsletter 2 times per month (1st and 15th) with all the latest recipes, and other fun info. I would be honored to have you join our growing list of subscribers, so you never miss a great recipe!
There is a Newsletter subscription box on the top right side (or bottom) of each blog post, depending on the device you use, where you can easily submit your e-mail address (only) to be included in my mailing list.

You Can Also Find Me On Social Media:
Facebook page: The Grateful Girl Cooks!
Pinterest: The Grateful Girl Cooks!
Instagram: jbatthegratefulgirlcooks

Spinach, Apple and Goat Cheese Salad with Apple Cider Vinaigrette / The Grateful Girl Cooks!

Recipe Source:  http://www.gimmesomeoven.com/my-favorite-apple-spinach-salad/

0 from 0 votes
Spinach, Apple and Goat Cheese Salad with Apple Cider Vinaigrette
Prep Time
15 mins
Cook Time
0 mins
Total Time
15 mins
 
Quick and easy to prepare, this salad is full of flavor and textures, thanks to spinach, crisp apple slices, red onion, cranberries, creamy goat cheese, toasted pecans, and apple cider vinaigrette!
Category: Salad
Cuisine: American
Keyword: spinach goat cheese salad
Servings: 4 servings
Calories Per Serving: 576 kcal
Author: JB @ The Grateful Girl Cooks!
Ingredients
For salad:
  • 10 ounces baby spinach
  • 2 apples (cored/thinly sliced- leave peel ON)
  • 2/3 cup dried cranberries
  • 1 cup pecans (or walnut halves), lightly toasted
  • Half small red onion , peeled/thinly sliced
  • 5 ounces goat cheese , DIVIDED. (May also substitute feta or bleu cheese)
For Apple Cider Vinaigrette:
  • 1/3 cup extra virgin olive oil
  • 1/4 cup apple cider vinegar (may also substitute champagne vinegar)
  • 2 Tablespoons fresh lemon juice
  • 1 Tablespoon Dijon mustard
  • 1 garlic clove , peeled/minced
  • 1 Tablespoon maple syrup (or honey), to sweeten
  • pinch salt and pepper , to taste
Instructions
  1. Place baby spinach, sliced apples, cranberries, toasted pecans (see NOTES section), red onion slices, and crumble HALF of the goat cheese into a large salad bowl.
  2. In separate bowl, jar, or container with lid, mix together the vinaigrette ingredients. Shake or whisk until all salad dressing ingredients are fully blended.
  3. Lightly drizzle the vinaigrette over the salad. Toss salad, to combine.
  4. Crumble the remaining goat cheese over the top of the salad, and serve!
Recipe Notes

To toast pecans (walnuts): Place in skillet (a dry skillet) and cook on medium-low for about 5 minutes, stirring/turning often, until nuts are lightly toasted and aromatic. Let nuts cool a minute or two, before adding to salad.

Nutrition Facts
Spinach, Apple and Goat Cheese Salad with Apple Cider Vinaigrette
Amount Per Serving (1 salad (1/4 of total))
Calories 576 Calories from Fat 396
% Daily Value*
Fat 44g68%
Saturated Fat 9g56%
Cholesterol 16mg5%
Sodium 242mg11%
Potassium 645mg18%
Carbohydrates 40g13%
Fiber 7g29%
Sugar 28g31%
Protein 11g22%
Vitamin A 7075IU142%
Vitamin C 28.5mg35%
Calcium 151mg15%
Iron 3.6mg20%
* Percent Daily Values are based on a 2000 calorie diet.

Here’s one more to pin on your Pinterest boards!Spinach, Apple and Goat Cheese Salad with Apple Cider Vinaigrette / The Grateful Girl Cooks!


Save

Save

Save

Save

Save

Save

Save

Save

Save

Save

Save

Save

Save

Save

Save

Rhubarb-Orange Marmalade

If you enjoy the flavor combination of rhubarb and oranges, then you will enjoy this recipe for canning Rhubarb-Orange Marmalade! You will enjoy this thick, delicious, rhubarb-orange marmalade (made without pectin) using fresh oranges and rhubarb, on toast and biscuits, etc.You will enjoy this thick, delicious, rhubarb-orange marmalade (made without pectin) using fresh oranges and rhubarb. Delicious spread for toast, biscuits, etc.
This rhubarb-orange marmalade recipe is fairly simple in that it requires NO PECTIN, and only three ingredients to make some incredible tasting jam! If you prefer a “not as chunky” JAM that uses Pectin to make this same flavor combo, be sure and check out my recipe for Rhubarb-Orange Jam… that recipe uses a slightly different process for preparing the jam.

Scroll Down For A Pintable Recipe Card At The Bottom Of The Page

Before beginning, prepare your water bath canner, jars and lids, according to canning and manufacturer guidelines.  Place rhubarb and granulated sugar into a large soup pot or Dutch oven.

Rhubarb and sugar mixing in large pan

Place the two oranges (I cut them into chunks and removed any seeds), INCLUDING PEEL, into a food processor. Process the oranges until blended and in small pieces.

Whole oranges are pulverized in food processor

Preparing the Rhubarb-Orange Marmalade For Canning

Add the processed oranges to the rhubarb-sugar mixture in pan. Bring the fruit mixture to a boil, stirring frequently. Once fruit begins boiling, turn down the heat and simmer mixture (uncovered) for about an hour, stirring frequently to prevent scorching.

Pulverized oranges added to rhubarb and sugar mixture
Mash the rhubarb with a potato masher as it cooks to help break down the rhubarb.  Cook marmalade until mixture “sheets” from a very cold spoon (about an hour). **Notes on the “sheeting” process can be found in the NOTES section of the printable recipe. Once the marmalade is done cooking, and the gel stage has been reached, remove the pan from the stove. If any foam has appeared on the surface of jam, remove it with a spoon and discard.

rhubarb-orange-marmalade3

Rhubarb, oranges and sugar cooking in large pan.

Fill the Jars

Carefully ladle the hot marmalade into prepared hot canning jars, leaving 1/4 inch headspace.

Prepared canning jars with funnel, ready for jam!

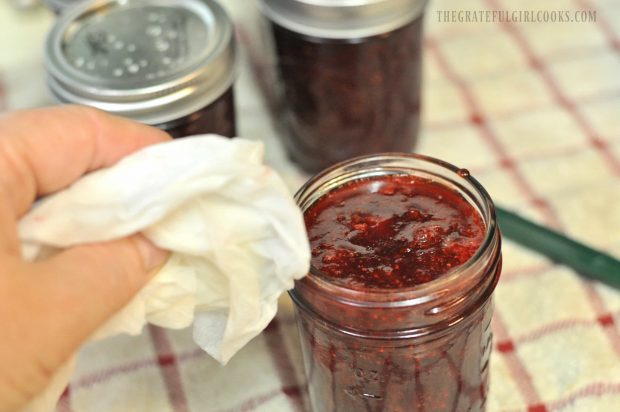
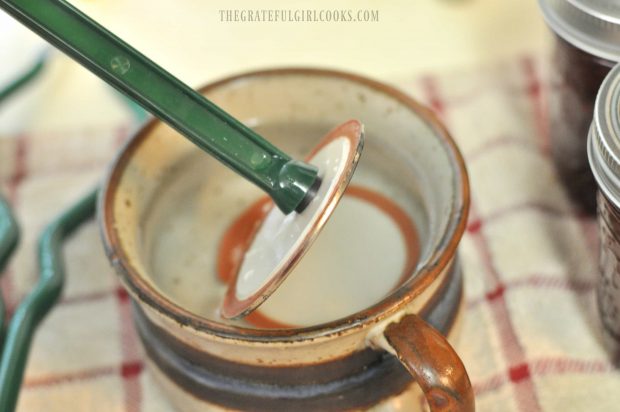
Be sure to remove any air bubbles, and adjust headspace, if necessary, by adding or removing jam to reach correct headspace.  Wipe the jar rims clean with a wet cloth or paper towel to remove spills and ensure a good seal. Place the prepared lids and screwband on jars; tighten to fingertip tight.

Processing The Jars Of Rhubarb-Orange Marmalade

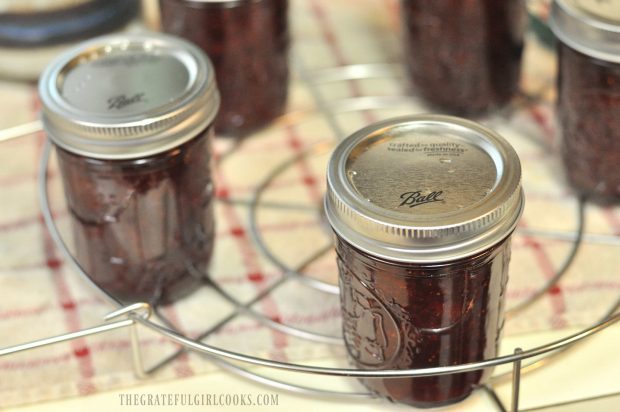
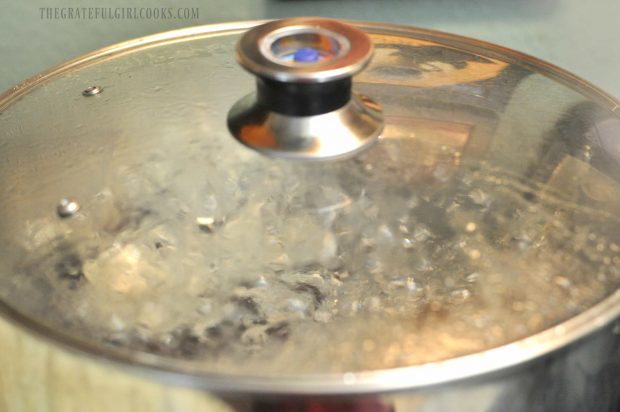
Place filled jars into simmering water onto canning rack in water bath canner. Make sure the jars are completely covered (by at least an inch above the top of jars) with hot water. Bring water to a boil; once water has reached a full boil, process jars for 10 minutes.

Jars of rhubarb-orange marmalade processing in canner

When done, carefully remove the HOT jars to a dish towel on countertop. Do not place directly on counter as temperature variations could cause jars to crack. Let the jars cool completely, undisturbed for 12-24 hours. Label and store. This recipe makes approximately 7- 8 half-pint or 4 pint jars of rhubarb-orange marmalade. Processing time is the same for both sized jars.

rhubarb-orange-marmalade3Jars of rhubarb-orange marmalade on dish towel after processing.

I love to make jams and marmalades to sample throughout the year OR to tuck into a gift basket for a friend when they least expect it!  This Rhubarb-Orange Marmalade is delicious!

Looking for More JAM Recipes?

You can find ALL my recipes in the Recipe Index, located at the top of the page. I have lots of delicious jam recipes, including:

Interested In More Recipes?

Thank you for visiting this website. I appreciate you using some of your valuable time to do soIf you’re interested, I publish a newsletter 2 times per month (1st and 15th) with all the latest recipes, and other fun info. I would be honored to have you join our growing list of subscribers, so you never miss a great recipe!
There is a Newsletter subscription box on the top right side (or bottom) of each blog post, depending on the device you use, where you can easily submit your e-mail address (only) to be included in my mailing list.

You Can Also Find Me On Social Media:
Facebook page: The Grateful Girl Cooks!
Pinterest: The Grateful Girl Cooks!
Instagram: jbatthegratefulgirlcooks

Have a GREAT day!

Author's signature

Recipe Source:  http://www.tasteofhome.com/recipes/rhubarb-marmalade/

↓↓ PRINTABLE RECIPE BELOW ↓↓

5 from 1 vote
Rhubarb-Orange Marmalade
Prep Time
1 hr 10 mins
Cook Time
10 mins
Total Time
1 hr 20 mins
 
You will enjoy this thick, delicious, rhubarb-orange marmalade (made without pectin) using fresh oranges and rhubarb. Delicious spread for toast, biscuits, etc.
Category: Jam / Canning and Preserving
Cuisine: American
Keyword: rhubarb orange marmalade
Servings: 8 half-pints (approx)
Calories Per Serving: 38 kcal
Author: JB @ The Grateful Girl Cooks!
Ingredients
  • 6 cups fresh rhubarb , chopped (See NOTES section for info on using frozen rhubarb)
  • 6 cups sugar
  • 2 medium oranges (including peel), cut into chunks
Instructions
  1. Place the chopped rhubarb and sugar into a large Dutch oven or soup pot.
  2. Place the orange chunks (yes, peel included!) into a food processor. Process the oranges until small pieces are left. Add the orange pieces to the rhubarb/sugar mixture in the Dutch oven. Stir well, to combine.
  3. Bring mixture to a full boil, then reduce heat to a simmer. Cook, uncovered for about 1 hour, stirring quite often (to prevent burning on bottom of pot). When done the marmalade should "sheet" off of a spoon. (See NOTES section for explanation of process).
  4. While marmalade is cooking, prepare water bath canner, canning jars and lids, according to manufacturer and USDA canning instructions.
  5. Remove the marmalade and pan from the heat. Skim any foam off the top of the marmalade and discard. Ladle the hot marmalade into prepared and heated pint jars. Leave 1/4 inch headspace in each jar. Remove any air bubbles, and adjust the headspace by adding or removing marmalade. Wipe the lids of each jar well with a damp towel to ensure a good seal. Place the heated flat lid onto each jar, then screw on the jar band until it is fingertip-tight.
  6. Carefully place hot jars into simmering water in the canner. Make sure jars are completely covered with hot water by at least an inch. Bring water in canner to a full boil; process jars for 10 minutes.
Recipe Notes

If using frozen rhubarb... measure frozen, then thaw. Drain in colander-don't press juice out
Processing time is for 1,000 feet of altitude and lower. Be sure to add a minute of processing time for each 1,000 feet higher in altitude you are.
"Sheeting process": Dip a very cold metal spoon into hot marmalade. Lift up spoon; hold it horizontally. The syrup will run off the edge of spoon. As it cooks, the syrup will usually run off in drops, two at a time. Keep cooking. Once jam has cooked enough that the drops mix together and "sheet" (blob together in solid sheet) off a very cold spoon, you've reached the gel stage.

Nutrition Facts
Rhubarb-Orange Marmalade
Amount Per Serving (1 Tablespoon)
Calories 38
% Daily Value*
Potassium 20mg1%
Carbohydrates 9g3%
Sugar 9g10%
Vitamin A 10IU0%
Vitamin C 1.6mg2%
Calcium 6mg1%
* Percent Daily Values are based on a 2000 calorie diet.

Here’s one more to pin on your Pinterest boards!
You will enjoy this thick, delicious, rhubarb-orange marmalade (made without pectin) using fresh oranges and rhubarb. Delicious spread for toast, biscuits, etc.


Save

Save

Save

Save

Save

Save

Save

Save

Save

Save

Save

Save

Save

Save

Save

Save

Save

Poppyseed Cake

This Poppyseed Cake is absolutely EASY, delicious, serves 12 as dessert or coffeecake, and takes only 5 minutes prep time, using a boxed cake mix!This Poppyseed Cake is absolutely EASY, delicious, serves 12 as dessert or coffeecake, and takes only 5 minutes prep time, using a boxed cake mix!
Want a fabulous tasting cake recipe that only has a few ingredients, takes 5 minutes to throw together, and can be served as dessert OR coffeecake? Well if you do, this Poppyseed Cake is perfect for you!

I found the recipe for this poppyseed cake in my Mom’s trusty recipe box over 35 years ago and wrote it down on a little 3×5 index card. It looked easy to prepare, and turned out fantastic the very first time I made it, so I’ve been making it ever since!

The recipe is totally EASY, EASY, EASY, and tastes amazing, due to the subtle flavor imparted into a simple boxed yellow cake mix by adding a couple additional ingredients like poppyseeds and cooking sherry!

Scroll Down for A Printable Recipe Card At The Bottom Of The Page

Prepare The Cake Batter

The poppyseed cake can be in the oven in about 5 minutes! How’s THAT for easy? Combine cake mix, oil, cooking sherry, eggs and poppyseeds in a large bowl. Mix well for 4-5 minutes. That’s it! The cake batter is ready!

Poppyseeds, cake mix, and eggs in mixing bowl.

Batter for poppyseed cake in white bowl, and ready to pour into pan.

Bake The Poppyseed Cake

Pour the cake batter into a very well-greased bundt pan. Make sure the batter is evenly distributed.  Bake the poppyseed cake at 350 degrees for 45 minutes. You can test for “done-ness” by inserting a toothpick into the center of the cake. If it comes out clean, then it is ready!

When the cake is done, remove the bundt pan from the oven, and transfer the pan to a wire rack to completely cool the cake.

Here is the poppyseed cake batter in bundt pan, ready to bake.

Removing the Poppyseed Cake From the Bundt Pan

Once the cake has cooled completely, run a spatula or butter knife around the edges of the cake, because it helps to loosen the edges. Place a large plate upside down on top of the bundt pan, and holding both bundt pan and plate securely, flip the cake upside down, inverting the cake onto the plate.

If you greased the pan really well, it should come right out onto the plate.  Once onto plate, carefully turn the cake over again so it is right side up on a serving platter.

Fully baked poppyseed cake in bundt pan on rack

Make The Decorative Icing To Drizzle On the Cake

Decorating the cake with an icing drizzle is completely optional (cake tastes great all by itself), and the icing adds a nice fancy touch, and a little sweetness.

In a small bowl, mix together the icing ingredients until you have an icing that can be decoratively drizzled over the surface of the cake. Let this icing firm up completely, once you’ve drizzled it onto cake.

Icing dripping off of the poppyseed cake.

Time To Serve The Poppyseed Cake!

Slice and serve! If serving poppyseed cake as a dessert, a scoop of ice cream is a perfect accompaniment.  When serving it as a breakfast or snack coffeecake, it tastes great with a good cup of coffee or tea! Doesn’t it look yummy?

One slice of poppyseed cake, sitting on a plate.

The flavor is wonderful, and the cake is not dry!  Sure hope you will consider making this Poppyseed Cake. It’s also a wonderful addition to any brunch table, too.

A fork and bite of the poppyseed cake on a white plate.

Thanks for taking time out of your day to give this recipe a “look”. Really glad I found it in my Mom’s old recipe box so long ago.  I don’t have a clue who the original author was, but am thankful for the recipe, because I’ve made it many, many times over the past 35 years!

By the way, if you enjoy cakes that can double as dessert OR coffeecake, be sure to check out my recipe for Hummingbird Cake! Have a wonderful day.

Looking For More CAKE Recipes?

You can find all of my cake recipes in the Recipe Index, located at the top of the page. A few favorites include:

Interested In More Recipes?

Thank you for visiting this website. I appreciate you using some of your valuable time to do soIf you’re interested, I publish a newsletter 2 times per month (1st and 15th) with all the latest recipes, and other fun info. I would be honored to have you join our growing list of subscribers, so you never miss a great recipe!
There is a Newsletter subscription box on the top right side (or bottom) of each blog post, depending on the device you use, where you can easily submit your e-mail address (only) to be included in my mailing list.

You Can Also Find Me On Social Media:
Facebook page: The Grateful Girl Cooks!
Pinterest: The Grateful Girl Cooks!
Instagram: jbatthegratefulgirlcooks

Author's signature

Recipe Source:  My Mom (years and years ago)

0 from 0 votes
Poppyseed Cake
Prep Time
5 mins
Cook Time
45 mins
Total Time
50 mins
 

This Poppyseed Cake is absolutely EASY, delicious, serves 12 as dessert or coffeecake, and takes only 5 minutes prep time, using a boxed cake mix!

Category: Dessert or Coffeecake
Cuisine: American
Keyword: poppyseed cake
Servings: 12 servings
Calories Per Serving: 363 kcal
Author: JB @ The Grateful Girl Cooks!
Ingredients
For cake:
  • 1 box yellow cake mix (get the kind that says "with pudding")
  • 3/4 cup cooking sherry
  • 3/4 cup vegetable oil
  • 4 large eggs
  • 1/3 cup poppyseeds
For Icing:
  • 1 cup powdered sugar
  • 1 teaspoon vanilla extract
  • a few sprinkles water at a time (until icing becomes a "drizzling" consistency)
Instructions
  1. Preheat oven to 350 degrees F. Grease a bundt pan very well. Set aside.
  2. In large bowl, mix cake ingredients for 5 minutes (boxed yellow cake mix, cooking sherry, oil, eggs and poppyseeds). Pour batter evenly into greased/floured cake pan. Bake cake at 350 degrees for 45 minutes. Remove pan to wire rack to cool.
  3. While cake is cooling, mix up icing ingredients in small bowl. Add sprinkles of water until icing is thick enough to drizzle over top of finished cake. (Too thick... add couple drops water. Too thin... add more powdered sugar).
  4. Once cake has completely cooled, invert a plate over top of bundt pan, and holding both plate and bundt pan securely, flip the cake over. Once cake is on plate, carefully turn it over once more on serving platter so the right side is facing up. Decoratively drizzle the icing over top of cake. Let icing firm up, then serve and enjoy this tasty cake for dessert (with a scoop of ice cream) or as a coffeecake for breakfast!
Recipe Notes

The baking time indicated is designed for a bundt pan. If using a standard sized cake pan, your cooking time will need to be adjusted slightly.

Nutrition Facts
Poppyseed Cake
Amount Per Serving (1 slice)
Calories 363 Calories from Fat 153
% Daily Value*
Fat 17g26%
Saturated Fat 12g75%
Cholesterol 54mg18%
Sodium 336mg15%
Potassium 70mg2%
Carbohydrates 46g15%
Fiber 1g4%
Sugar 28g31%
Protein 3g6%
Vitamin A 80IU2%
Calcium 140mg14%
Iron 1.5mg8%
* Percent Daily Values are based on a 2000 calorie diet.

Here’s one more to pin on your Pinterest boards!This Poppyseed Cake is absolutely EASY, delicious, serves 12 as dessert or coffeecake, and takes only 5 minutes prep time, using a boxed cake mix!


Save

Save

Save

Save

Save

Save

Save

Save

Save

Save

Save

Save

Save

Save

Save

Mom’s Swedish Meatballs and Rice

Mom’s Swedish Meatballs and Rice is a family and budget friendly dinner that feeds 6 with one pound of hamburger meat… and it’s delicious!Mom's Swedish Meatballs and Rice is a family and budget friendly dinner that feeds 6 with one pound of hamburger meat... and it's delicious!
When I was growing up, my mother sure knew how to stretch a dollar! Mom’s Swedish Meatballs and Rice was one of the meals she fed our family of 5. She did this using only 1 pound of hamburger meat, a few other ingredients and served these delicious meatballs and gravy with rice! We LOVED this meal!

Scroll Down For A Printable Recipe Card At The Bottom Of The Page

Fast forward over 40 years later, and I still make this scrumptious meal! Now… my Mom is about as far from being Swedish as one could imagine (she’s a Texas gal), yet this was the name given it when I copied down the recipe from her over 40 years ago! Trust me, Swedish meatballs, with gravy and rice is a fantastic tasting dinner (the leftovers are awesome, as well).

Swedish meatballs are super simple to make, the gravy is even easier, and it’s fairly impossible to mess up a pan of rice, right?  Trust me when I say this is simple meal to prepare; it’s a great way to feed several people a filling meal without breaking the bank! if you like meatballs, be sure and check out some of my other meatball recipes, including Easy Meatballs for Spaghetti, Meatballs Stroganoff, Hawaiian Meatballs, and Hoisin Asian Meatballs.

How To Make Swedish Meatballs

Here’s what you do:  Place the meatball ingredients in large bowl and mix well, to combine (ground beef, bread crumbs, milk, egg, onion, salt, pepper & nutmeg).

Hamburger meat, onions and spices ready to make Swedish meatballs.

Mixing ingredients for Swedish meatballs in large mixing bowl.

Scoop out a small portion of meat, and roll it between your clean hands to form 1 inch sized meatballs. A full pound of ground beef “should” yield about 24-25 small meatballs. I was using slightly less than a full pound and ended up with 22 Swedish meatballs. Set meatballs on waxed paper or foil until all have been formed.

Meatballs are formed out of hamburger meat and spices, etc.
Brown The Swedish Meatballs

Heat shortening in large skillet (may substitute oil, if necessary). When skillet is hot, add meatballs in single layer. Let brown on one side, then carefully turn to brown all sides (I use tongs). If necessary, add additional shortening or oil to prevent sticking.  When meatballs are browned on all sides, remove them to a large plate to rest.  Keep meatballs warm.

Swedish meatballs are browned in skillet.

The Swedish meatballs are browned on all sides.

Make The Gravy

Now it’s time to make the gravy!  Using the same pan (without cleaning it out), add hot water to meat drippings in skillet. Stir to mix and heat on low, scraping up the browned bits from the bottom of the skillet. This will help “de-glaze” the pan, and will incorporate all those yummy browned bits off the bottom of the skillet into your gravy.

Hot water is added to Swedish meatball drippings in skillet to begin making gravy.

The browned bits in skillet from cooking Swedish meatballs go into the gravy.

Now add the water/flour mixture to the hot water mixture in skillet. Whisk well as you pour, to fully combine ingredients. Bring the gravy to a boil. The gravy will begin to thicken as you heat and stir it. Once thickened, taste test, and season gravy with salt/pepper, if desired.

Water, flour, and seasonings poured into Swedish meatballs gravy.

Whisking ingredients for Swedish meatballs gravy in skillet.

Add Swedish Meatballs Back Into The Skillet

Once gravy has thickened, add the browned meatballs back into the skillet. Turn to coat each meatball with gravy. Put a lid on the skillet, and cook on low for 30 minutes. Check occasionally.

If necessary, add a bit more water to skillet and mix it in, to ensure you have enough gravy. You just gotta have enough gravy for Swedish meatballs, right?

Mom's Swedish meatballs are added back into gravy in skillet.

While meatballs are cooking, cook rice using your “normal” method (I use a rice cooker).  When meatballs and rice are done, the meal is ready. Make sure to coat the Swedish meatballs in gravy before placing on serving platter.

Mom's Swedish Meatballs finish cooking in the gravy.

Serve The Swedish Meatballs And Rice

To serve, arrange the cooked hot rice in a ring shape on a serving platter.  Place sprigs of fresh parsley around the rice. Carefully place the Swedish meatballs into the center of the ring. Pour remaining gravy over the meatballs.  Serve HOT, and enjoy this delicious meal!

Mom's Swedish Meatballs with gravy are served on top of a bed of rice.

I love recipes that don’t cost an arm and a leg to prepare for my family. This simple Swedish meatballs meal fits the bill perfectly, and tastes fantastic, too!  Hope you will consider making this “comfort food” dish for those you love. It really does taste wonderful! 

Blessings to you on this day. Thanks for stopping by, and please come back again soon. Also be sure to check out ALL my recipes in the Recipe Index, located at the top of the page.

Interested In More Recipes?

Thank you for visiting this website. I appreciate you using some of your valuable time to do soIf you’re interested, I publish a newsletter 2 times per month (1st and 15th) with all the latest recipes, and other fun info. I would be honored to have you join our growing list of subscribers, so you never miss a great recipe!
There is a Newsletter subscription box on the top right side (or bottom) of each blog post, depending on the device you use, where you can easily submit your e-mail address (only) to be included in my mailing list.

You Can Also Find Me On Social Media:
Facebook page: The Grateful Girl Cooks!
Pinterest: The Grateful Girl Cooks!
Instagram: jbatthegratefulgirlcooks

Author's signature

Recipe Source: My MOM (over 40 years ago)

0 from 0 votes
Mom's Swedish Meatballs and Rice
Prep Time
15 mins
Cook Time
30 mins
Total Time
45 mins
 

Mom's Swedish Meatballs and Rice is a family and budget friendly dinner that feeds 6 with one pound of hamburger meat... and it's delicious!

Category: Entree
Cuisine: Swedish
Keyword: Swedish meatballs
Servings: 6 servings
Calories Per Serving: 454 kcal
Author: JB @ The Grateful Girl Cooks!
Ingredients
For meatballs:
  • 1 pound ground beef
  • 1 cup bread crumbs
  • 1/2 cup milk
  • 1 egg , well beaten
  • 1 small brown onion (or 1/2 large), finely chopped
  • 2 teaspoons salt
  • 1/8 teaspoon black pepper
  • 1/4 teaspoon ground nutmeg
  • Shortening , approx. 2 Tablespoons (to cook meatballs in-may substitute oil)
For gravy:
  • 2 cups very hot water
  • 2 Tablespoons flour
  • 6 Tablespoons cold water
  • Salt and pepper (to season)
For accompaniment:
  • 4 cups hot cooked rice (I used 2 cups dry rice to start, for quantity shown)
  • Butter (for rice, if desired)
  • Fresh parsley sprigs , for garnish (optional)
Instructions
  1. Place ground beef, bread crumbs, milk, egg, onion, salt, pepper and nutmeg in large bowl. Mix well, to combine. Form mixture into 1 inch meatballs; set formed meatballs onto wax paper or foil.
  2. Heat shortening (or oil) in large skillet on medium heat. Add meatballs to hot oil in single layer. Brown on all sides (a minute or two per side). If necessary, add additional shortening (or oil) if necessary, to prevent sticking. When meatballs are fully browned, remove them to a plate, and keep warm.
  3. Add hot water back into skillet (DO NOT CLEAN OUT SKILLET). Stir while cooking on low, to deglaze the skillet and scrape up the flavorful browned bits off bottom of skillet. In a separate small bowl, combine cold water and flour. Mix really well, to remove lumps. Add this mixture to hot liquid in skillet, whisking well while adding. Continue to whisk gravy to remove any lumps. Bring mixture to a boil, stirring often until mixture thickens. Taste gravy... add salt and pepper to season, if desired.
  4. Add meatballs back into skillet. Turn to coat with gravy. Put a lid on the skillet; cook meatballs and gravy for 30 minutes, adding additional water to gravy, if necessary, to ensure there will be enough gravy (as gravy will cook down a bit).
  5. While meatballs are cooking, prepare rice (using the method you normally use to cook rice).
  6. When meatballs and rice are done, place cooked rice in a ring shape around outside of serving platter. Garnish rice with sprigs of fresh parsley. Carefully spoon the meatballs into center of ring, and pour gravy over the top of meatballs. Serve hot, and enjoy!
Nutrition Facts
Mom's Swedish Meatballs and Rice
Amount Per Serving (4 meatballs + rice)
Calories 454 Calories from Fat 171
% Daily Value*
Fat 19g29%
Saturated Fat 7g44%
Cholesterol 81mg27%
Sodium 978mg43%
Potassium 342mg10%
Carbohydrates 47g16%
Fiber 1g4%
Sugar 3g3%
Protein 20g40%
Vitamin A 80IU2%
Vitamin C 1.3mg2%
Calcium 90mg9%
Iron 2.8mg16%
* Percent Daily Values are based on a 2000 calorie diet.

Here’s one more to pin on your Pinterest boards!Mom's Swedish Meatballs and Rice is a family and budget friendly dinner that feeds 6 with one pound of hamburger meat... and it's delicious!


Save

Save

Save

Save

Save

Save

Save

Save

Save

Save

Save

Save

Save

How To Roast Pumpkin Seeds

It’s easy to roast pumpkin seeds, once you’re done carving your Halloween pumpkins! With a few common ingredients, you can enjoy this simple crunchy snack!It's easy to roast pumpkin seeds, once you're done carving your Halloween pumpkins! With a few common ingredients, you can enjoy this simple crunchy snack!
I love this snack! How cool is it that not only can we carve and decorate pumpkins for the Fall season, but we can roast and eat the seeds, too! Today I’m happy to show you how easy it is to roast pumpkin seeds!
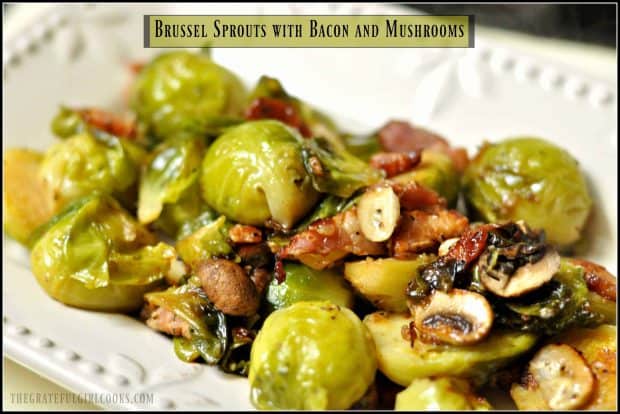
Do you roast pumpkin seeds?  When I was little, my mom would occasionally make this snack before Halloween. I love the slightly salty crunch of a pumpkin seed roasted just right! Pumpkins are beginning to make their annual appearance at grocery stores and Farmers Markets all over town!

This seems like the right time to post a quick “how to”, in case you’ve never made your own, and want to learn how! You can certainly add additional spices to the basic roasted pumpkin seeds to make them taste just how you like them. This is simply the basic “how to”.

Scroll Down For a Printable Recipe Card At The Bottom Of The Page

Choosing pumpkins to carve and to roast pumpkin seeds is always fun!

First you will need to carefully cut your pumpkin open. You can use any kind of traditional pumpkin you want. You will definitely want to put newspaper or some other paper (wax or parchment) under the pumpkin, cause it can get a bit messy! My favorite tip for getting seeds to roast AND pumpkin puree from the pumpkins is below.

You Can Also Make Pumpkin Puree From Your Pumpkin

Not only can you roast seeds, you can make pumpkin puree from fresh pumpkins! My recommendation is to use “pie” or “sugar” pumpkins (smaller variety of pumpkins) if you want to roast pumpkin seeds AND use the “meat” of the pumpkin to make puree to store in the freezer.
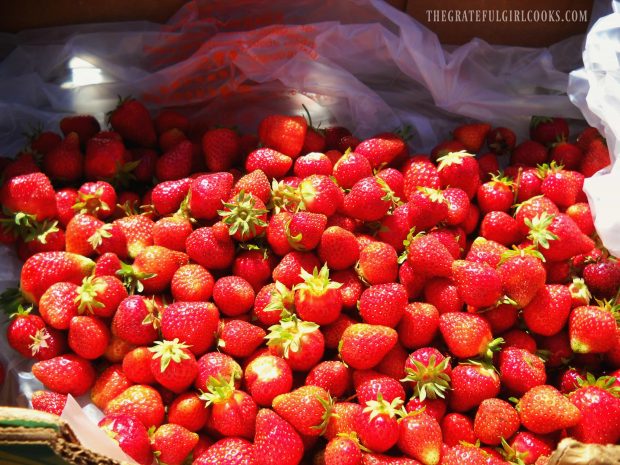
“Pie” or “Sugar” pumpkins have less water content in their flesh, so they make a far less watery pumpkin puree, which is desirable. By freezing the puree you can have it ready to use in various recipes throughout the year.

If you’re interested in how to make puree from your pumpkin, check out my post on How To Make Pumpkin Puree. Pumpkin puree is wonderful to use for pumpkin muffins, sconesbread, coffeecake, etc.

How To Roast Pumpkin Seeds

Now… back to the SEEDS:  After you cut your pumpkin open, and before you can roast pumpkin seeds, you need to remove the seeds and the “guts”.

Separating pumpkin stringy flesh from seeds in order to roast pumpkin seeds.

Two Methods For Removing Pumpkin Seeds

There are two ways to separate the seeds from the stringy “guts”. One way is to put that “BLOB”  into a strainer and slowly pull the seeds away from the guts by hand, then give the seeds a good rinse. This is the method I typically use.

The other method is to put the seeds/guts into a large deep bowl, fill it with water, and remove seeds with your hands from the “guts”. The seeds should float to the top once they are separated from the “guts”, then you can just scoop or skim them up.

Give the seeds a good rinse, then place them in a single layer on 3-4 layers of paper towels or a couple dish towels to drain a bit.

Seeds must be rinsed and drained in order to roast pumpkin seeds.
Spread the pumpkin seeds out in a single layer on several layers of paper towels or a couple dish towels. Once spread out, let the pumpkin seeds dry for an hour. Make sure they get nice and dry.

In order to roast pumpkin seeds, they must first dry completely, after rinsing.

Toss the dried seeds with oil. Sprinkle with salt (side note: try these sometime substituting seasoning salt for regular salt), and stir, to combine. Spread the seasoned seeds out into a single layer on a large (13×9 or larger) baking sheet.

Roast Pumpkin Seeds In Oven

Cook the pumpkin seeds for about 20-25 minutes at 325 degrees F.  When you hit the 15 minute mark, give the seeds a good stir, then spread back out again. At the 20 minute mark, give them another stir.

Keep a close eye on them so they don’t overcook and burn. The average coking time is 25 minutes… the roast pumpkin seeds are done when light golden brown and crunchy.

Roast pumpkin seeds are cooked on baking pan in oven for about 25 minutes.

When done, remove pan from oven.  Let the cooked pumpkin seeds cool completely, then eat! Be sure to store the finished pumpkin seeds in an airtight  covered container or resealable plastic bag. That’s all you need to do… see how easy it is to roast pumpkin seeds?
Roast pumpkin seeds are stored in an airtight container to keep them crunchy!

We enjoy snacking on the seeds, and occasionally I will throw a few into a salad for added crunch.  I figure if you’re gonna go to the trouble and mess of carving a pumpkin (cause it’s FUN!!), why not get an added bonus of roasted pumpkin seeds to snack on, too?!!

No hard work is required for this simple snack. A printable recipe is further below, but here is the basic “process” to roast pumpkin seeds:

A quick "how to" roast pumpkin seeds.

Hope you’ll give this recipe for how to roast pumpkin seeds a try when carving your Fall pumpkins this year! Enjoy! Have a great day, and don’t forget to check out ALL my recipes in the Recipe Index,located at the top of the page.

Interested In More Recipes?

Thank you for visiting this website. I appreciate you using some of your valuable time to do soIf you’re interested, I publish a newsletter 2 times per month (1st and 15th) with all the latest recipes, and other fun info. I would be honored to have you join our growing list of subscribers, so you never miss a great recipe!
There is a Newsletter subscription box on the top right side (or bottom) of each blog post, depending on the device you use, where you can easily submit your e-mail address (only) to be included in my mailing list.

You Can Also Find Me On Social Media:

Facebook page: The Grateful Girl Cooks!
Pinterest:
The Grateful Girl Cooks!
Instagram:
jbatthegratefulgirlcooks

How To Roast Pumpkin Seeds / The Grateful Girl Cooks!

0 from 0 votes
How To Roast Pumpkin Seeds
Prep Time
15 mins
Cook Time
20 mins
Drying Time
1 hr
Total Time
35 mins
 
It's easy to roast pumpkin seeds, once you're done carving your Halloween pumpkins! With a few common ingredients, you can enjoy this simple crunchy snack!
Category: Snacks
Cuisine: American
Keyword: roast pumpkin seeds
Servings: 8 (total 2 cups)
Calories Per Serving: 119 kcal
Author: JB @ The Grateful Girl Cooks!
Ingredients
  • 2 cups pumpkin seeds
  • 2 Tablespoons vegetable oil (or canola oil)
  • 1/4 teaspoon salt (or more), to taste
Instructions
  1. Remove seeds from pumpkin. Rinse seeds thoroughly; remove stringy pumpkin flesh from seeds. 

  2. Place pumpkin seeds in single layer on several layers of paper towels or dish towels to absorb water. Let pumpkin seeds completely dry (approx. 1 hour).

  3. Once completely dry, mix pumpkin seeds with oil and salt in large bowl. Stir well, to cover seeds with oil and salt (or any additional spices you may wish to add).

  4. Spread pumpkin seeds out in a single layer on a 13x9 baking sheet. Bake in preheated 325°F oven for approximately 20-25 minutes. Halfway through the baking time, give the seeds a good stir, then spread out into single layer again, and place back in oven. When done, the seeds should be light golden brown and crispy. Remove from oven. Remove seeds from baking sheet once cooled.

  5. Store roasted pumpkin seeds in an airtight covered container or resealable plastic bag to ensure seeds stay crunchy. Enjoy!

Nutrition Facts
How To Roast Pumpkin Seeds
Amount Per Serving (1 (1/4 cup per serving))
Calories 119 Calories from Fat 99
% Daily Value*
Fat 11g17%
Saturated Fat 4g25%
Sodium 73mg3%
Potassium 129mg4%
Carbohydrates 1g0%
Protein 4g8%
Vitamin C 0.3mg0%
Calcium 7mg1%
Iron 1.4mg8%
* Percent Daily Values are based on a 2000 calorie diet.

Here’s one more to pin on your Pinterest boards!It's easy to roast pumpkin seeds, once you're done carving your Halloween pumpkins! With a few common ingredients, you can enjoy this simple crunchy snack!


Save

Save

Save

Save

Save

Save

Save

Save

Save

Save

Save

Save

Save

Save

Olive Garden Chicken Gnocchi Soup

This delicious, copycat version of Olive Garden’s beloved thick and creamy chicken gnocchi soup is easy to make in 30 minutes, for lunch or dinner!This delicious, copycat version of Olive Garden's beloved thick and creamy chicken gnocchi soup is easy to make in 30 minutes... for lunch or dinner!
Last year a friend from out of state was staying in our home for several days. My friend Patti and I went to a local restaurant, where I tasted an amazing soup… Olive Garden Chicken Gnocchi Soup!  It was so good I’ve been on a quest ever since, to find a great recipe to duplicate it.

I think I found a great recipe on Pinterest. The soup tastes amazingly similar to the restaurant version, and it is crazy delicious! Did I mention it only takes 25-30 minutes from start to finish to make, as well? Yep.  EASY and delicious – now that’s my kind of meal! Here’s how you make this main course soup:

Scroll Down For A Printable Recipe Card At The Bottom Of The Page

How To Make Olive Garden Chicken Gnocchi Soup

Add butter and olive oil to a large soup pot. Turn heat to medium-high heat, and melt butter. Add diced onion and celery and sauté for 3-4 minutes, stirring occasionally, until onions are translucent and tender. During the last minute, add the minced garlic and continue cooking, stirring to prevent garlic from burning.

Cooking onion, celery and garlic for gnocchi soup

Once onions and celery are tender, add the flour to the pan.  Stir to combine all the ingredients.  This makes a “roux” which helps to thicken the soup. Cook the roux for an additional minute, stirring well.

Flour added to onion and celery to thicken chicken gnocchi soup

Add the half and half and the chicken broth to the soup pot, and stir well, to fully combine ingredients.

Half n' half added to chicken gnocchi soup

Chicken broth added to soup

The chicken gnocchi soup will look like the photo below. Continue to cook, stirring frequently until the soup begins to thicken.

Finish Making The Chicken Gnocchi Soup

Once the soup has begun to thicken, add the shredded carrots, chopped spinach, fresh thyme leaves, diced chicken breast, and potato gnocchi. Stir well, to fully blend all these ingredients into the chicken gnocchi soup.

Soup base for chicken gnocchi soup, cooking in large saucepan.

Continue to cook the soup on medium heat until soup is heated through, and the potato gnocchi is fully cooked (between 5 and 10 minutes). The soup will thicken up a bit more, too. See that good looking gnocchi? YUM.

Gnocchi from soup, with spinach and carrots, on wooden spoon

Serve The Olive Garden Chicken Gnocchi Soup

Once the chicken gnocchi soup is finished cooking, give it a taste test. Season with salt and ground black pepper, to taste.  See the bites of gnocchi, chicken, spinach and shredded carrots in the photo below? This is a meal in a bowl, friends!
Ladle full of homemade Olive Garden Chicken Gnocchi Soup

Ladle the creamy soup into serving bowls, and serve this chicken gnocchi soup while HOT! I think you’re gonna love this soup… we sure did! The potato gnocchi in the soup taste like little dumplings!
Soup, with chicken and gnocchi, is served in white bowl

We ate our Olive Garden chicken gnocchi soup with thick slices of crusty French bread. French bread tasted GREAT dipped in the soup to “sop up” some of that delicious creamy broth!
Thick, creamy gnocchi soup in white bowl

Sure hope you will consider making this absolutely delicious and filling chicken gnocchi soup. It’s quick and easy to prepare on a busy day, but is so filling and super delicious! The leftovers were just as good, as well! Have a great day, and thanks for taking the time to check out this recipe. Hope you enjoy it.

Looking For More GNOCCHI Recipes?

You can find all my recipes in the Recipe Index, located at the top of the page. I have some delicious gnocchi recipes you might be interested in, including:

Interested In More Recipes?

Thank you for visiting this website. I appreciate you using some of your valuable time to do soIf you’re interested, I publish a newsletter 2 times per month (1st and 15th) with all the latest recipes, and other fun info. I would be honored to have you join our growing list of subscribers, so you never miss a great recipe!
There is a Newsletter subscription box on the top right side (or bottom) of each blog post, depending on the device you use, where you can easily submit your e-mail address (only) to be included in my mailing list.

You Can Also Find Me On Social Media:
Facebook page: The Grateful Girl Cooks!
Pinterest: The Grateful Girl Cooks!
Instagram: jbatthegratefulgirlcooks

Author's signature

Recipe Source: http://therecipecritic.com/2016/09/creamy-chicken-gnocchi-soup-olive-garden-copycat/

0 from 0 votes
Olive Garden Chicken Gnocchi Soup
Prep Time
10 mins
Cook Time
20 mins
Total Time
30 mins
 
This delicious, copycat version of Olive Garden's beloved thick and creamy chicken gnocchi soup is easy to make in 30 minutes... for lunch or dinner!
Category: Soup
Cuisine: Italian
Keyword: chicken gnocchi soup
Servings: 6 servings
Calories Per Serving: 383 kcal
Author: JB @ The Grateful Girl Cooks!
Ingredients
  • 3 Tablespoons butter
  • 1 Tablespoon olive oil
  • 1 cup brown onion , diced
  • 1/2 cup celery , diced
  • 2 garlic cloves , minced
  • 1/4 cup all-purpose flour
  • 2 cups half and half
  • 1 can (14 ounces) chicken broth (**See NOTES section below for tip)
  • 1 cup shredded carrots
  • 1 cup fresh spinach leaves , chopped (may substitute frozen, chopped spinach-drained well)
  • 1 Tablespoon fresh thyme leaves
  • 1 cup cooked chicken breast , diced
  • 1 package (16 ounces) potato gnocchi (found in pasta aisle)
  • Salt and ground black pepper , to taste
Instructions
  1. Place the butter and olive oil in a large soup pot. Melt butter on medium-high heat. Add diced onion and celery. Sauté until onions are translucent and tender (about 3-4 minutes), stirring occasionally. During the last minute, add the minced garlic.
  2. Add flour to the pan, stir well, to combine (this makes a "roux"). Continue to cook this for an additional minute.
  3. Add the half and half, then the chicken broth to the soup pot. Mix well, to combine, and continue to cook, stirring frequently until the soup begins to thicken.
  4. Once soup has begun to thicken, add shredded carrots, chopped spinach, fresh thyme leaves, diced chicken and gnocchi. Simmer on low for 5-10 minutes, until soup is heated and thickened, and gnocchi have fully cooked. Taste and season with salt and pepper, if desired.
  5. Serve hot... and enjoy!
Recipe Notes

If you prefer a thinner soup, simply add an additional can of chicken broth to soup. (I like it thick and creamy, so only used one can!)

Nutrition Facts
Olive Garden Chicken Gnocchi Soup
Amount Per Serving (1 serving)
Calories 383 Calories from Fat 171
% Daily Value*
Fat 19g29%
Saturated Fat 10g63%
Cholesterol 64mg21%
Sodium 625mg27%
Potassium 381mg11%
Carbohydrates 40g13%
Fiber 3g13%
Sugar 2g2%
Protein 14g28%
Vitamin A 4585IU92%
Vitamin C 12.5mg15%
Calcium 137mg14%
Iron 3.9mg22%
* Percent Daily Values are based on a 2000 calorie diet.

Here’s one more to pin on your Pinterest boards!This delicious, copycat version of Olive Garden's beloved thick and creamy chicken gnocchi soup is easy to make in 30 minutes... for lunch or dinner!

Save

Save

Save

Save

Save

Save

Save

Save

Save

Save

Save